| Devon's 96 FZJ80 rear 9.5" gets a Harrop elocker A9378 |
|---|
| (49 BIG pics loading) |
| Mar 9 2026 |
|
|
This is Devon's 96 FZJ80 on the Devil's Canyon Trail...this is the "post test" with the Harrop installed. Devil's Canyon Trail is just east of Superior, AZ.....southside of highway 60. |
|---|
|
| Devon wired up a custom switch for his elocker. |
|
|
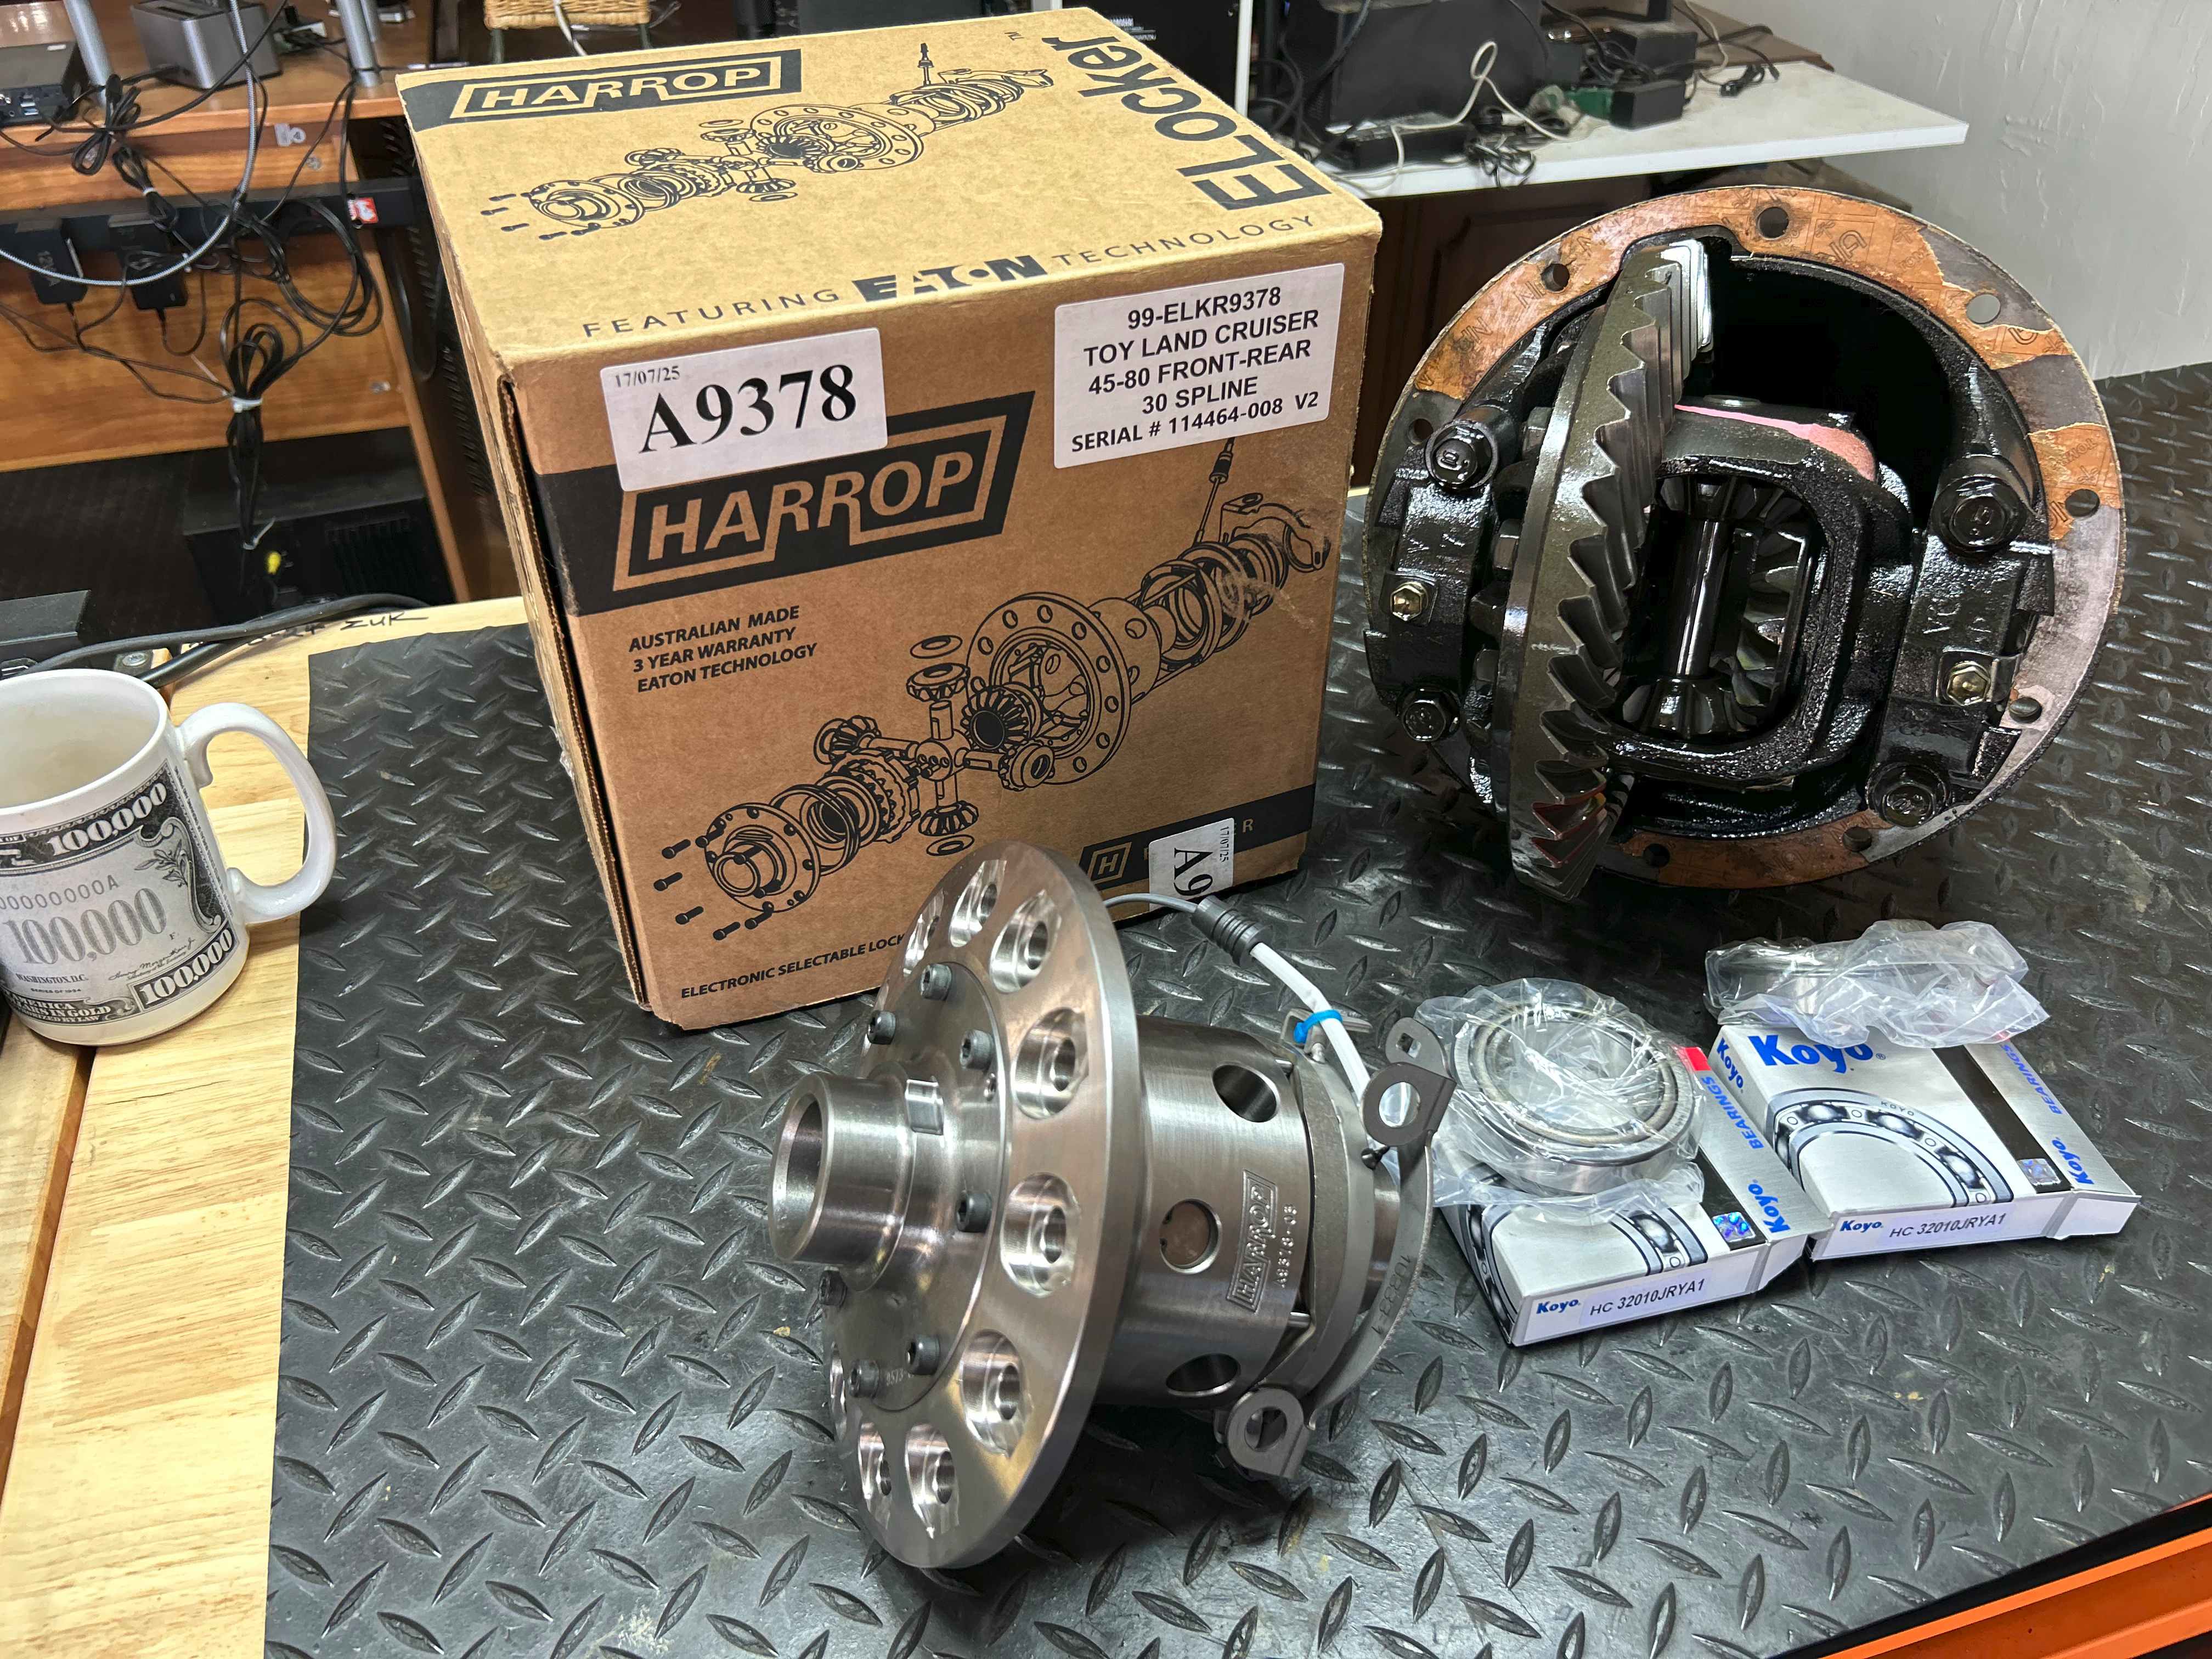
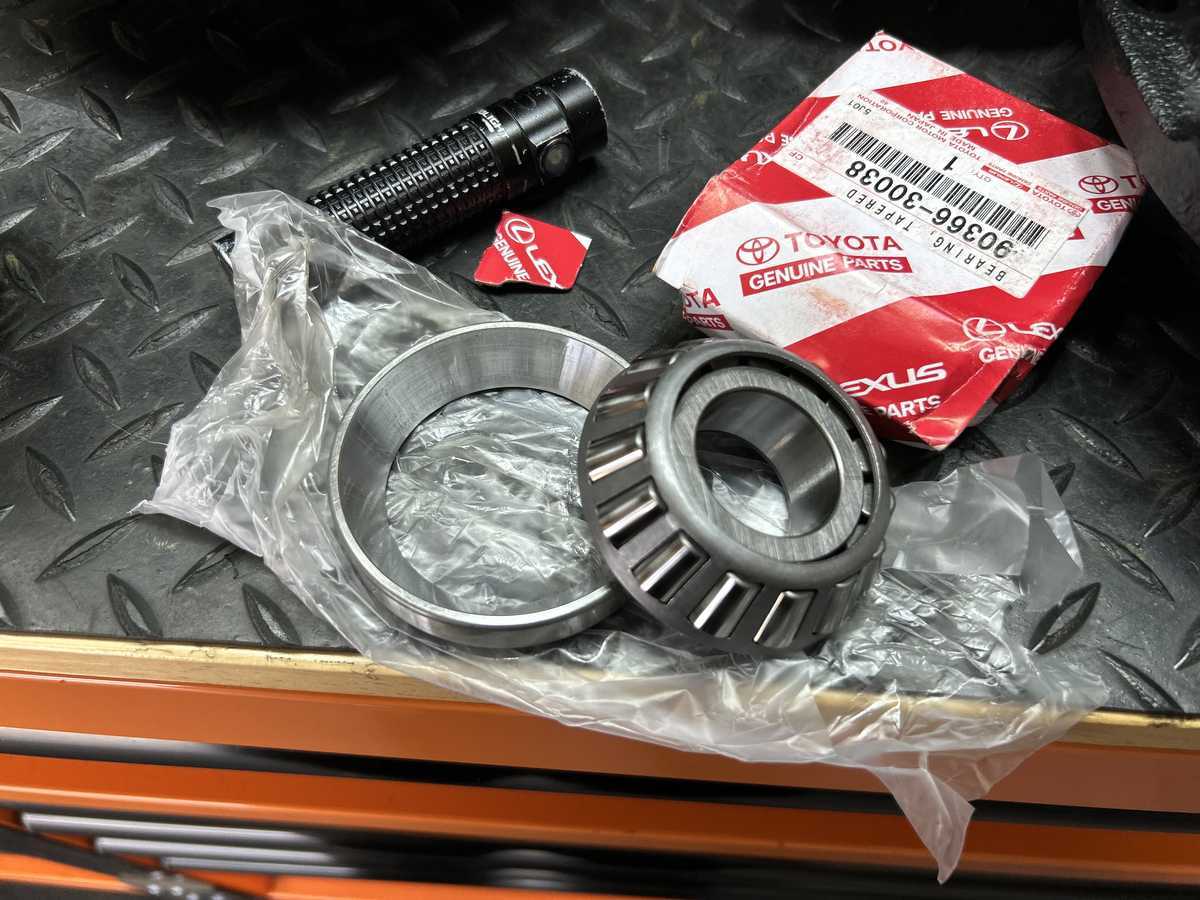
Since Devon is "semi-local", he shuttled the stock 9.5" 4.10 3rd up to me here in Prescott. New carrier bearings were not included in the Harrop box so those should be requested at the same time when the Harrop is ordered. It appears the best way to get the A9378 Harrop is to go to this website Valleyhybrids.com and fill out the worksheet OR it looks like there is also an email and a phone number( 209-475-8808 )to contact them at. |
|
|
An elocker install is relatively straight forward...Do a quick pattern check with yellow paint and characterized the backlash and then the disassembly can begin. Move the ring gear over and press the new carrier bearings on. Then re-install the harrop, set the backlash and preload and it's basically done. I ended up taking it a little further and took .003" off the pinion depth shim, replaced the worn outer pinion bearing and a new fresh pinion seal. |
|
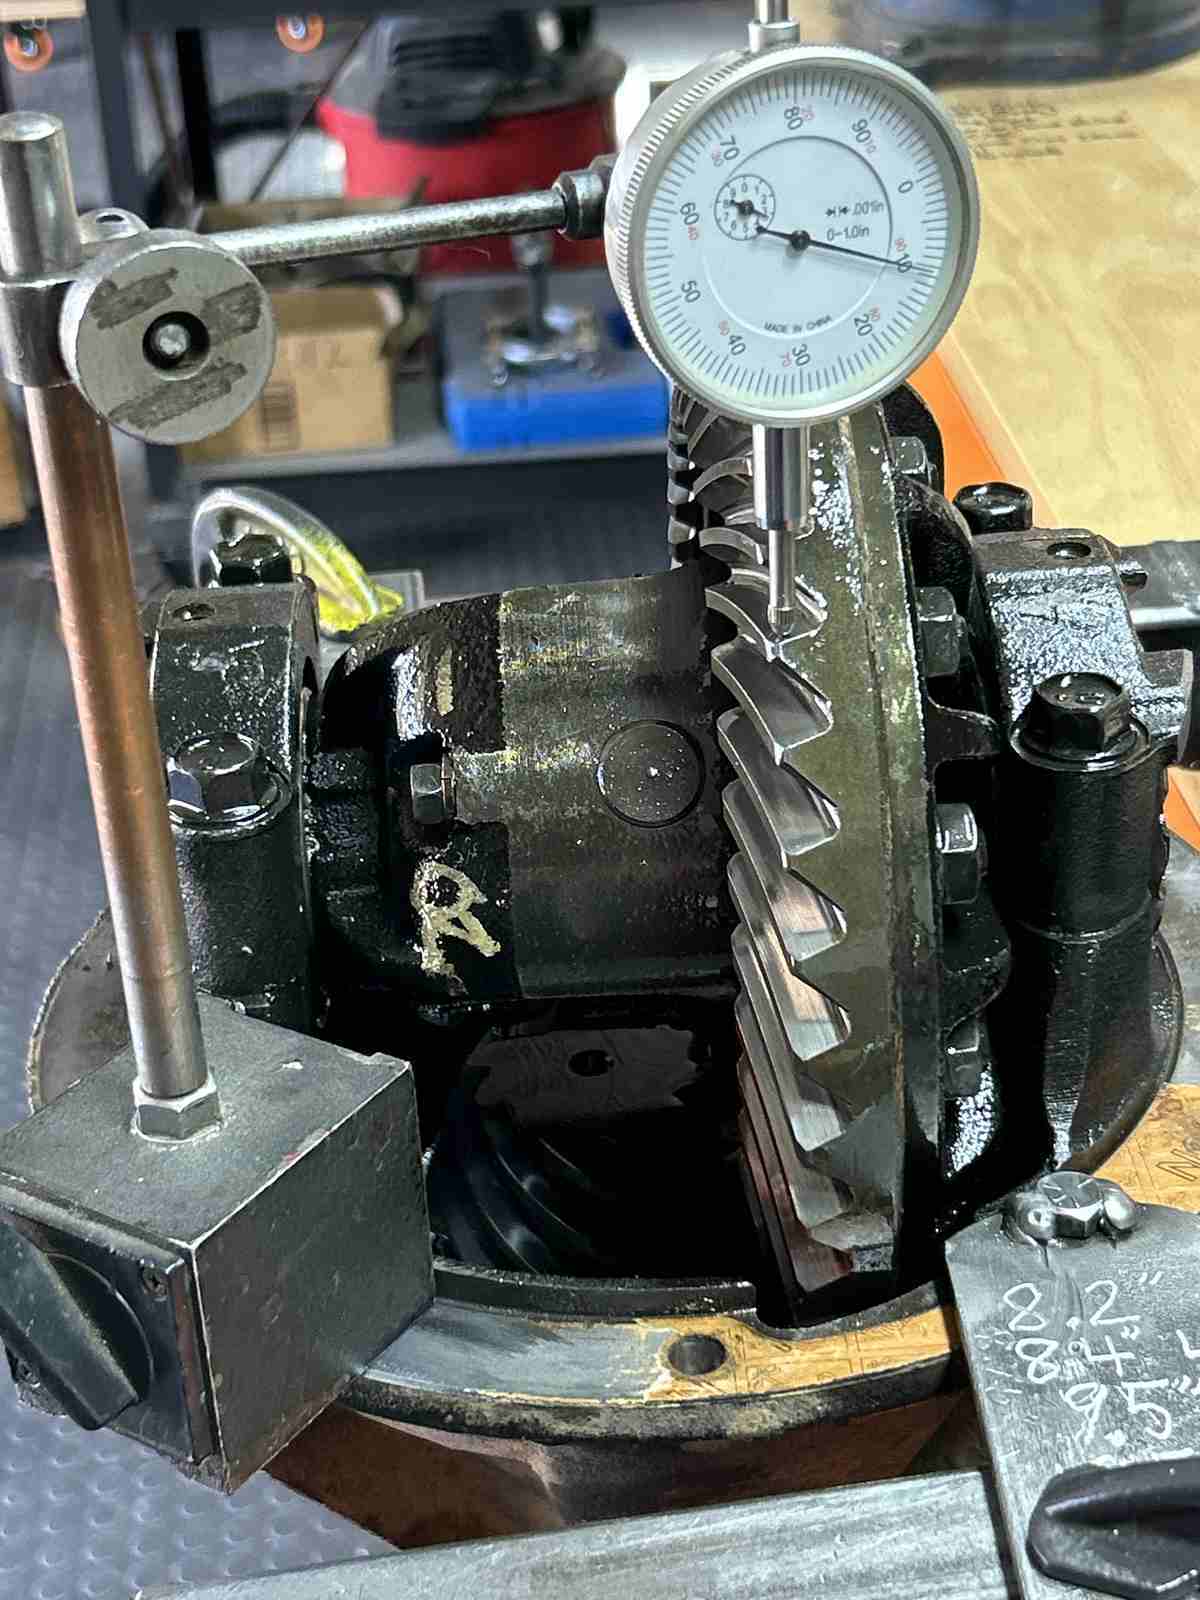
| The 3rd is mounted in the fixture and backlash is noted. |
|
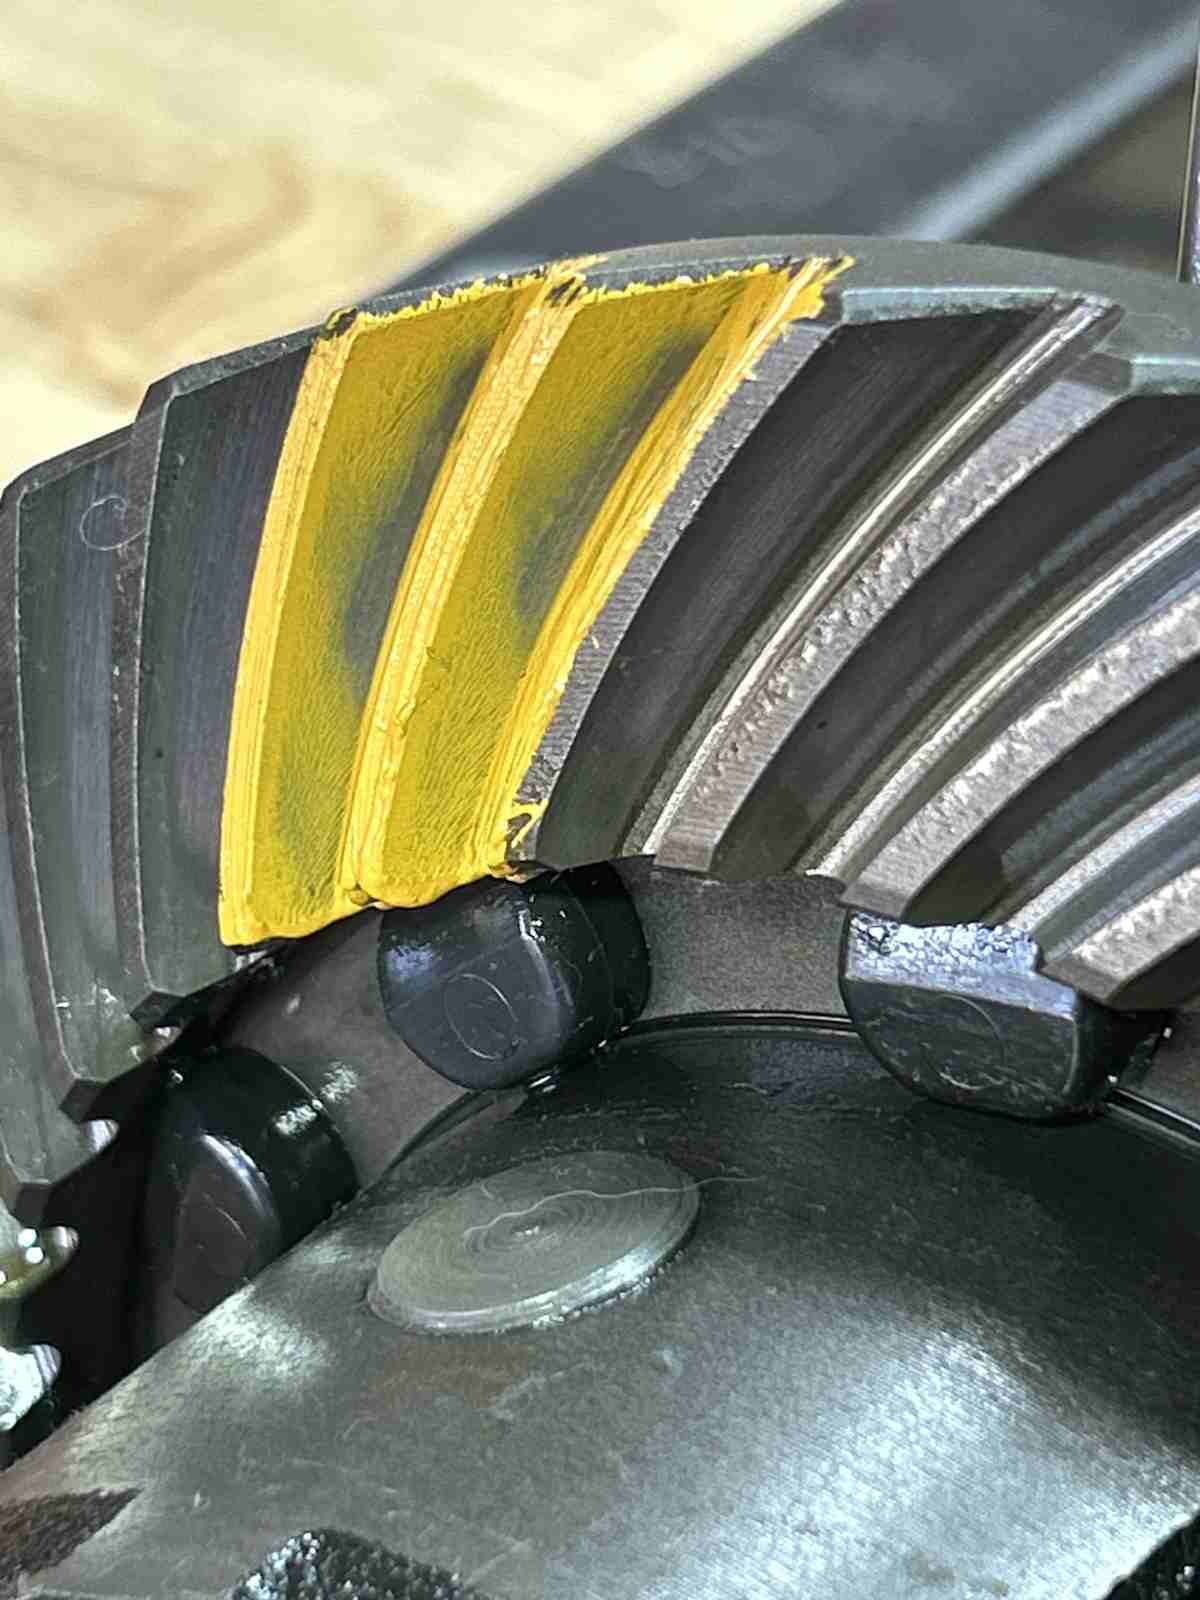
| Yellow paint is applied and the drive pattern is noted... |
|
| The coast pattern is not as good...too strong of contact in the root. |
|
| 10 teeth away is the reverse painted teeth....this is the drive side. Nothing wrong with it. |
|
| Here's the reverse painted coast.....does not look that great. |
|
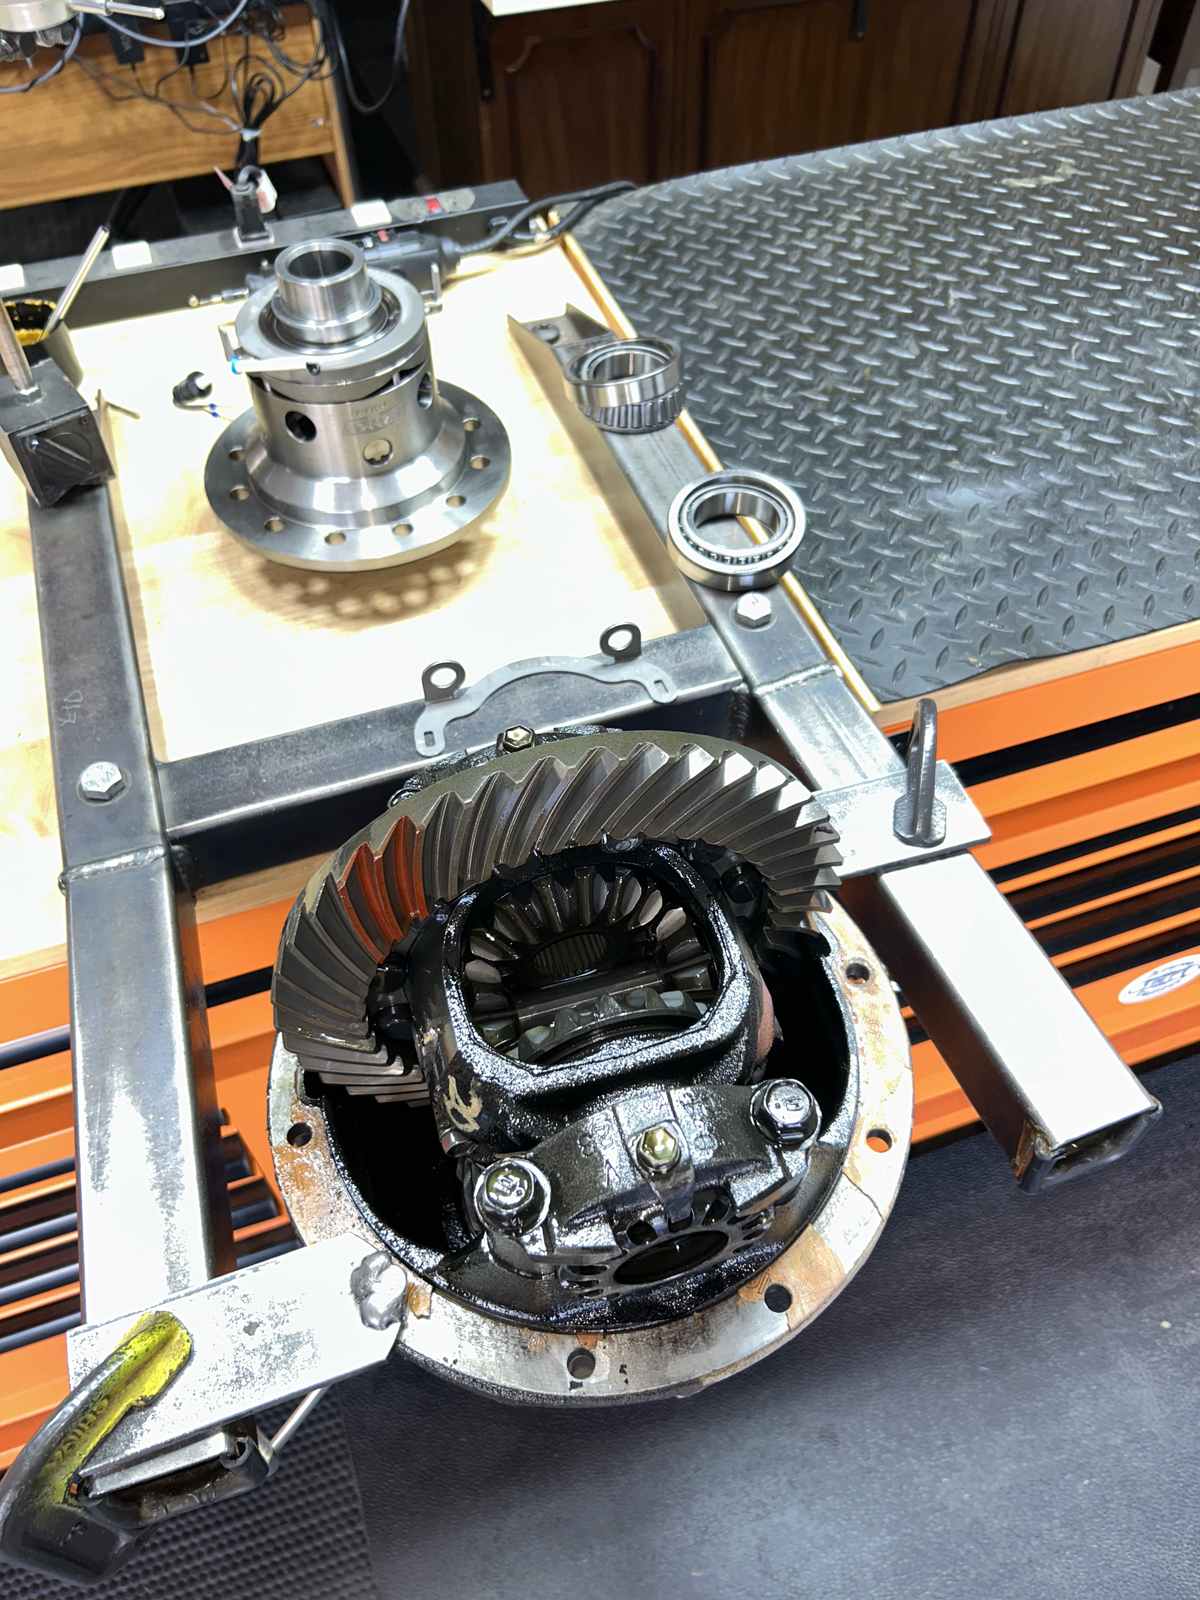
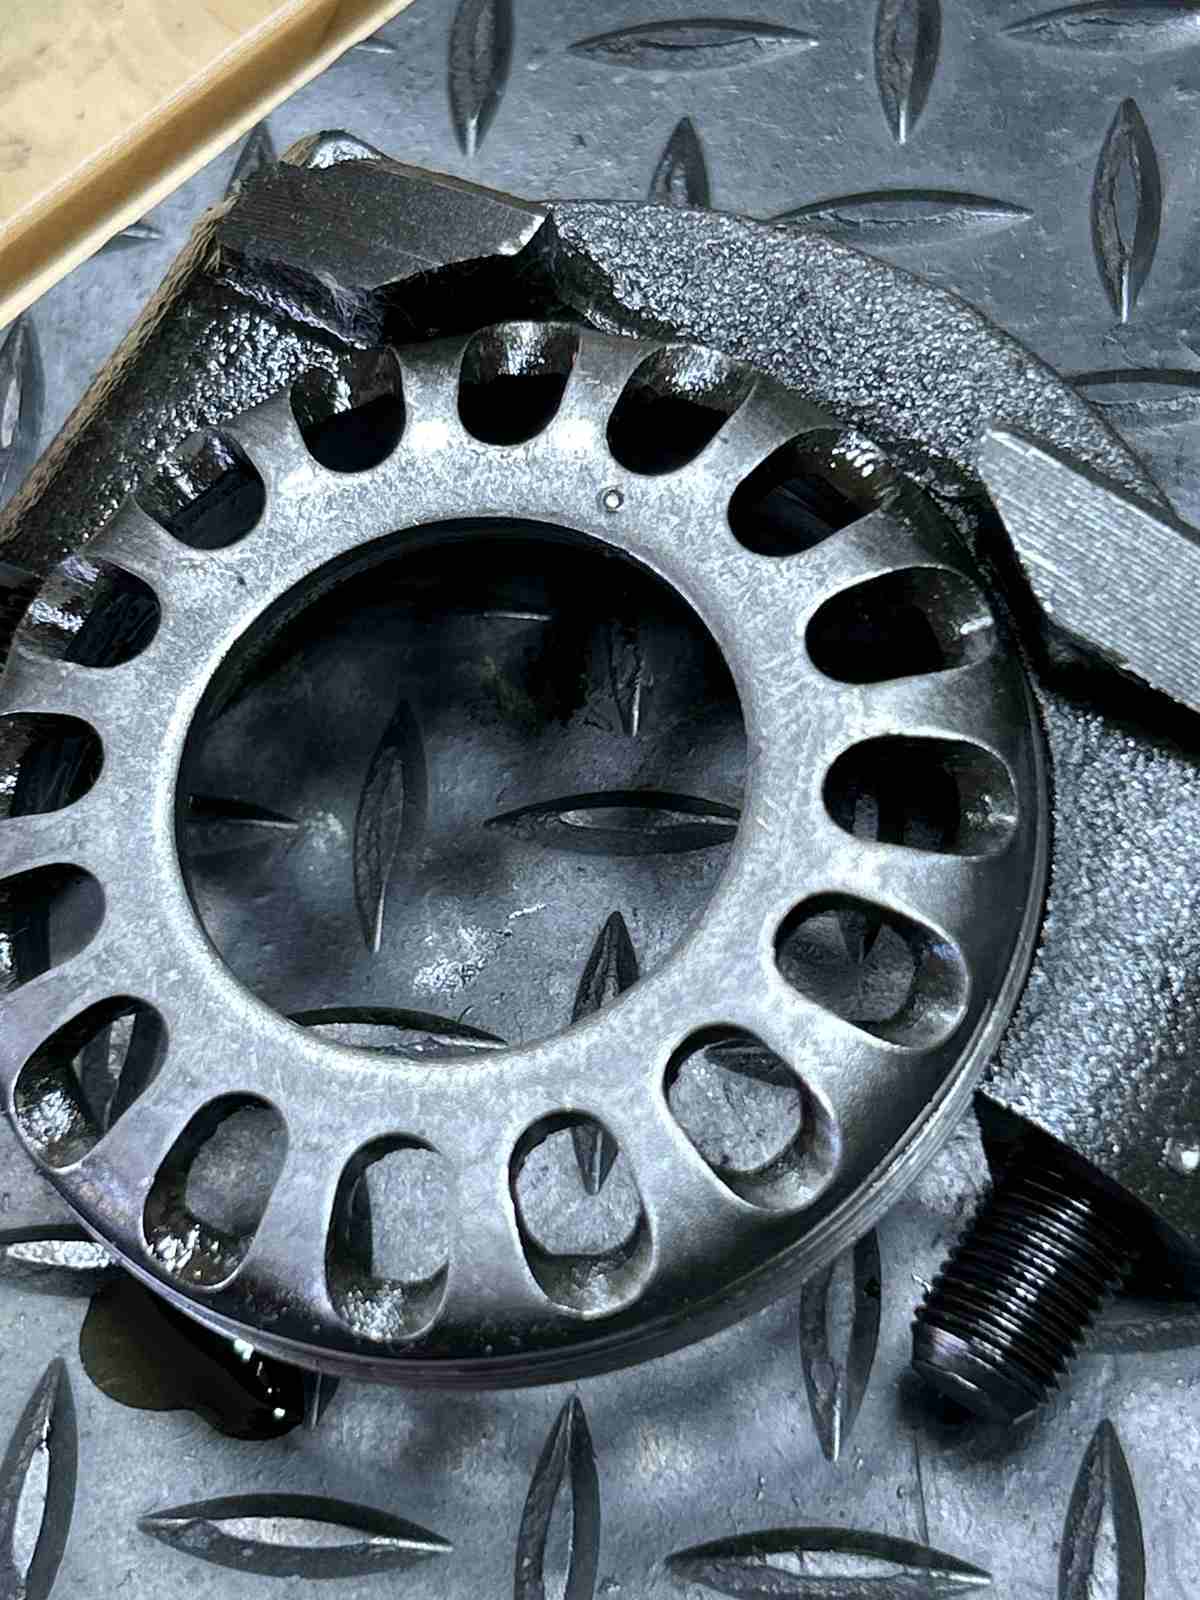
| Disassembly begins. |
|
|
The bearing adjuster was marked just to see how close it would be with new bearings and a new center elocker in place. |
|
| Ring gear is now removed. |
|
| I like to spray the ring gear bolts and nuts clean before reassembly. |
|
| 83 ft/lbs |
|
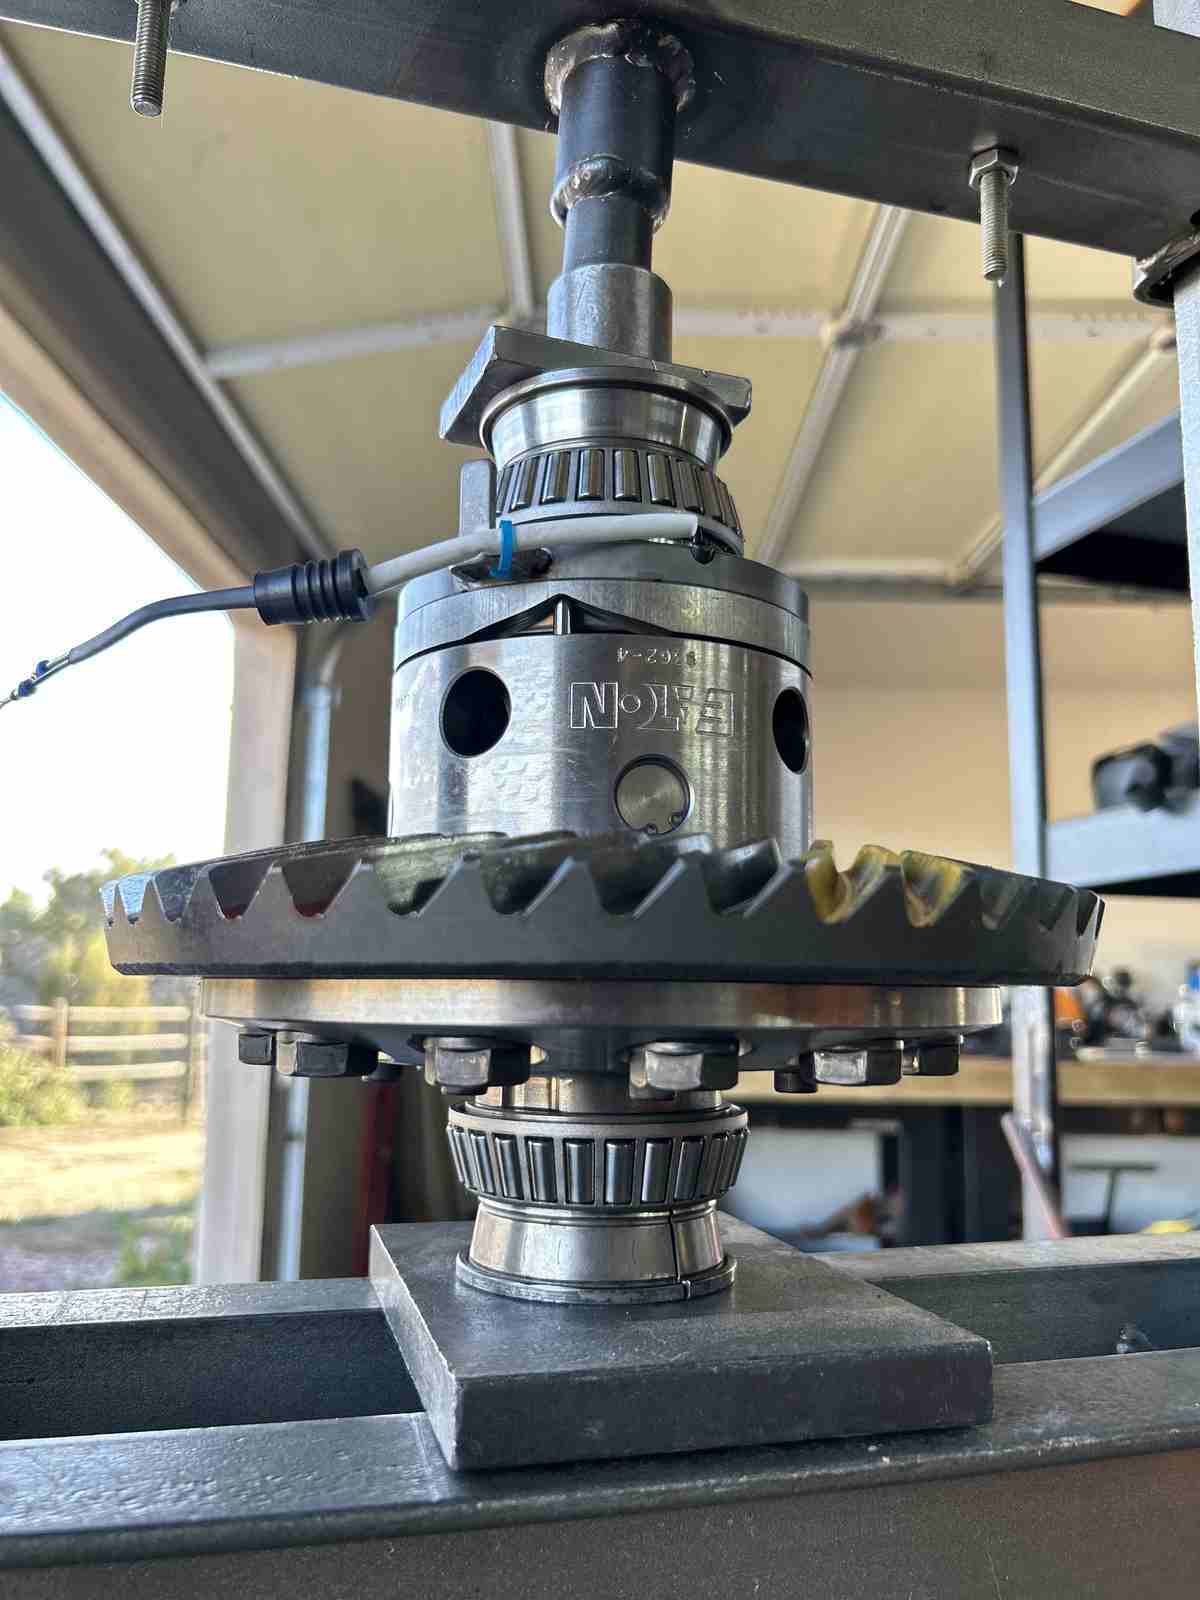
| The supplied carrier bearings from Terrain Tamer are high quality. |
|
| They are KOYO. |
|
|
The measured resistance of the magnetic coil ring is 3.6 ohms....spot on. If 2.6 was measured then something is wrong.... If 4.6 was measured then again something is wrong. |
|
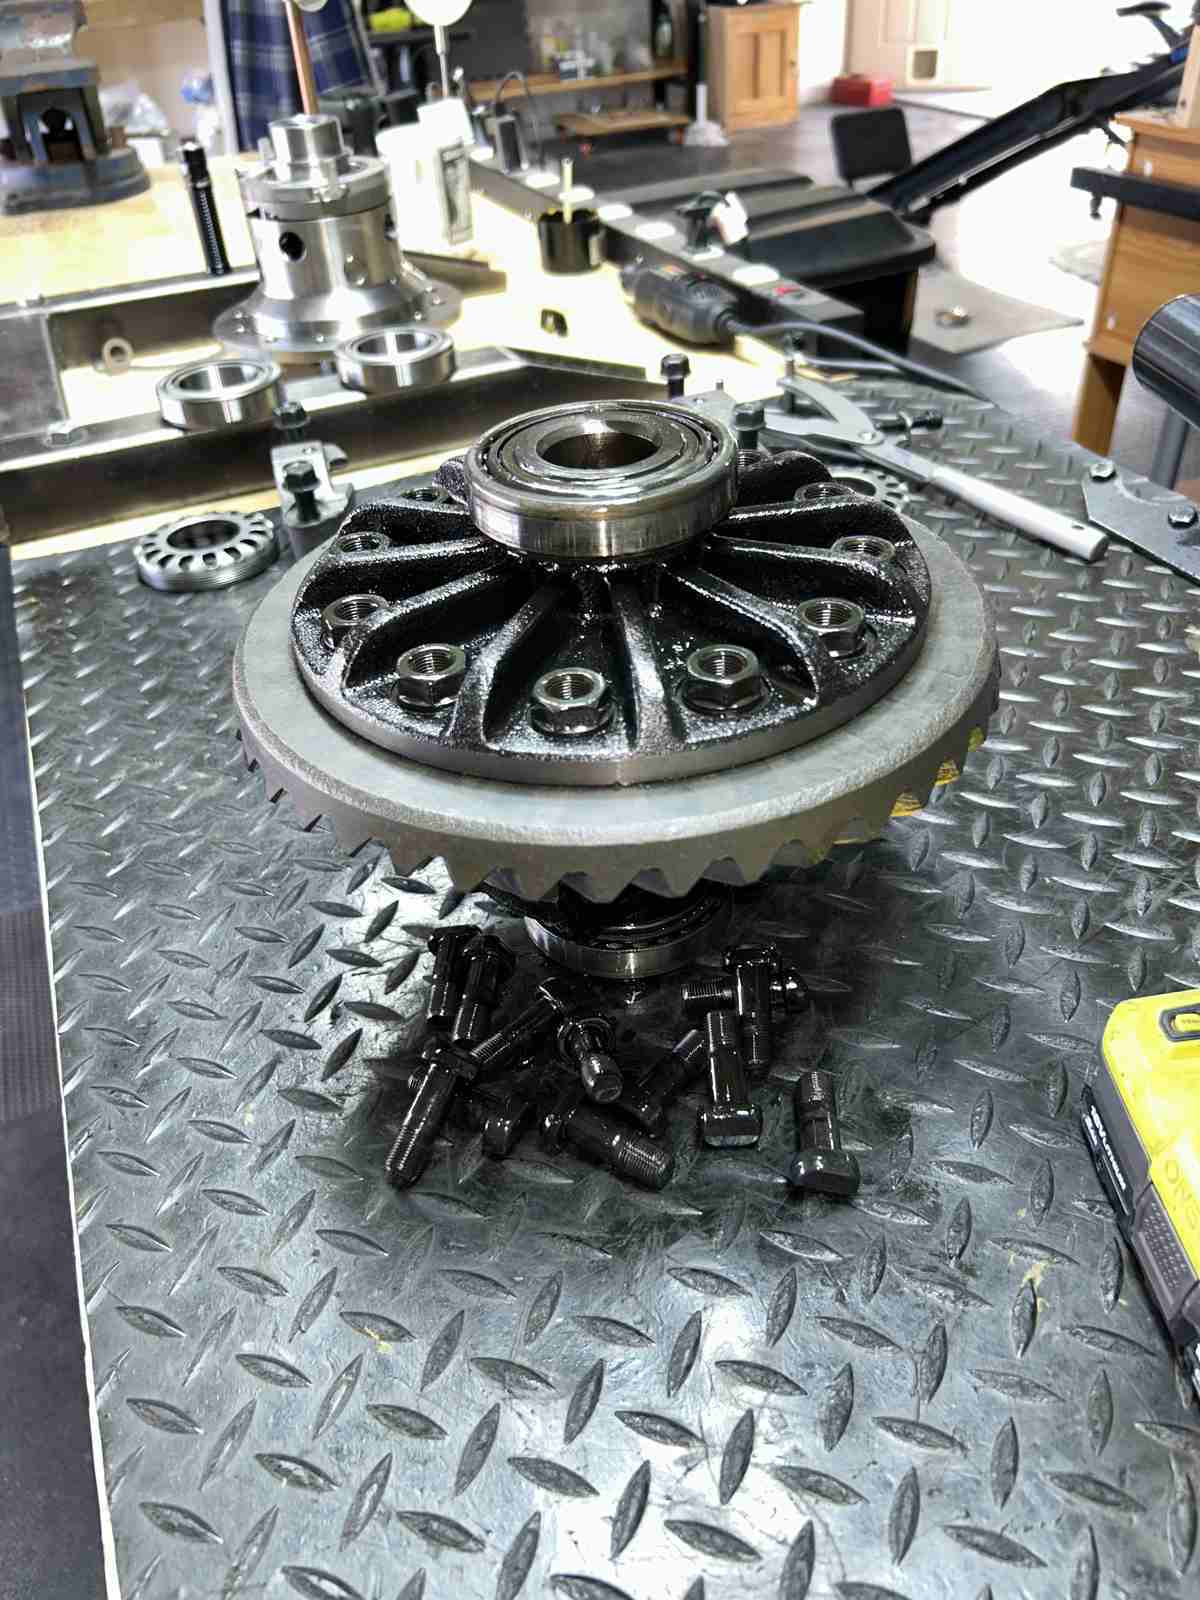
| Bearings are being pressed on. |
|
| A cosmetic coat of Satin Black is applied. |
|
| different angle.... |
|
| different angle. |
|
| Jesus...The paint has already dried and I'm still pressing the bearings on. |
|
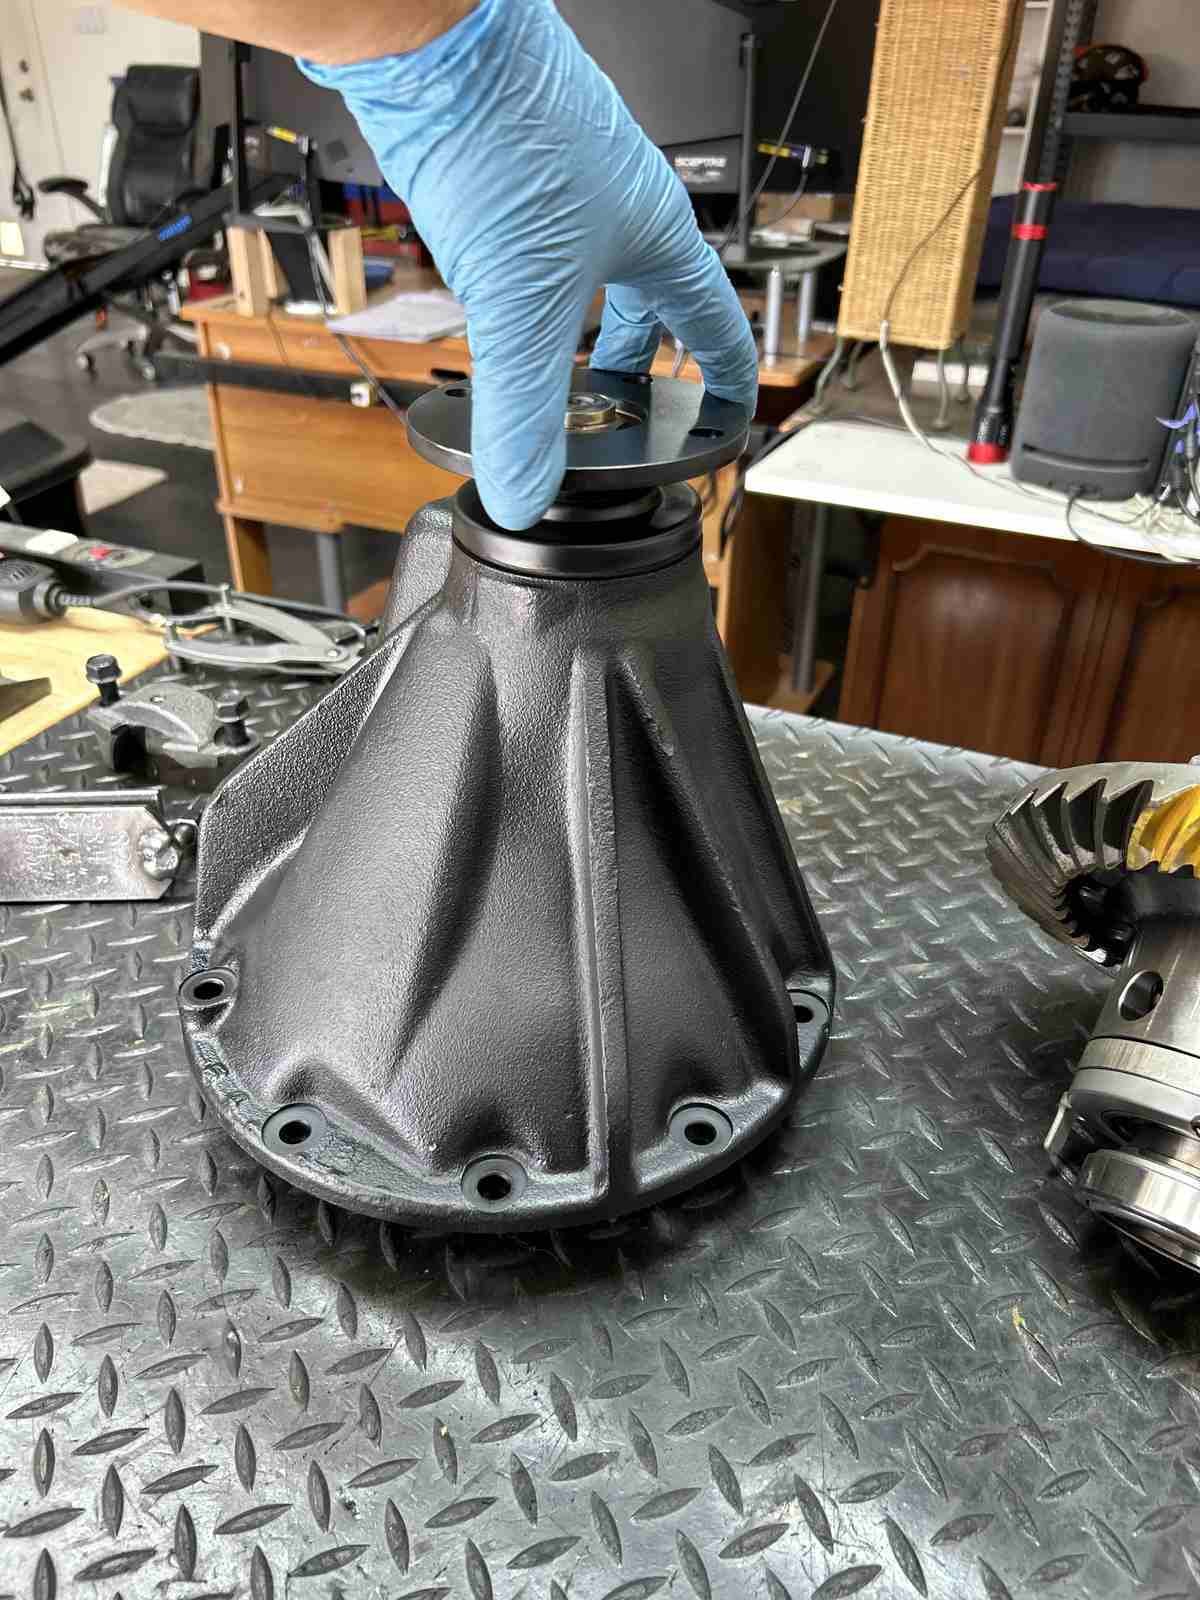
| Finally..... this is ready to load up. |
|
|
Now I can spin the pinion freely and it seems to turn very smooth..... absolutely no preload but very smooth. |
|
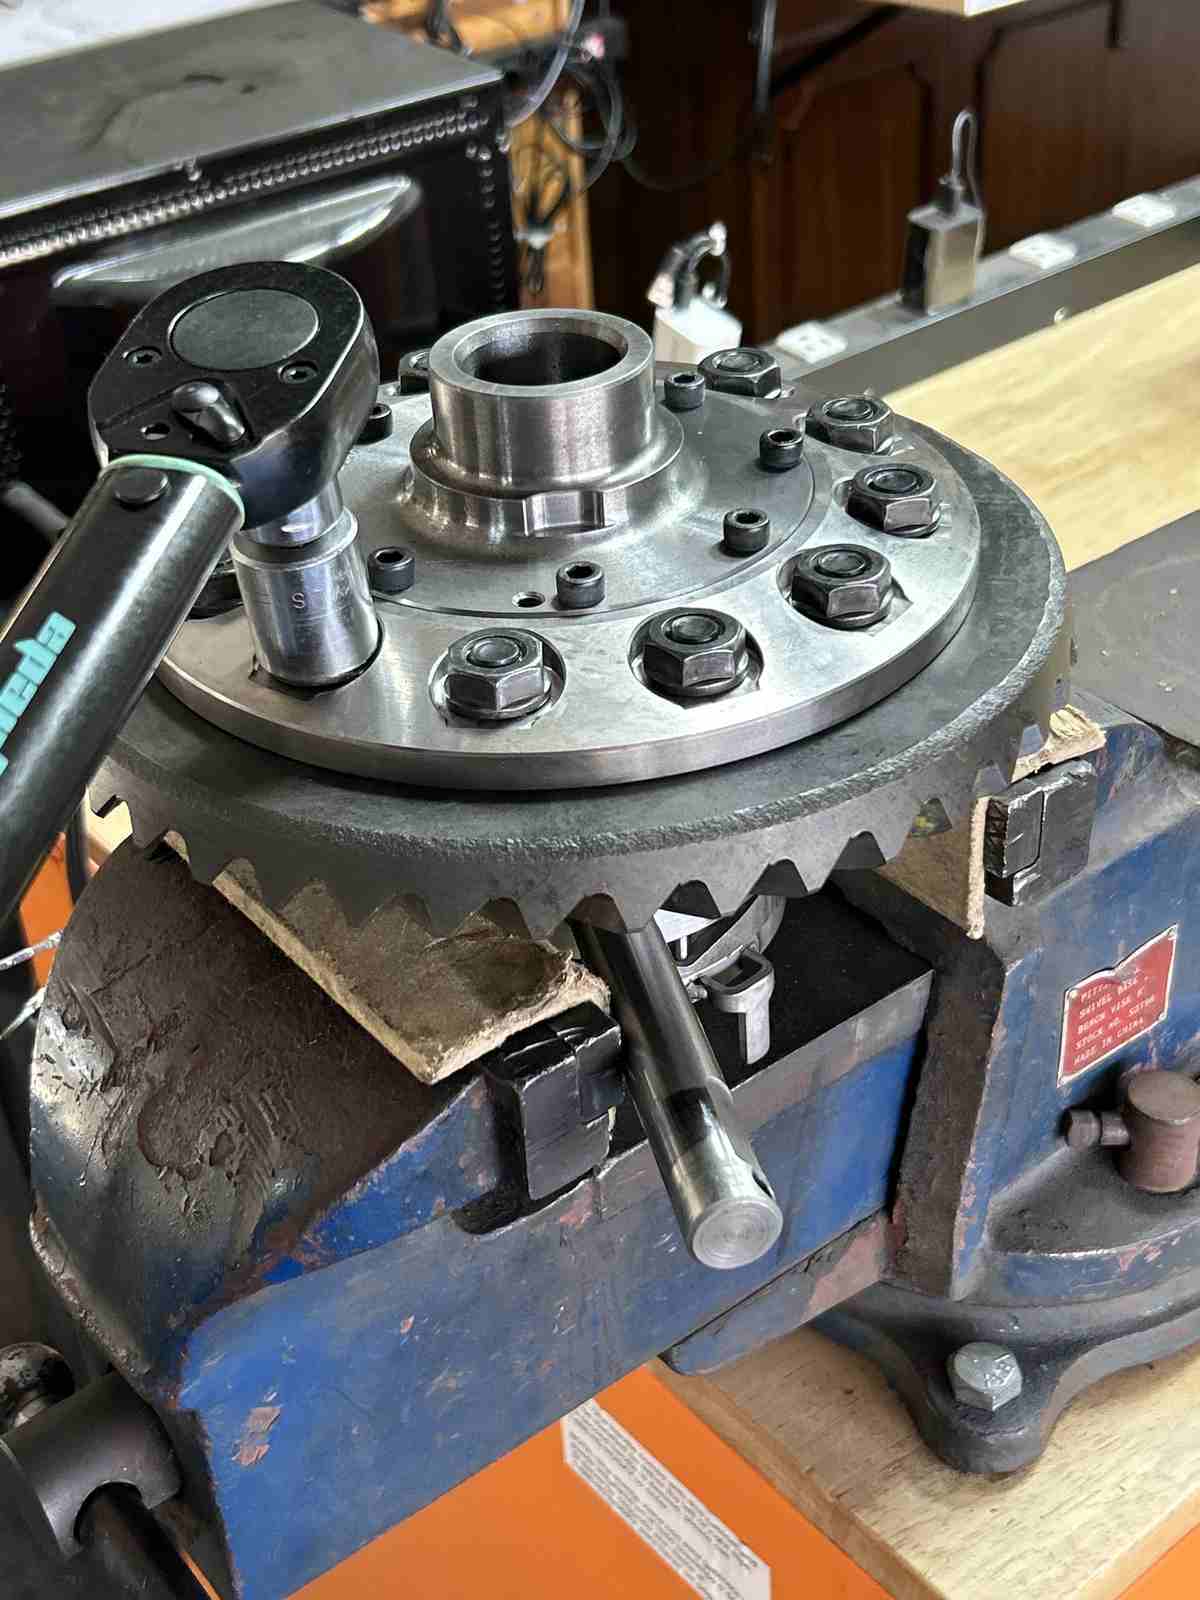
| Bearing caps secured in place...bearing preload is increased and backlash is set to about .008" |
|
| The driveside is repainted ............ looks slightly deep. |
|
| The coast is no better and still looks way deep. |
|
|
I'm thinking I can get this to paint even better if I thin the pinion shim a little and replace the small outer pinion bearing just for good measure. This 30 year old seal seems to have held up and is not leaking yet. |
|
| The much larger inner pinion bearing was inspected and is holding up good. |
|
| The factory .055" shim is being replaced with a .052" shim |
|
|
And then put it all back together and repaint... The drive side has a very nice spread evenly on the tooth. Much better. |
|
| The Coast is being stubborn...still deep in the root. |
|
|
Disassemble again and now looking at the outer pinion bearing again. Tapered rollers under the flashlight show considerable scuffing. |
|
| The penlight that I'm using here really makes the pitting show up on the race. |
|
| A Genuine Toyota outer pinion bearing is replacing it. |
|
| New race tapped in firmly. |
|
| Put it all together and a paint check....coast is still marginal. |
|
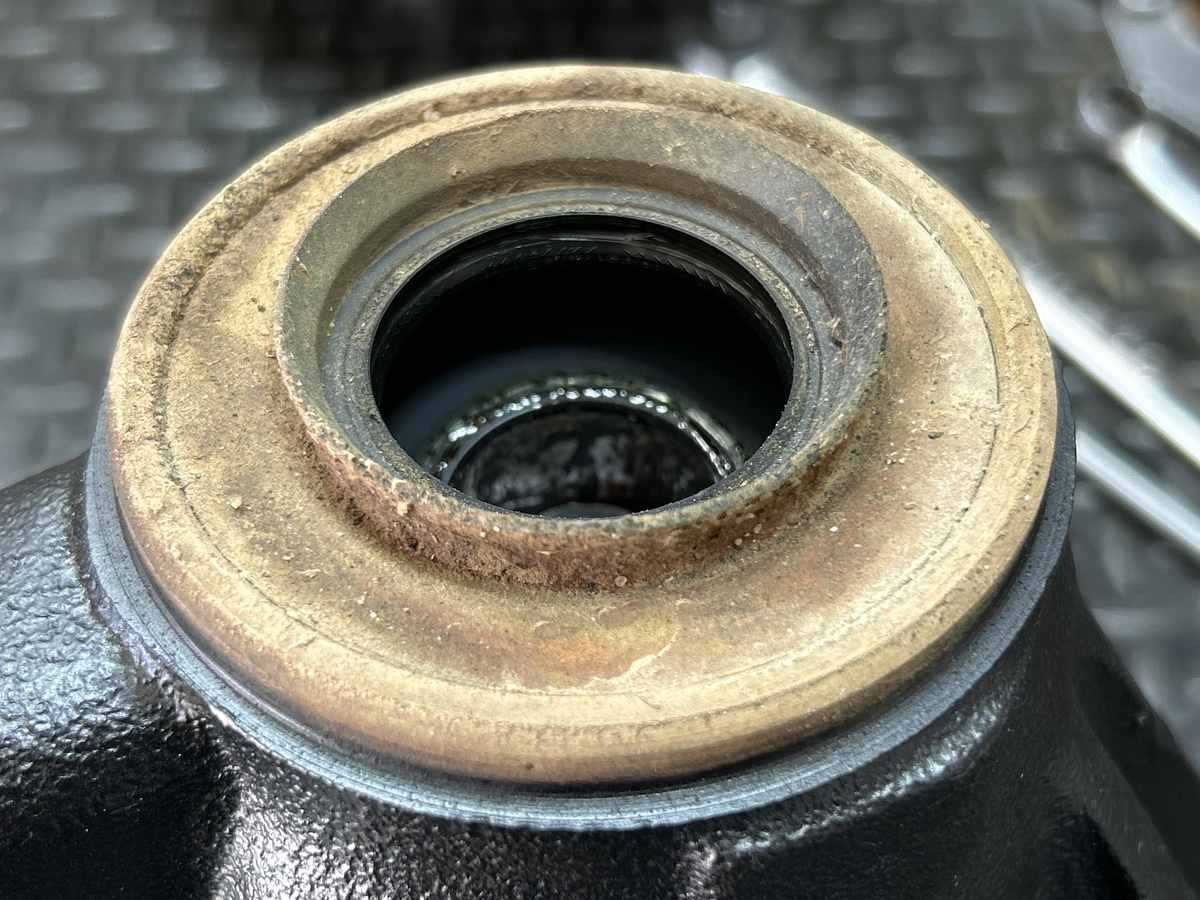
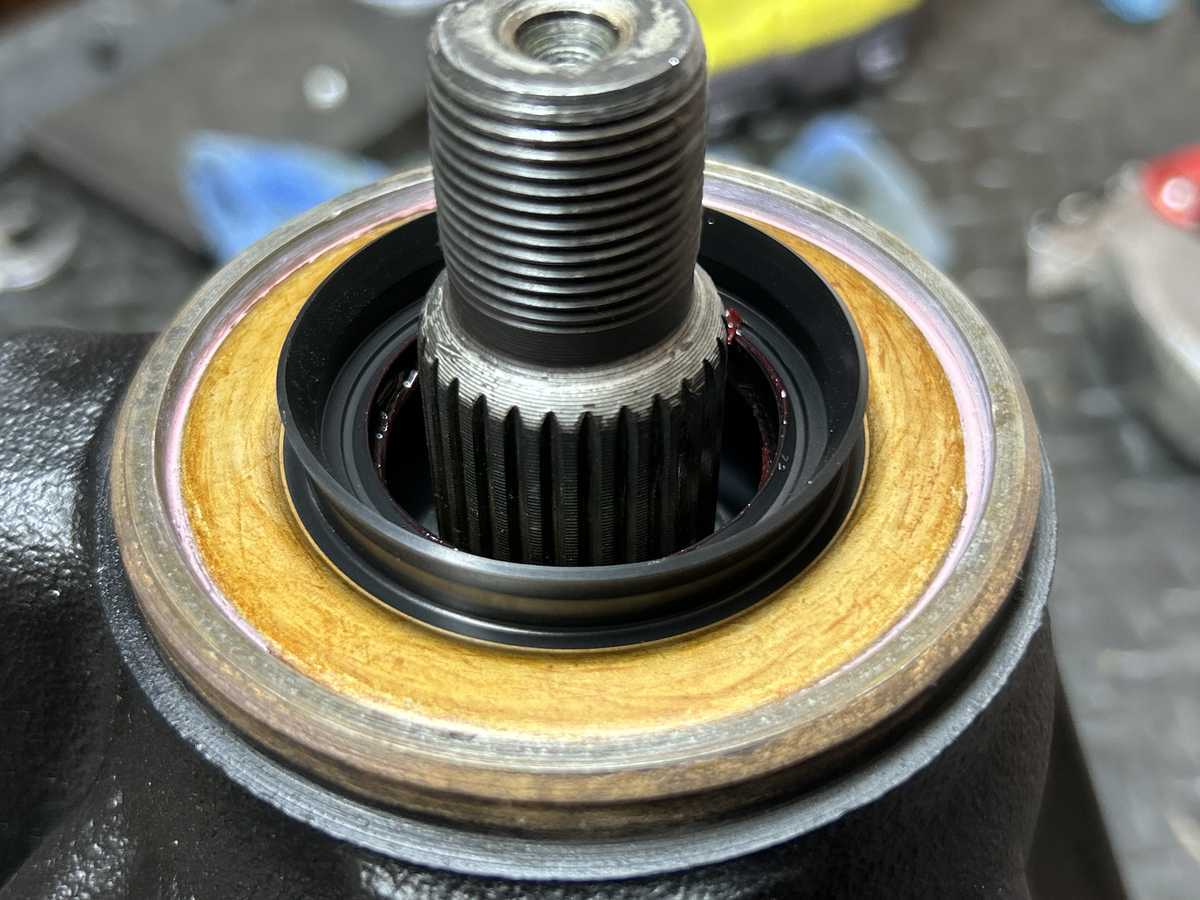
| Now to do a final assembly with a new genuine seal and some FIPG sealant to protect against a drip. |
|
| Recess the seal 2mm....apply grease on the rubber seal lips. |
|
| Crush the crush sleeve until about 6 inch/pounds of start torque is repeatedly measured. |
|
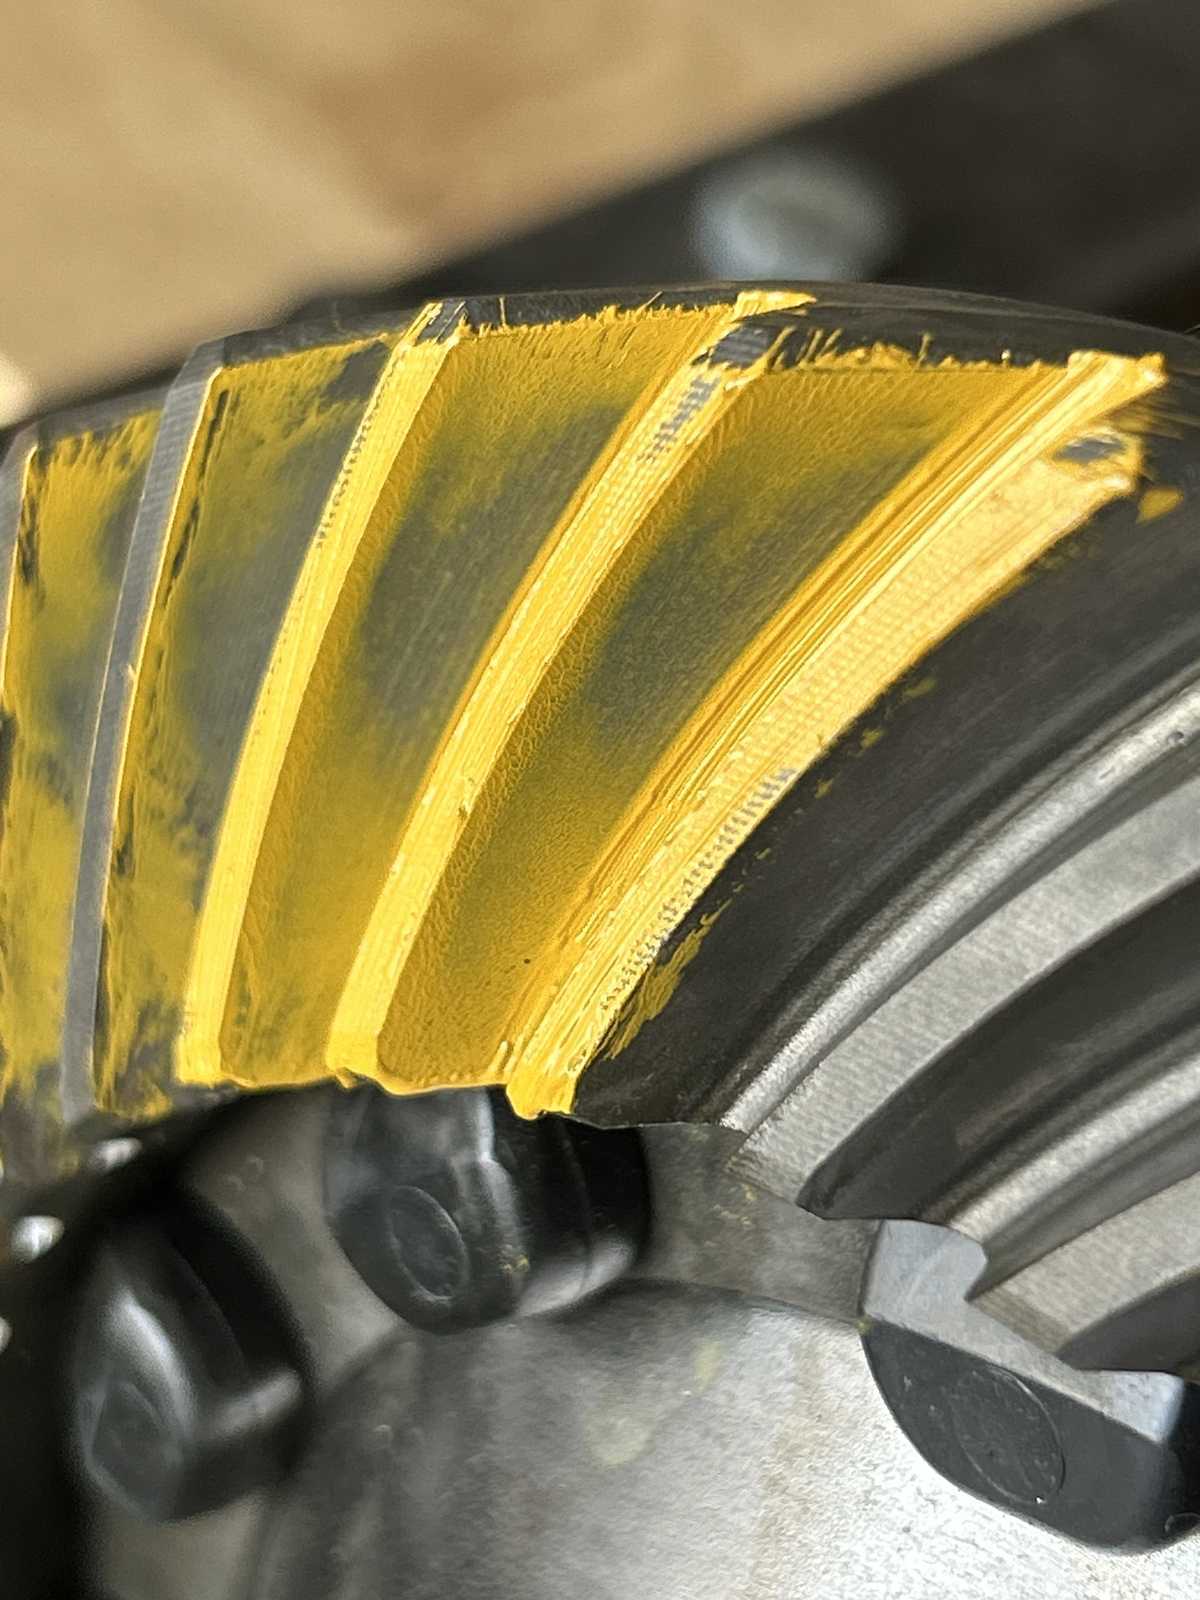
| This time I chose a different set of teeth to paint and this drive side is spot on. |
|
|
Interestly enough, the coast side now looks good. The pattern is spread evenly from the root to the top of the tooth. Maybe the wider .010" backlash really made the difference here. Devon texted back to me after the trip to Devil's Canyon and I quote, "Absolutely nice and quiet." |
|
| Backlash was recorded and I was very pleased with how uniform the numbers were. |
|
| ................................................................................... |
|
| 12 volts applied to the Harrop and passed the engagement test. |
|
| ................................................................................... |
|
| ................................................................................... |
|
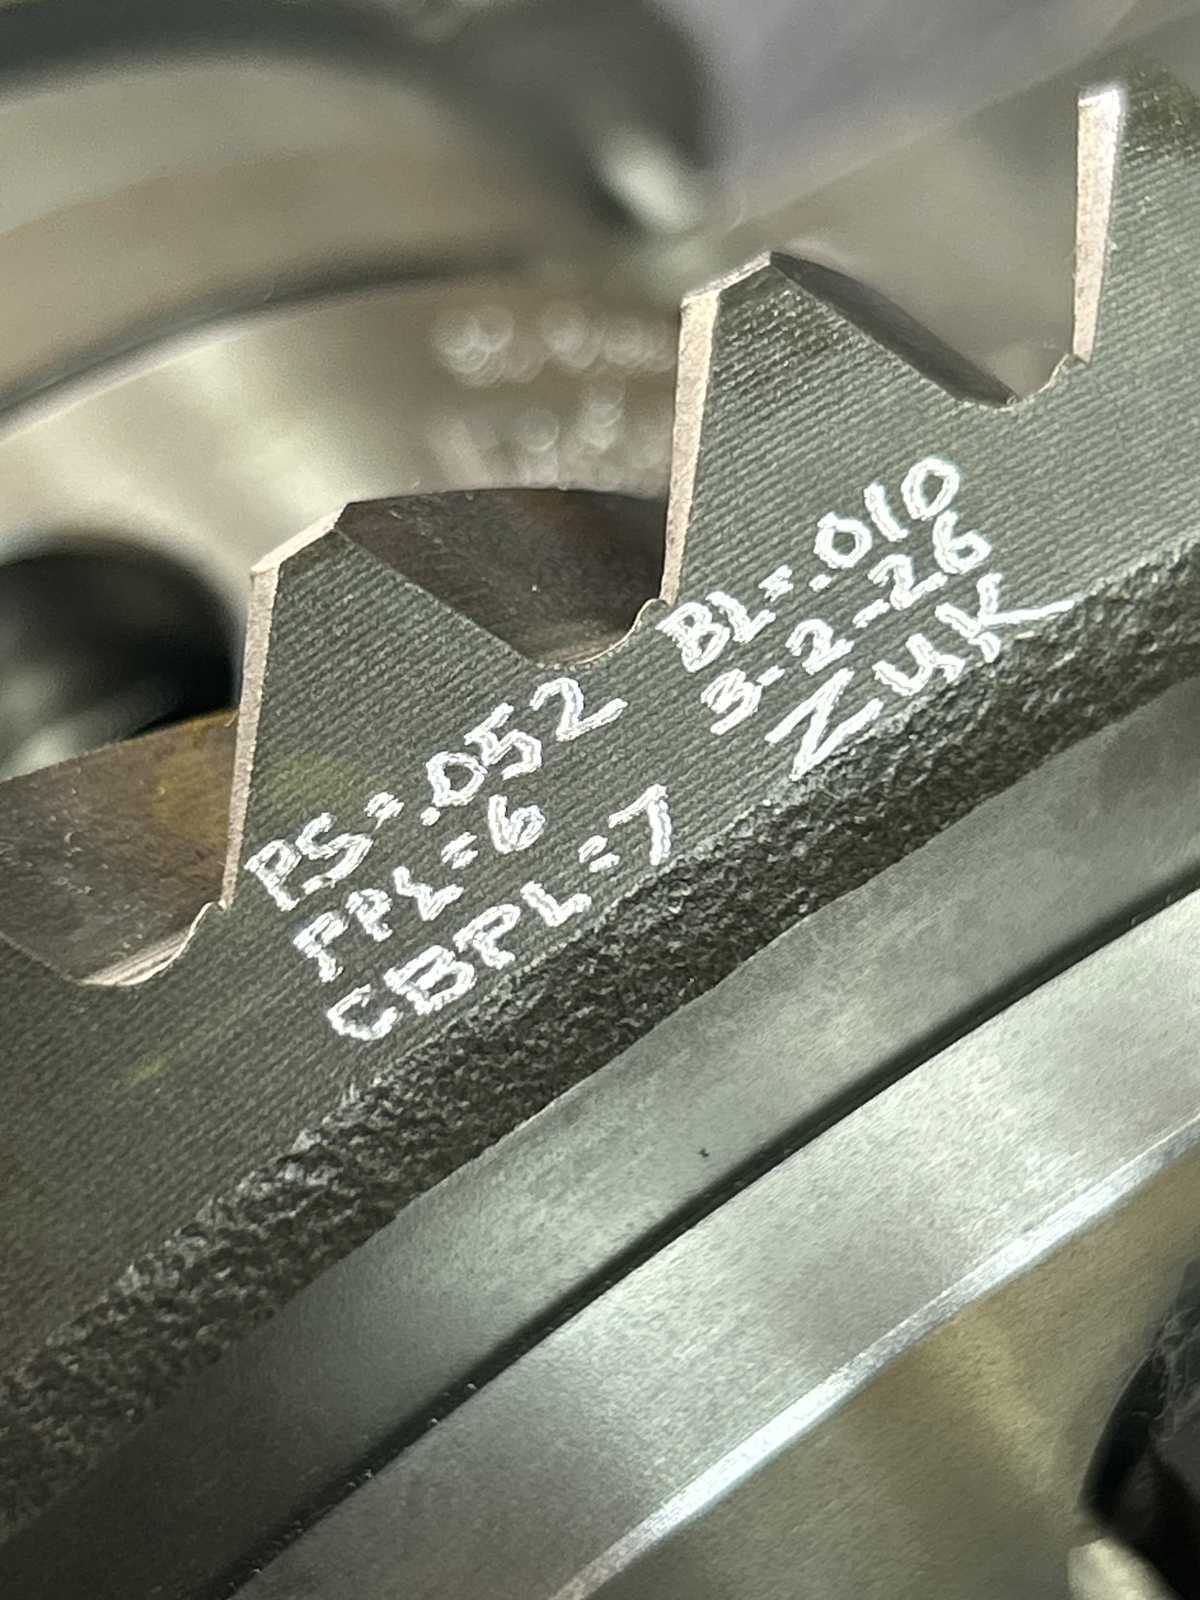
| Basic specs engraved on the ring gear.... |
|
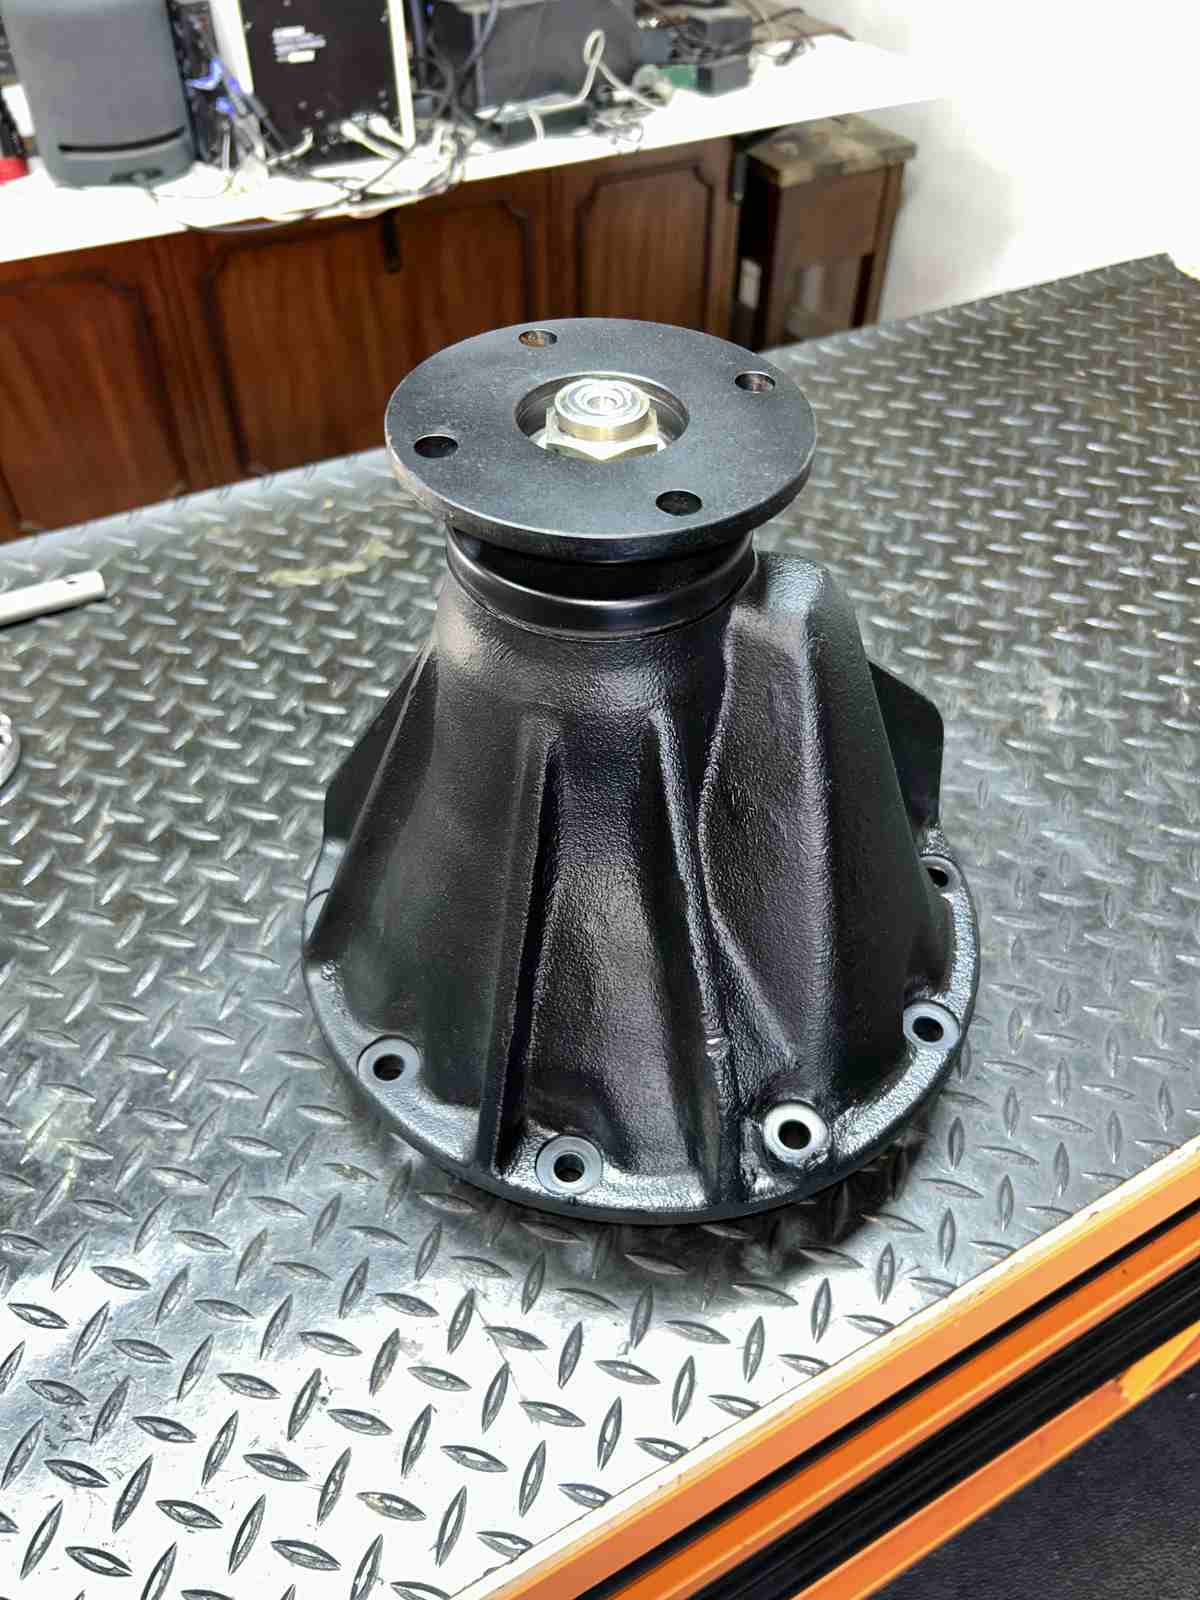
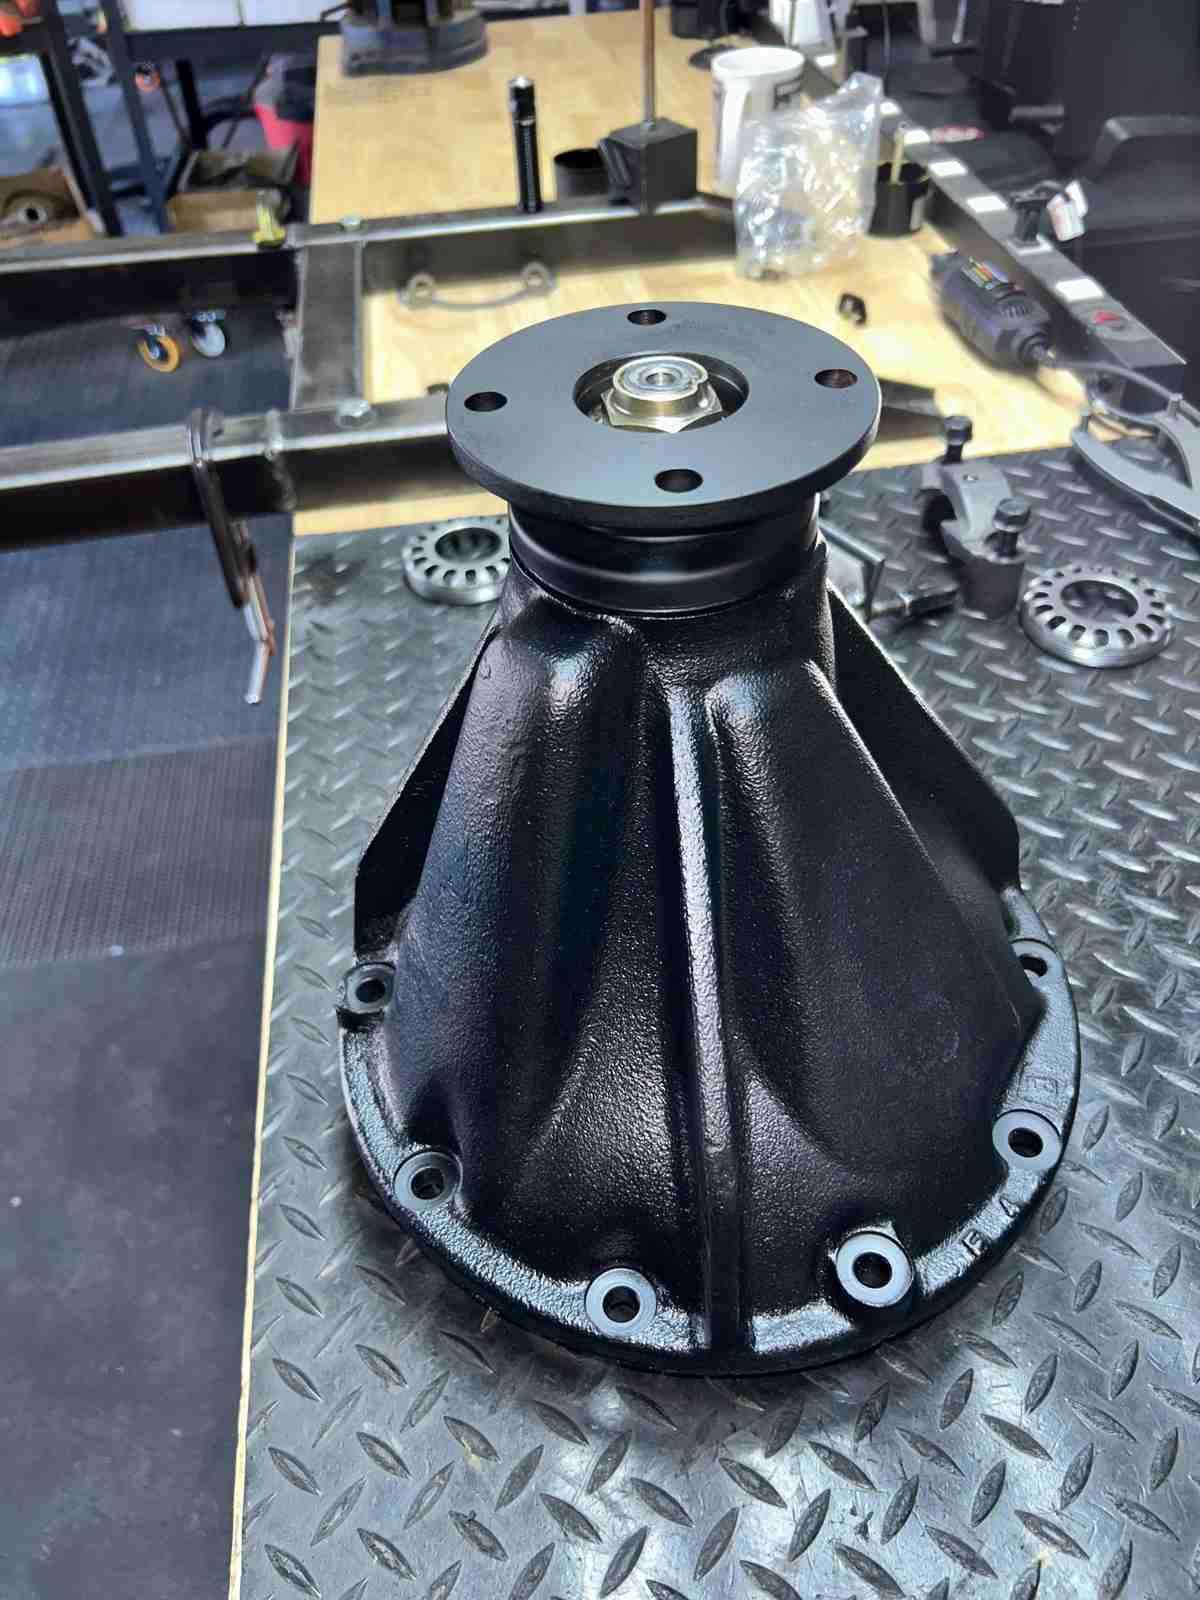
| Complete! :) |
|
|