| Steve's '95 FZJ80 gets Revolution 4.88 gears and Eaton elockers |
|---|
| (65 BIG pics loading) |
| April 17 2026 |
|
|
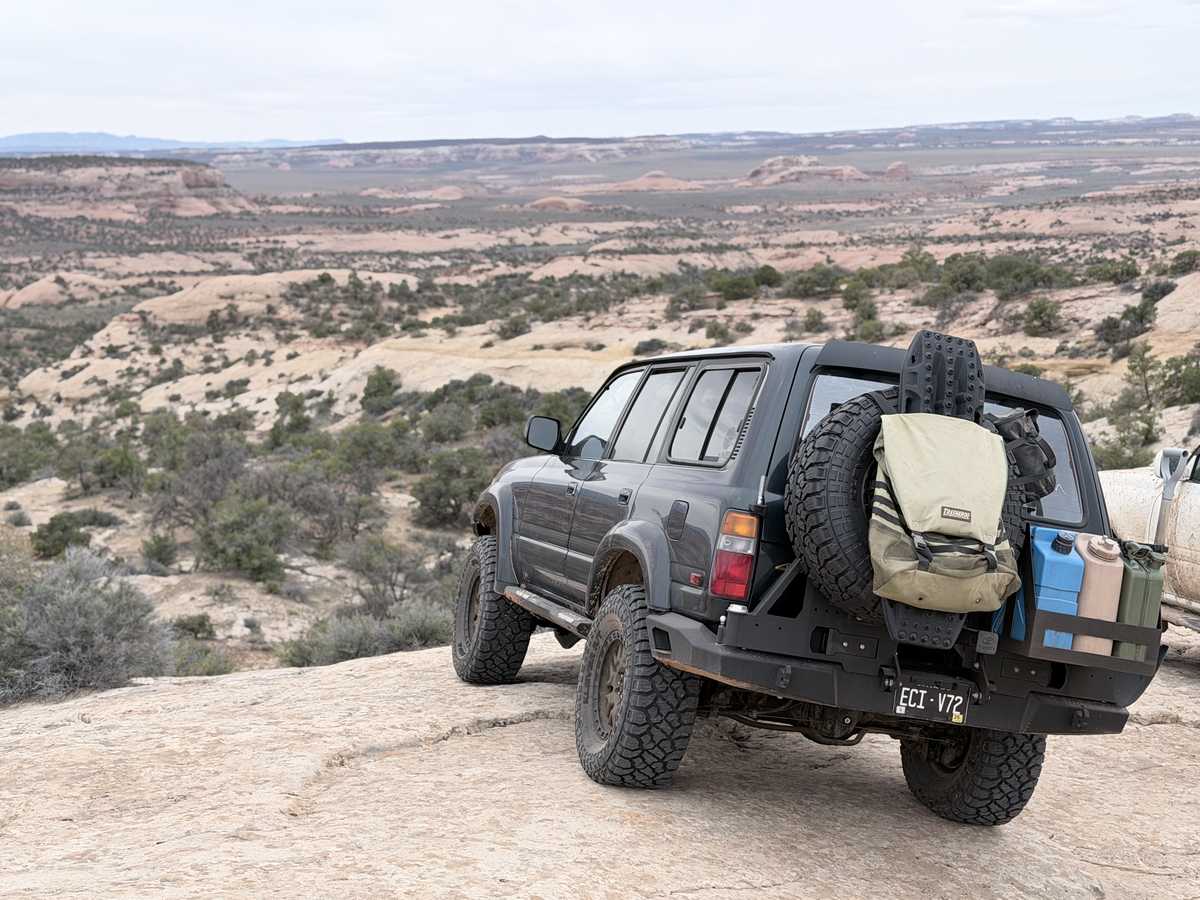
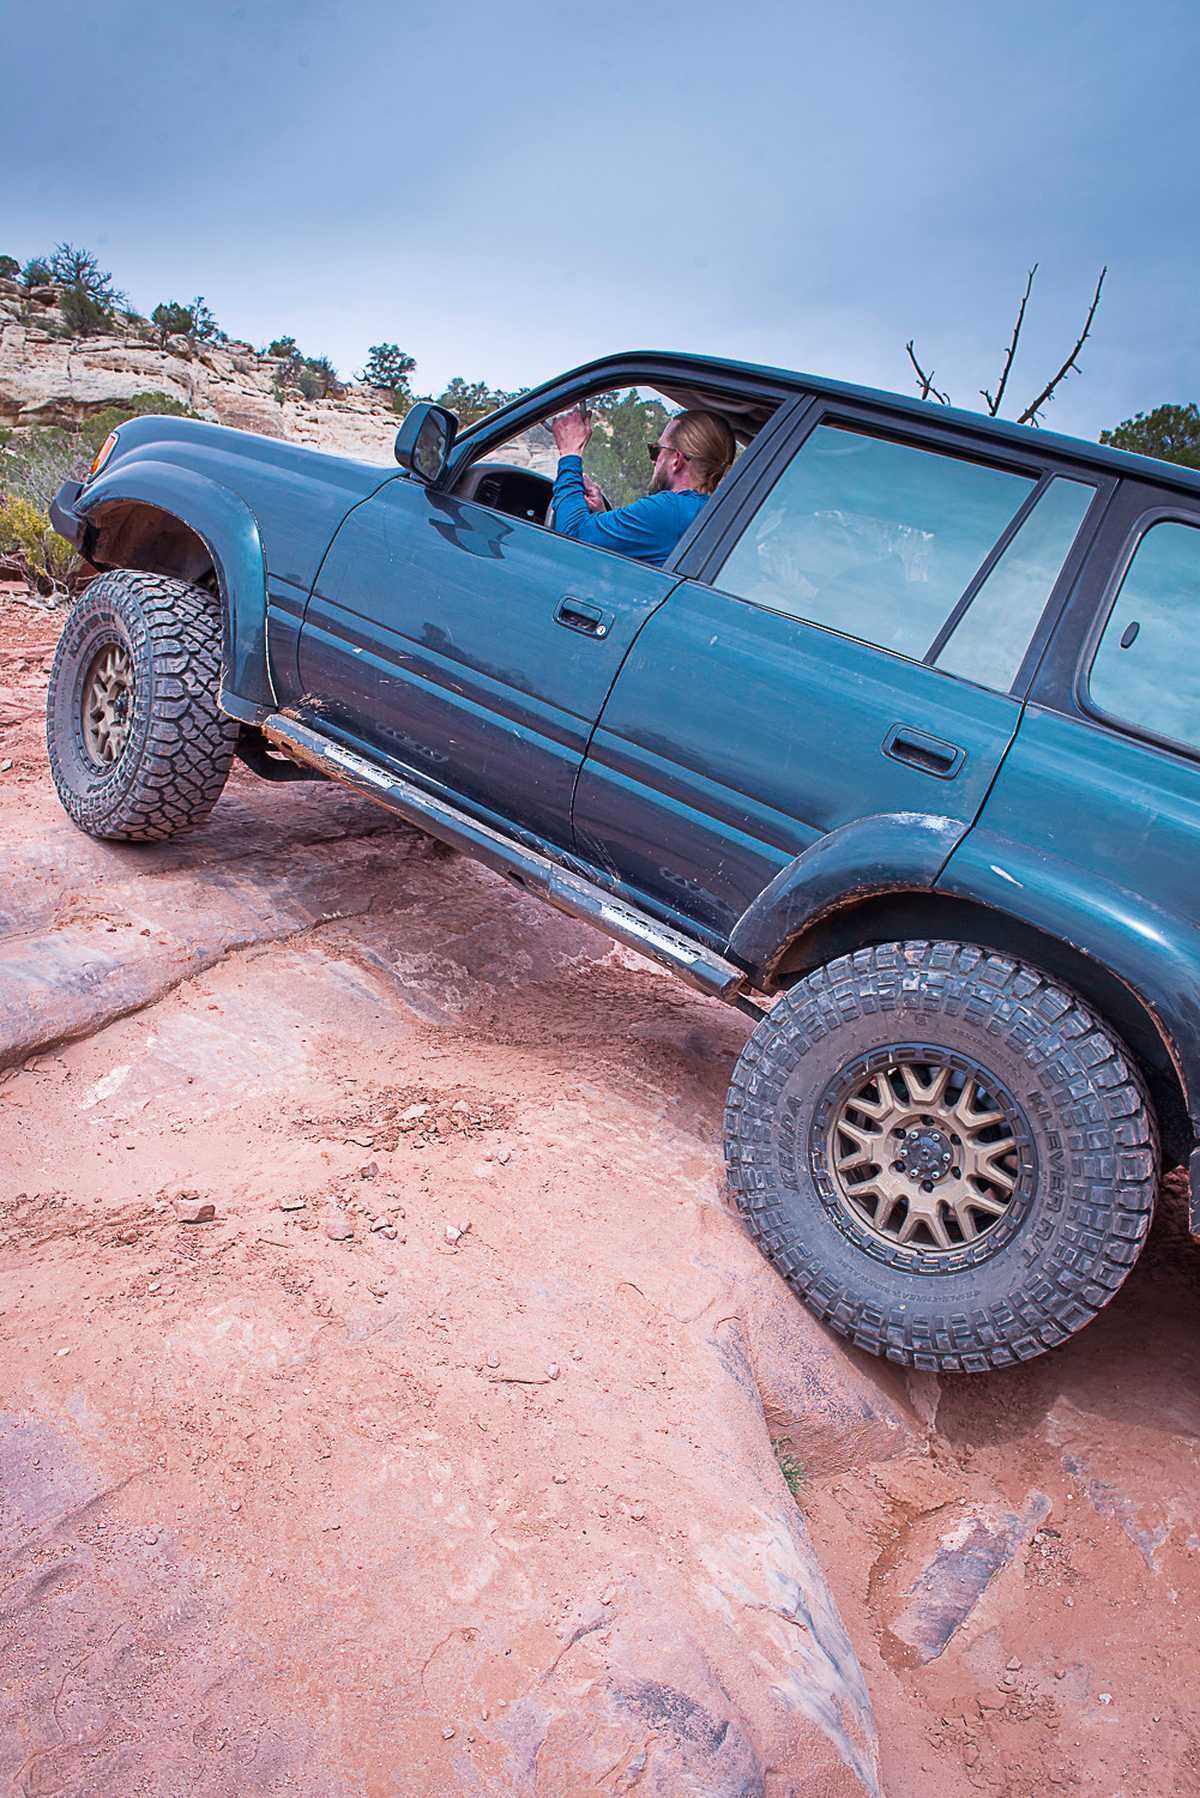
Steve's '95 FZJ80 is shown here in Moab on Jax Trax Trail. A very scenic trail about 25 miles south of Moab. Rated a 5....not too easy but not too hard also. 33" tires and a rear e-locker is what the guidebook recommends. Steve has 35" tires and elockers both ends with fresh 488 gears :) |
|---|
|
|
Sliders are from Delta Vehicle Systems. |
|
|
Same thing for the front and rear steel bumpers Delta Vehicle Systems The custom 3 tray jerry can fixture and receiver hitch were fabbed up by First Choice Fabrication located in Denver, Colorado. |
|
|
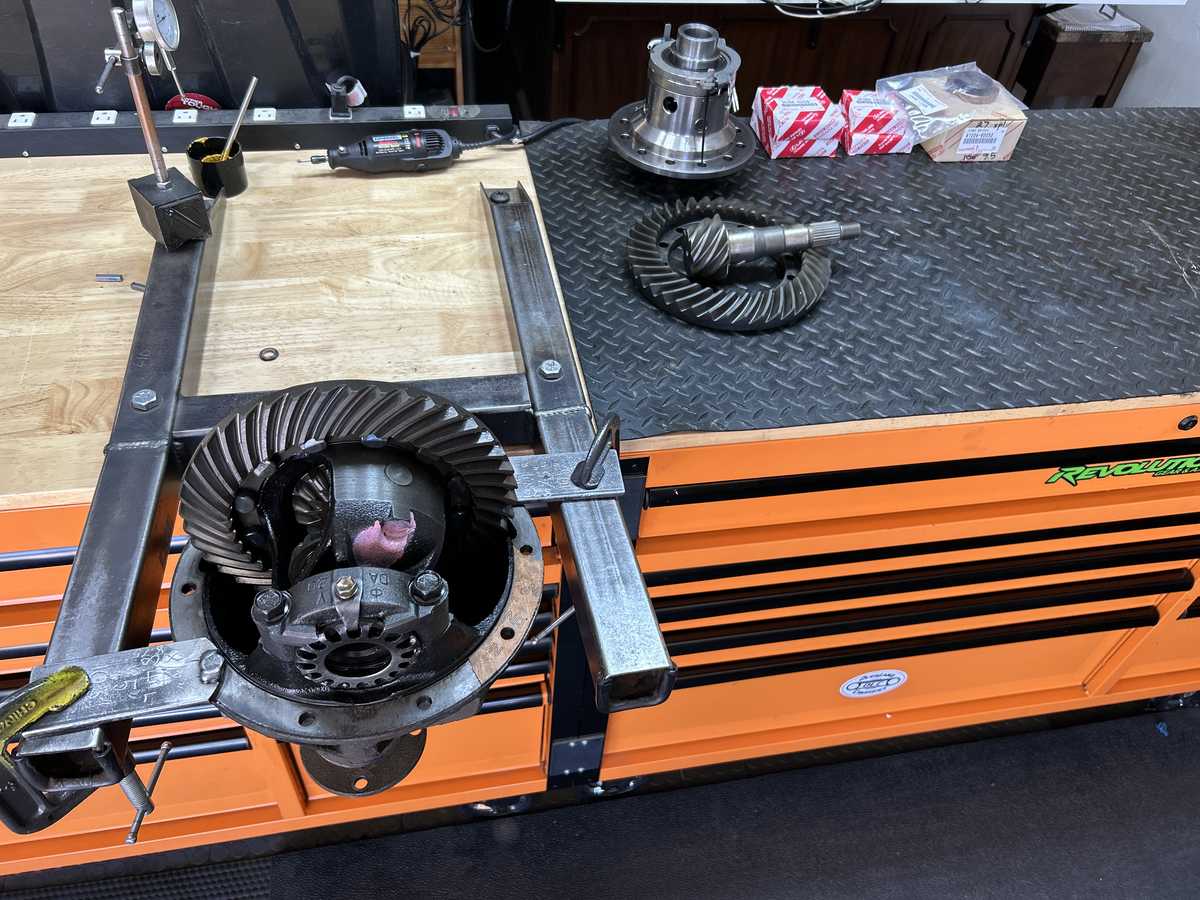
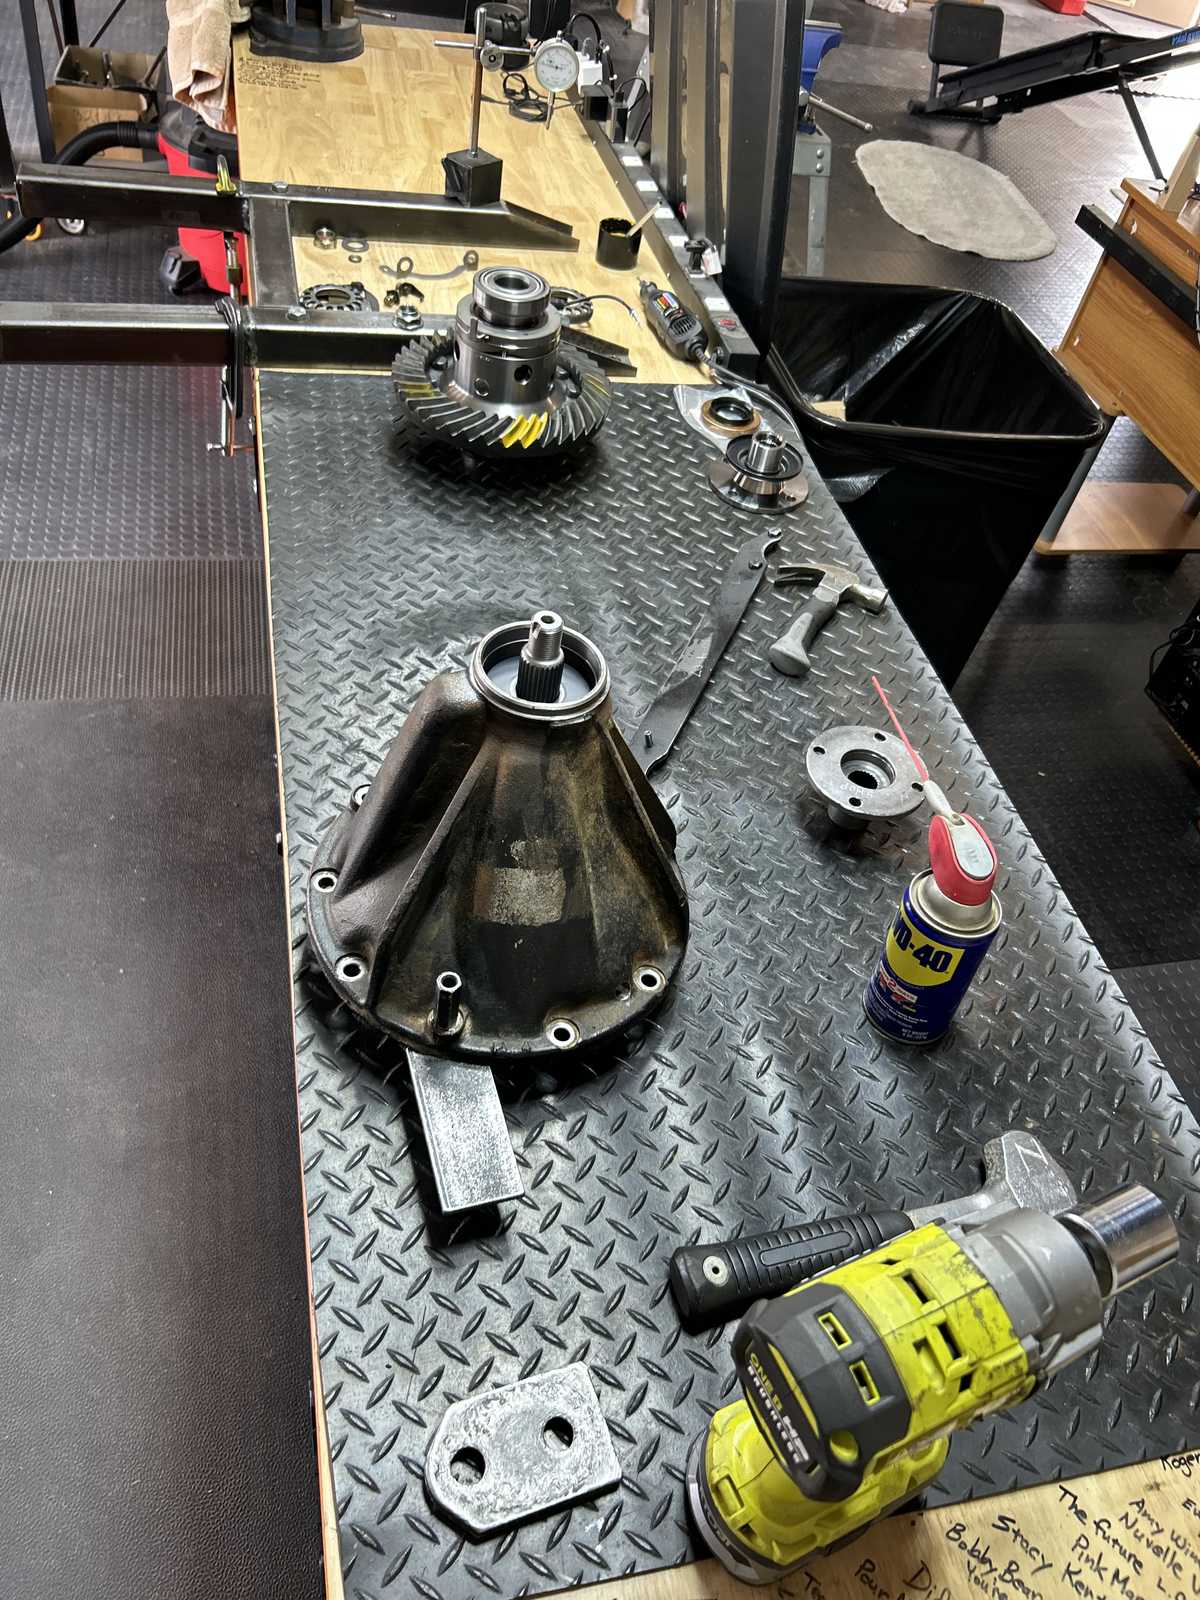
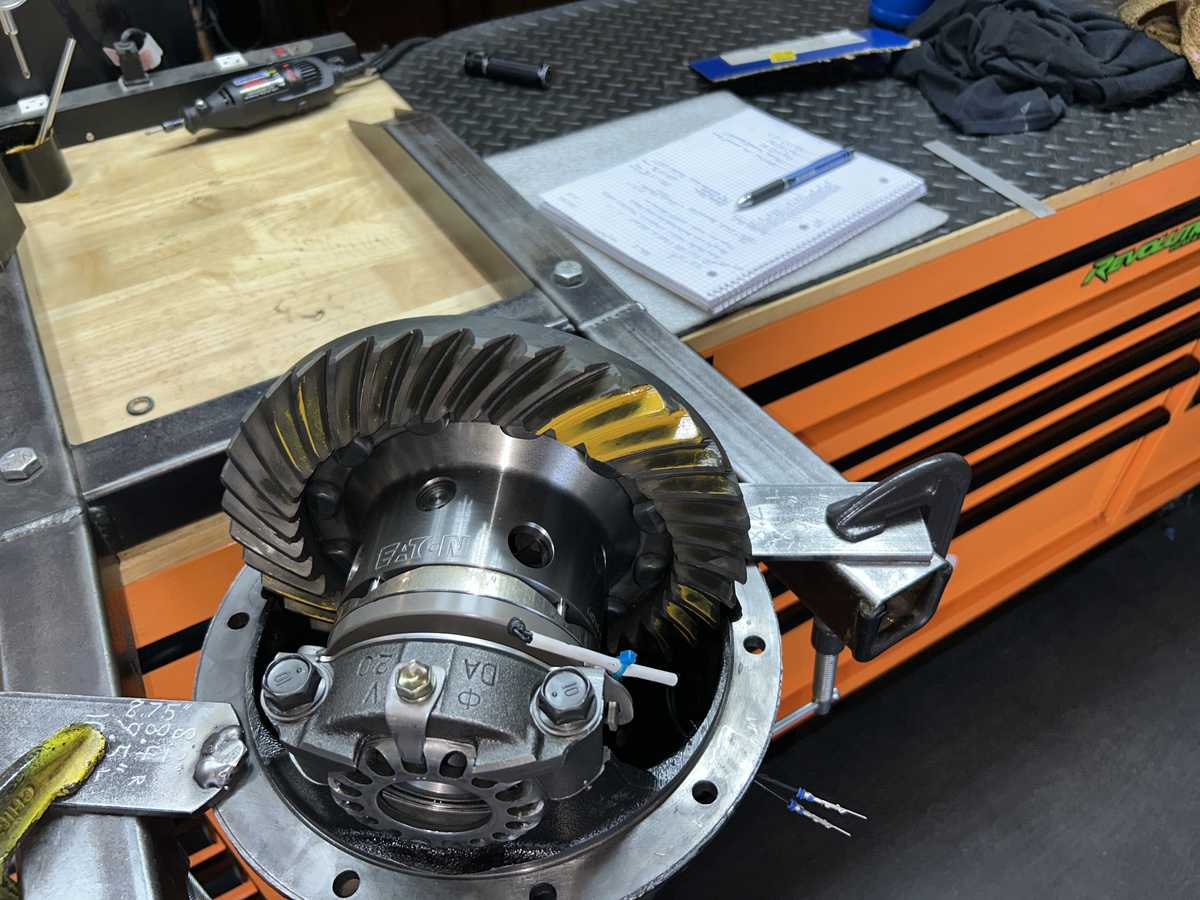
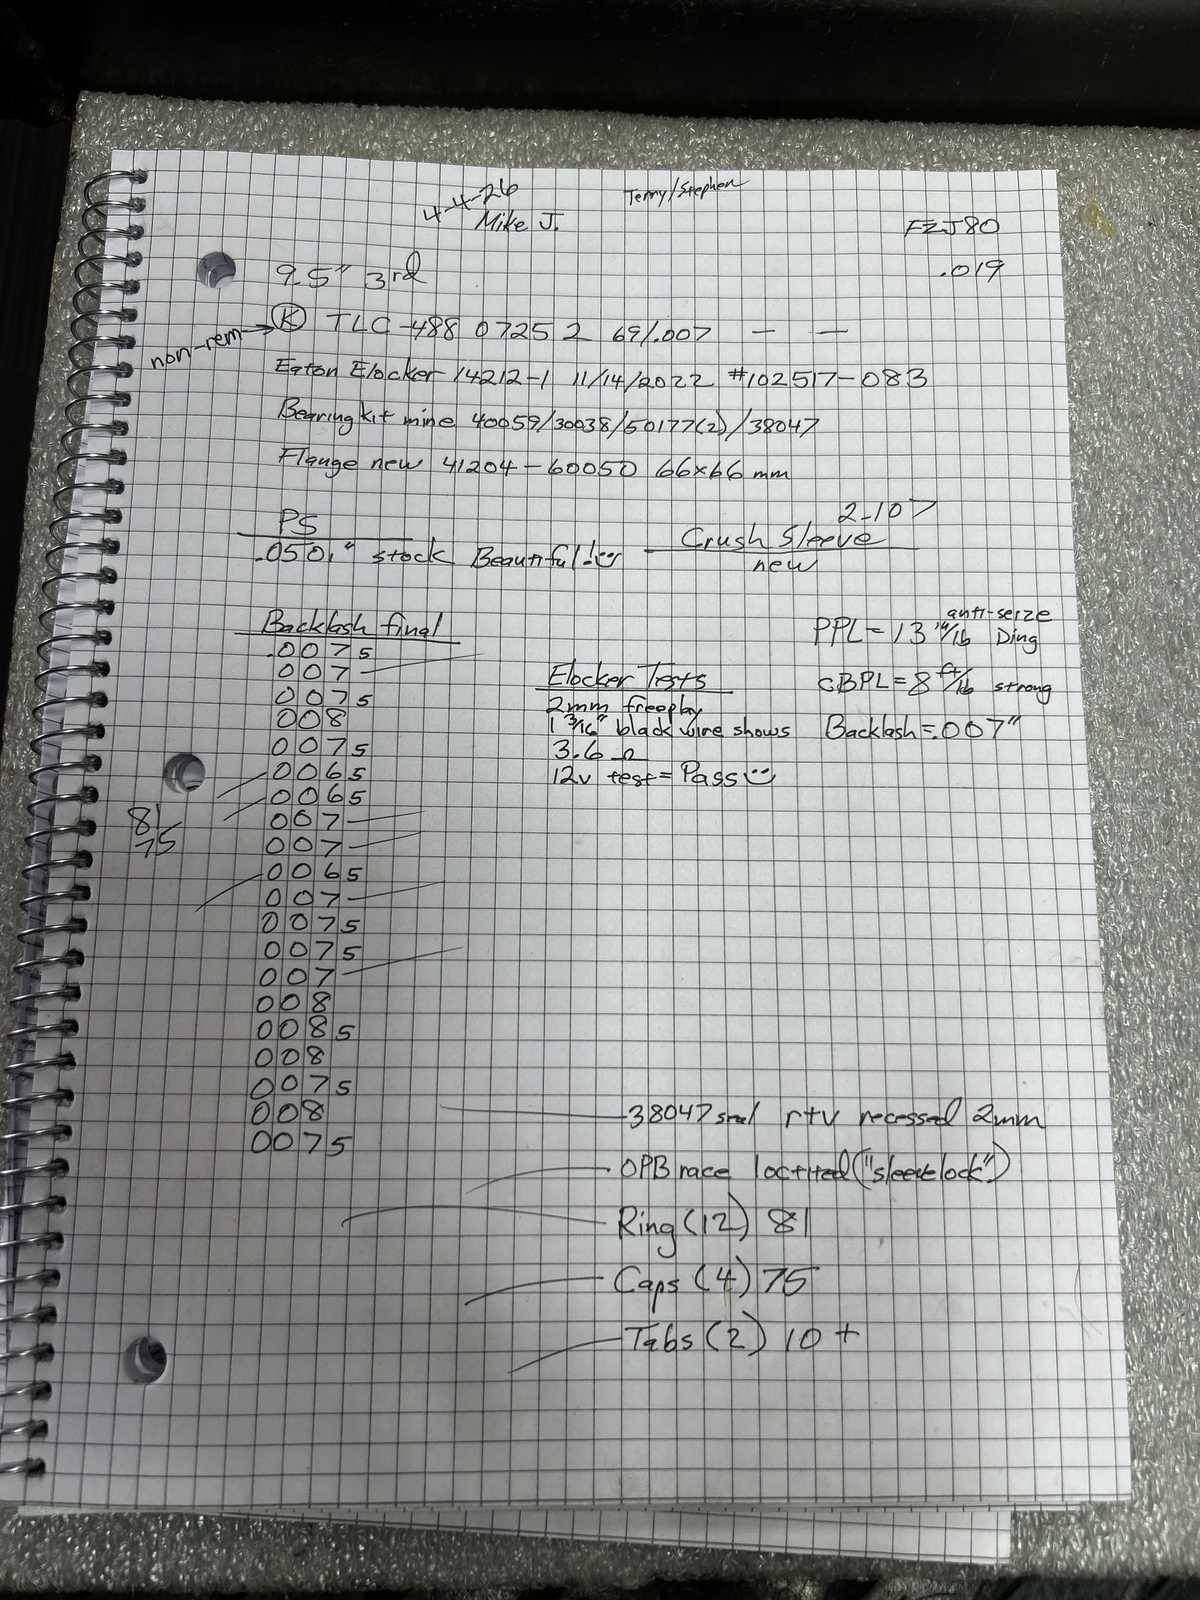
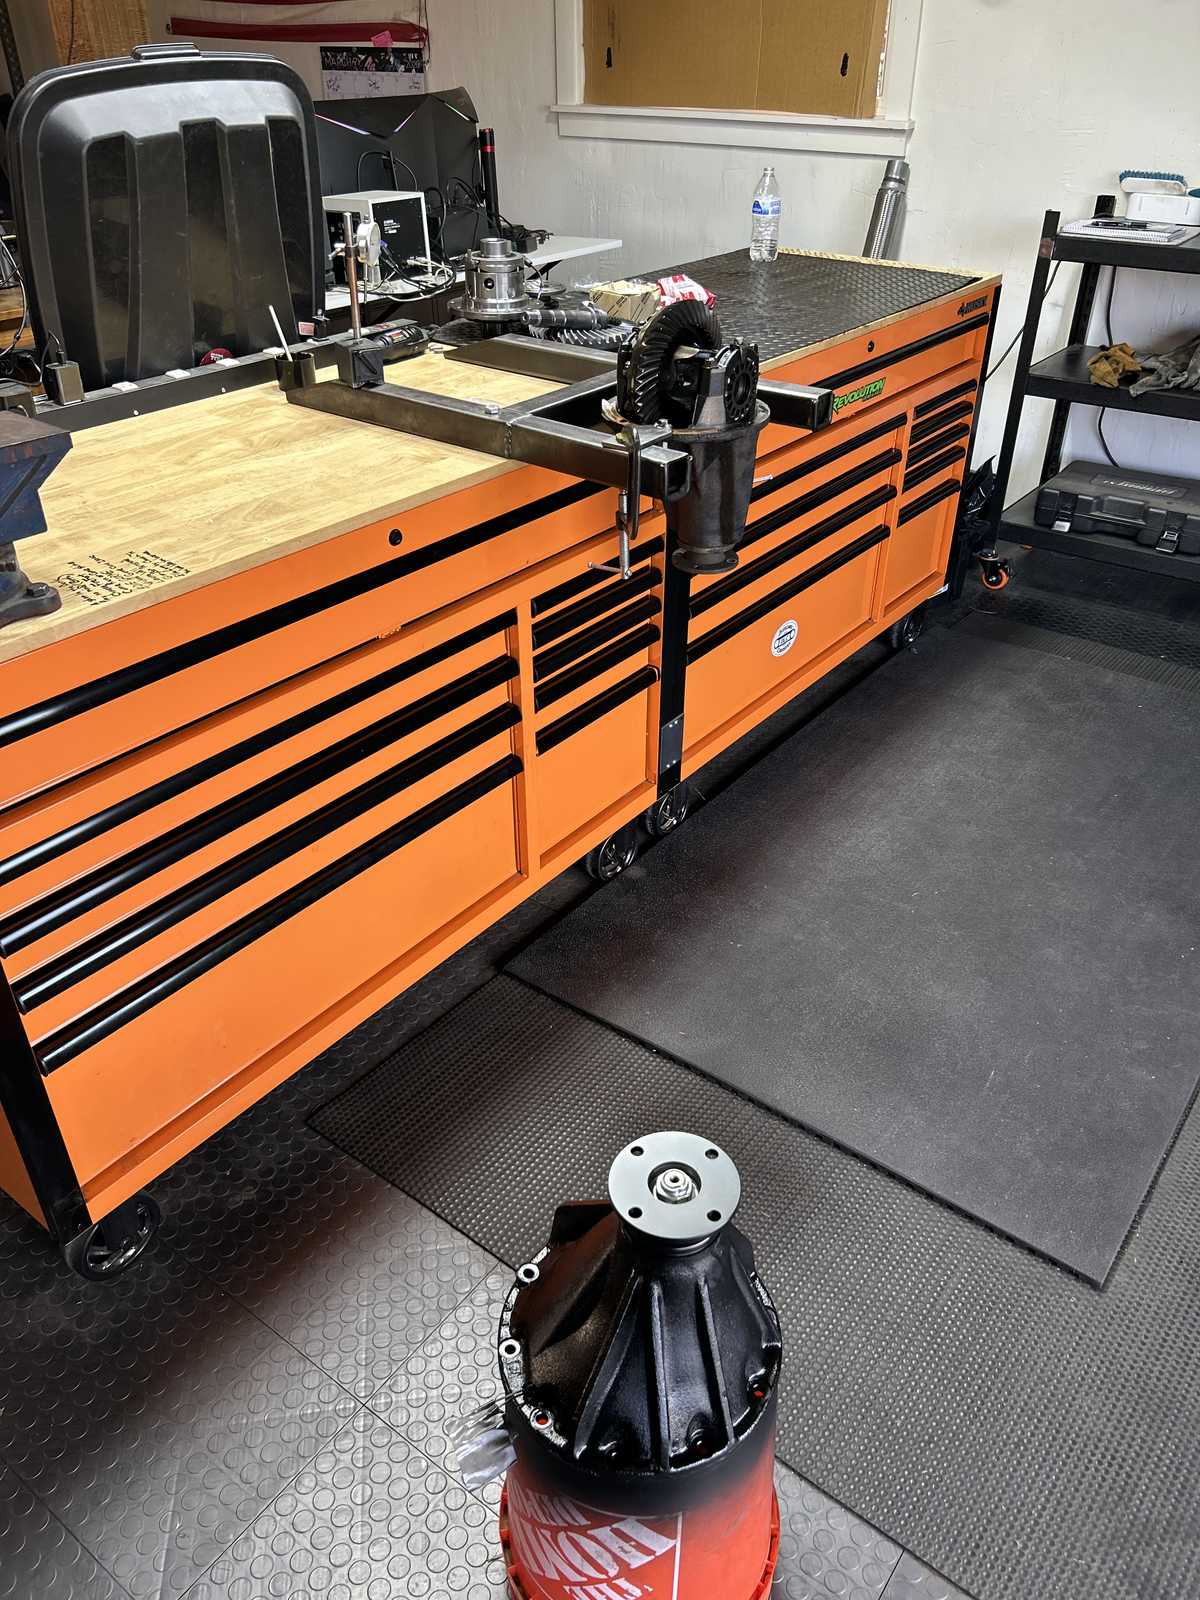
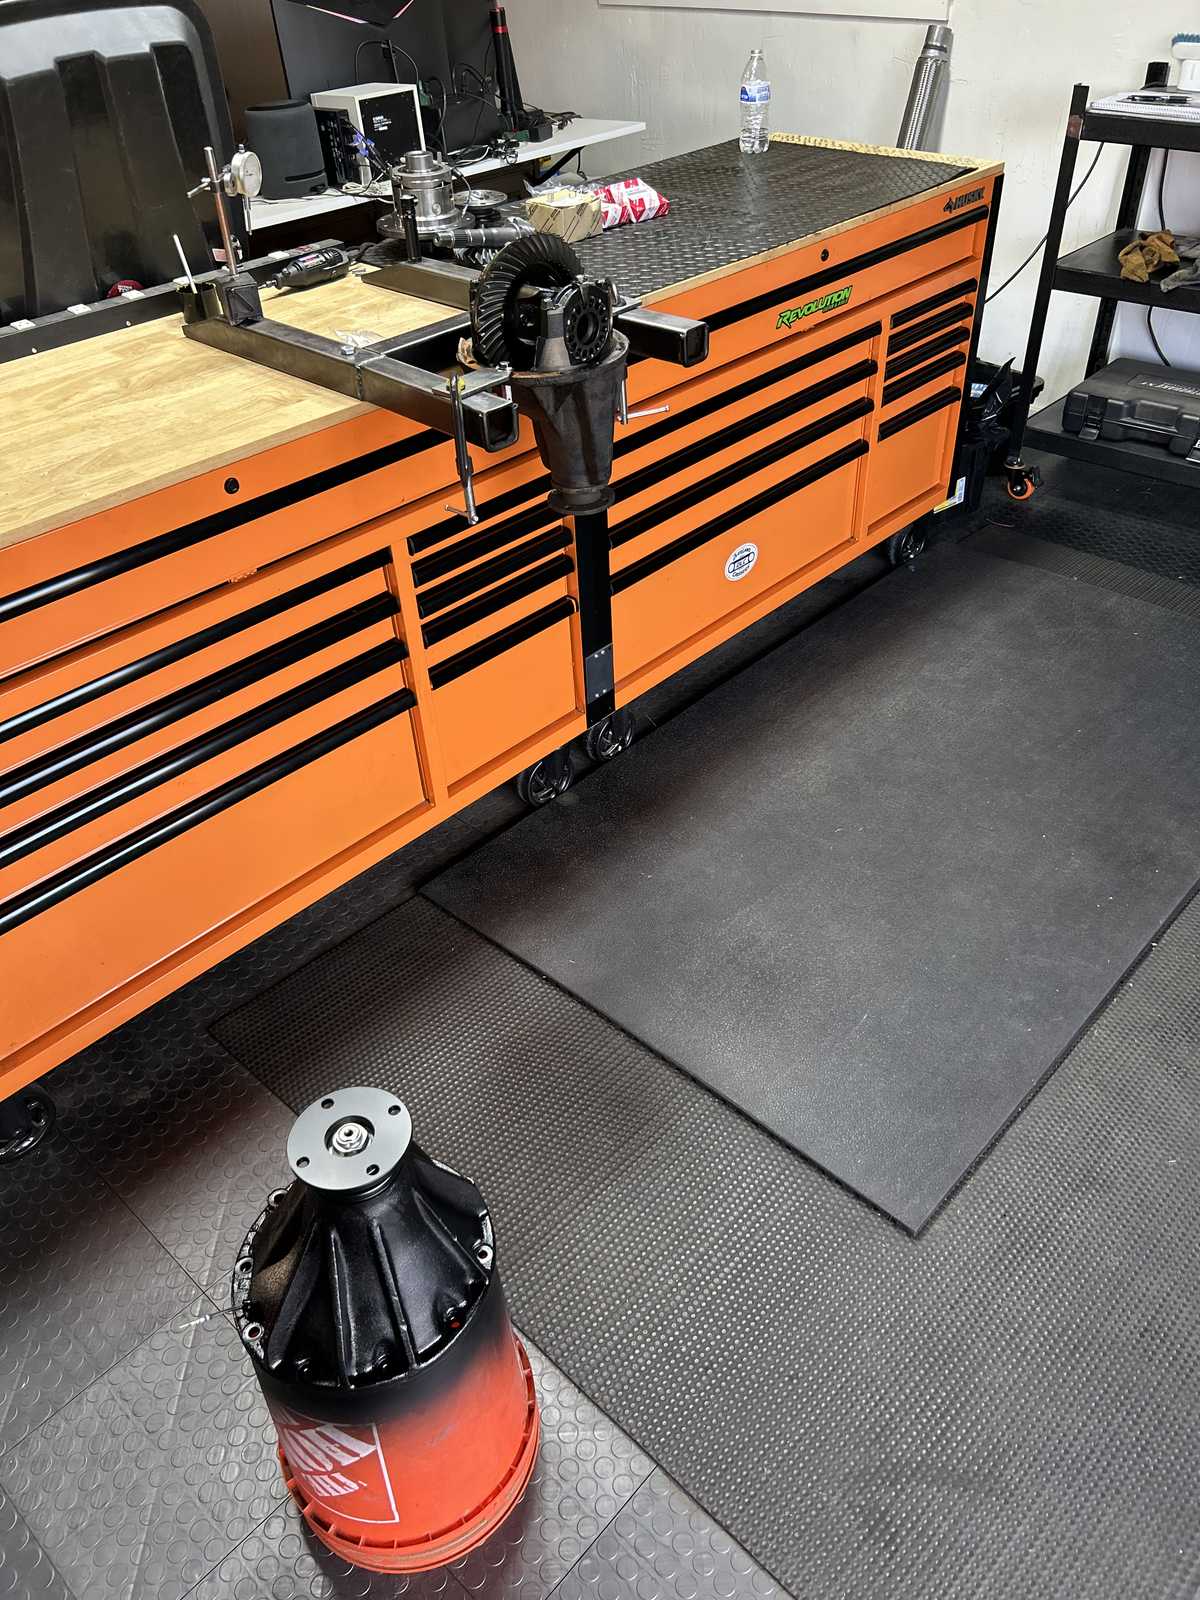
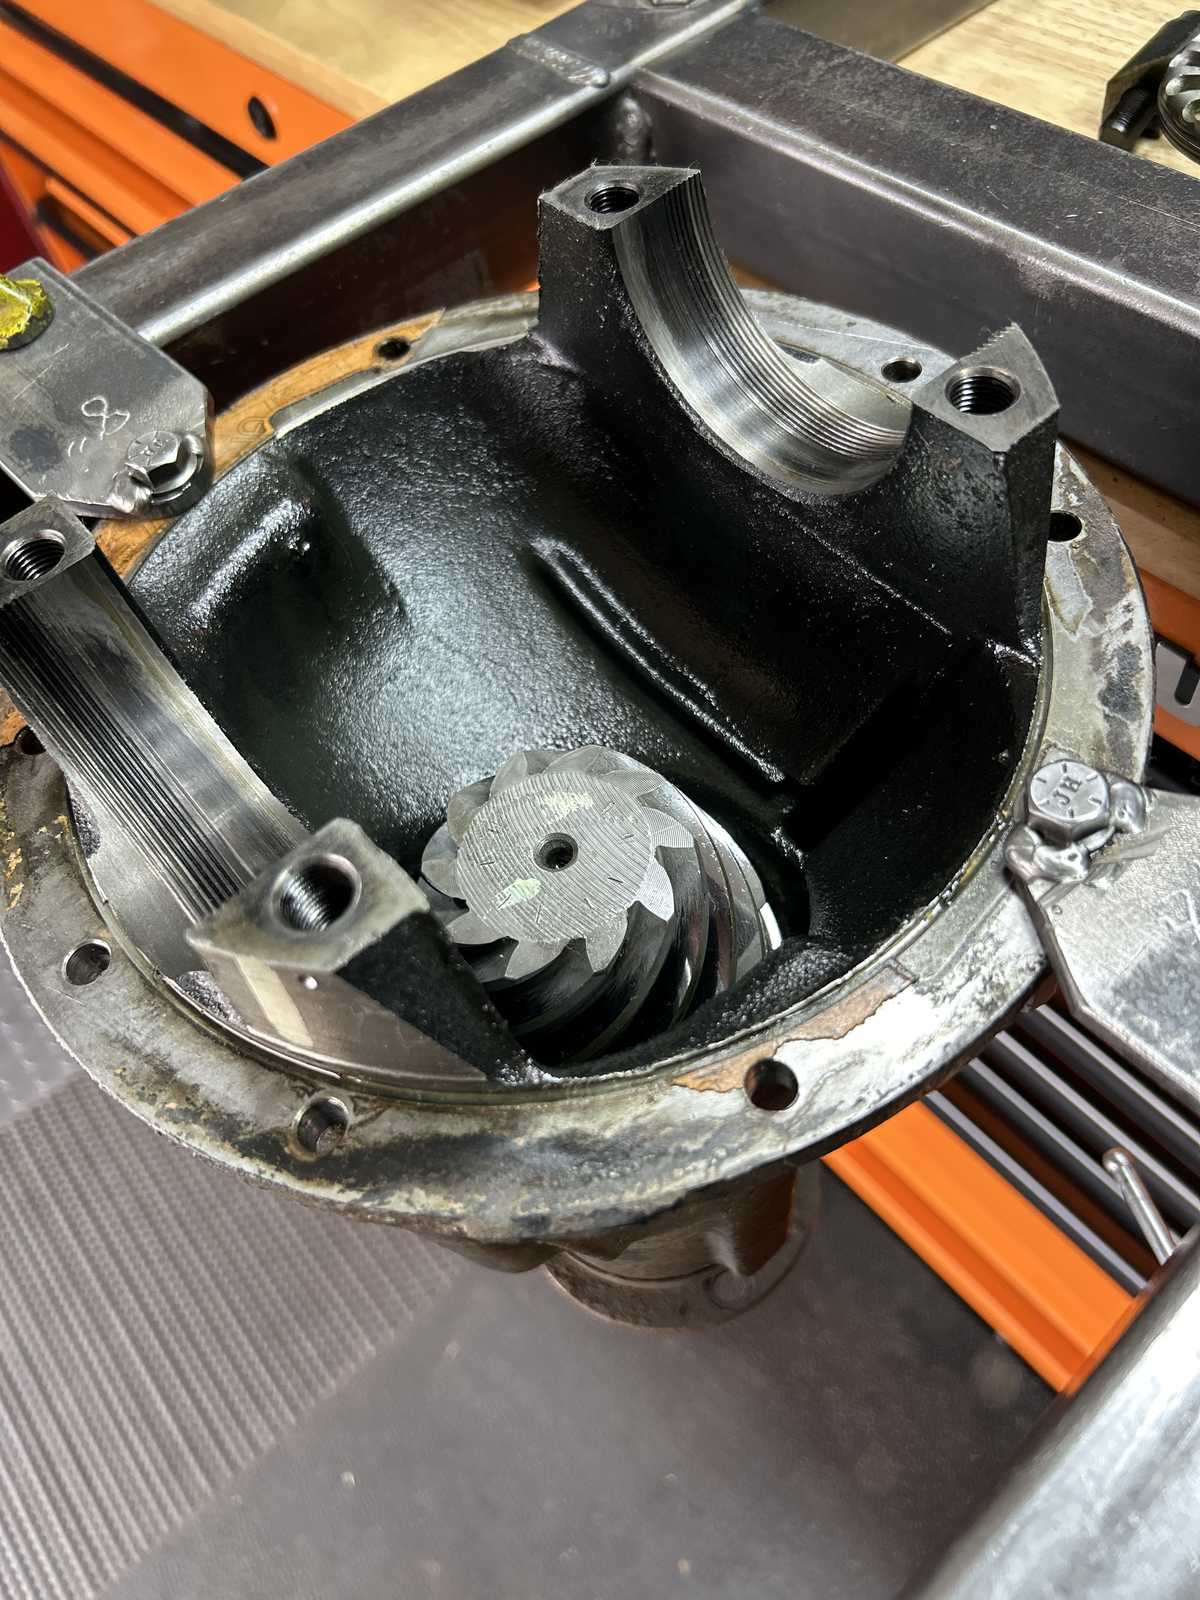
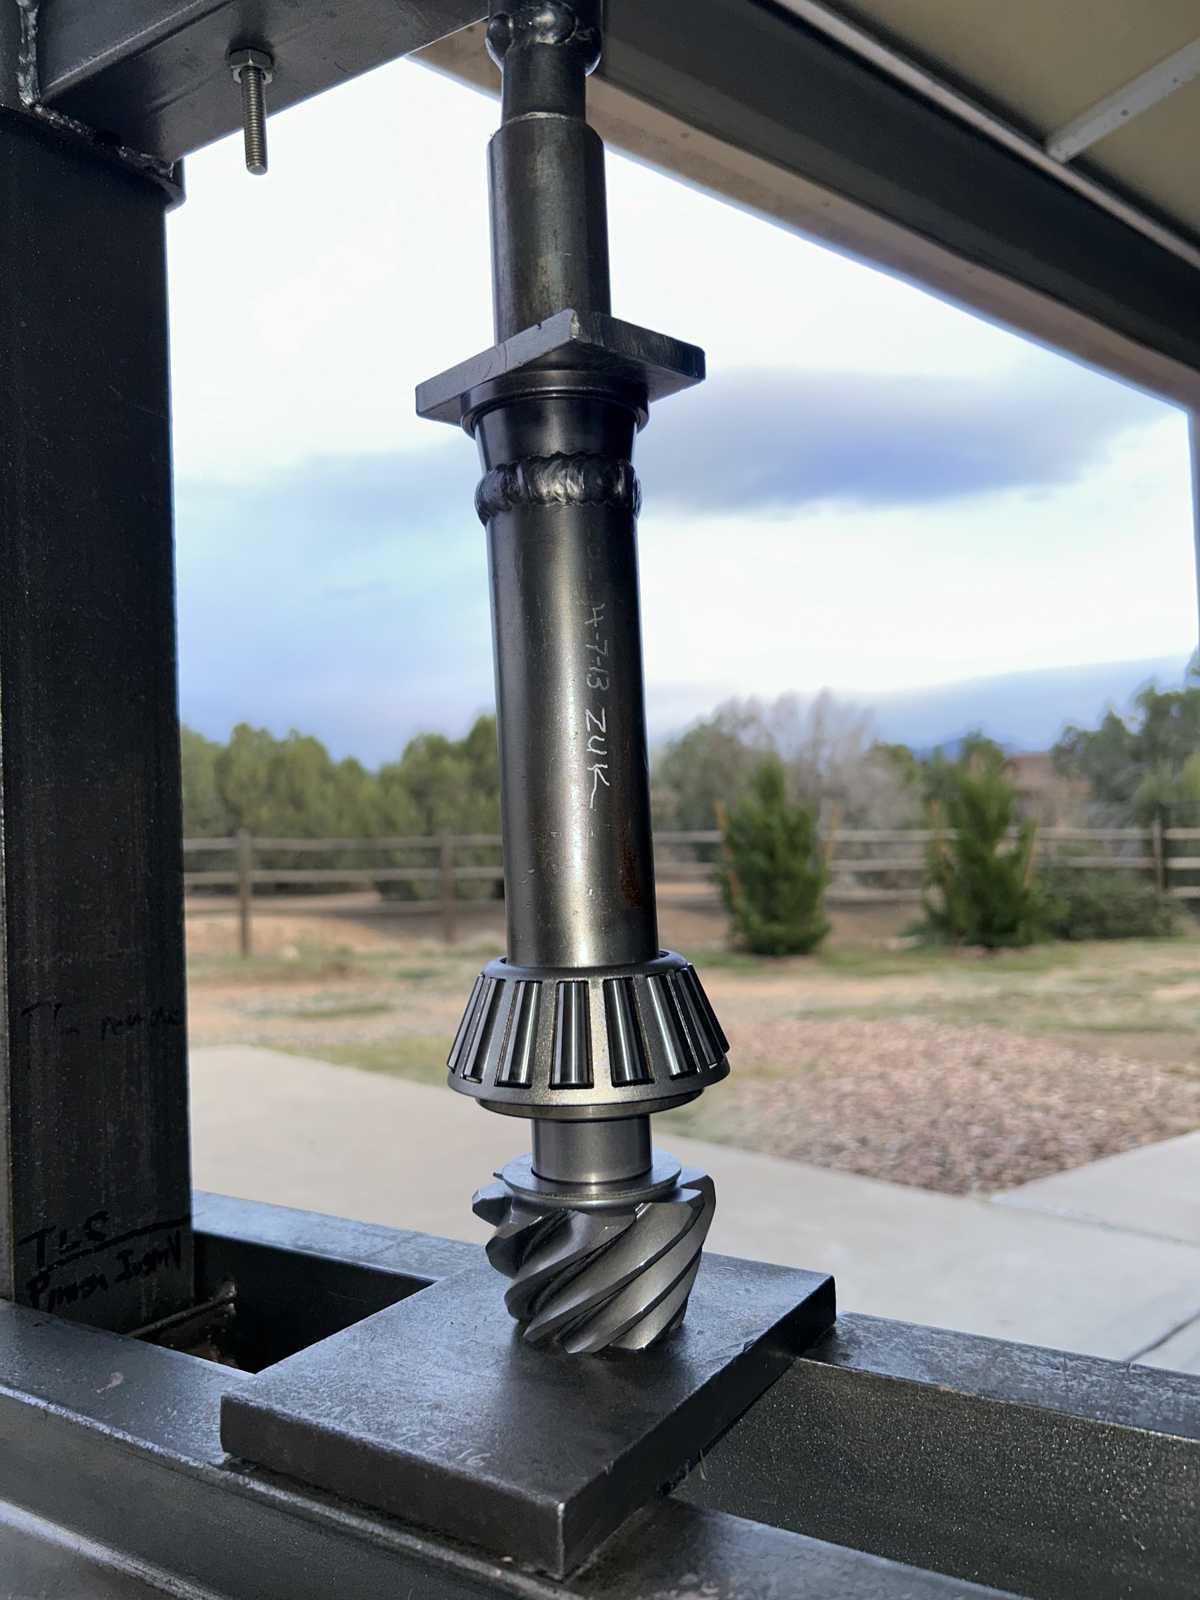
The rear 9.5" 3rd is in the fixture.... With the larger tires and the extra weight of the trail armor, the stock 410 gears were not cutting it. 488 is the magic number. |
|
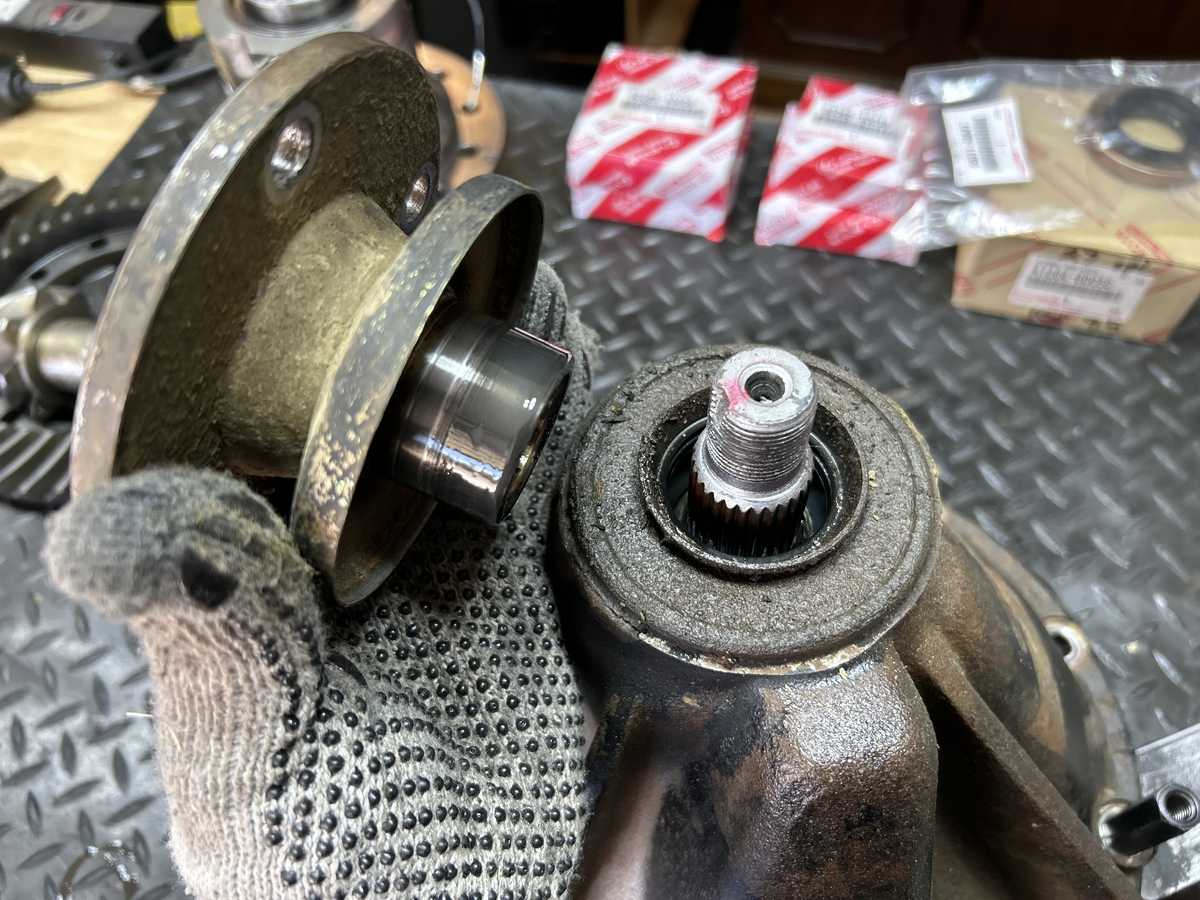
| The open center carrier is out and now breaking down the pinion end. |
|
|
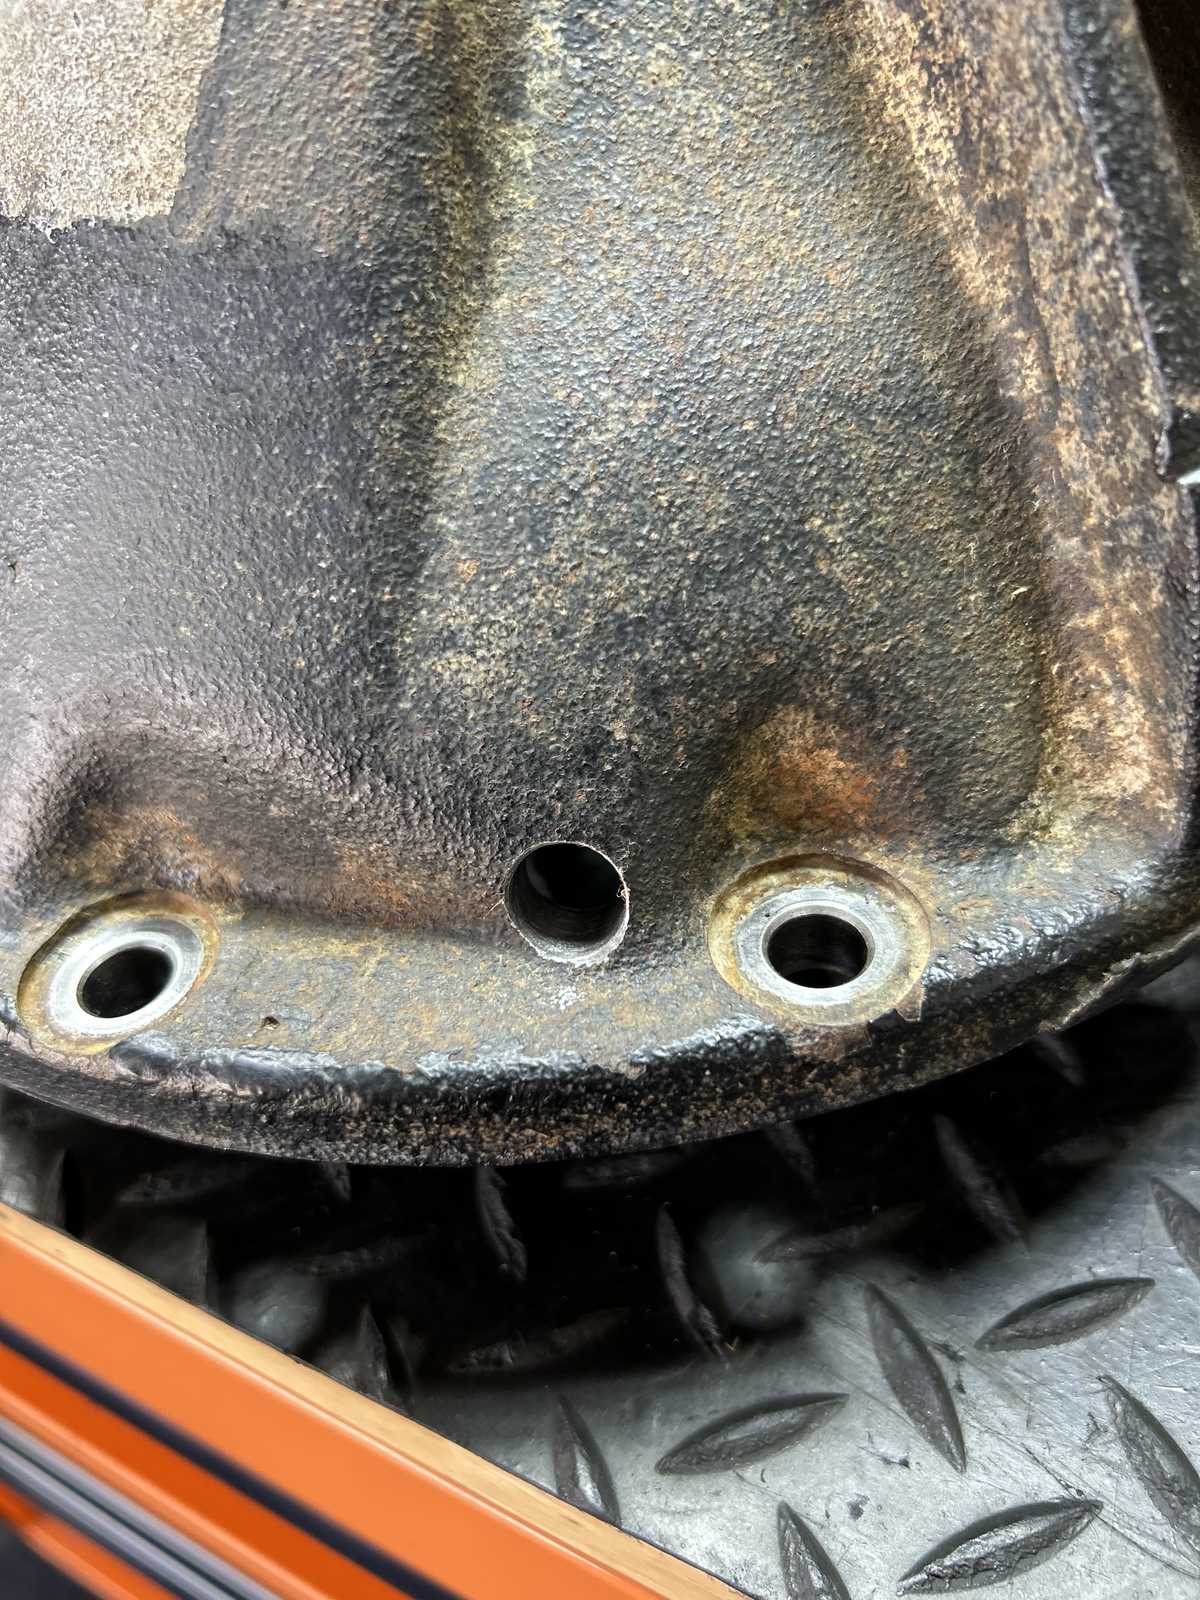
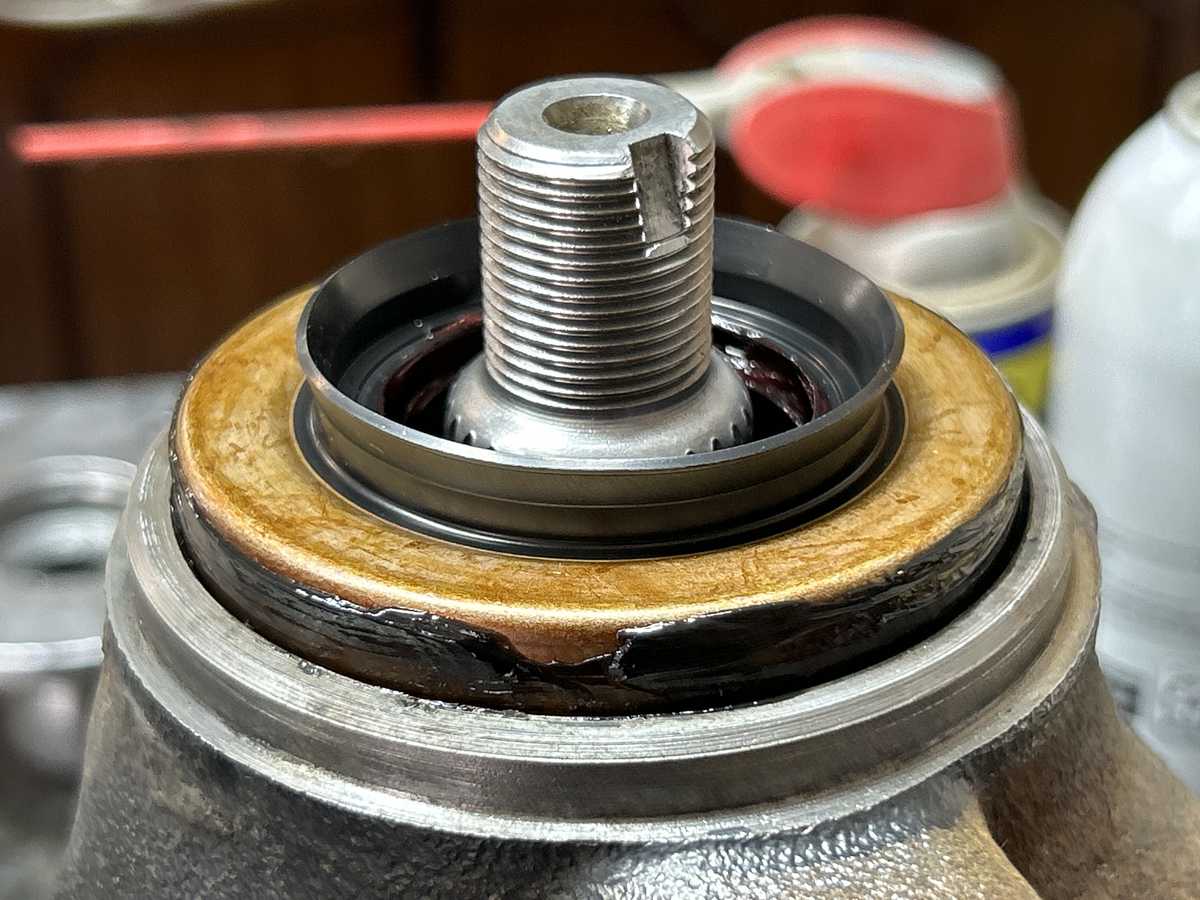
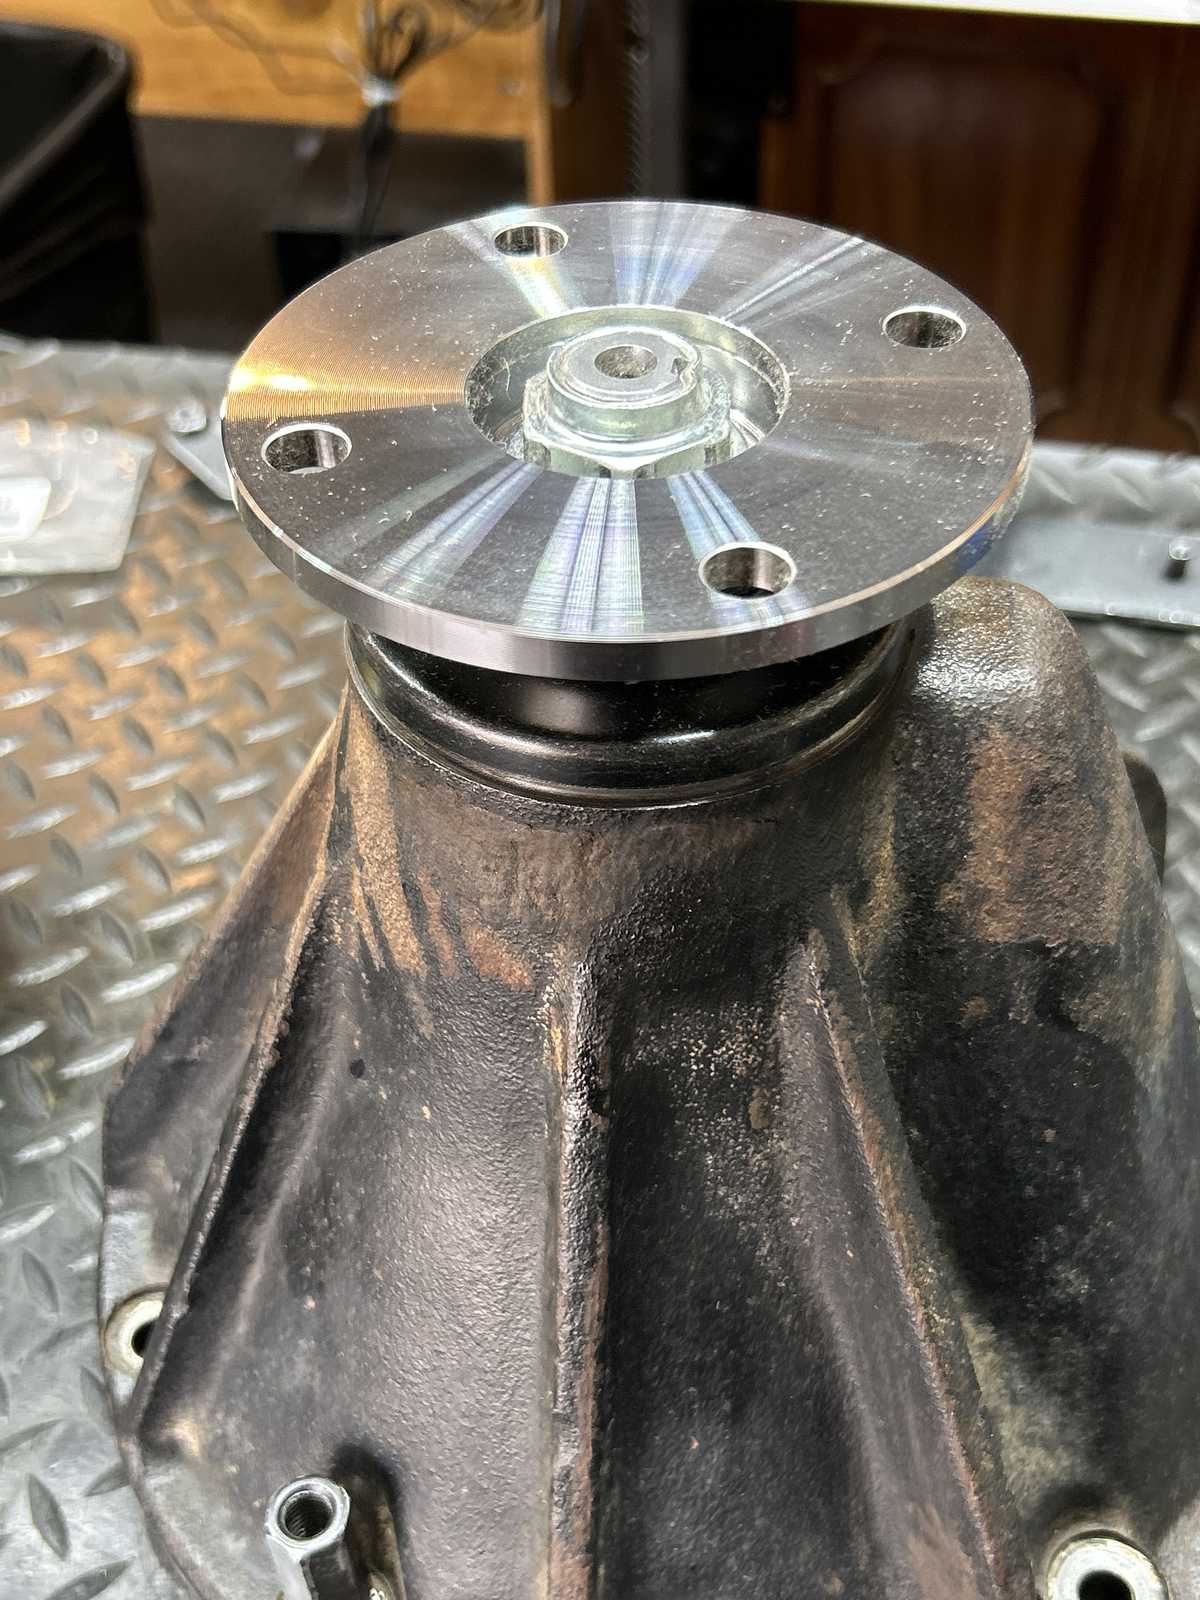
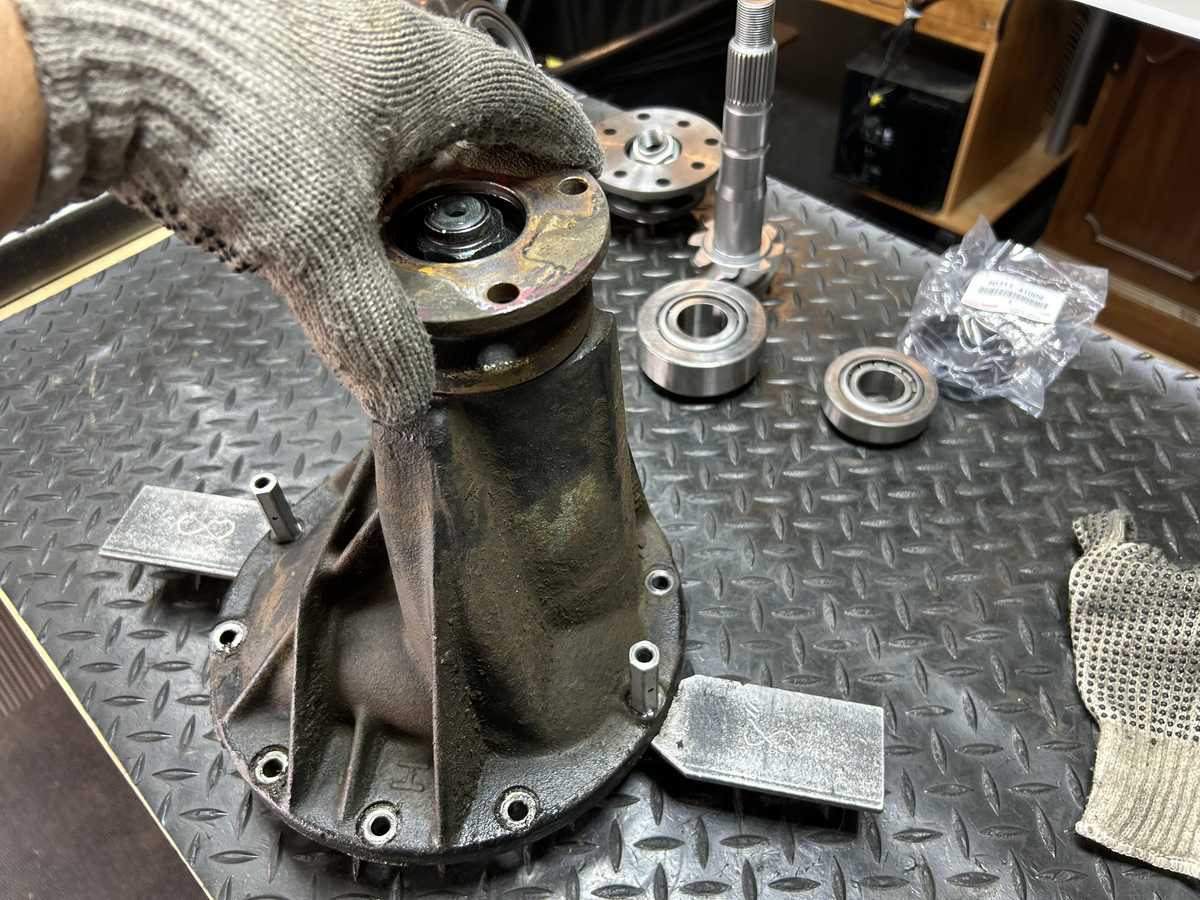
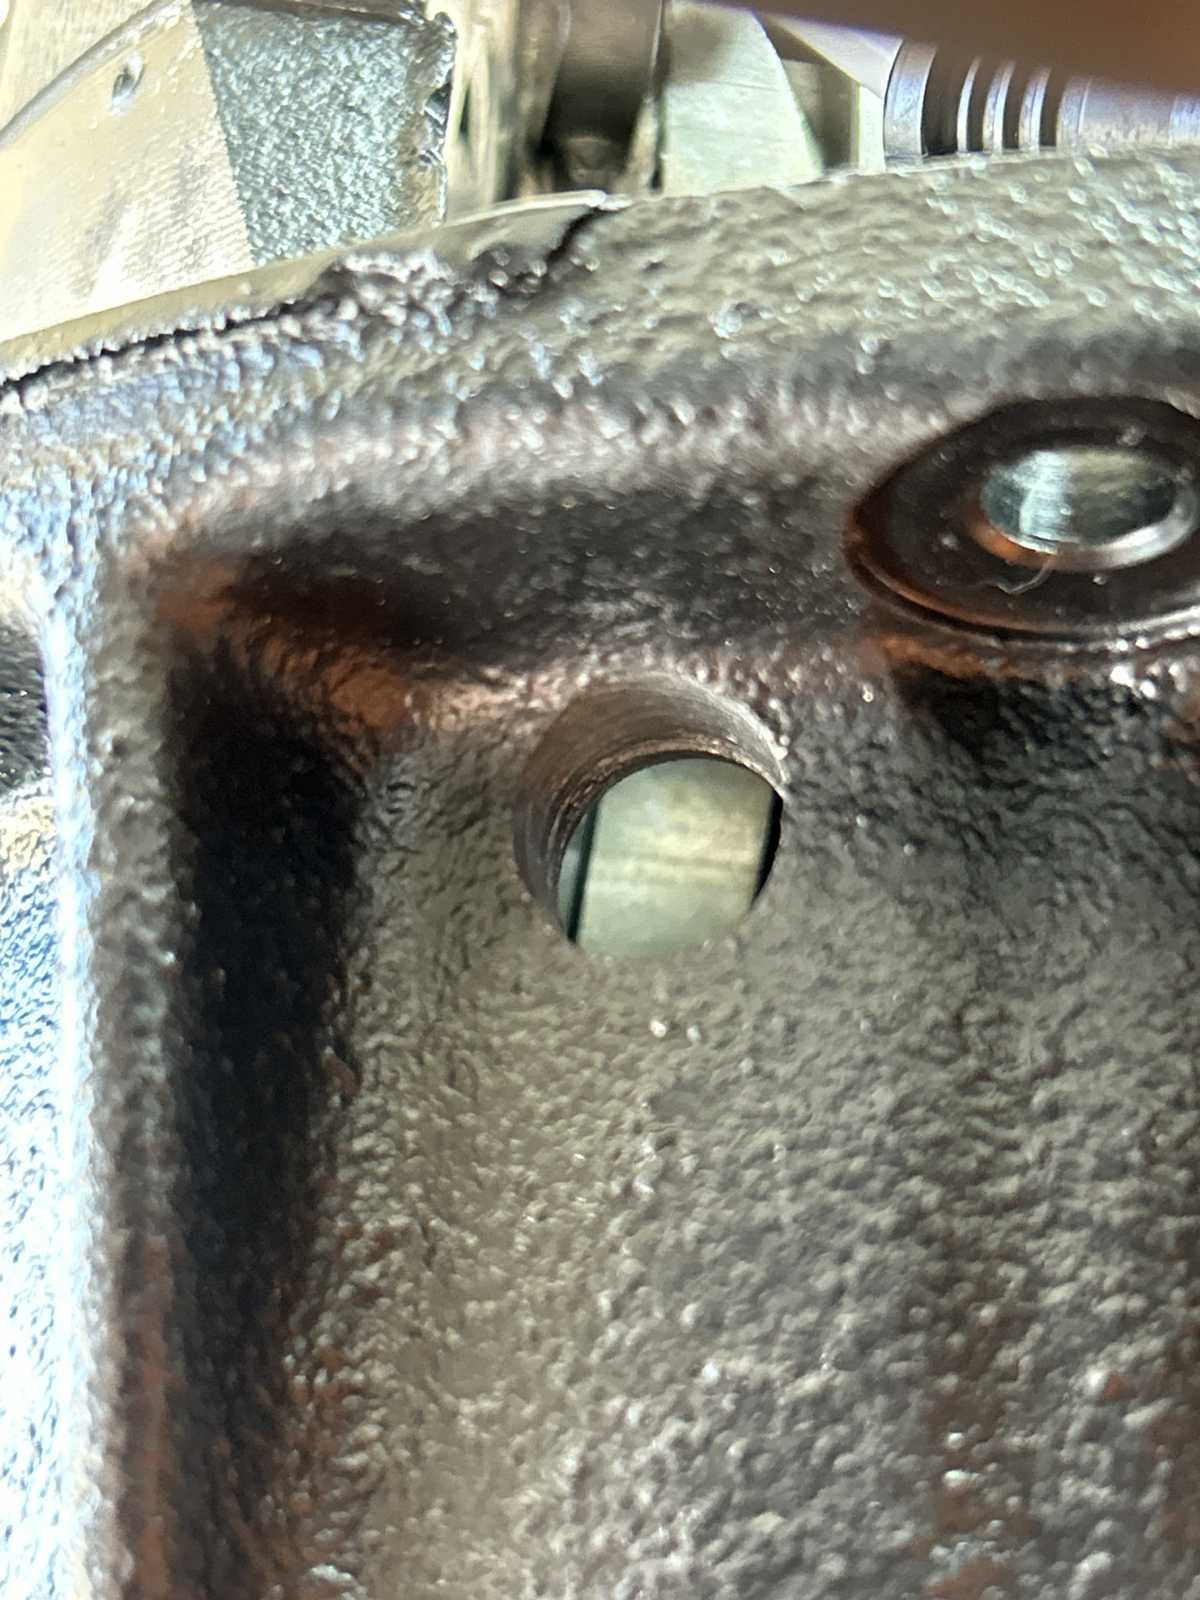
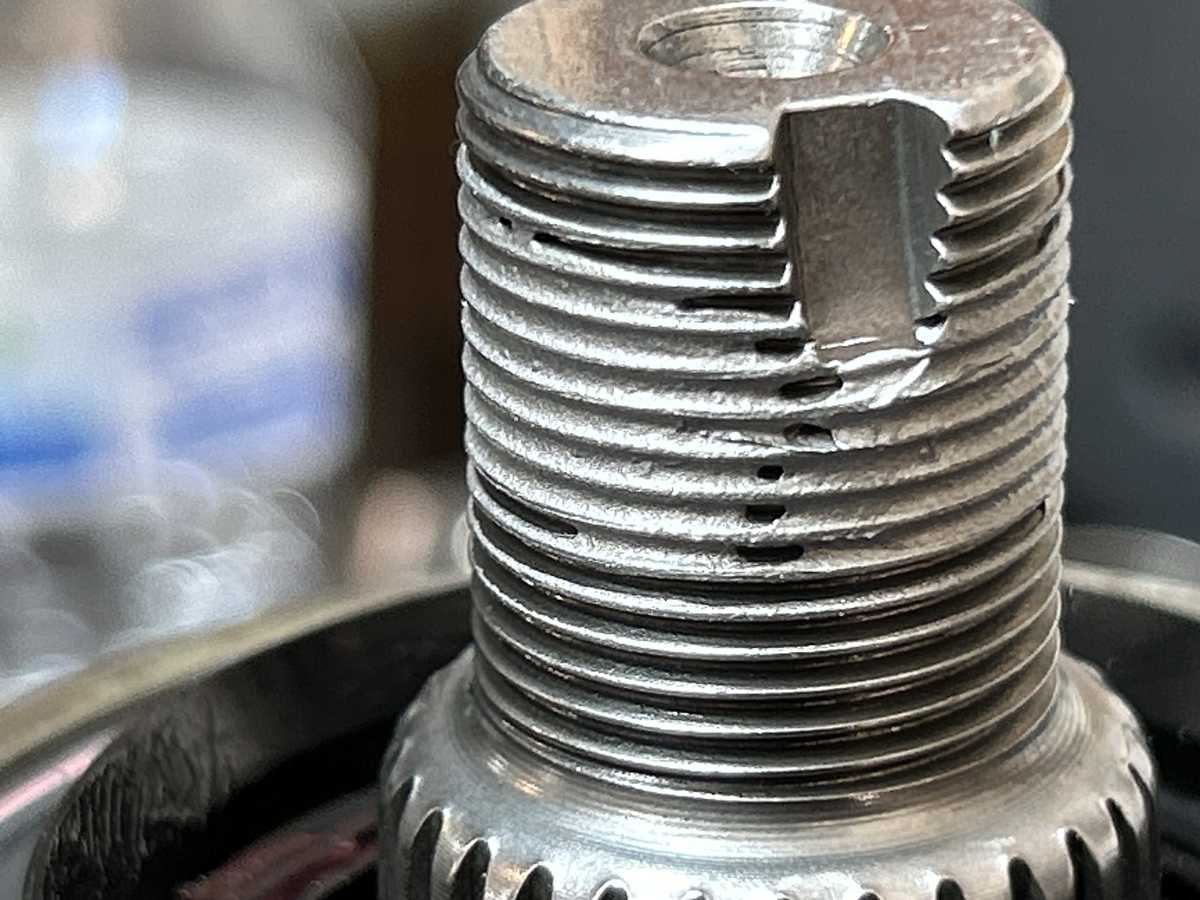
There is a good amount of wear from the seal on the flange and maybe was getting ready to leak based on the wetness shown here. |
|
| A new flange 41204-60050 and genuine seal 90311-38047 will be replacing them. |
|
|
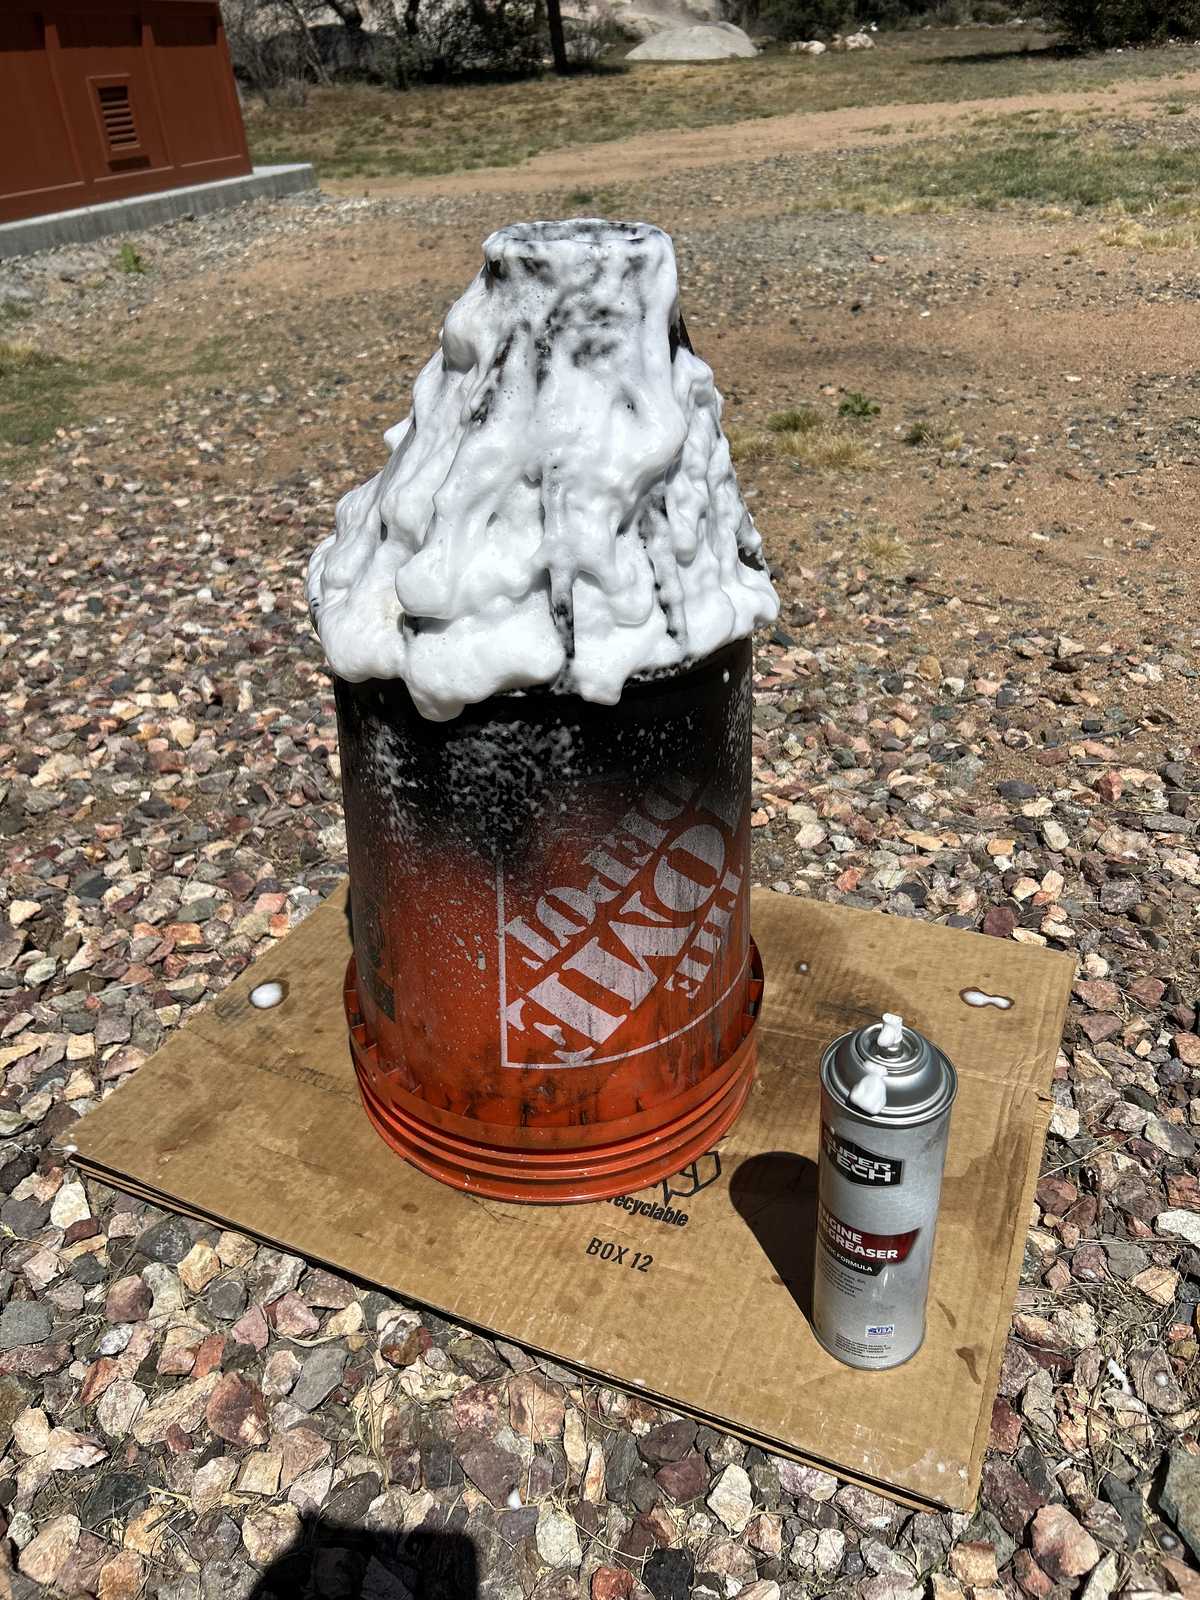
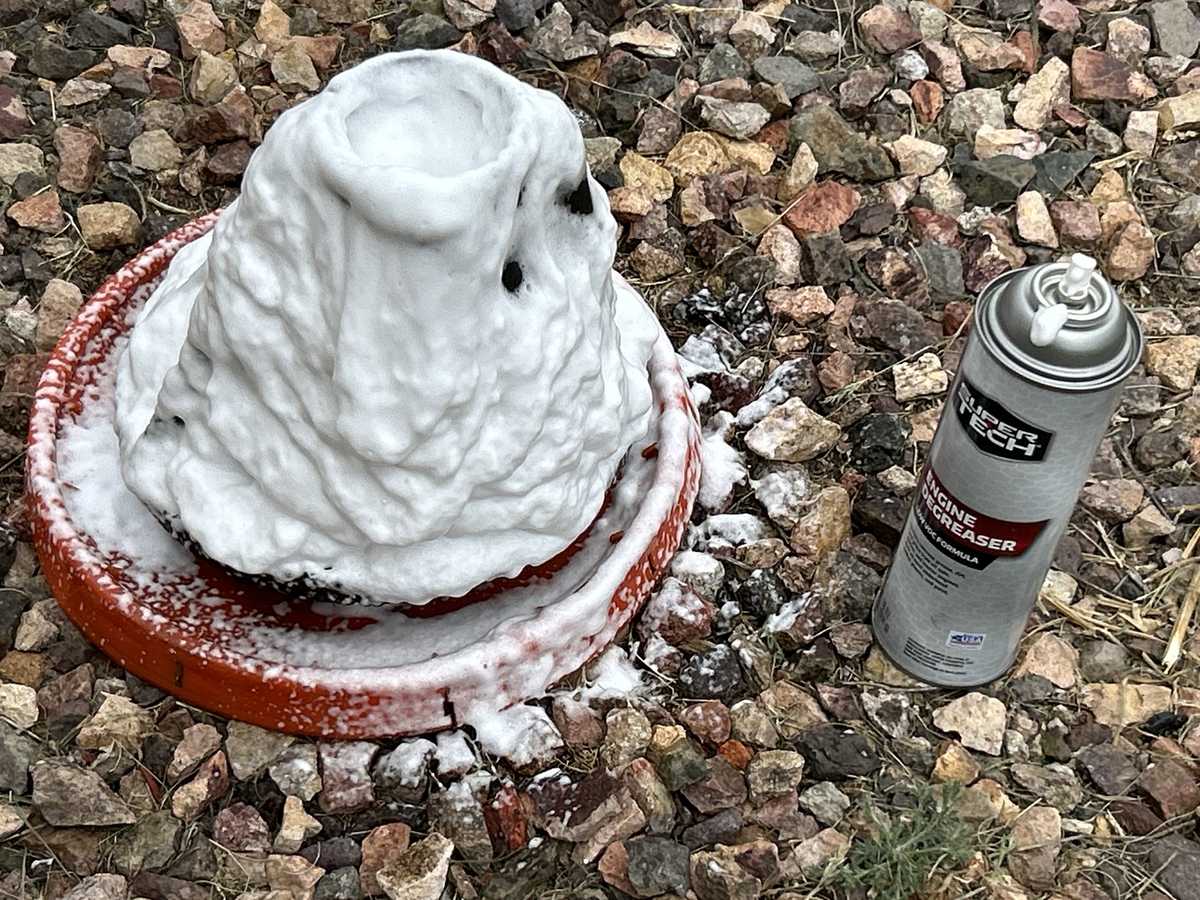
With everything out, a good degreasing seemed like a good idea. The Walmart degreaser and a stiff nylon brush did a surprisingly good job. |
|
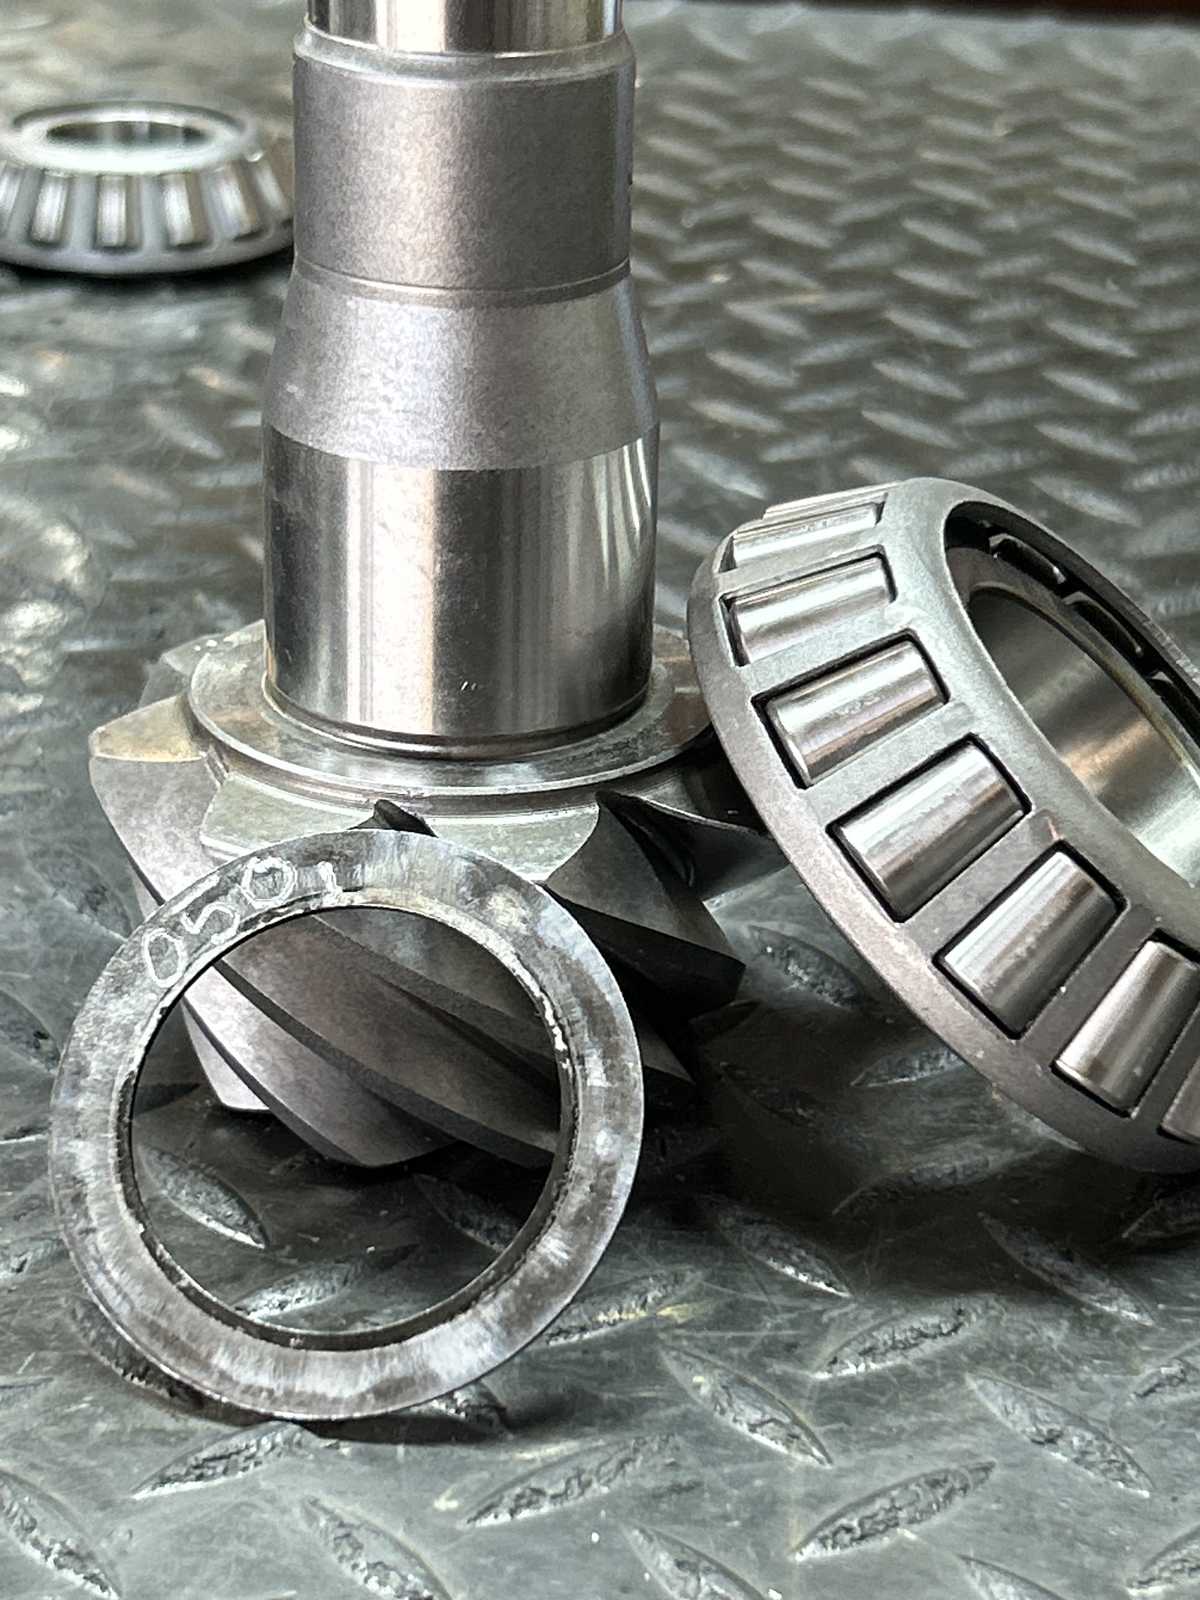
| New genuine pinion races with a bit of "sleevelock" for the outer race. |
|
|
The instructions say to use a .500" hole for the gromit pass-thru... I prefer a .480" for a good snug fit. |
|
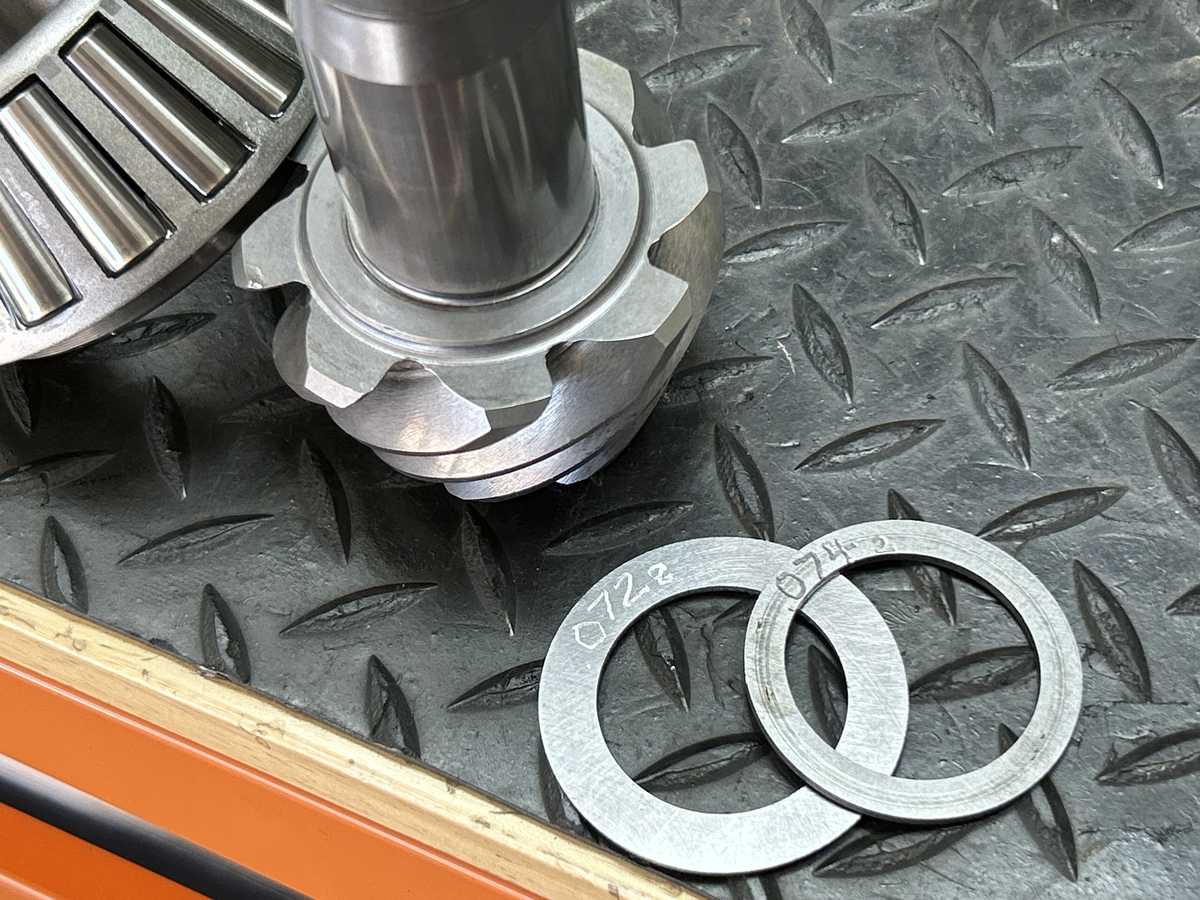
| .0501" is the starter shim..... |
|
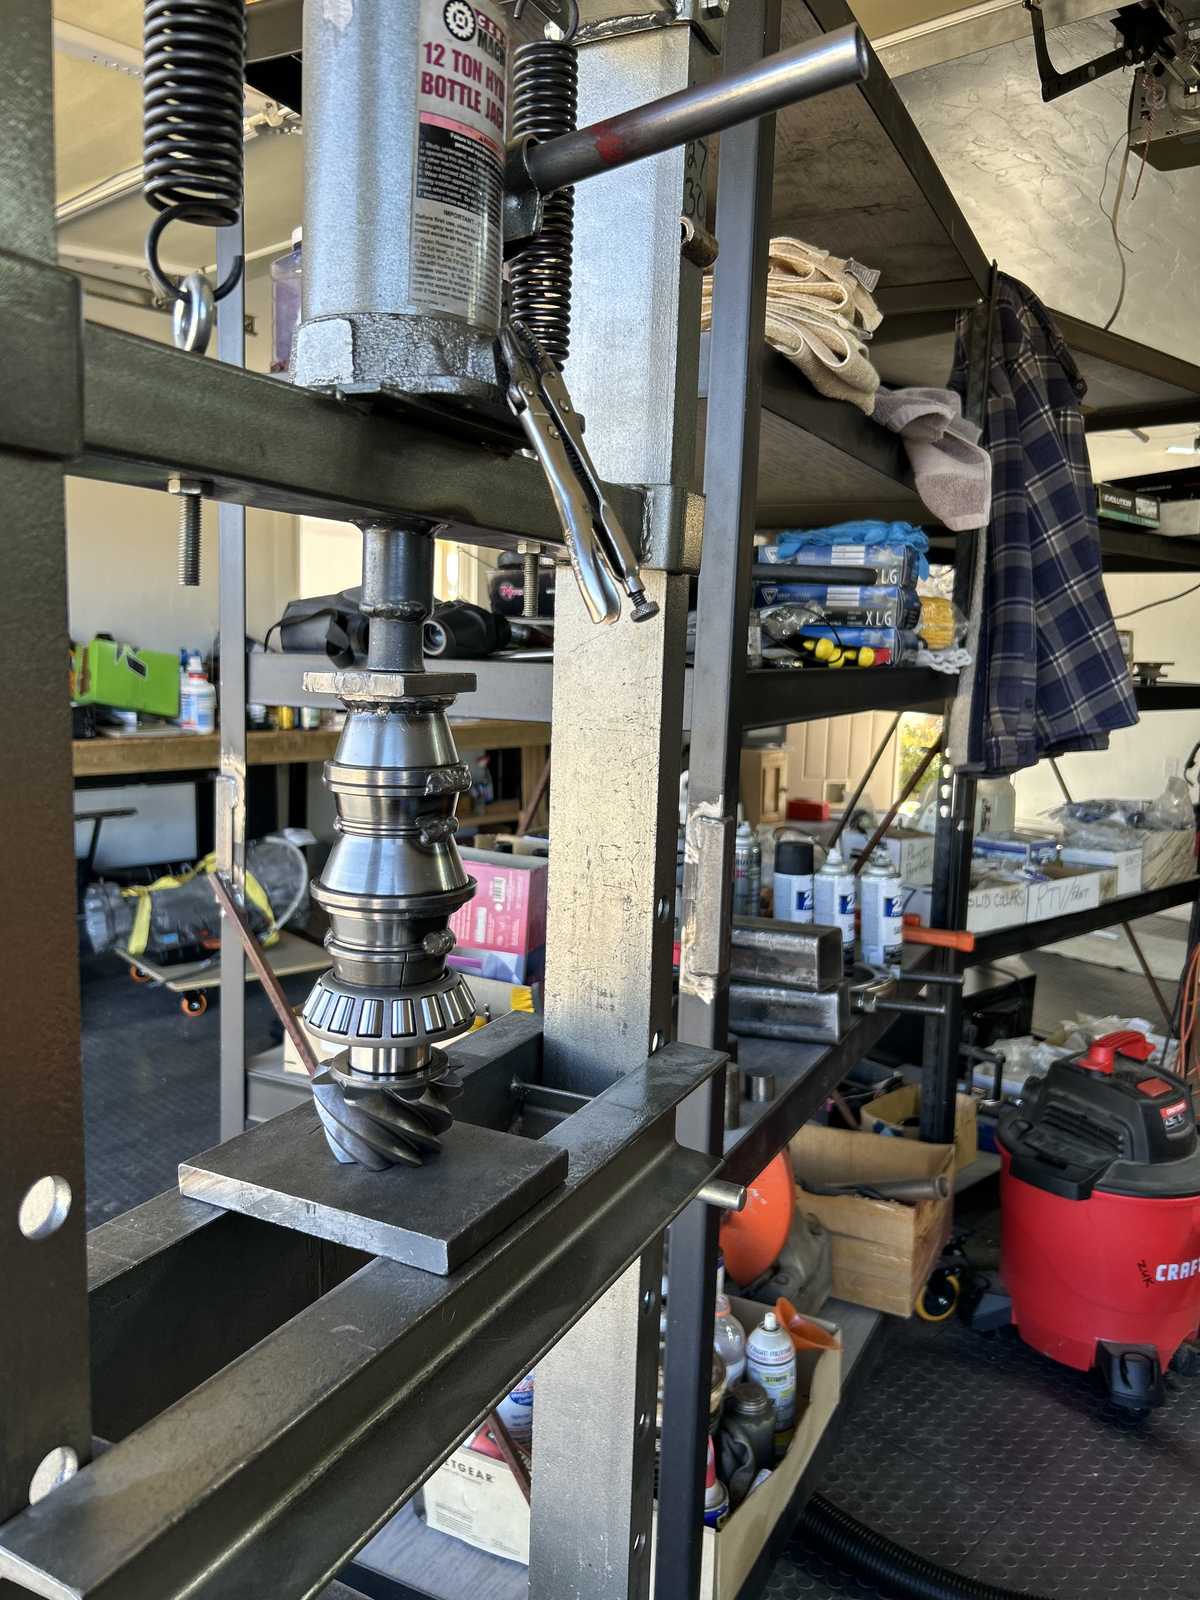
| The 12 ton Harborfreight press is the perfect press for the new bearings. |
|
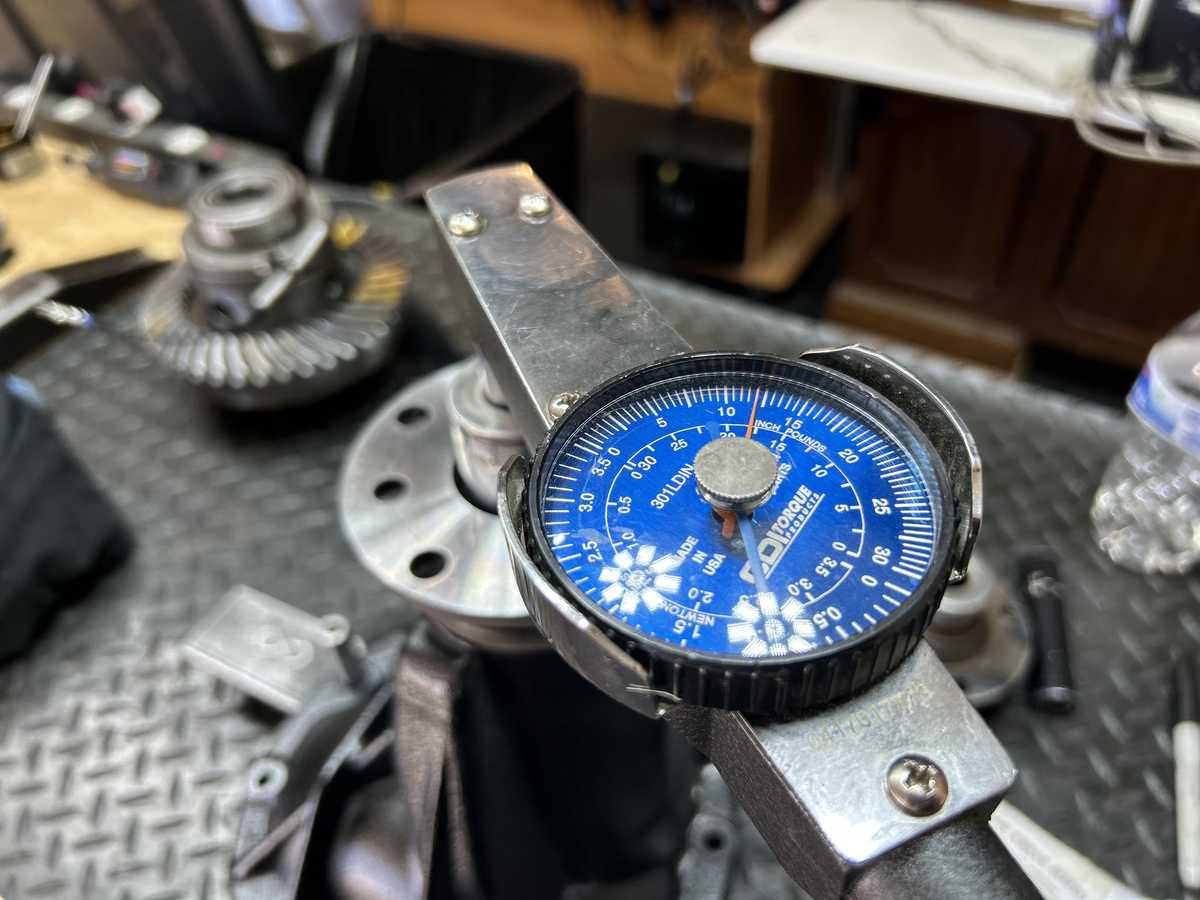
| The pinion bearings were overly lubed and a smooth 10~15 inch/pounds of preload was dialed in. |
|
|
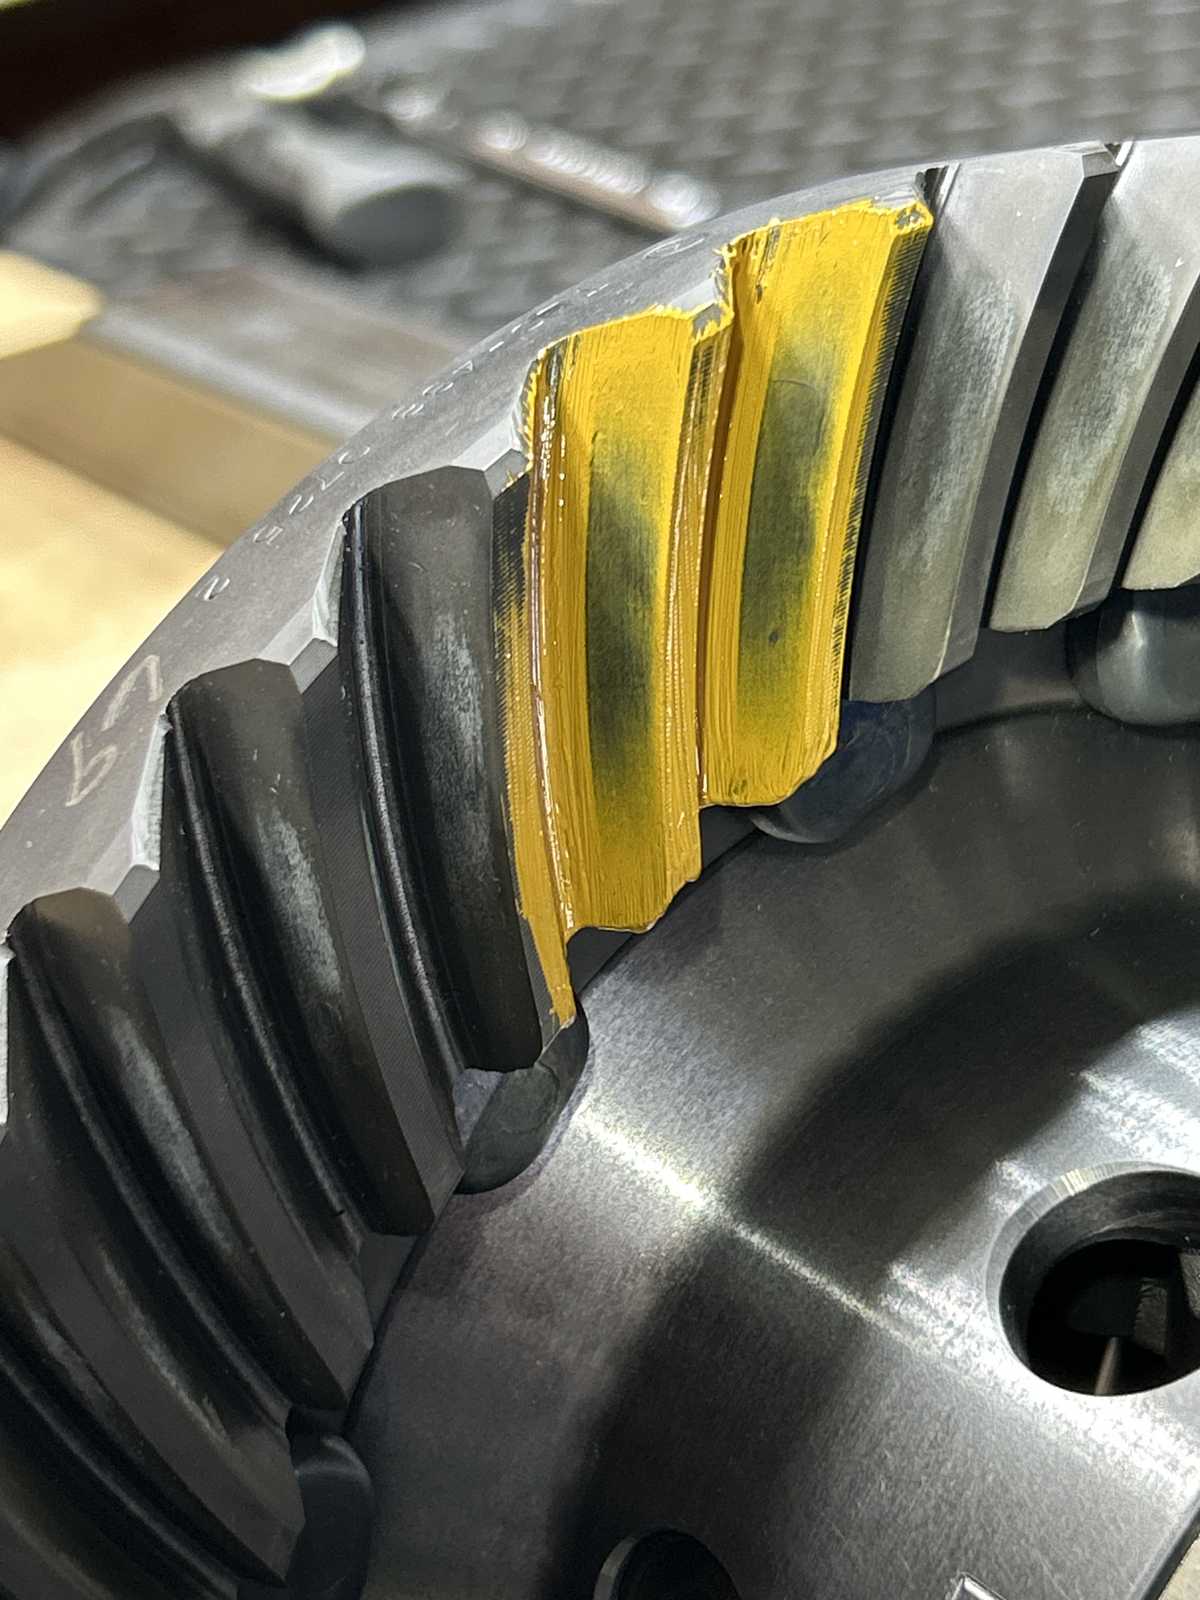
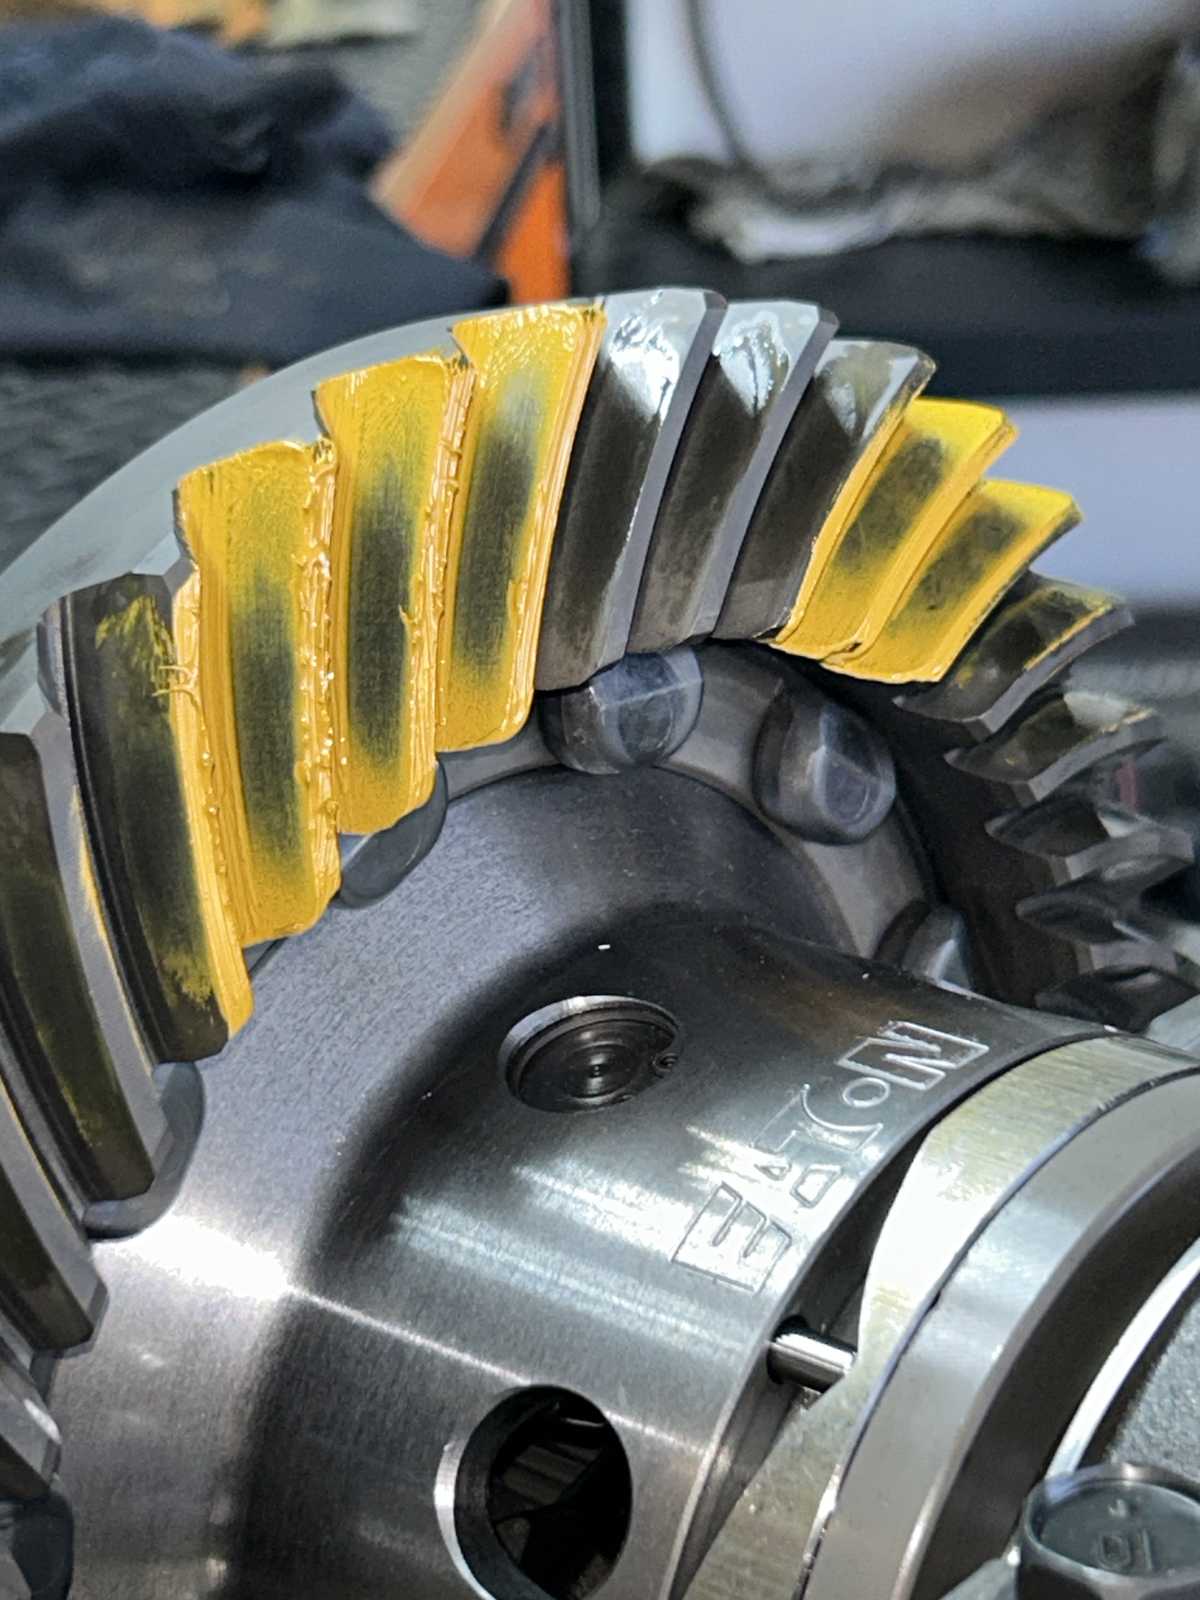
Seems like a good idea to now install the "non polished" 488 and carrier bearings. The rear gears never had the chance to get "super polished" because of a time crunch issue. That means the rear gears will need the annoying 500 mile break-in before this Moab trip. |
|
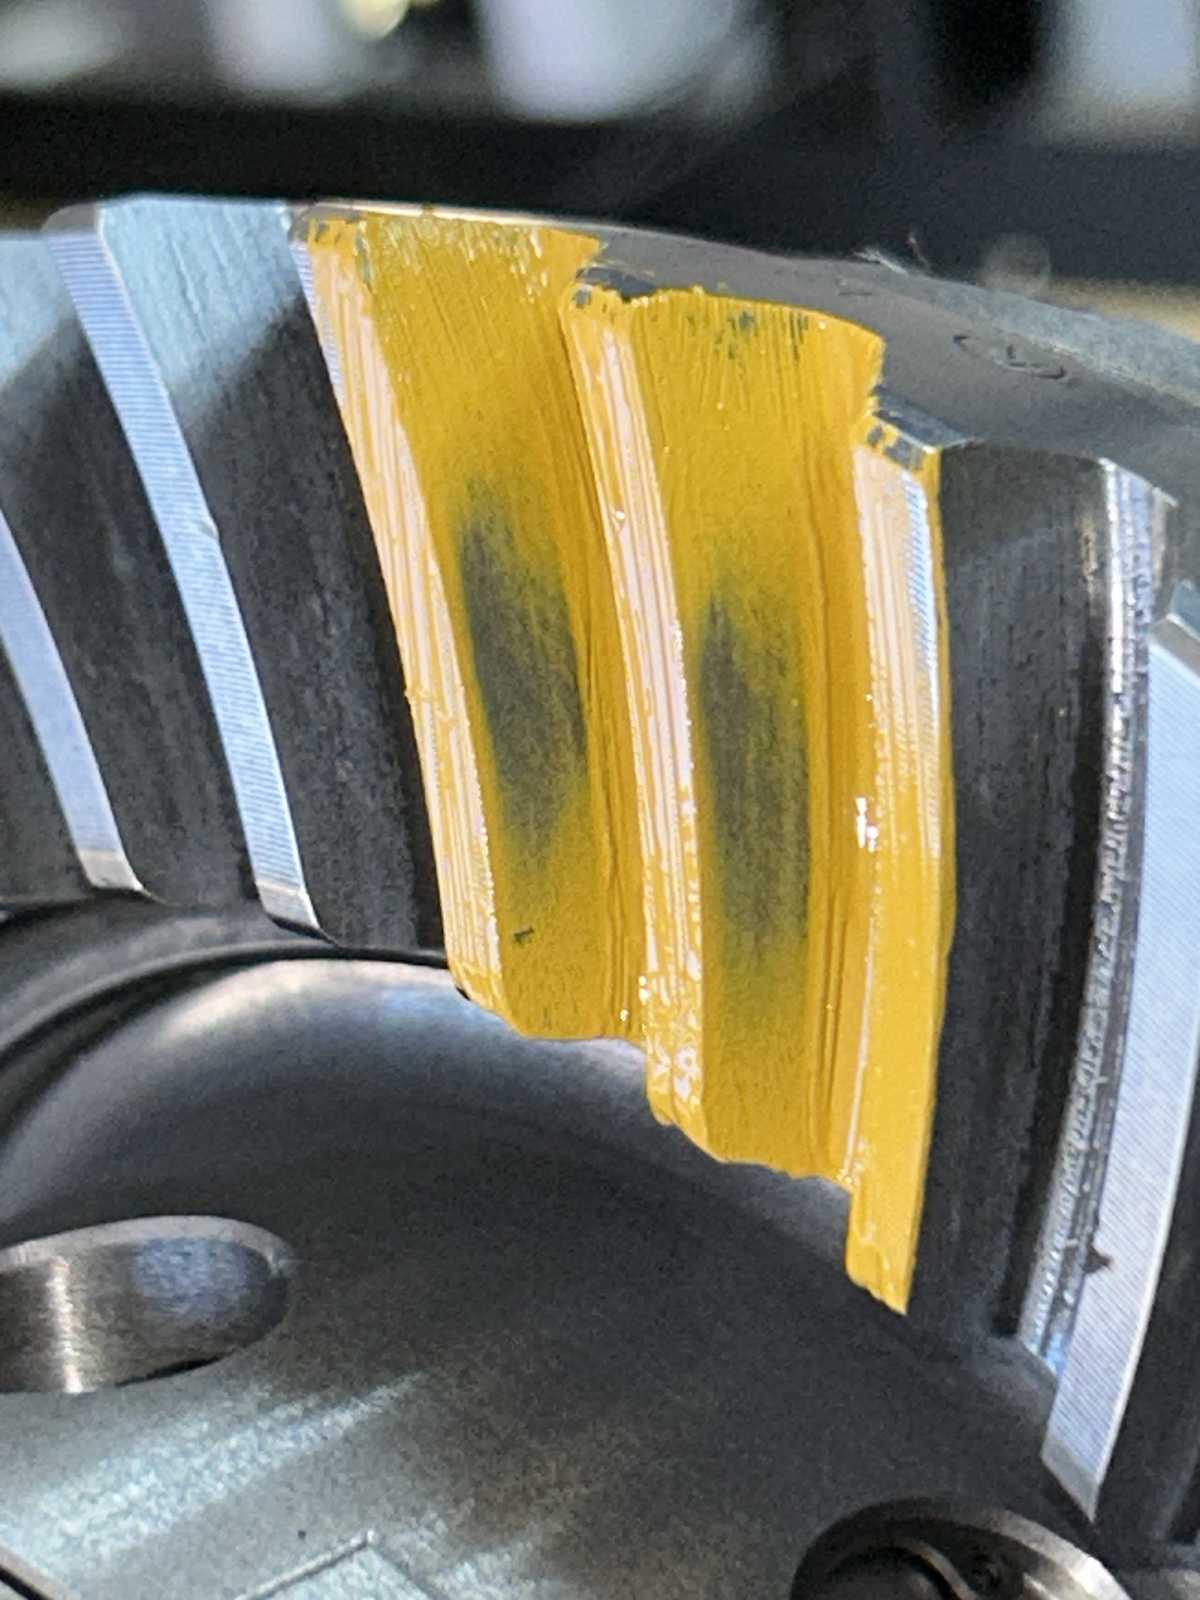
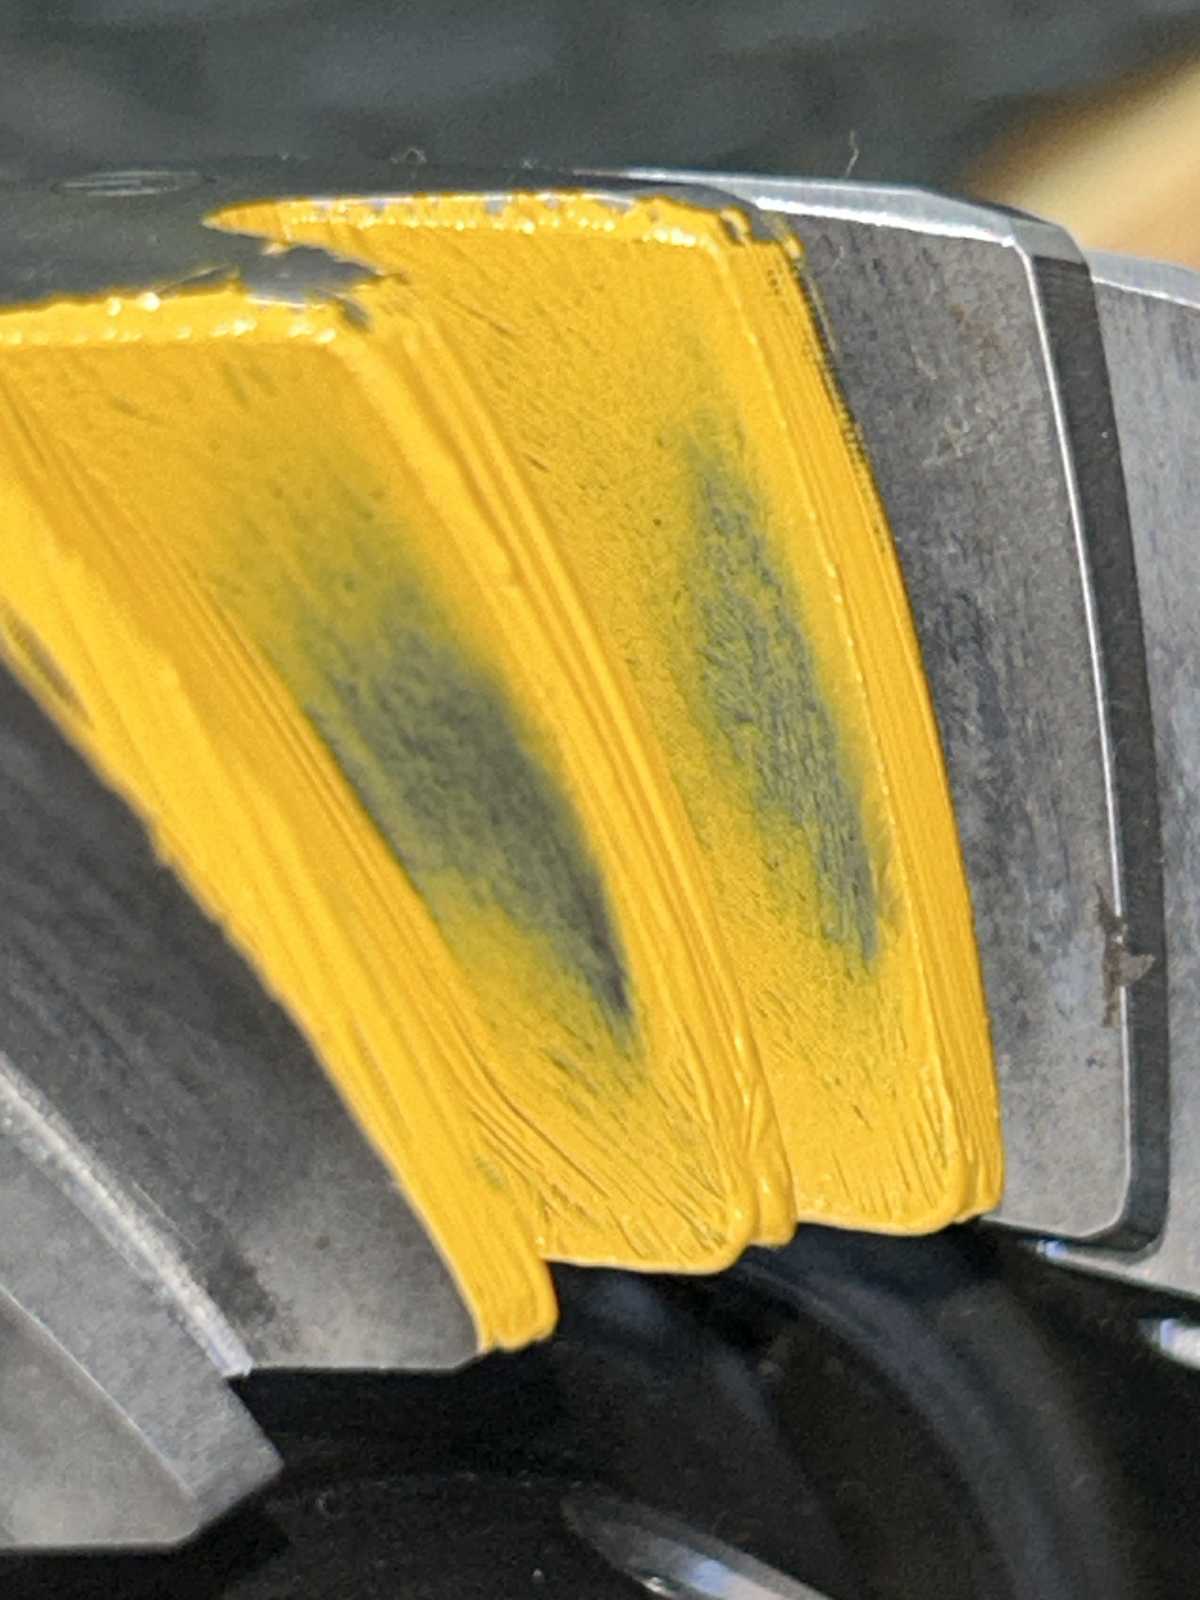
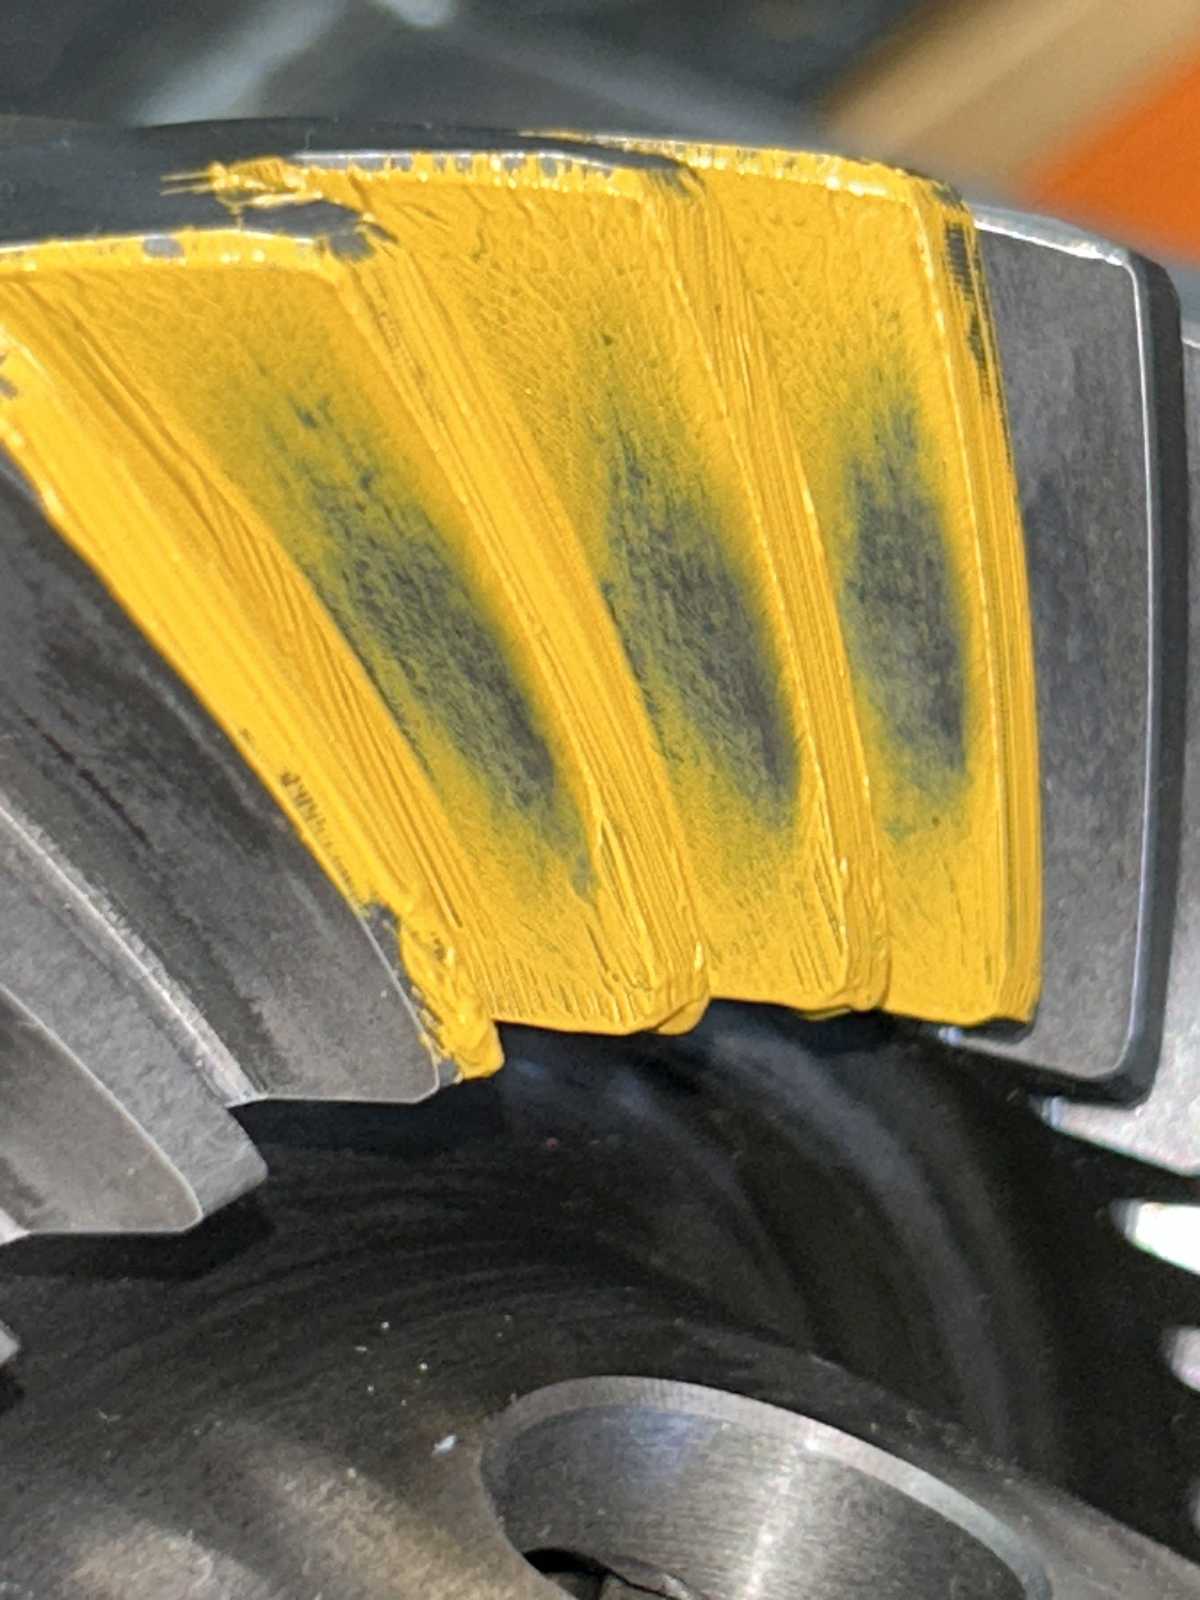
| Drive......Bingo! The spread from the root to the top is "even". |
|
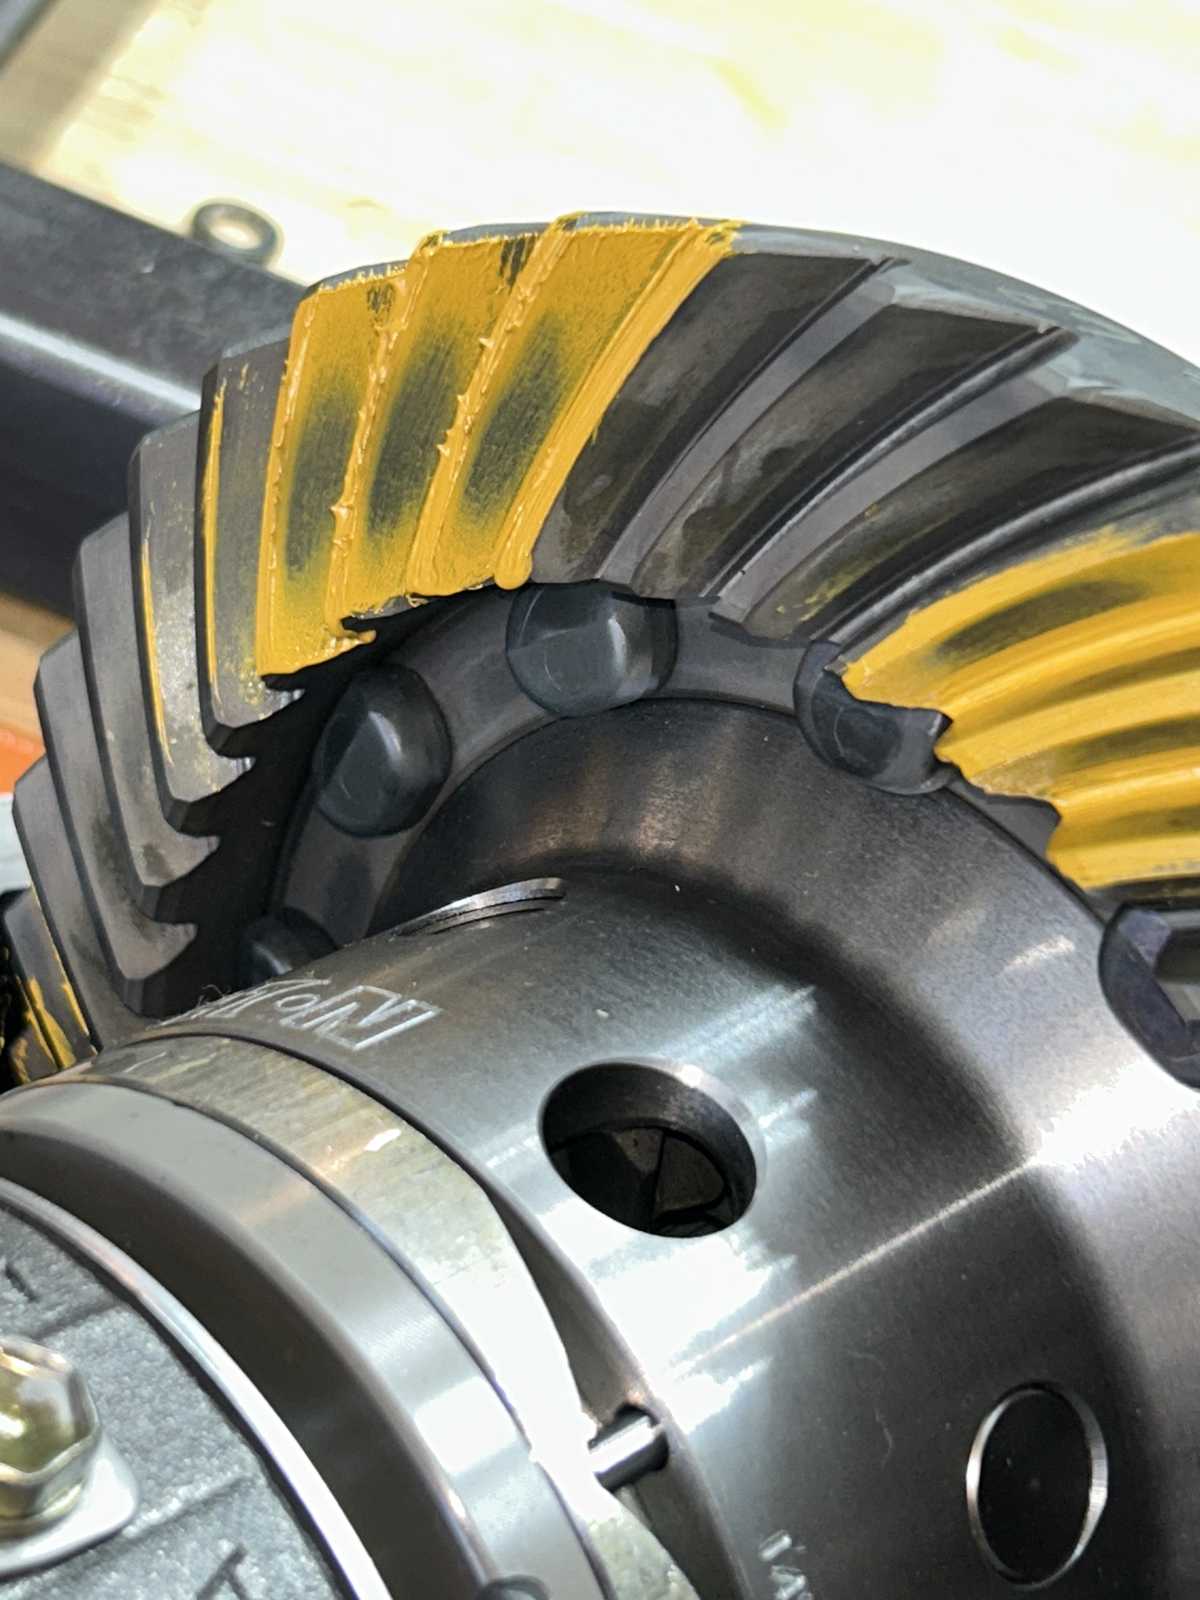
| Coast.....beautiful. |
|
| One last teardown and the crush sleeve is installed. |
|
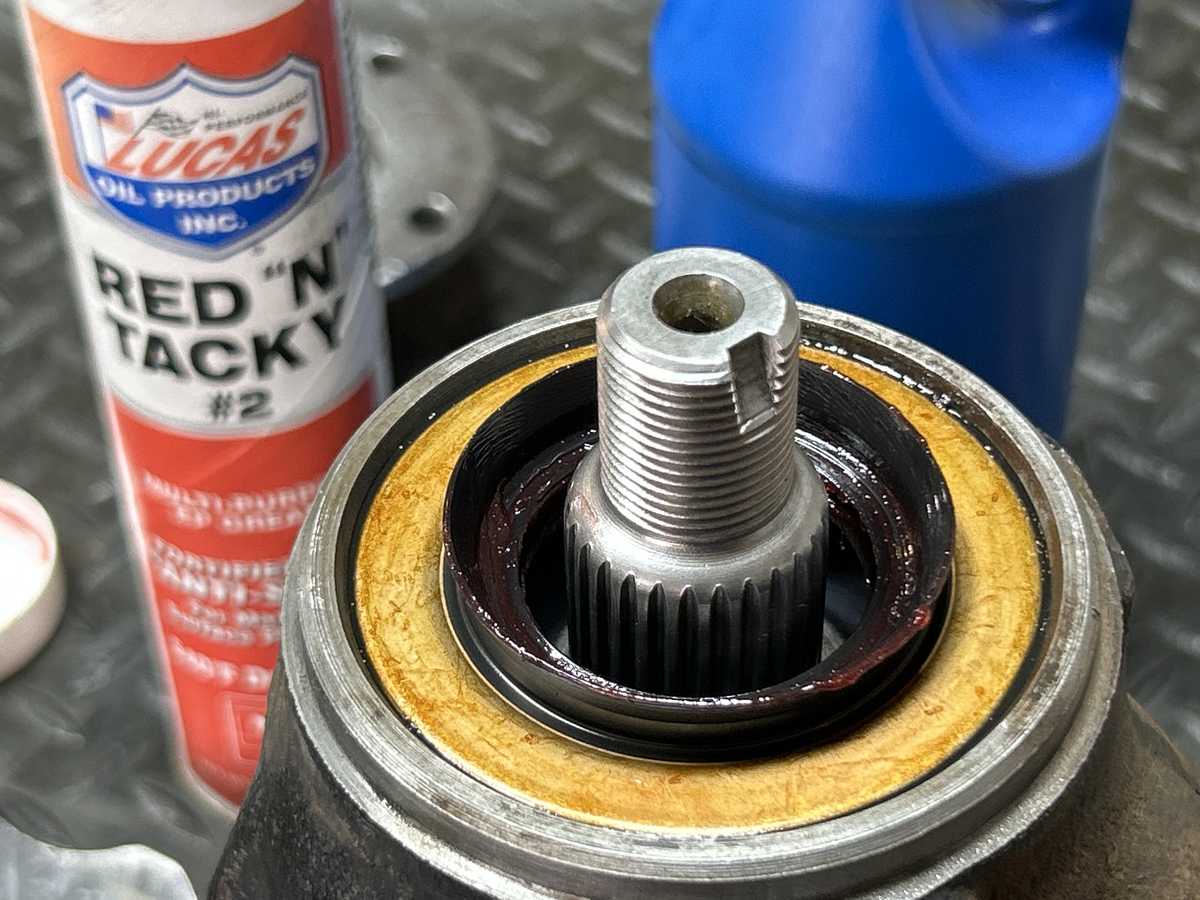
| A silicon RTV has been applied to the outside of the seal. |
|
| The seal is recessed 2mm. |
|
| Once the pinion preload has reached about 13 inch/pounds then now it can be DINGED! |
|
| This end is complete....onto the other end. |
|
|
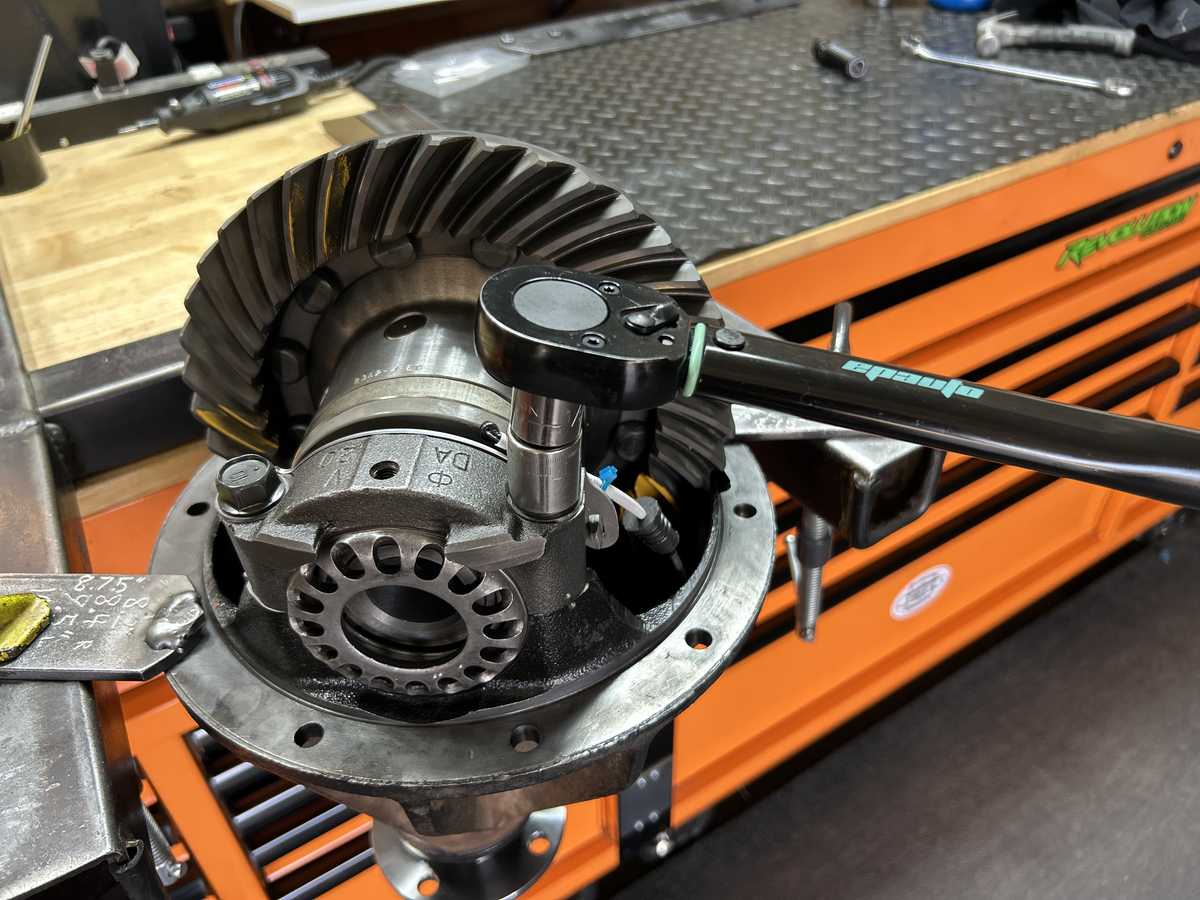
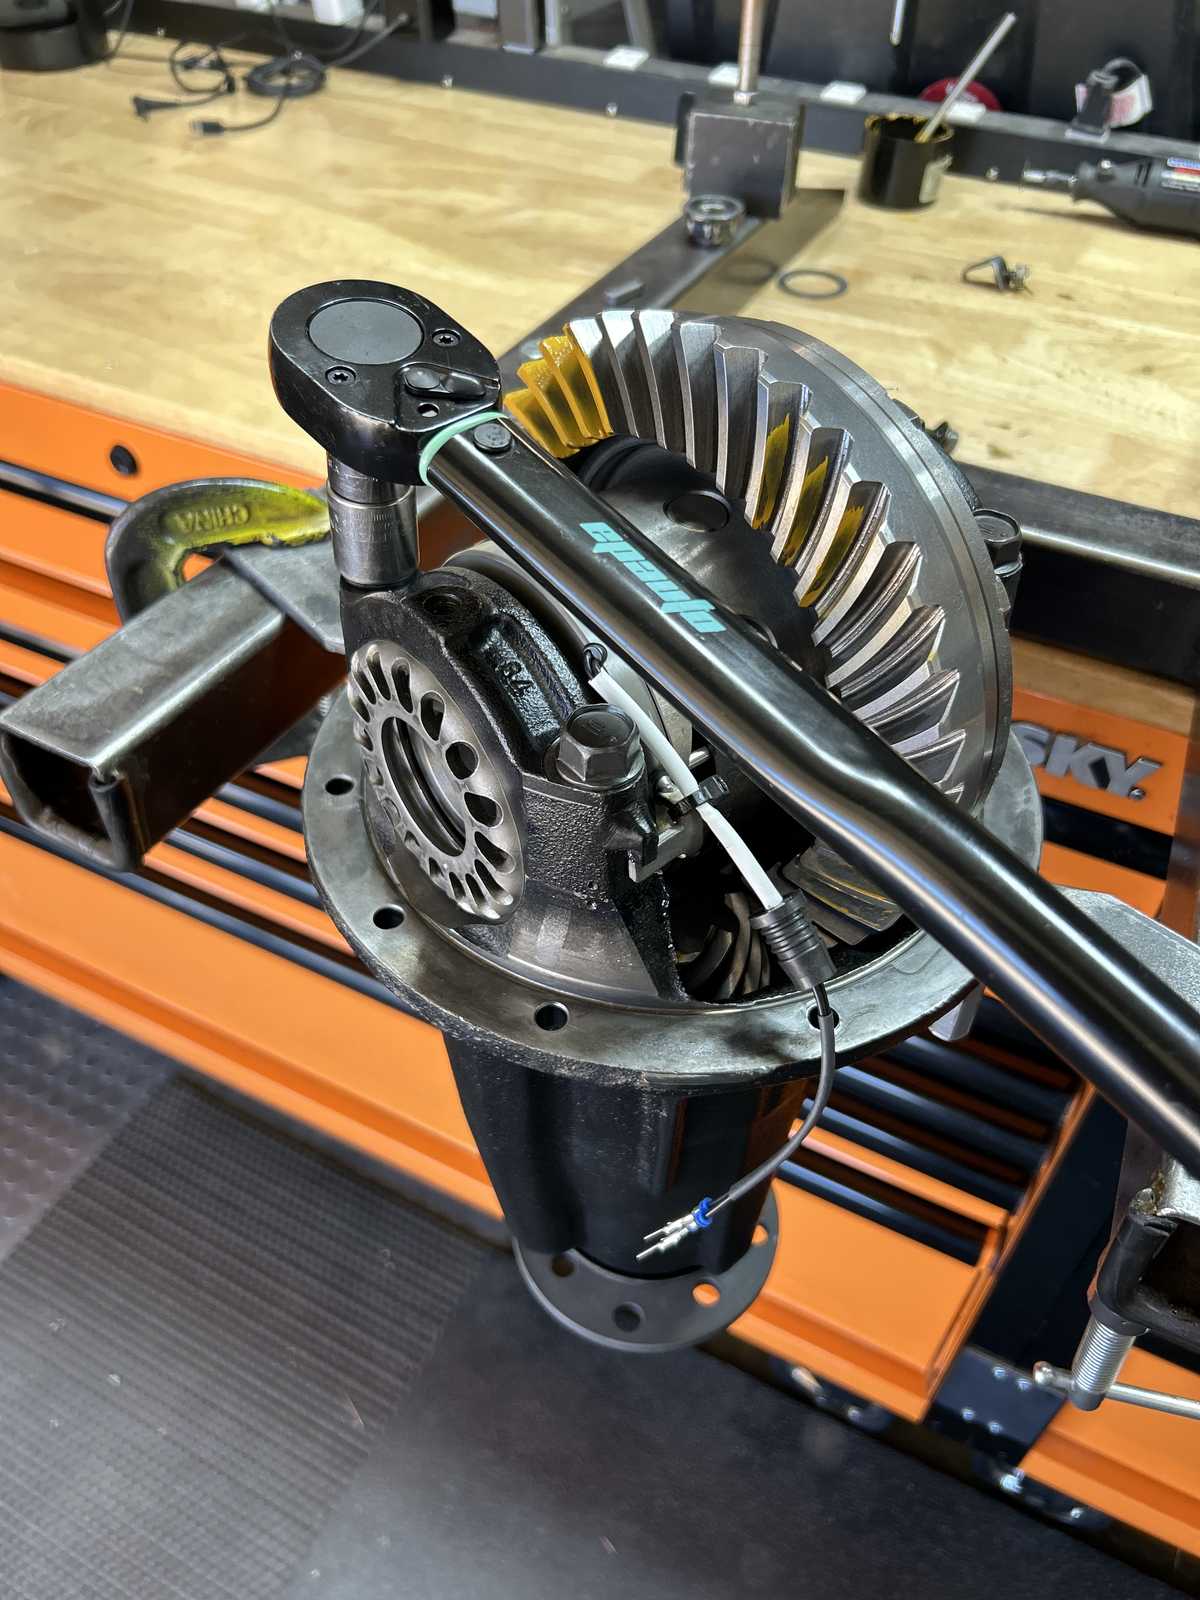
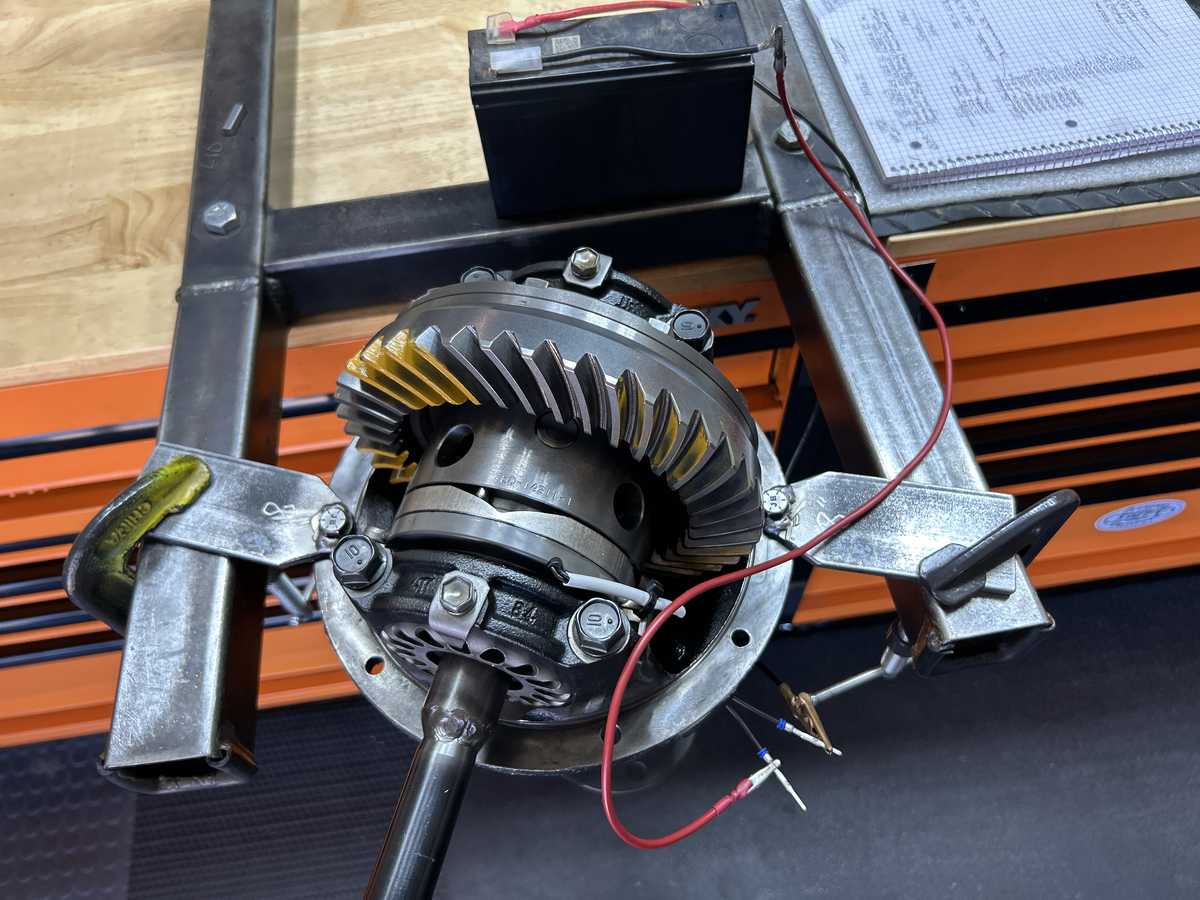
Dropped the elocker in place...placed adjusting wheels and bearing caps on... 75 ft/lb on all 4 cap bolts. |
|
|
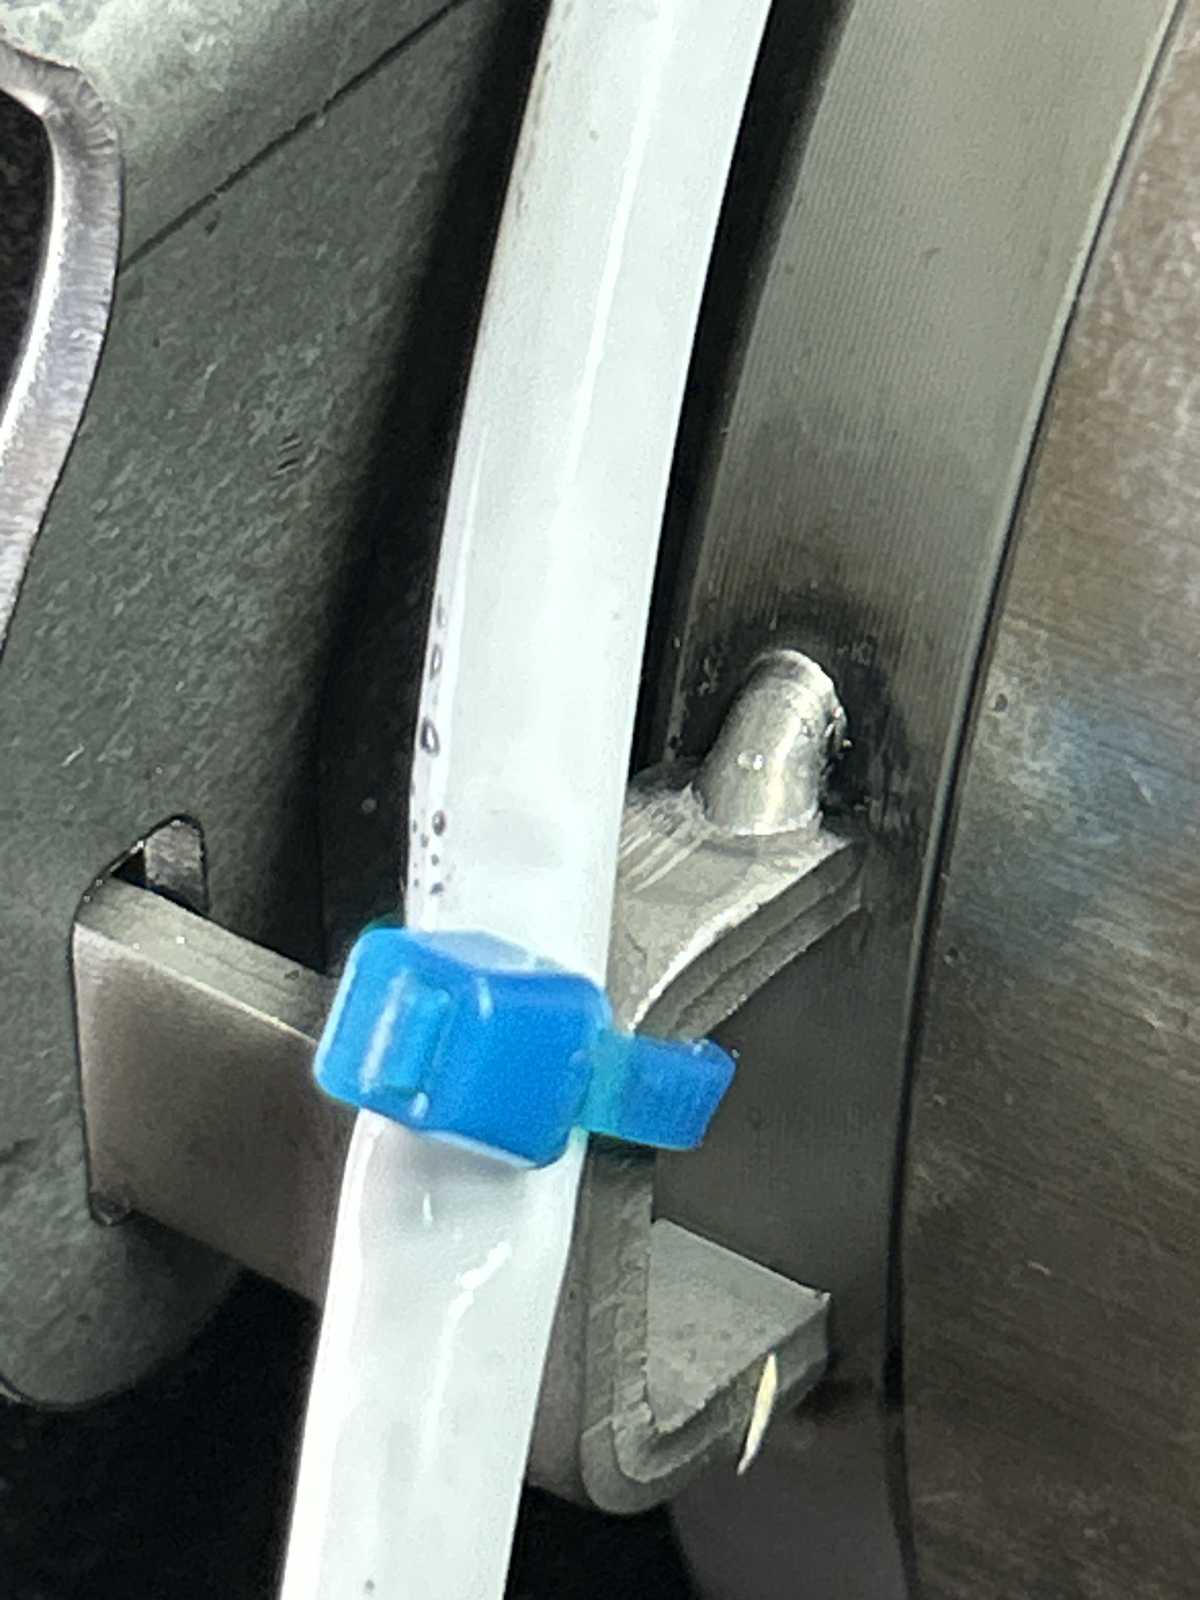
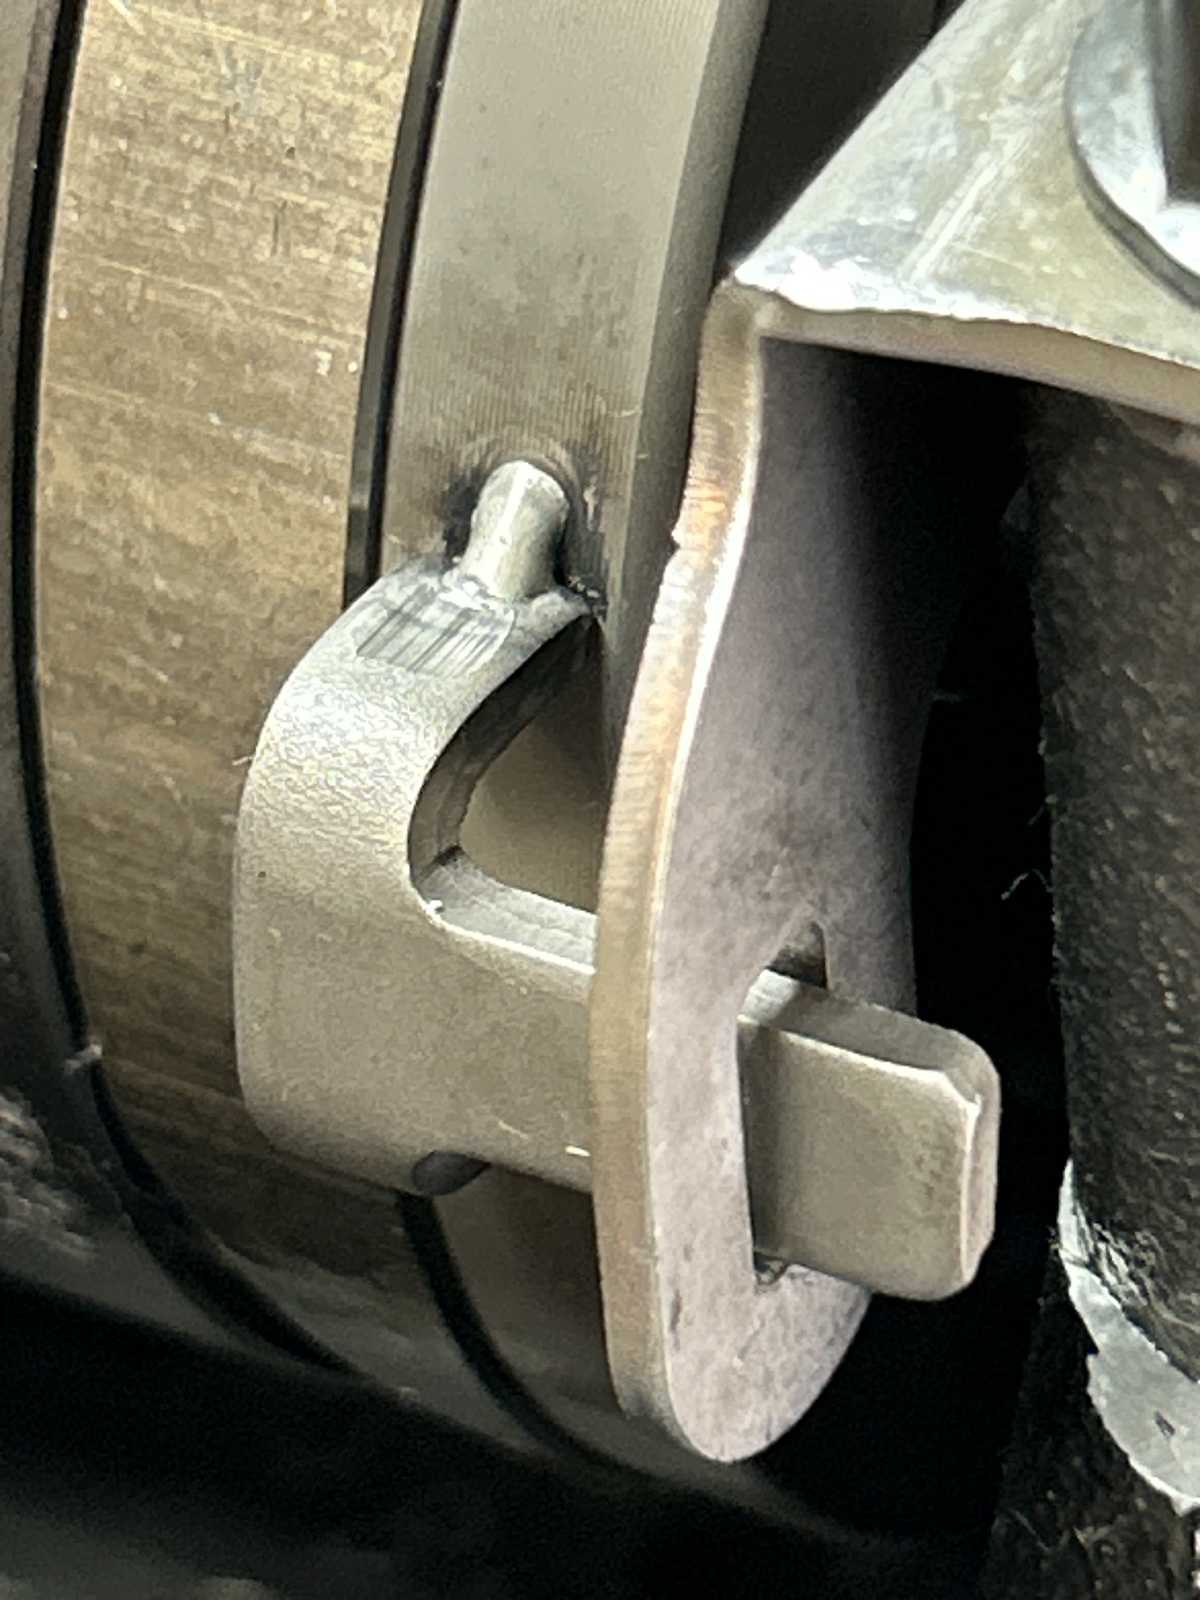
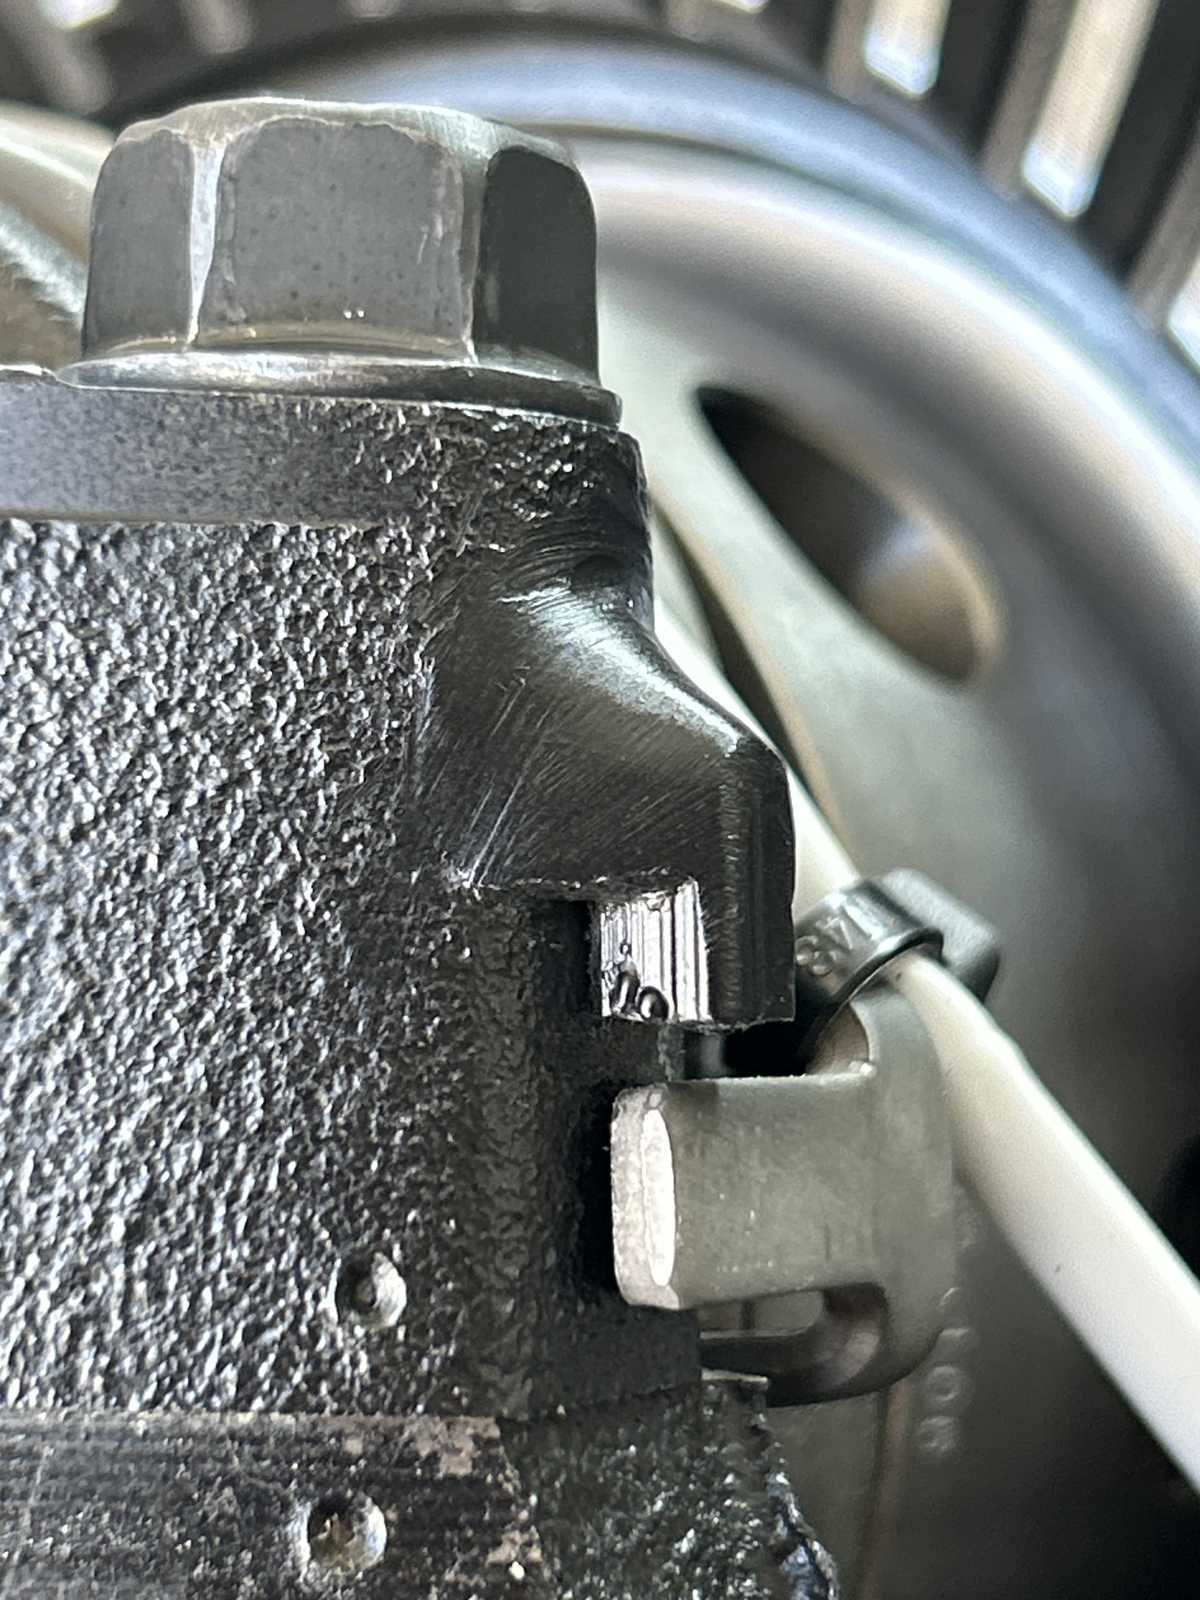
These are the TIG welds that they do in Australia for the stop tabs. Hey Aussie guys....I wish you could double up on those welds. They are "bare minimum" right now. |
|
|
Same thing on the other side...just 1 little drip top and bottom. The mild steel bracket they supply for the stop tabs is simple and works perfect! |
|
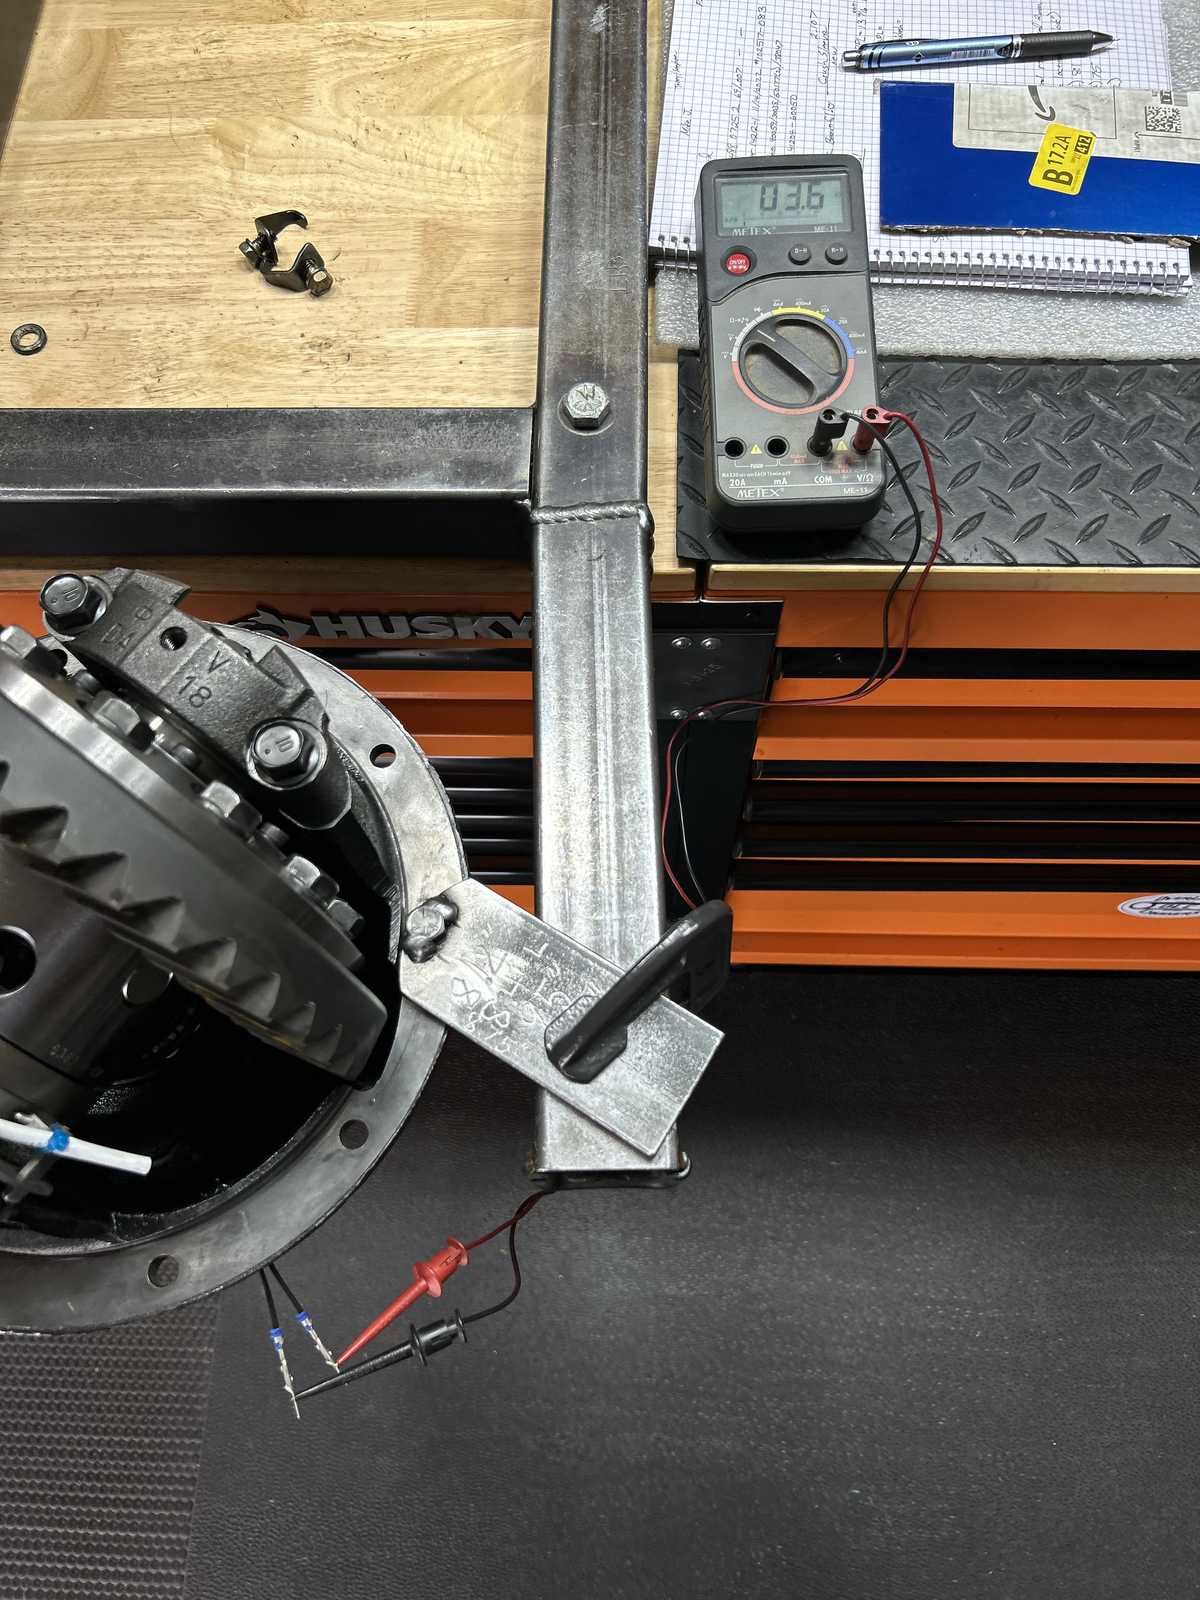
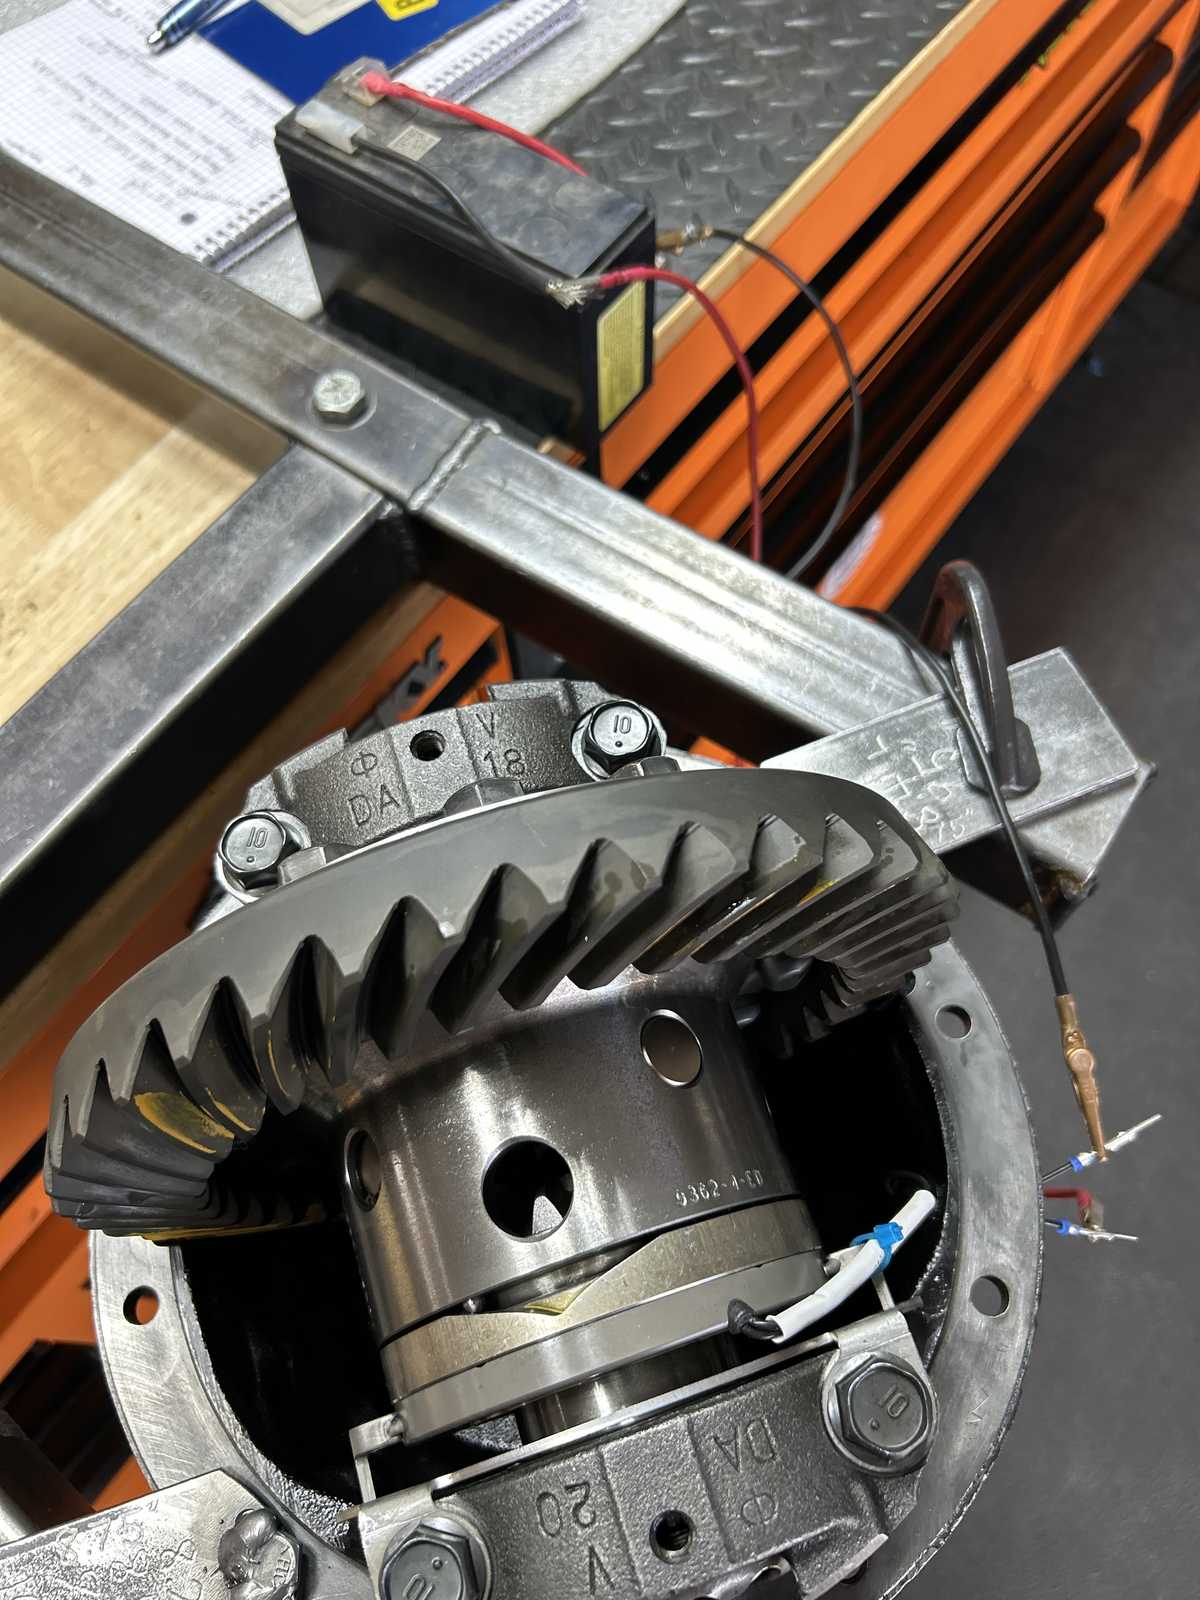
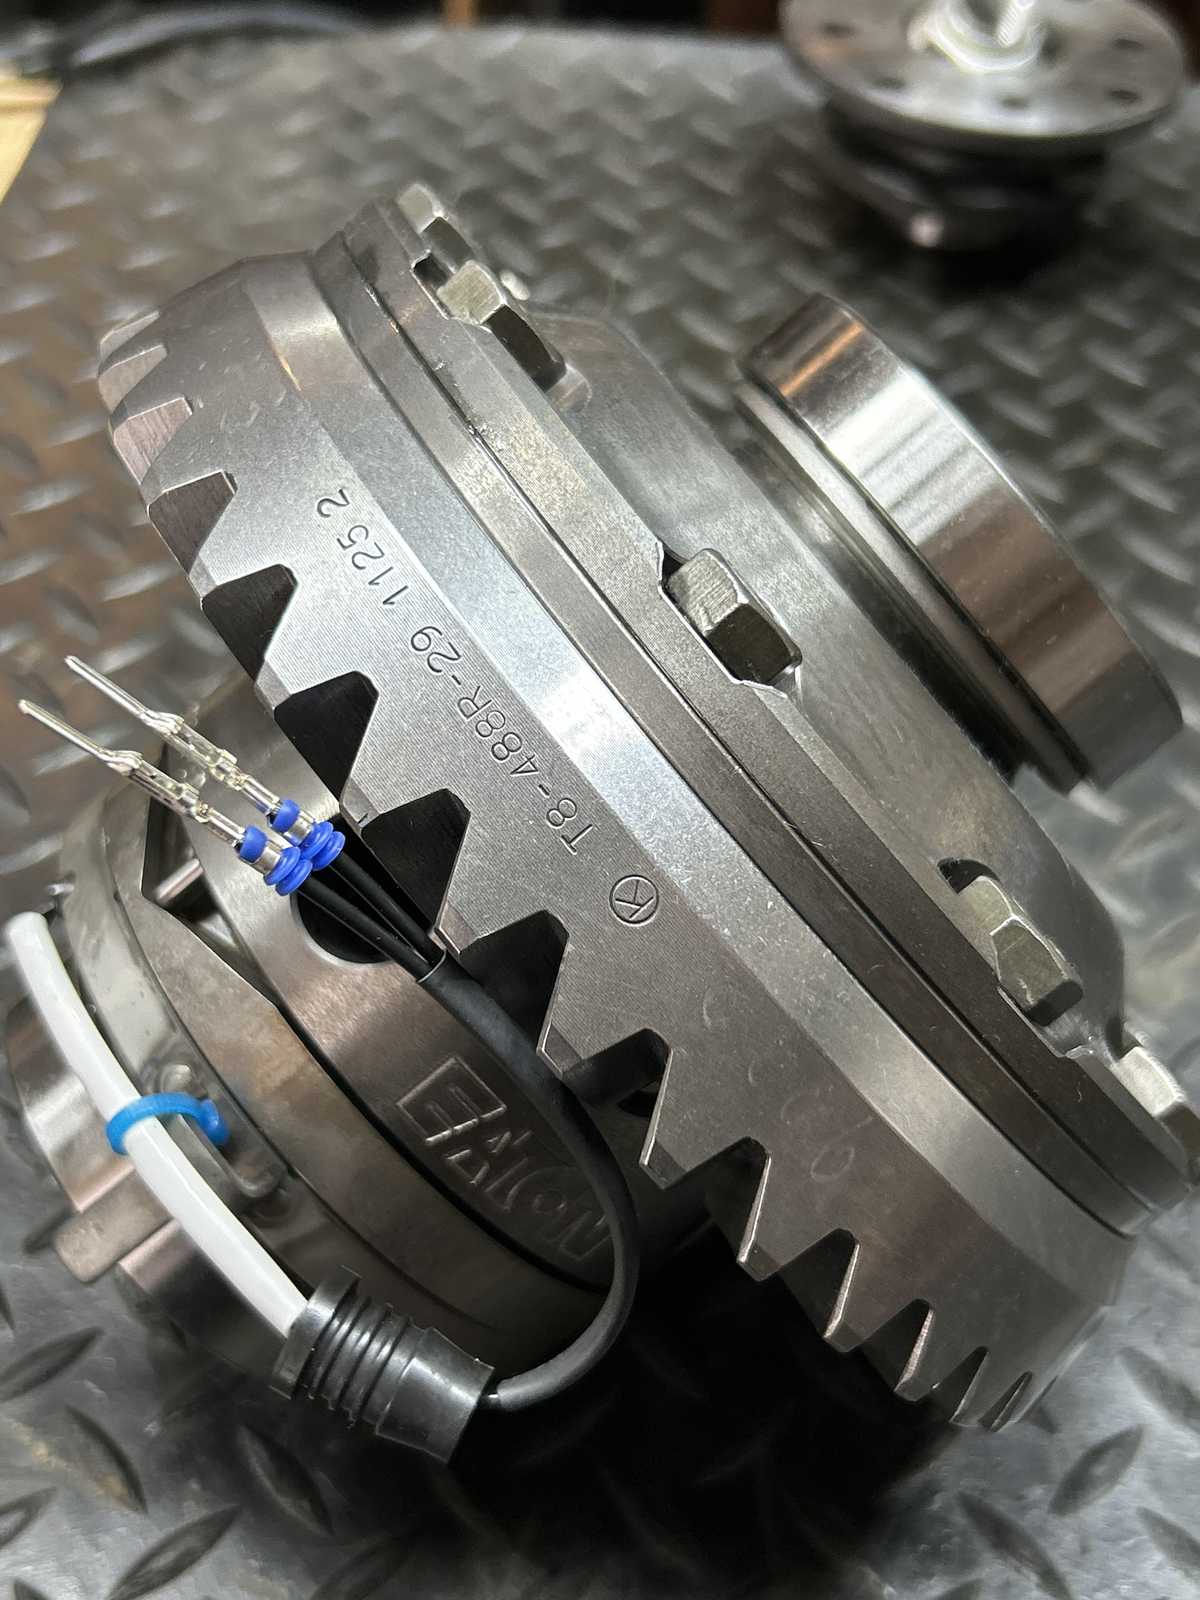
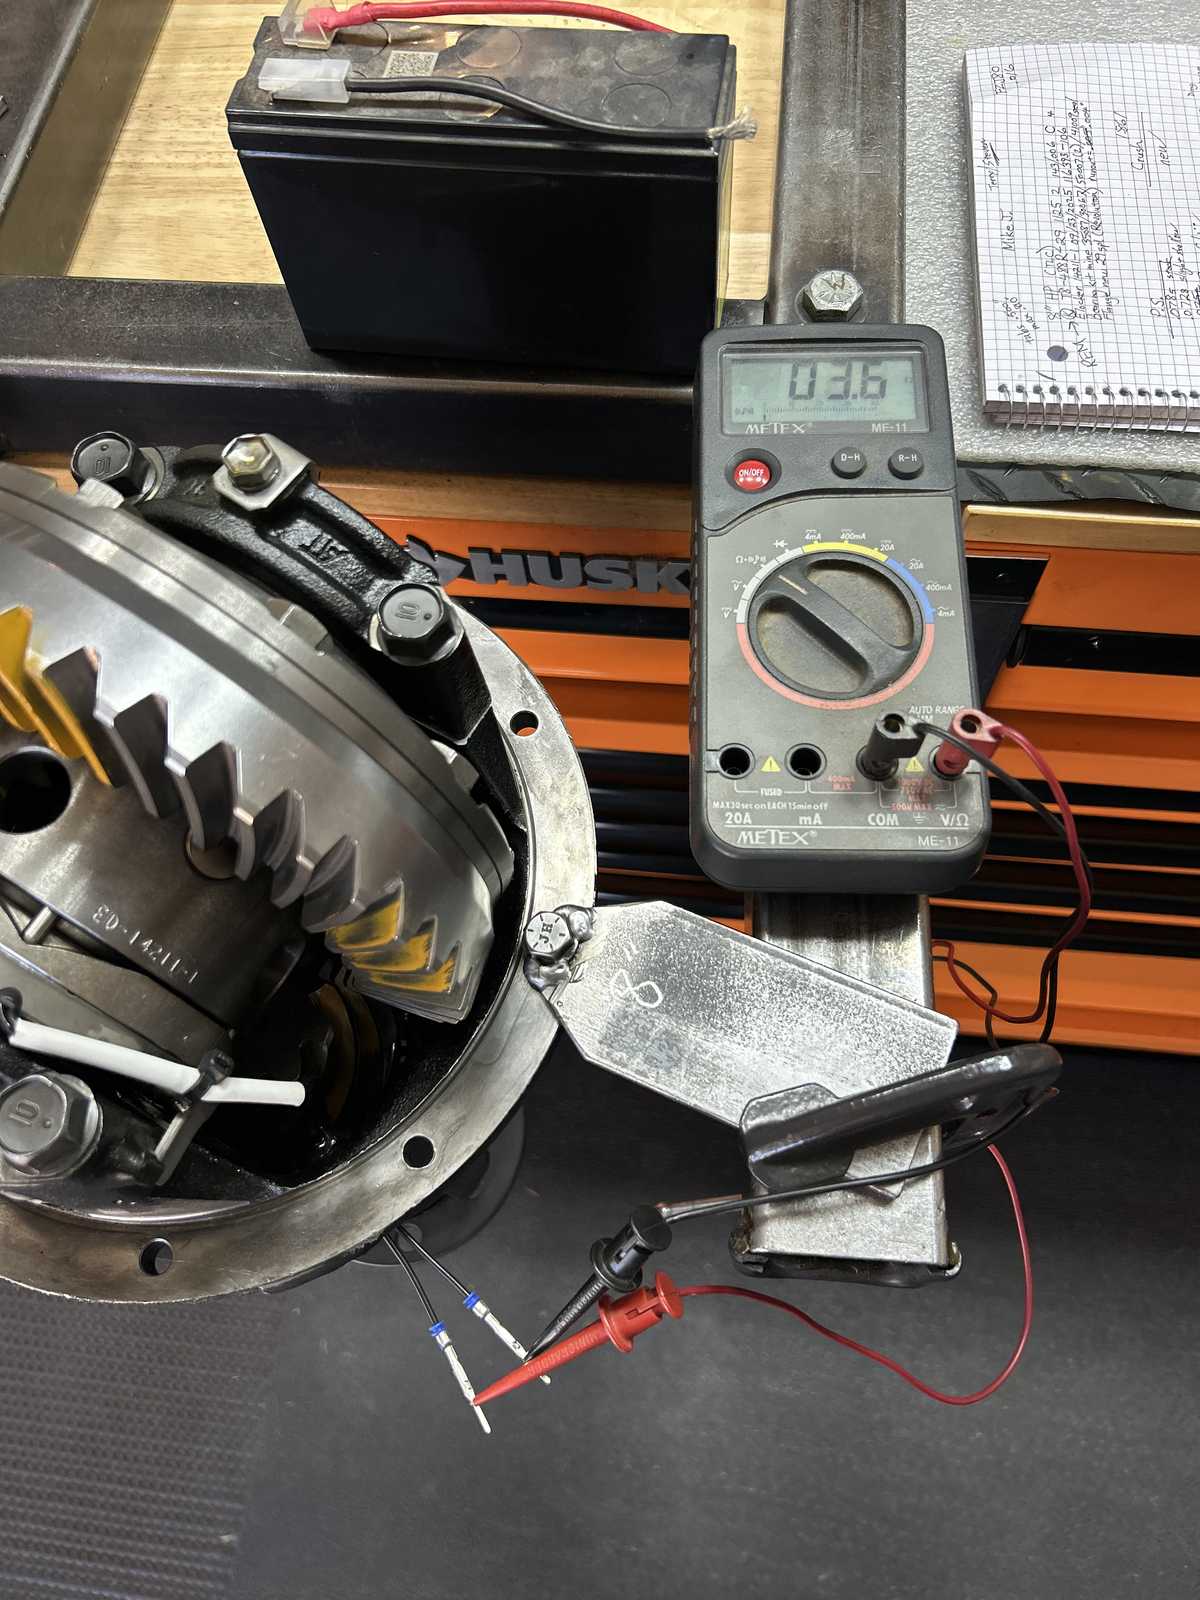
| Measuring the resistance of the magnetic coil ring.... 3.6 ohms. |
|
| 12 volt test...apply 12v....turn the flange and all 3 pins will be pushed into the case. Pass. |
|
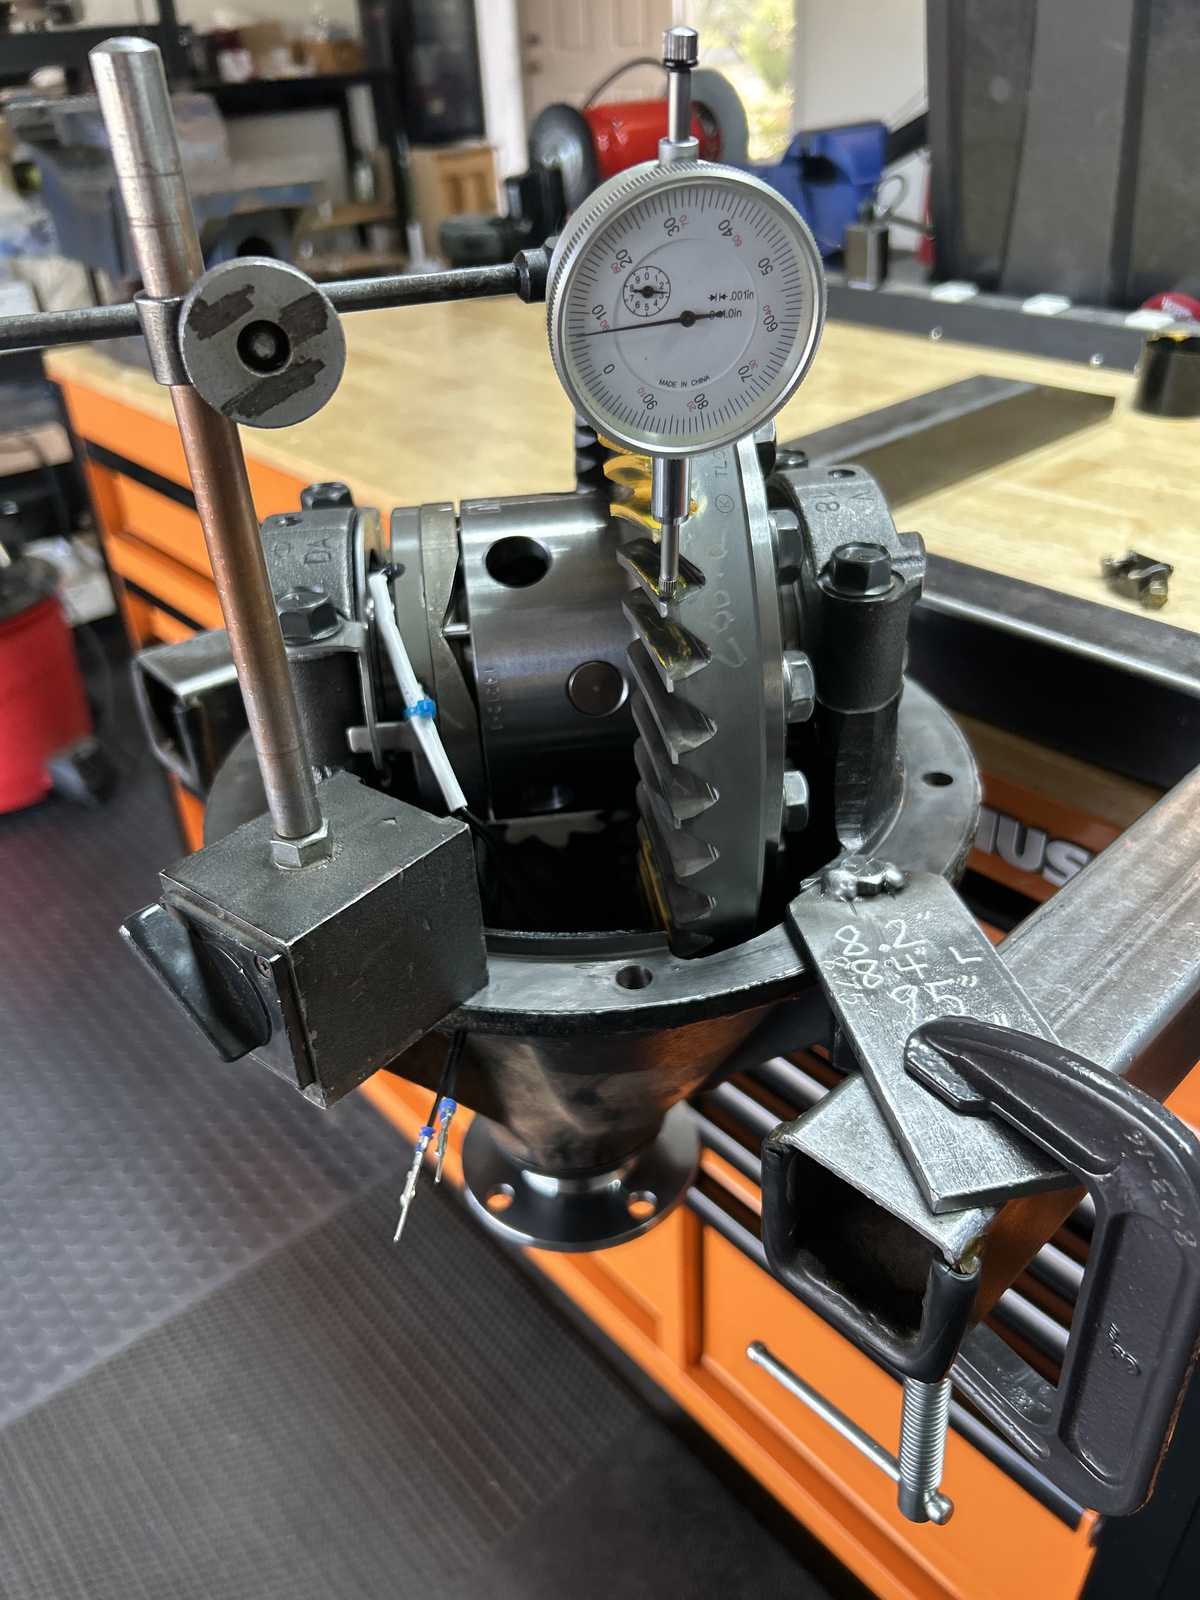
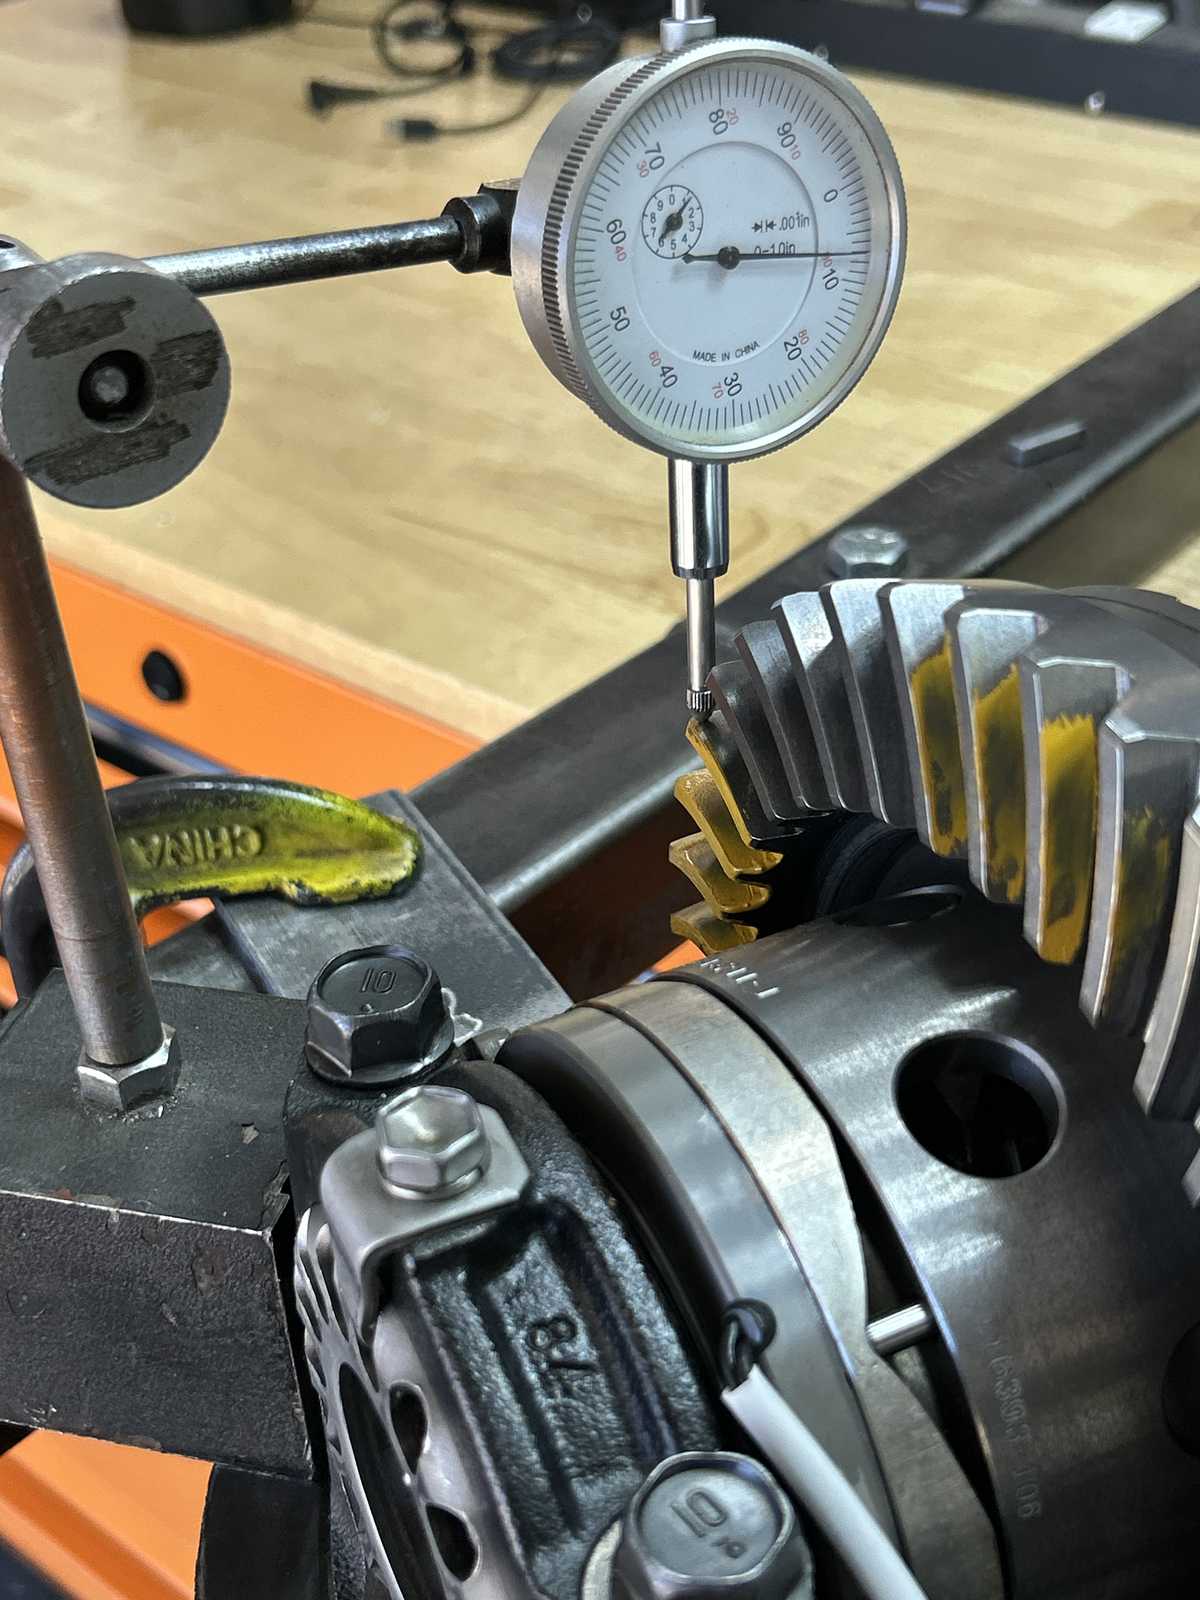
| Backlash is recorded on every other tooth... |
|
| With backlash and CBPL verified, now the 2 lock tabs can be torqued to 10 ft/lb. |
|
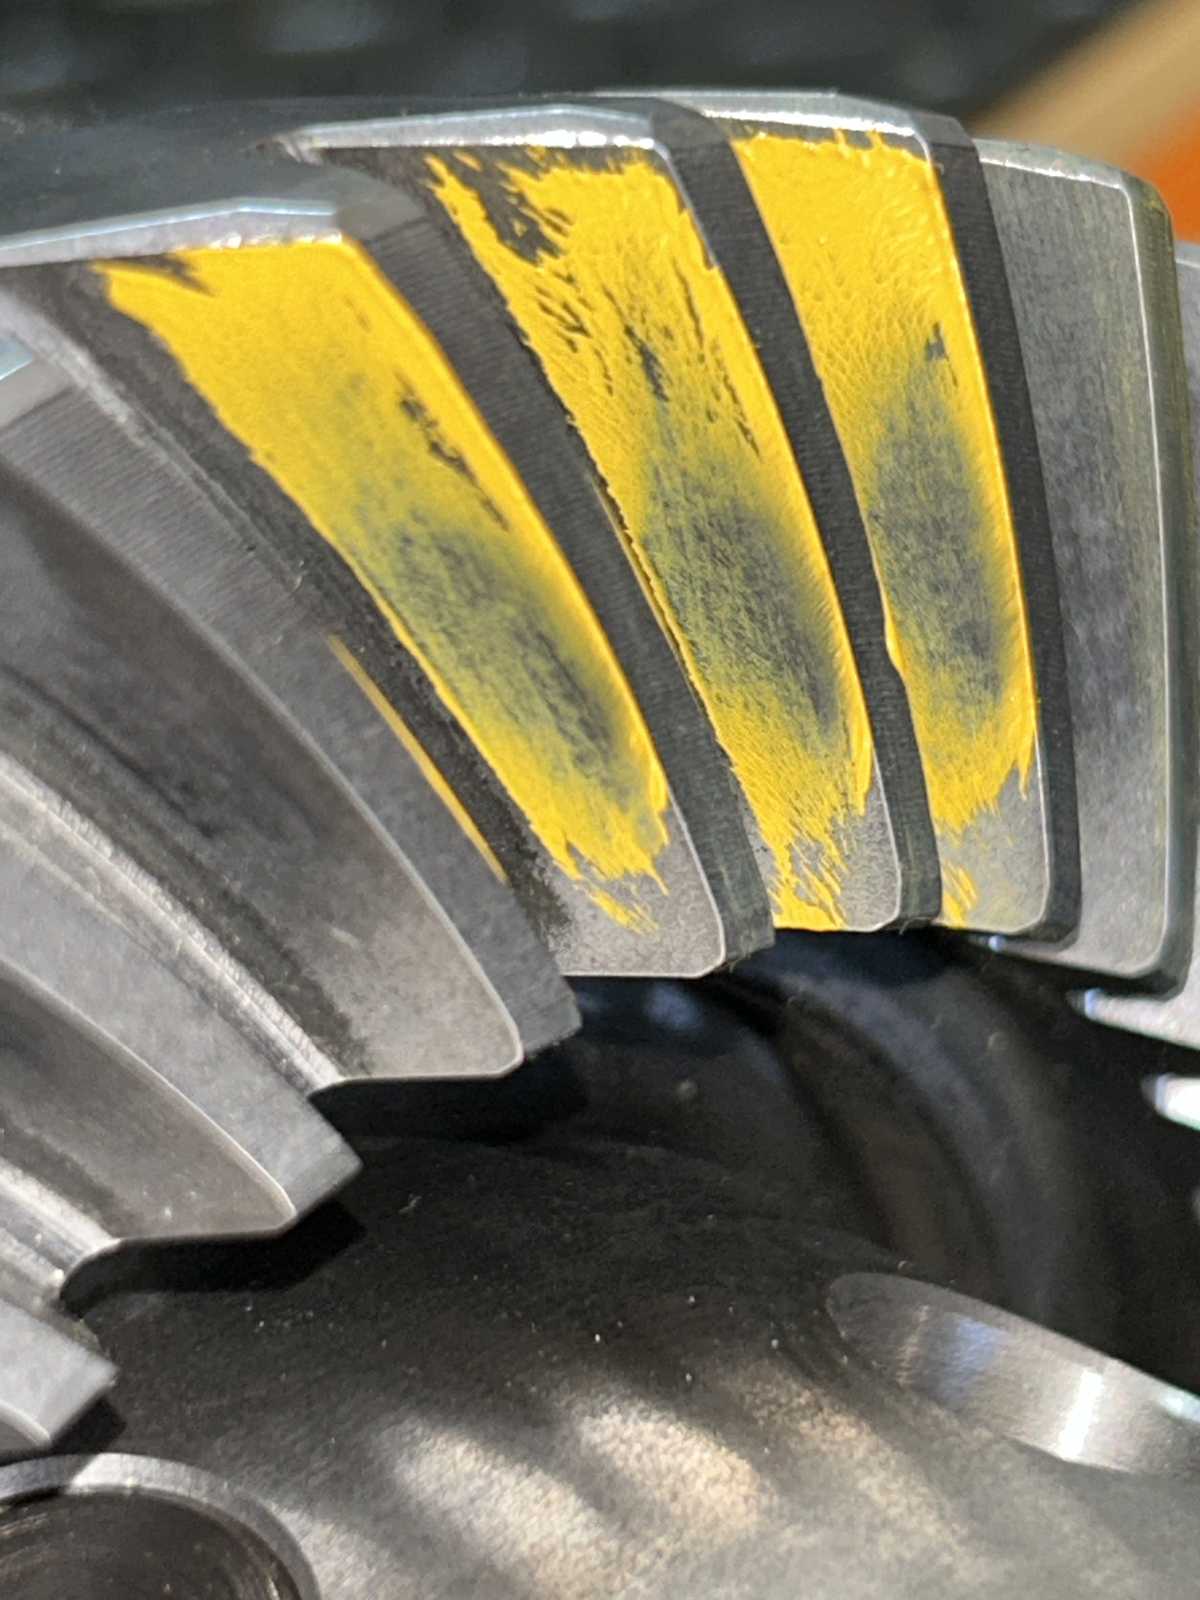
| One last final check of the patterns....spot on! |
|
| Beautiful. |
|
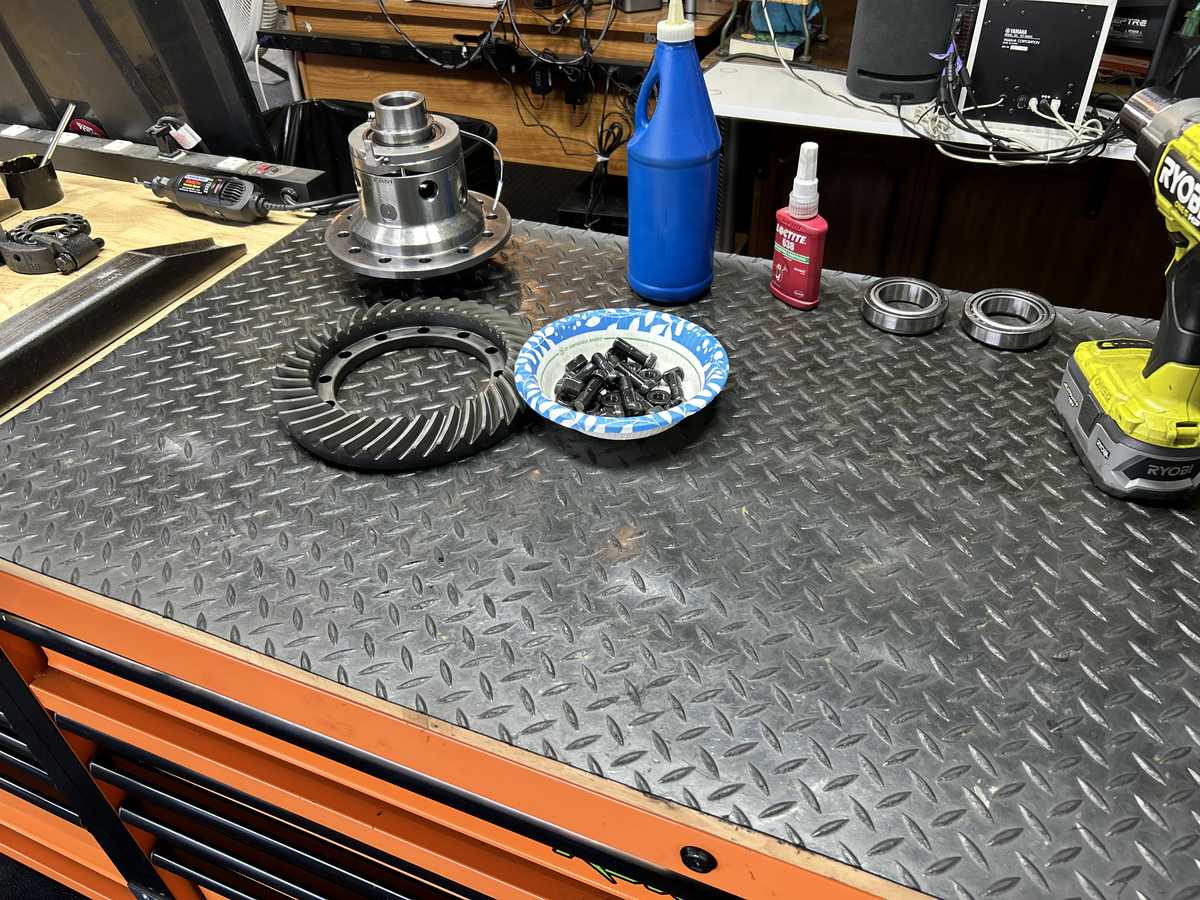
| Notes of the rear install |
|
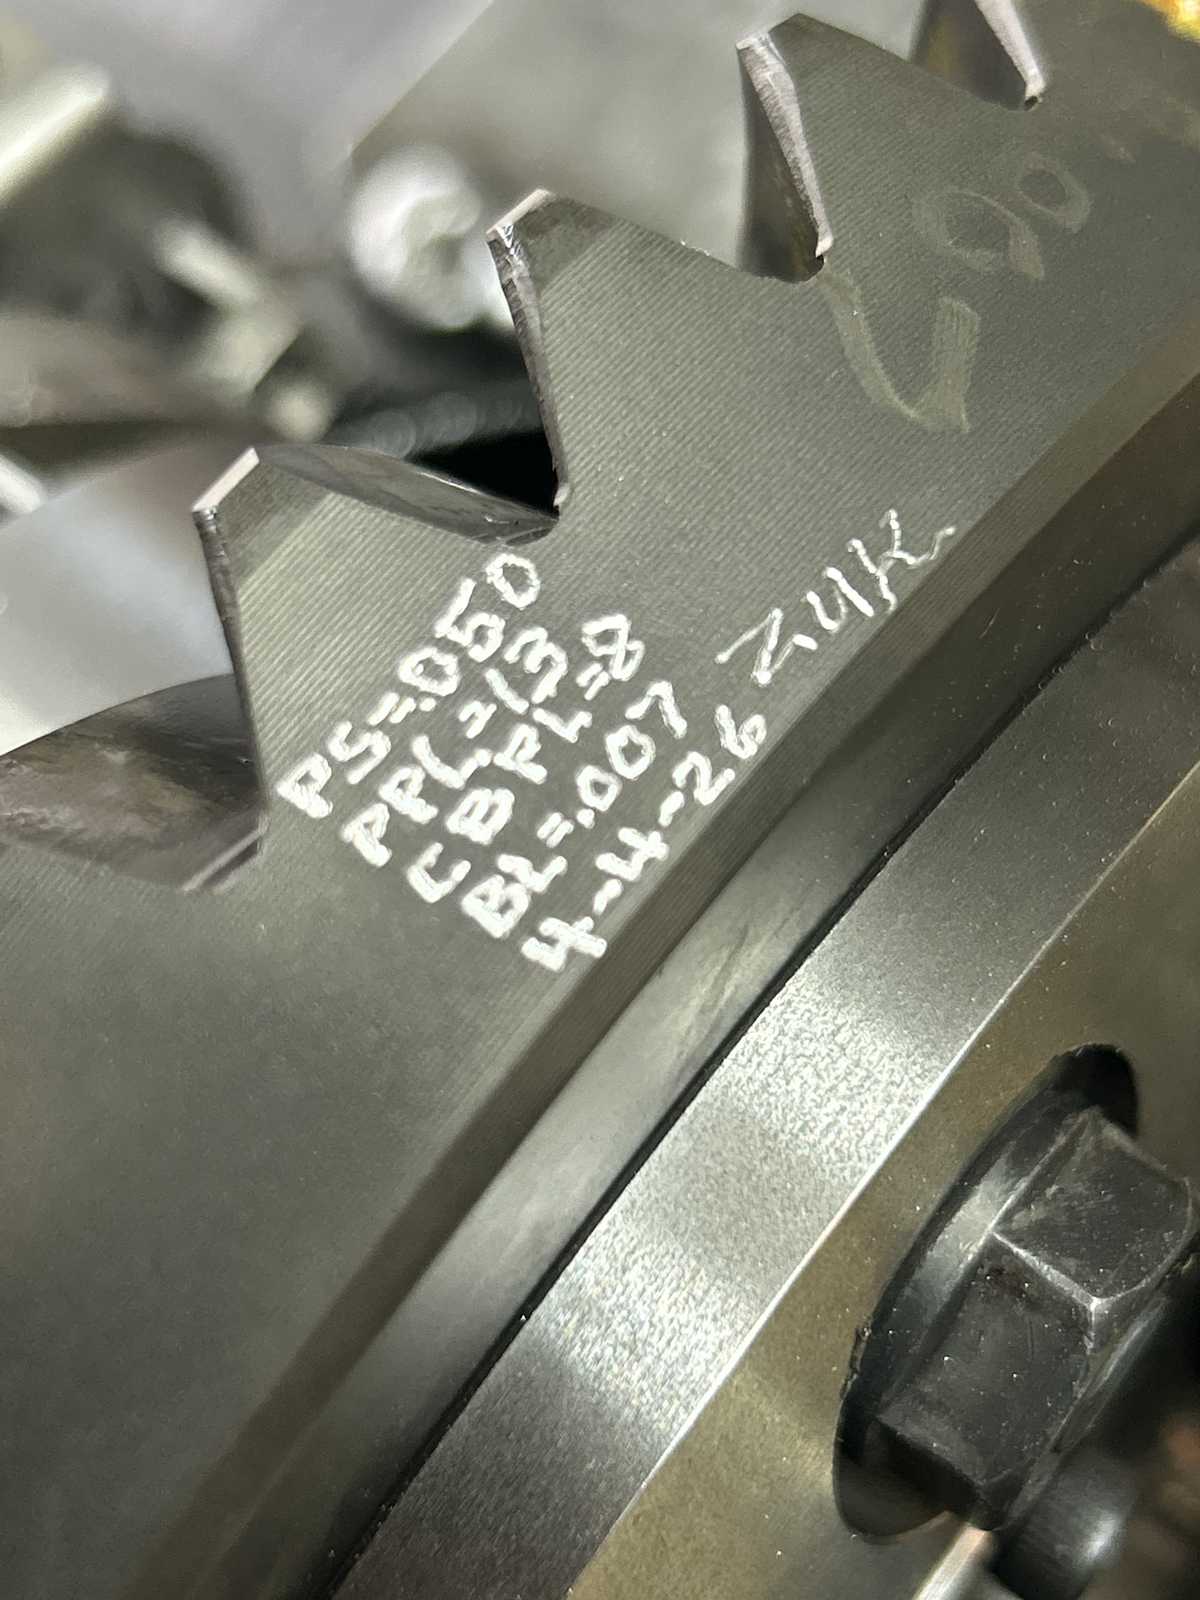
| One last thing to do before the front 8" hits the bench....engrave the basic info. |
|
|
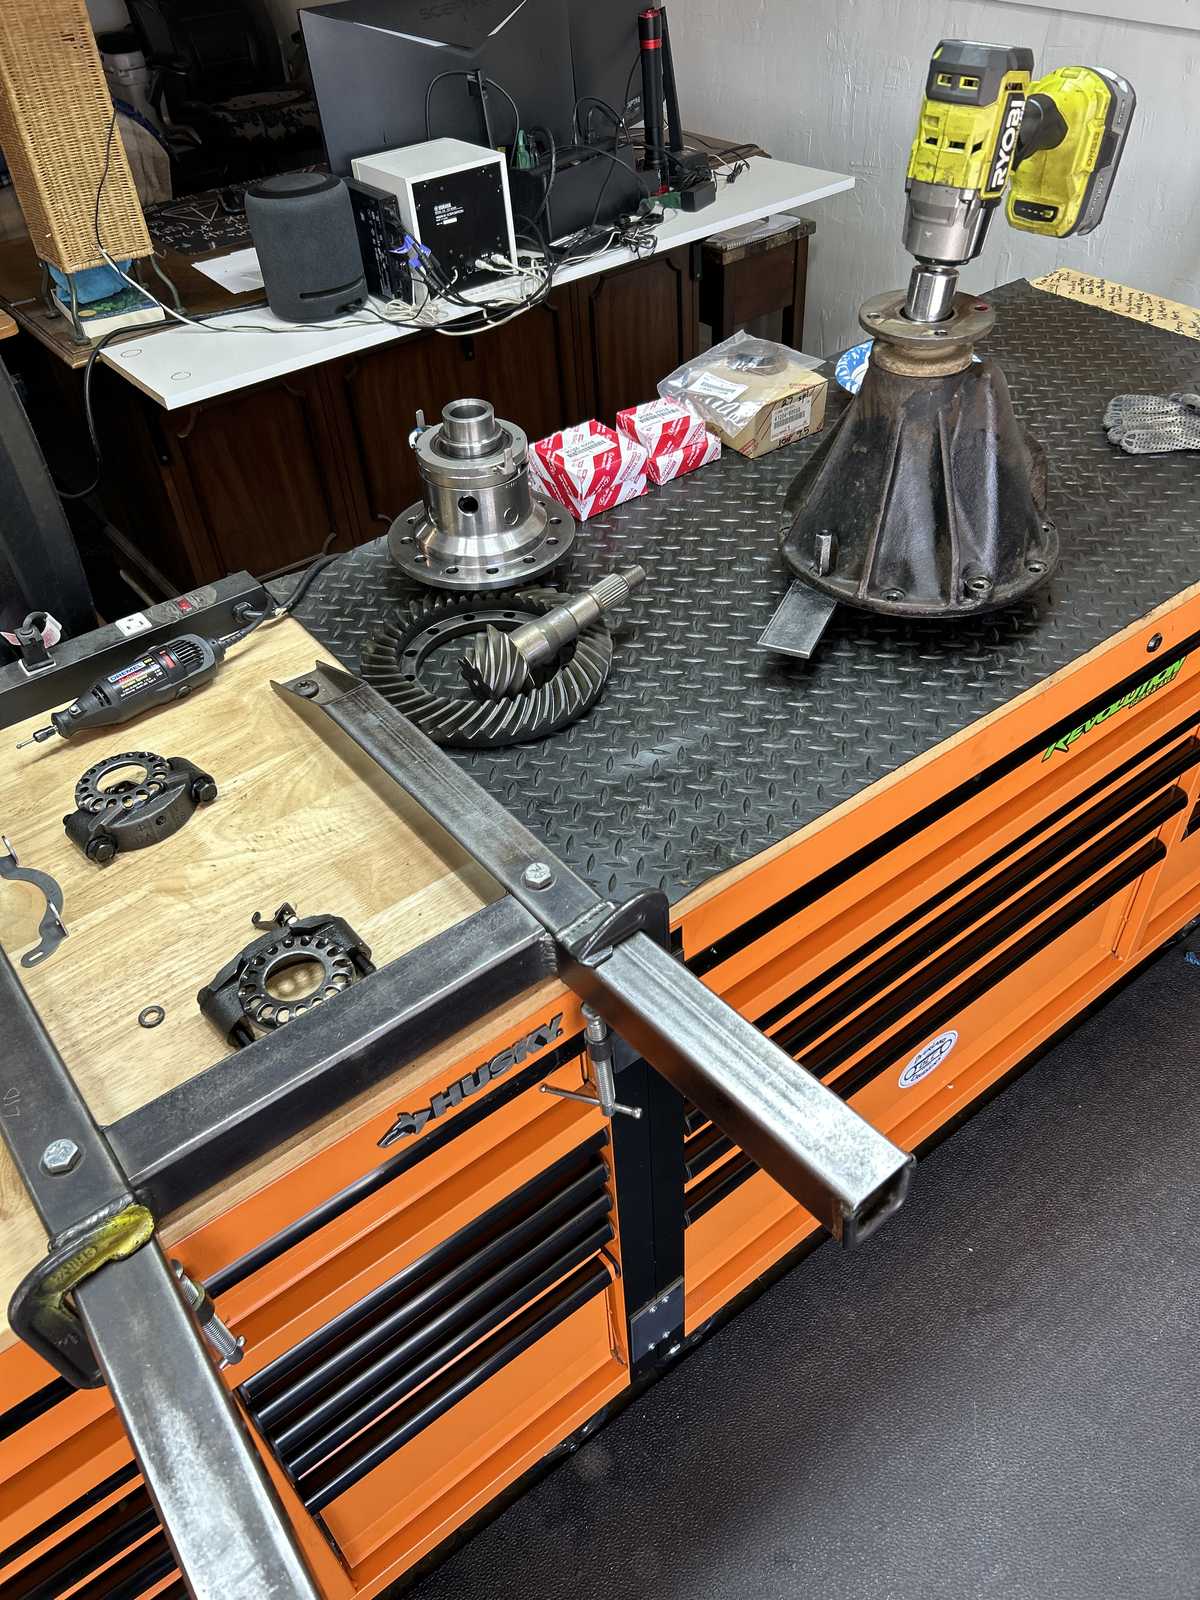
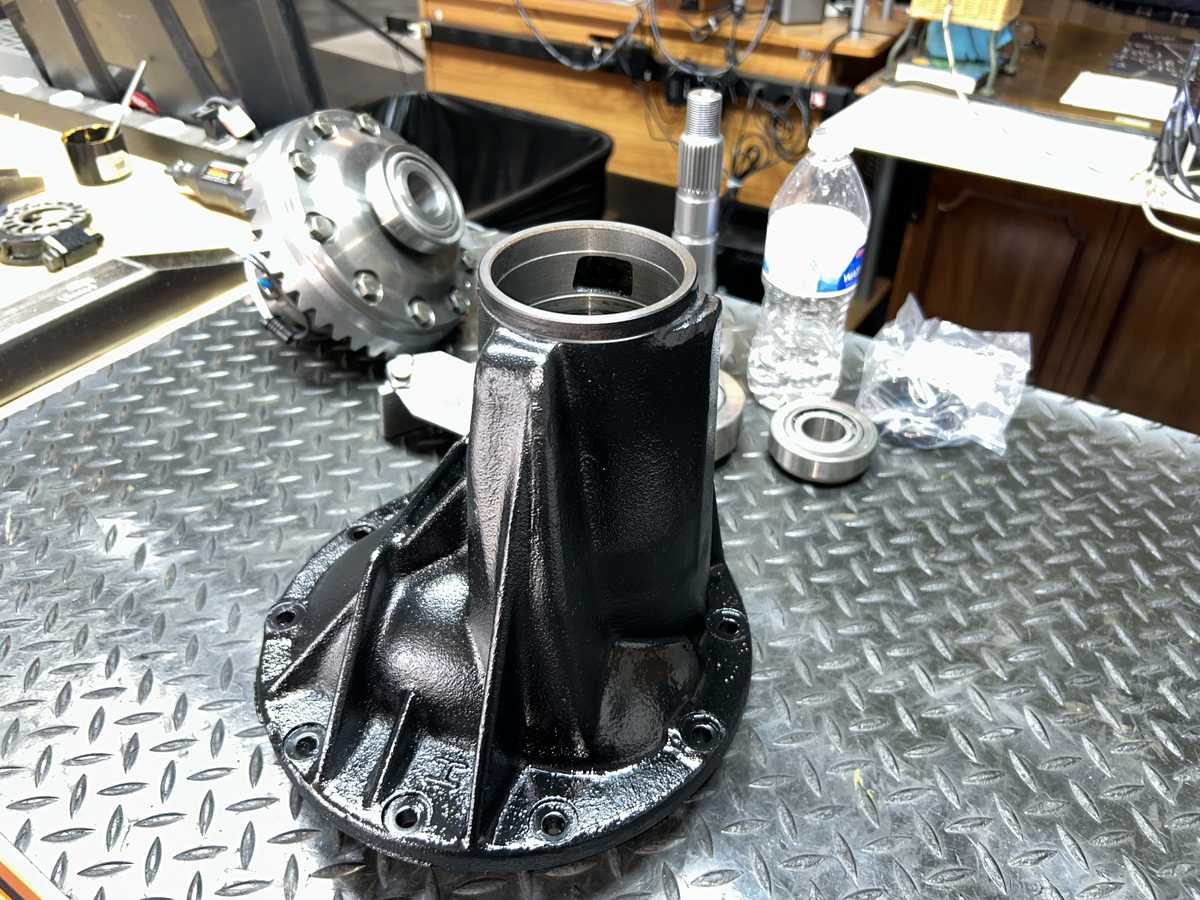
The rear gets a cosmetic coat of Satin Black..... The front 8" is in the fixture. |
|
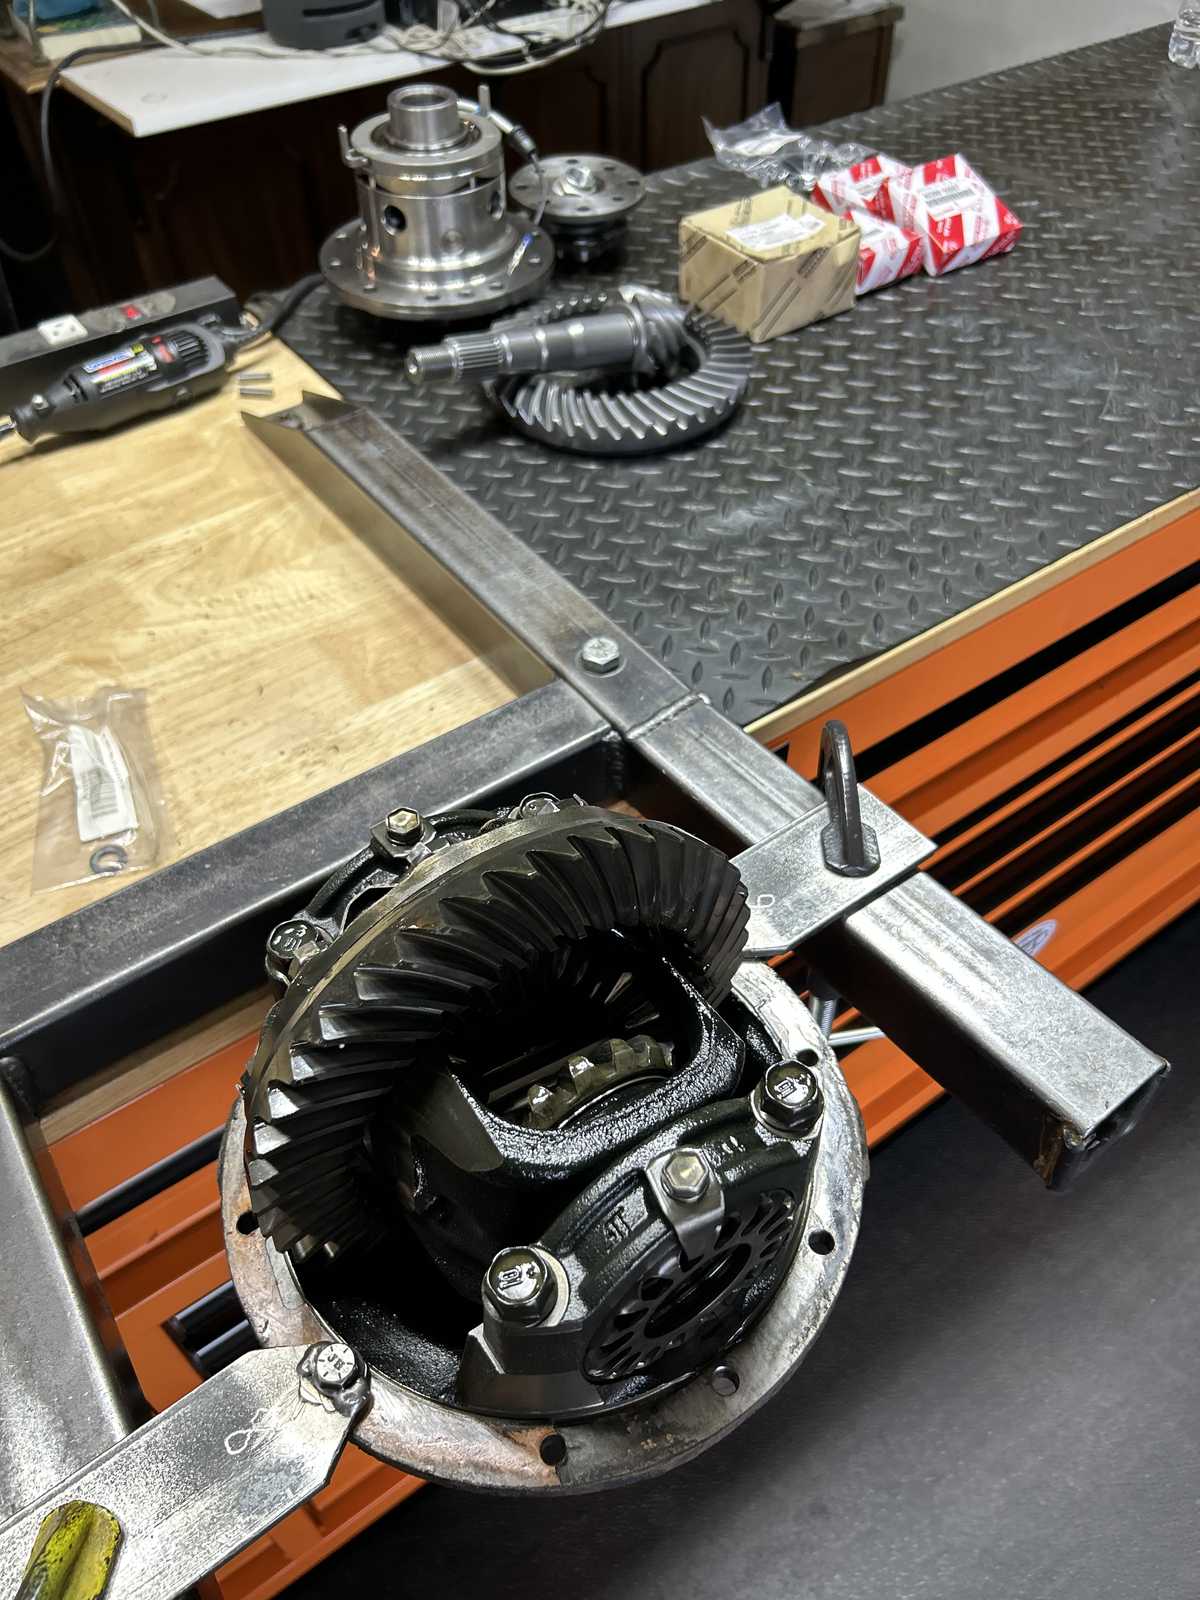
|
In the background is all the good stuff that it is getting. There was enough time to get the 8" ring/pinion super polished. Genuine Toyota bearings, of course. |
|
| .................................................................................. |
|
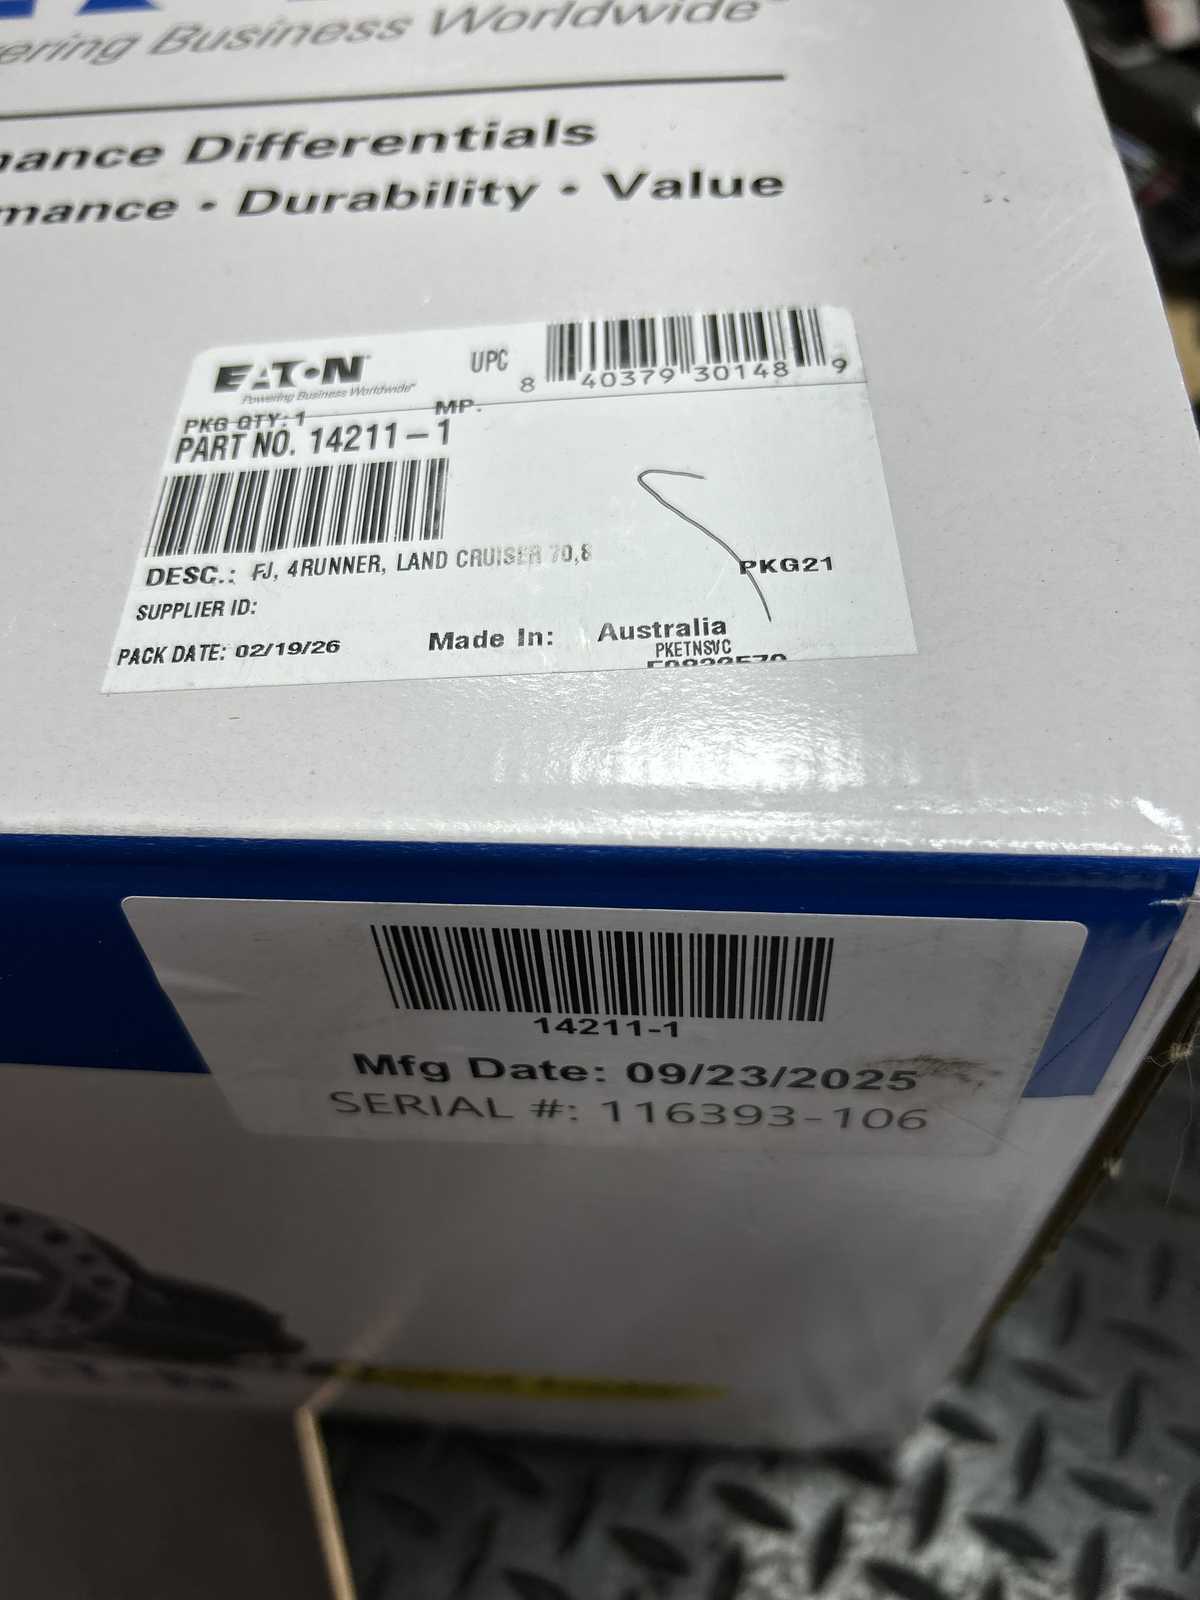
| The 14211-1 elocker is going in the front. |
|
|
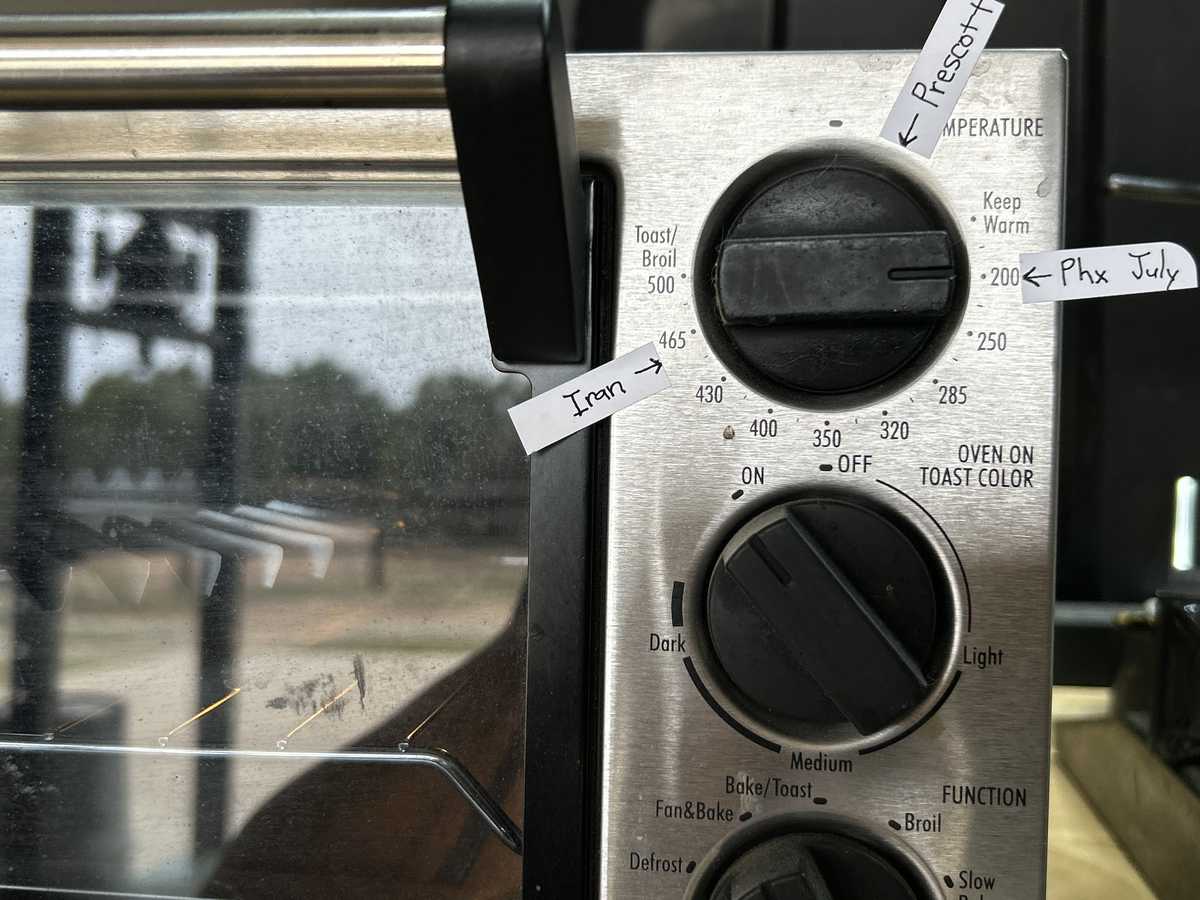
One of the tricks in order to get the tight fitting ring gears onto the elocker case is to preheat them up to about what one might experience in Phoenix in July. Not quite to boiling water but enough to get the job done without getting water in the threads. |
|
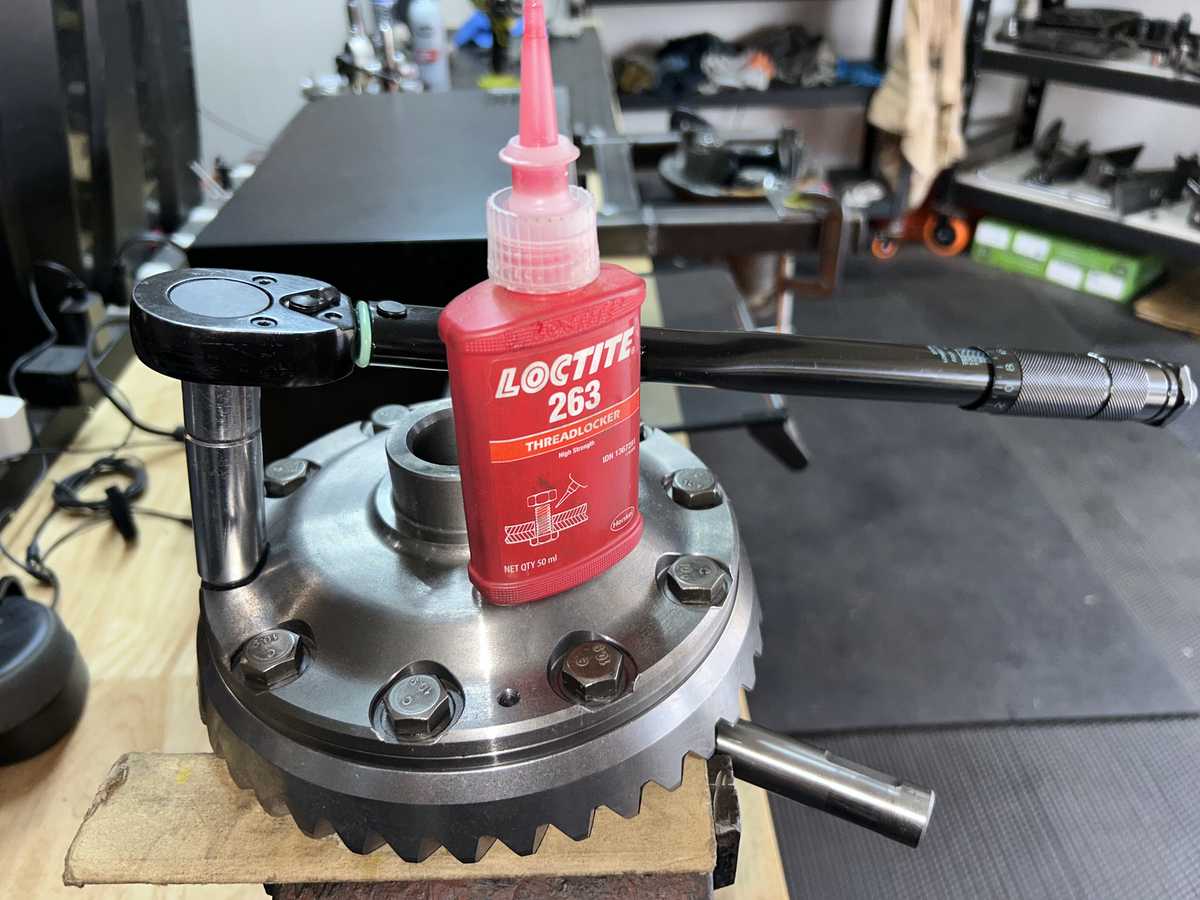
| Red Loctite and 75 ft/lb on all 10 bolts. |
|
|
"Circle K" gears I have referred to these since 2010.....Made in S Korea. An excellent quality gear for the Toyota application. Revolutiongear is the major distributor and they also will SUPER POLISH them upon request. Don't cheat yourself, get them super polished. The process has so many benefits. |
|
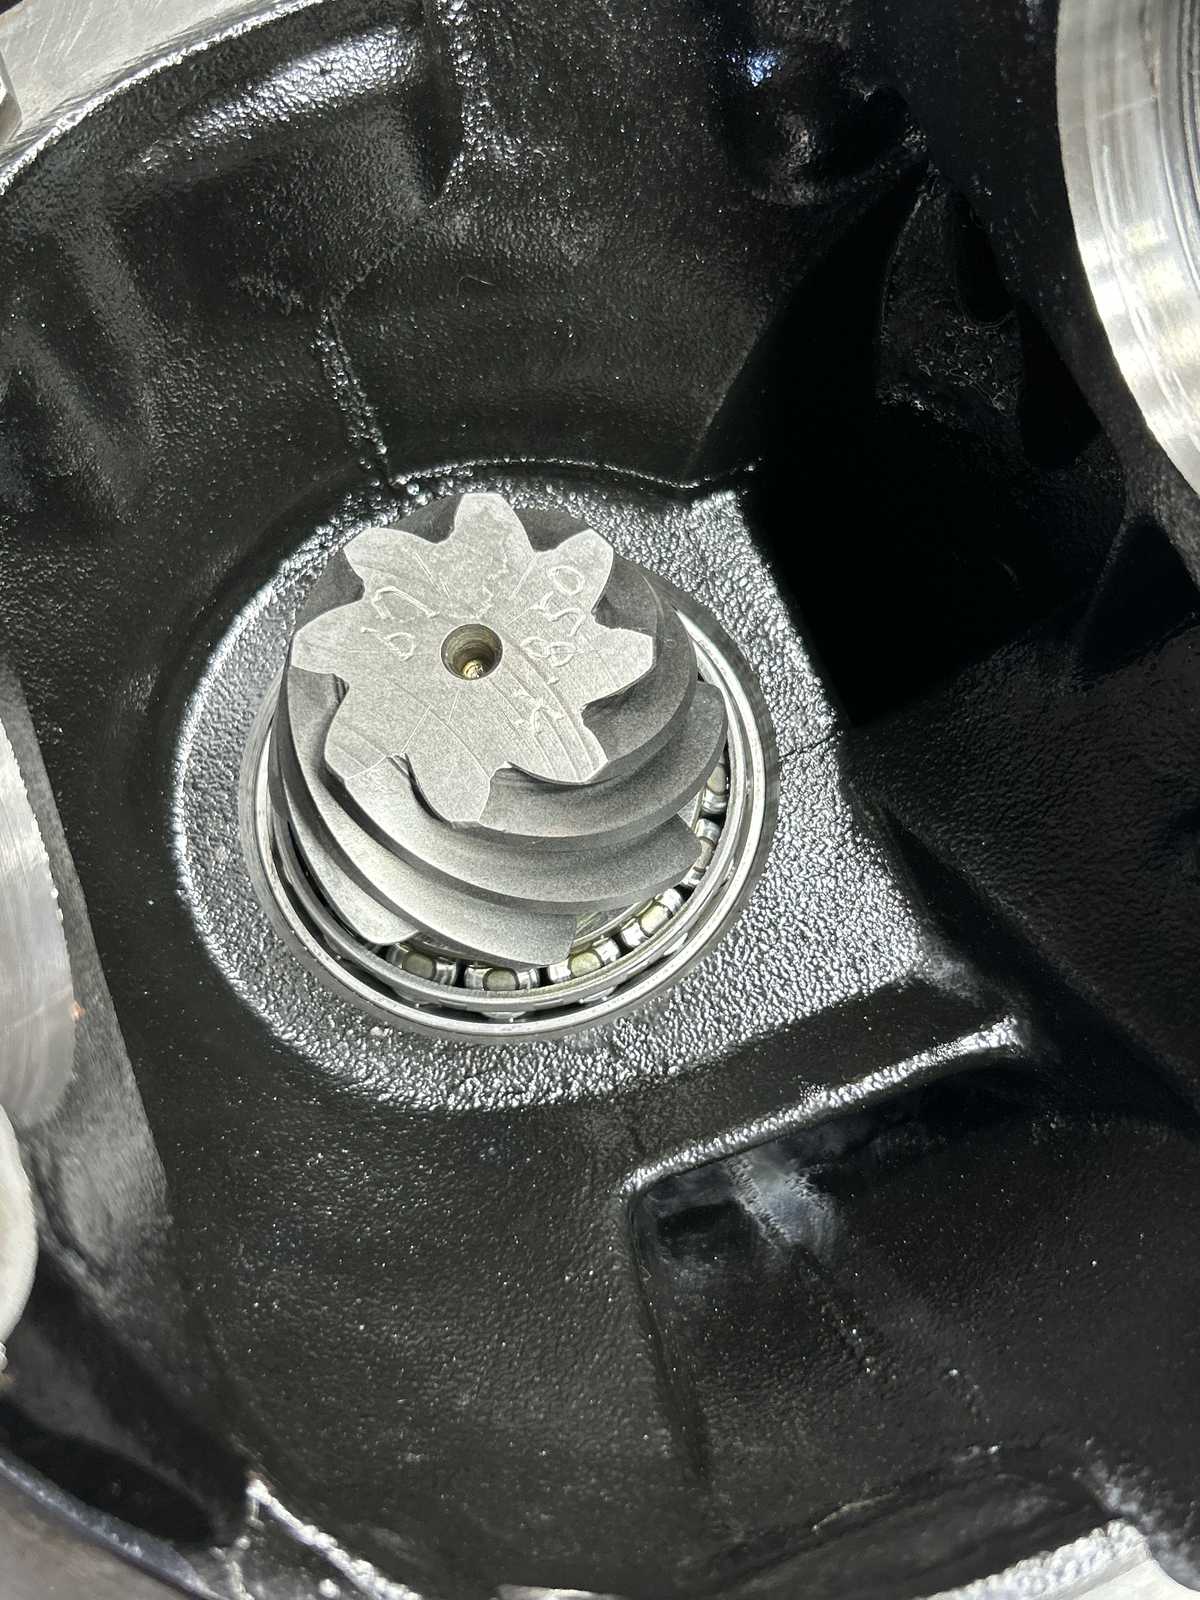
| Teardown begins by removing the open stock center carrier. |
|
| Now the pinion end.... |
|
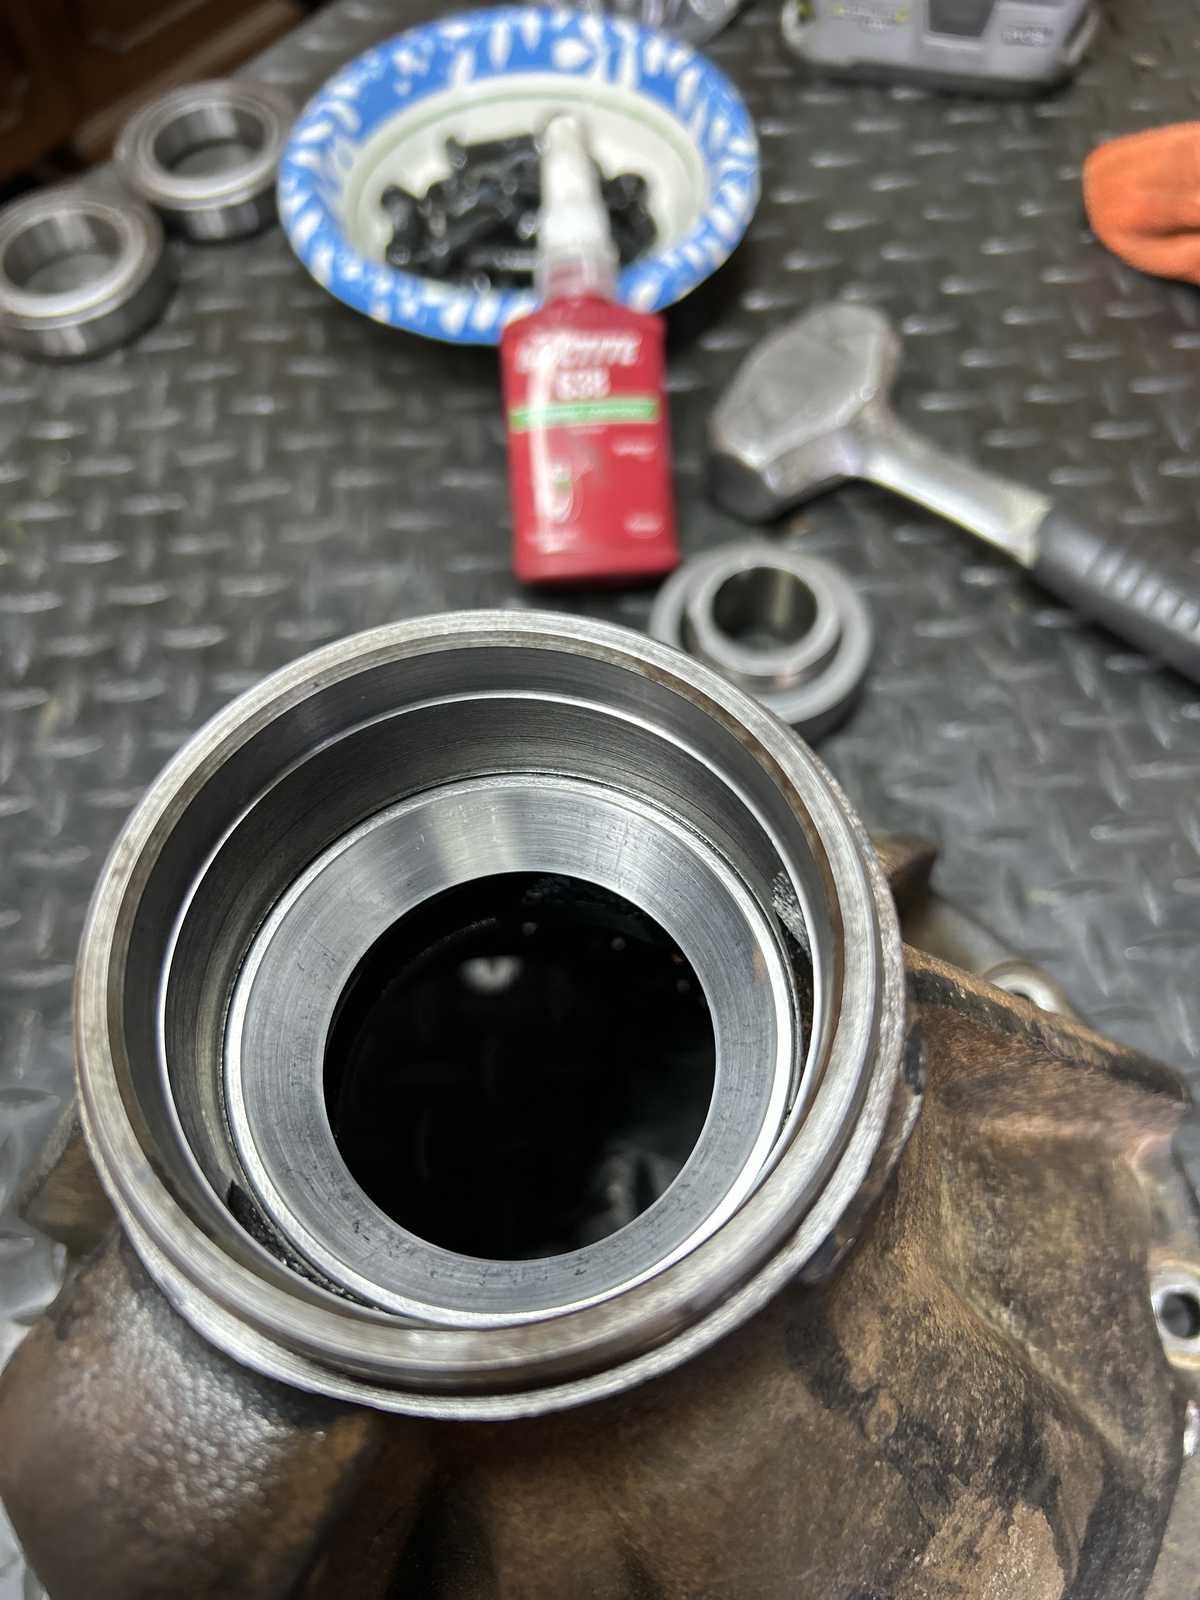
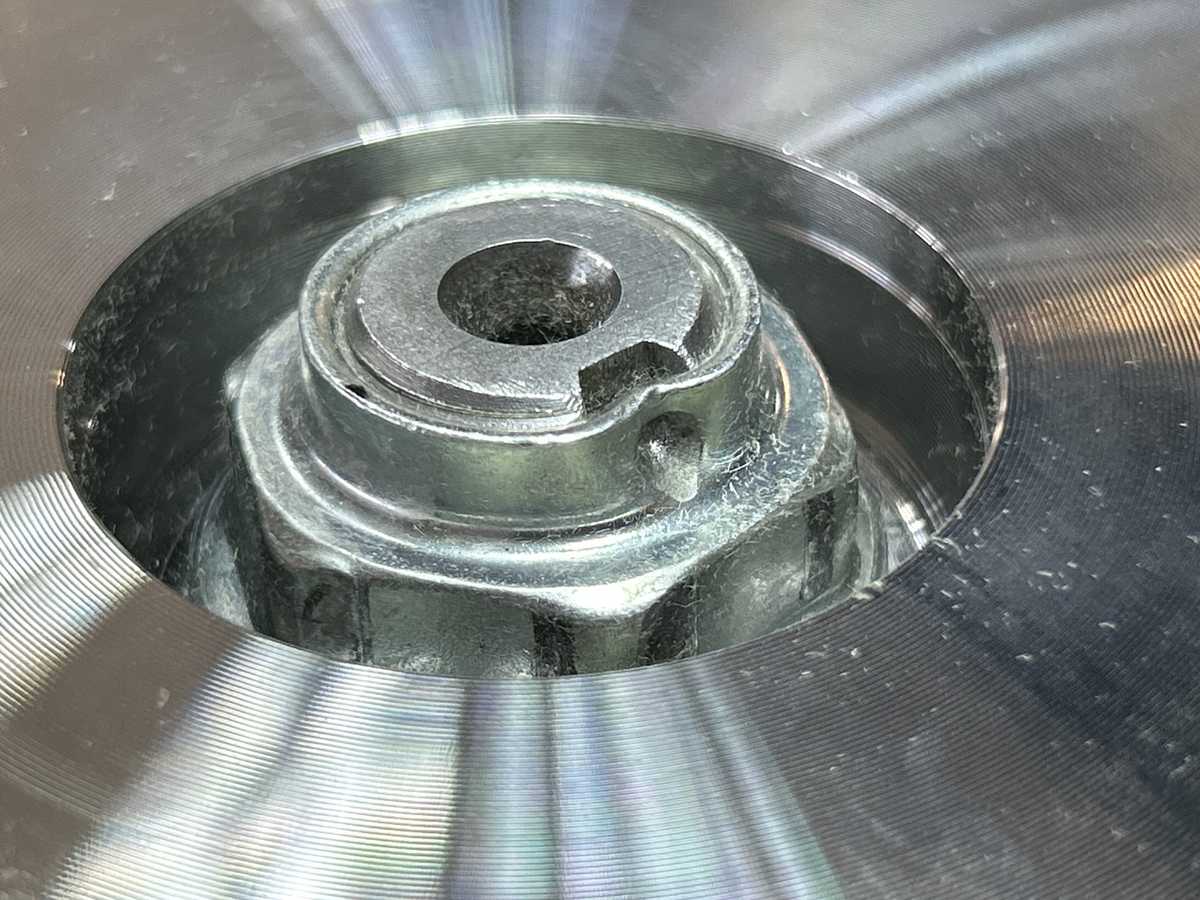
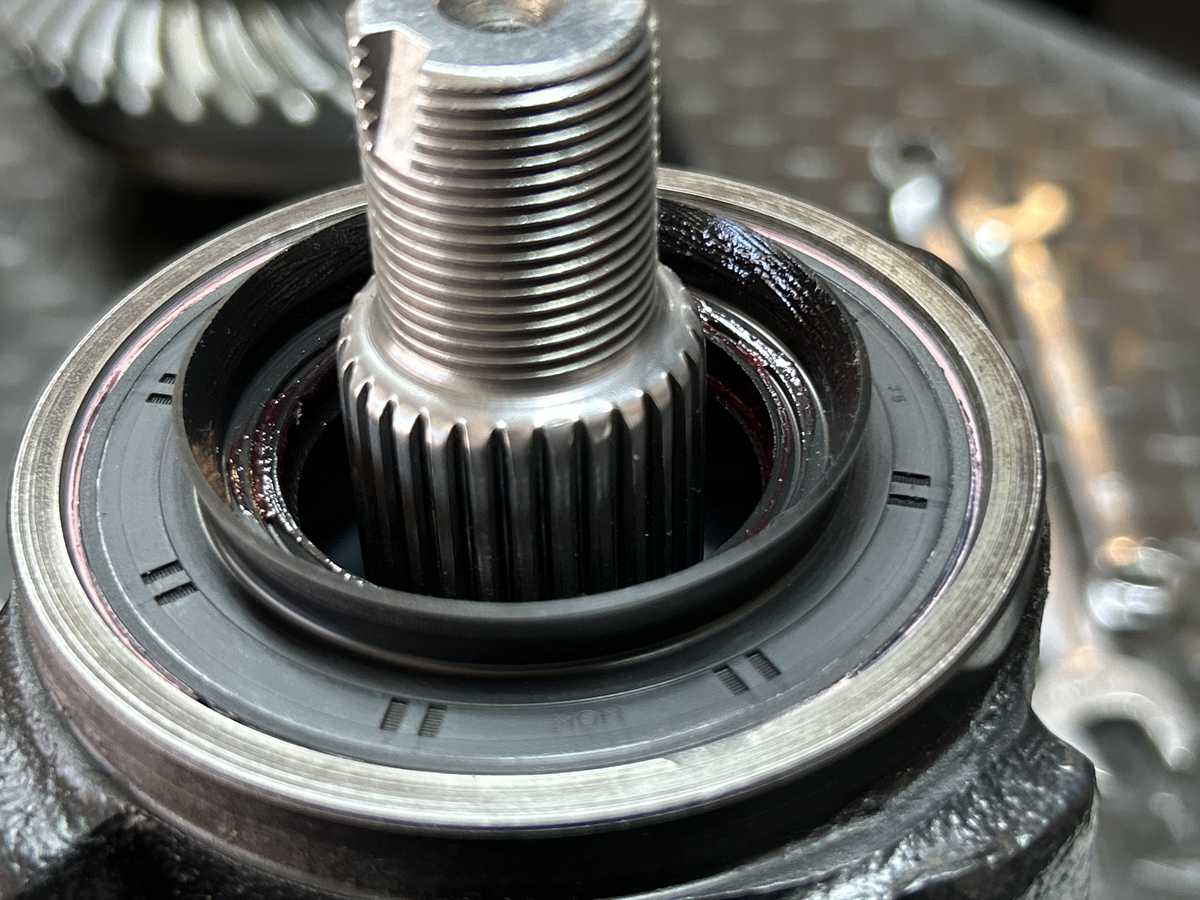
| Flange comes off revealing the crusty seal |
|
| The cleaning station...... |
|
| It received the satin black paint ahead of time..... |
|
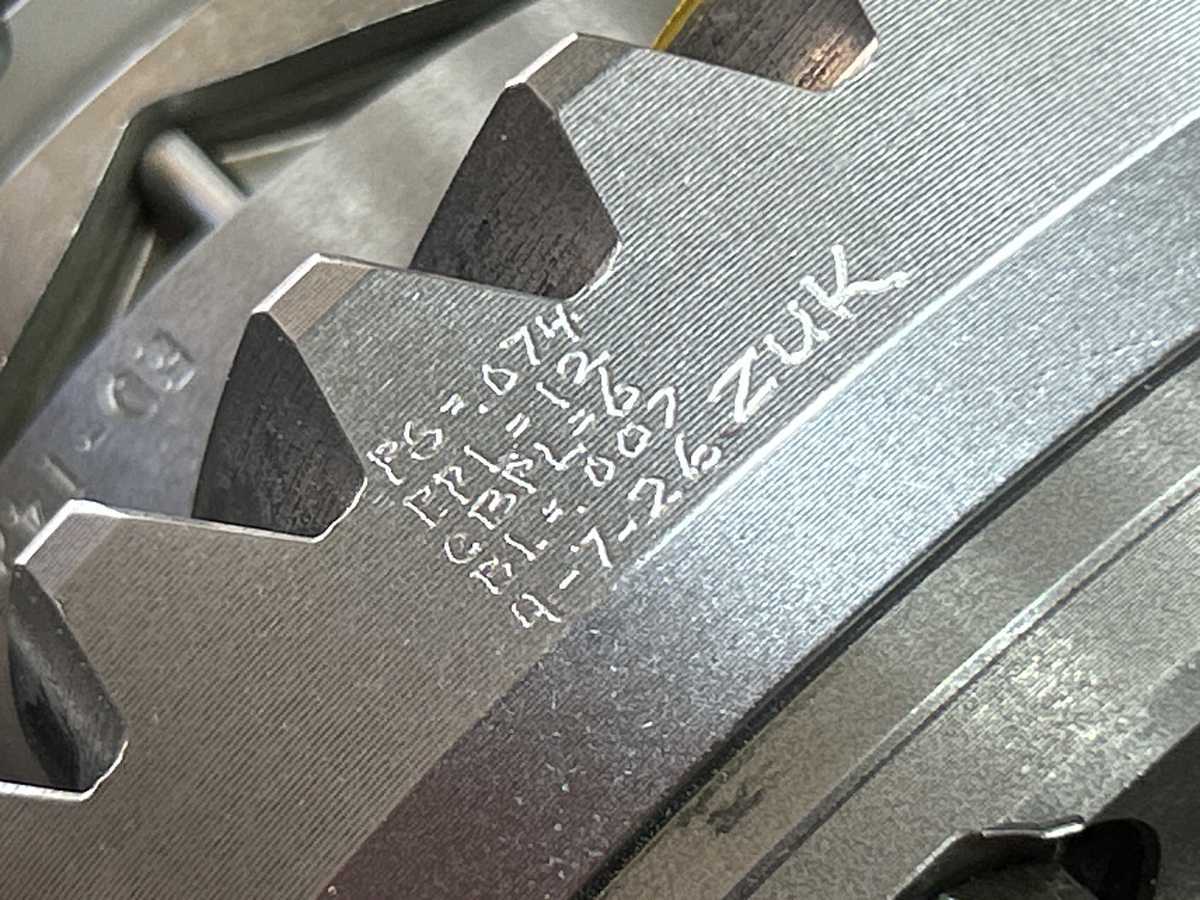
| The choice of starter shim for this one was .0728" |
|
| I also drilled the .480" hole here. |
|
|
The 8" 3rds do not come with the nifty stop tab bracket so some creativity is needed. A new and improved process that I now do... A short length of 1/4" square rod (.800") is MIG welded to the bearing cap. One on each side...Nobody else is doing this yet that I know of. |
|
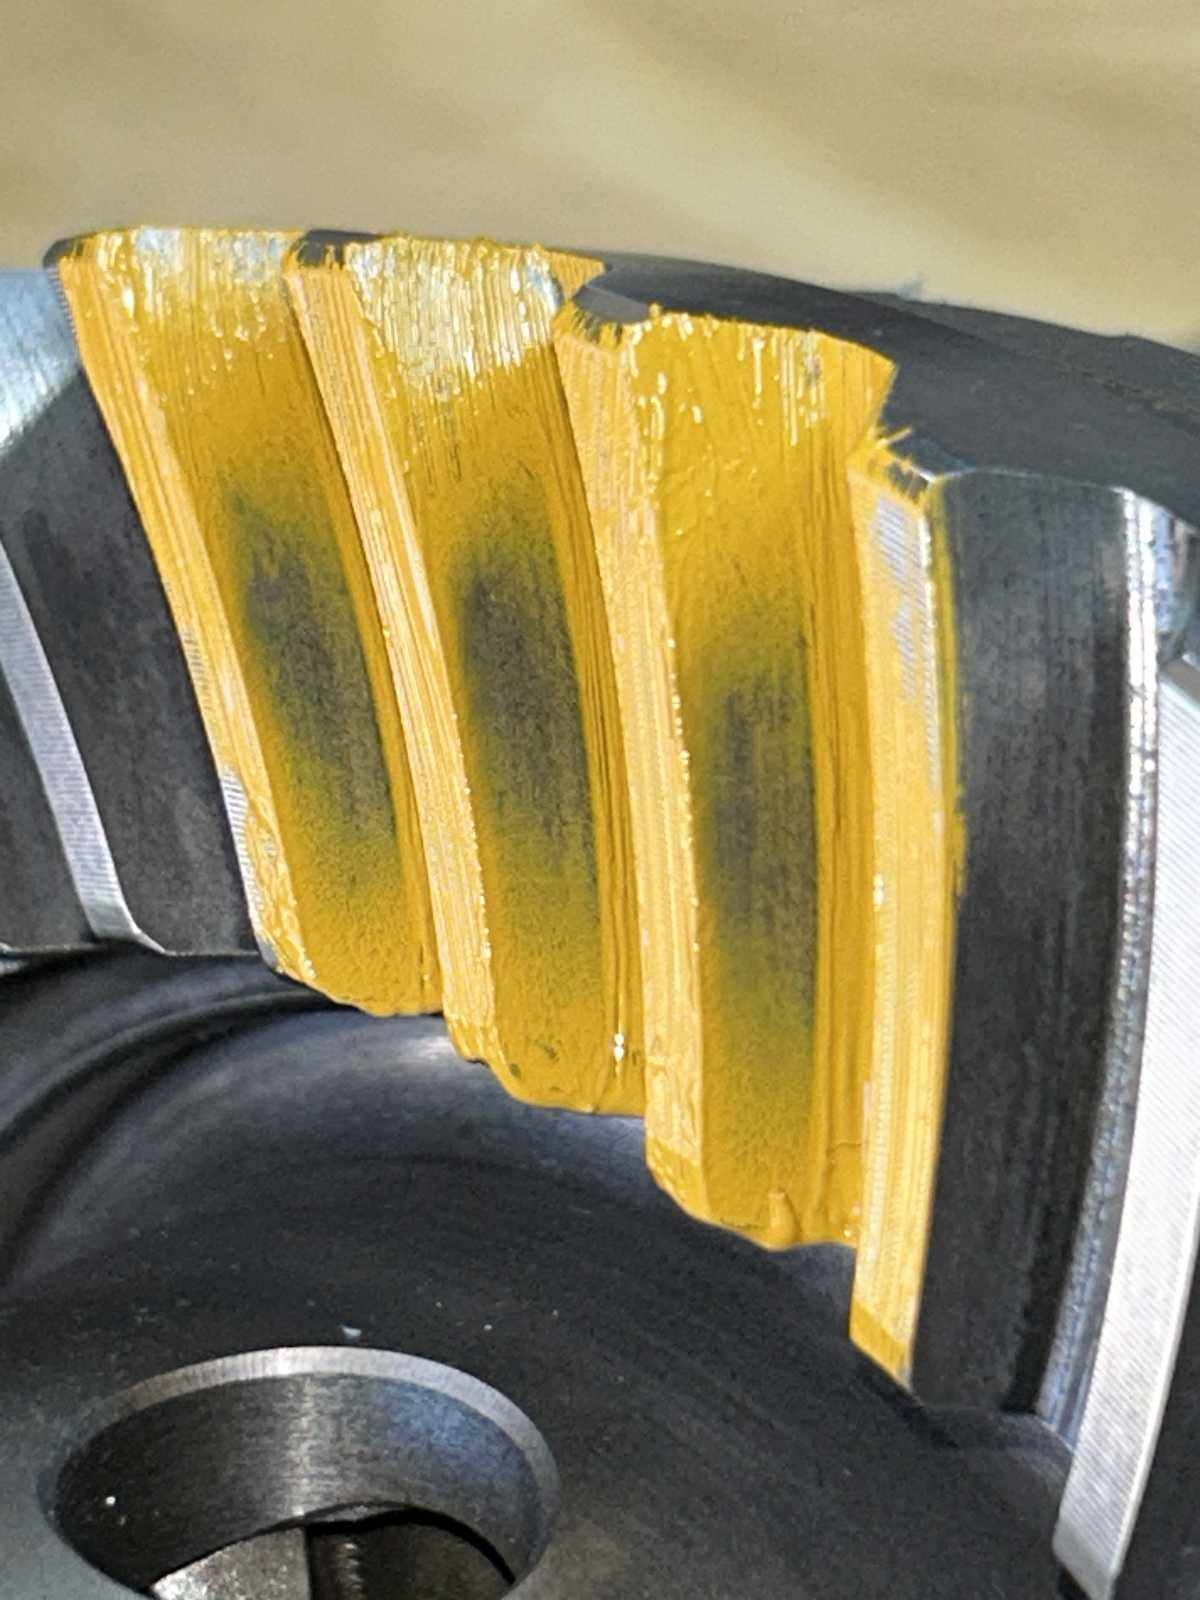
| Drive .0728" looks good but might be slightly shallow. |
|
| Coast .0728" seems to agree that a slight shallow condition exists. |
|
| Teardown and replace the 0728 with 0742....that's only 1.4 thou thicker. |
|
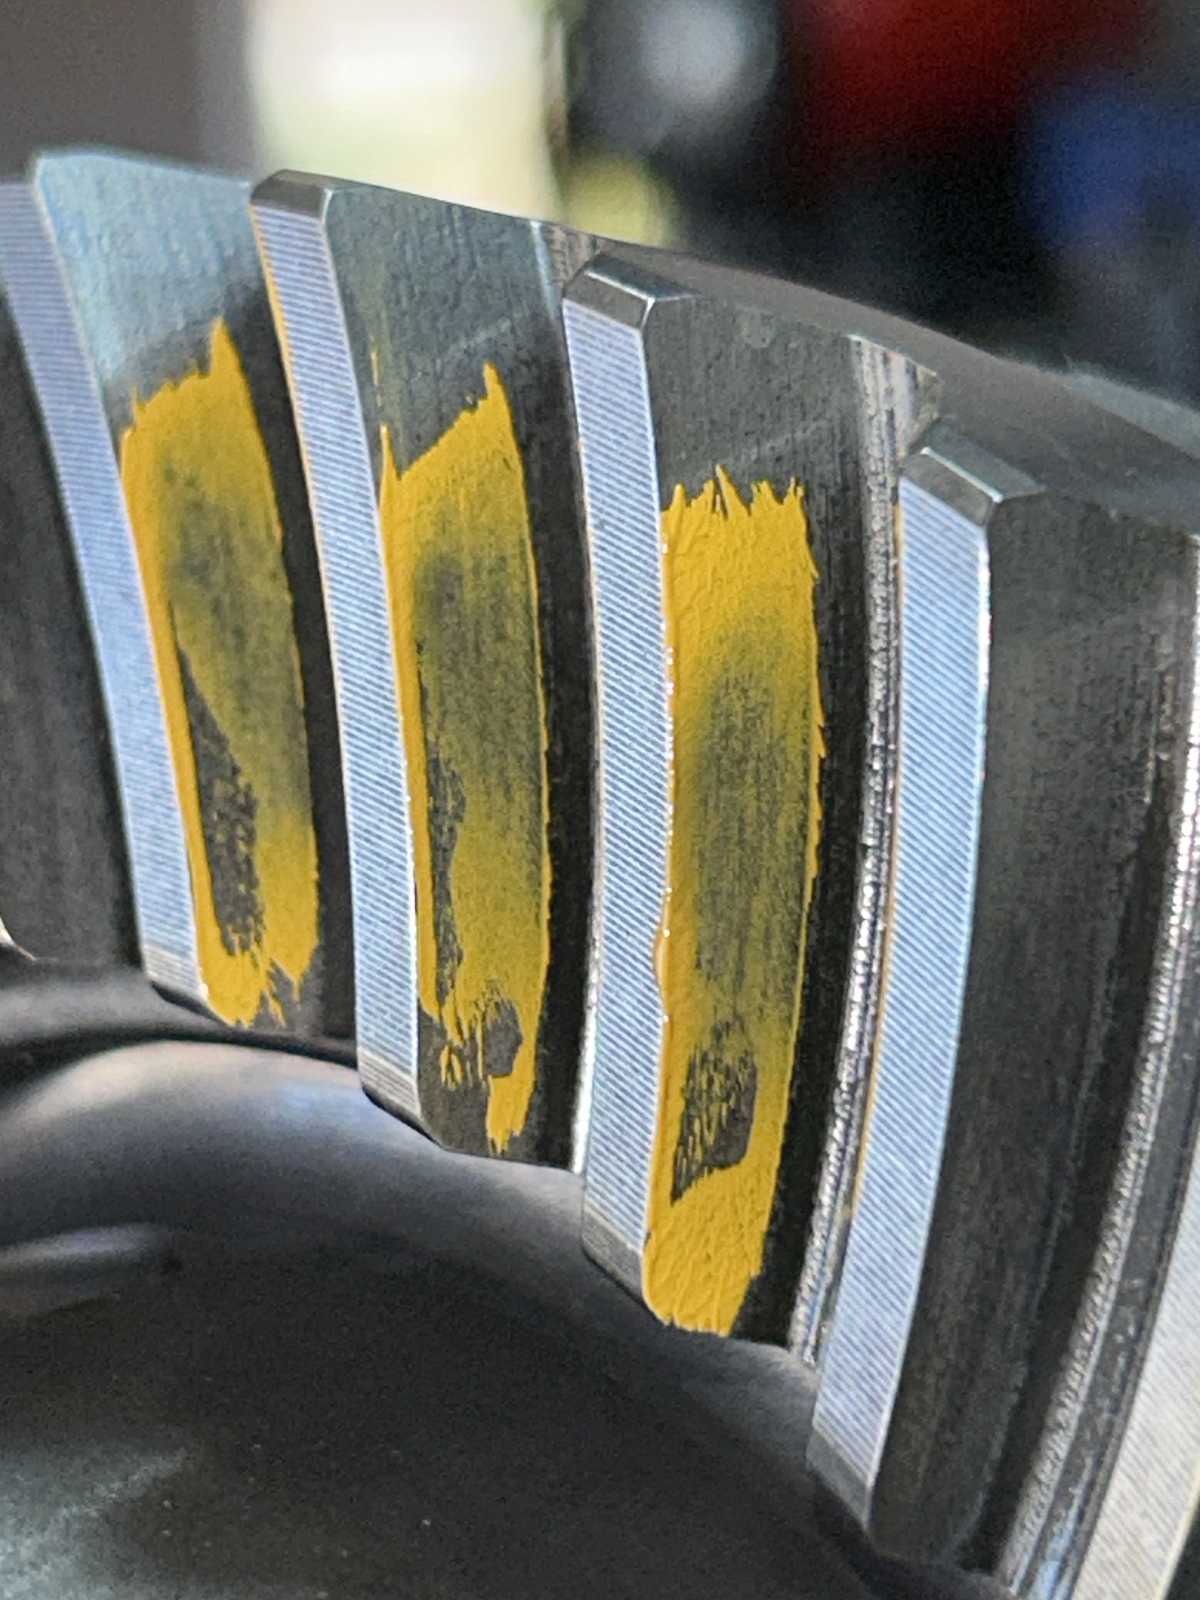
| Now look at the DRIVE...this is spot on! |
|
| Reverse painted drive.....agrees. |
|
| COAST....beautiful. |
|
| Reverse painted COAST shows it to be in the bullseye. |
|
|
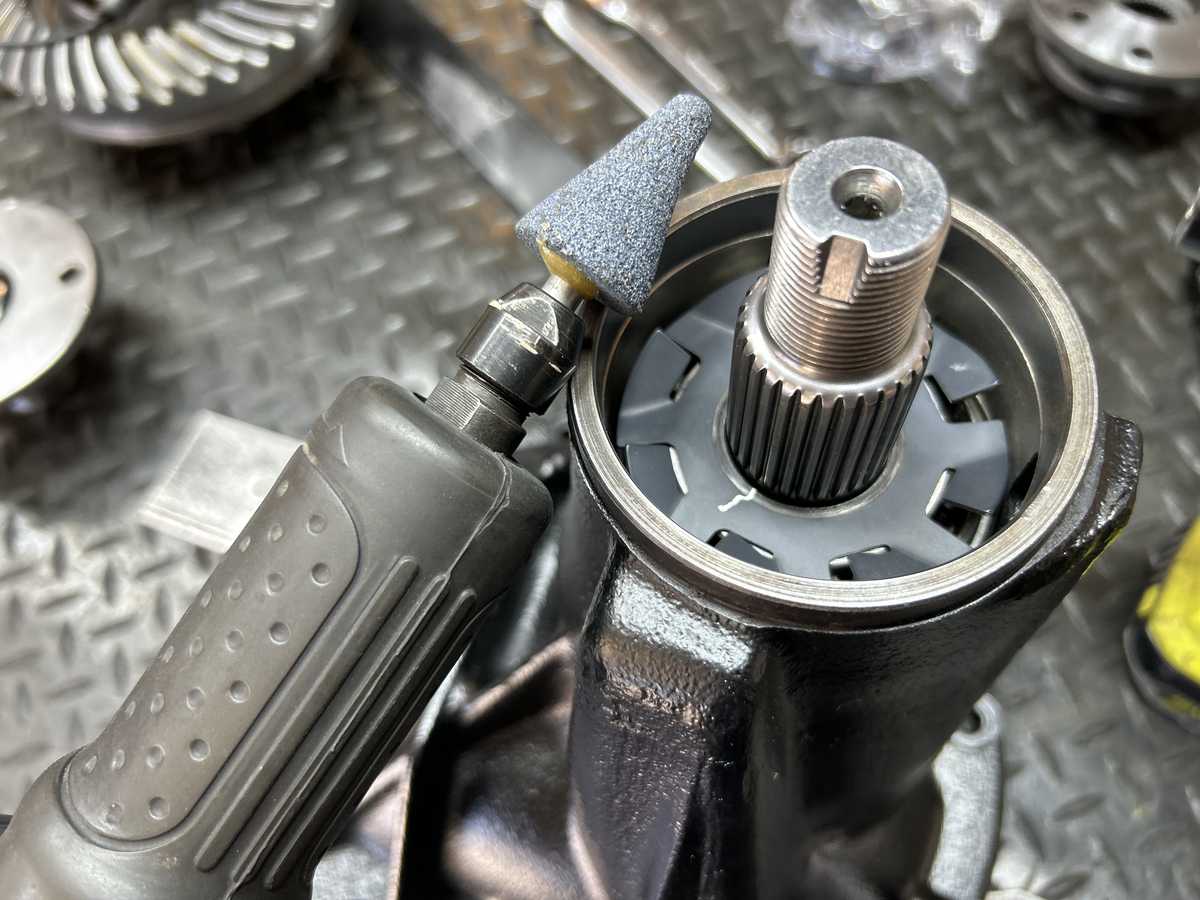
It's a high pinion 8"....have to re-use the fanblade splashguard so a 1/4" die grinder will open it up in order to slide down on the thicker 29 spline pinions. |
|
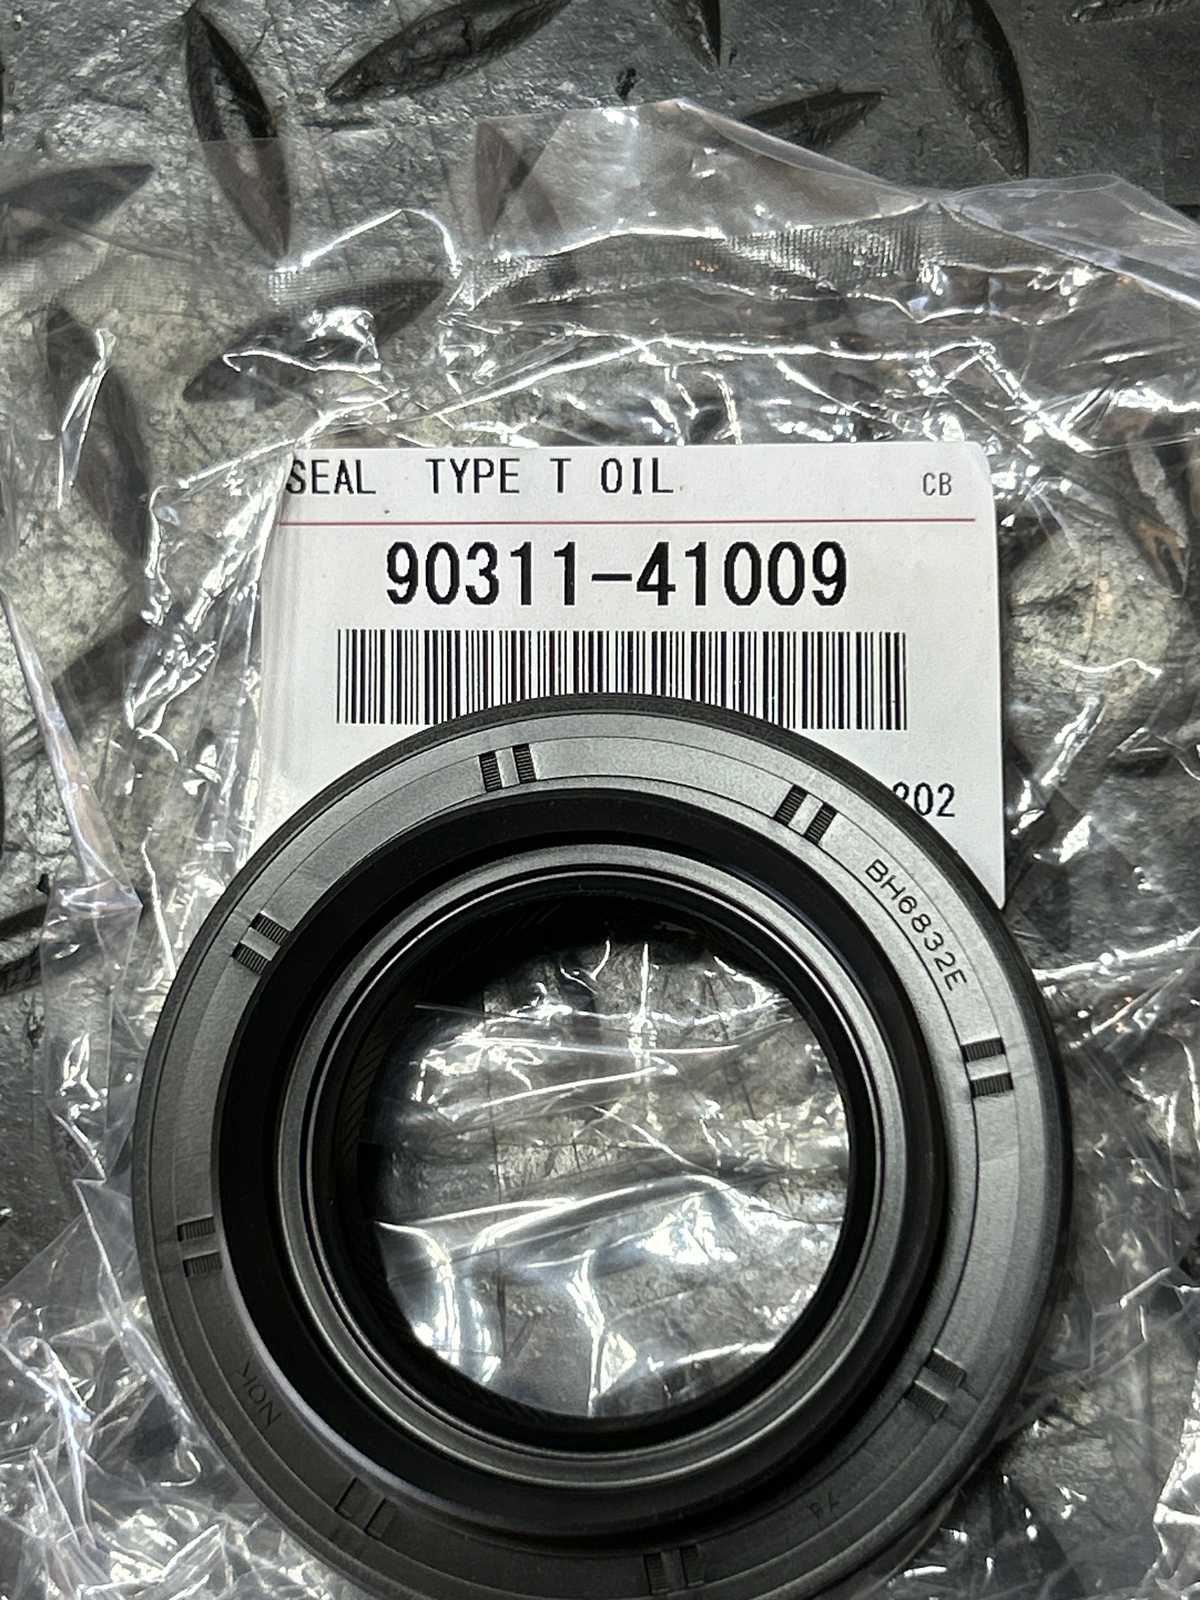
| Genuine Toyota seal designed for the 29 spline pinions. |
|
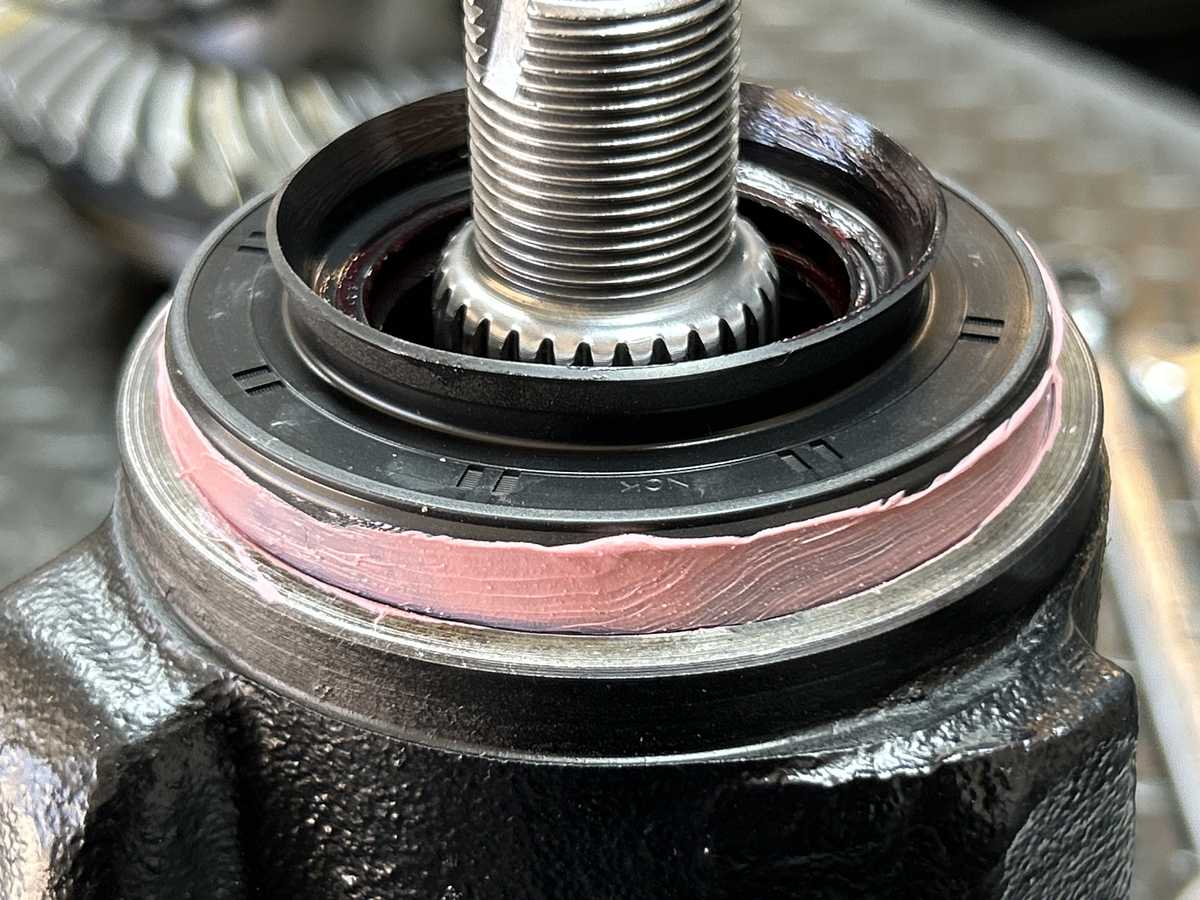
| Even with the rubberized seals, I can opt to use my choice of sealant...I chose FIPG. |
|
| Recessed 2mm. |
|
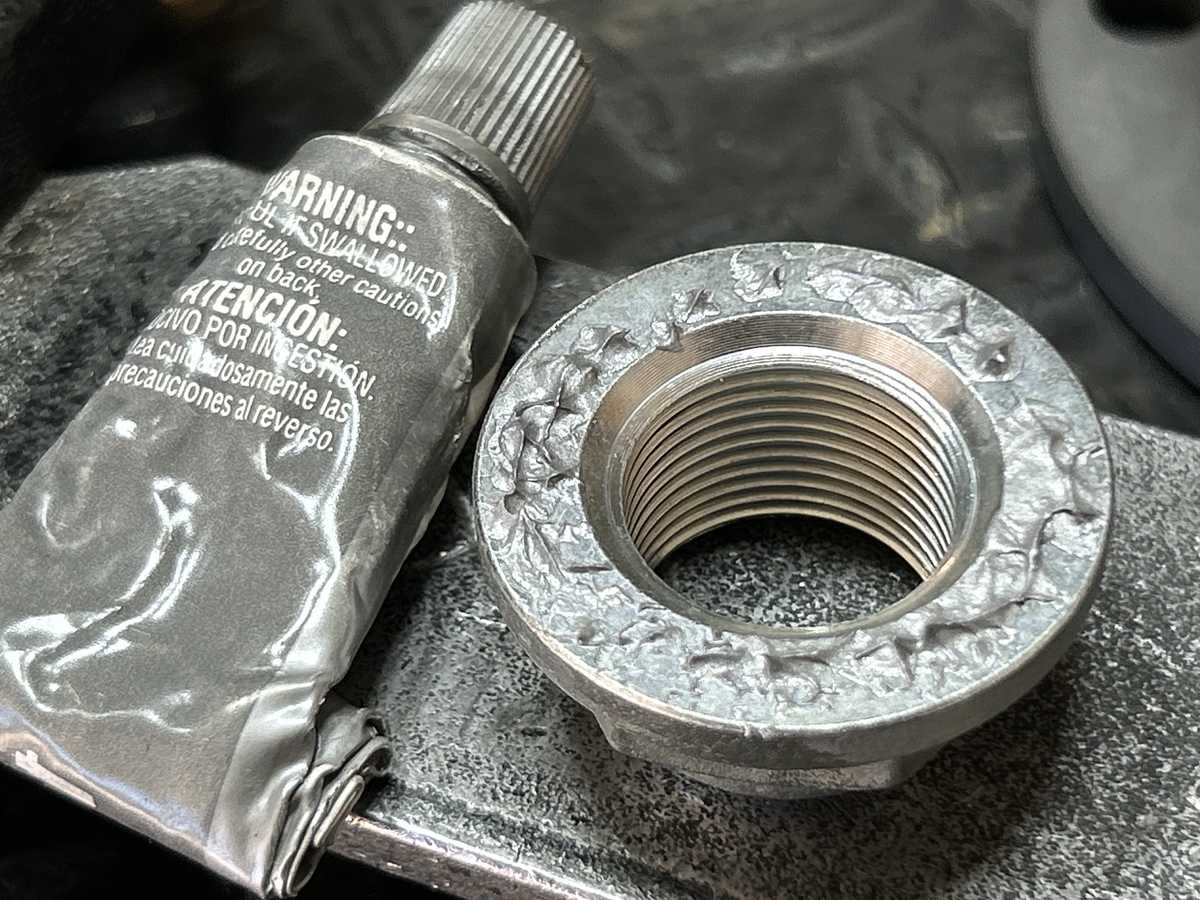
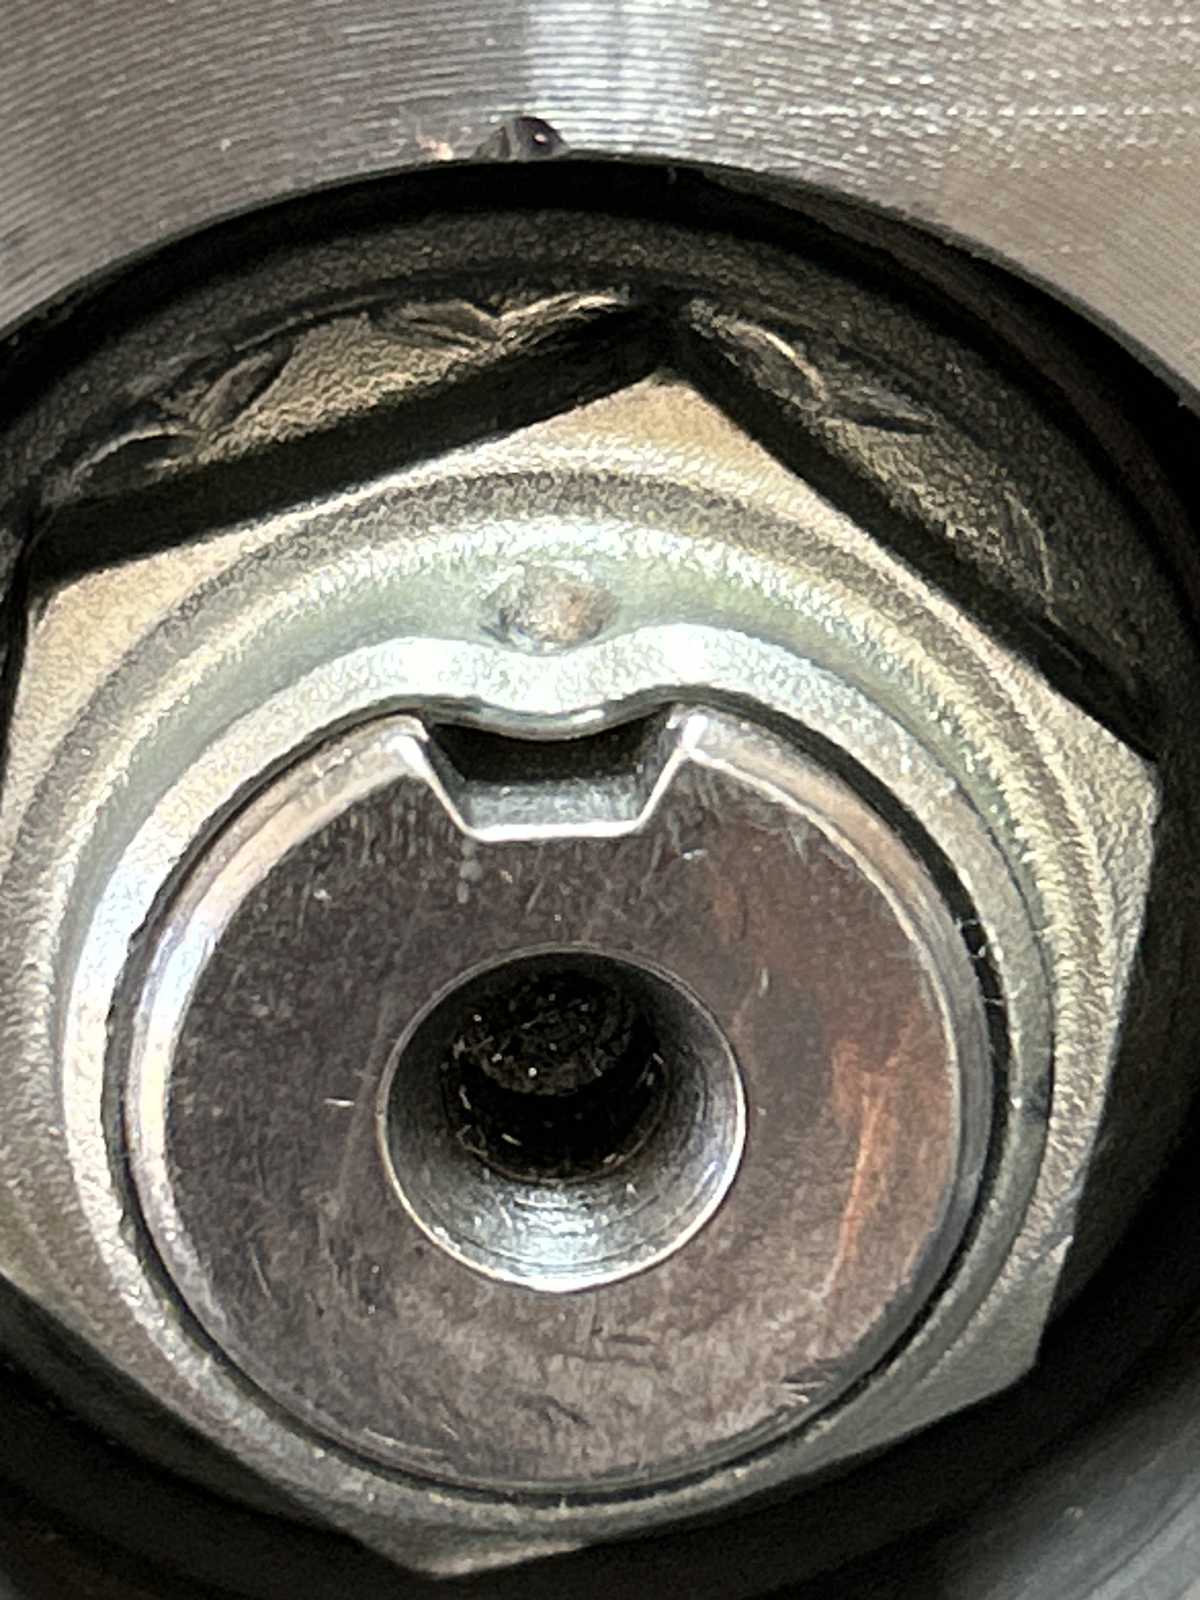
| That's aluminum based anti-seize on the threads. |
|
| Same on the bottom of the new nut. |
|
|
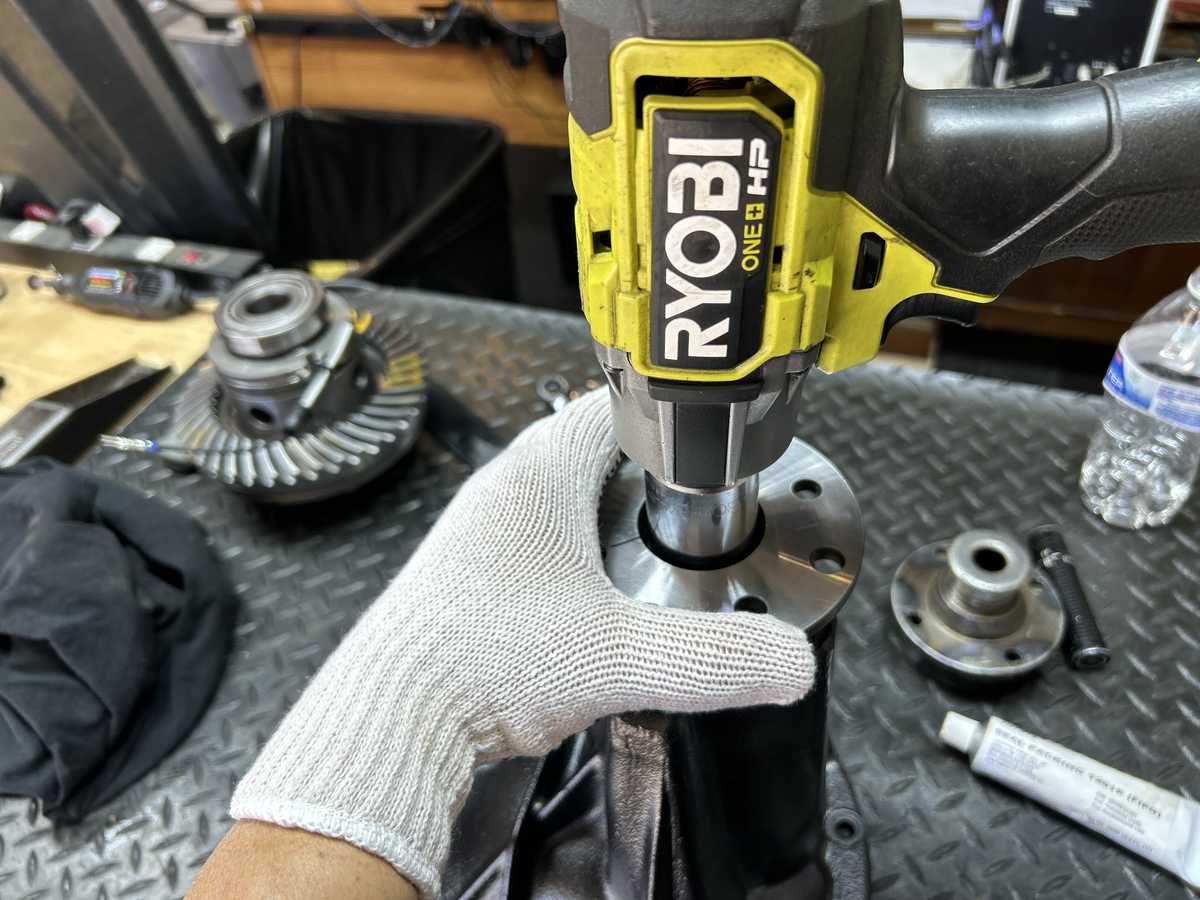
That removes so much of the friction that I can hold the flange with a couple of fingers and crush the crushsleeve using only medium power with the cordless impact.!! I have never overtightened it yet. |
|
| A nice smooth, repeatable 12 inch/pounds of PPL. |
|
| DING!! and this end is done. |
|
| 75 ft/lb on all 4.... |
|
| Backlash is measured in 20 places and recorded. |
|
|
1 final check of the patterns.... short 29 sec video showing the excellent "balance" from drive side to coast side |
|
| Again, I measured 3.6 ohms on this magnetic coil. |
|
| Again, it passed the 12 volt test. |
|
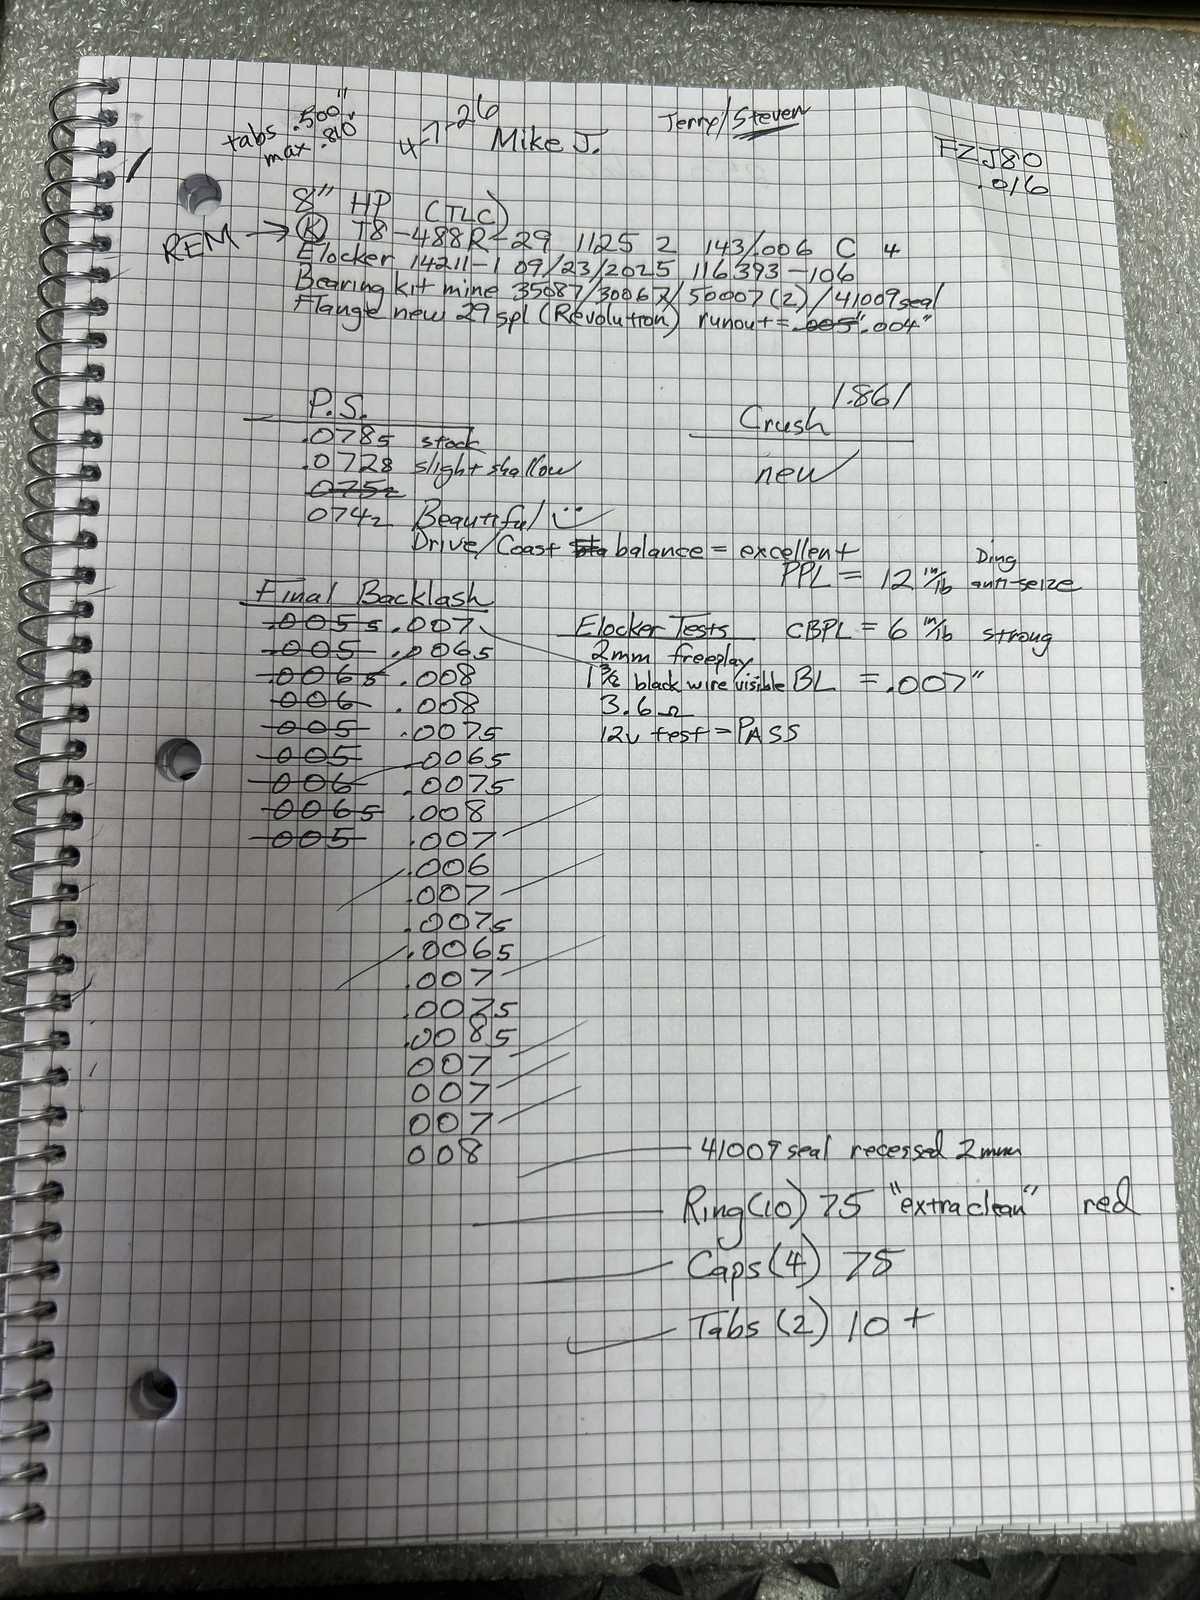
| Some data is "recorded". |
|
| Final notes of the front 8". :) |
|
|