| Nitro 4.56 gears and a Harrop elocker for CJ's 2015 Tacoma front 8" clam |
|---|
| (82 BIG pics loading) |
|---|
| AUGUST 13 2017 |
|---|
|
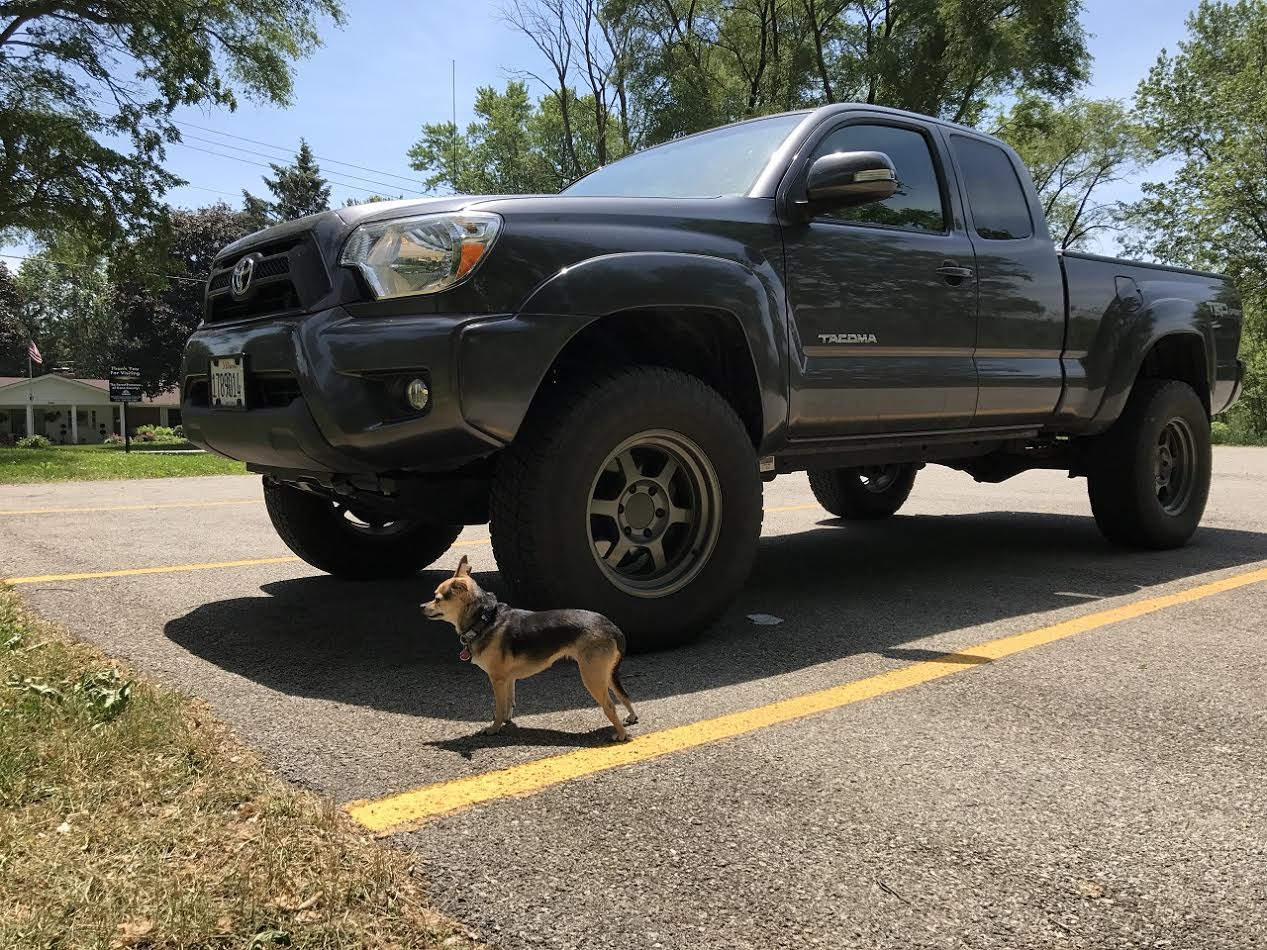
The truck has a basic lift setup... Bilstein 6112s up front and 5160s rear with Dakar leafs. FN 17x8 wheels.
Nitto Terra Grapper G2 33 inch tires (upgrading to 34 inch soon).
CJ will be doing the hands-on install of the TrueTrac and 4.56 gears to the rear. |
|---|
|
|
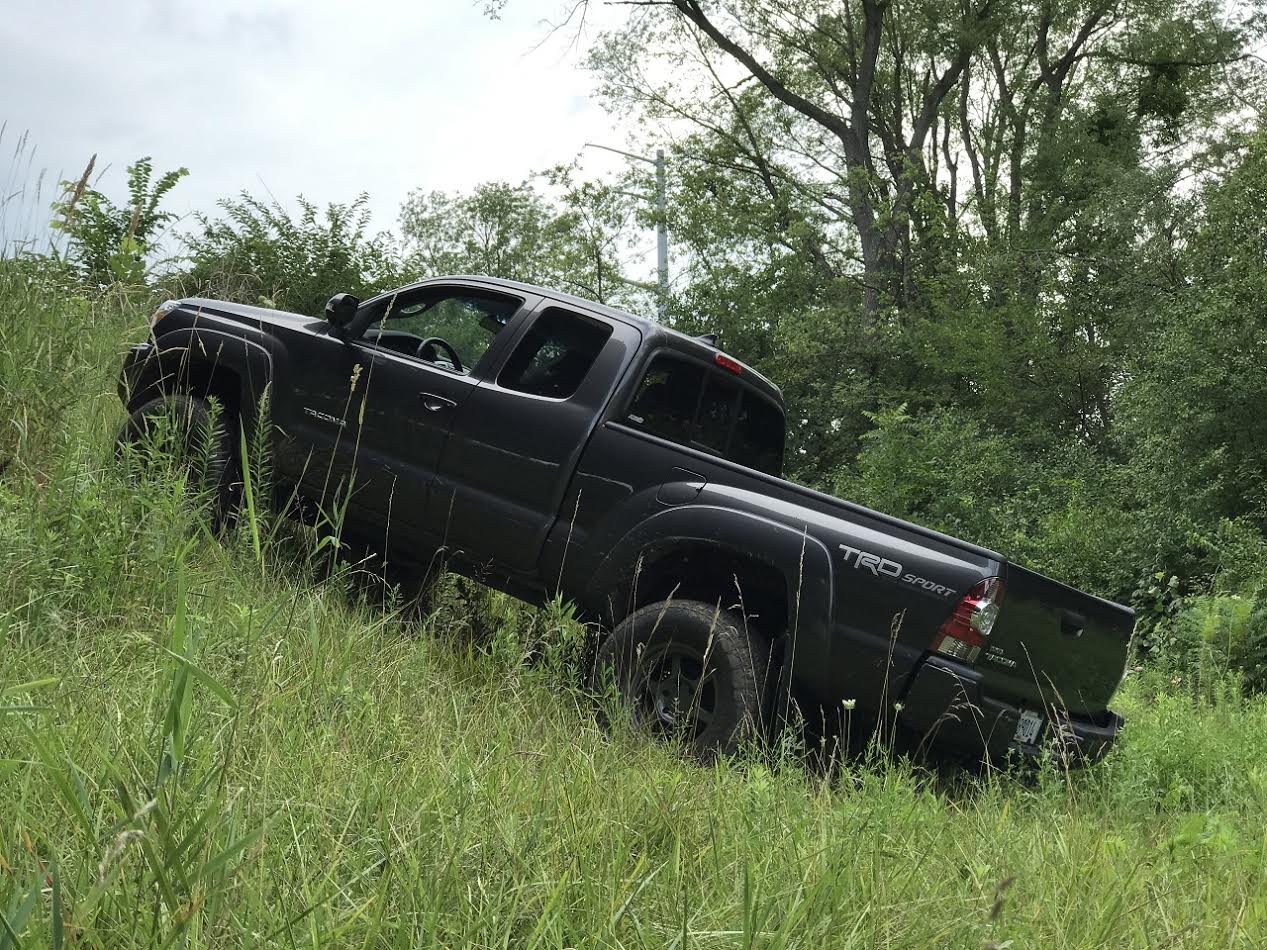
Future plans include a trail in Michigan as well as a long road trip to Utah (Moab, of course).
I recommended the Gold Bar Rim trail for the scenic cliff lunch spot overlook.......
and Moab Rim trail for the infamous "Z Turn"....and thinking about it,
maybe a good trail guide, one that knows the best route up the
rocky stairstep shelving at the Z is the advisable thing to do..
A trail guide by the name of Dan Mick. |
|---|
|
|
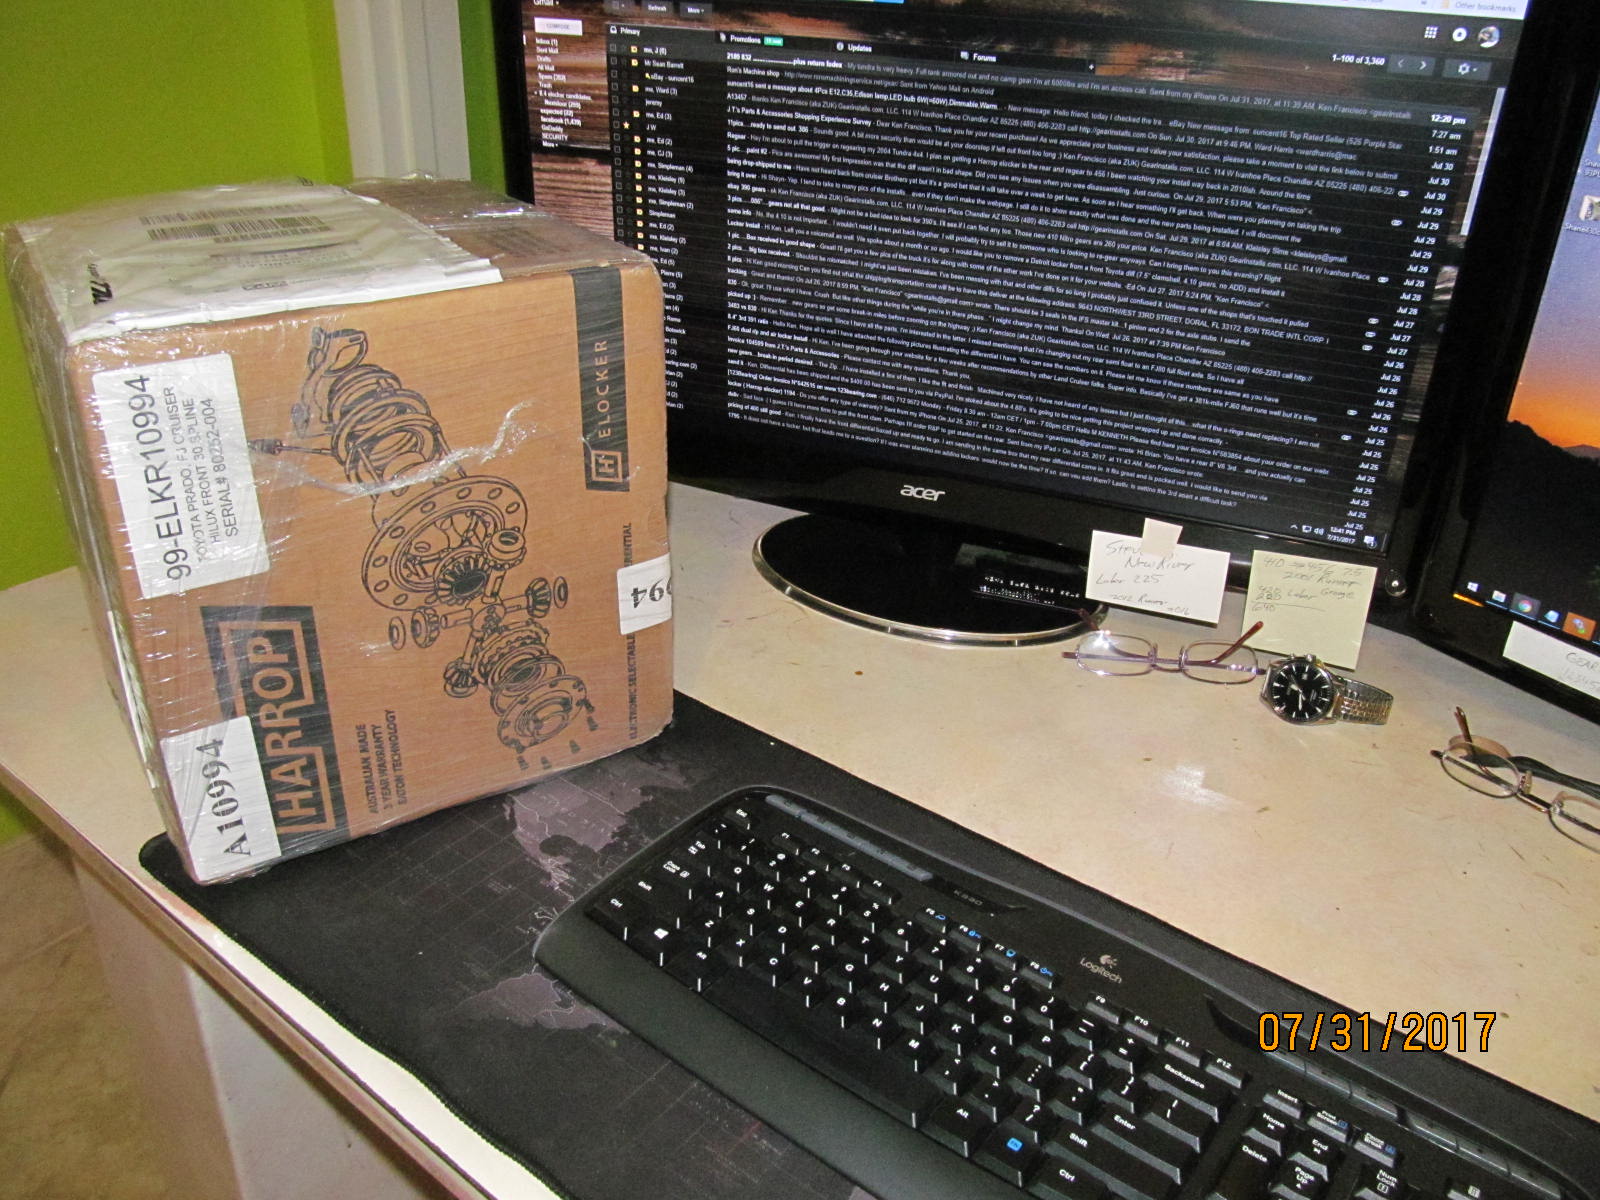
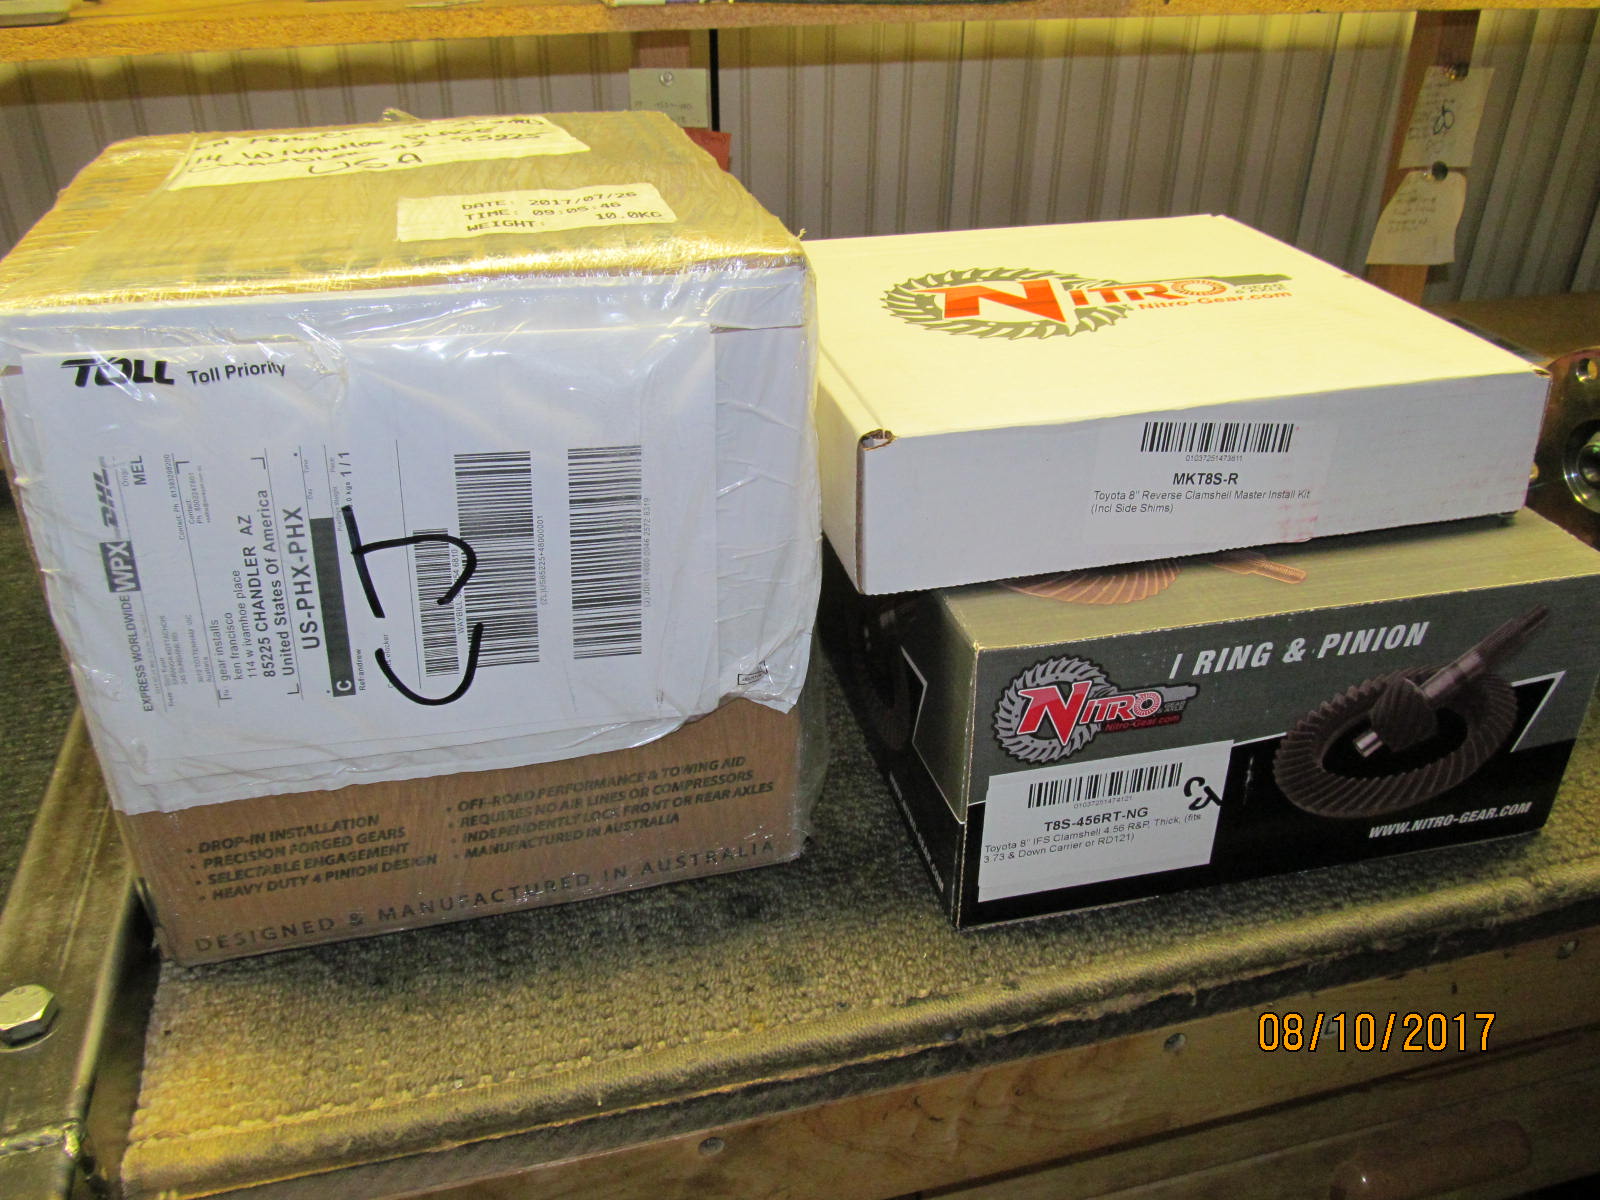
| Australian Elocker as received directly from overseas. It only took 8~10 days to get to my shop. |
|---|
|
|
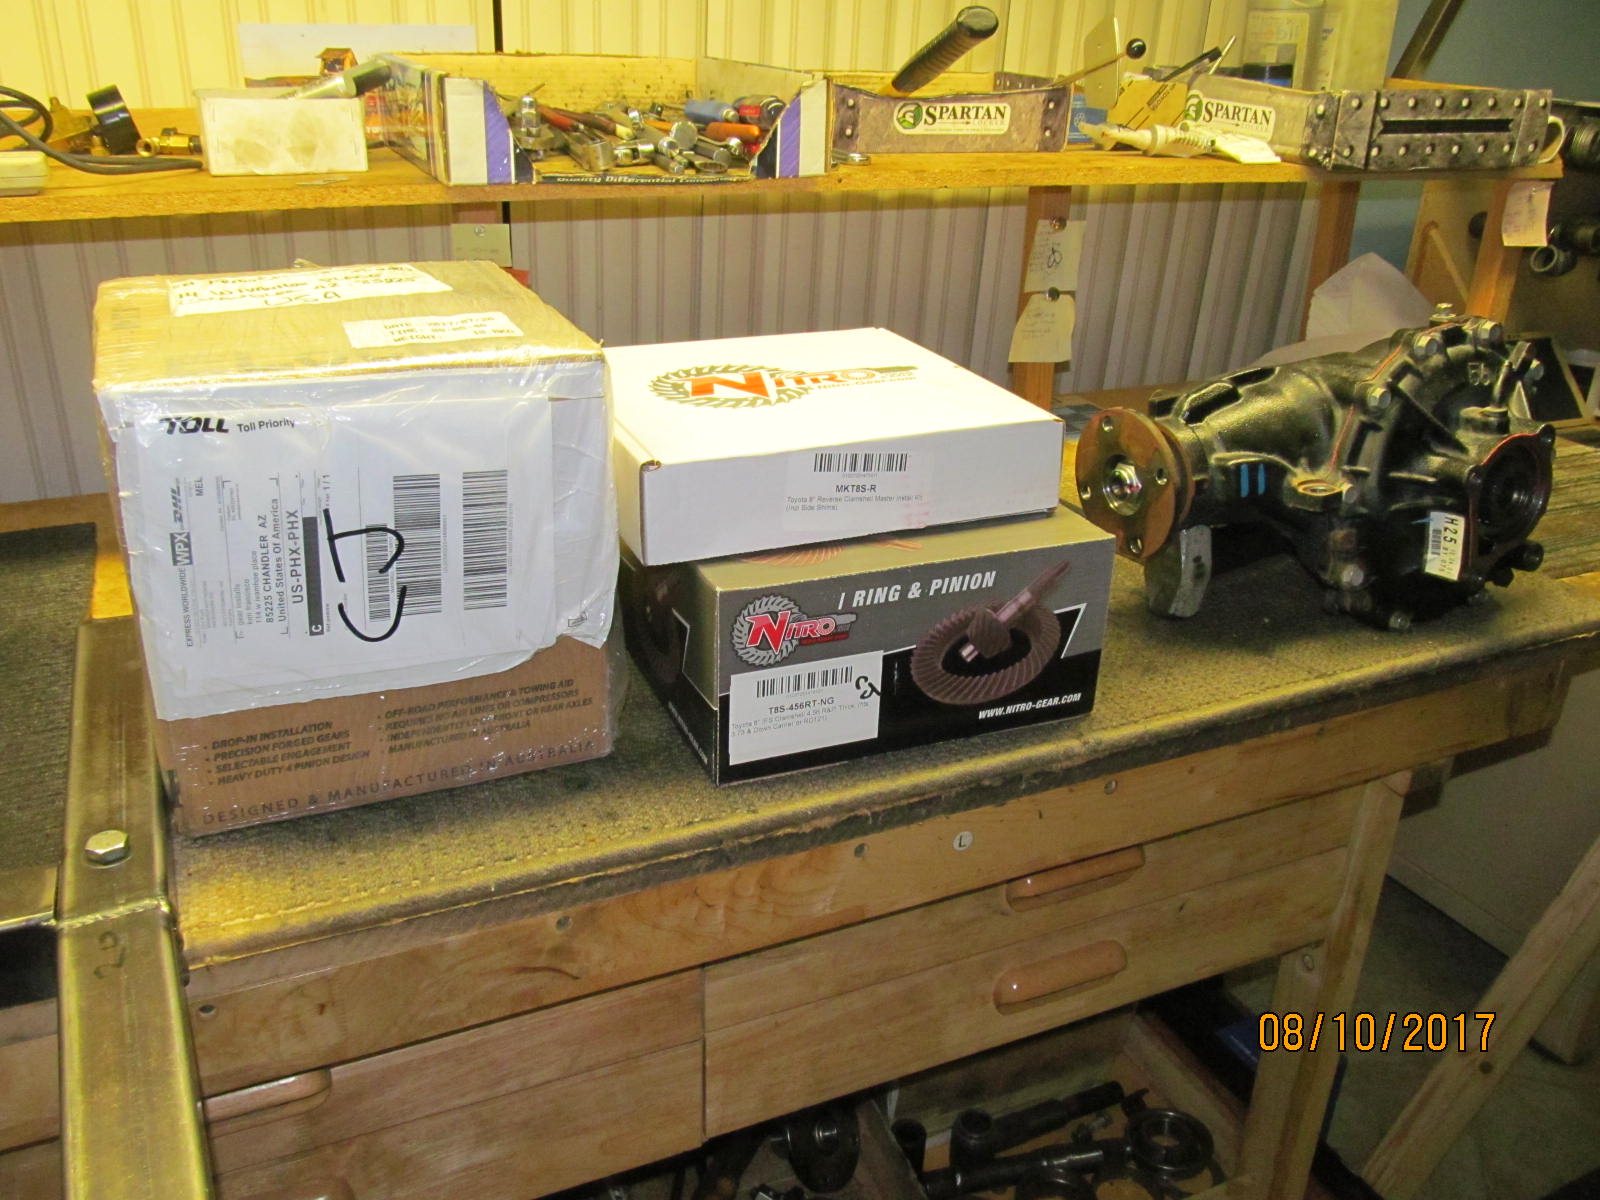
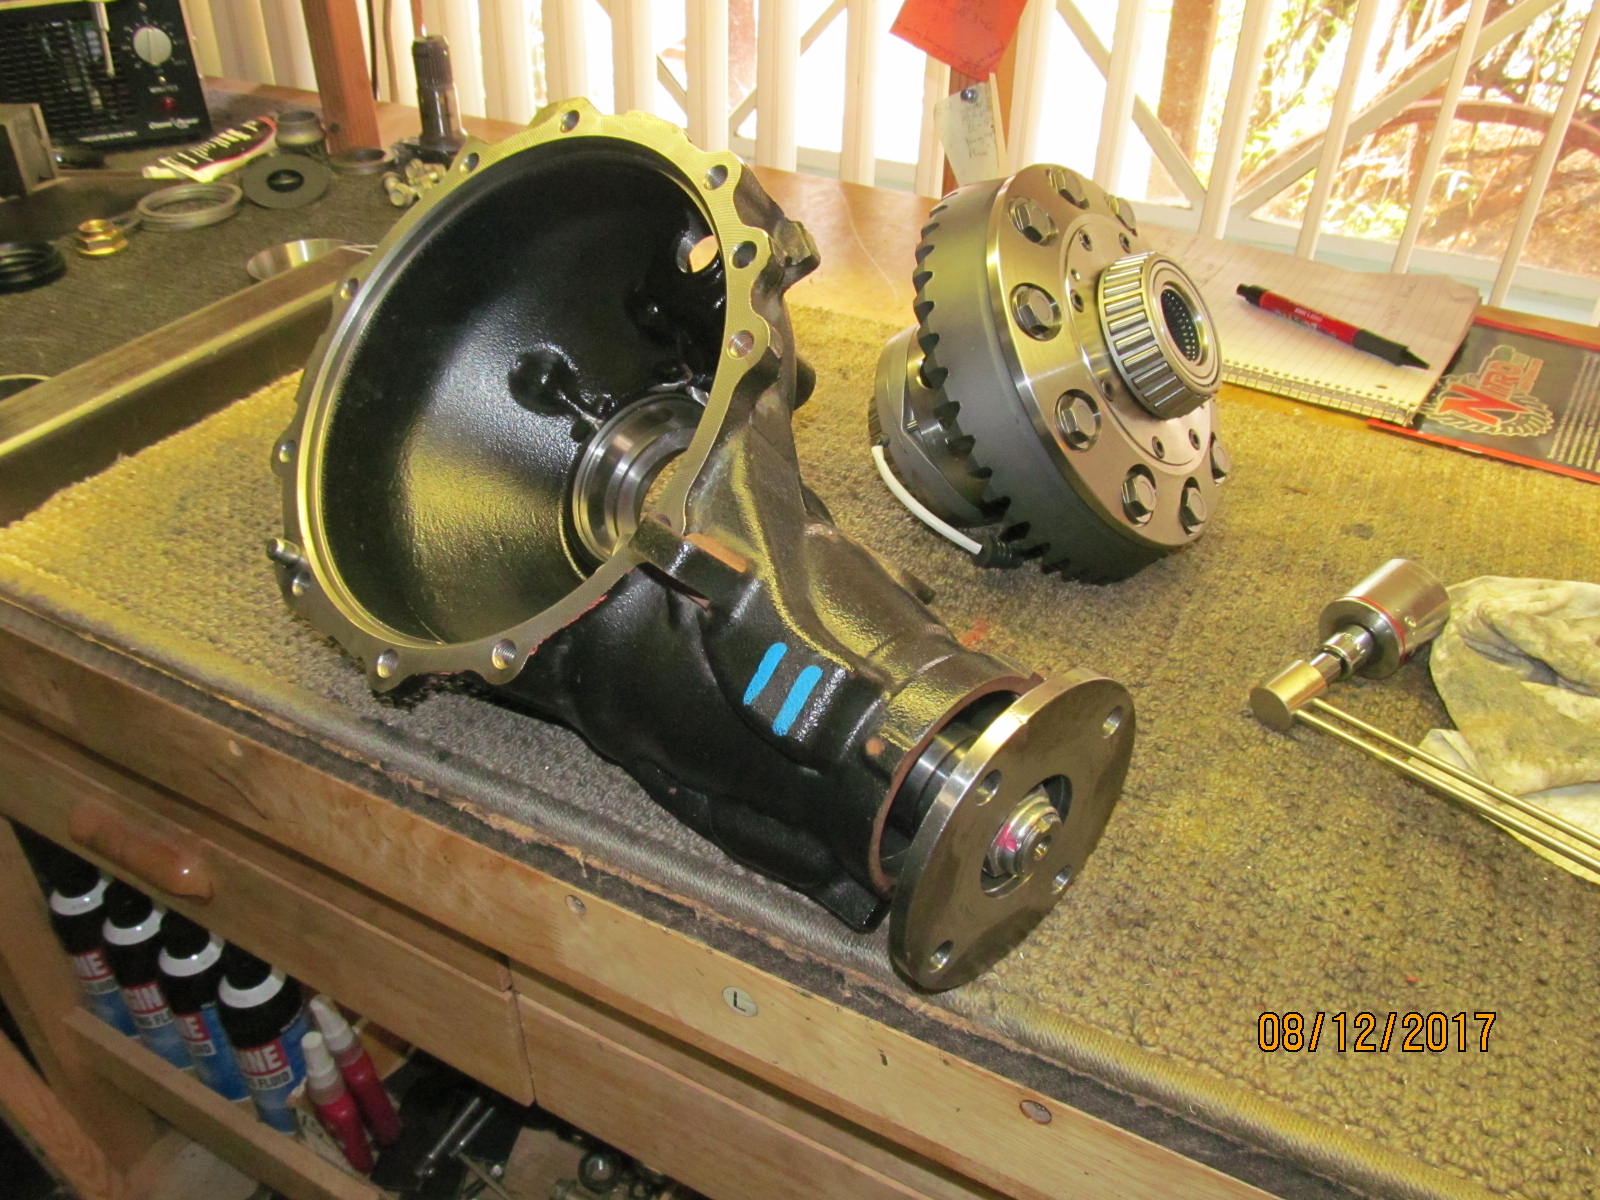
| Items are organized on the bench. On the left is the elocker then the Nitro 456 8" gears with the Nitro master kit, and finally the 8" clam from CJ. |
|---|
|
|
| ,,,,,,,,,,,,,,,,,,,,,,,,,,,,,,,,,,,,, |
|---|
|

|
| ,,,,,,,,,,,,,,,,,,,,,,,,,,,,,,,,,,, |
|---|
|
|
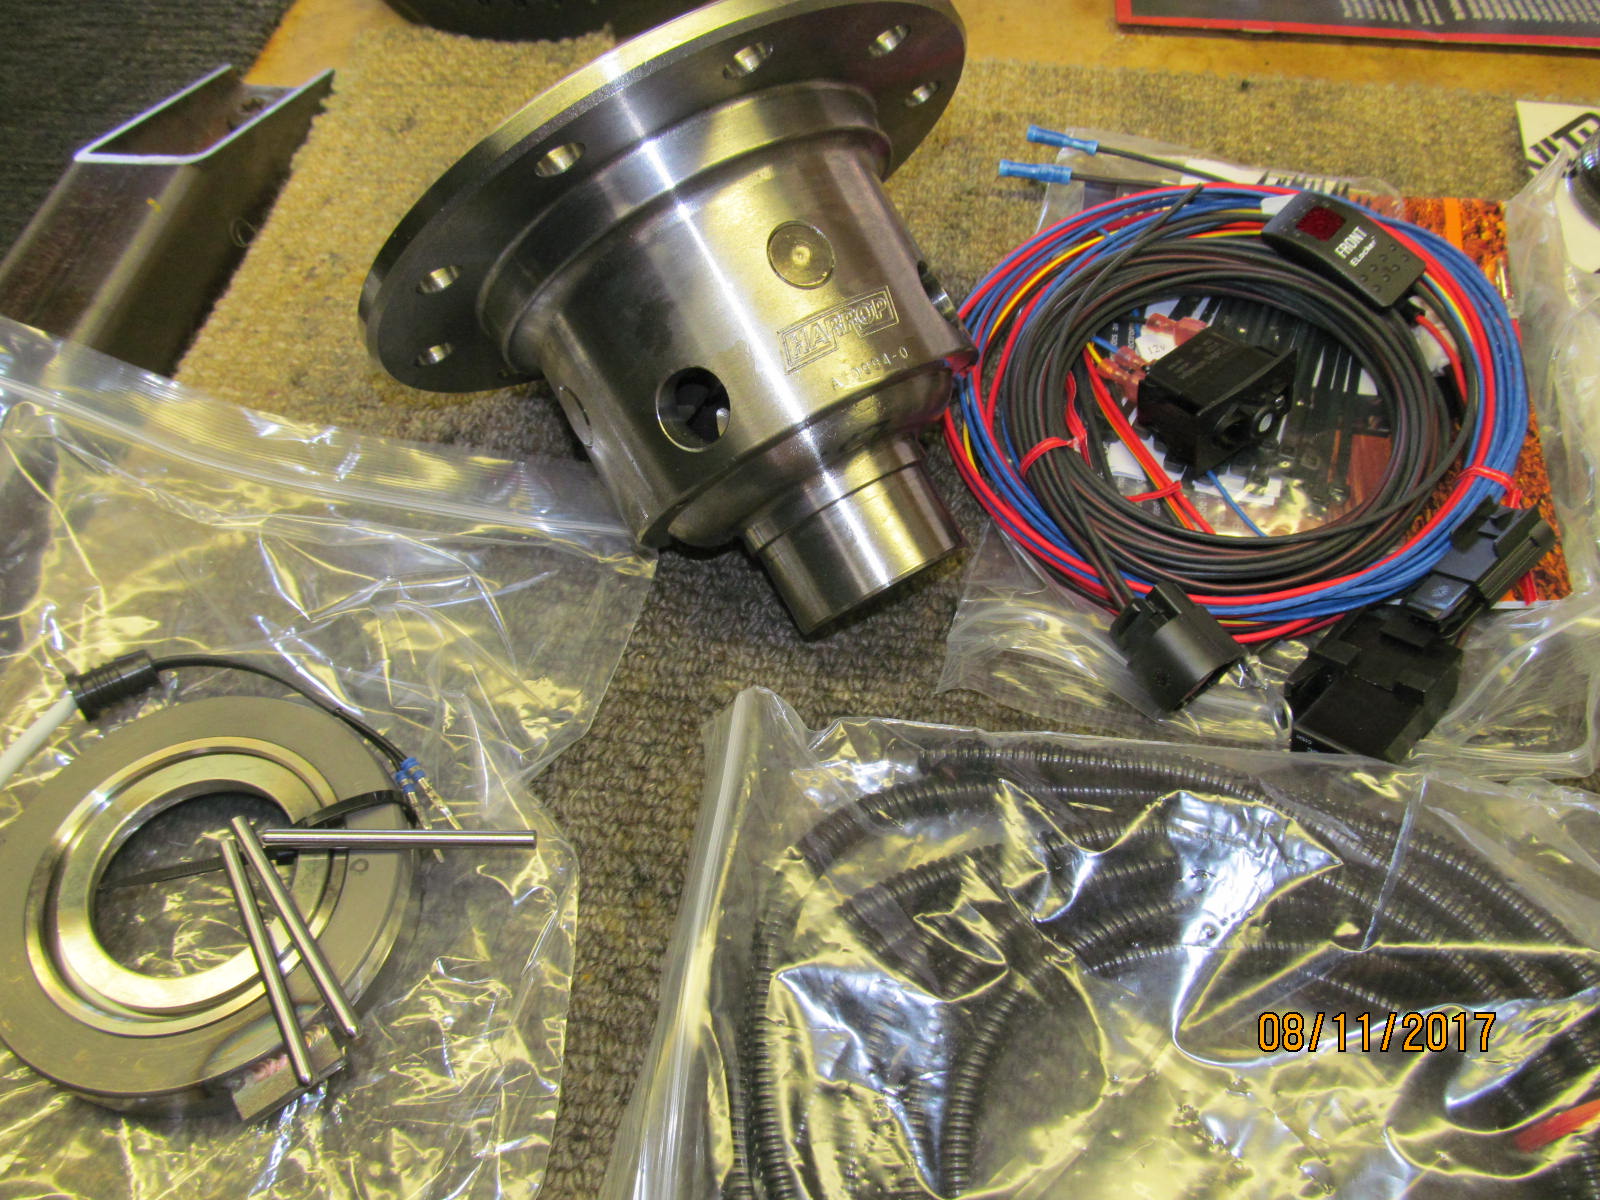
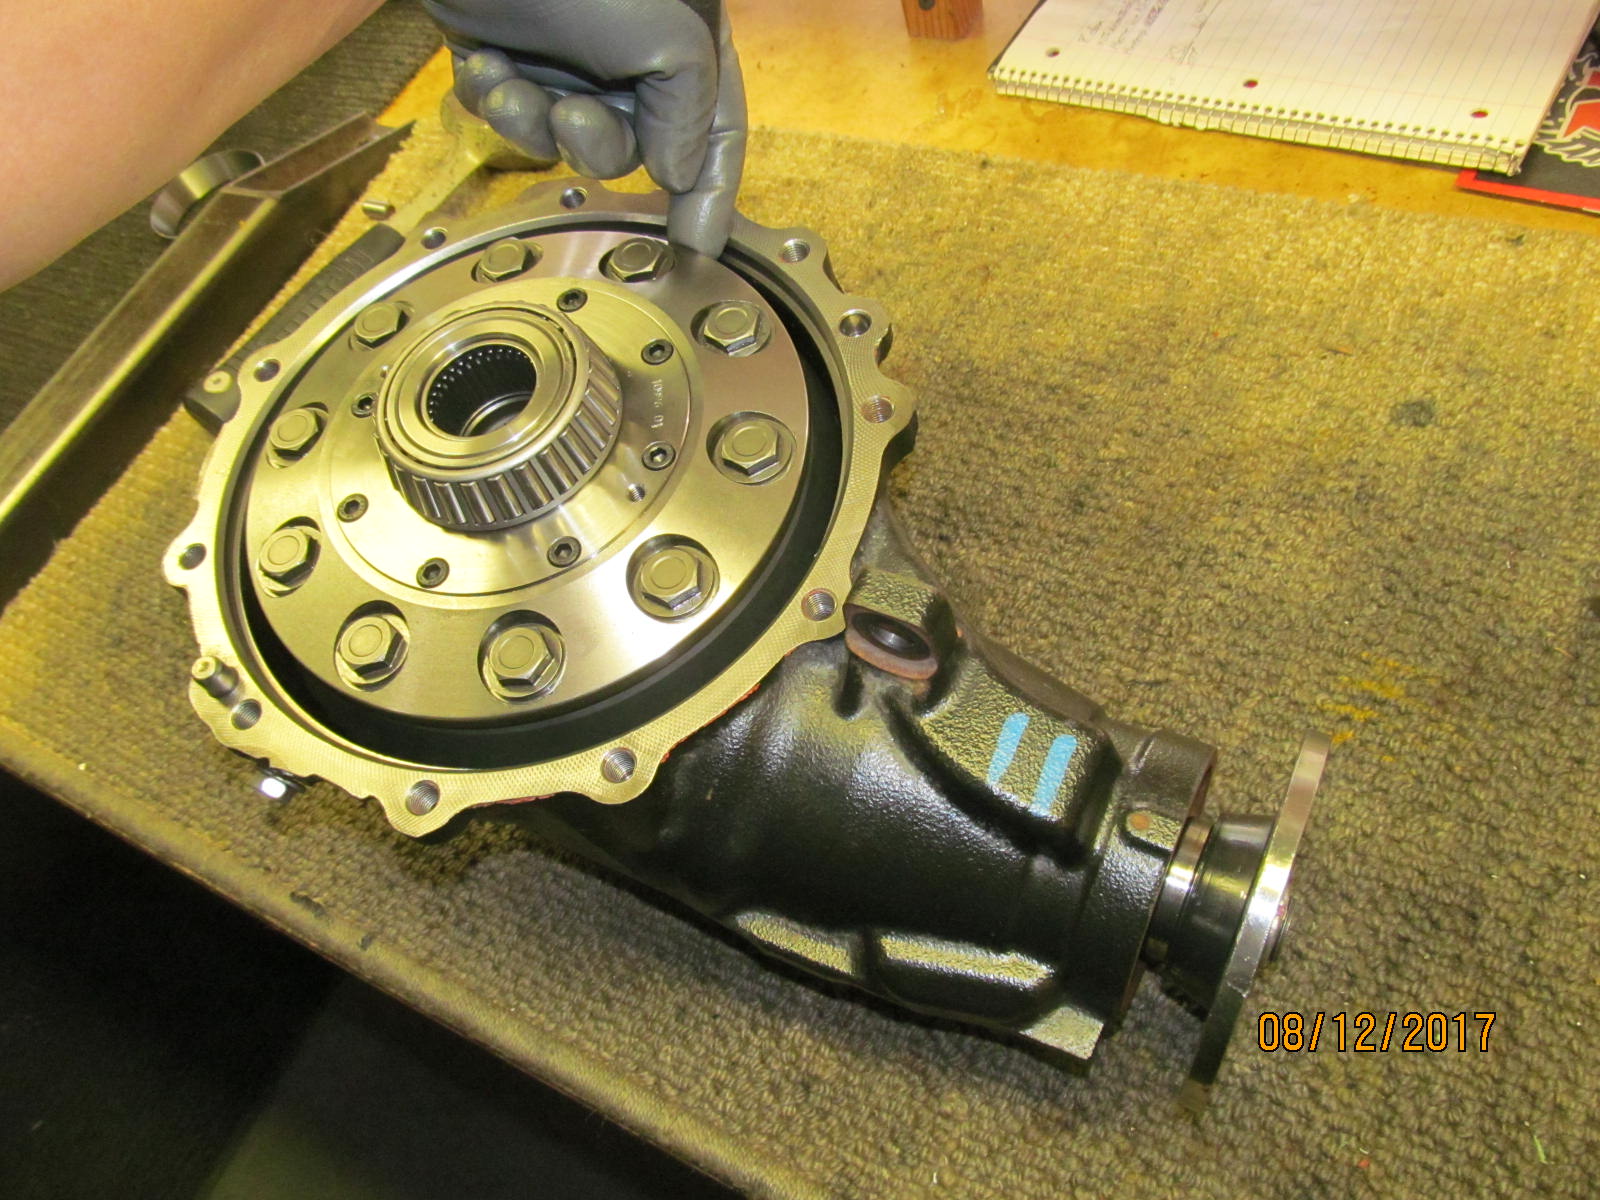
| This model has the electro-magnetic assembly not pre-installed. |
|---|
|
|
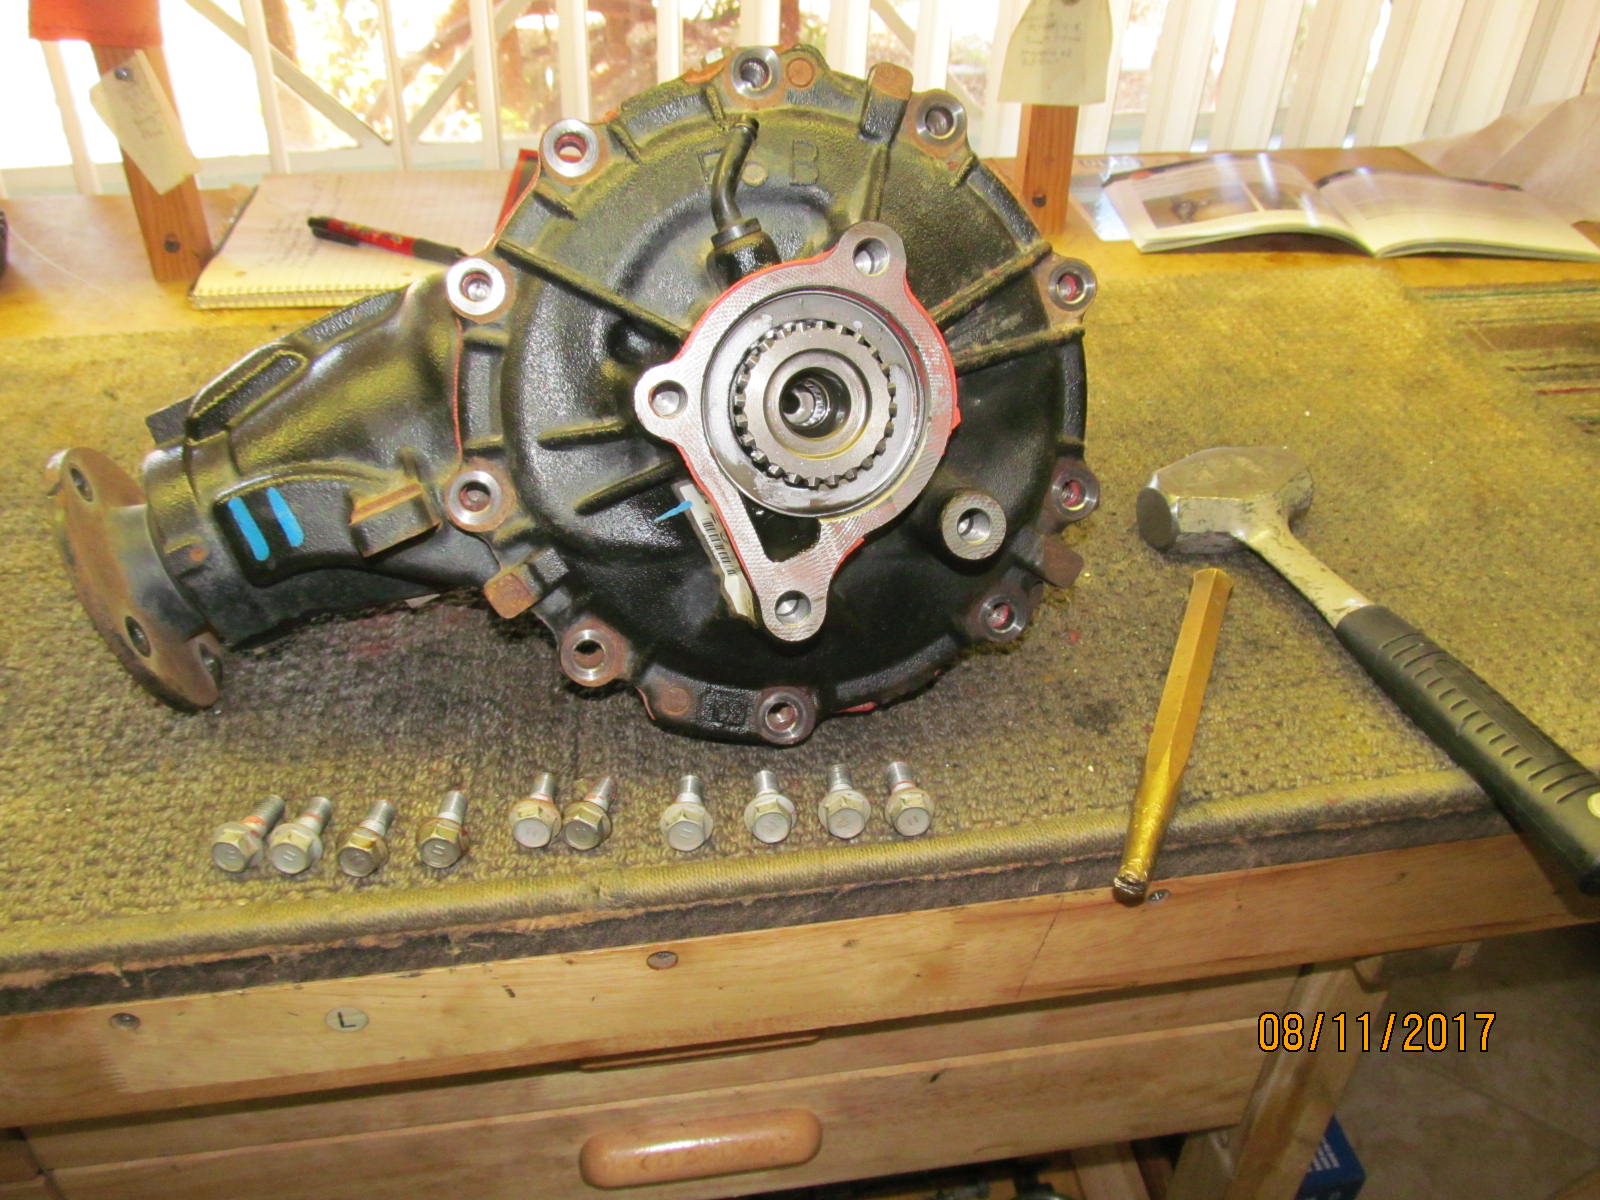
| Disassembly starts by removing the ten 14mm bolts from the lid. |
|---|
|
|
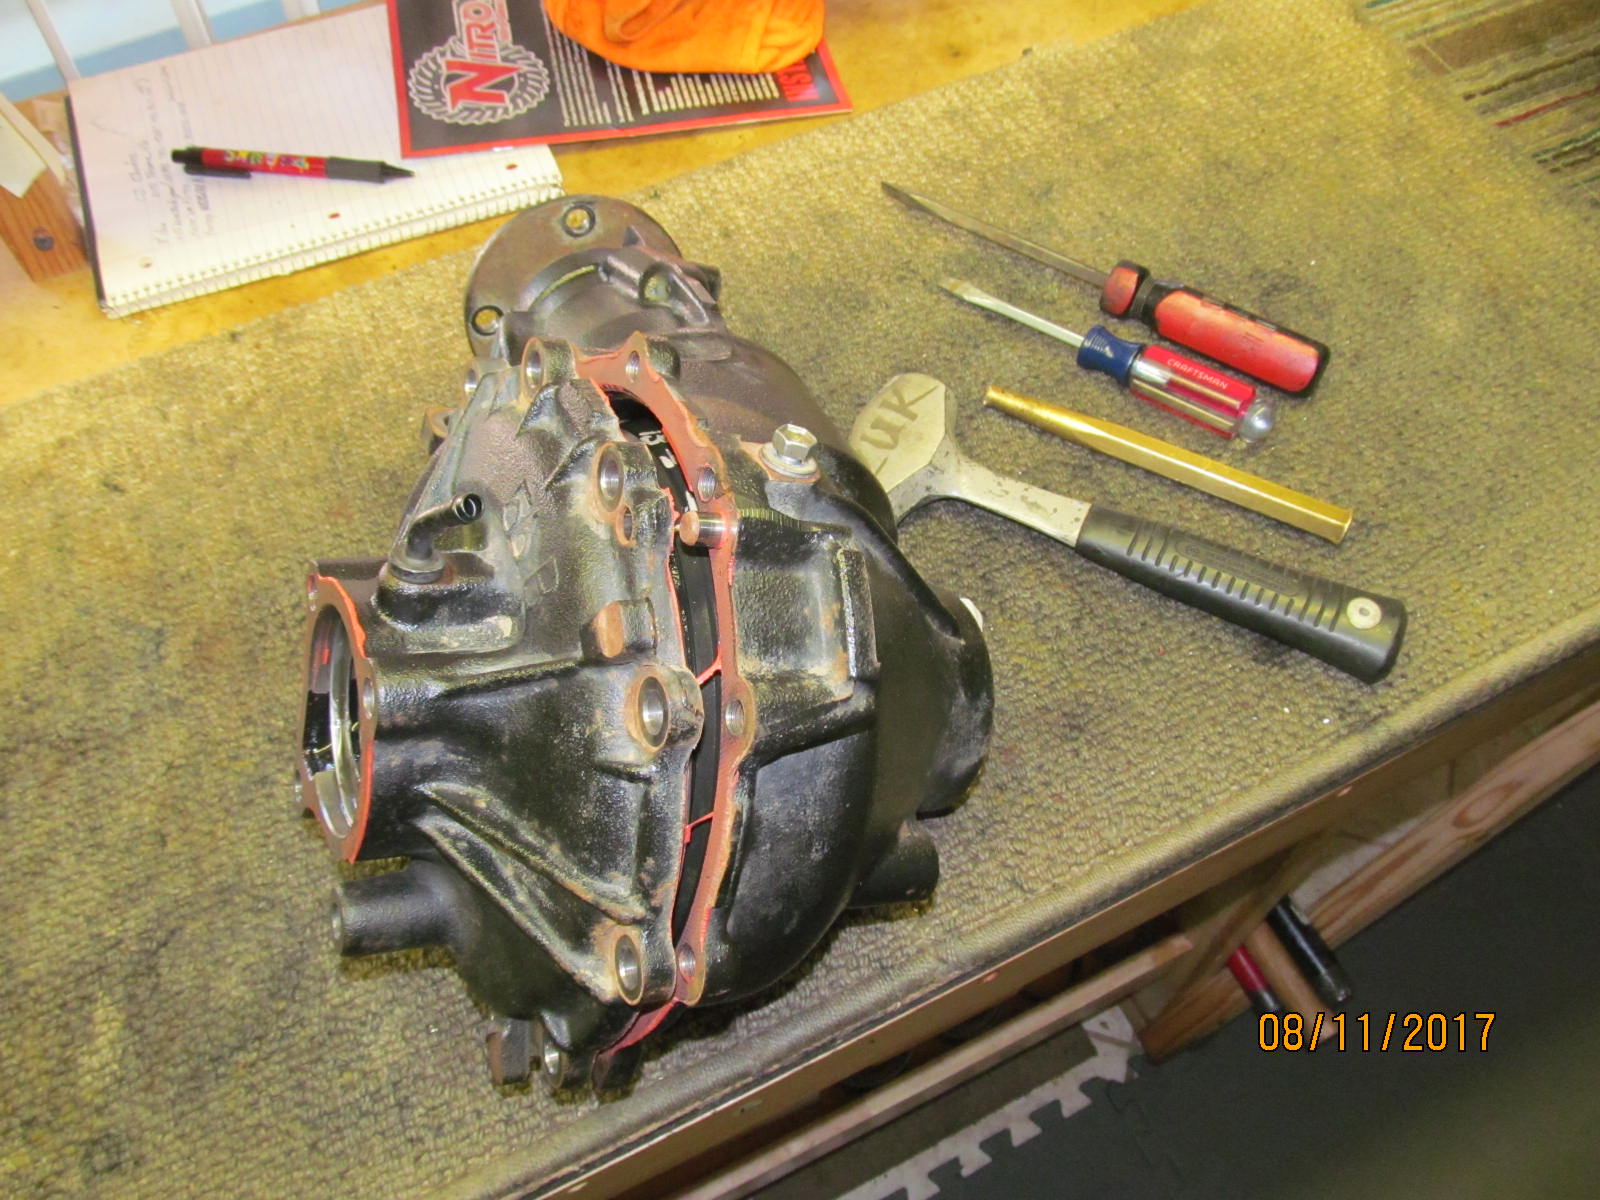
| Tap tap all the way around with a brass punch and the lid is loose. |
|---|
|
|
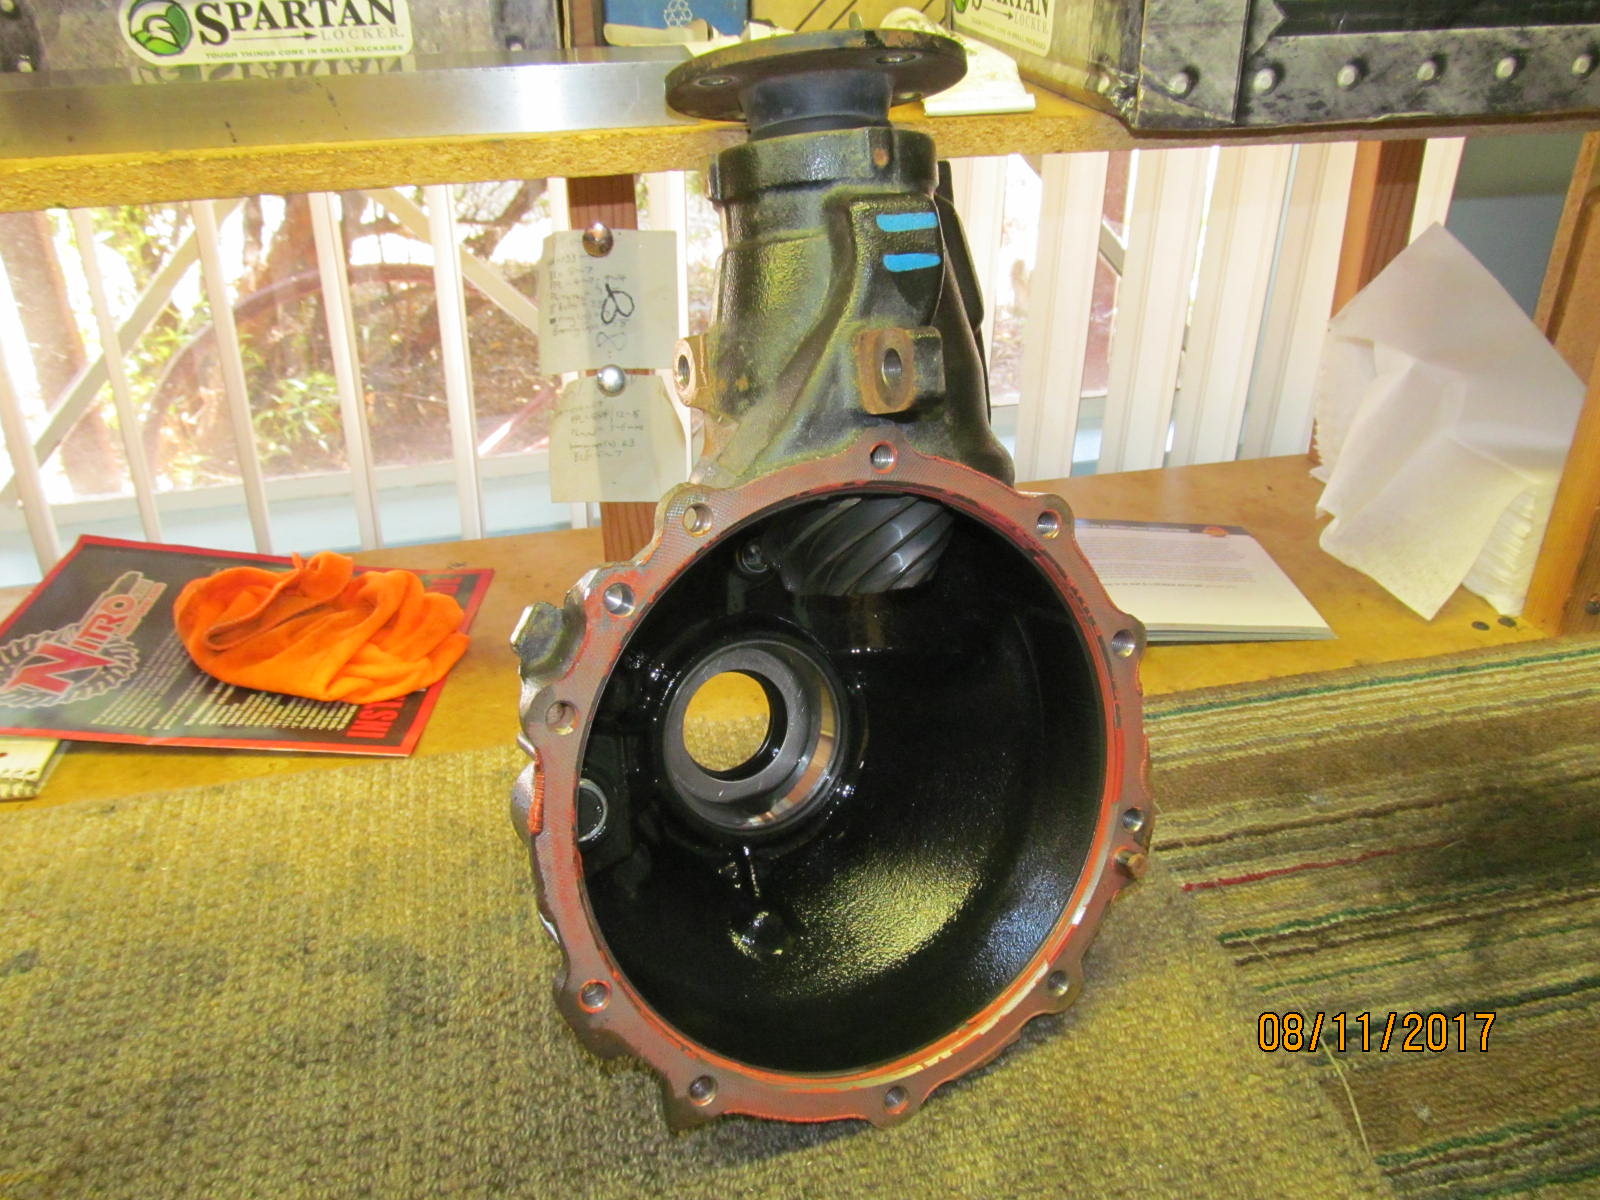
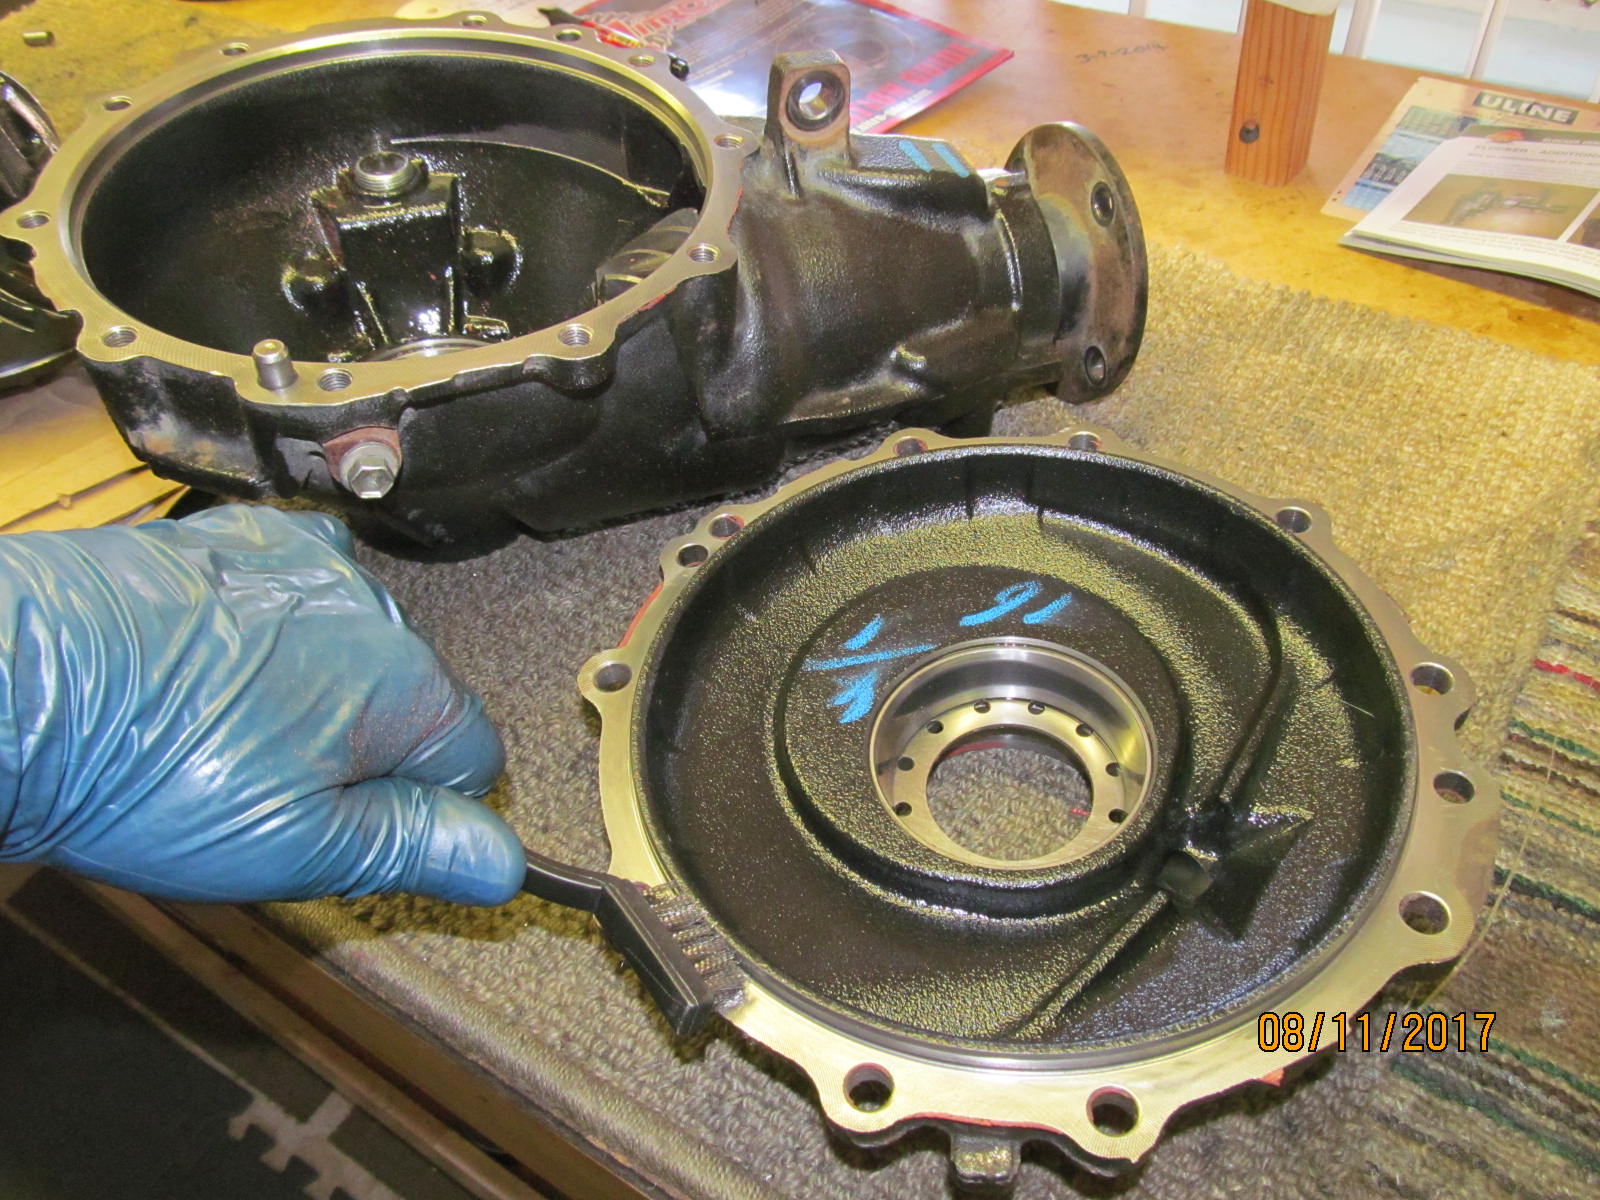
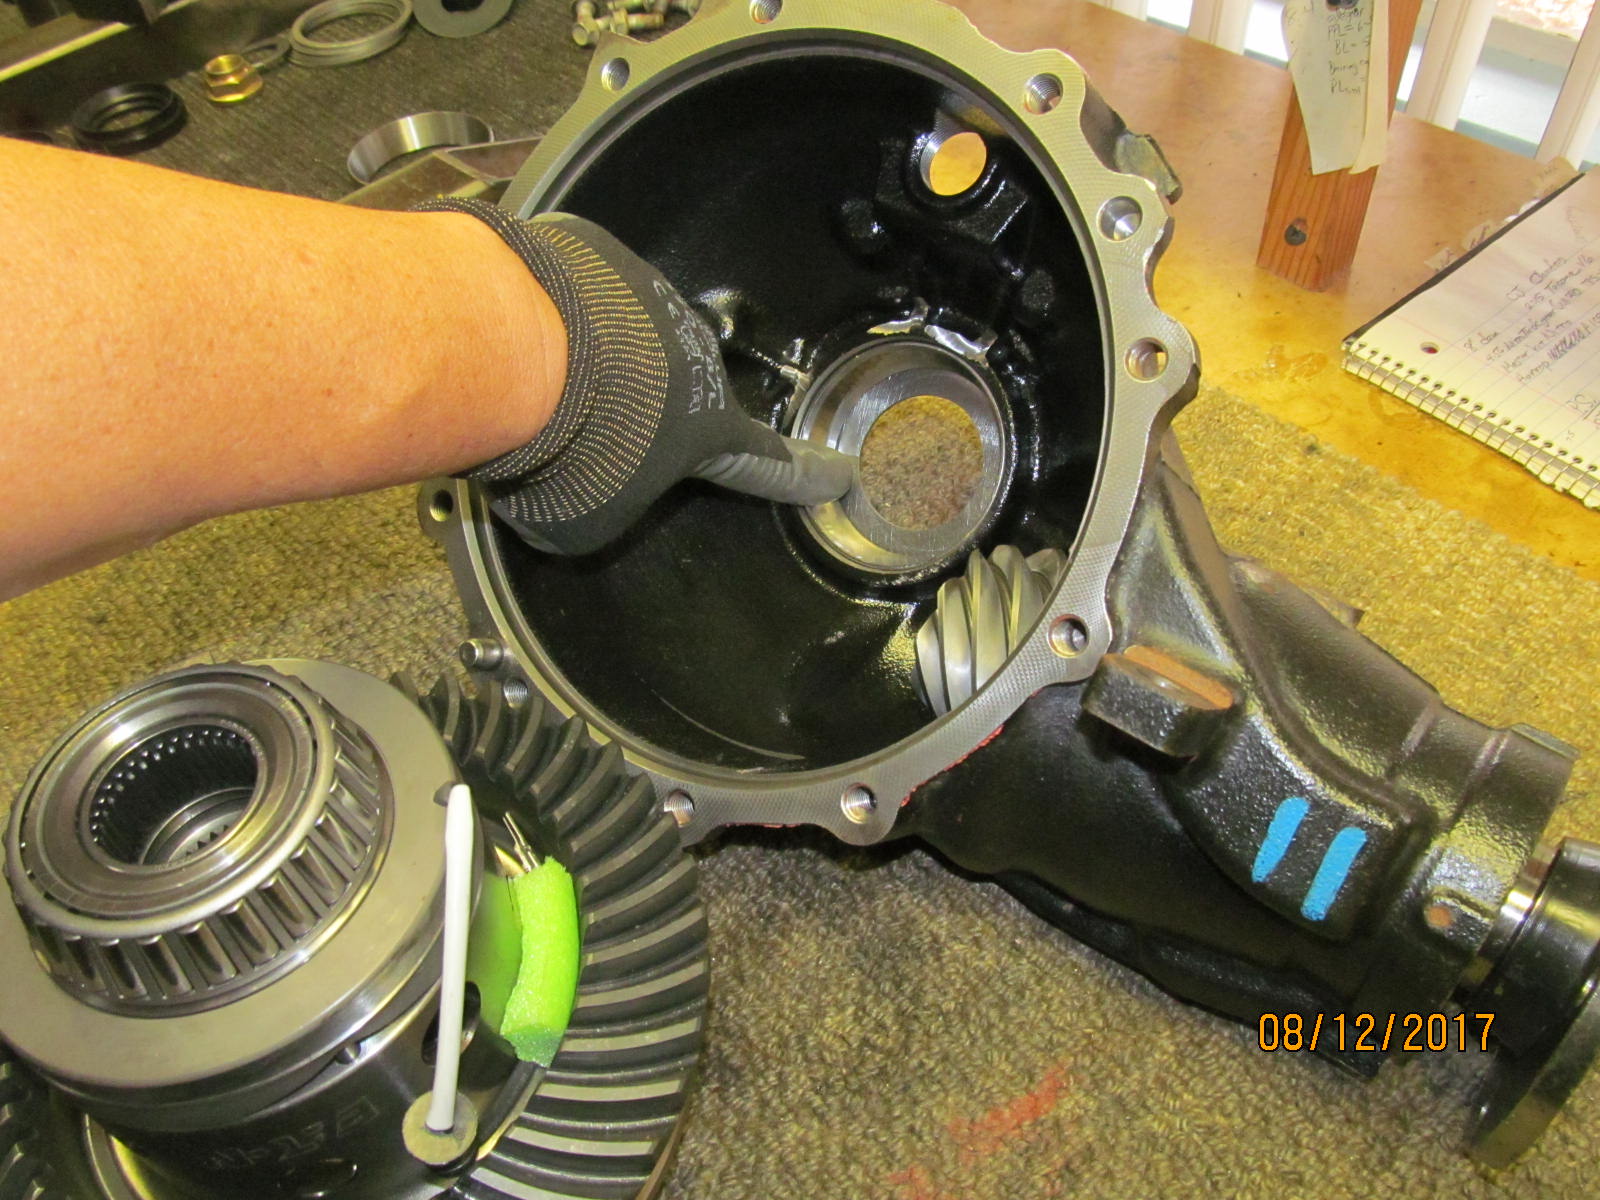
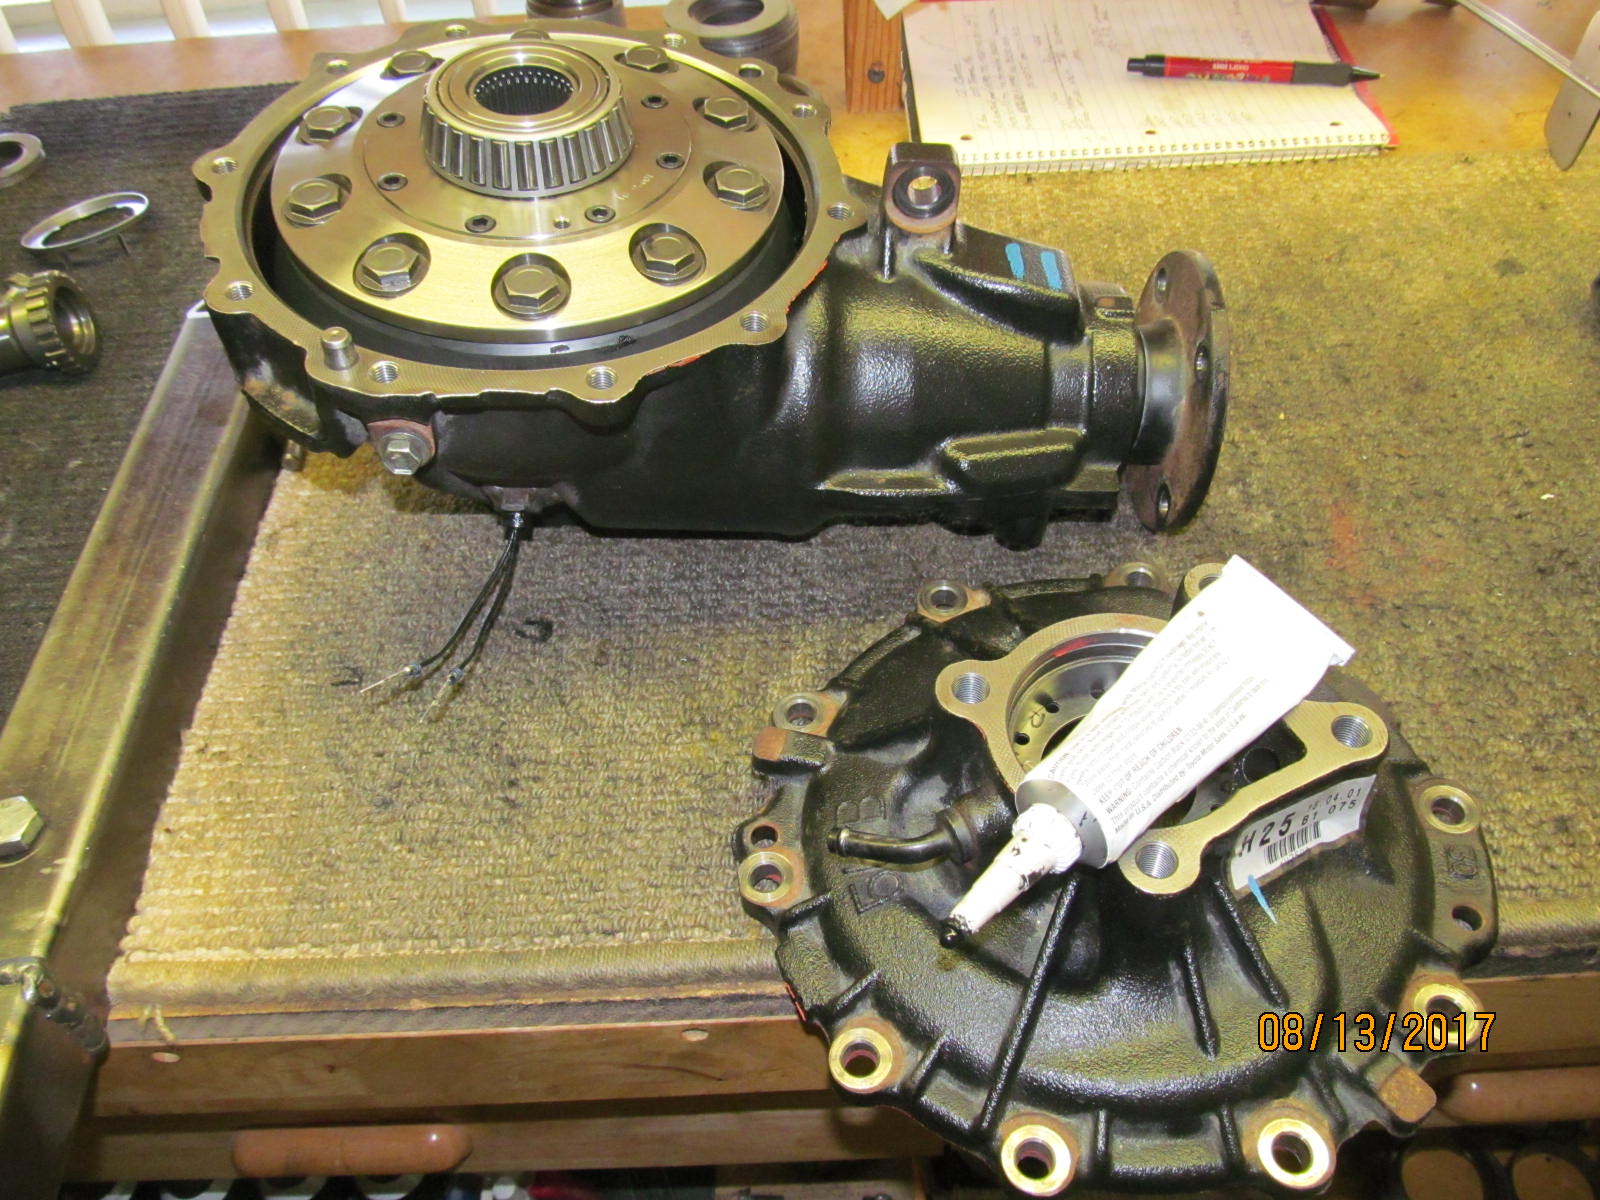
| The bowl..... |
|---|
|
|
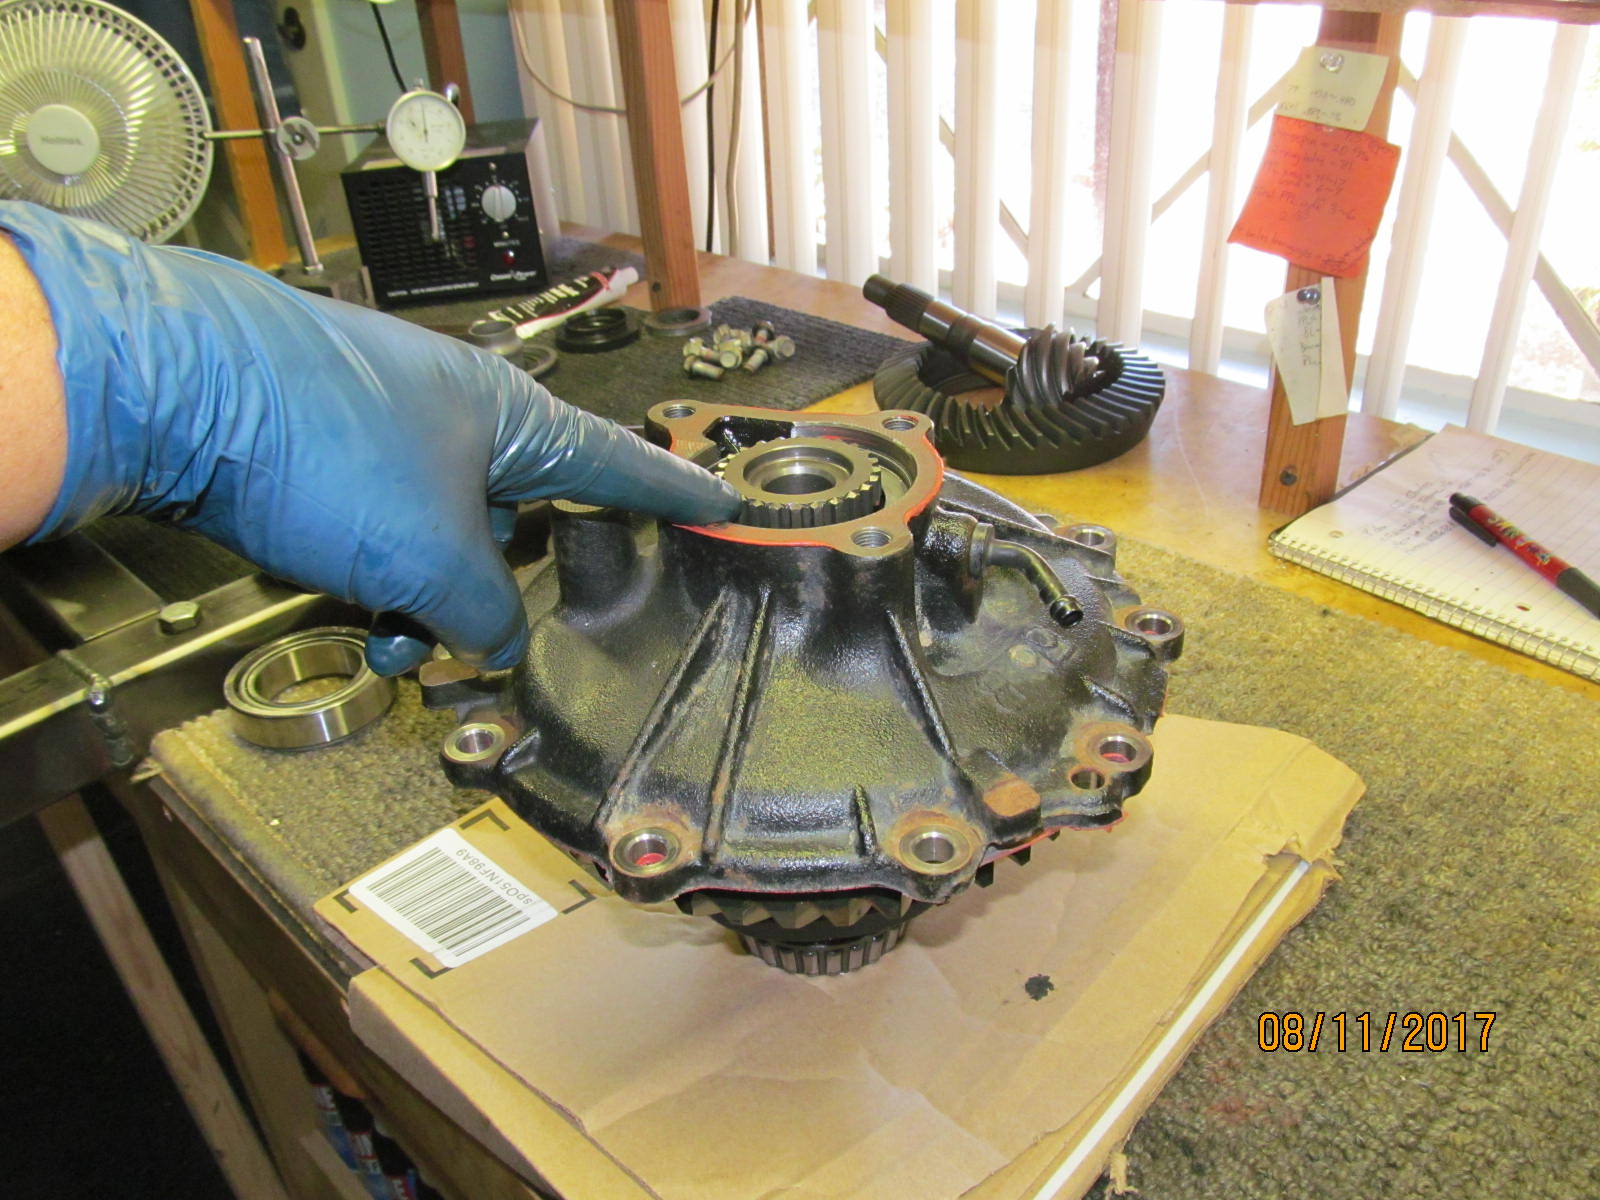
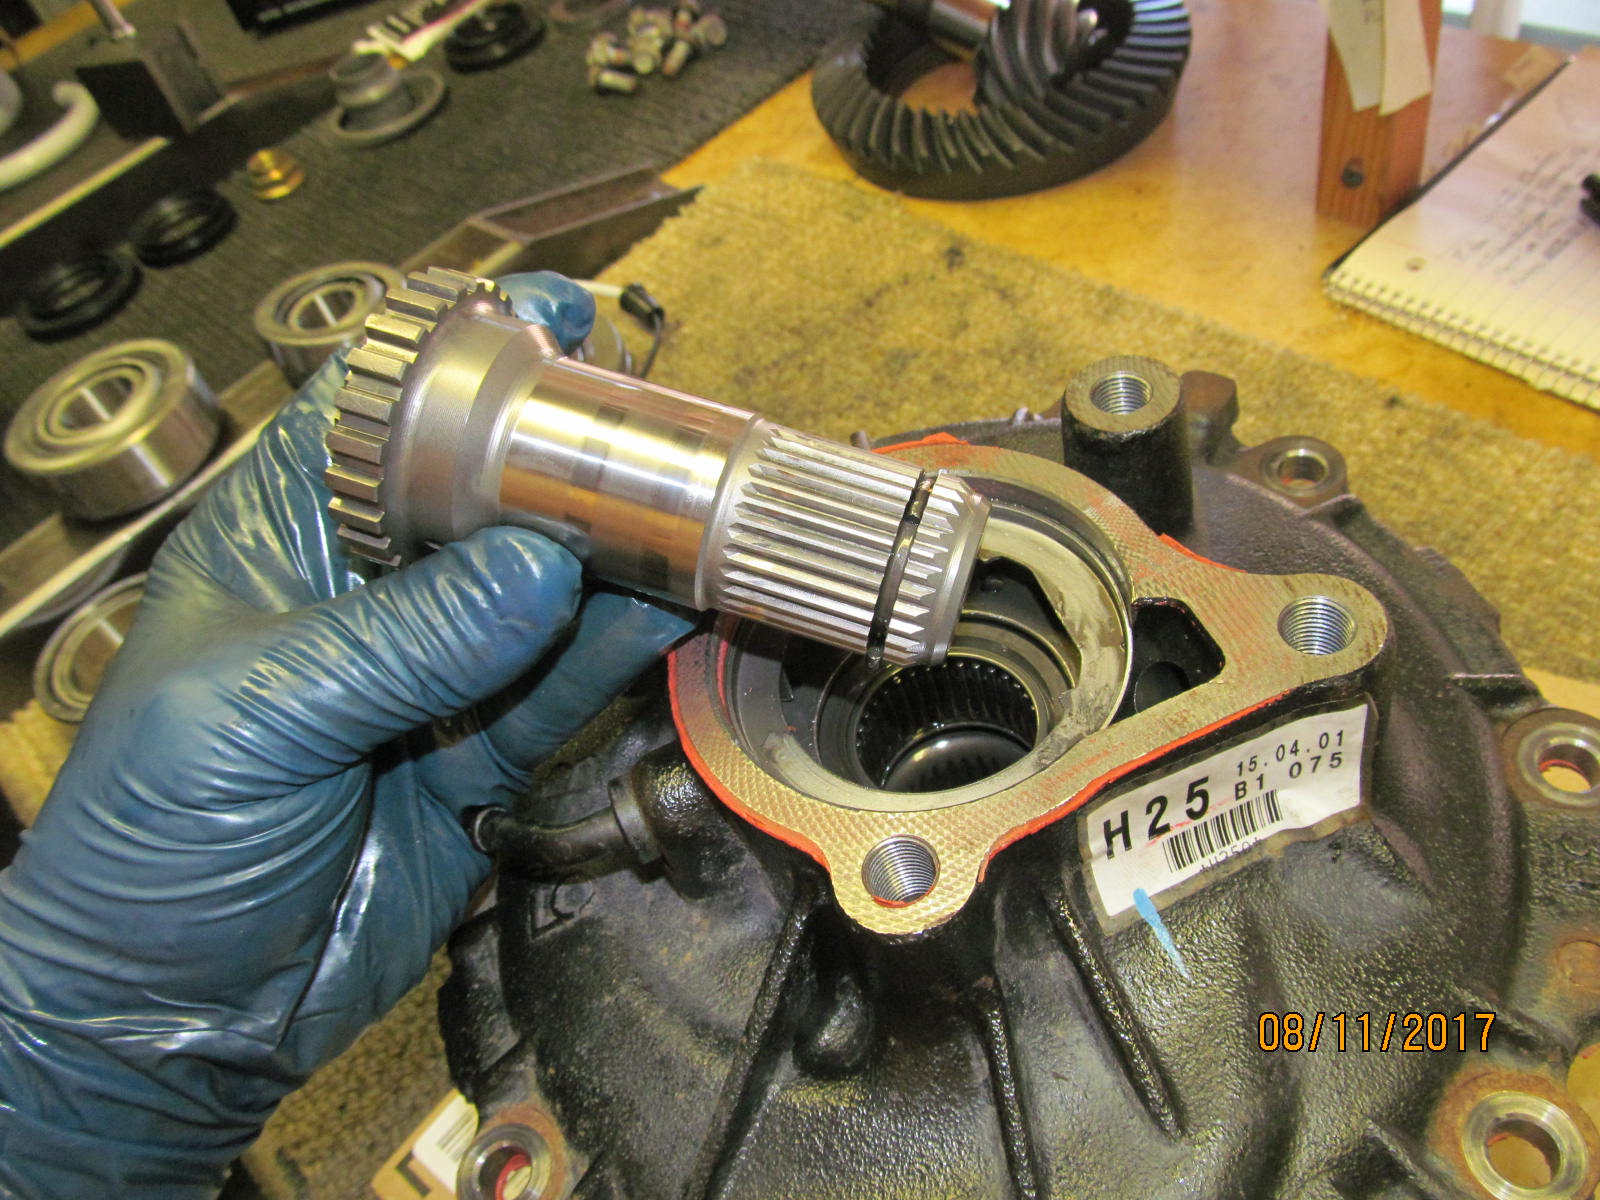
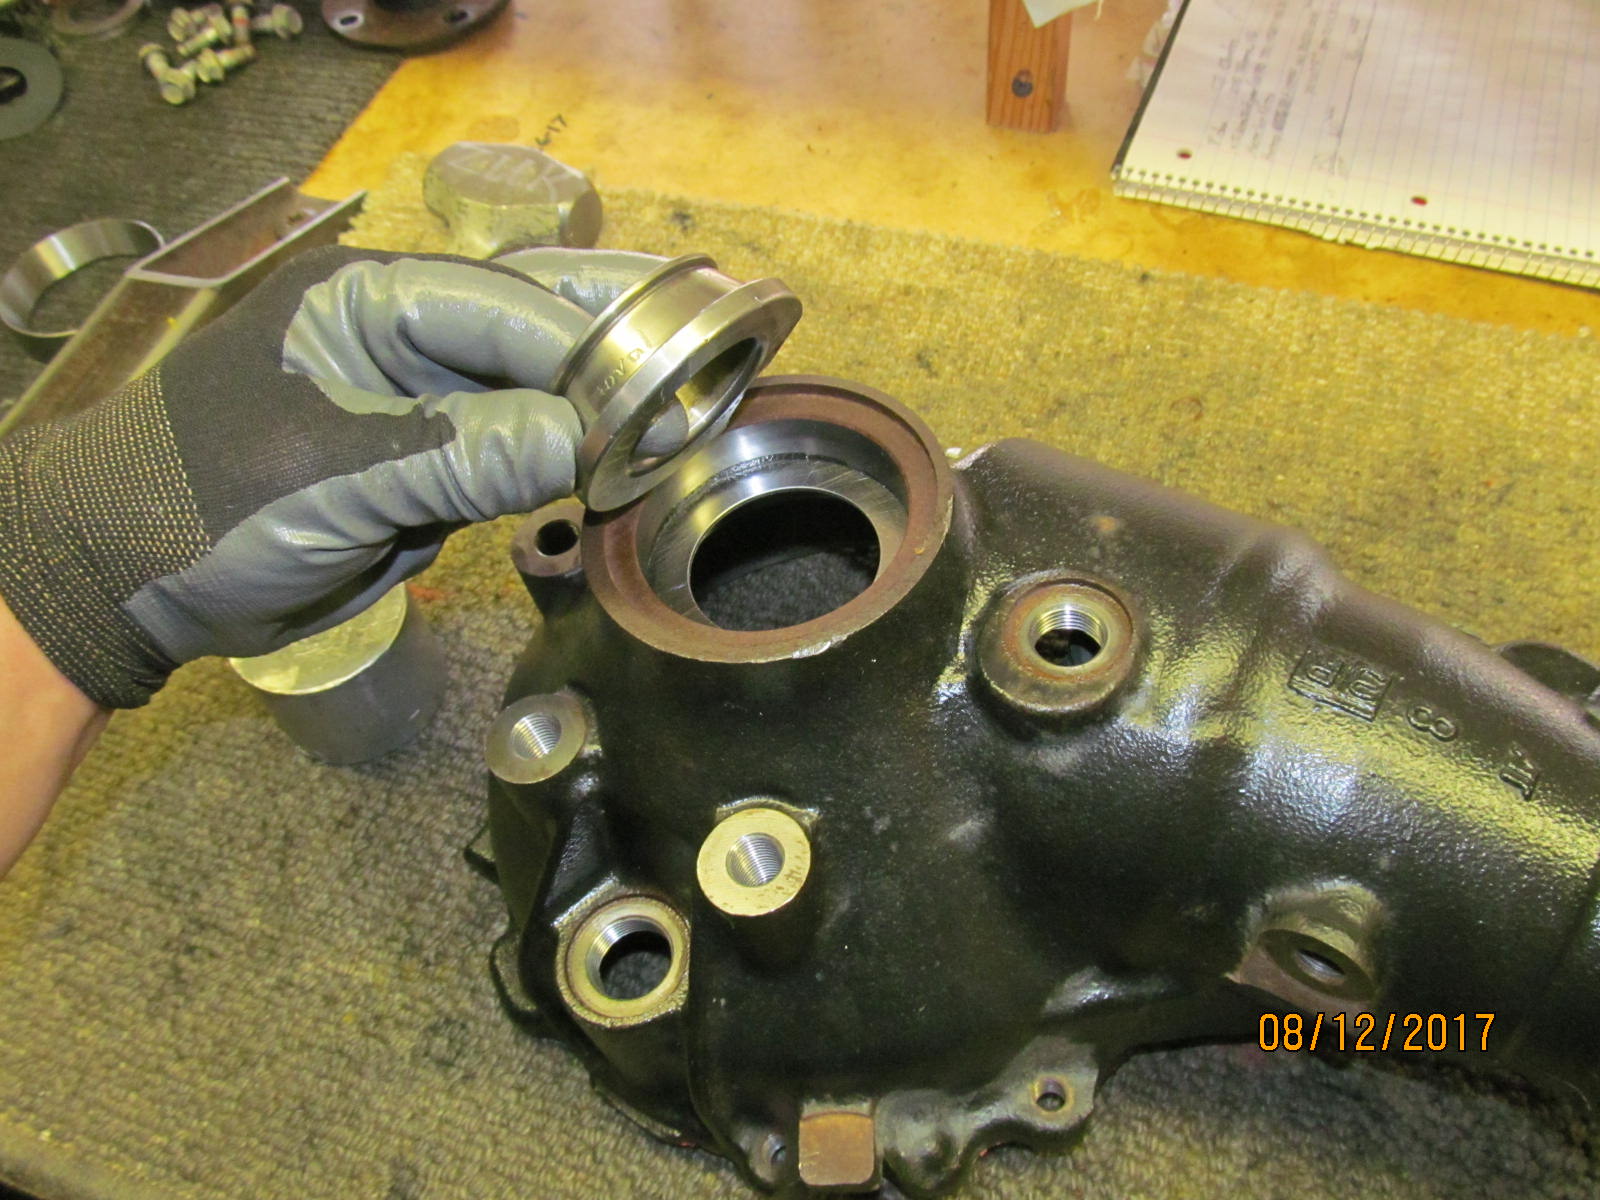
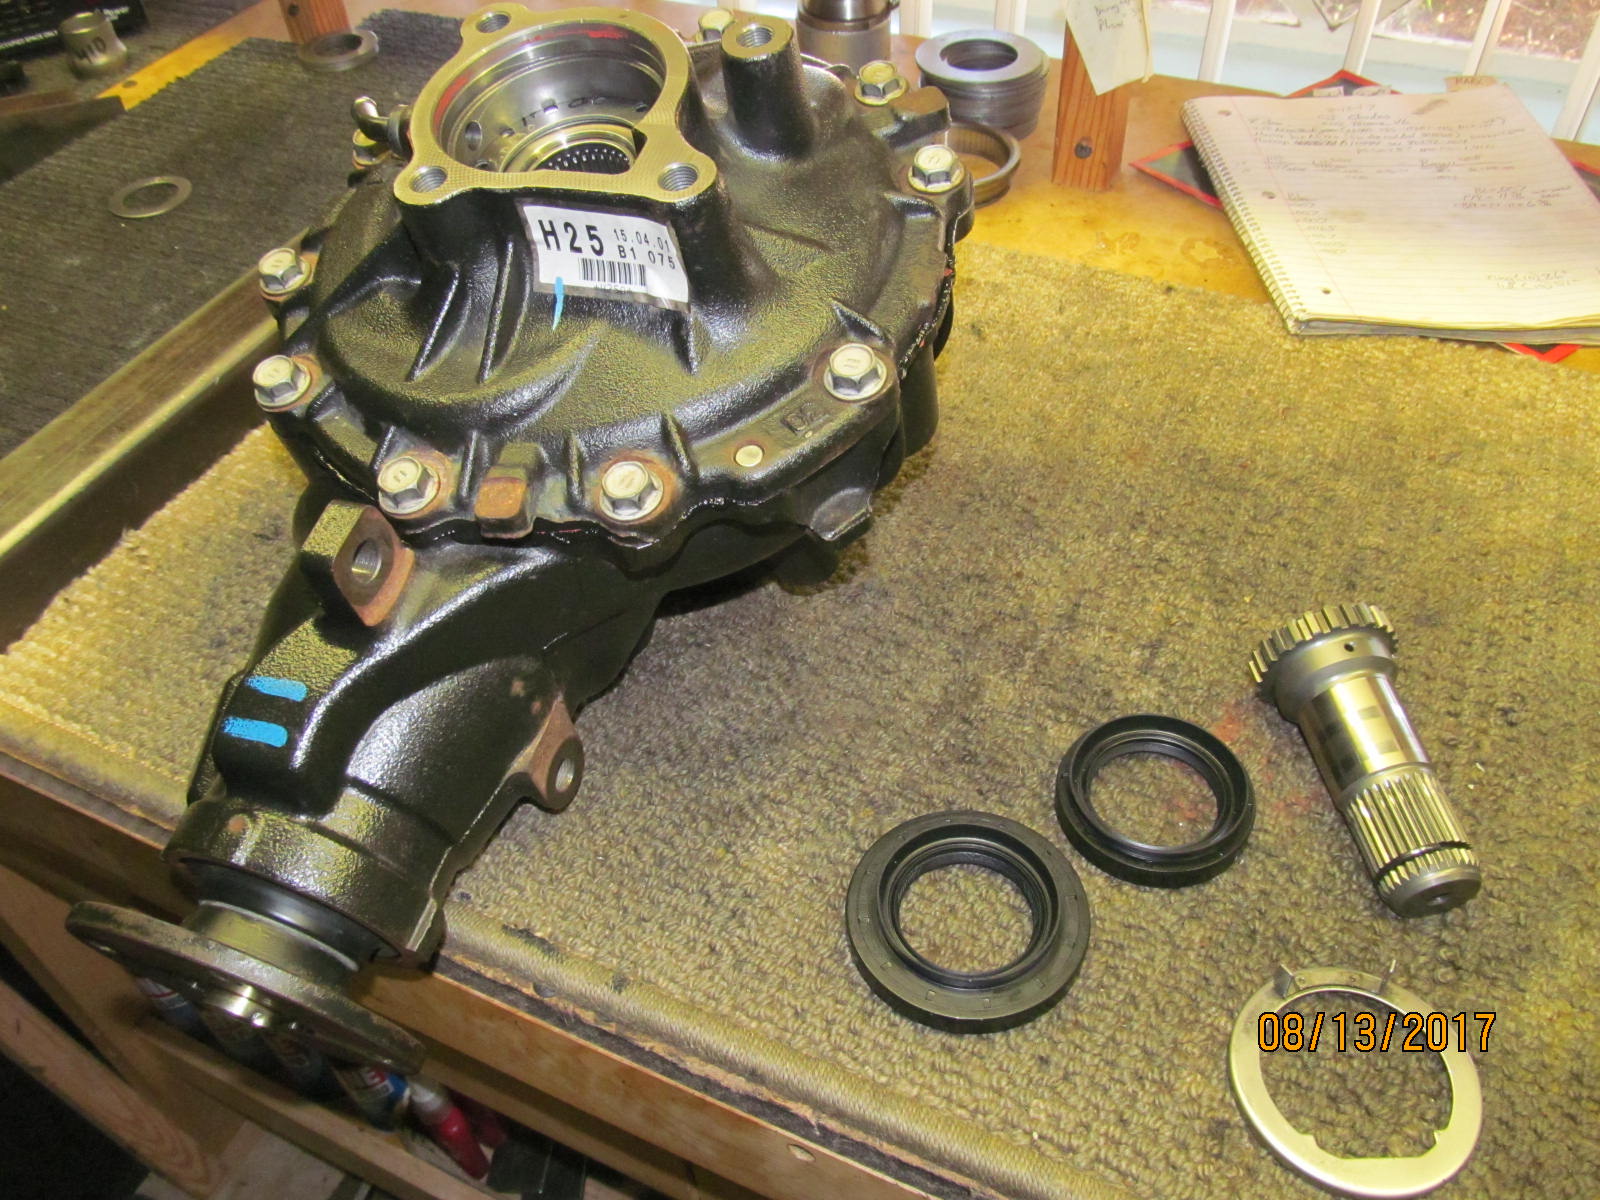
| The lid.....Let's get that stub axle out right now. |
|---|
|
|
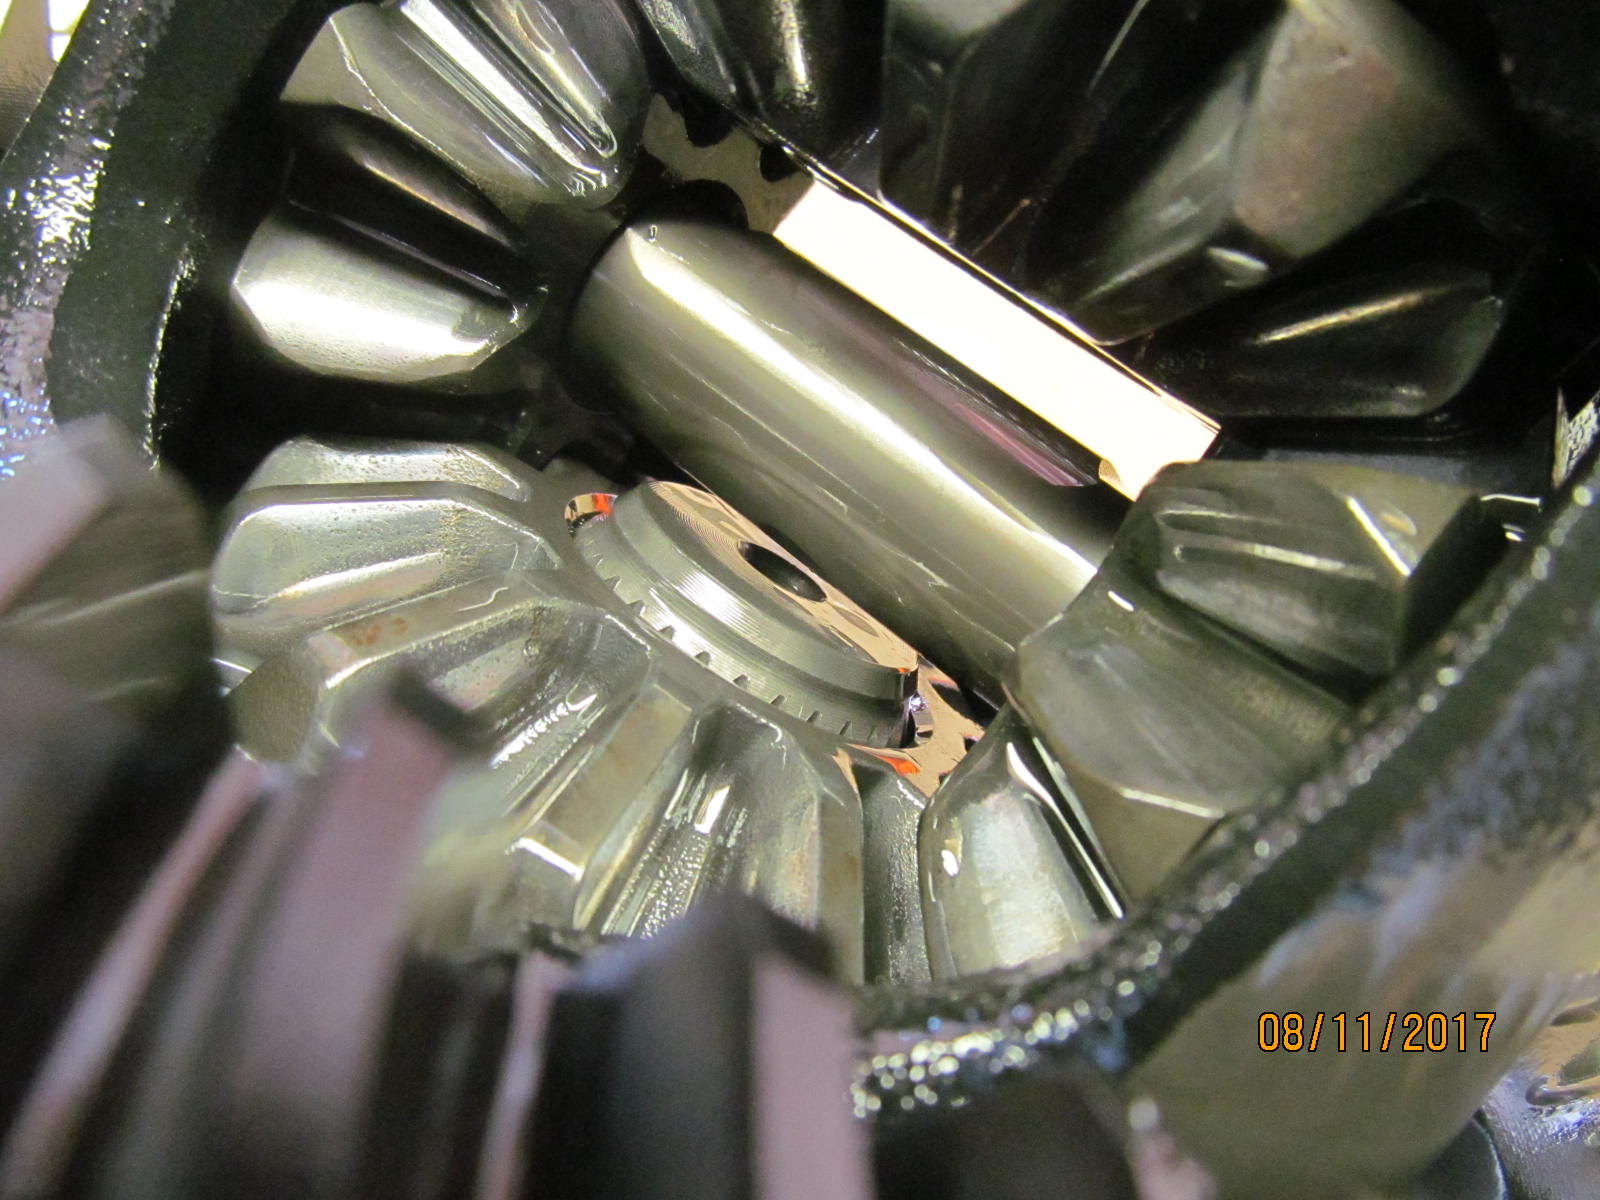
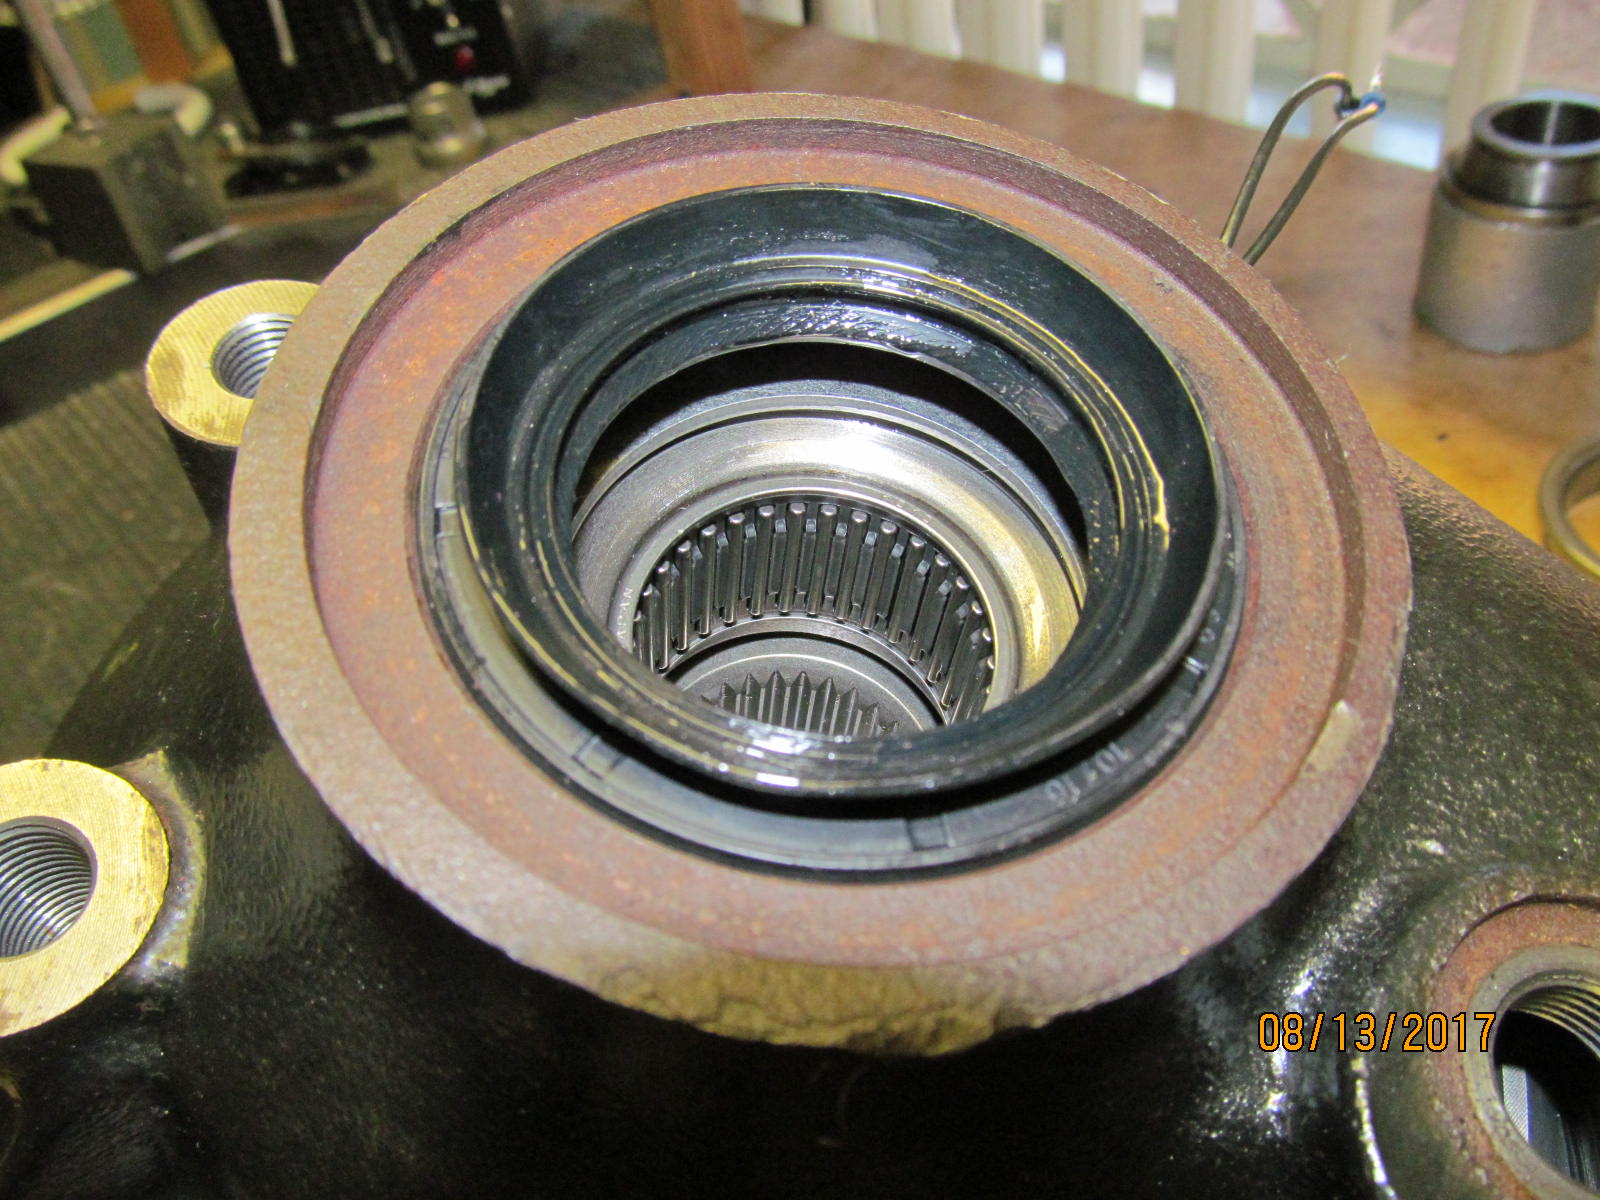
| Easy access to push the stub axle out from the inside. |
|---|
|
|
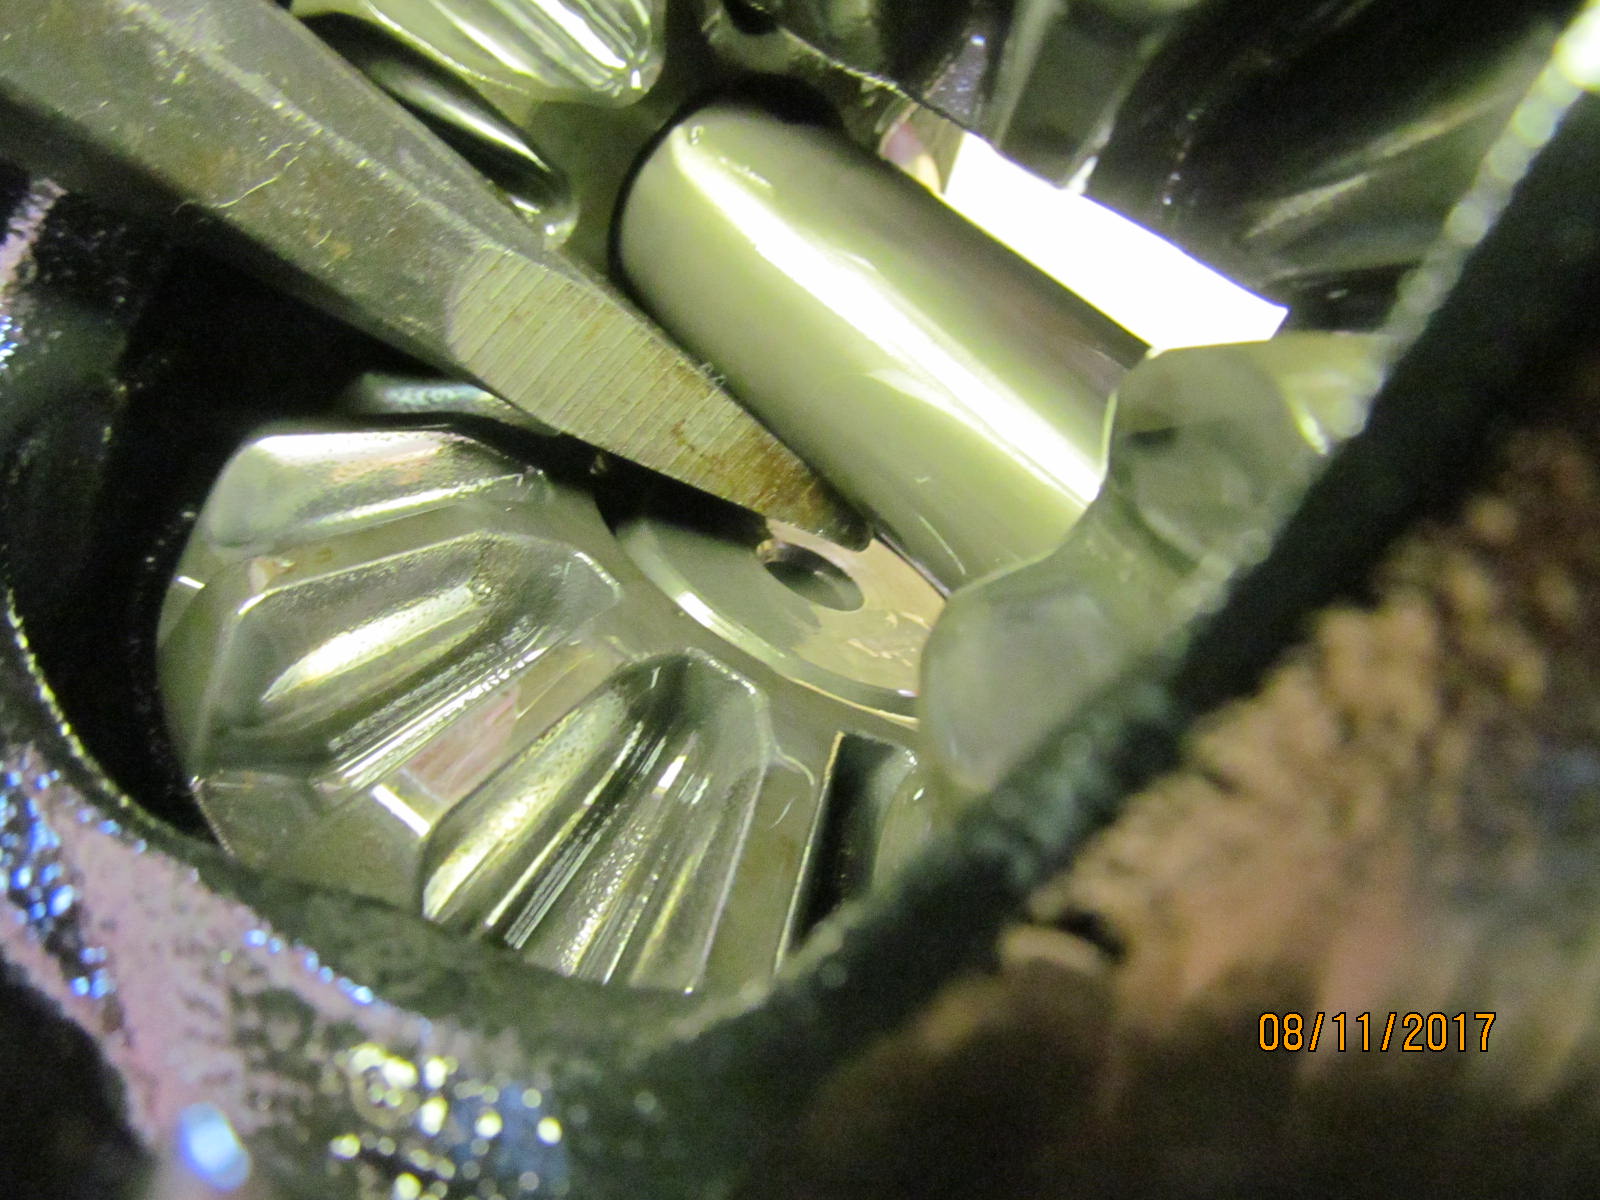
| A chisel or large screwdriver tapped in between will push the axle stub out with very little trouble. |
|---|
|
|
| The circular clip is undamaged. |
|---|
|
|
A high speed wire brush was used to get the majority of the rtv of the sealing surface. A harborFreight brush took care of the rest.
A clean surface is very important with all the trial fitting that will be happening. |
|---|
|
|
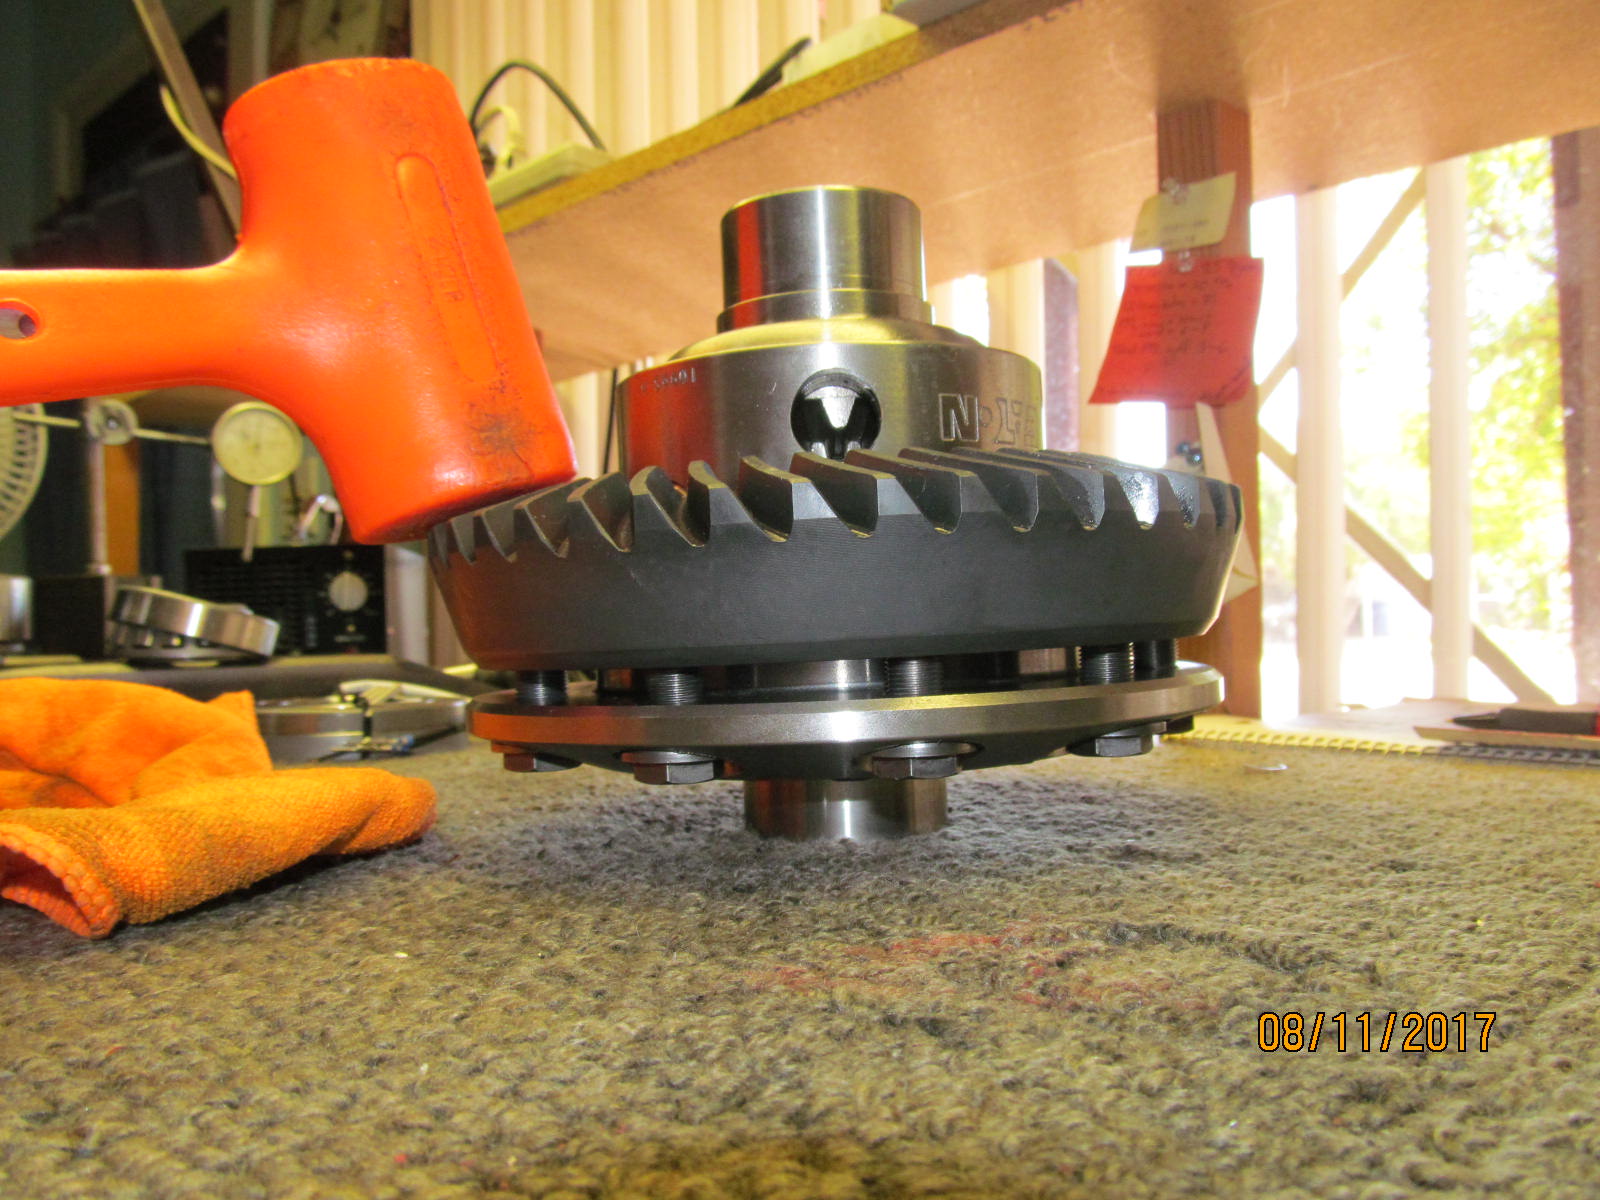
It was a tight fitting ring gear. The lead filled plastic hammer was able to seat it about 30% of the way.
I must have a good eye because the 10 bolts fit perfectly with no mis-alignment at all. |
|---|
|
|
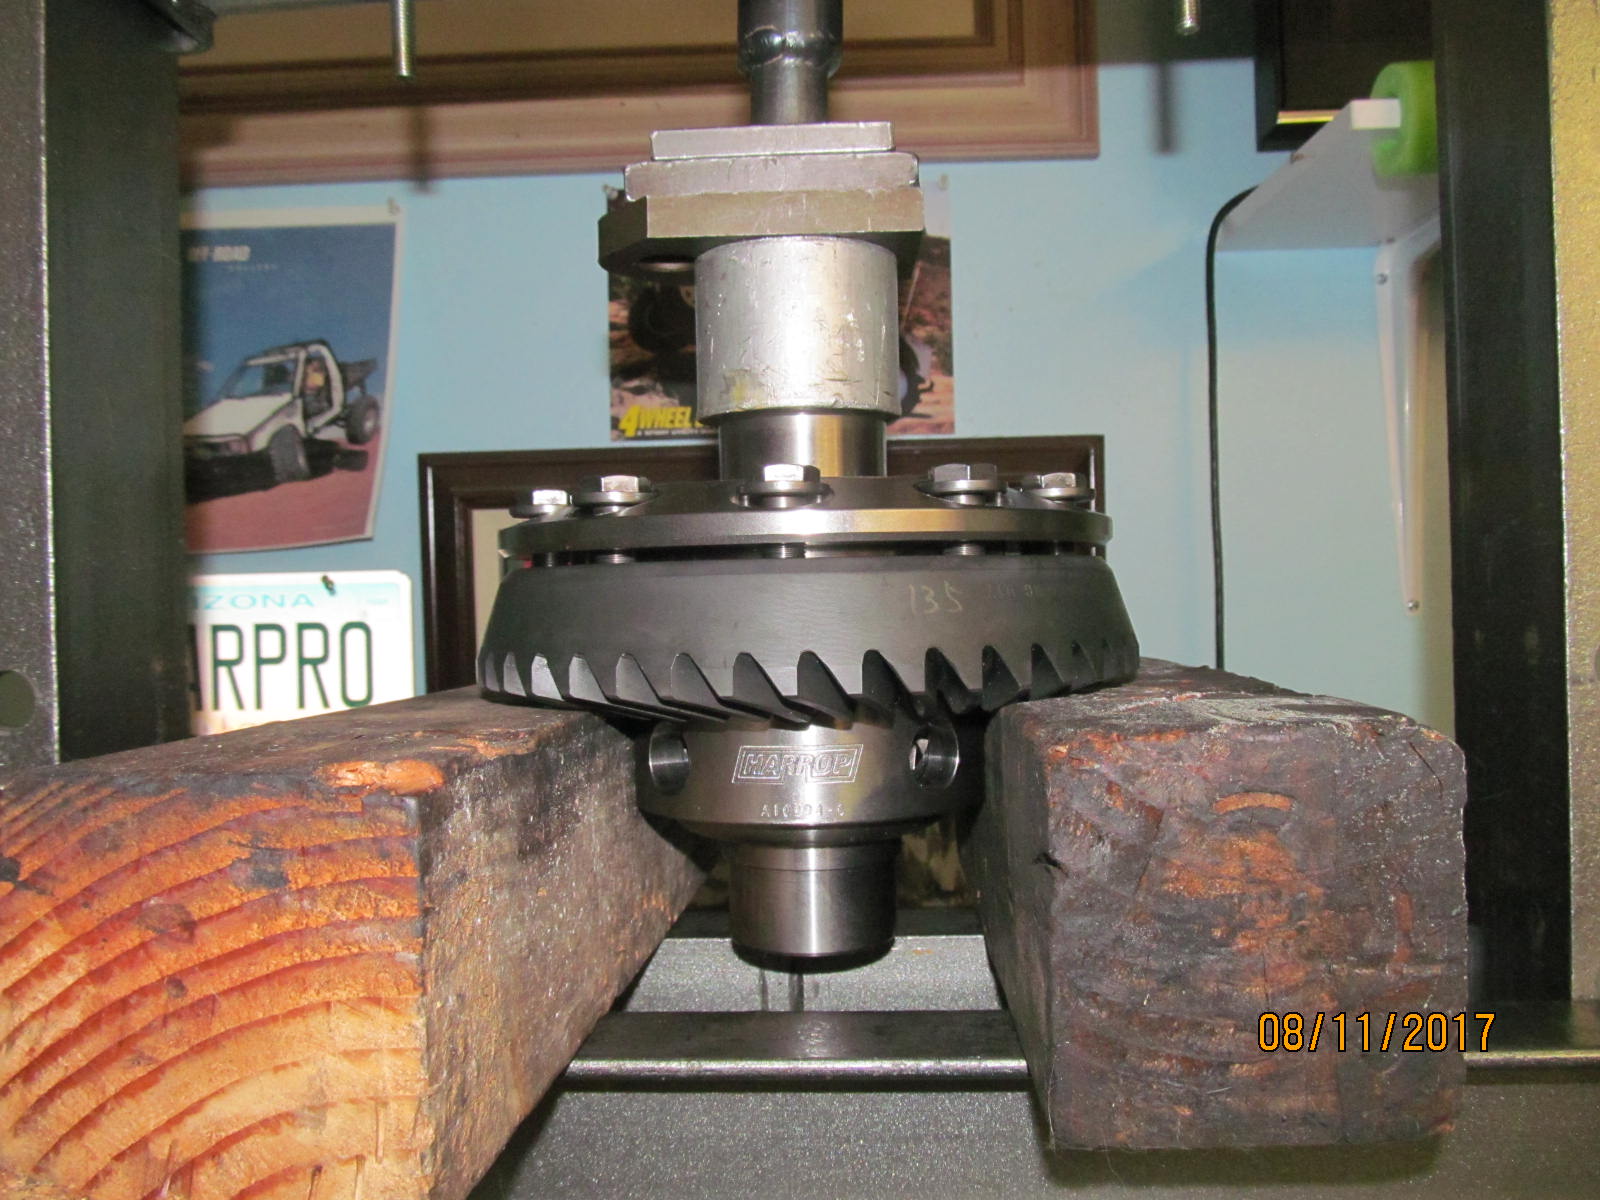
| The 2 pieces of wood were able to push the ring on the remaining 70%. |
|---|
|
|
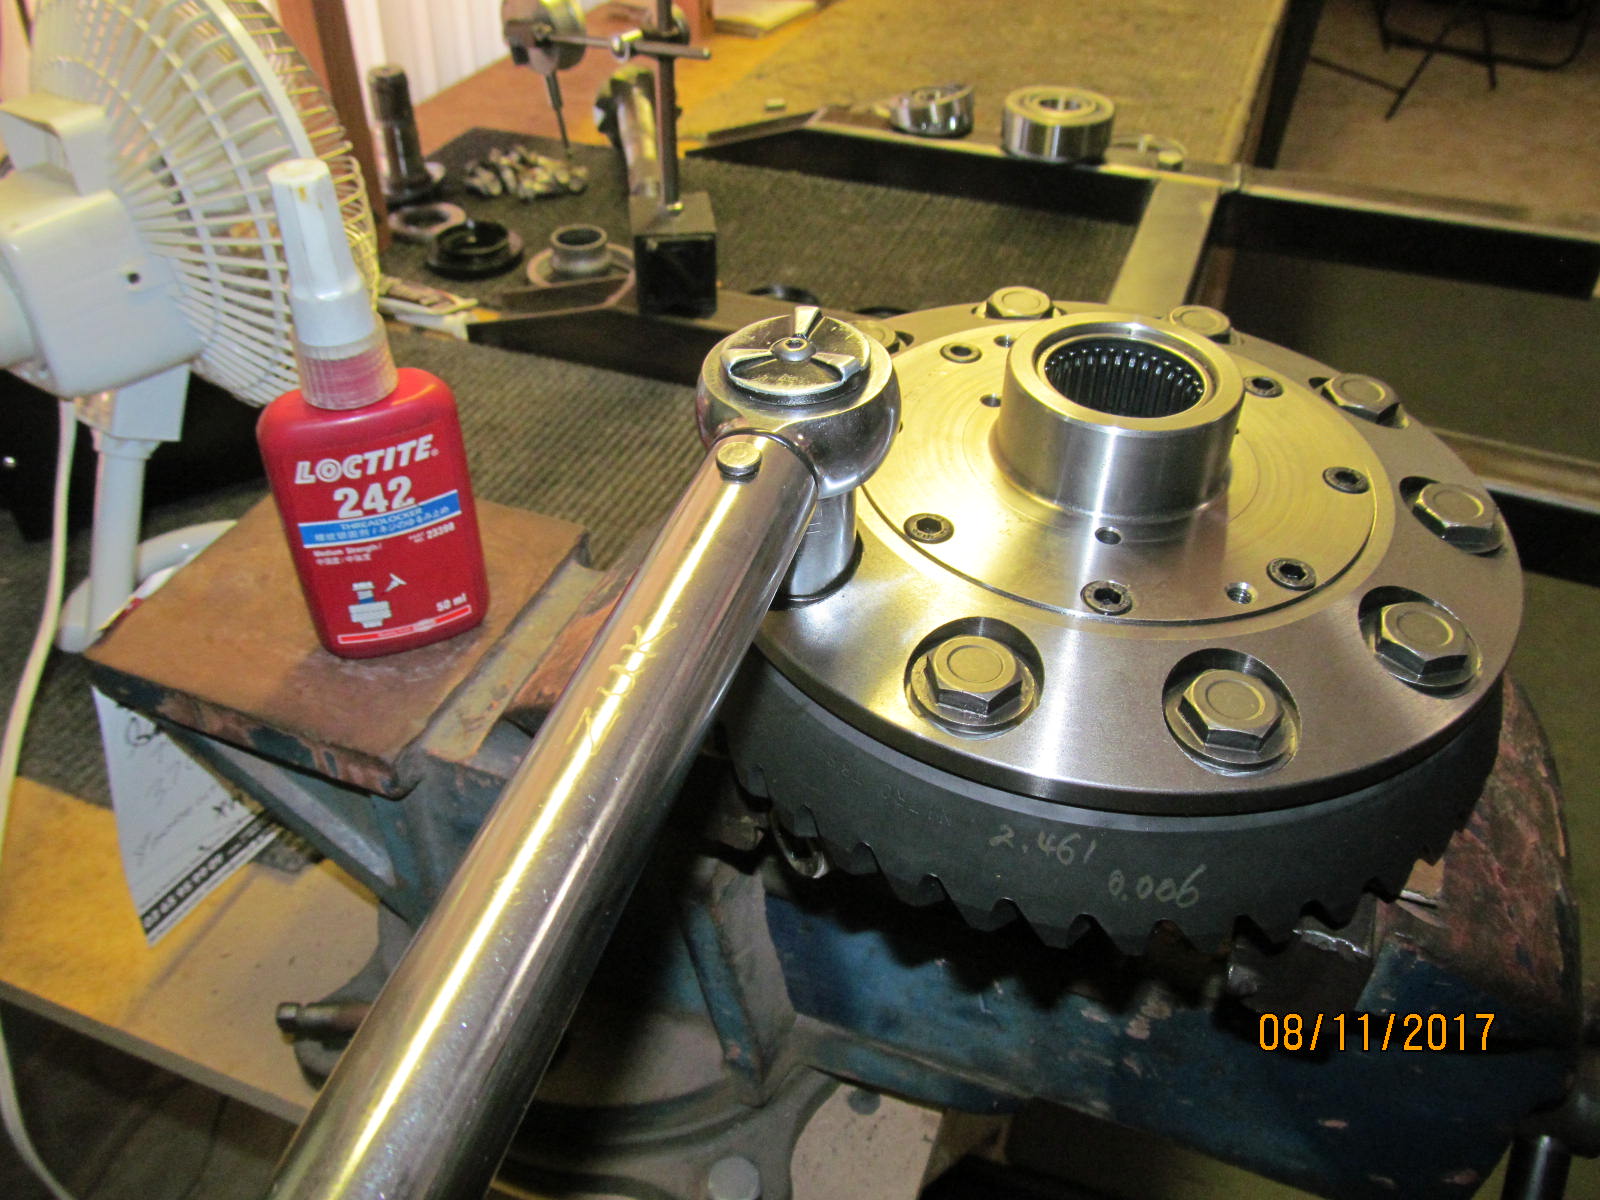
| 86 ft/lb per the manual and blue loctite. |
|---|
|
|
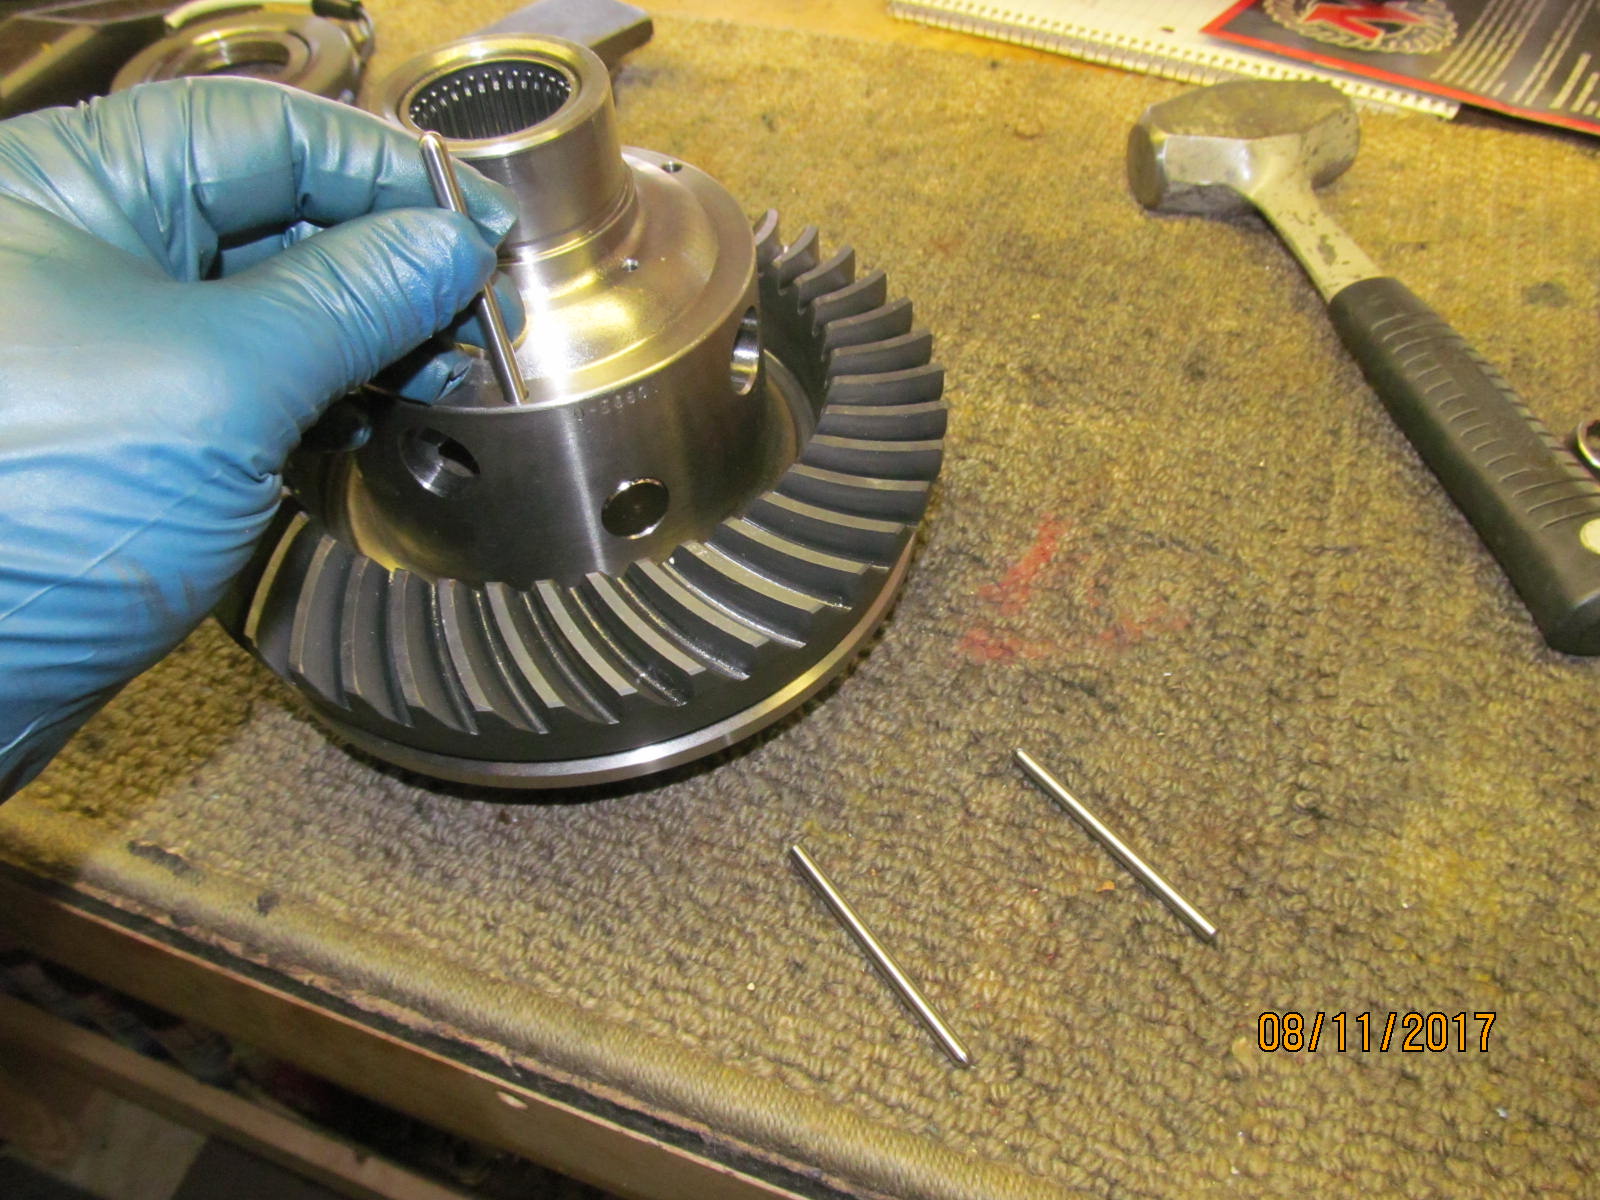
| With the ring gear already on, now is a good time to piece together the electromagnet assembly. The 3 pins first.... |
|---|
|

|
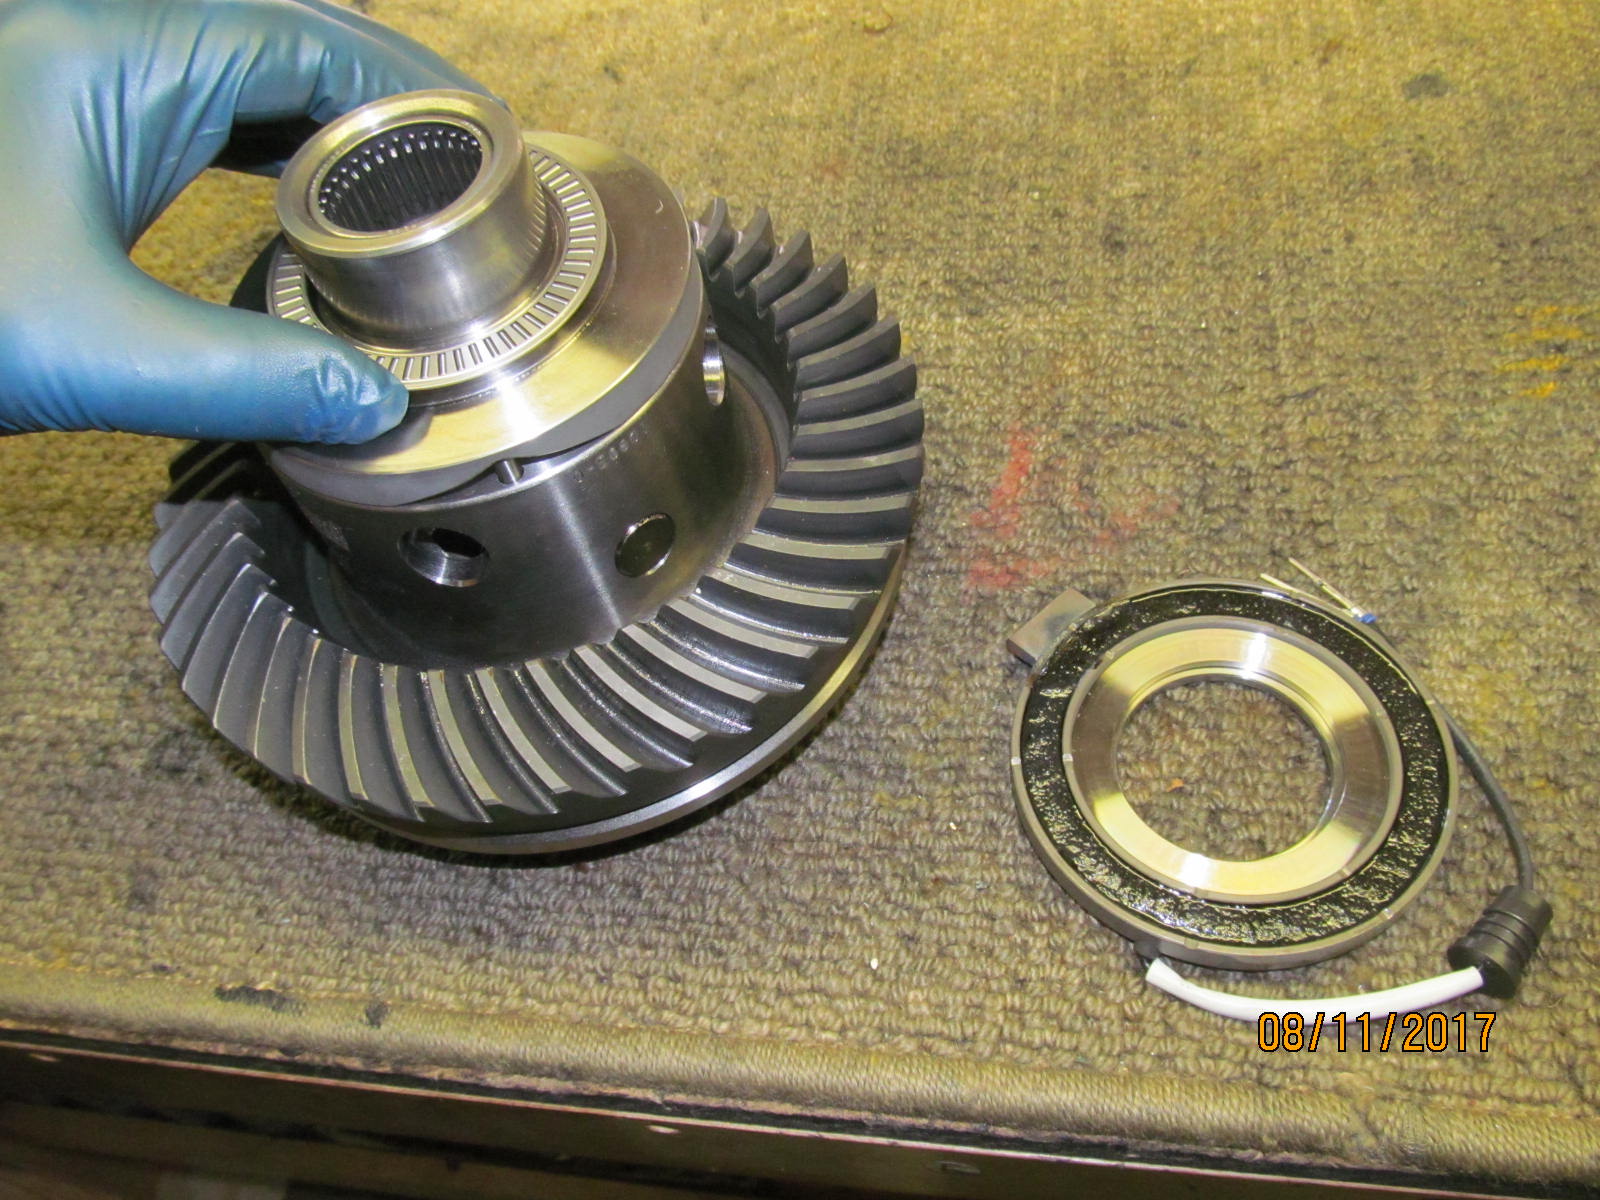
| ...then the ramping plate.. |
|---|
|
|
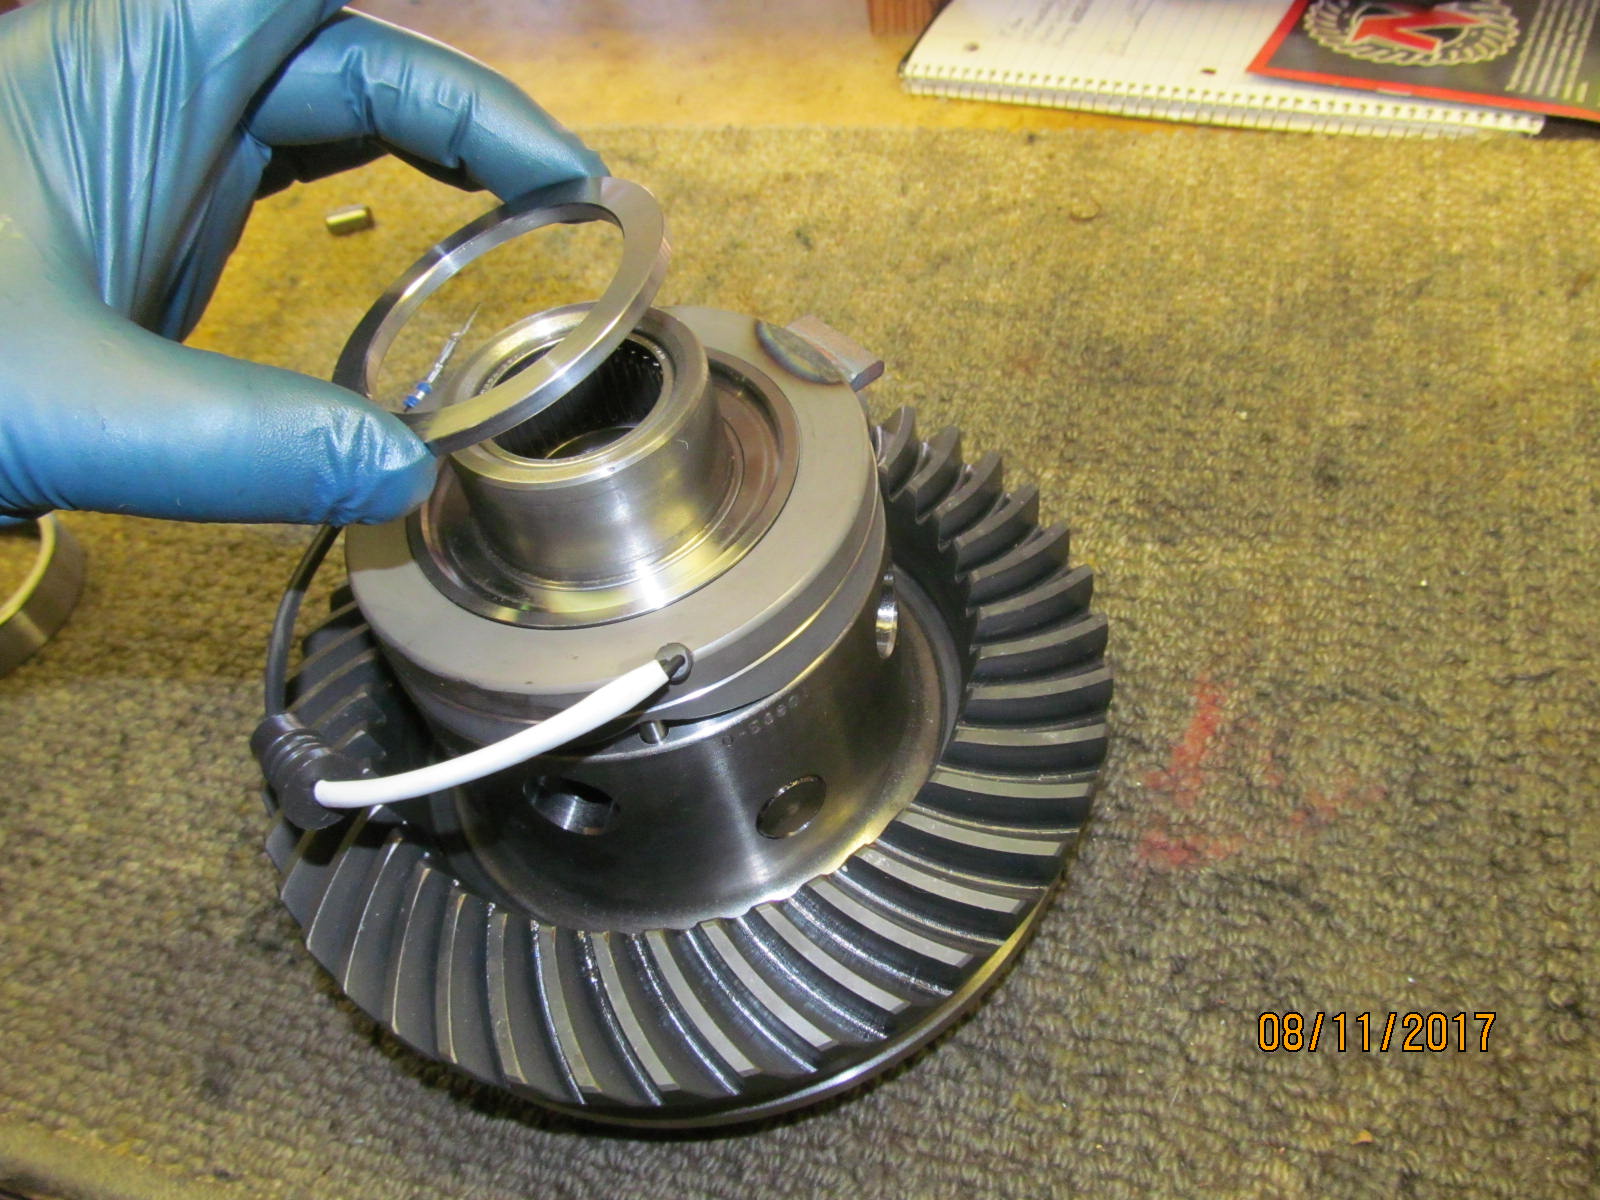
| ...then the bearing thrust washer... |
|---|
|
|
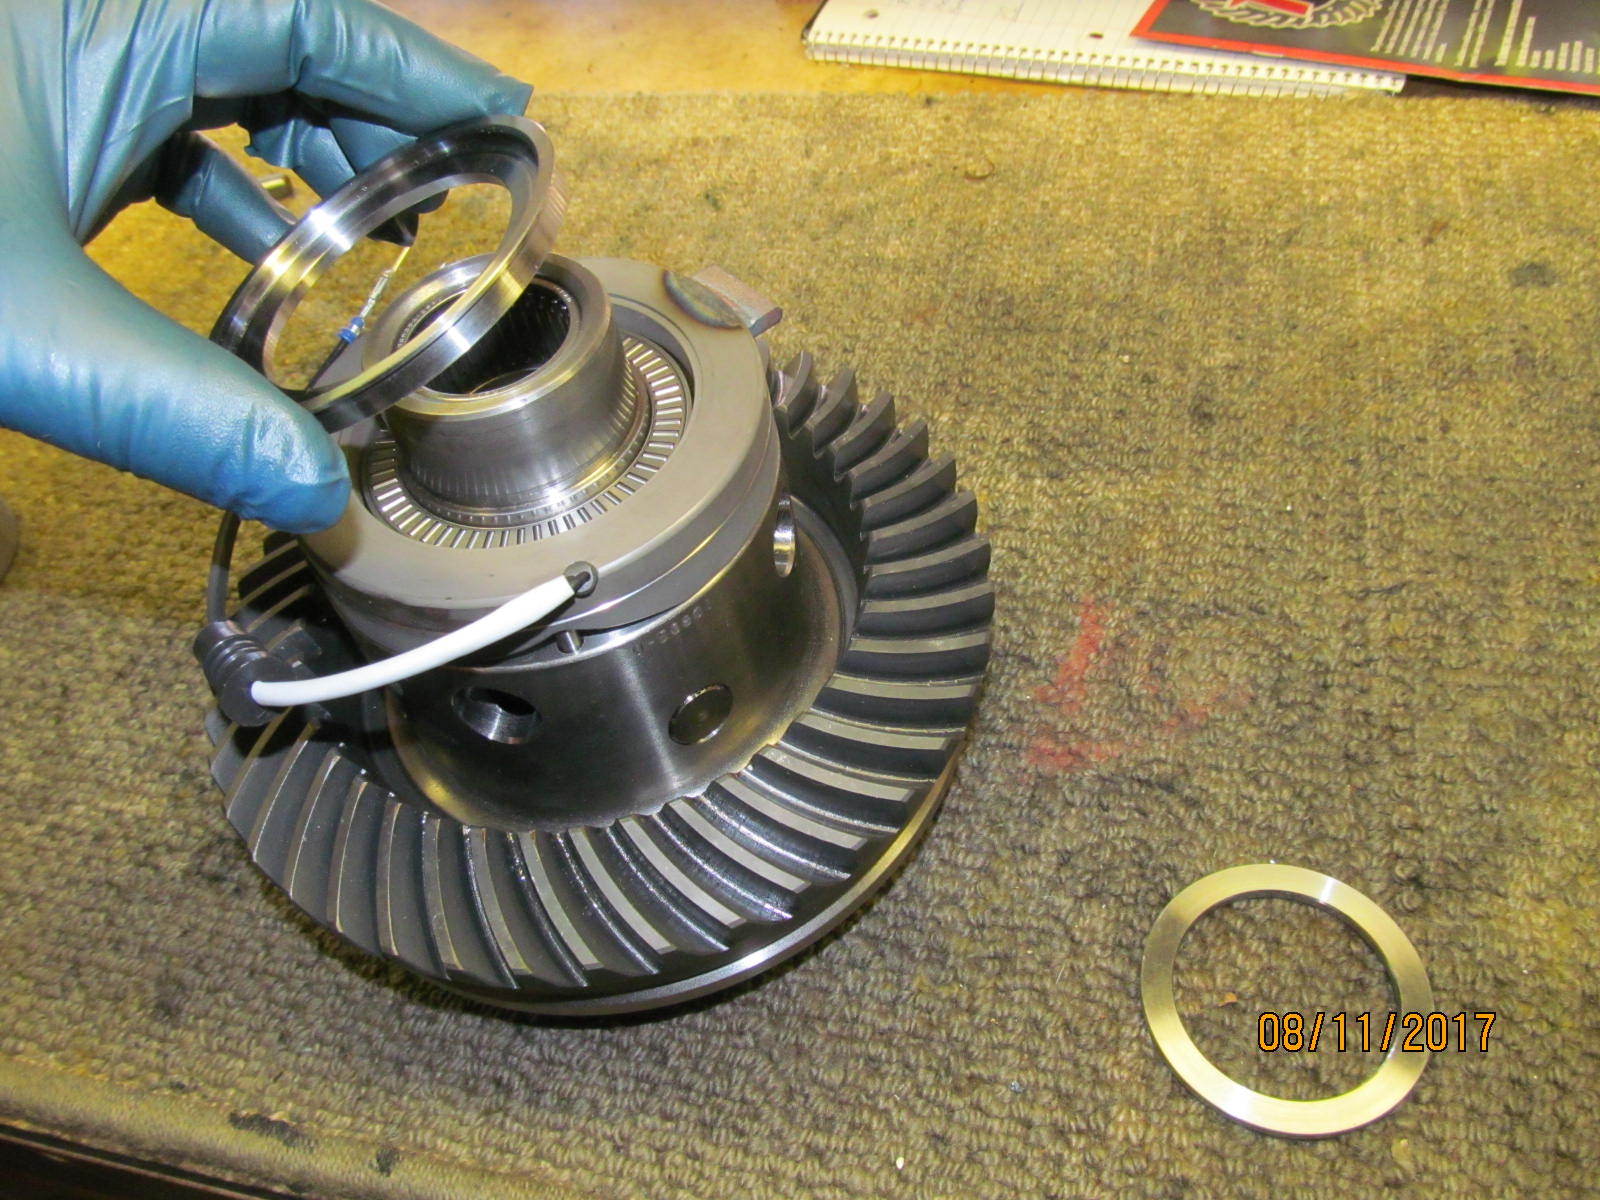
| ...then the bearing race... |
|---|
|
|
| ...and finally, the bearing spacer which is a light press fit. |
|---|
|
|
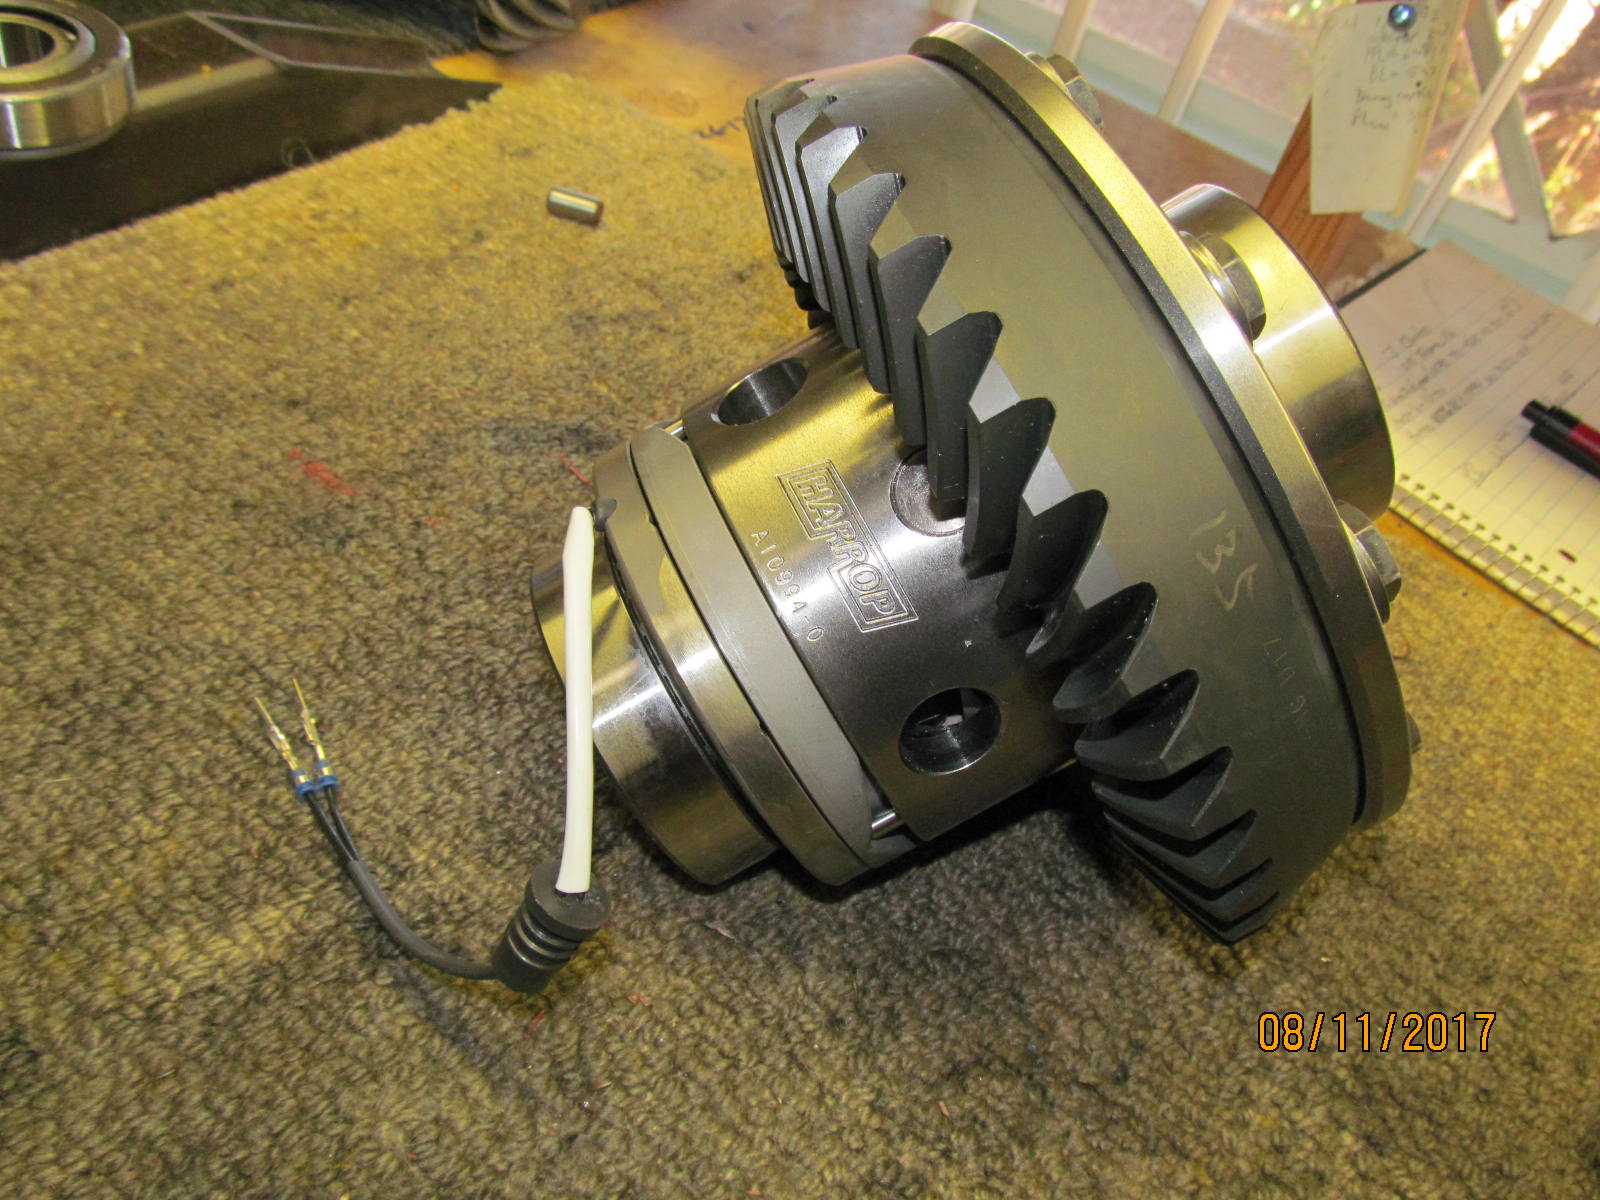
| Assembled with the Koyo bearings pressed on. |
|---|
|
|
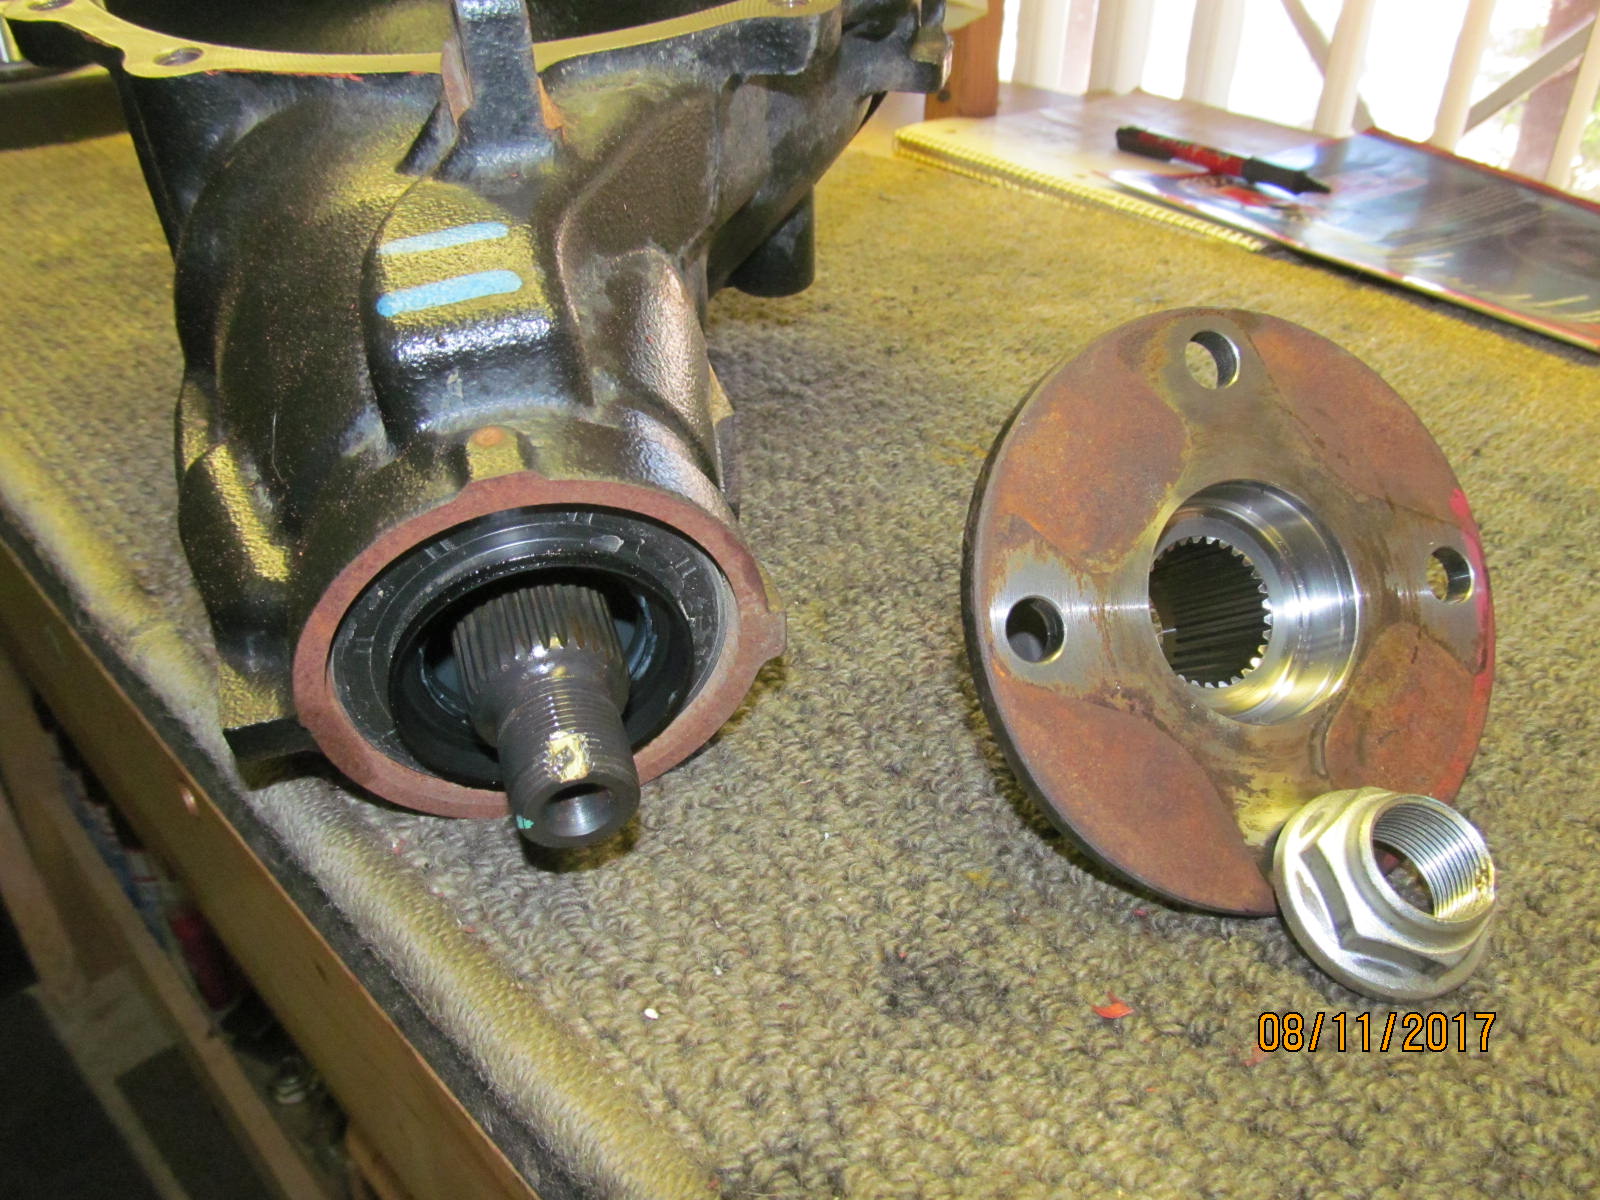
| Now onto the pinion end. Remove the pinion nut and flange. |
|---|
|
|
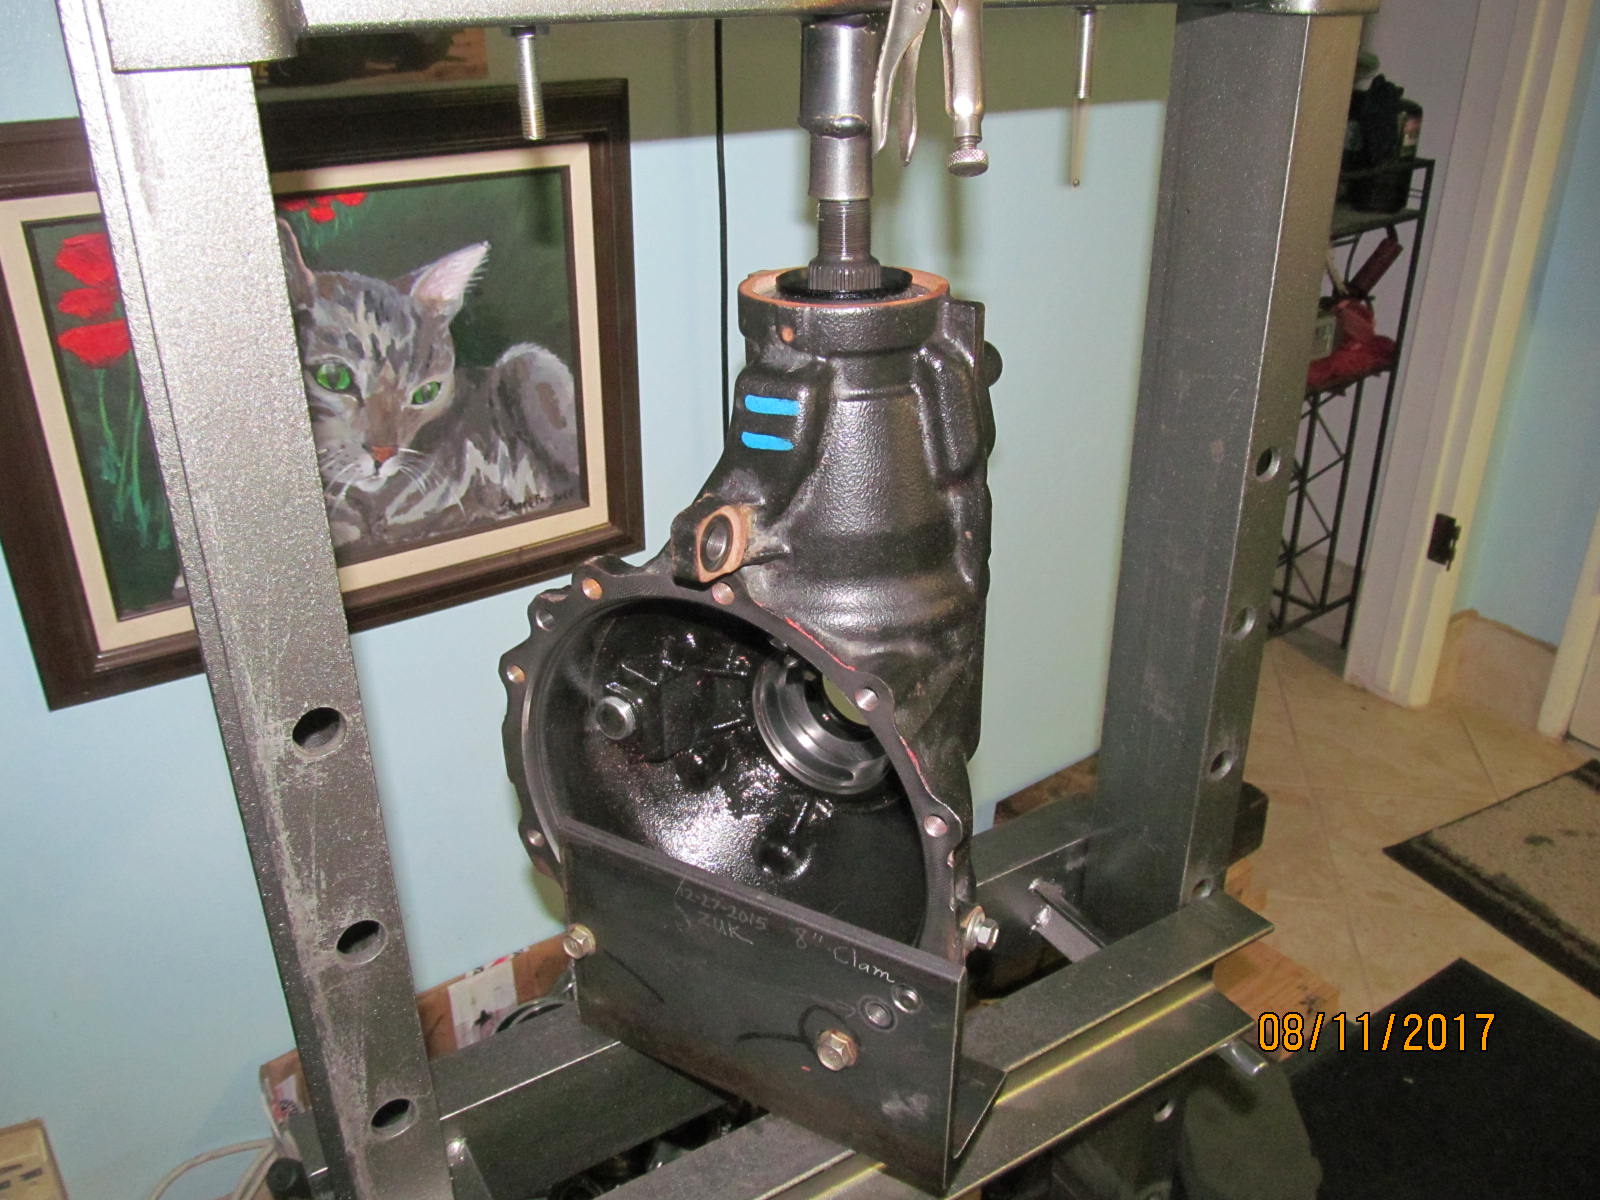
| Press the old pinion out. |
|---|
|
|
| Attempt to tap the difficult inner race in with the limited swing of a low profile hammer...sometimes it works and sometimes not. |
|---|
|
|
| ....Or use other means and this one worked. |
|---|
|
|
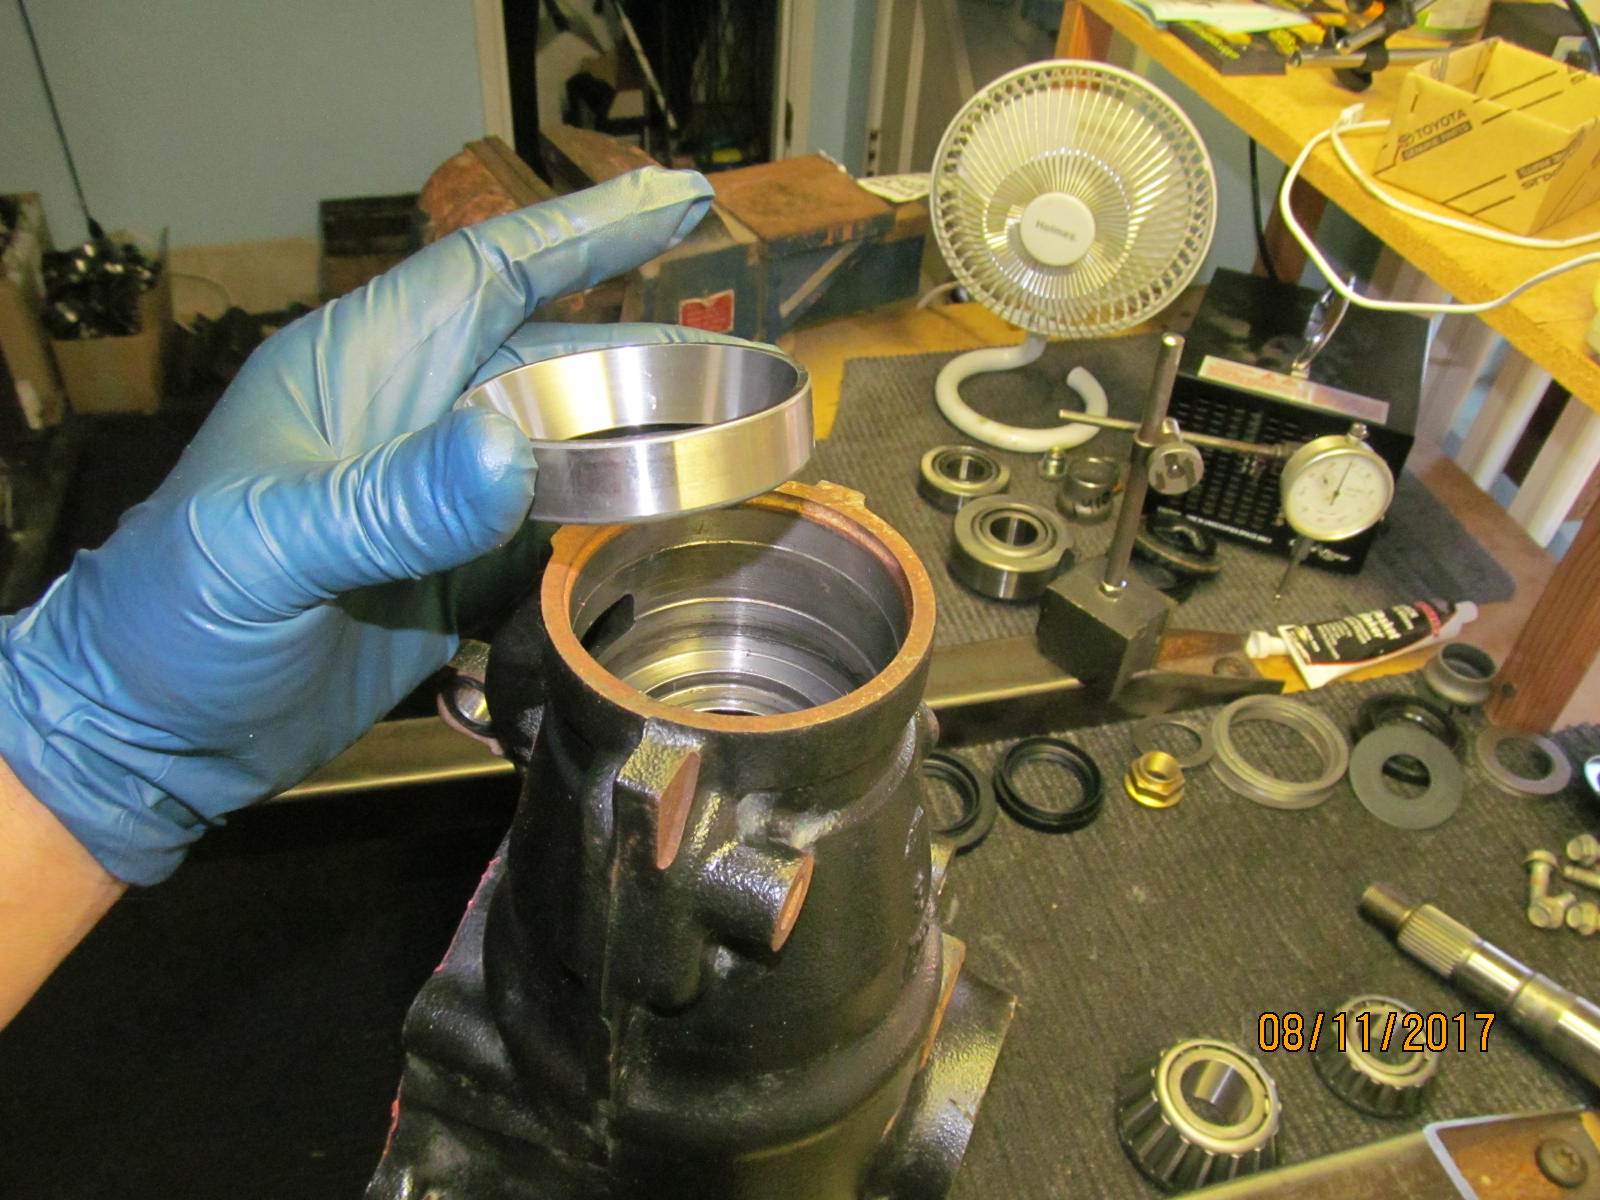
| The outer race is easy. |
|---|
|
|
| BAM!! Knock it in and you're done. |
|---|
|
|
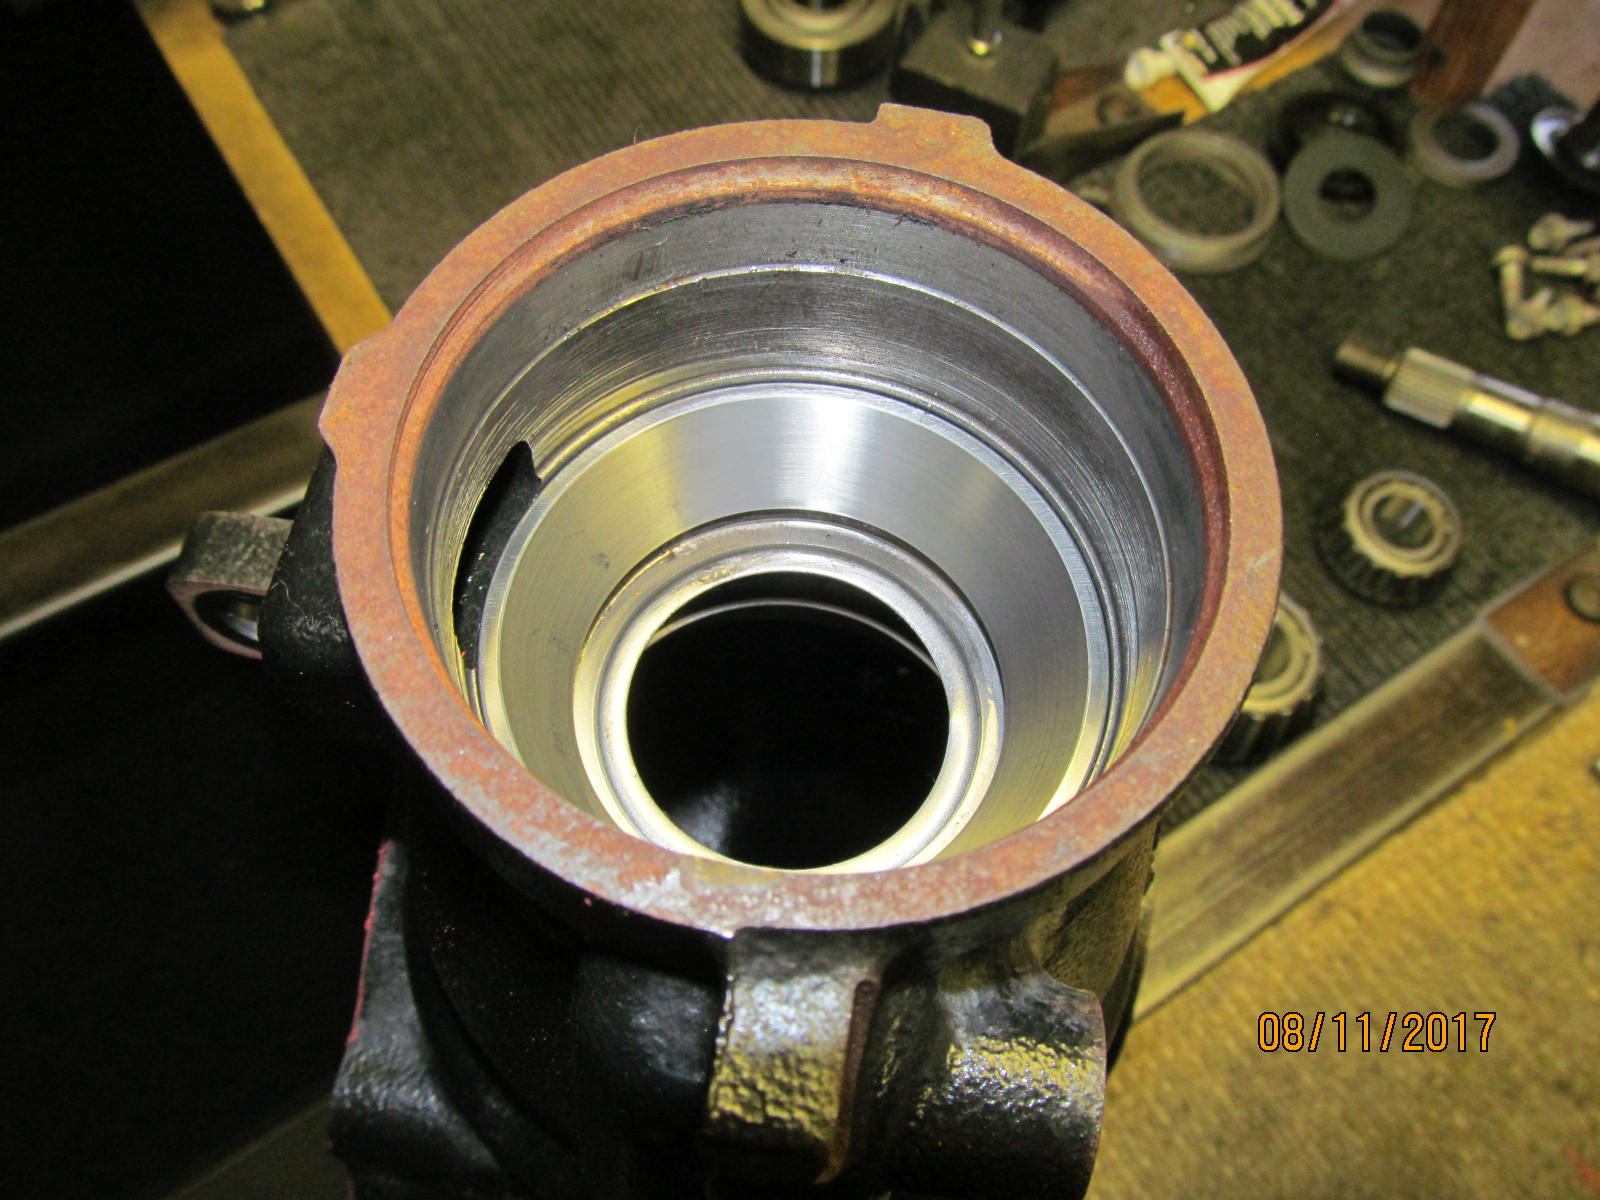
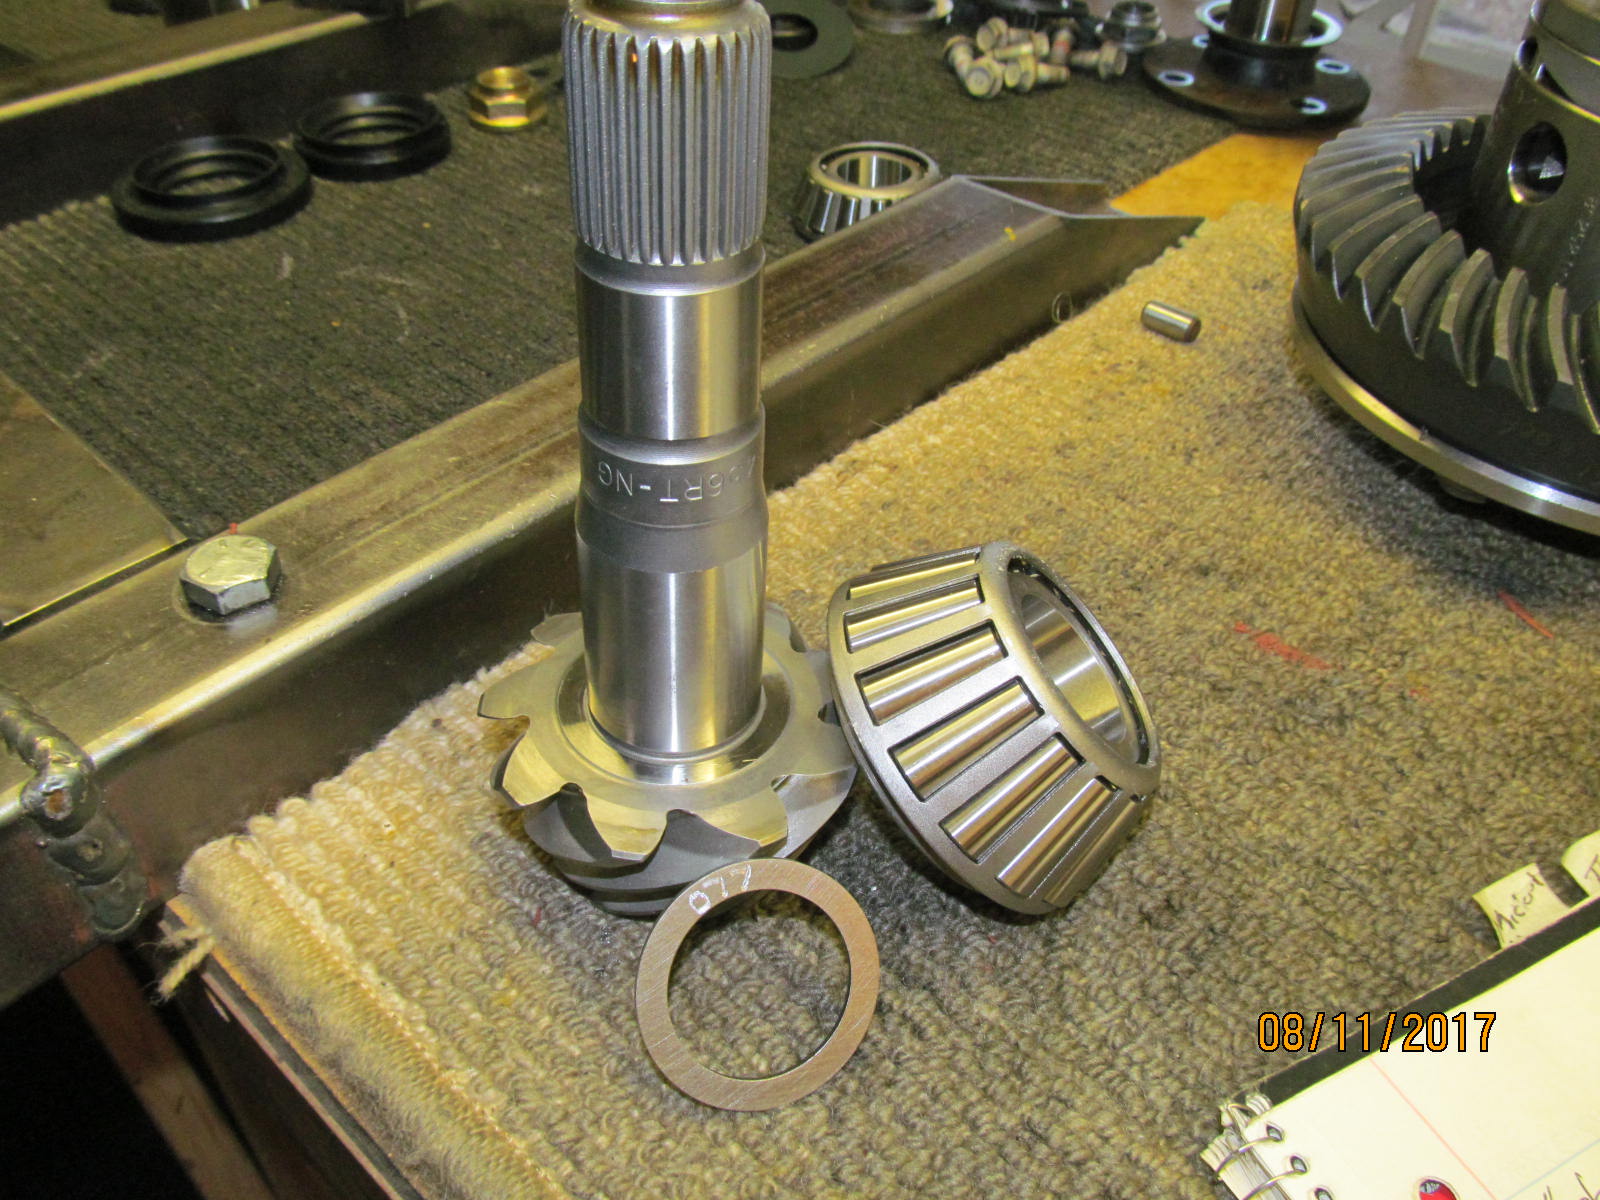
| And the inner race is fully in....fully seated. |
|---|
|
|
| .077" is what I choose for the starter shim. |
|---|
|
|
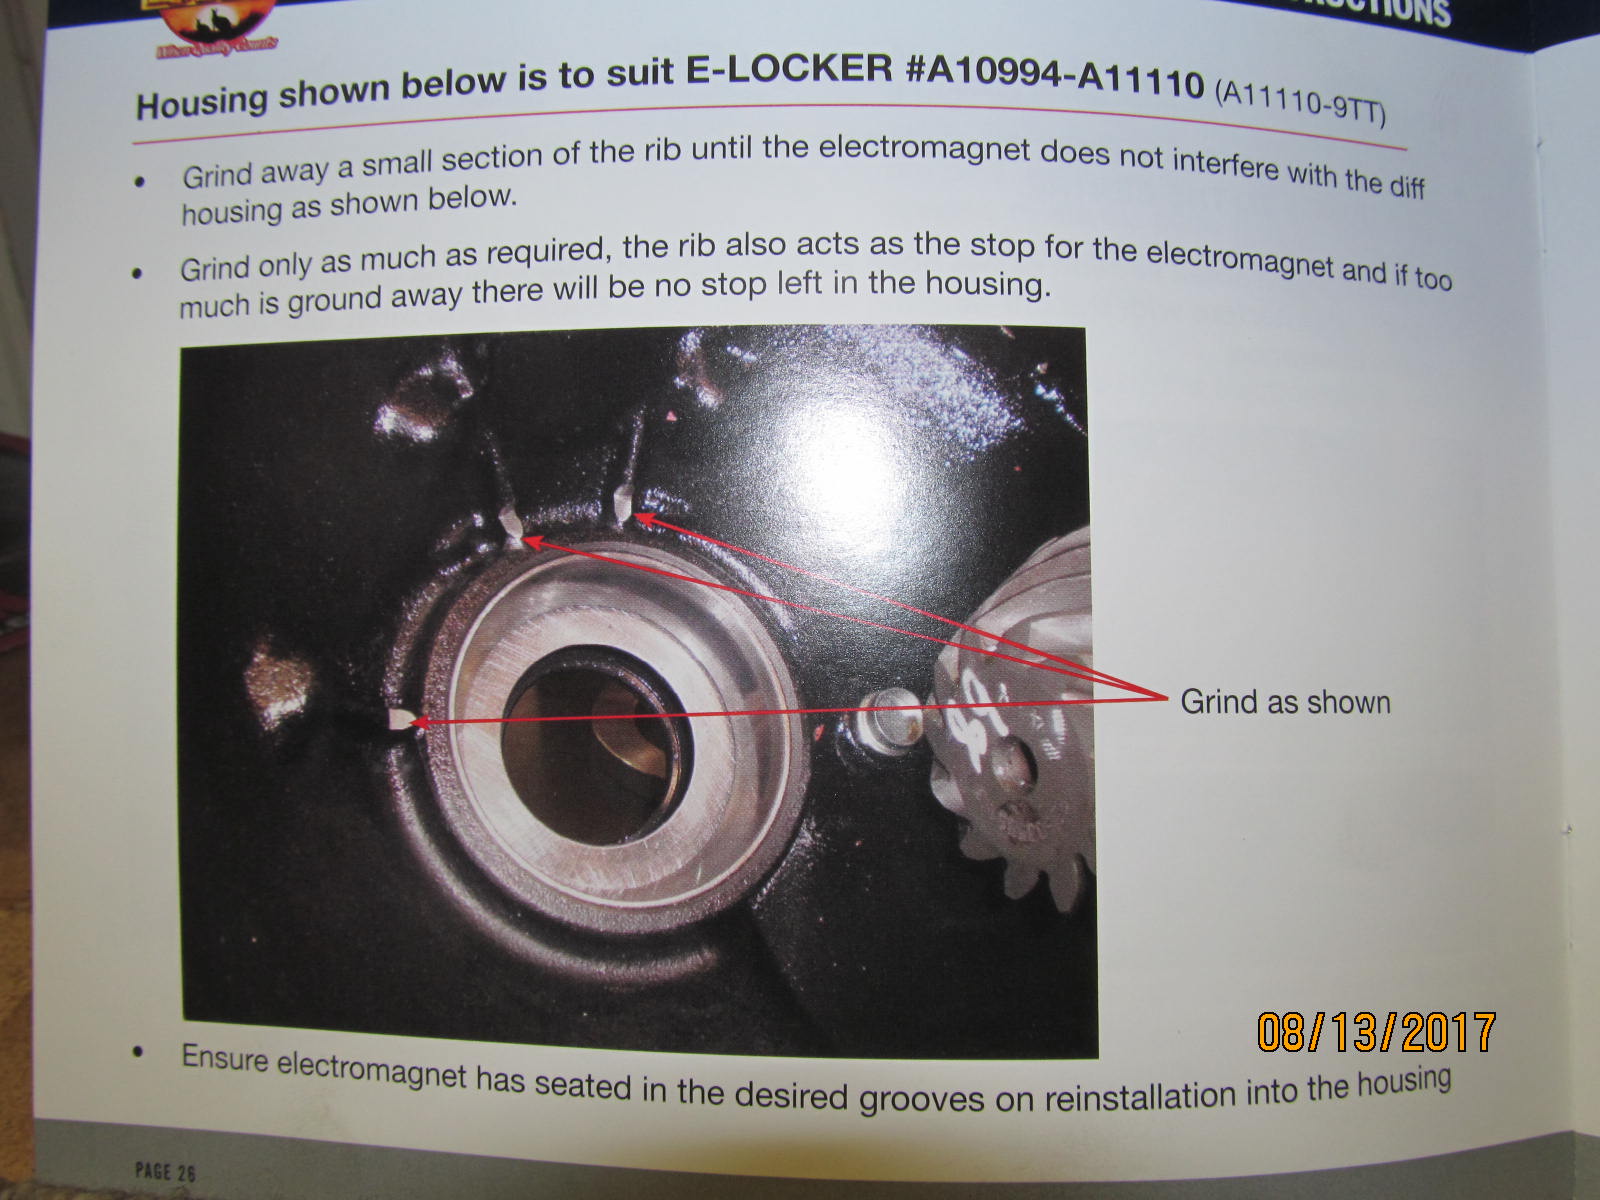
| And, before I get too far along, better grind the 3 spots to clear the electromagnet. |
|---|
|
|
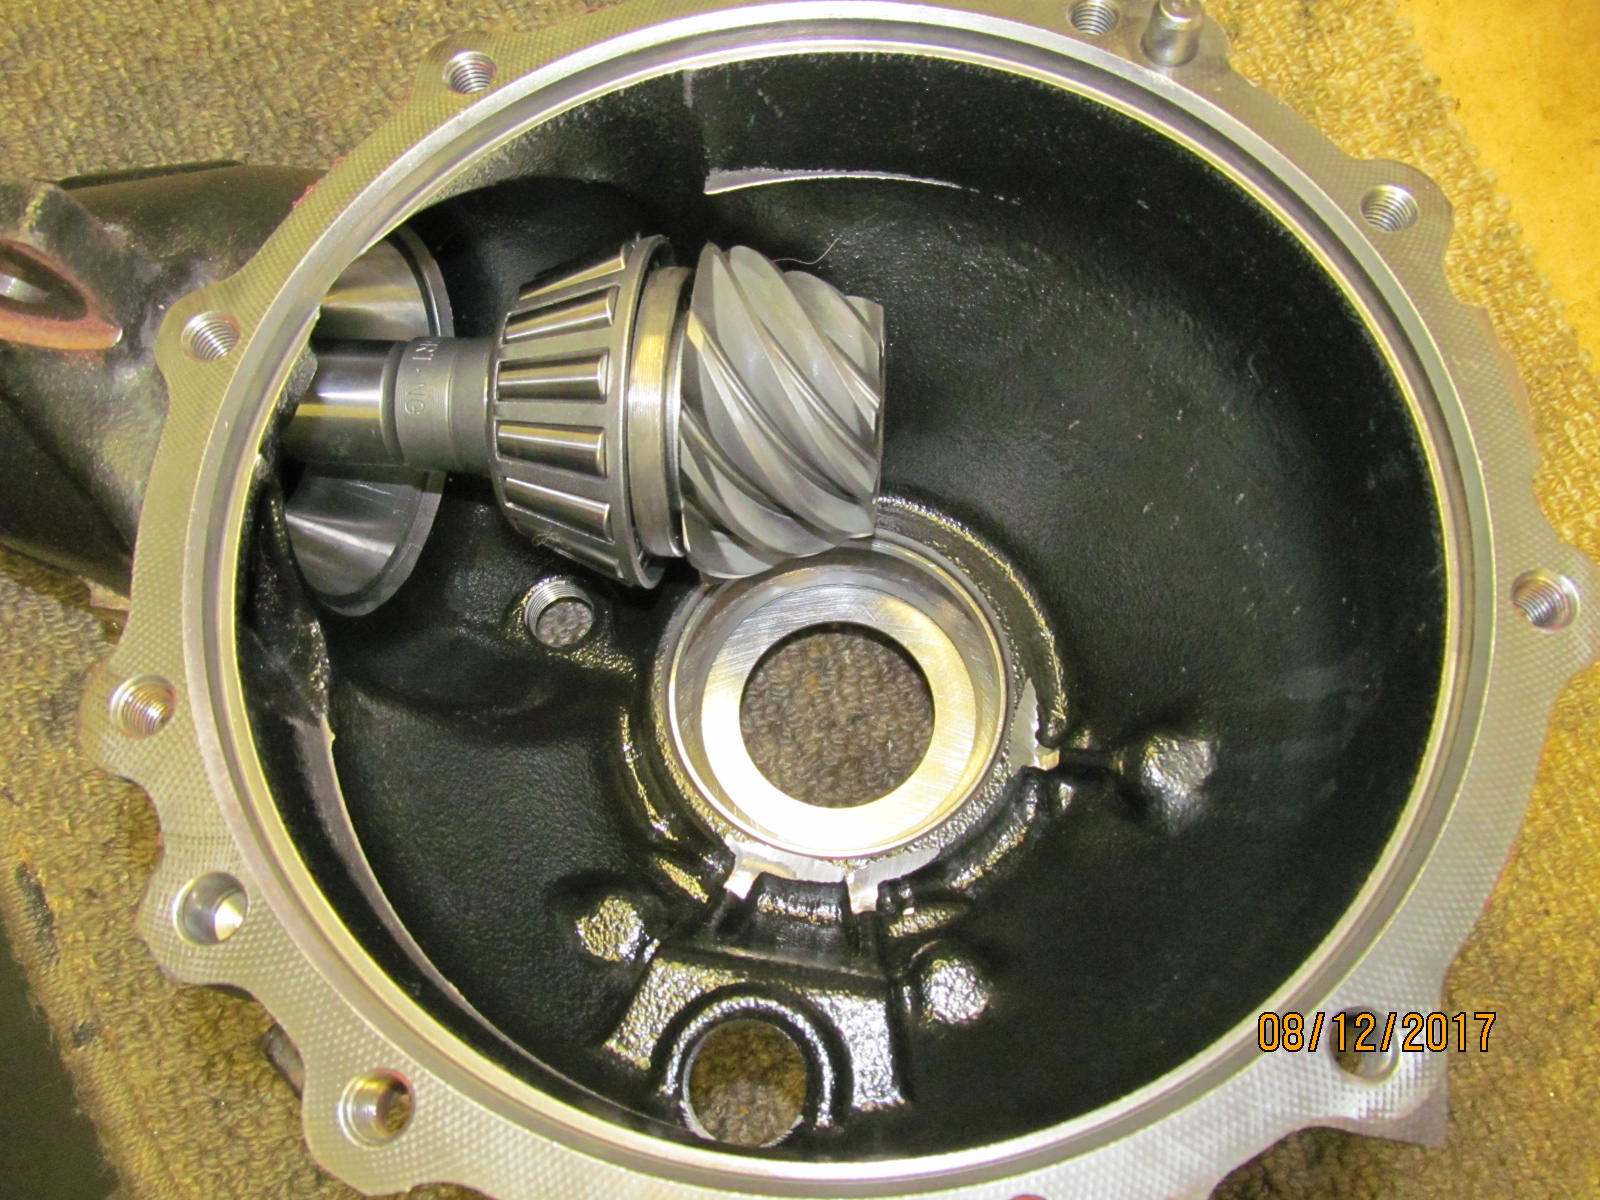
| Pinion can be mounted now. No crush sleeve yet. Just tighten the pinion nut enough to offer some pinion bearing preload. |
|---|
|
|
| .............................. |
|---|
|
|
"click click click" I can hear the electromagnet tab clicking between the stops when I turn the pinion back and forth.
But I also note no backlash at all when I jiggle the ring back and forth. That means the race at the bottom
of the bowl needs a thicker washer plate. |
|---|
|
|
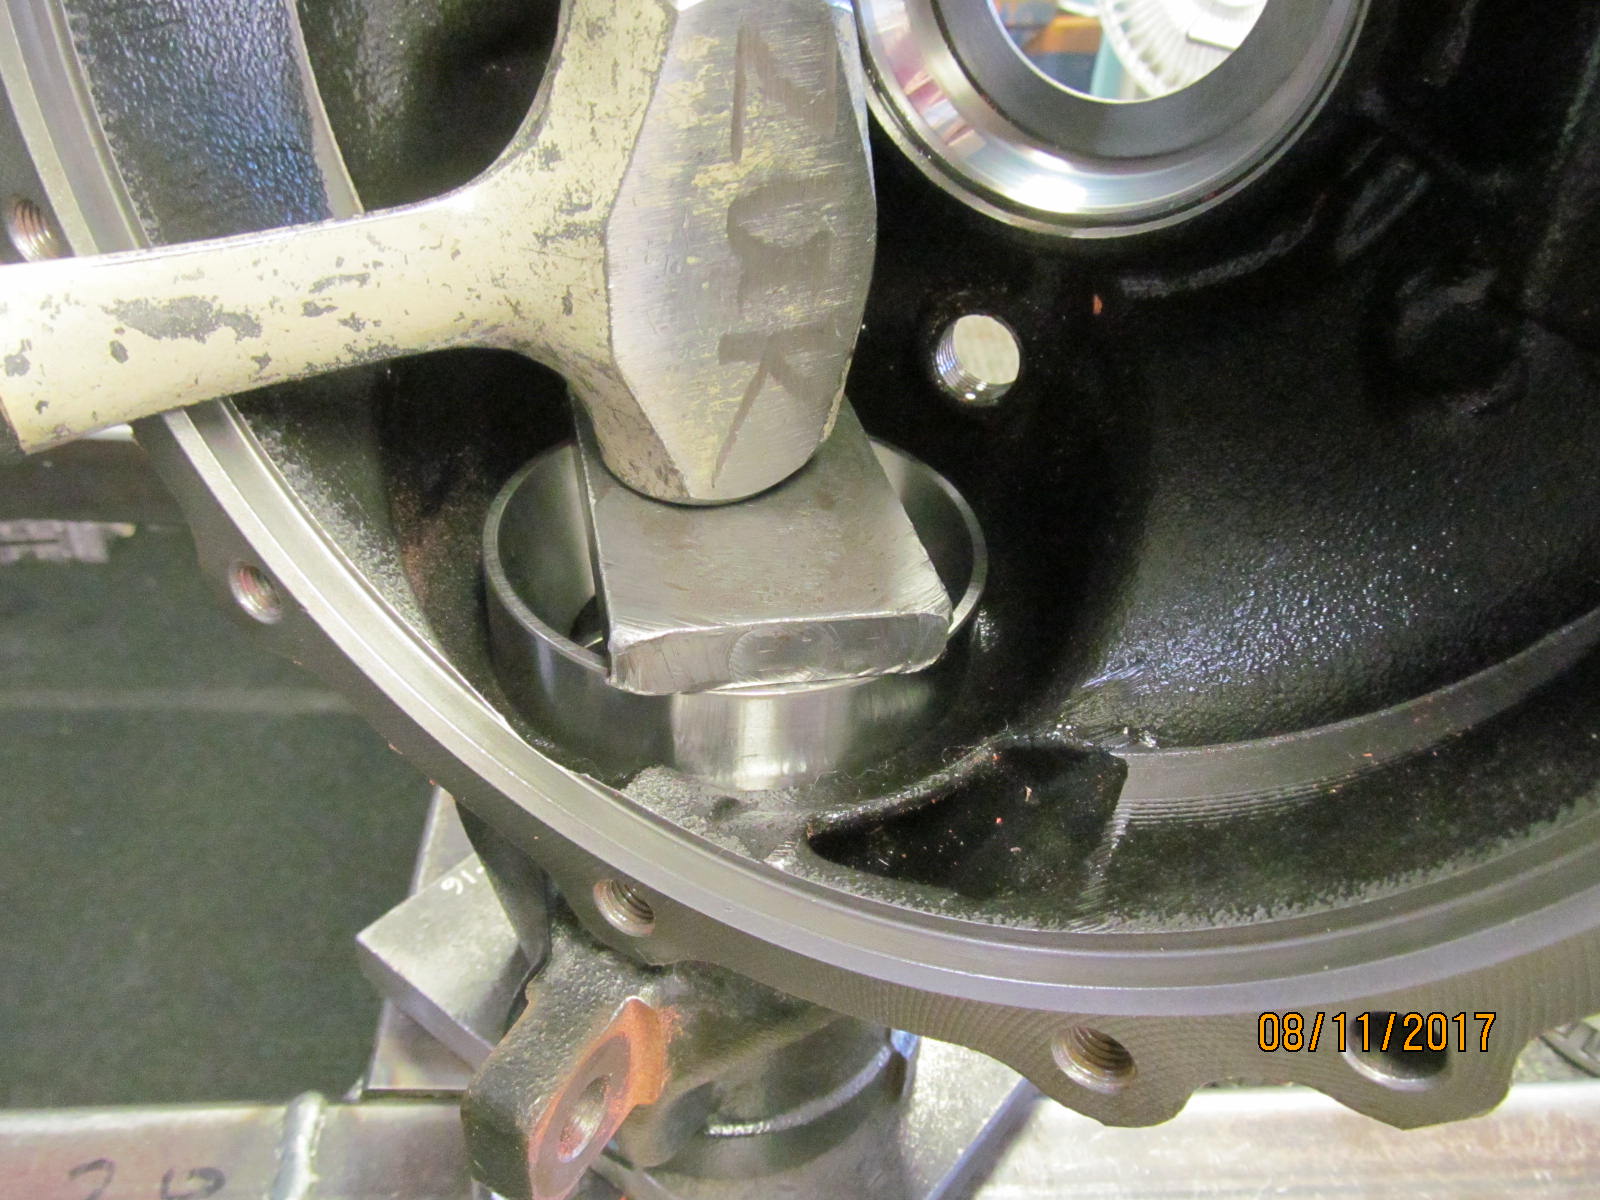
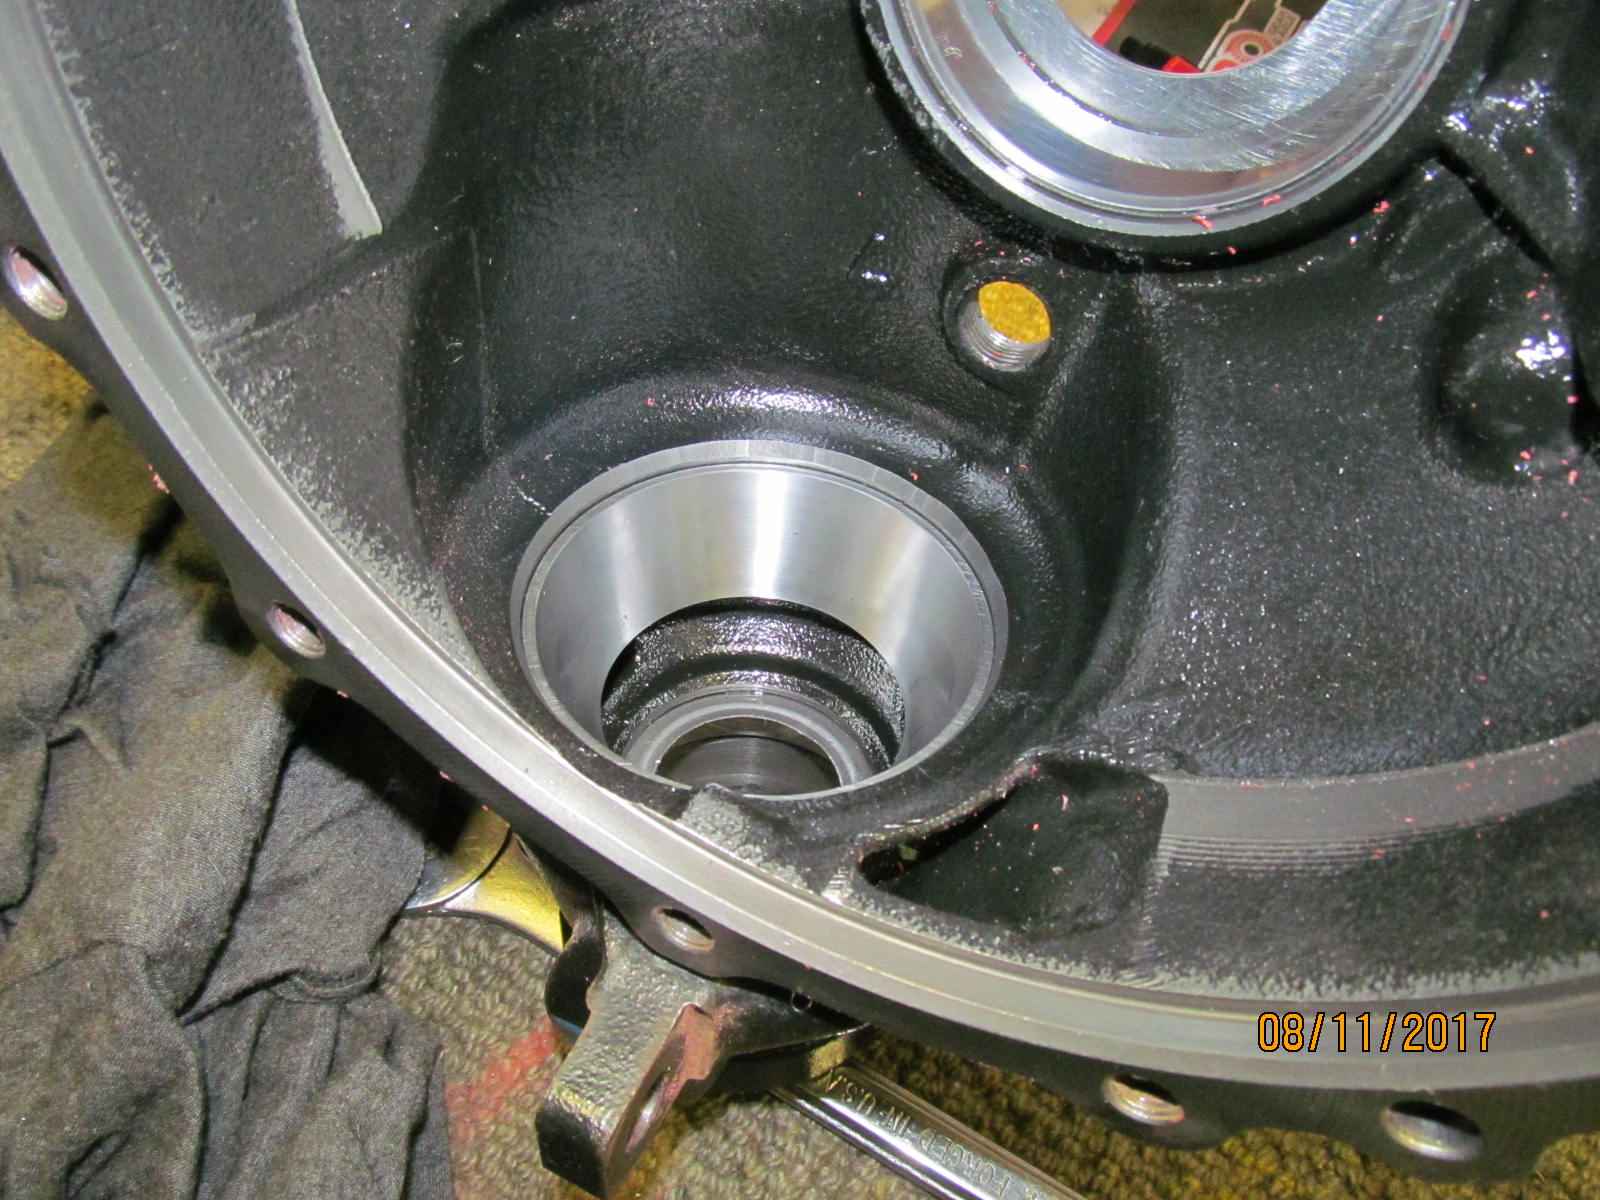
| This bad boy right here needs the thicker washer. |
|---|
|
|
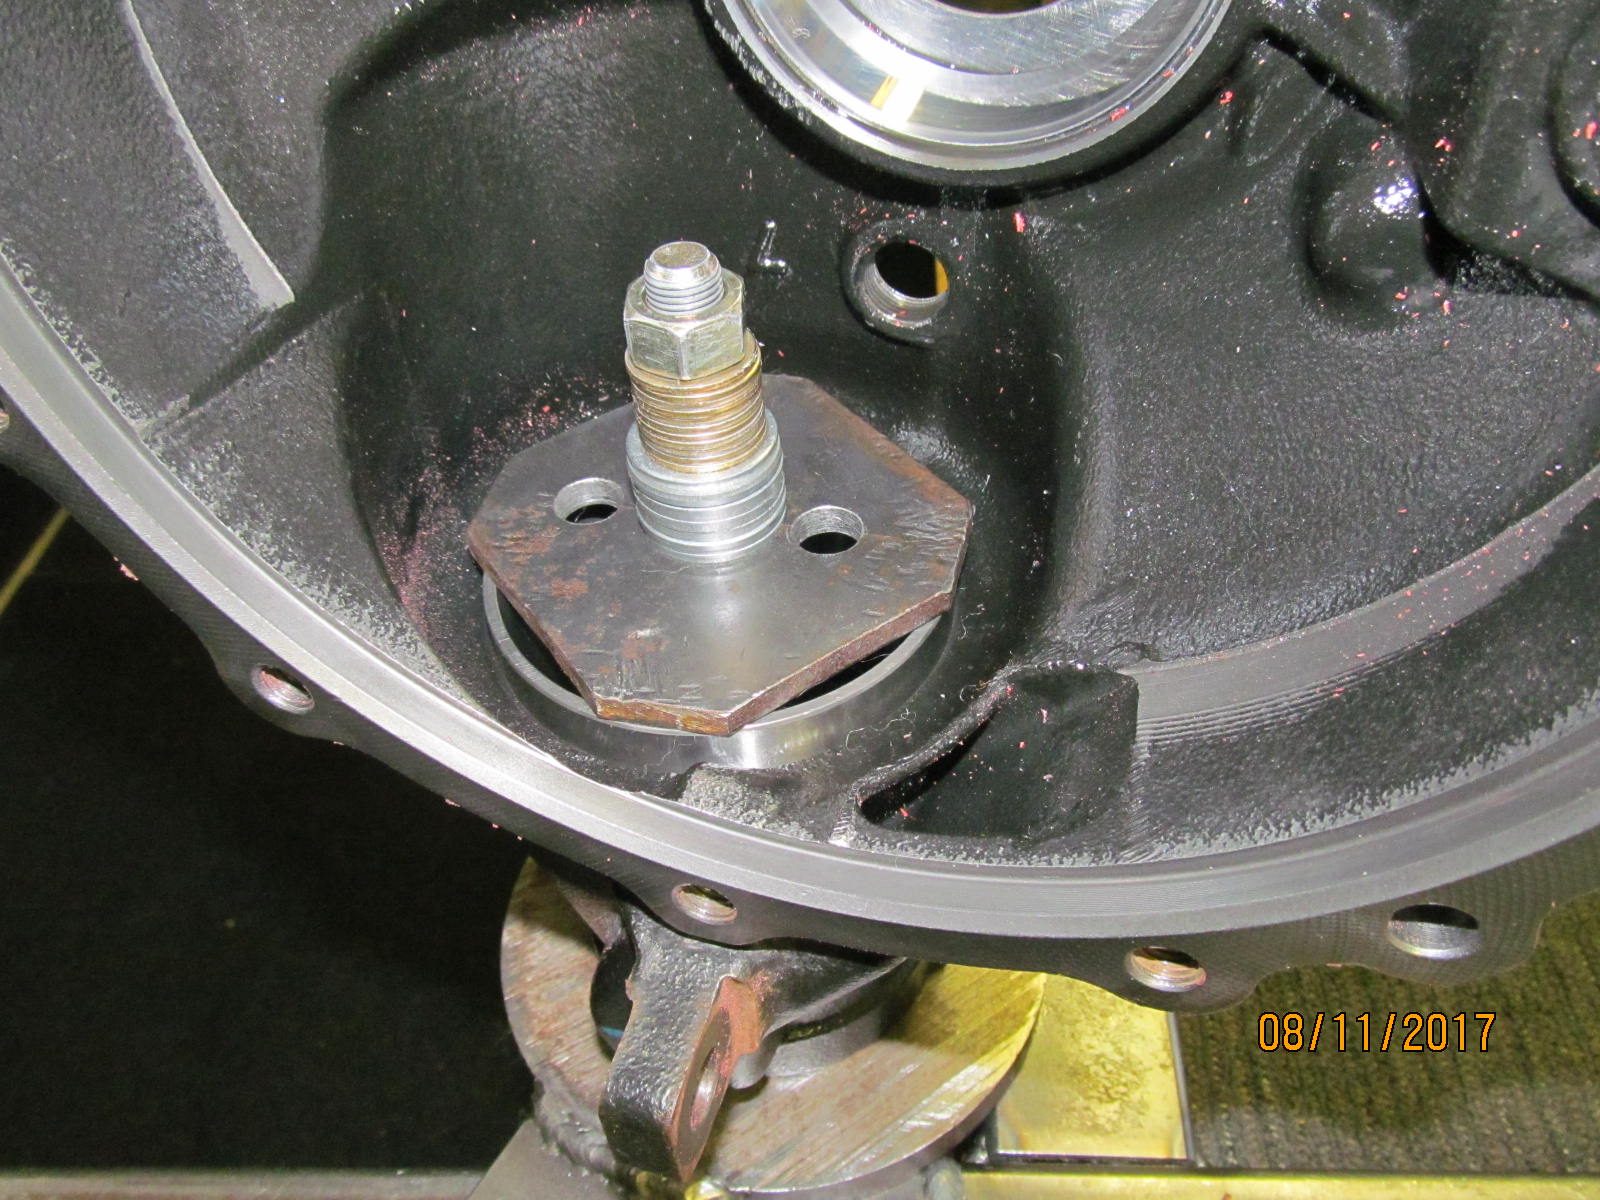
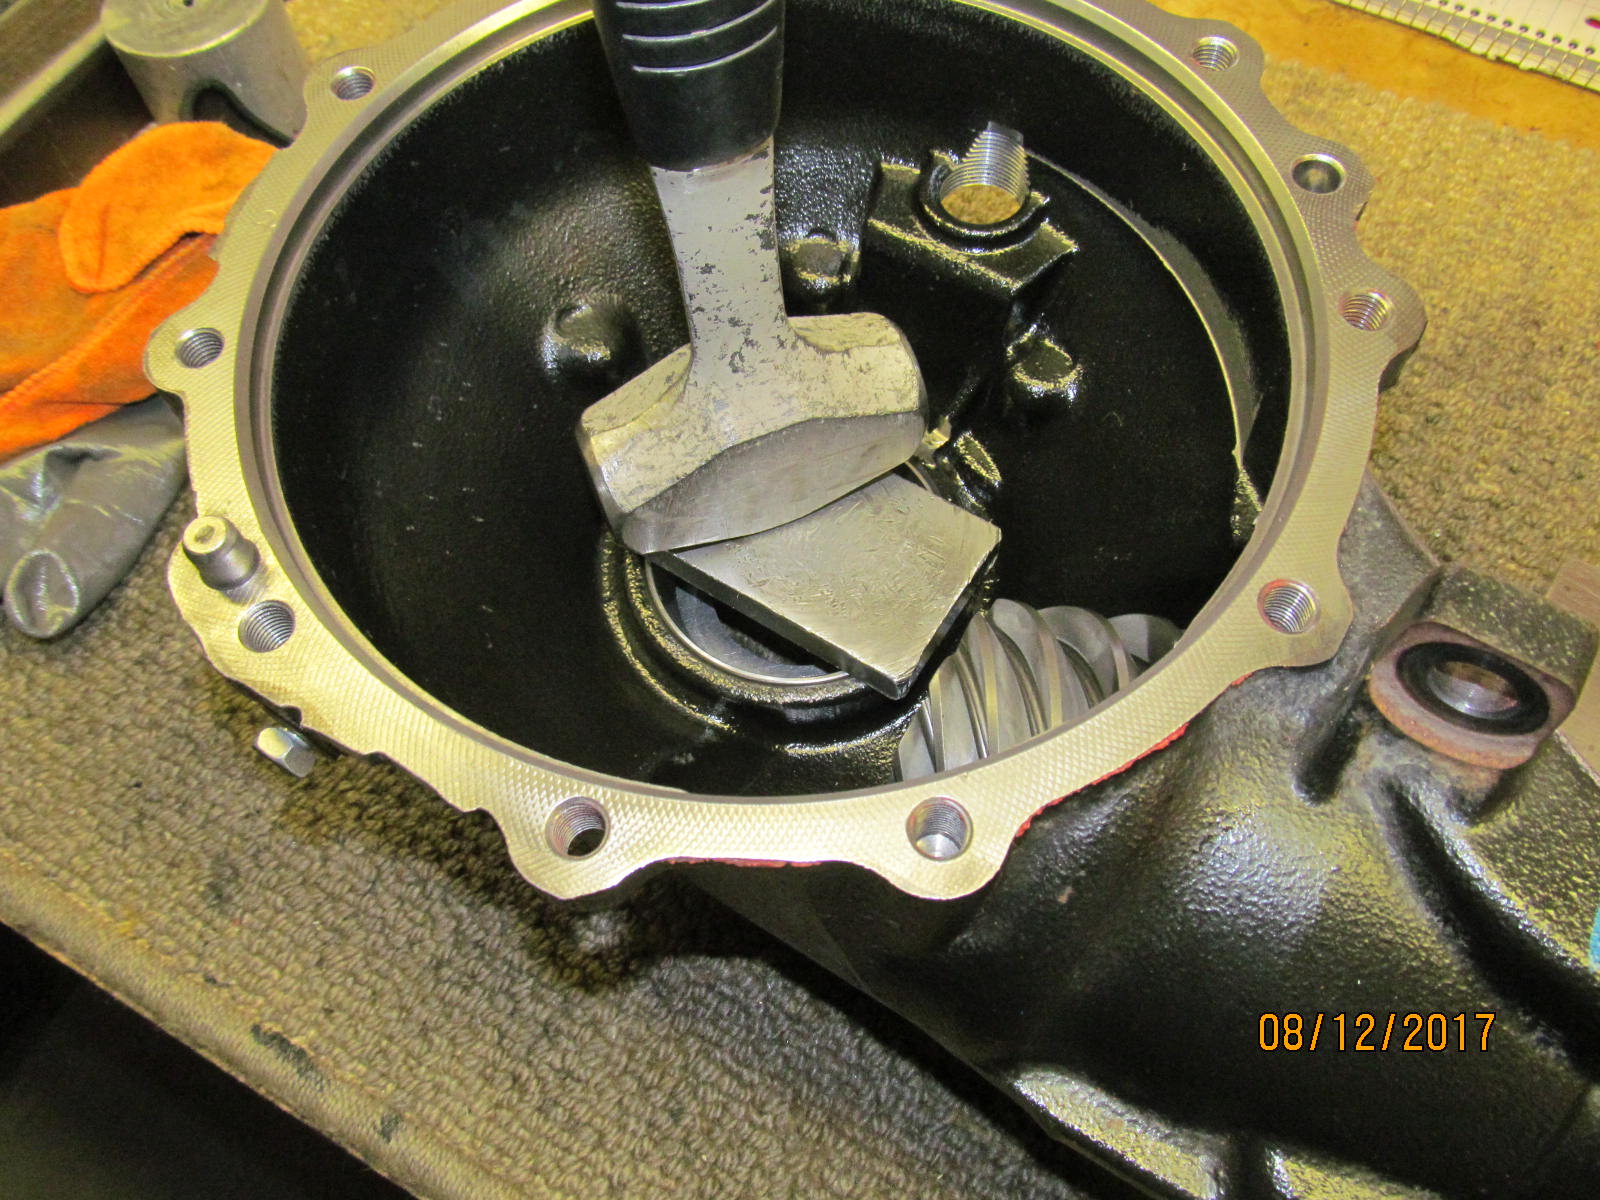
| Again, using old bearing parts to tap the race and washerplate out at the same time. |
|---|
|
|
| Tap tap tap and it's out. No bending or distortion of the washerplate. |
|---|
|
|
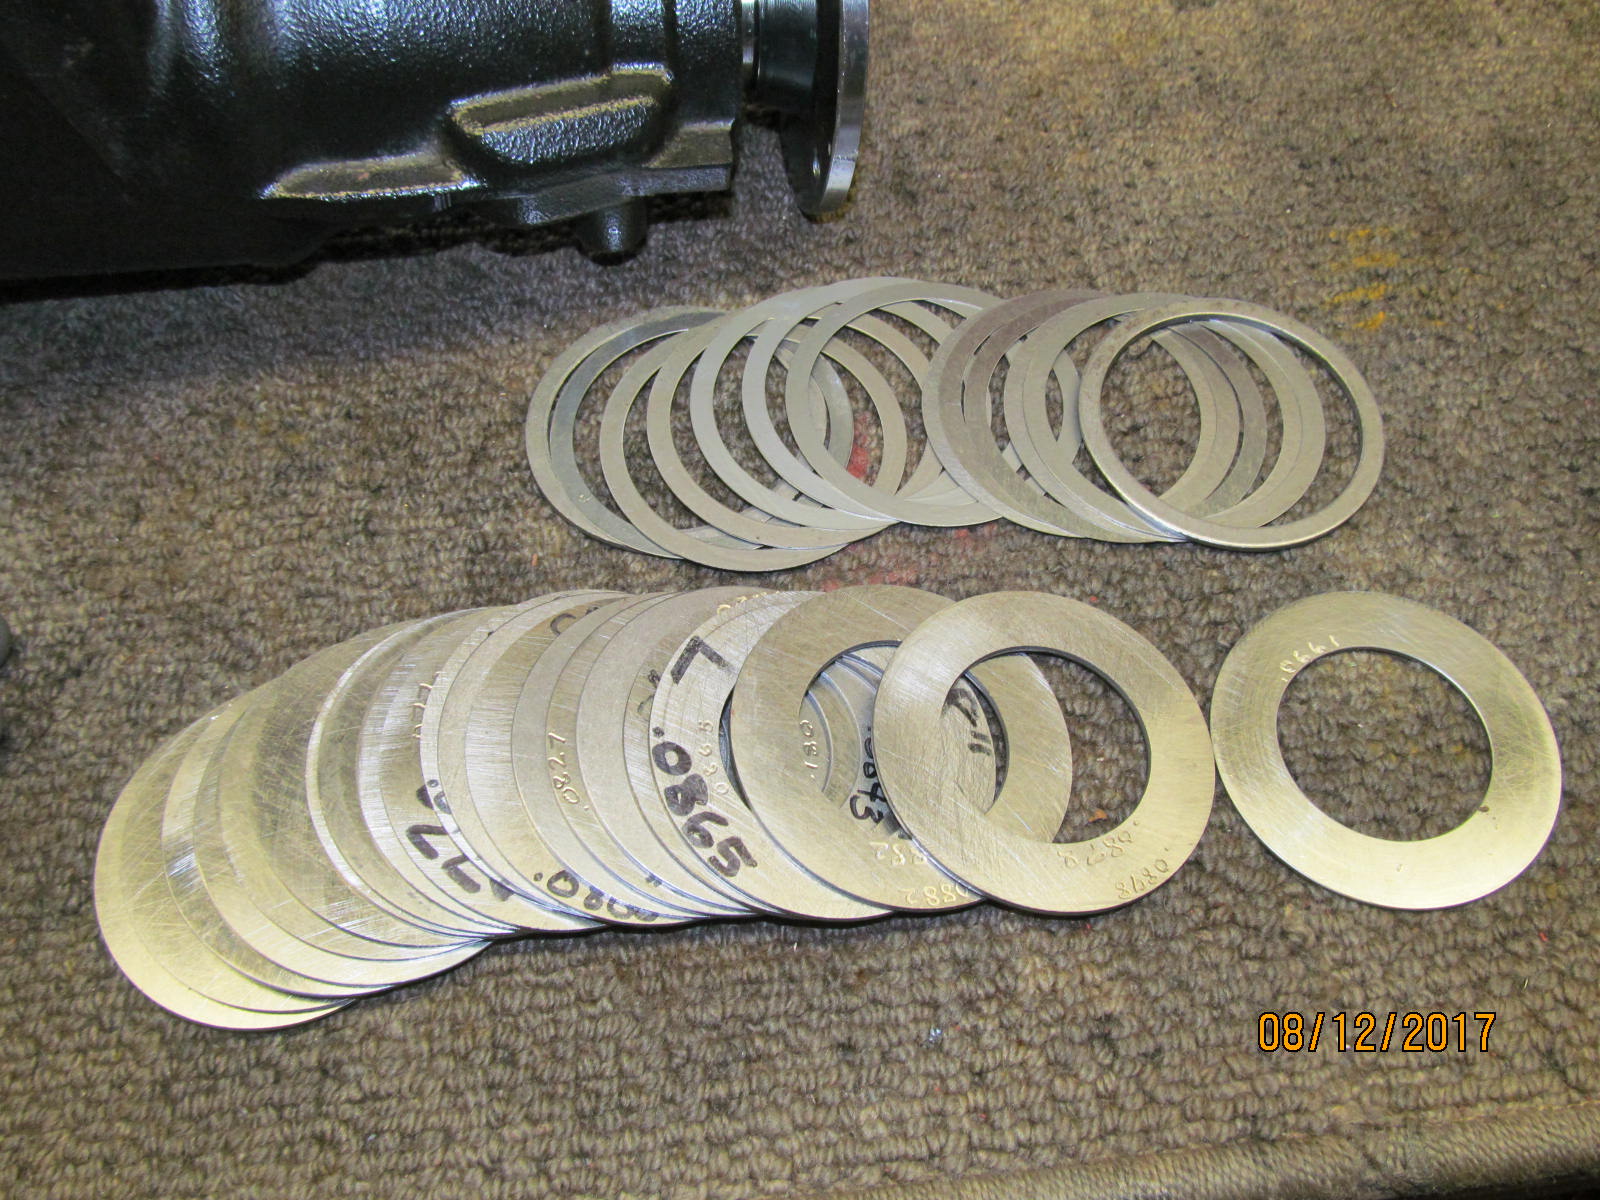
| Thick factory washerplates on the bottom and the aftermarket shims supplied in the Nitro kit above. |
|---|
|
|
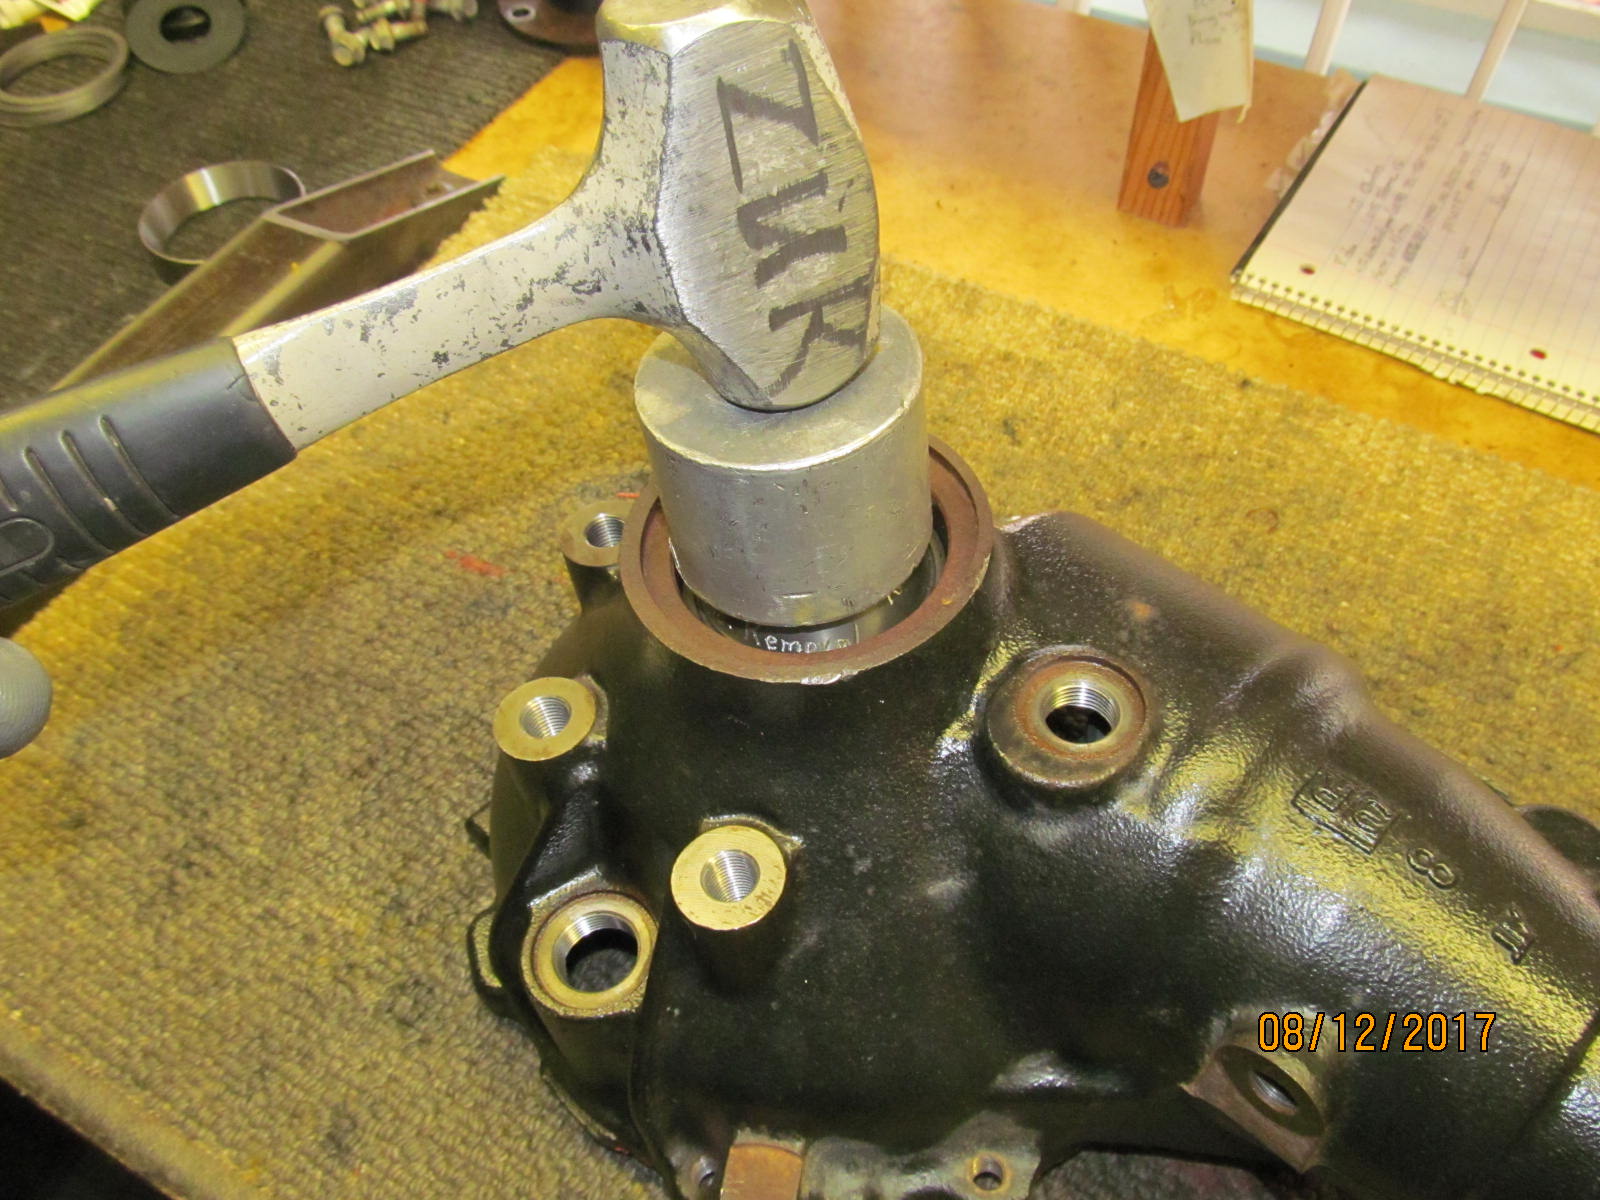
| This type of hammer is kinda cool and a good choice for the clams. In the pic, I can use the top of the hammer to pound in the race. |
|---|
|
|
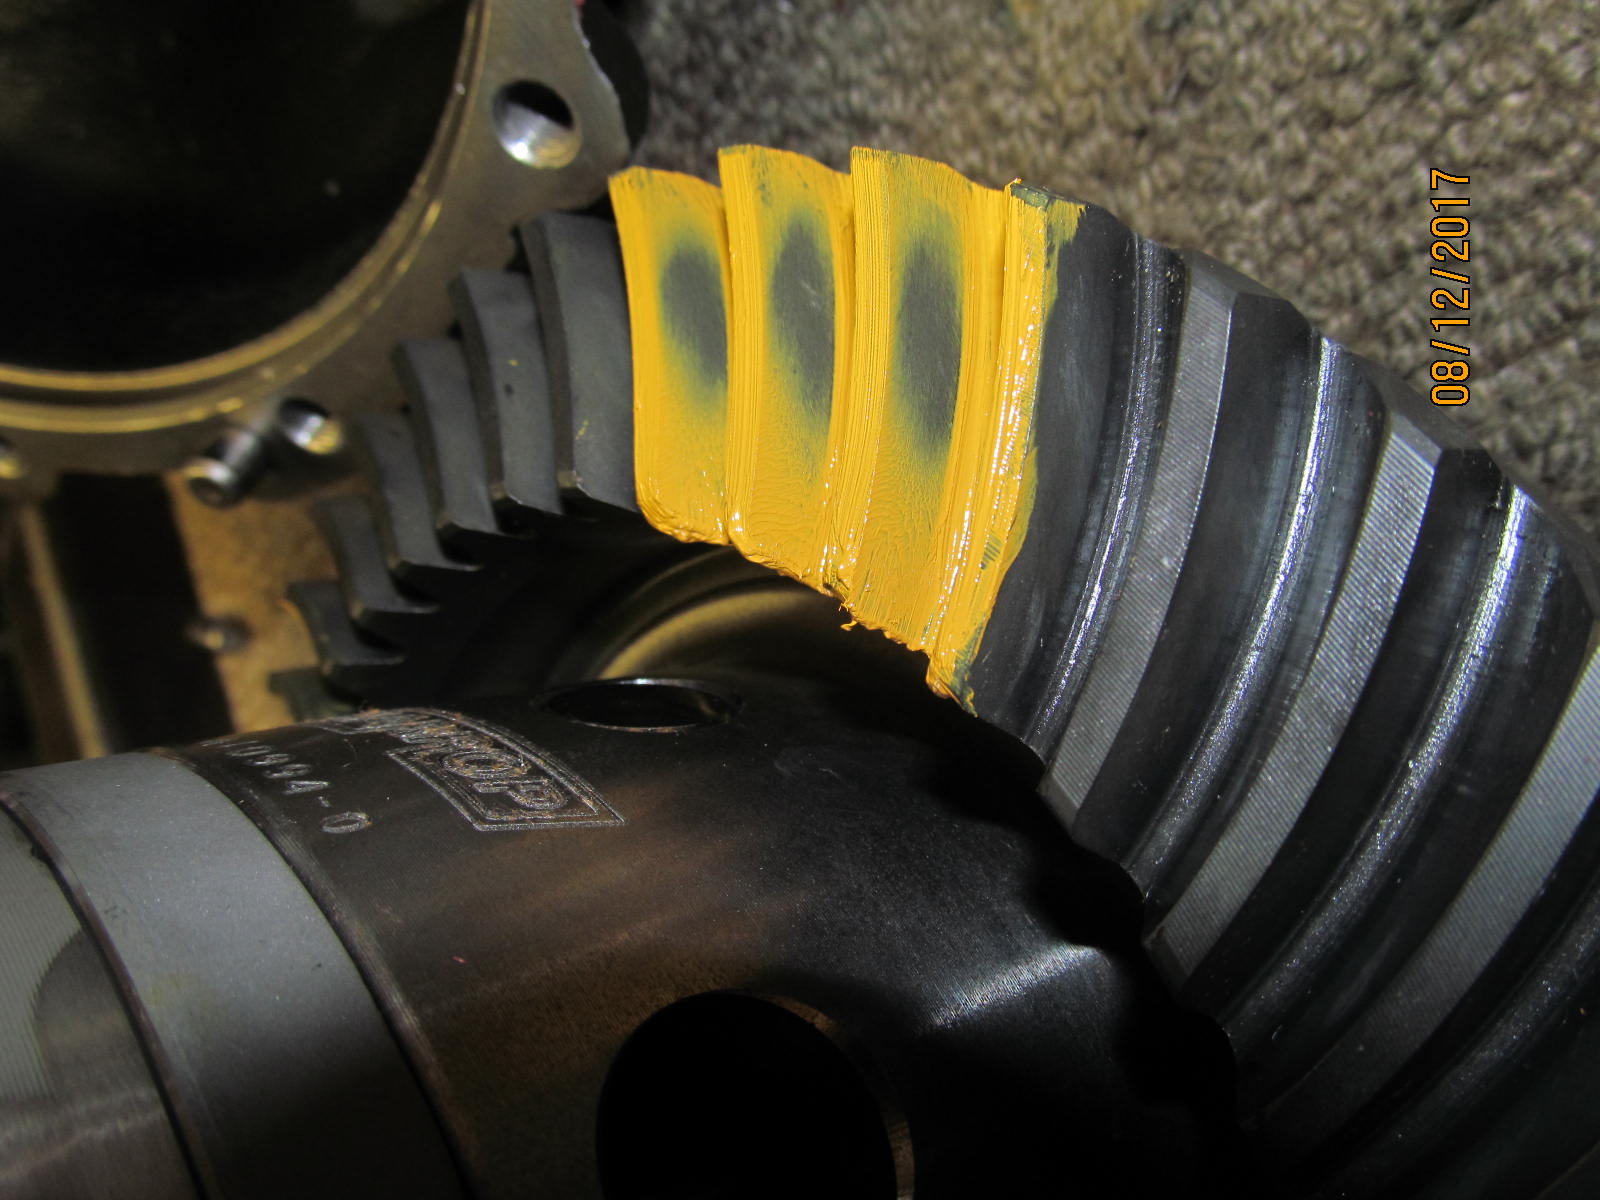
| Another tool I made.....made from an old bent Moser axle. This one locks the sidegear in solid and allows for a paint check. |
|---|
|
|
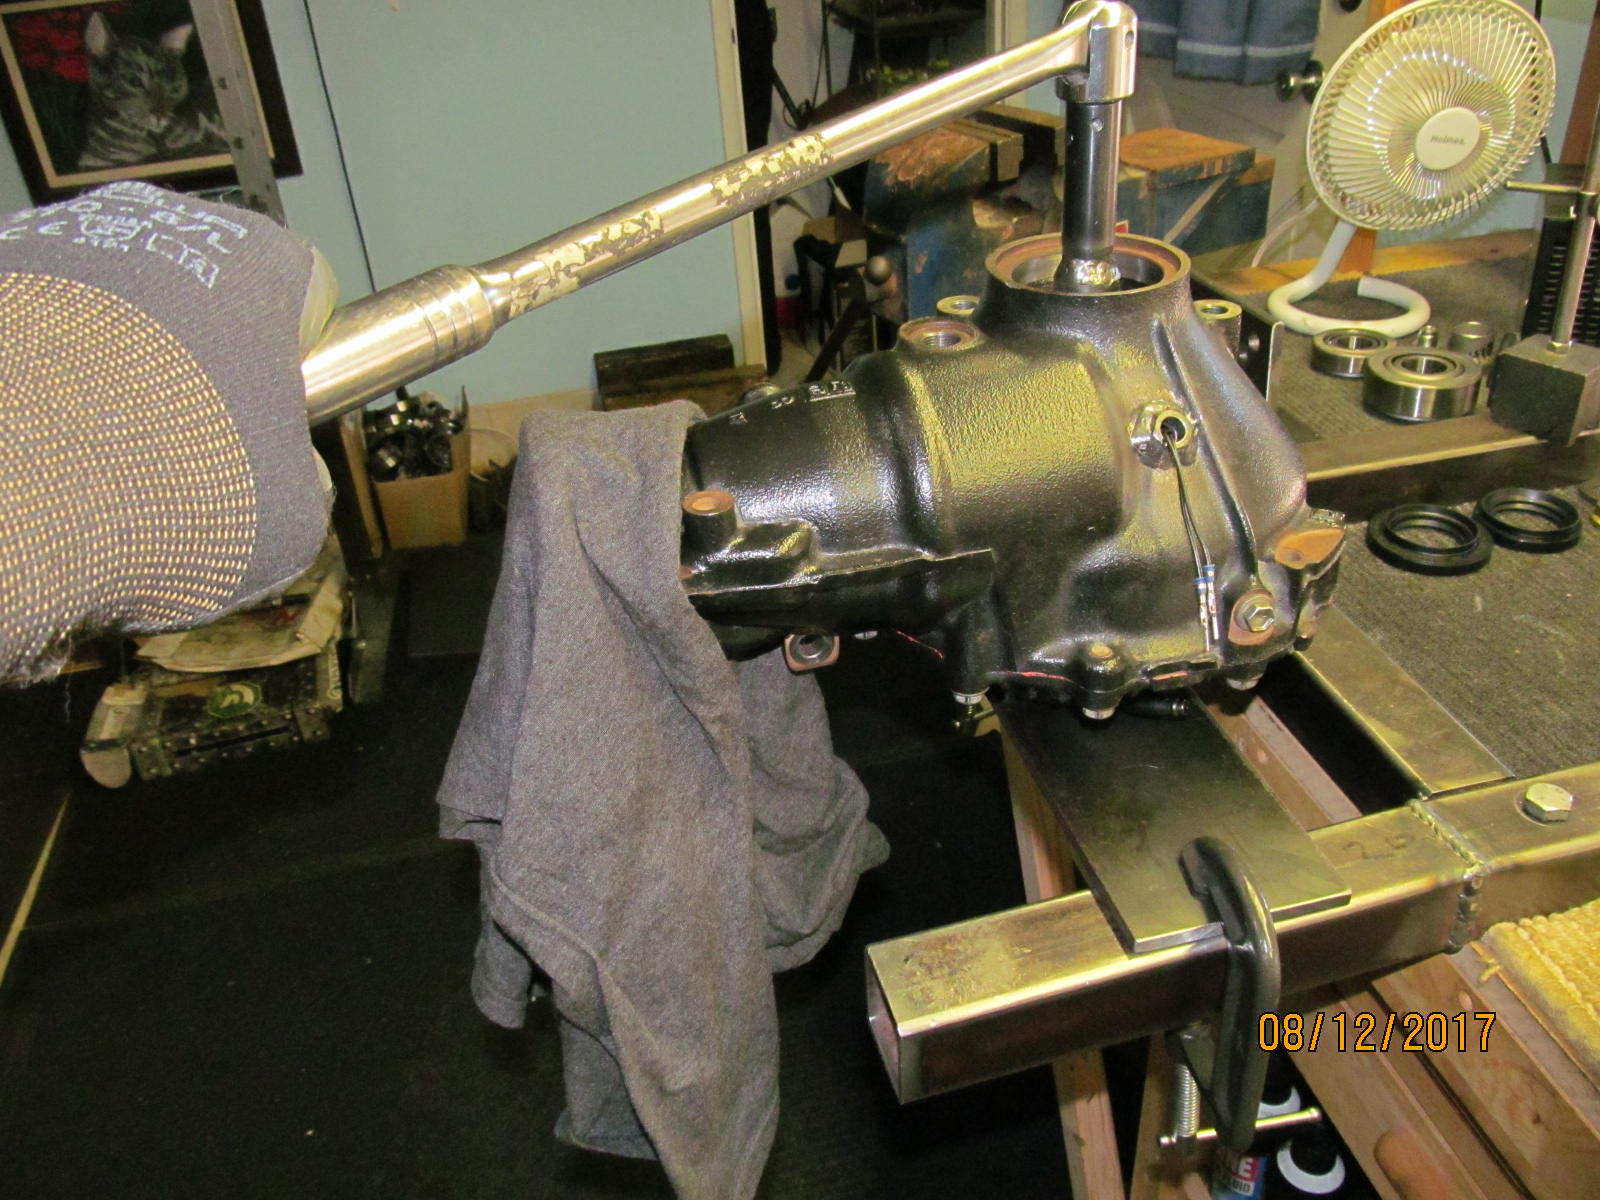
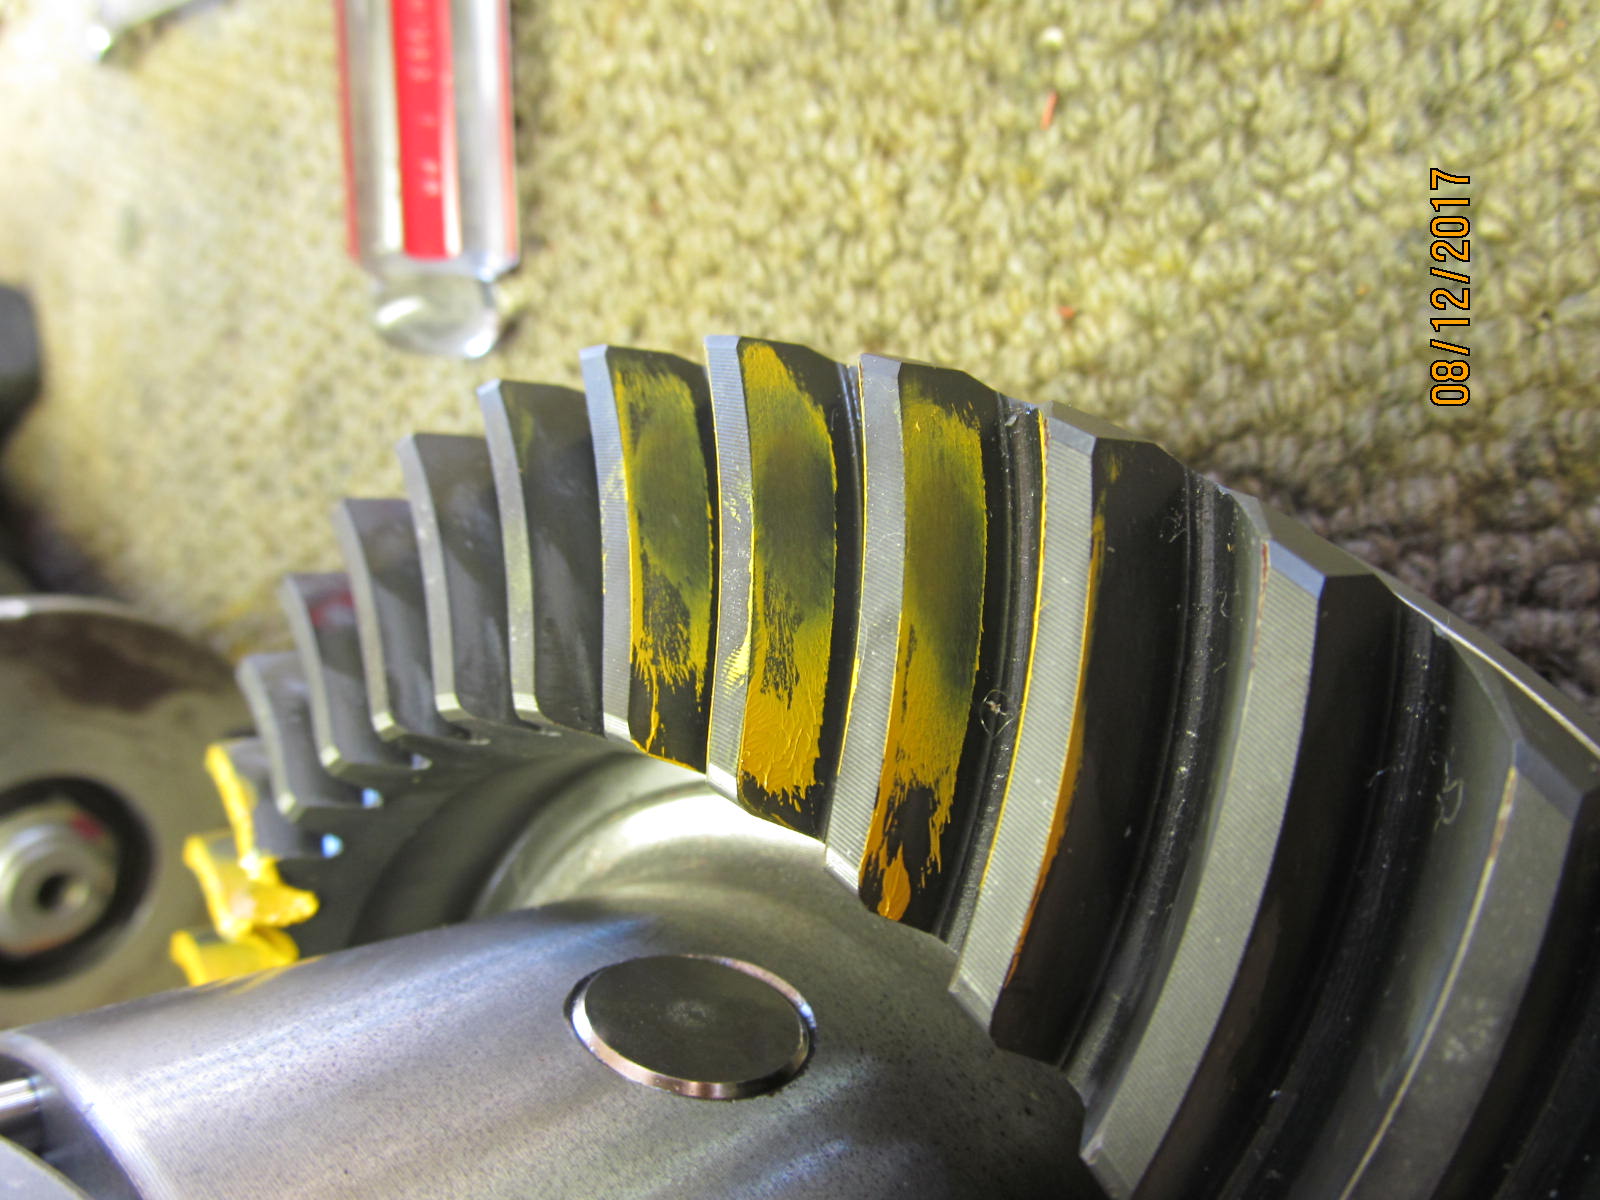
That tool allows the clam to be secured to the fixture as shown with 2 c-clamps. I then offer resistance on the pinion flange with a rag and
turn the other sidegear with a cheater bar. That offers enough resistance where the yellow paint makes an excellent inpression. |
|---|
|
|
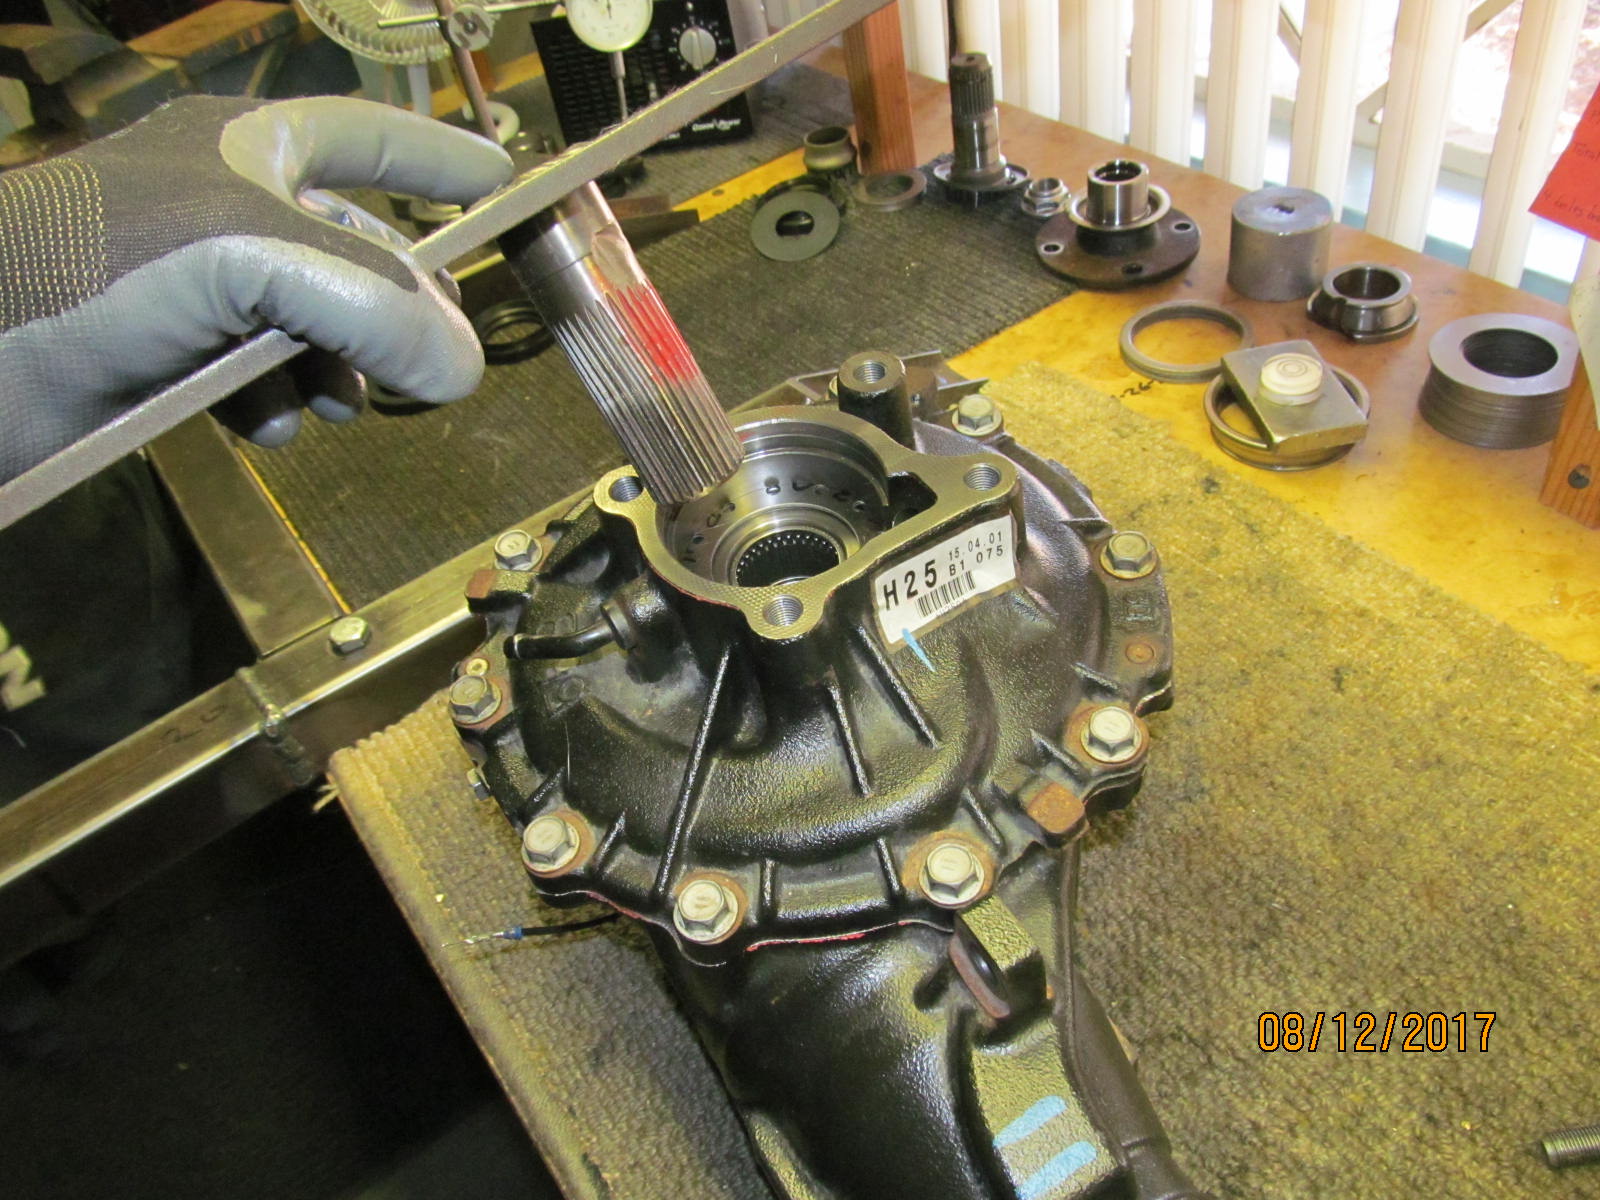
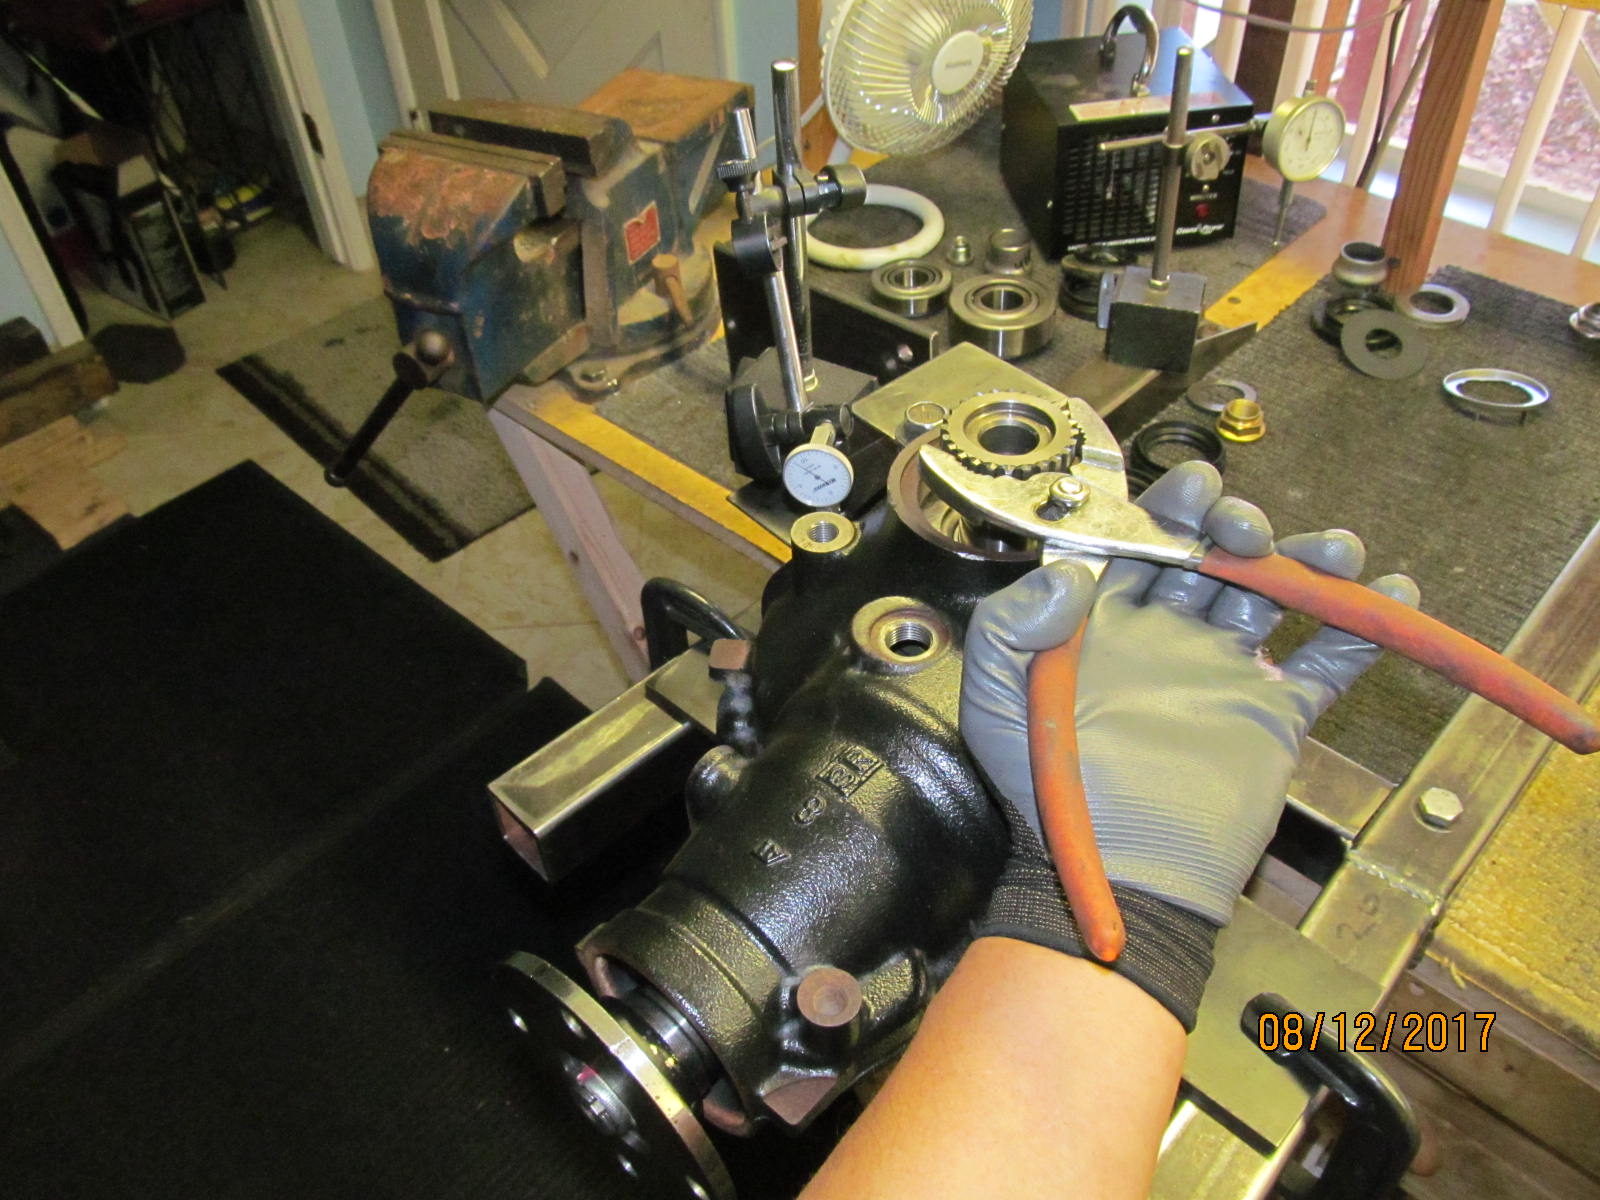
Backlash check. The axle stub was 30 spline so just a light jiggle back and forth means I can measure the backlash. No real pressure
on the little teeth so no tooth damage. Backlash checked in at .009" but good enough for a paint check. |
|---|
|
|
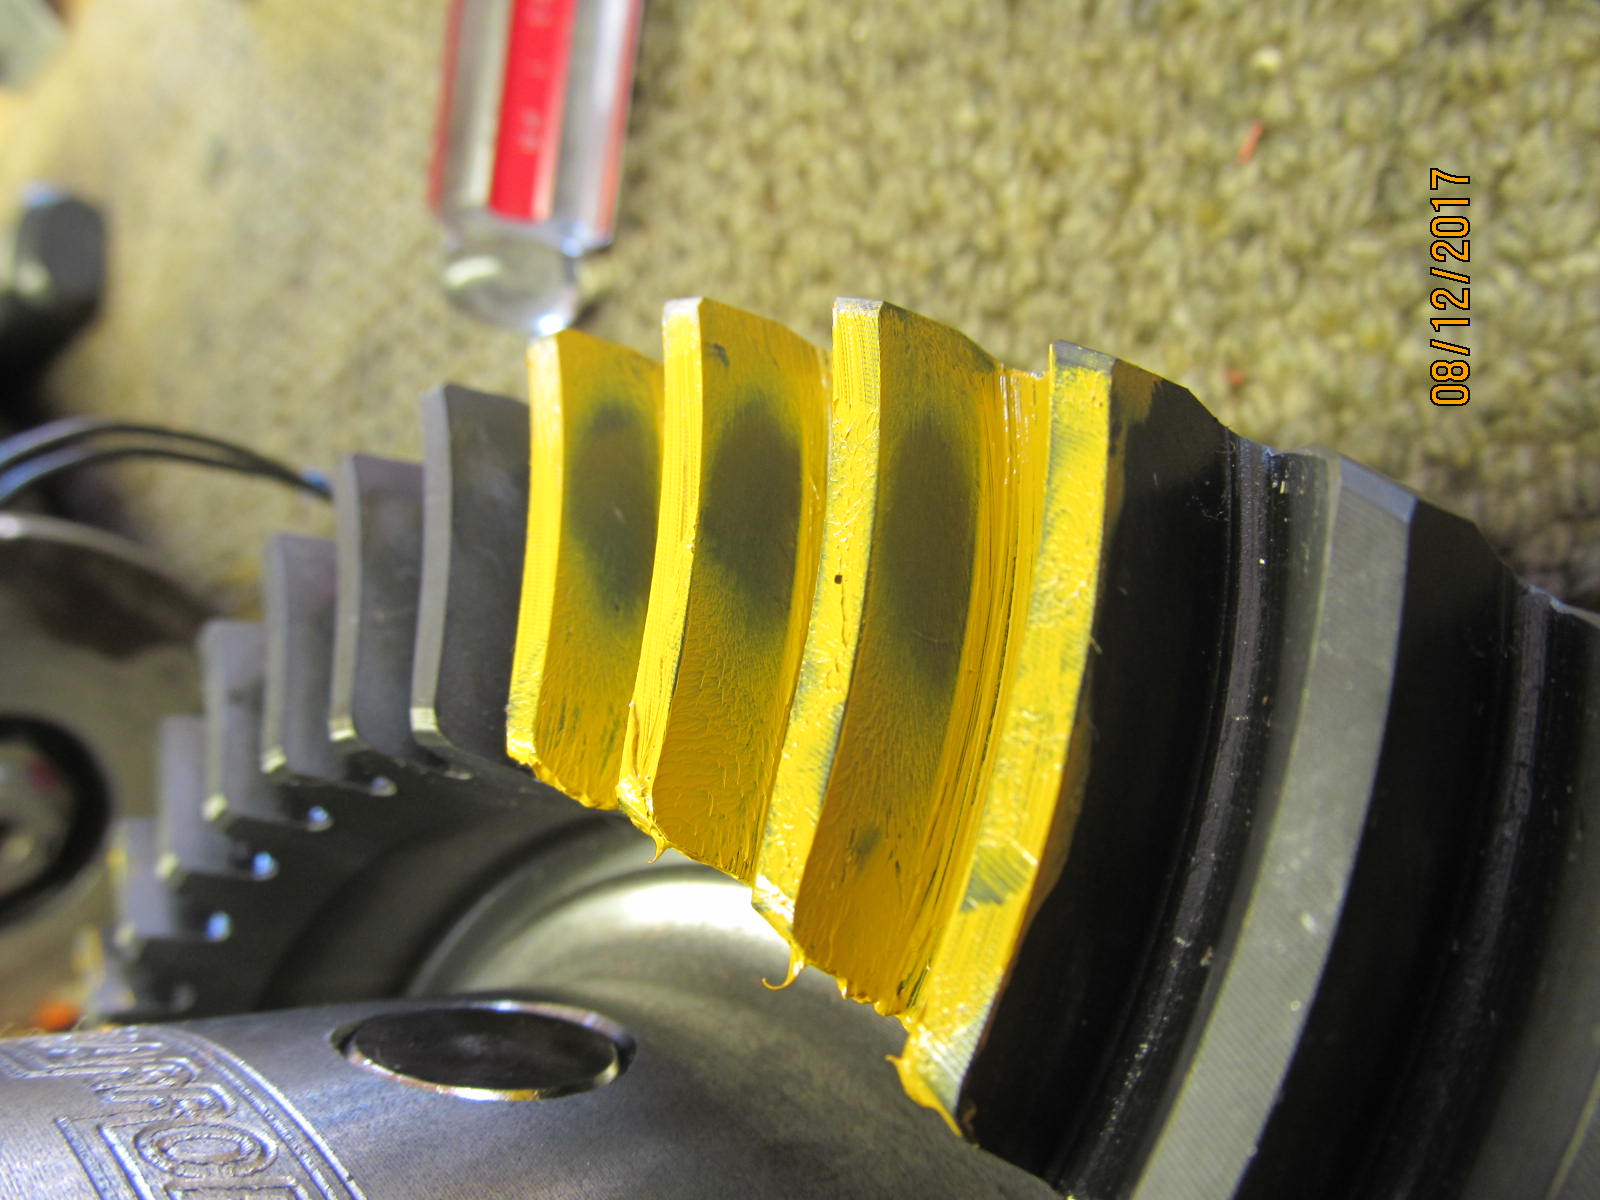
Drive side. NICE. Depth is beautiful. A little to the heel but tightening up the BL might help there.
But what is really important is the depth parameter which is spot on. |
|---|
|
|
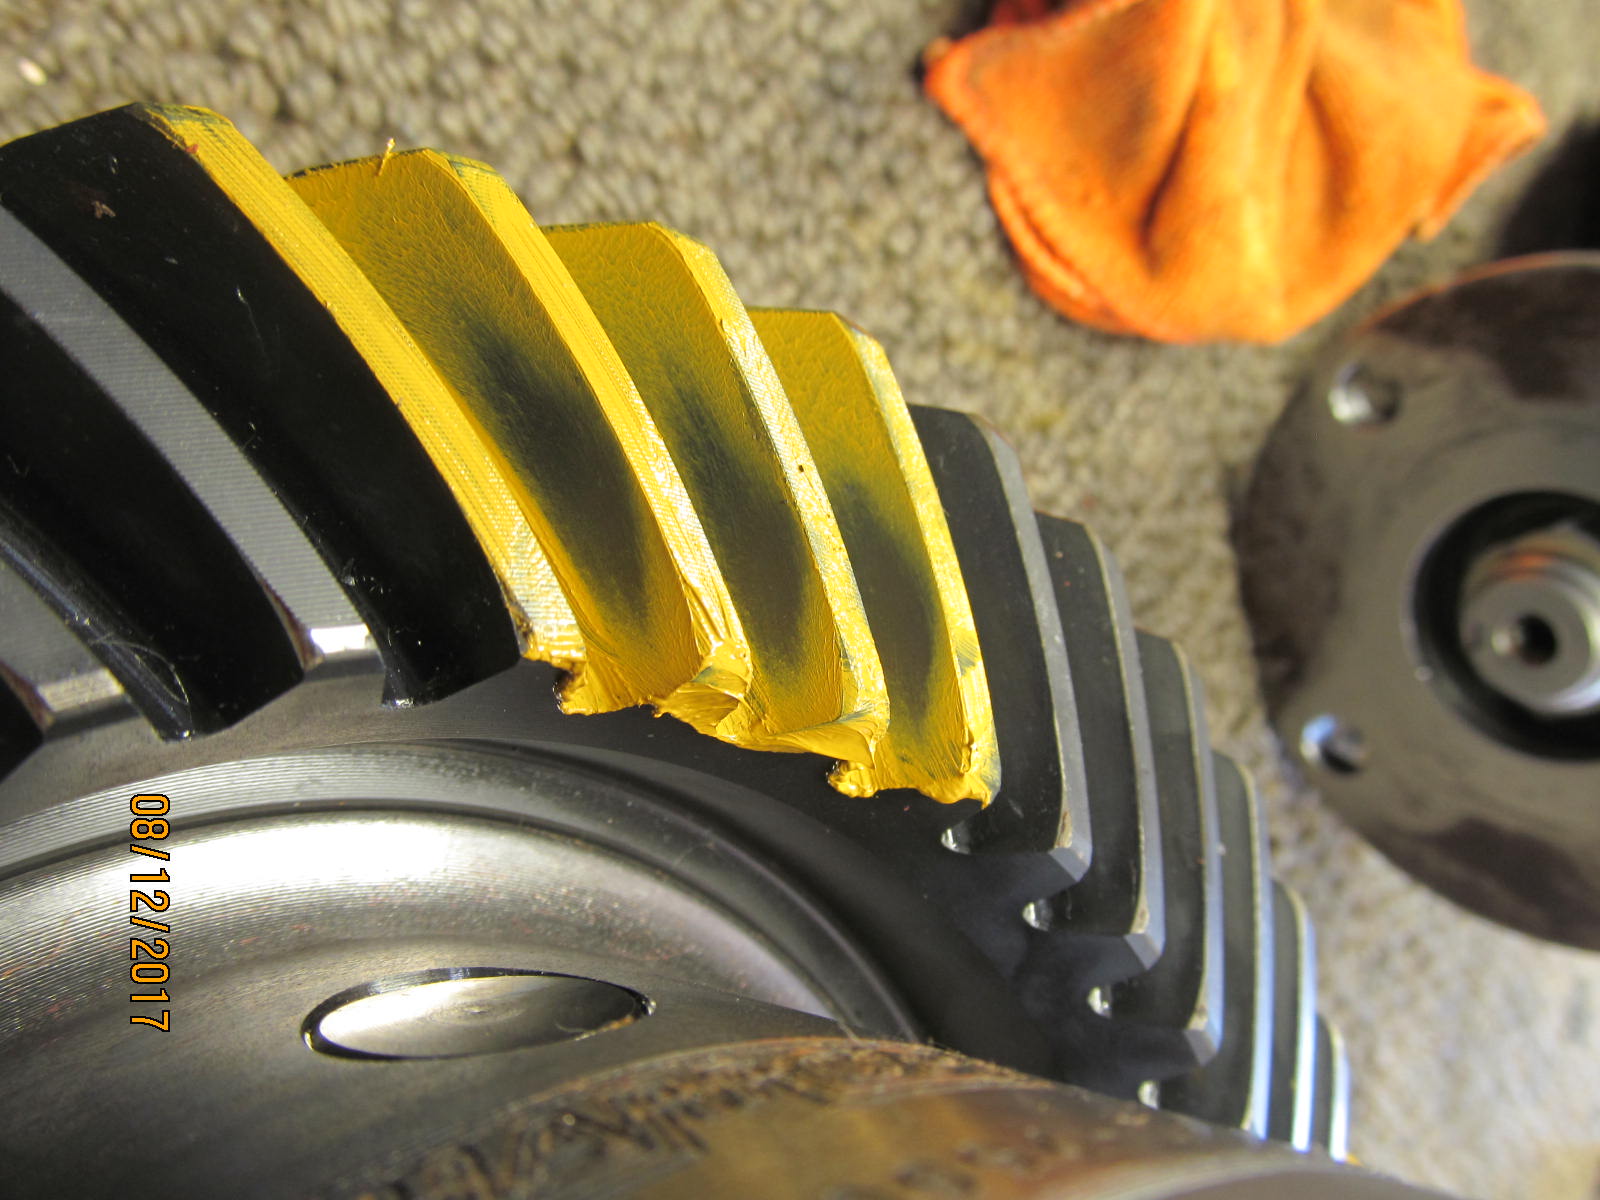
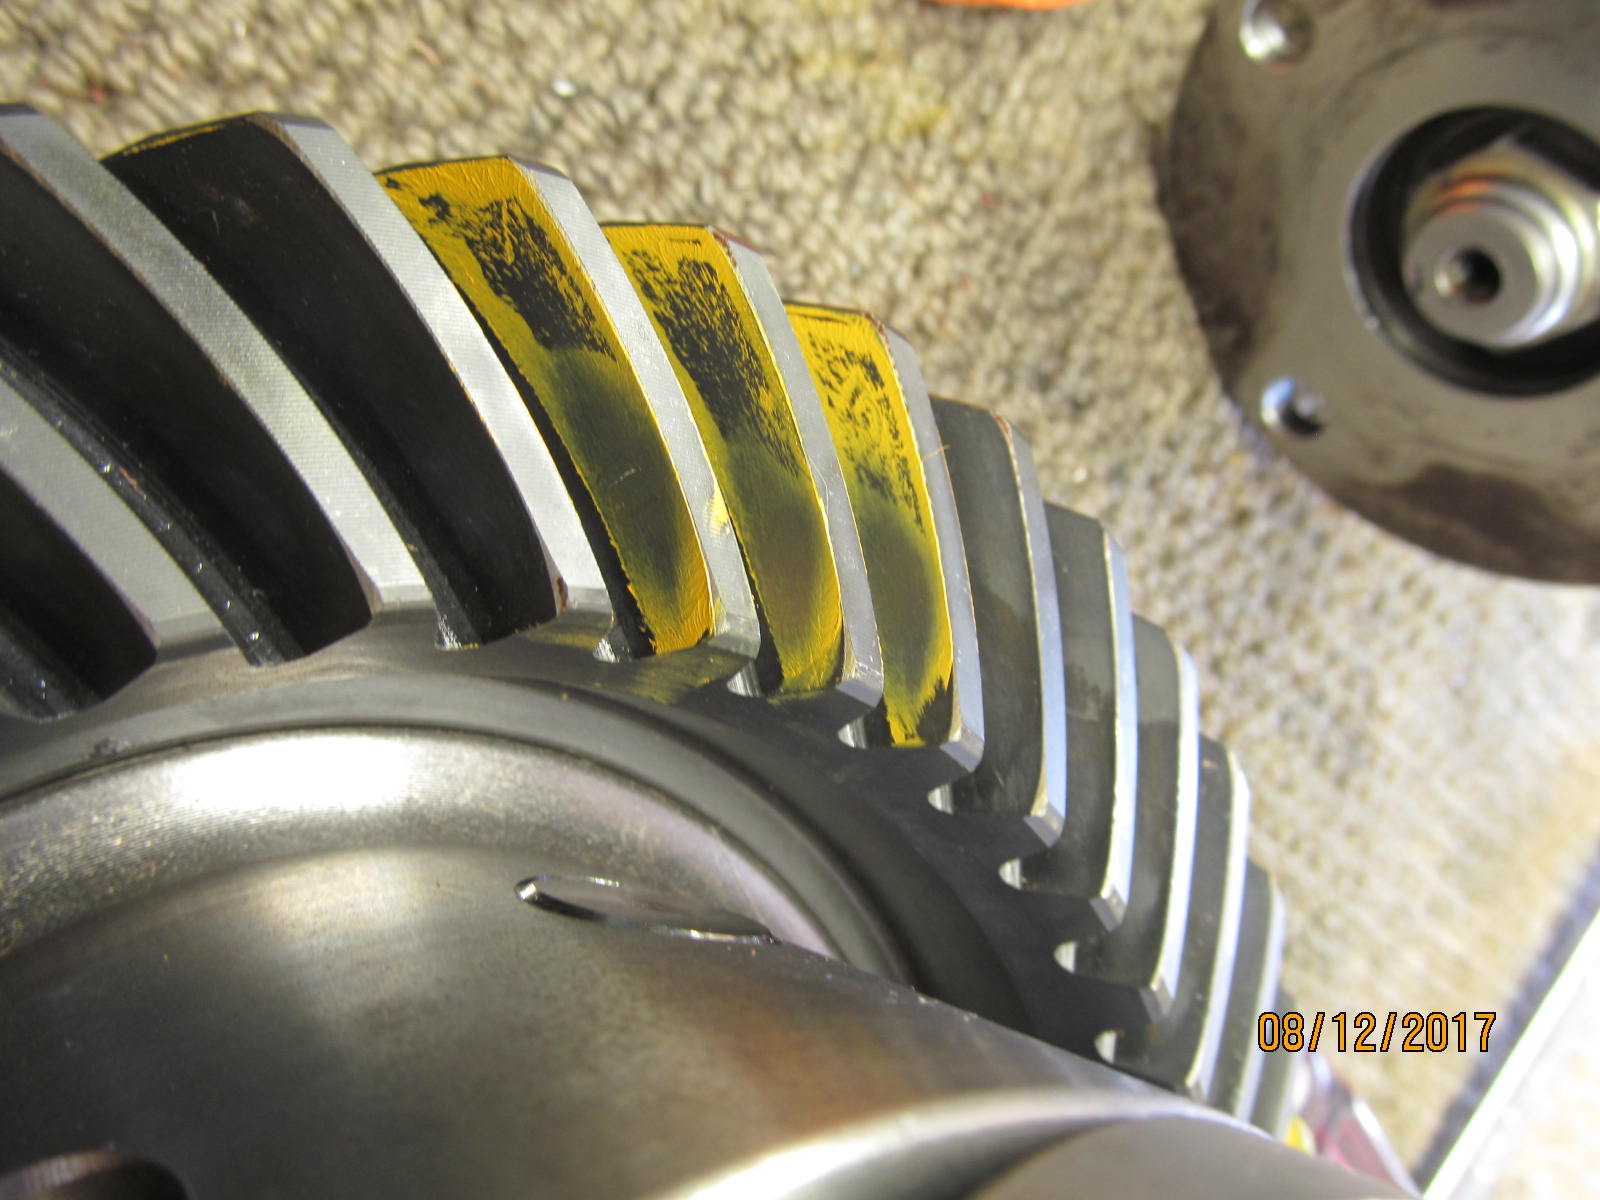
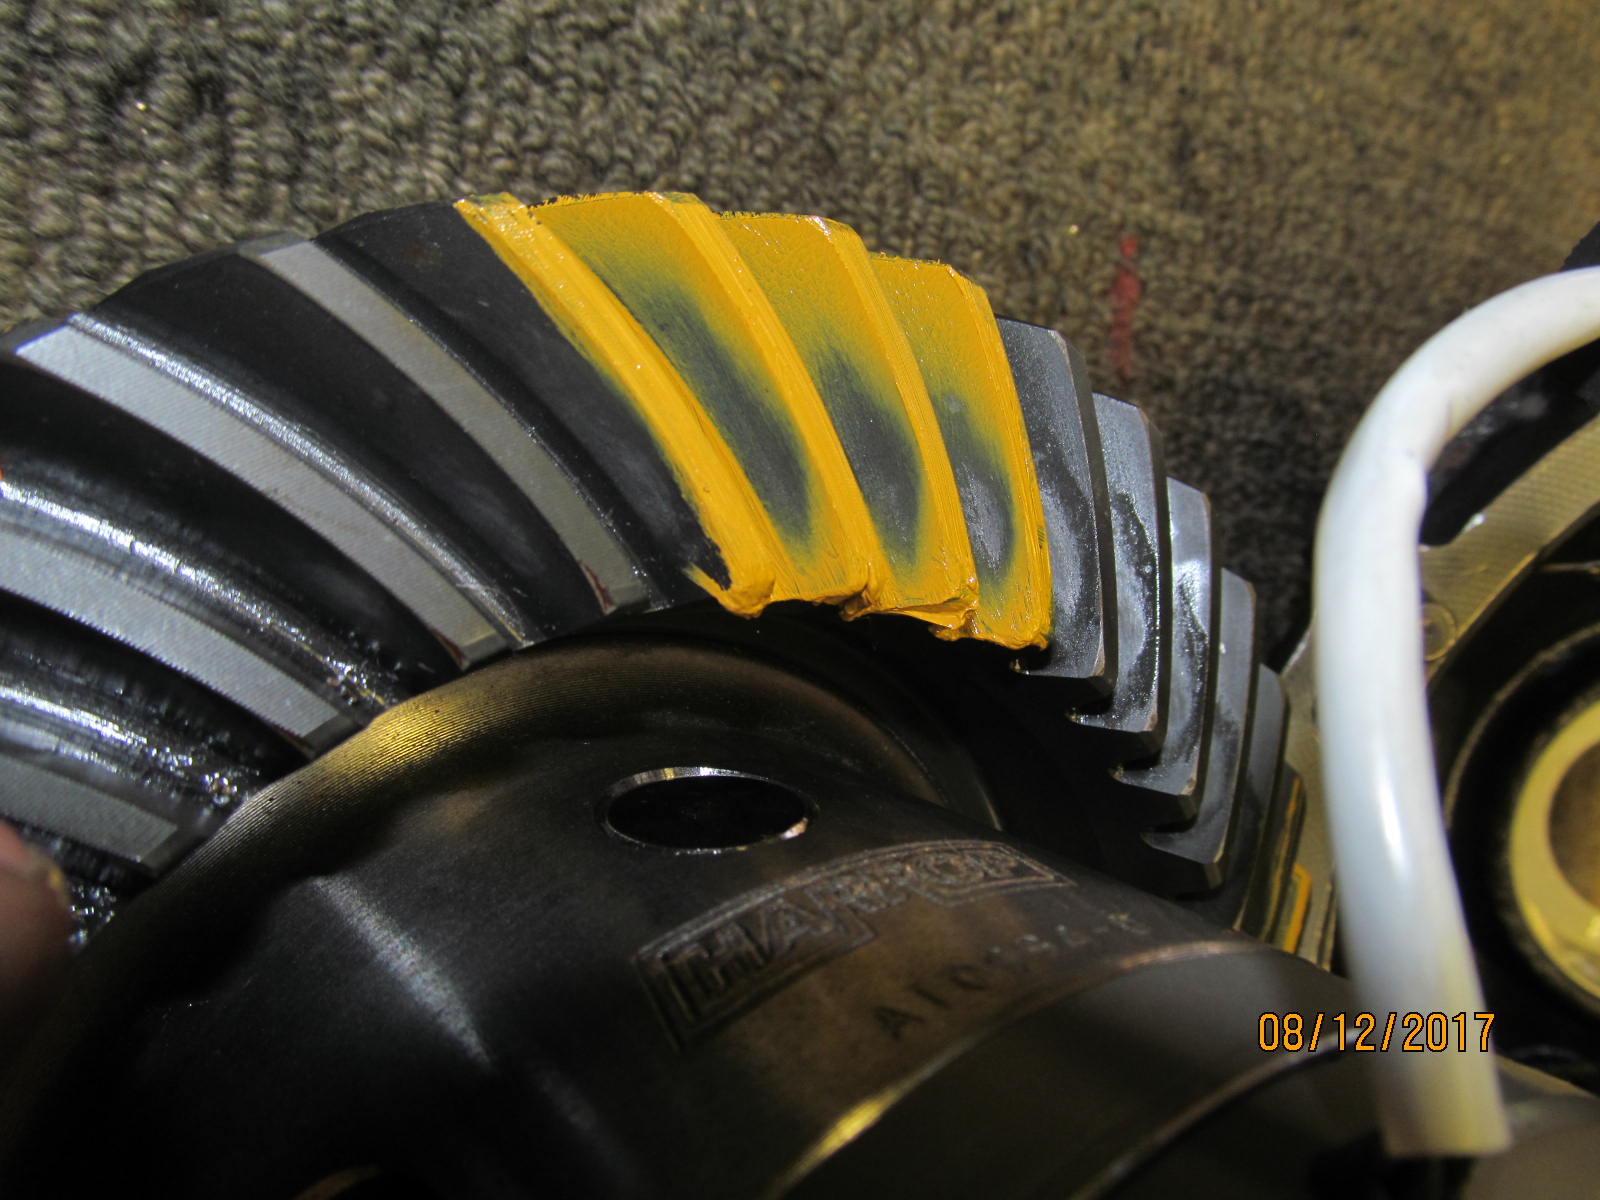
| Coast....thing of beauty. |
|---|
|
|
| Drive....reverse painted. |
|---|
|
|
| Coast....reverse painted. |
|---|
|
|
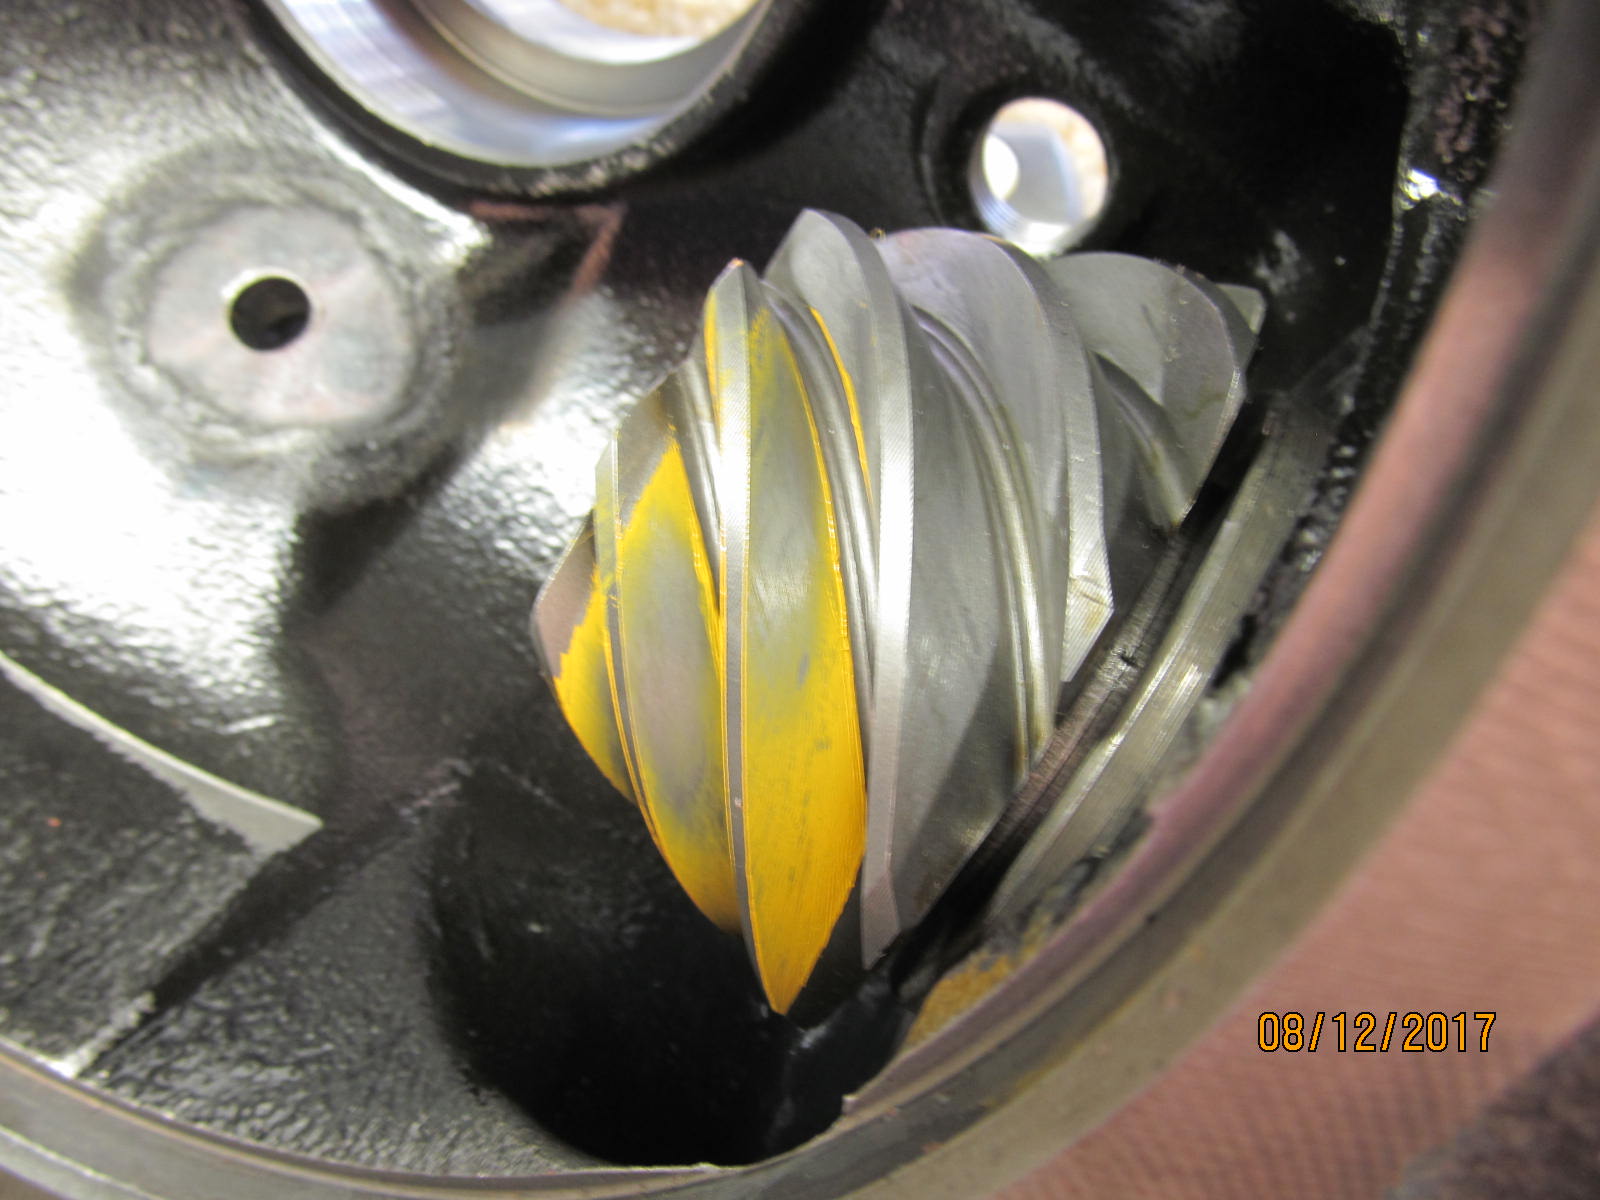
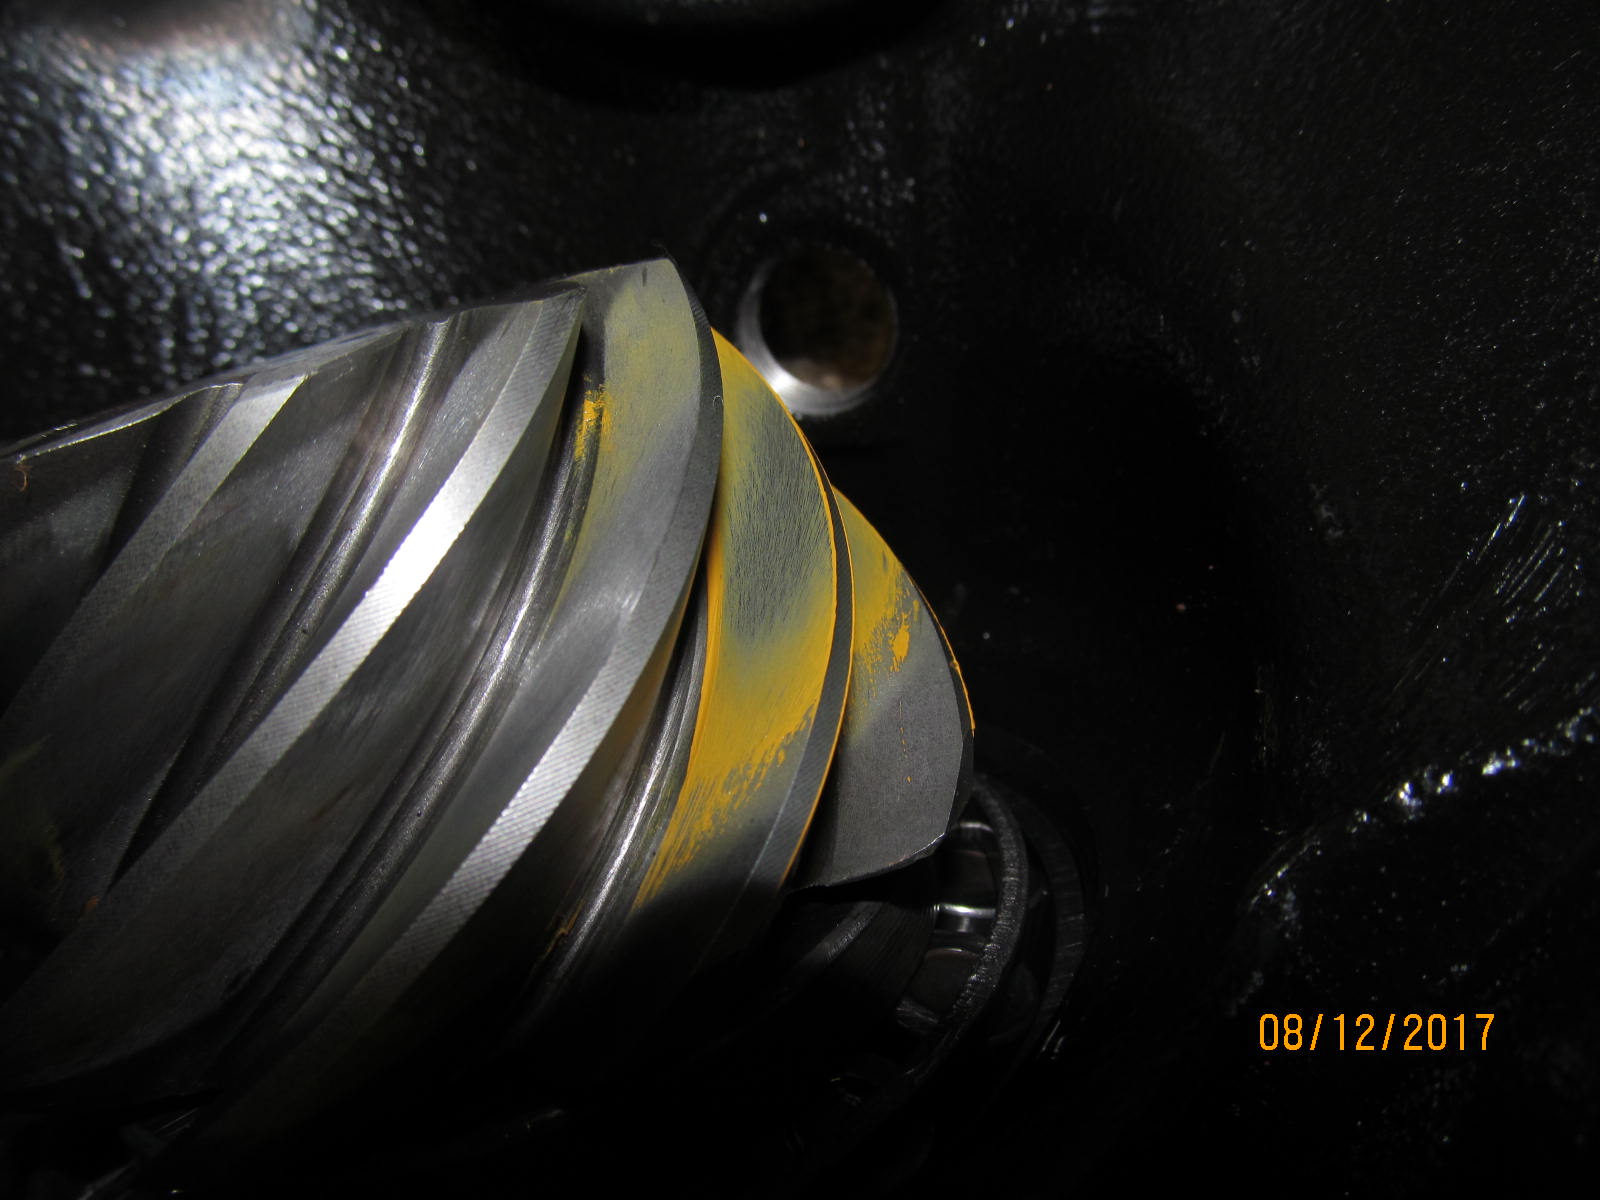
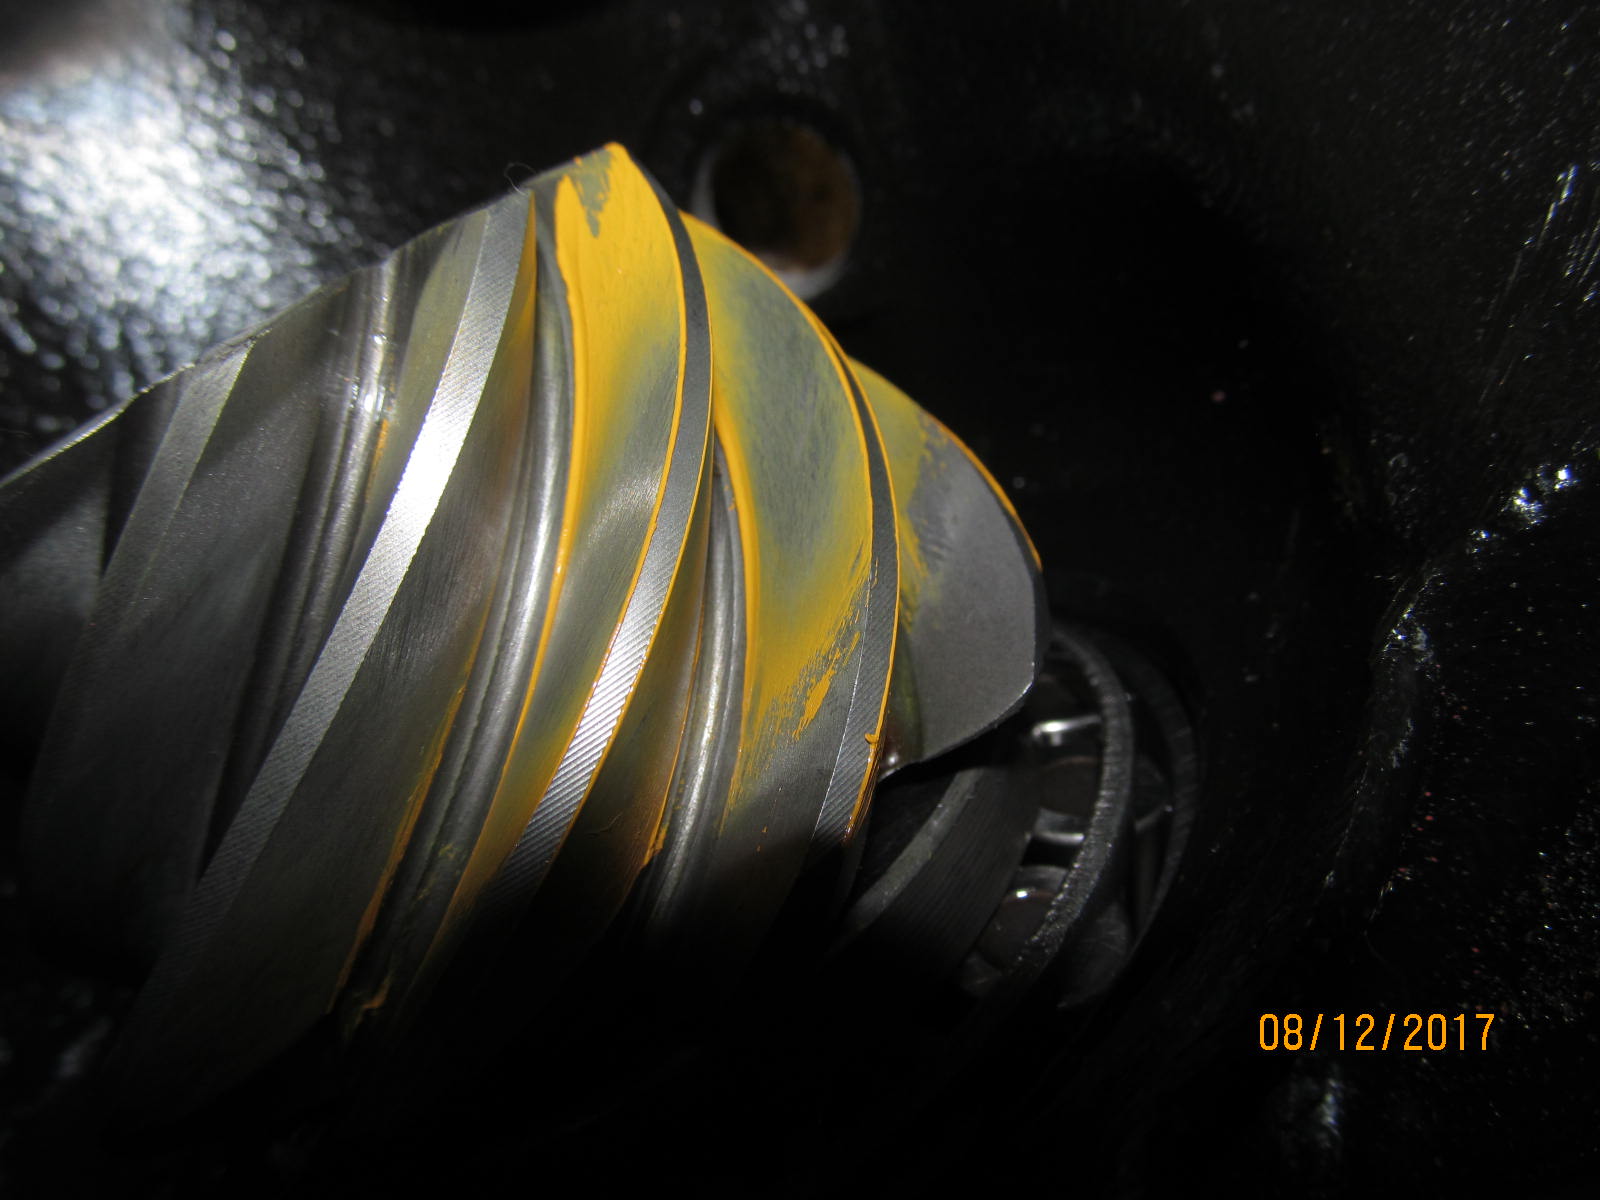
| Pinion. |
|---|
|
|
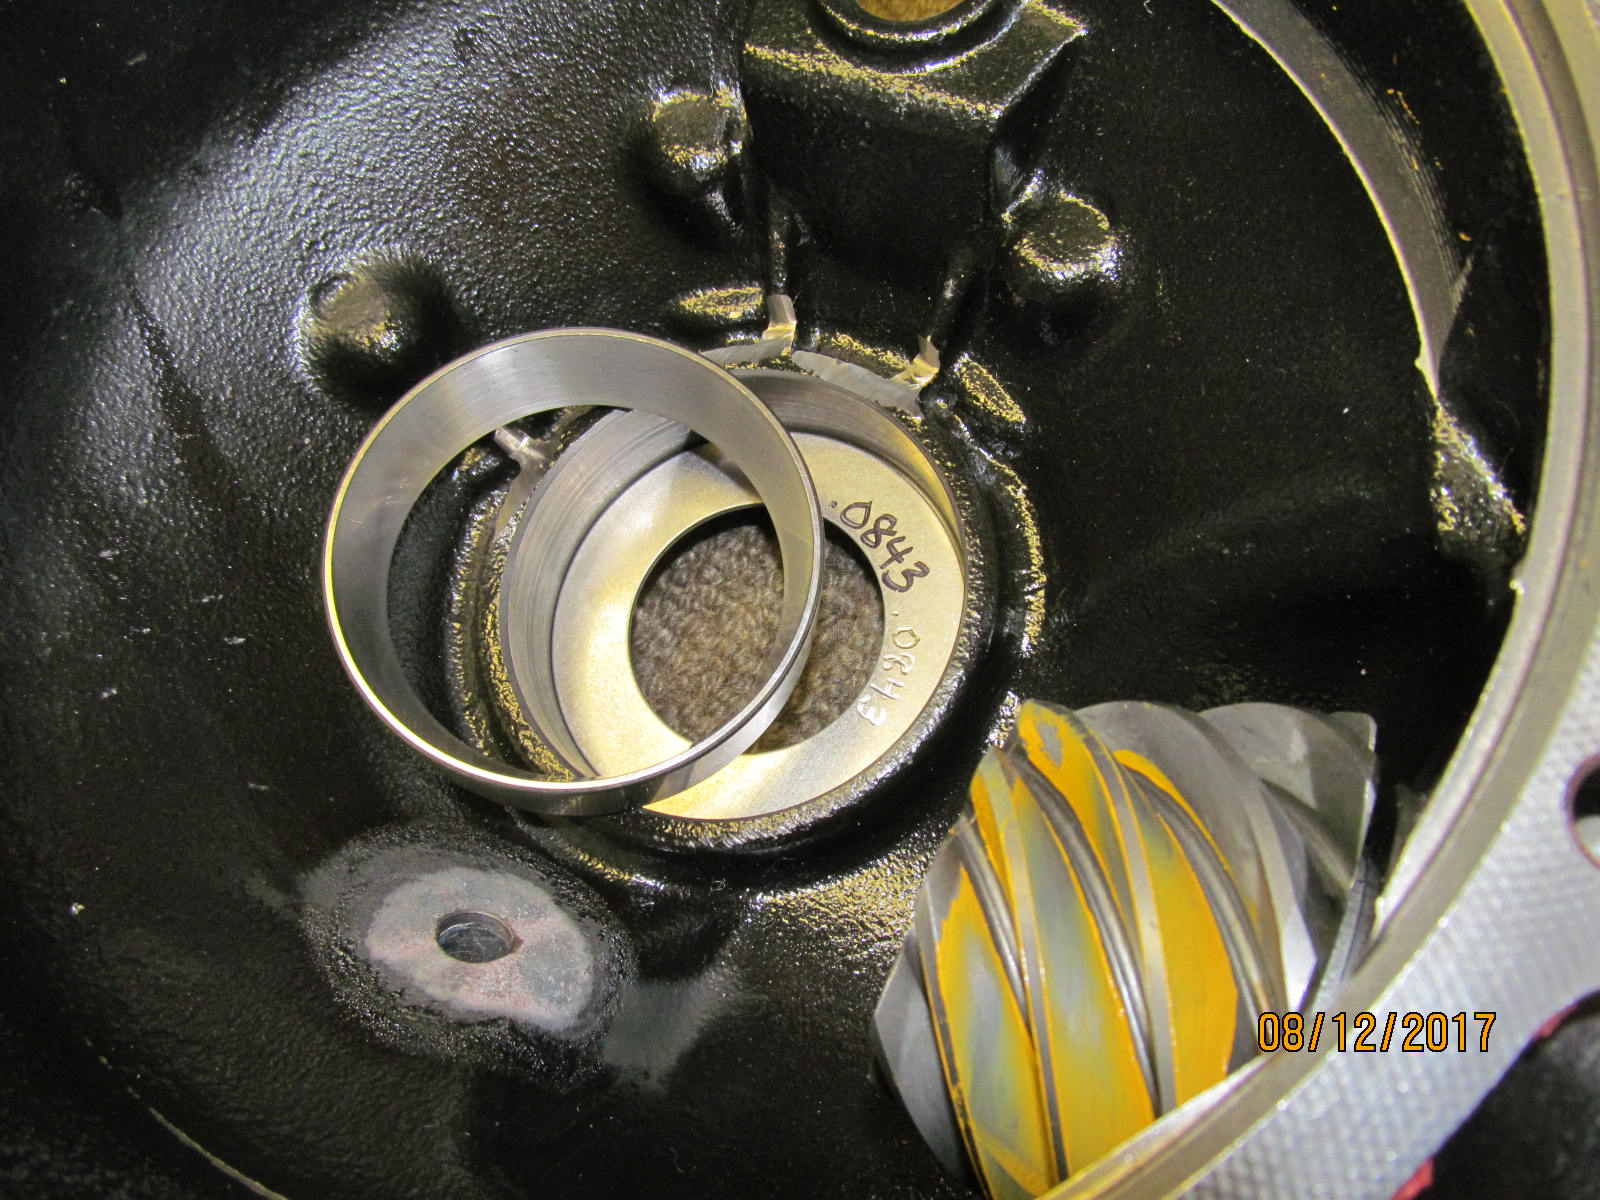
A "fine tuning". Removed .004 from the bowl side(from .0883" to .0843") which has 2 effects....
reduces the backlash and lightens up on the carrier bearing preload. Since the preload was too strong anyways it will
work out well for both parameters with this 1 washer plate change. |
|---|
|
|
| Drive....nice. |
|---|
|
|
| Coast .....nice. |
|---|
|
|
| The DRIVE side of the pinion.....NICE...in an ideal spot. |
|---|
|
|
| ,,,,,,,,,,,,,,,,,,,,, |
|---|
|

|
| ,,,,,,,,,,,,,,,,,,,,, |
|---|
|
|
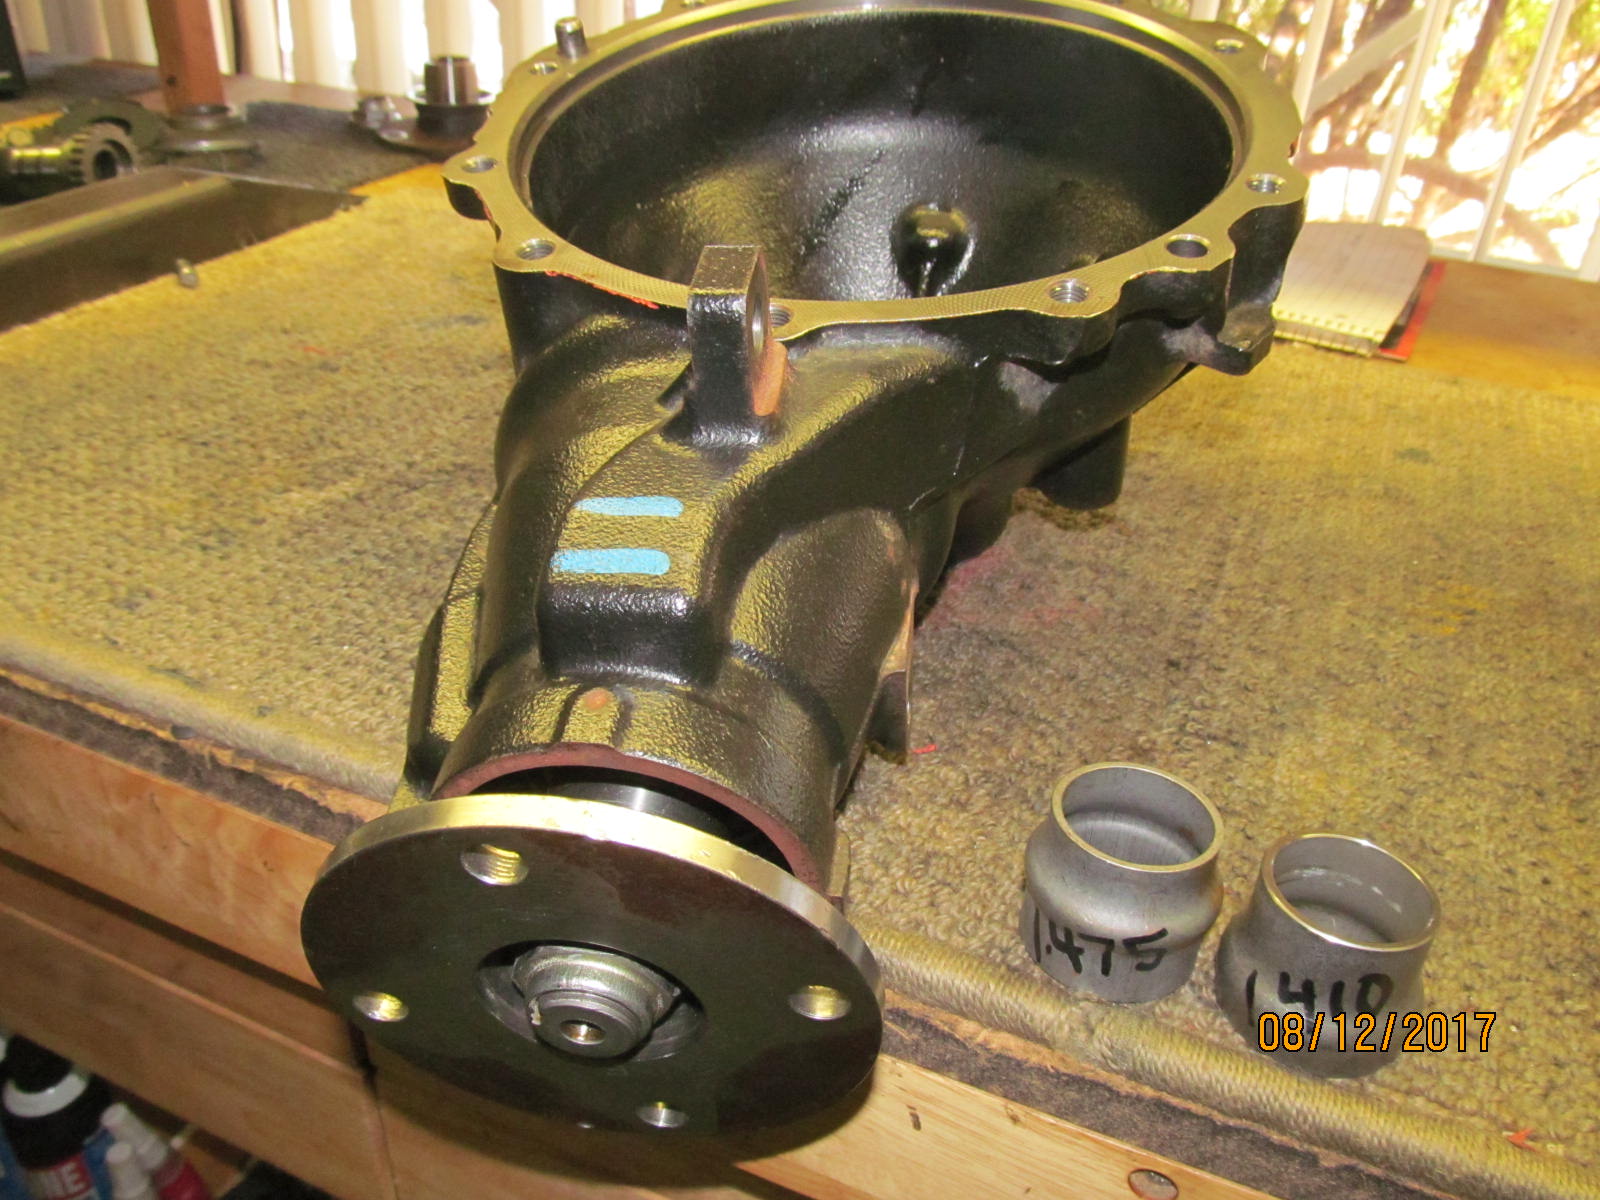
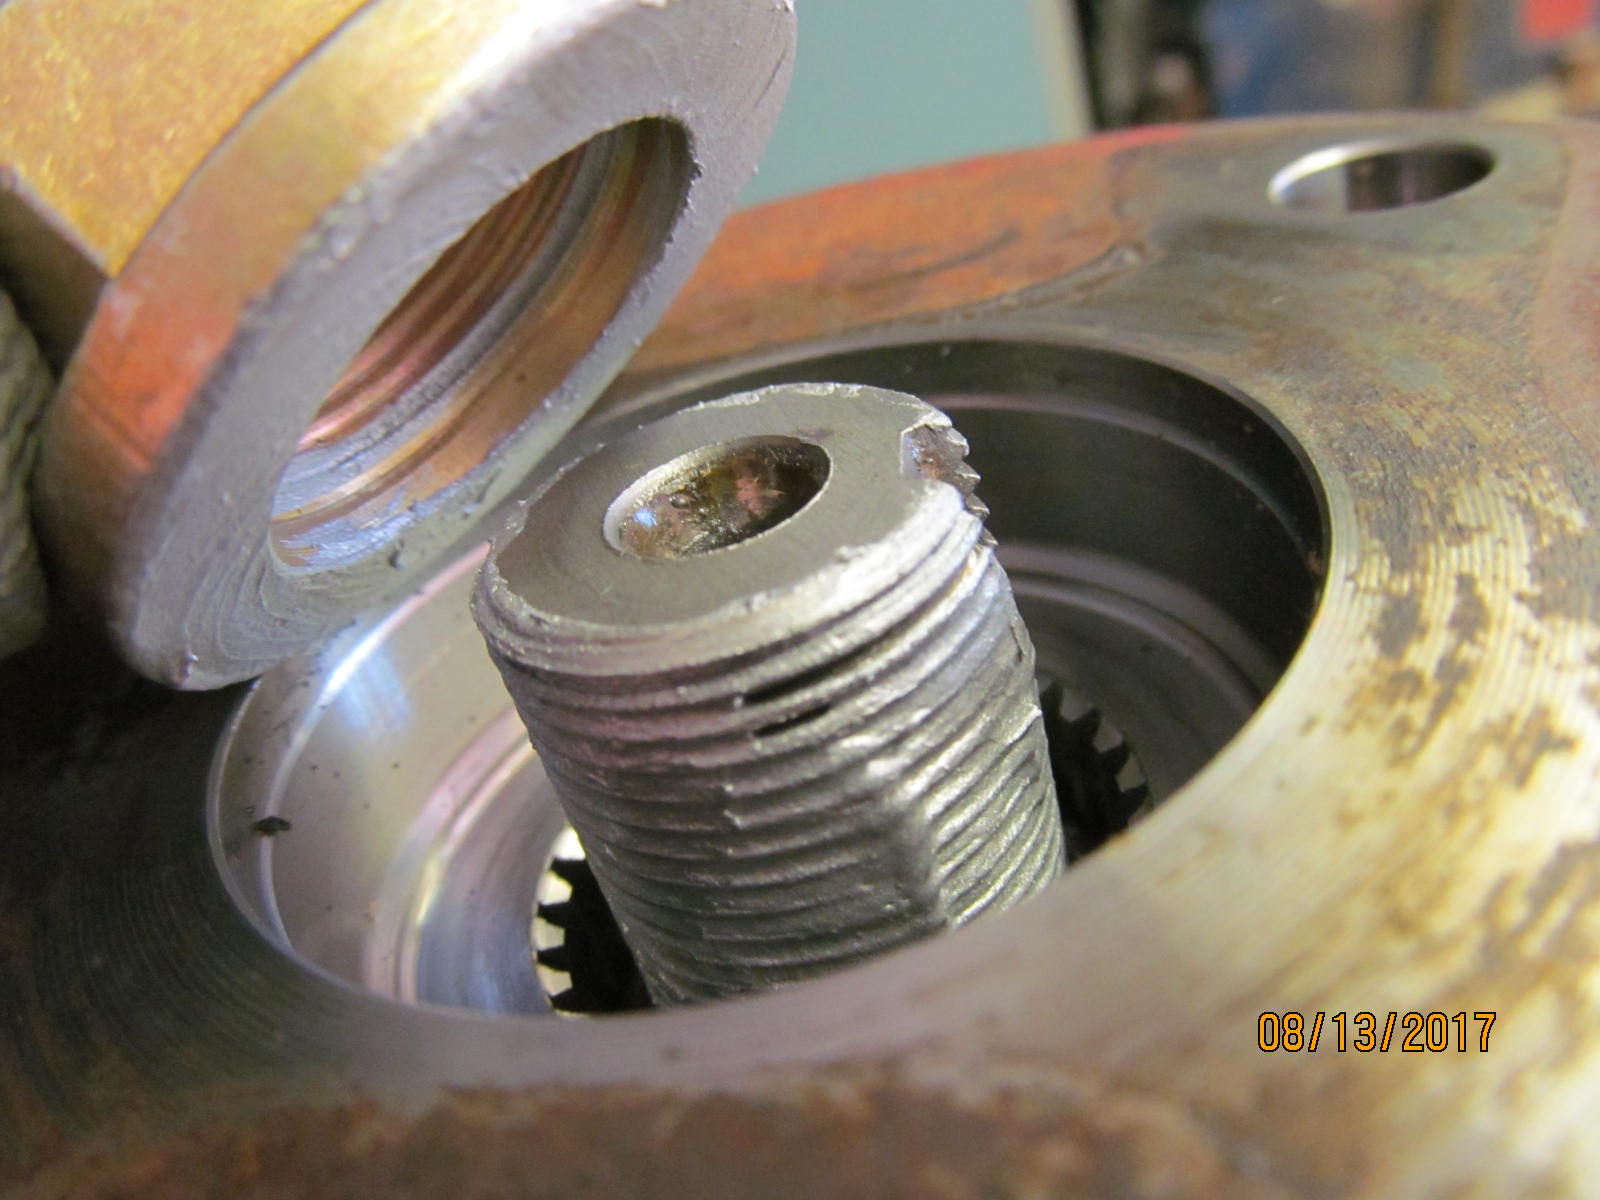
| Time now to put the new crush sleeve in(1.475"). It will take over 1 complete turn to crush it down into the target zone based on .060" between threads. |
|---|
|
|
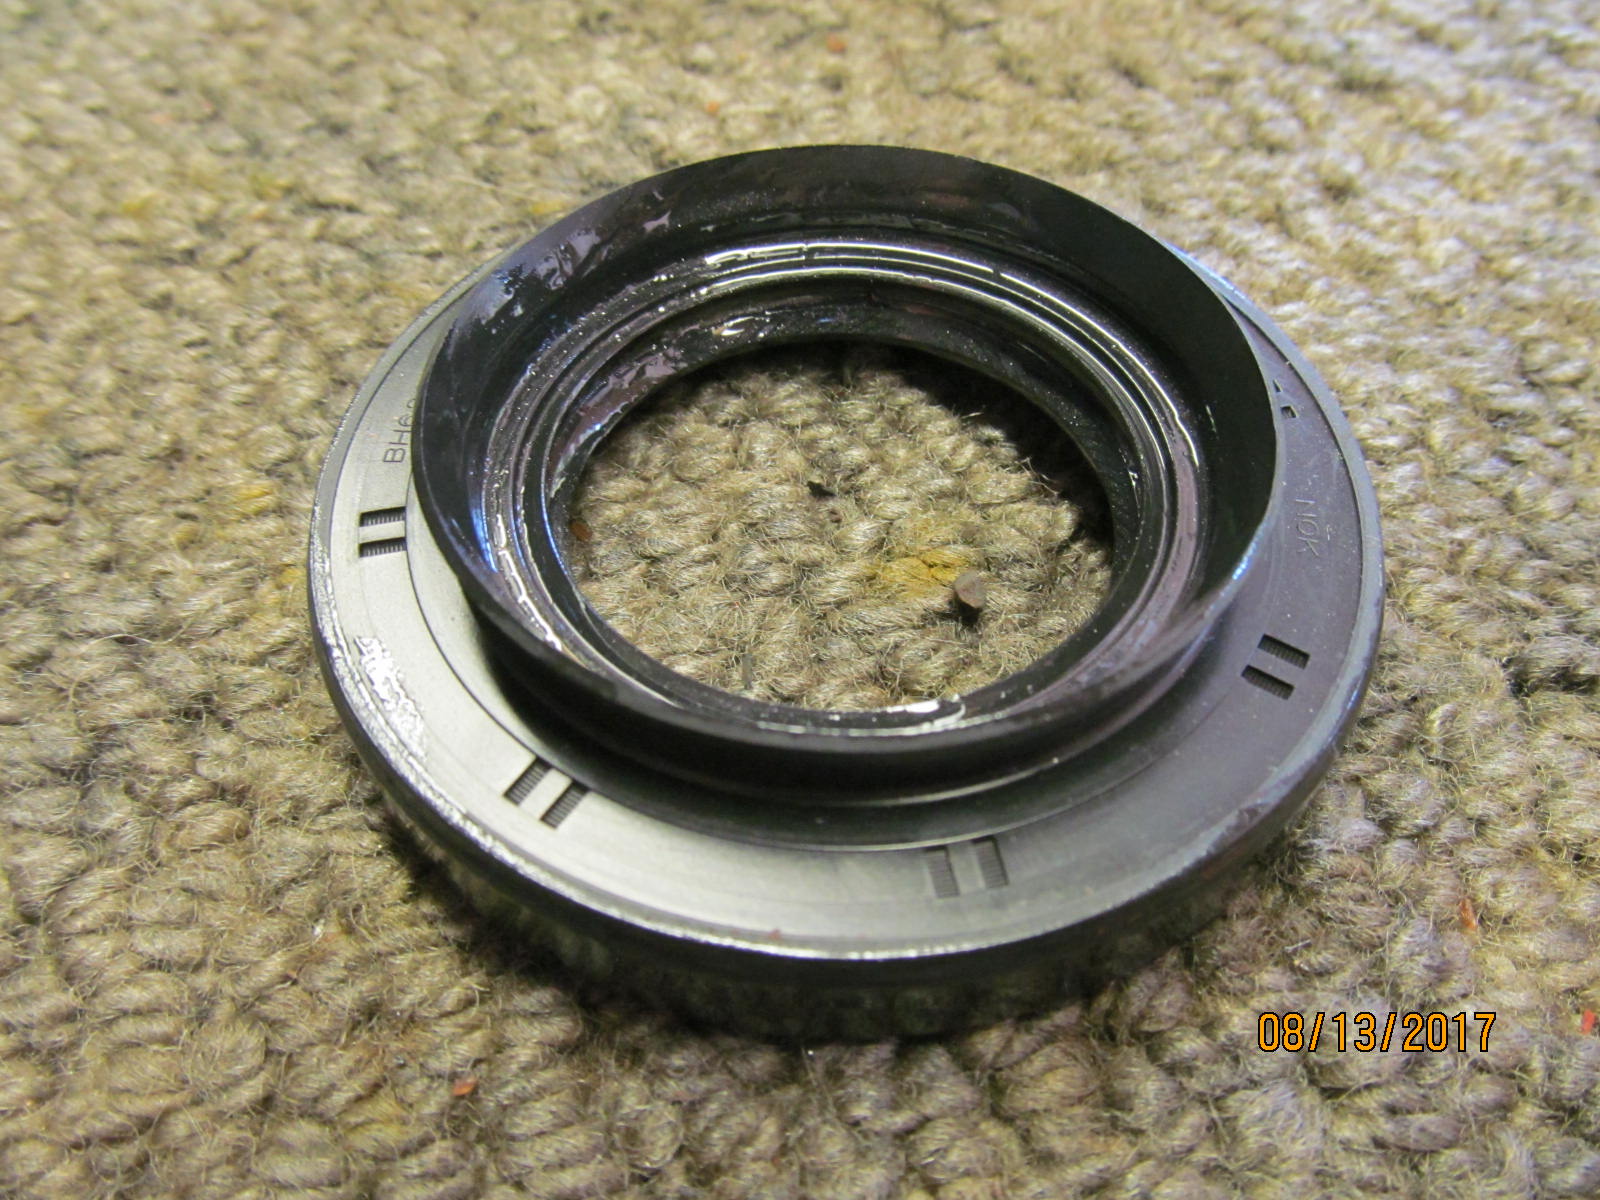
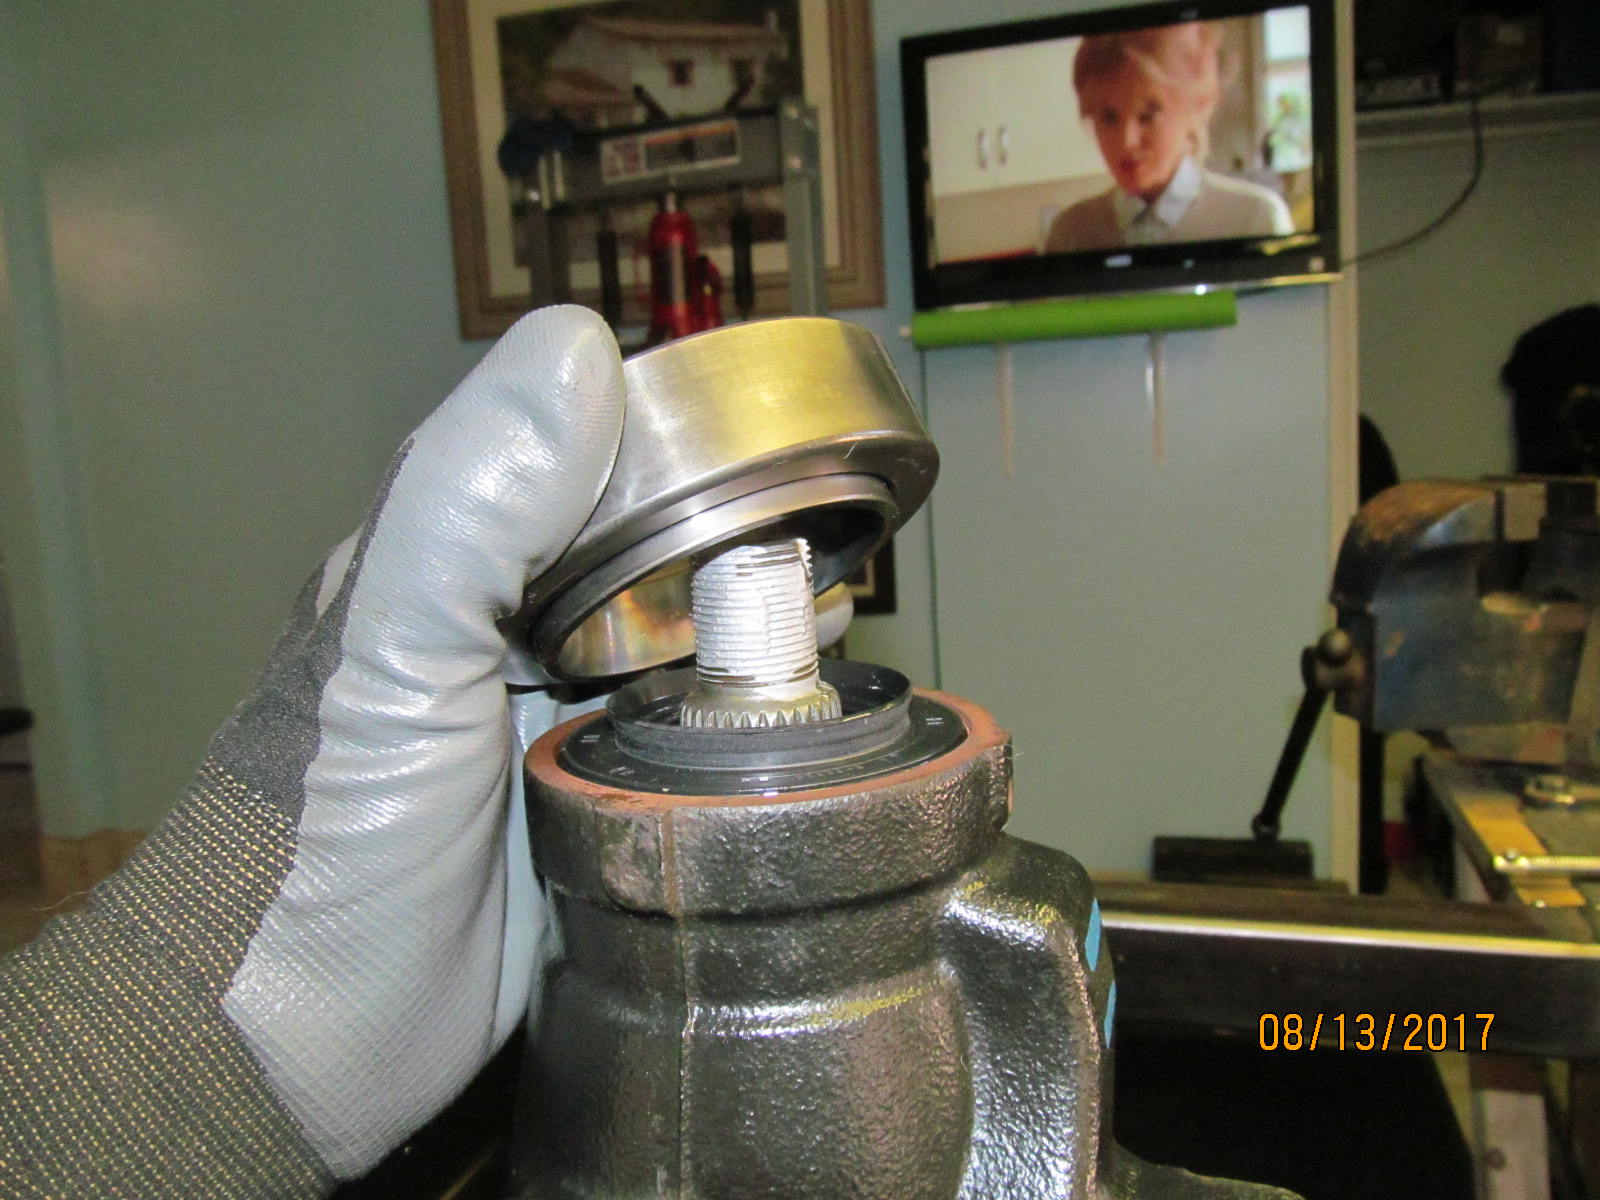
| The seal supplied with this Nitro kit. It has just been lubed up with gear oil. |
|---|
|
|
| Genuine OEM seals are extra insurance against pinion leaks. |
|---|
|

|
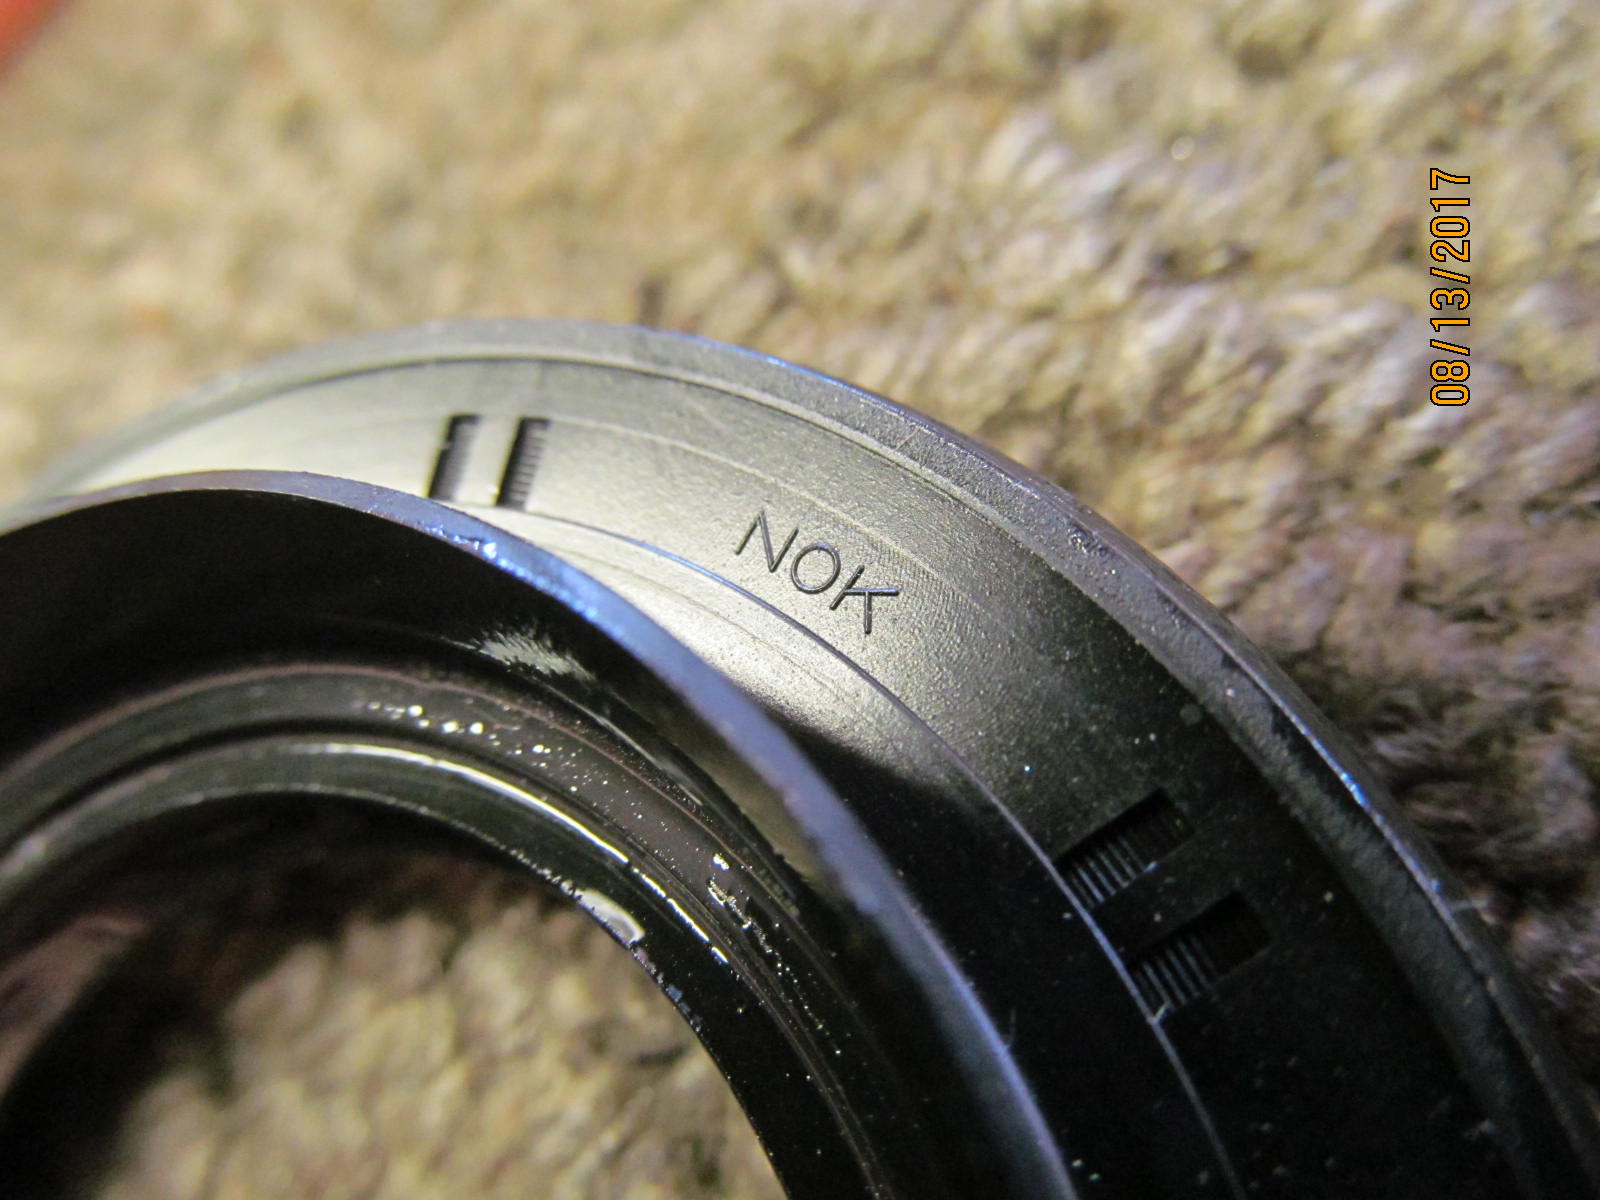
| BH6832E....nice to see the transition to quality seals ;) Not all Nitro kits have them yet but I see the trend. |
|---|
|
|
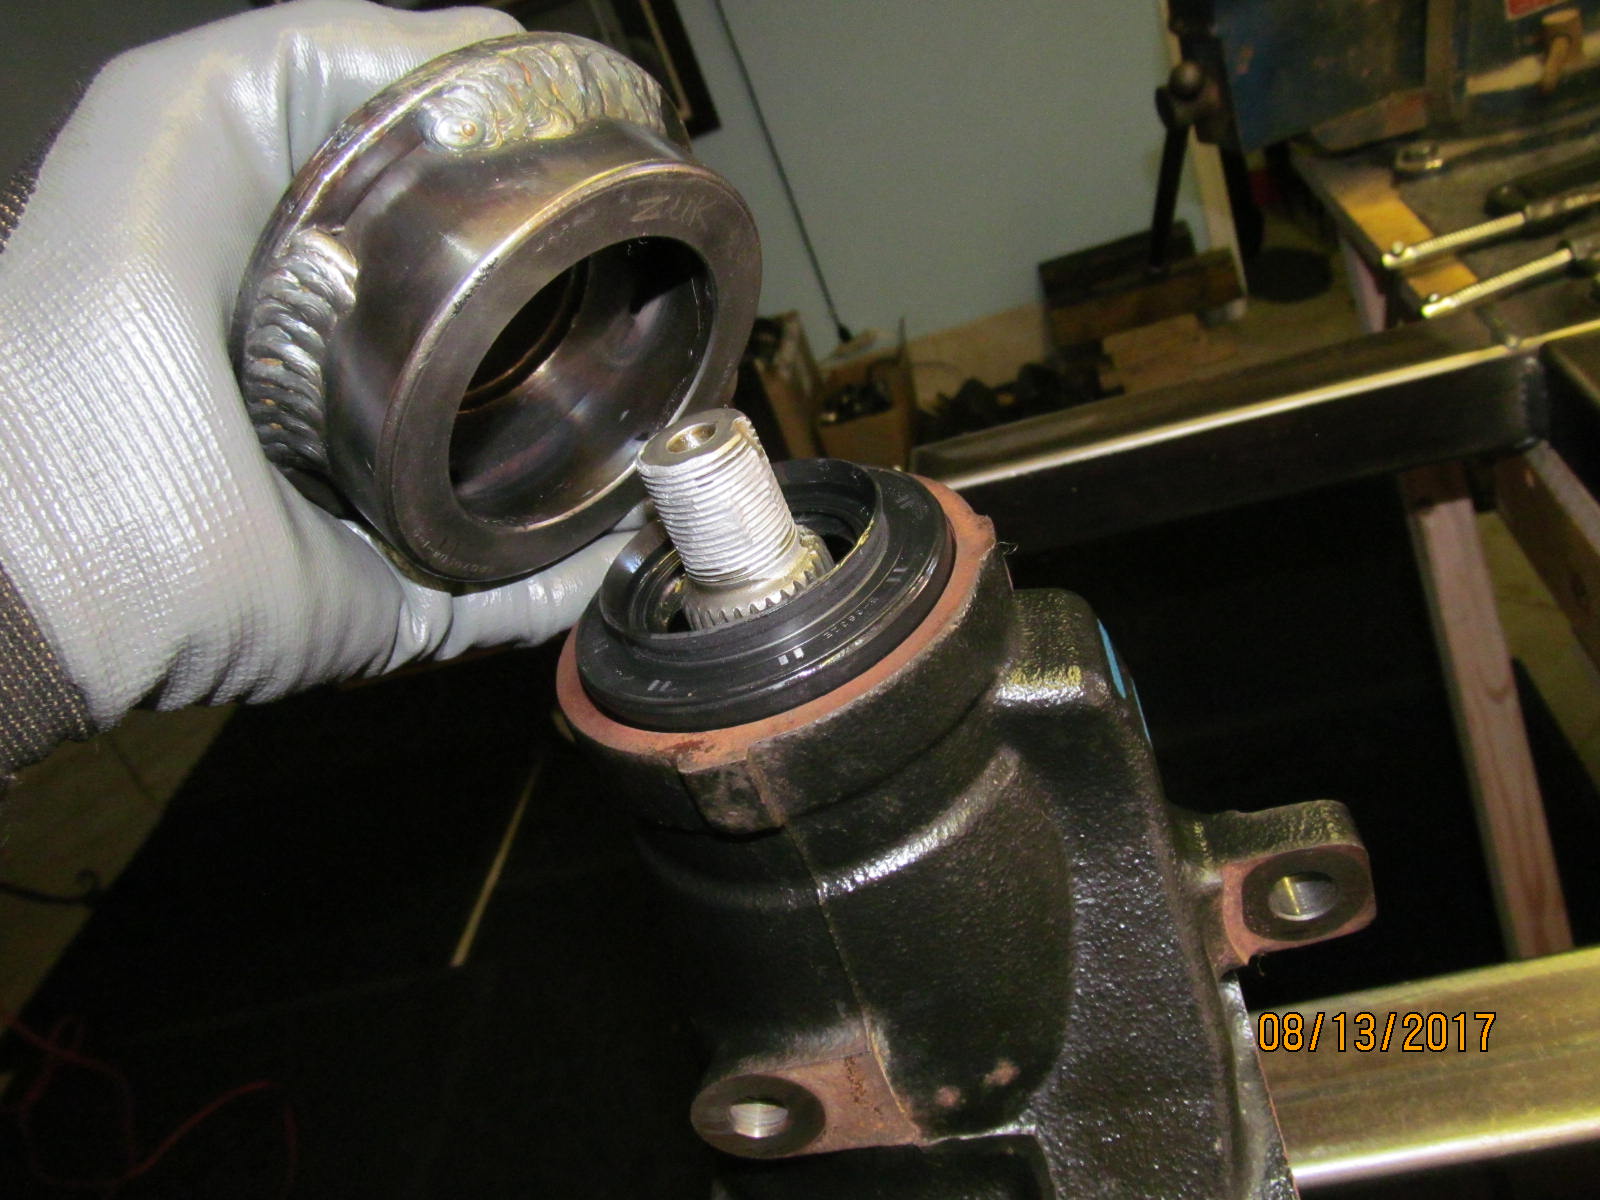
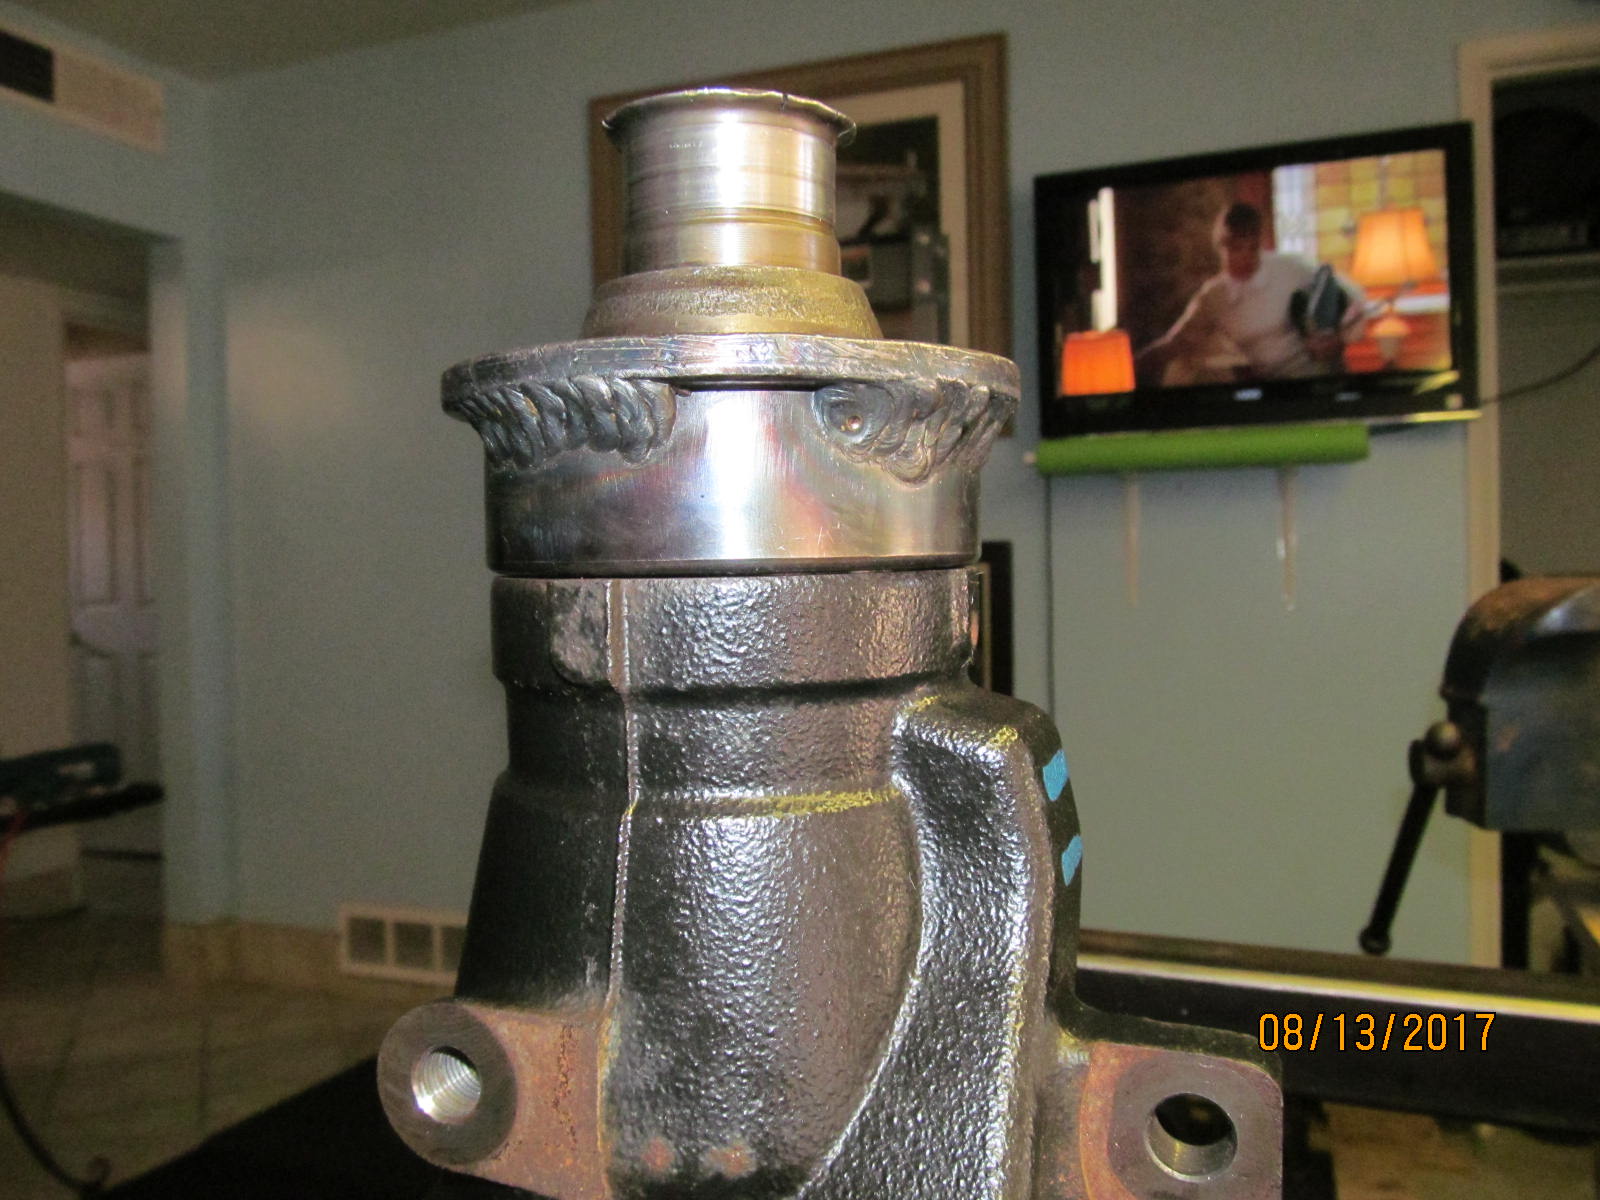
| 360 degree support to drive the seal home. |
|---|
|
|
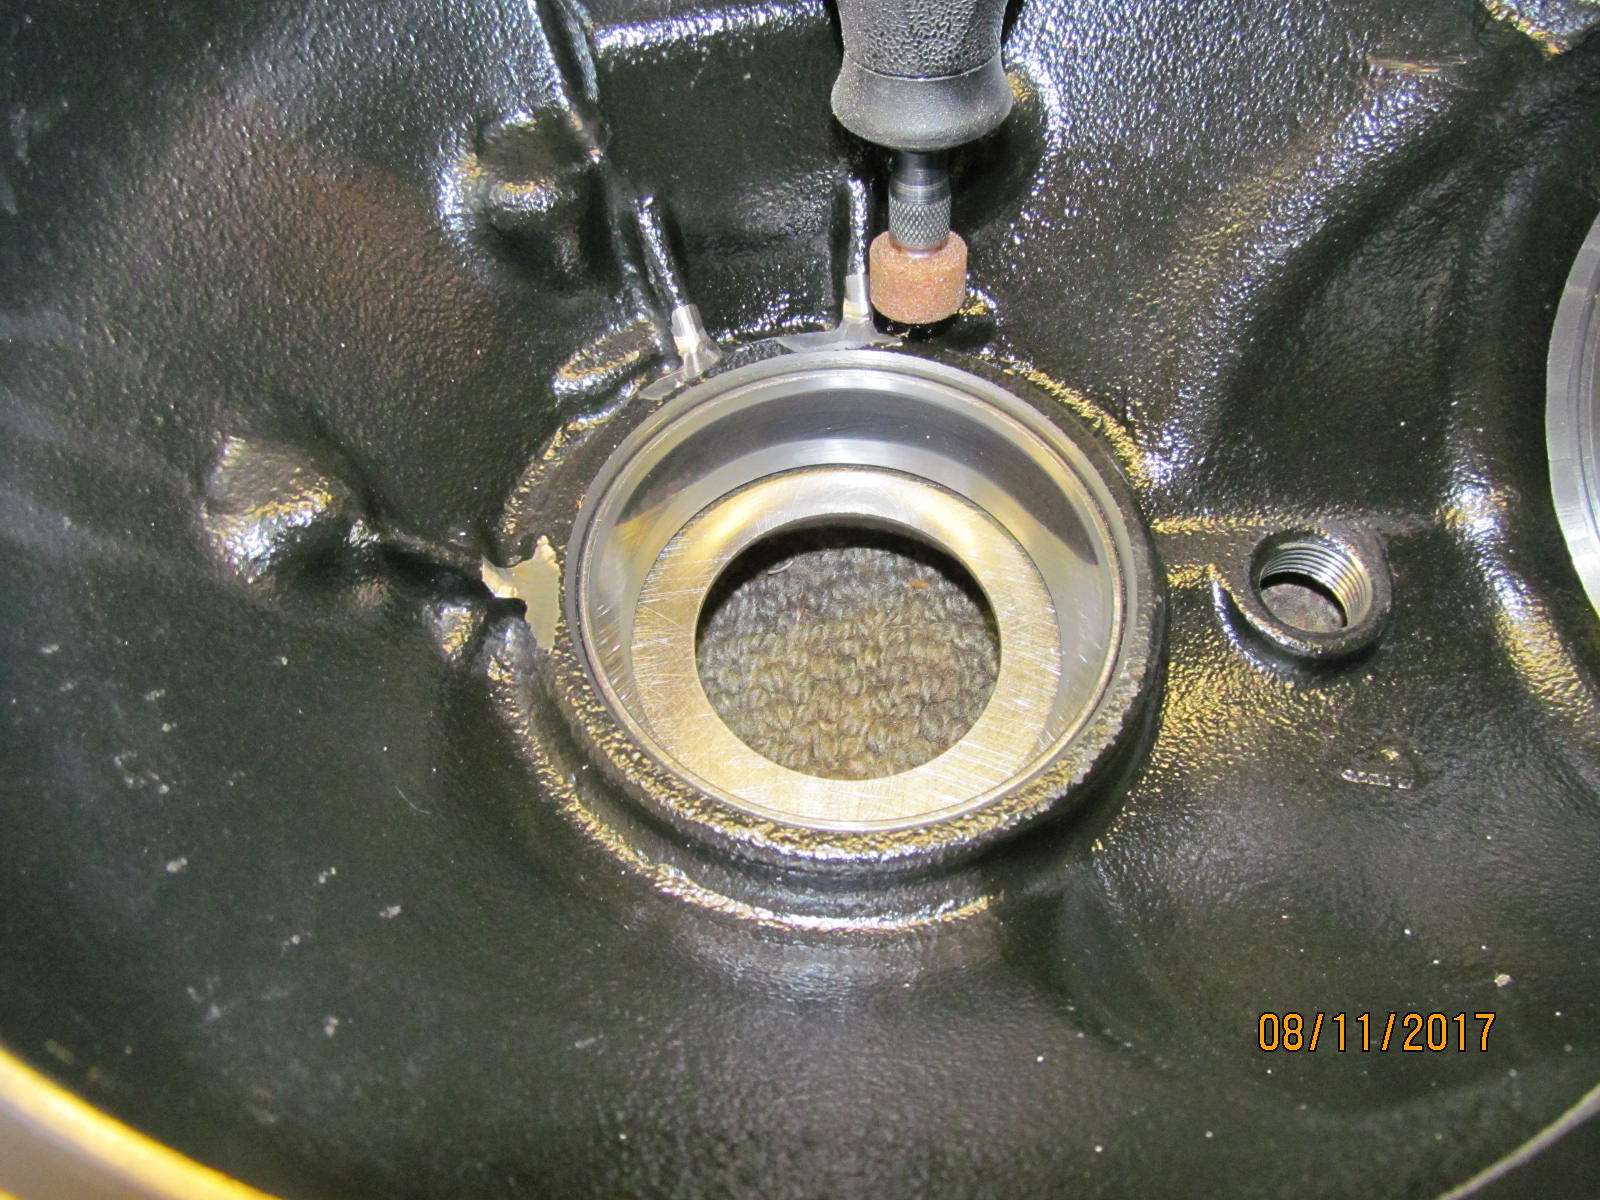
| Now it has been driven down level with the ridge. |
|---|
|
|
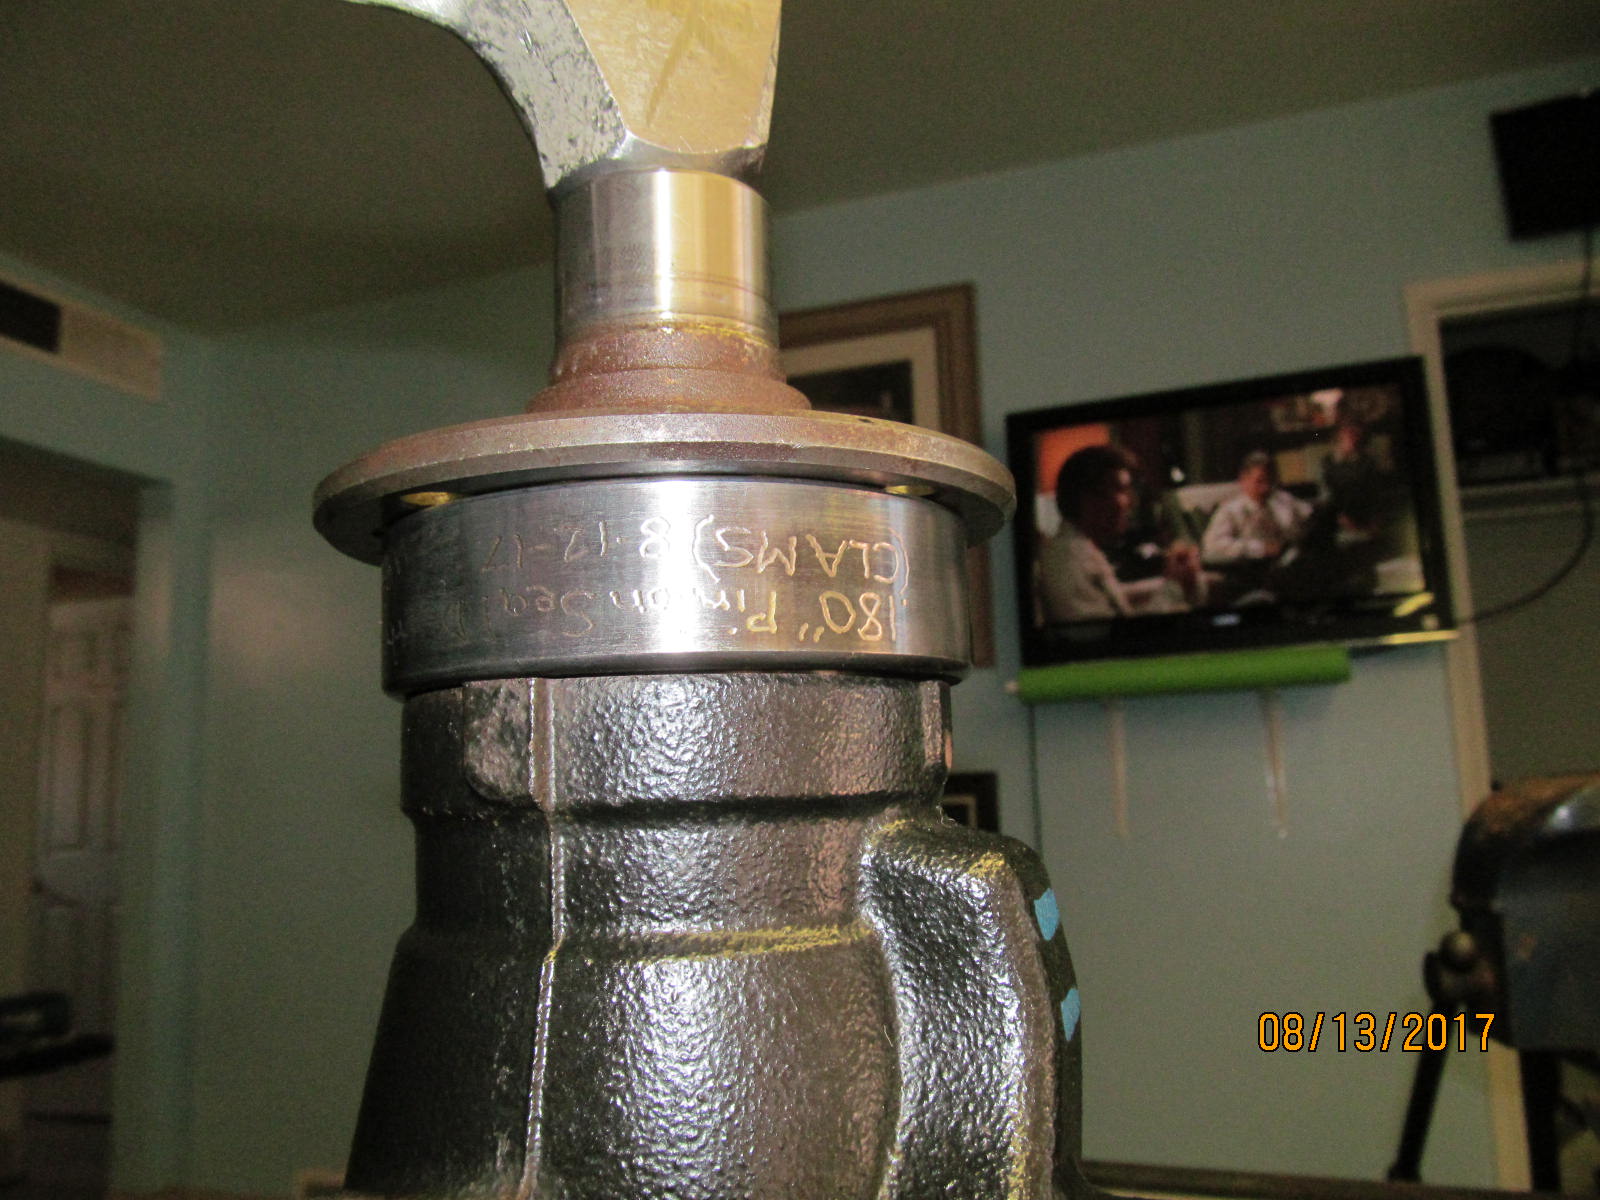
| This custom seal driver will recess it .180" below the rim. The FSM specs it at .165~.189". |
|---|
|
|
| Bam!! Done. No doubt about it being evenly down all 360 degrees around.....no seal distortion. |
|---|
|
|
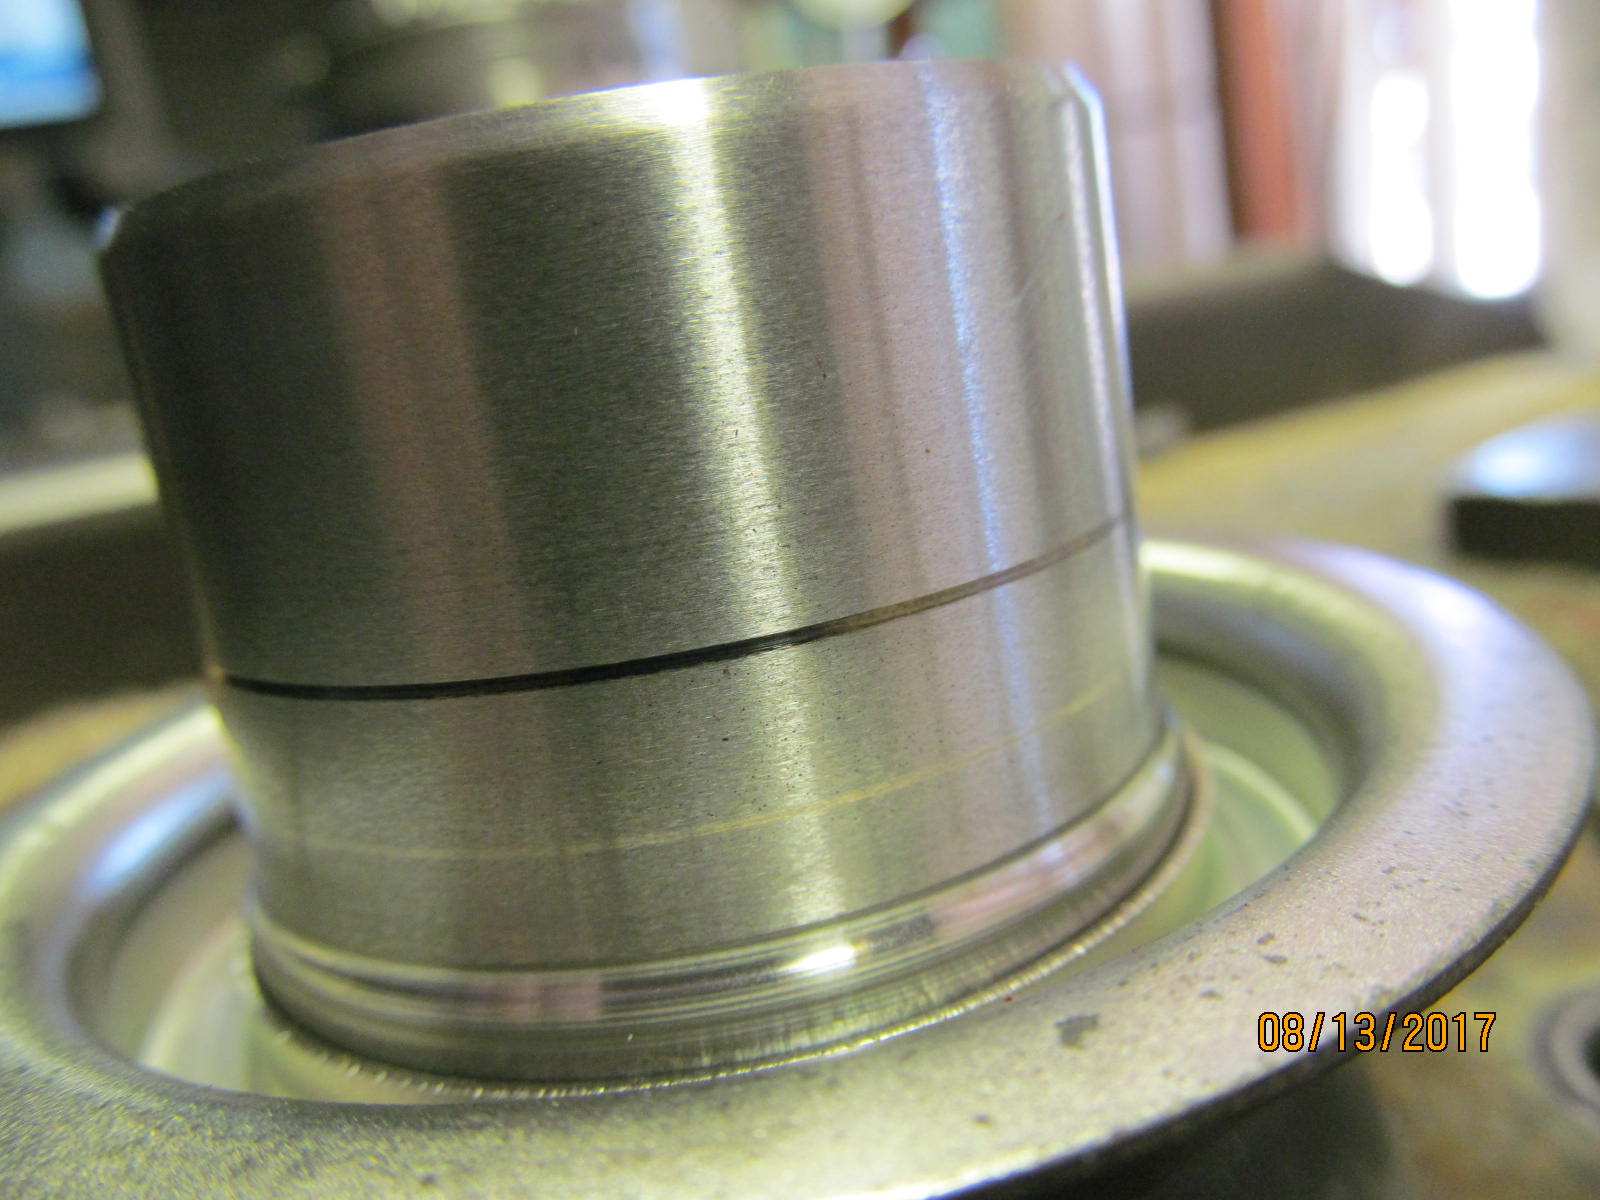
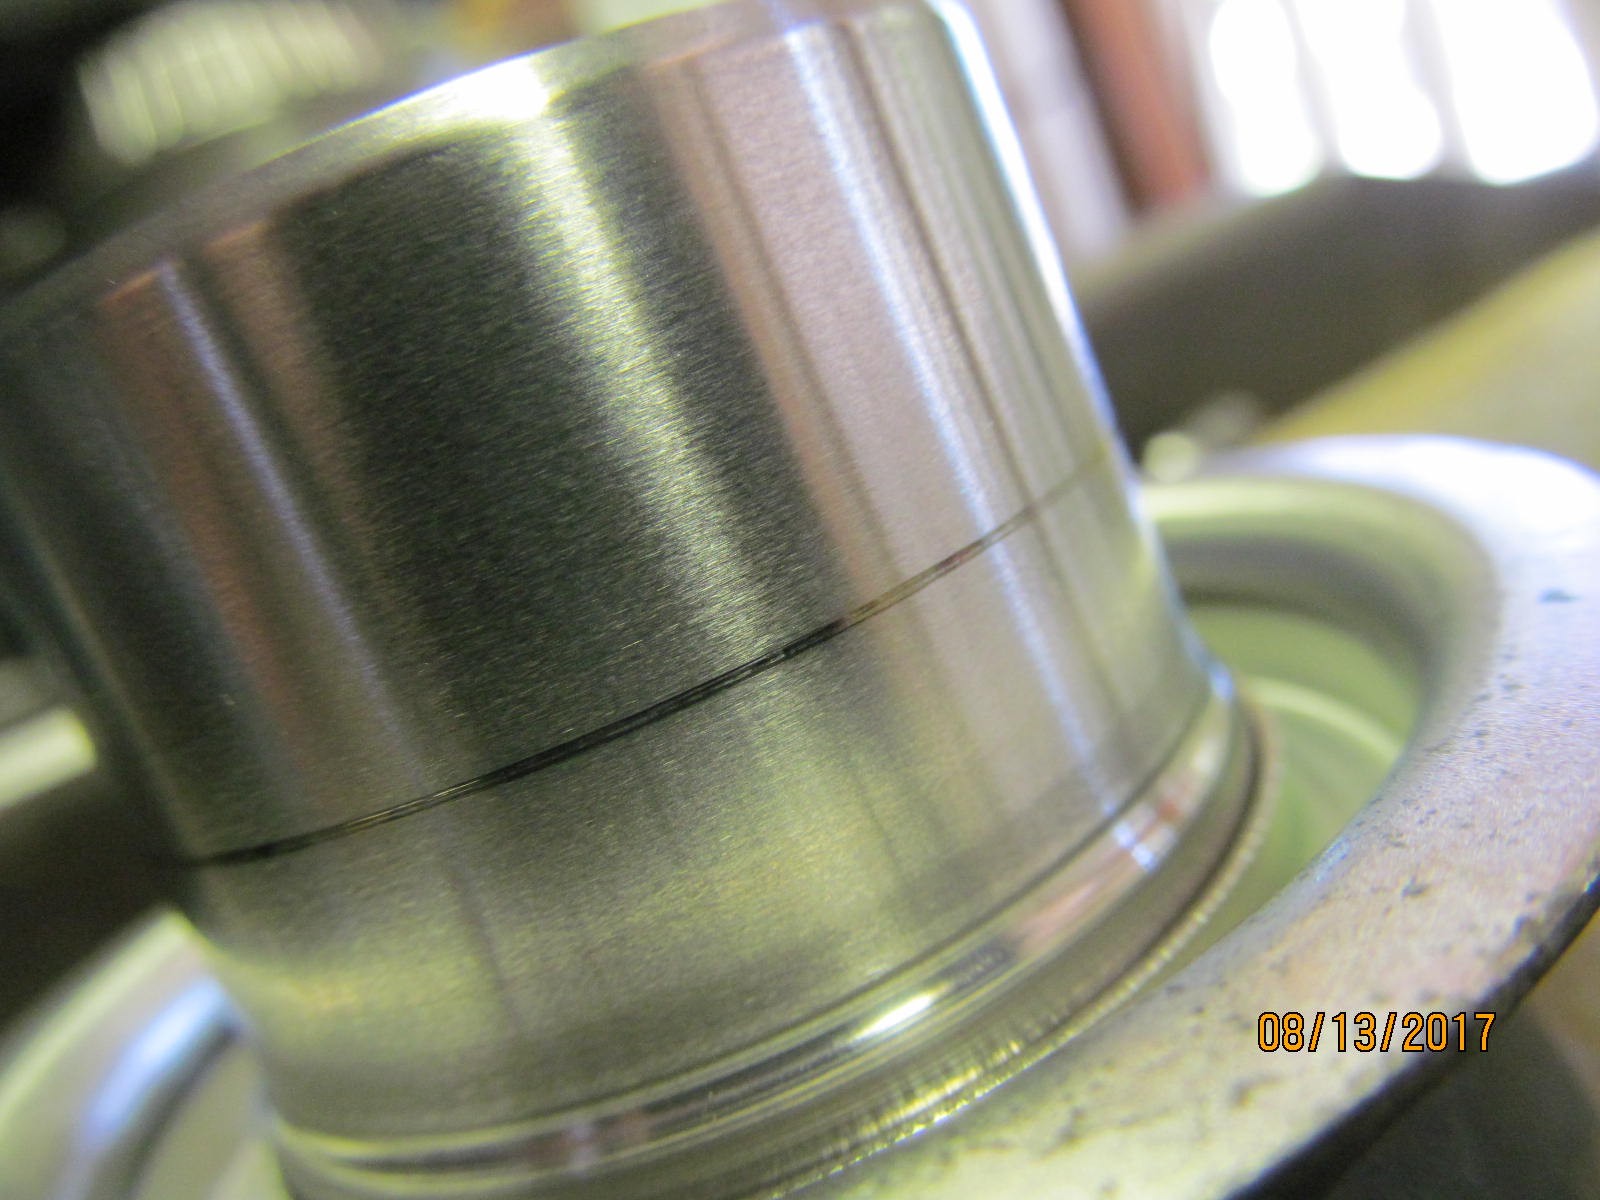
| Seal surface is in nice shape. A very small ridge and not deep at all. |
|---|
|
|
Just now sanded it with #1500 wet/dry sandpaper and not much change.
Even if it doesn't need it, it should be done anyways. |
|---|
|
|
| Aluminum based antiseize is a good idea. |
|---|
|
|
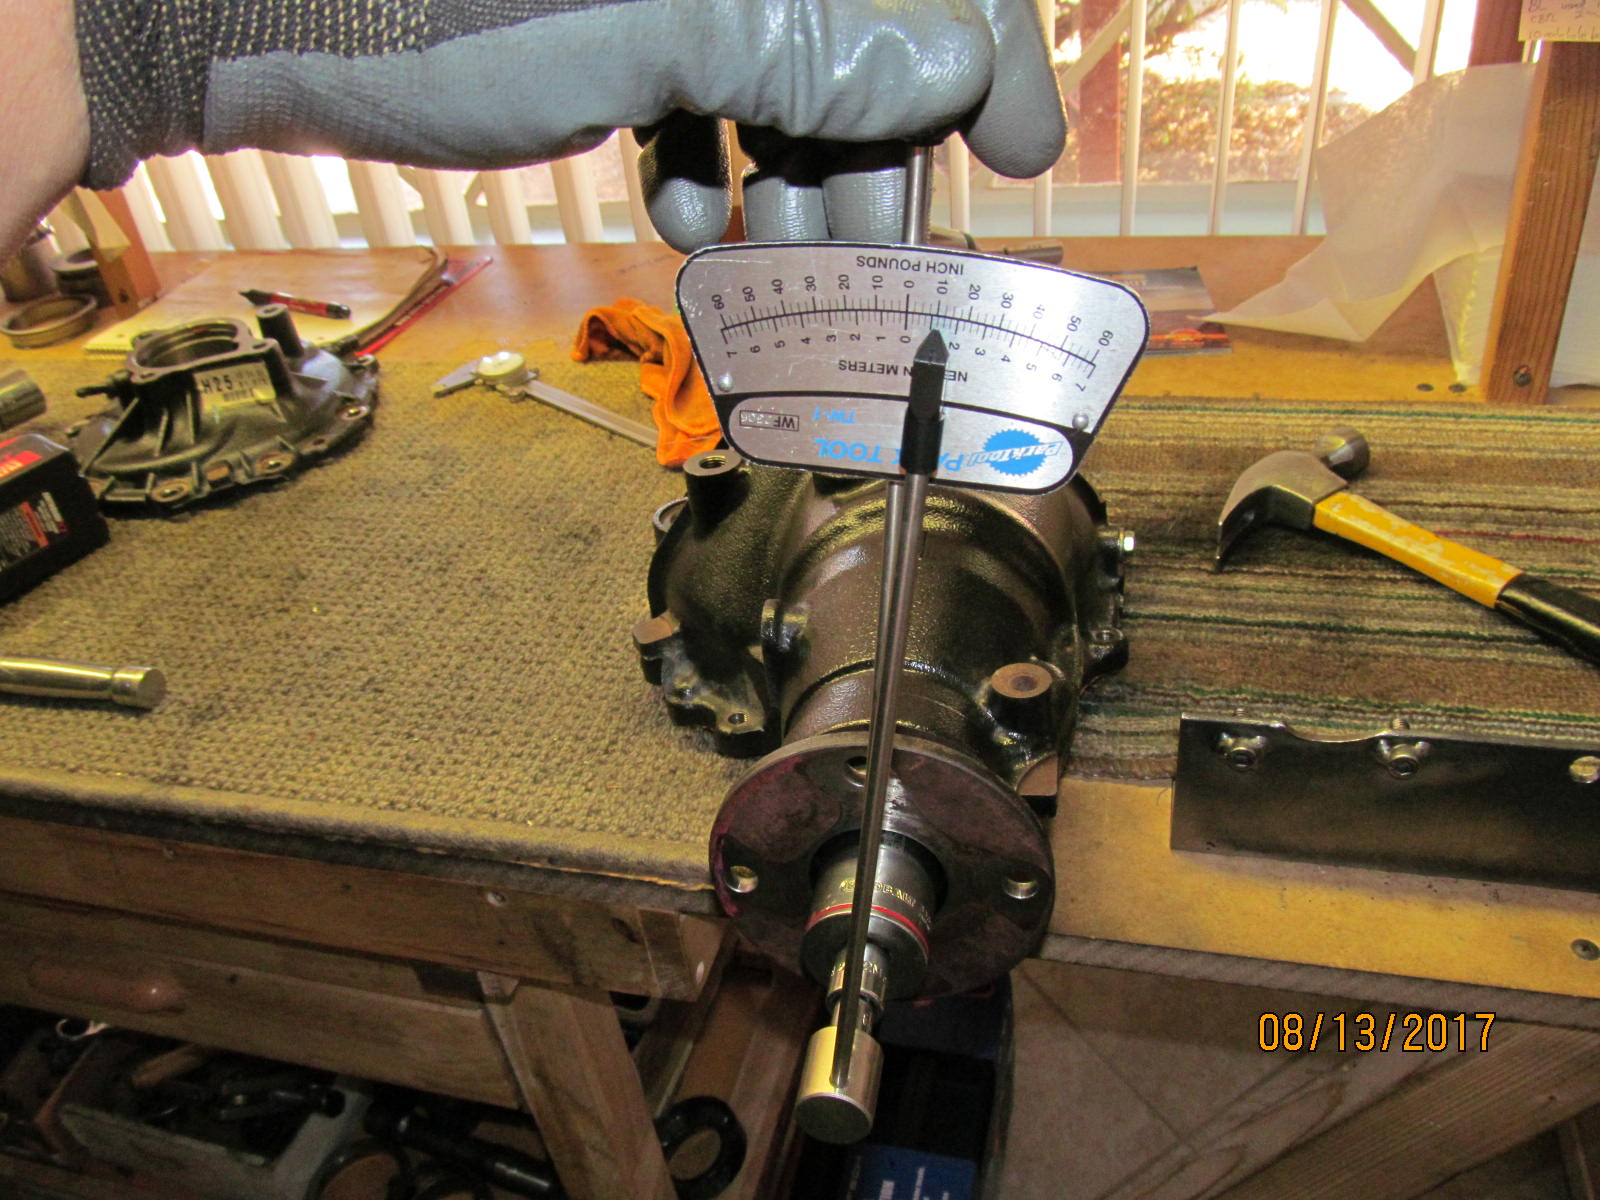
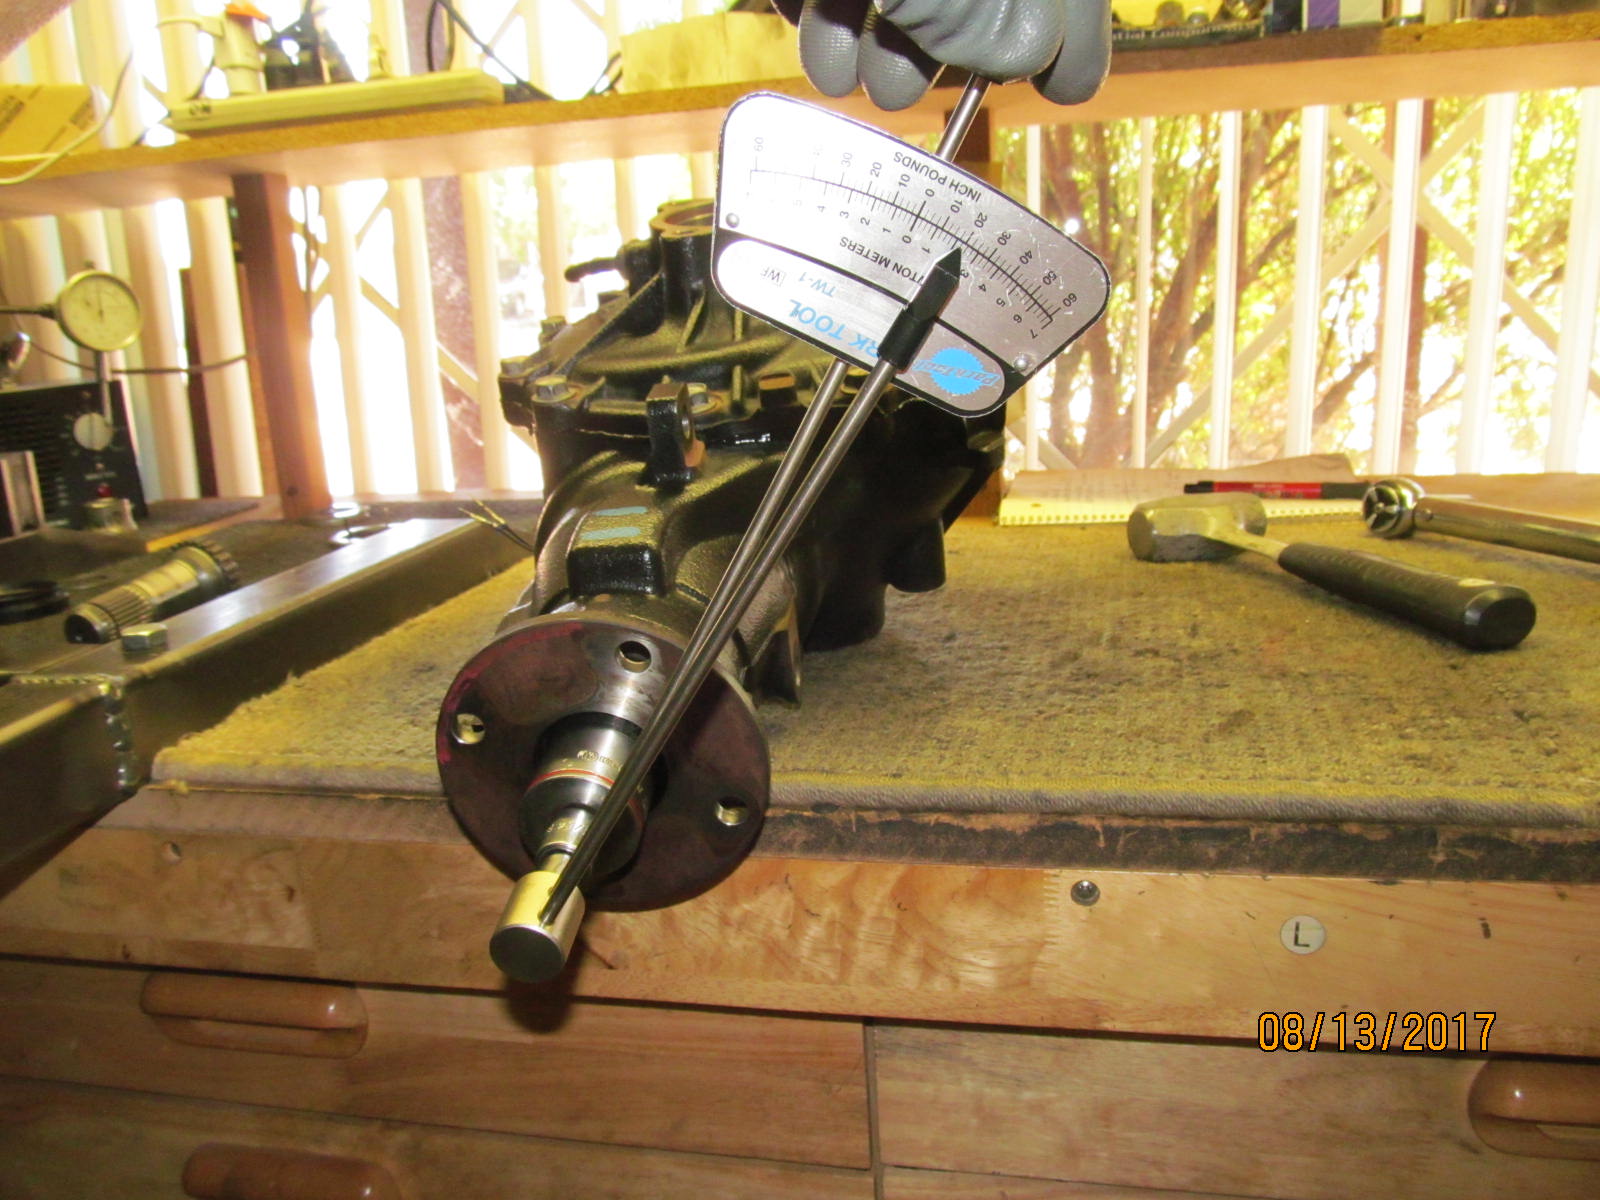
A nice 11 inch/pounds of pinion bearing preload. Very smooth and repeatable. If any debri falls in the bearings
or there's not enough gear lube on them then readings will be all over the board. |
|---|
|
|
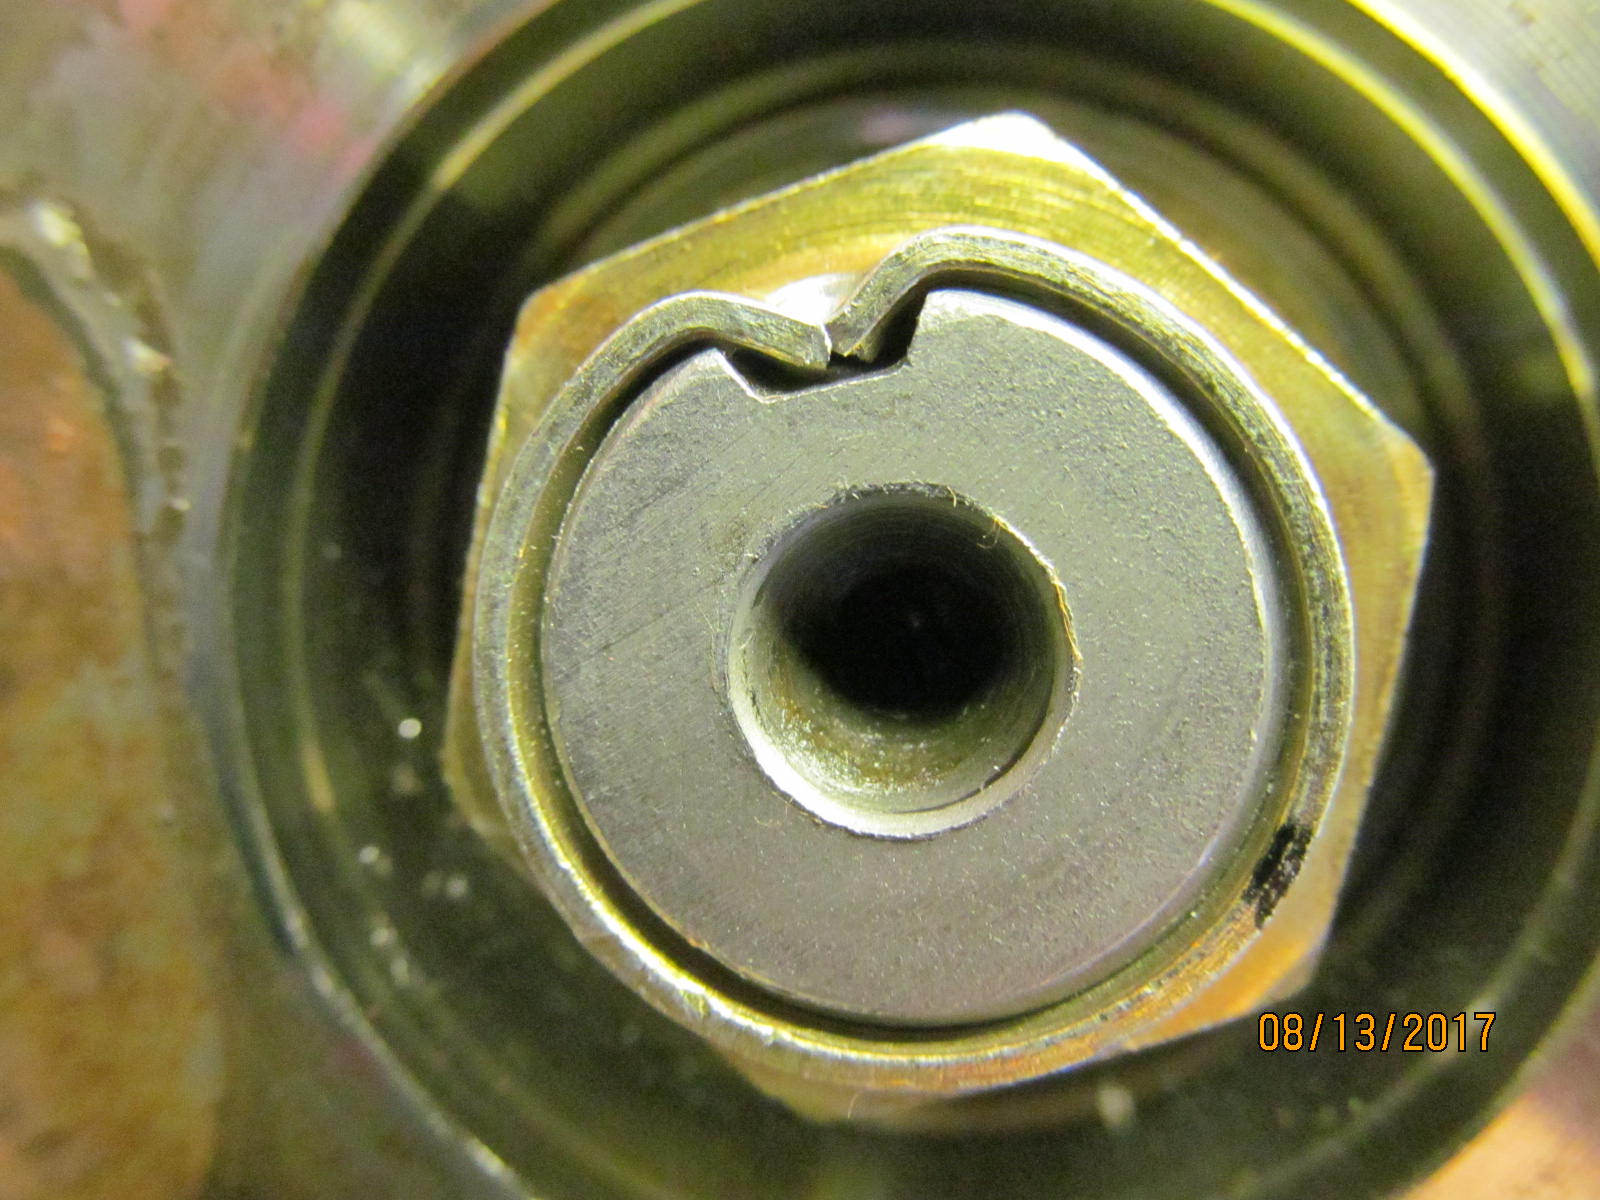
| DING! and this end is now done. |
|---|
|
|
| The last washer change to .0843"reduced the backlash to .007" and lightened up the CBPL into a good range(6 in/lb) so now the cover can go on. |
|---|
|
|
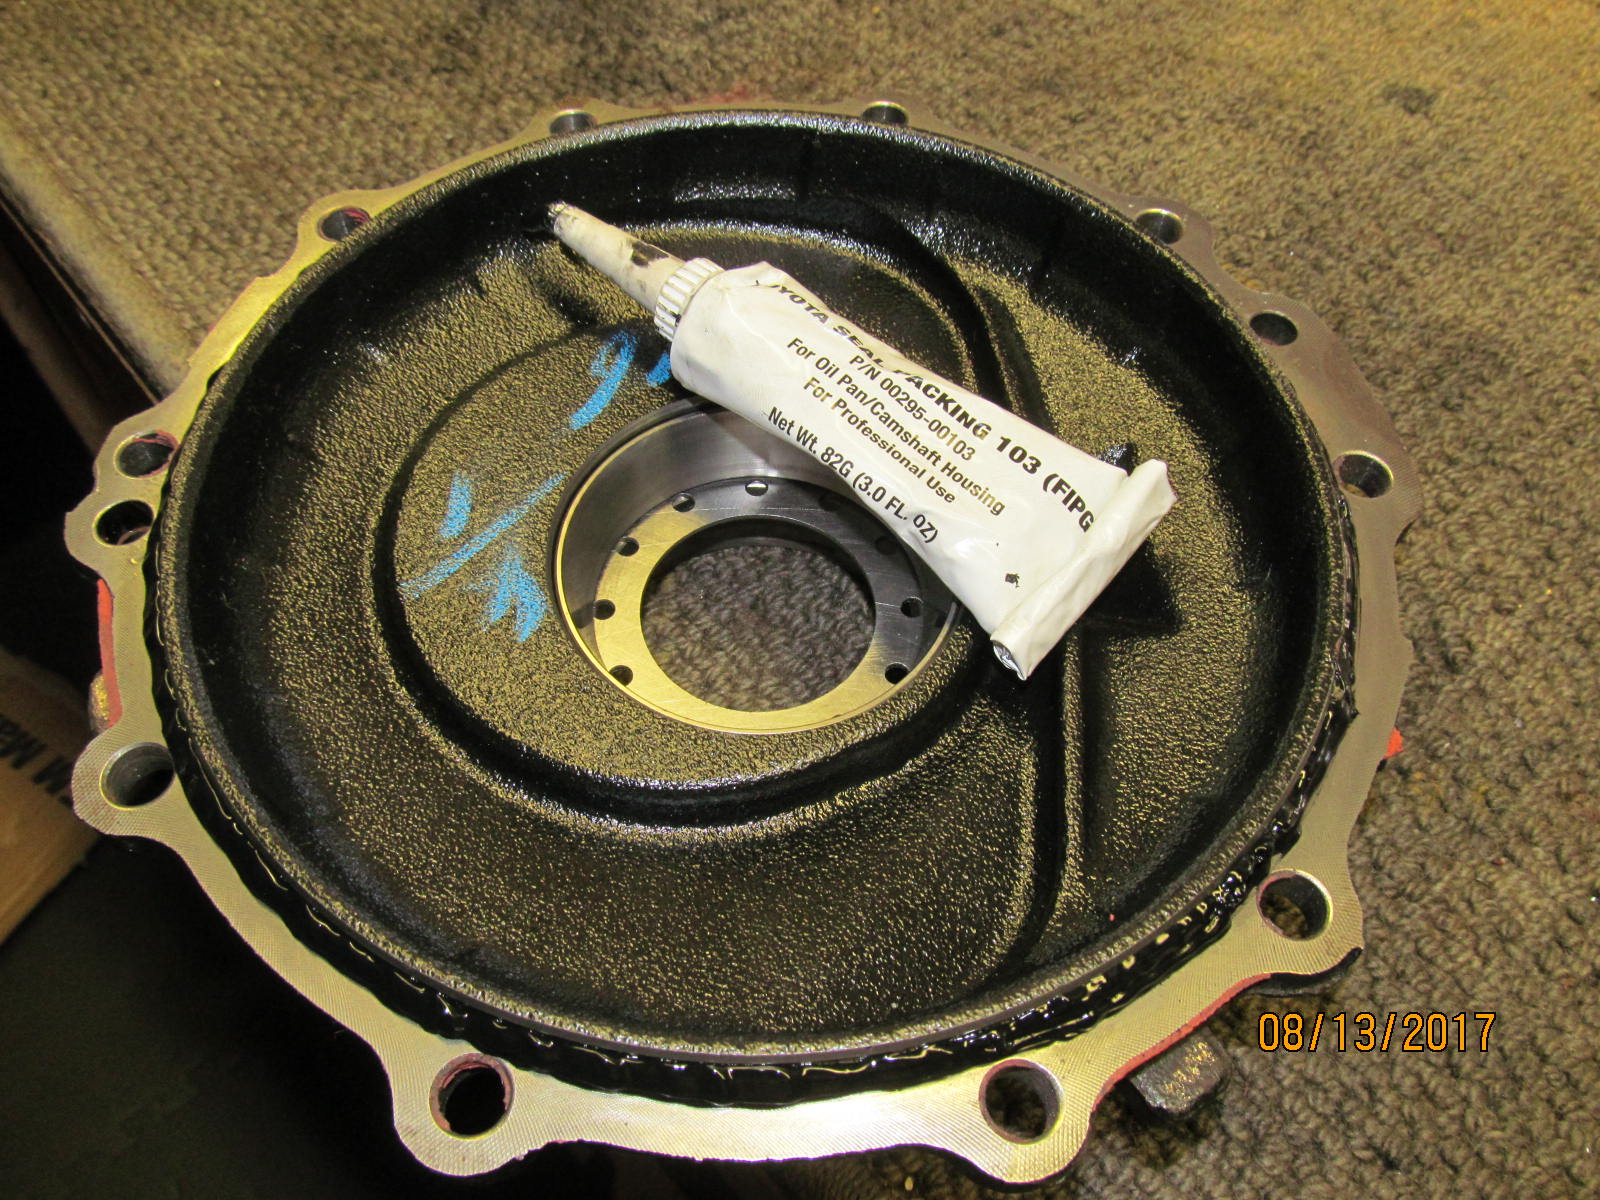
| 00295-00103 can be had on Ebay.com |
|---|
|
|
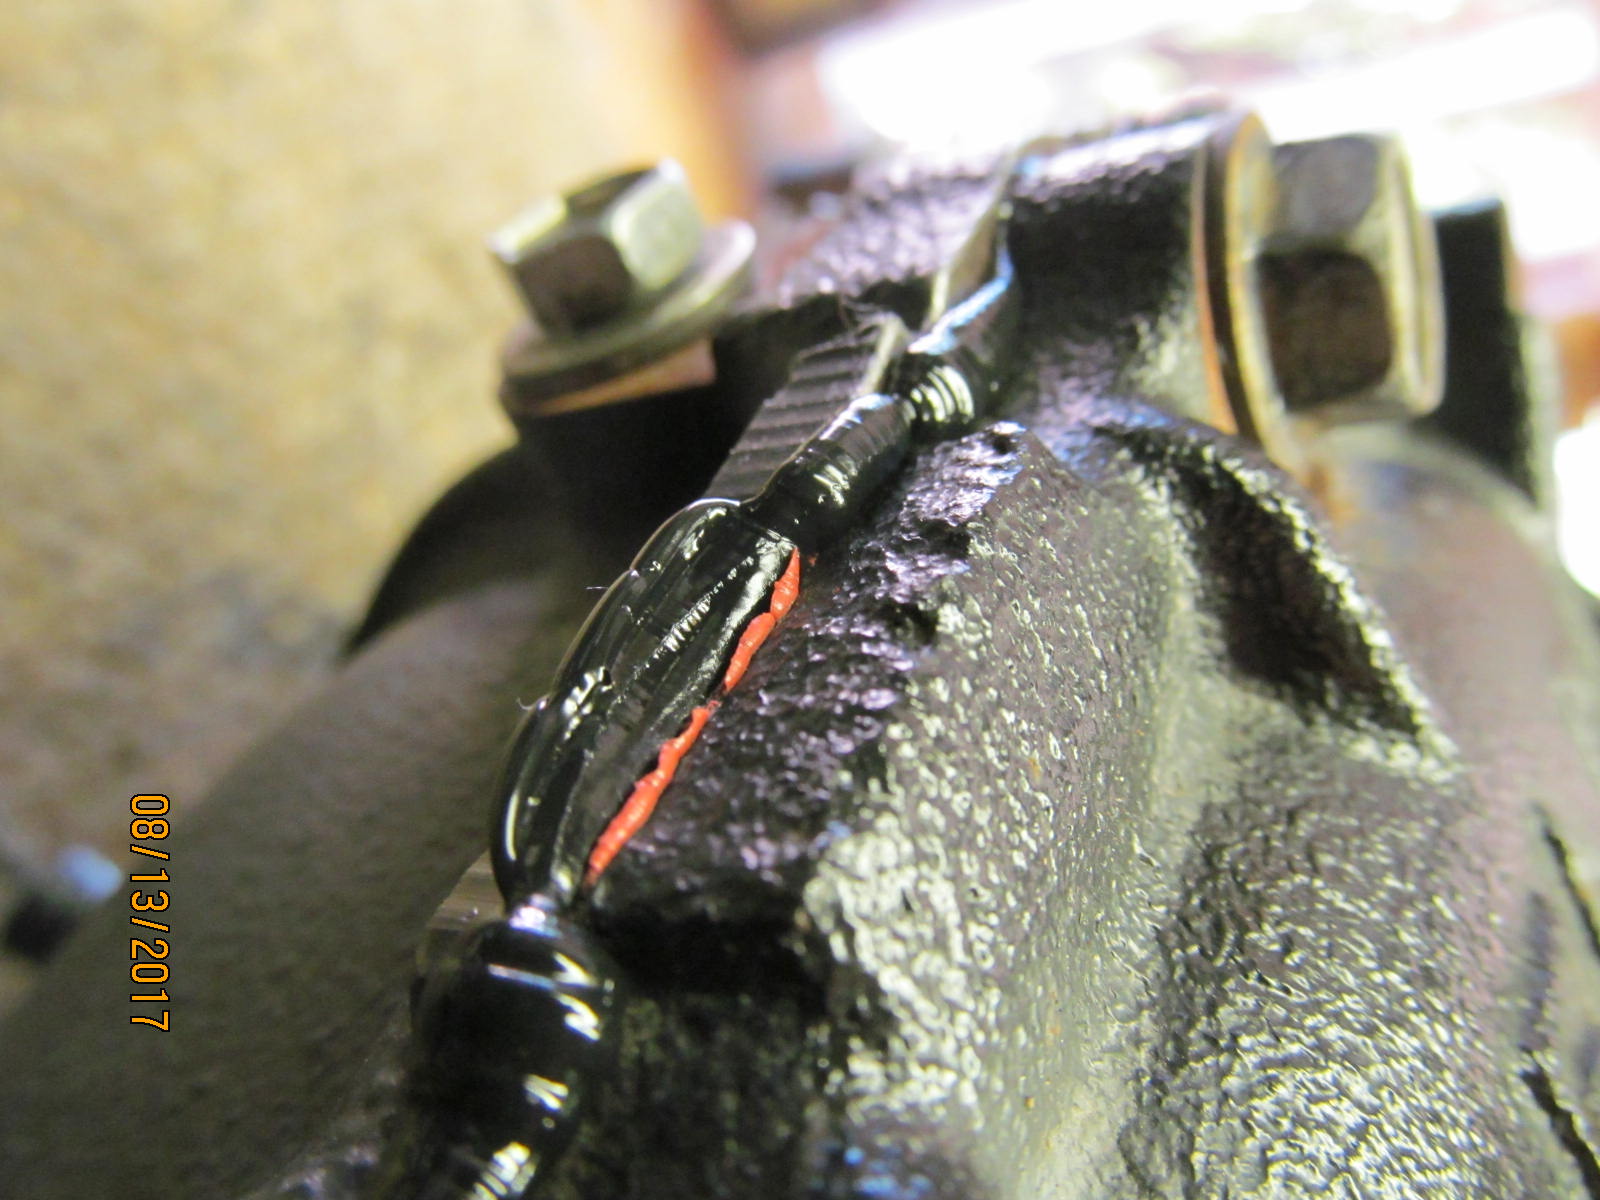
| The lid is tapped down, the FIPG is gooshing out, and the 10 lid bolts are threaded in... |
|---|
|
|
| 51 ft/lb final FSM recommended torque in a cross pattern. |
|---|
|
|
| Measuring right at 17 in/lb of total preload. 11 of that is the pinion bearings so that leaves 6 for the carrier bearings. |
|---|
|
|
| Goosh....... |
|---|
|
|
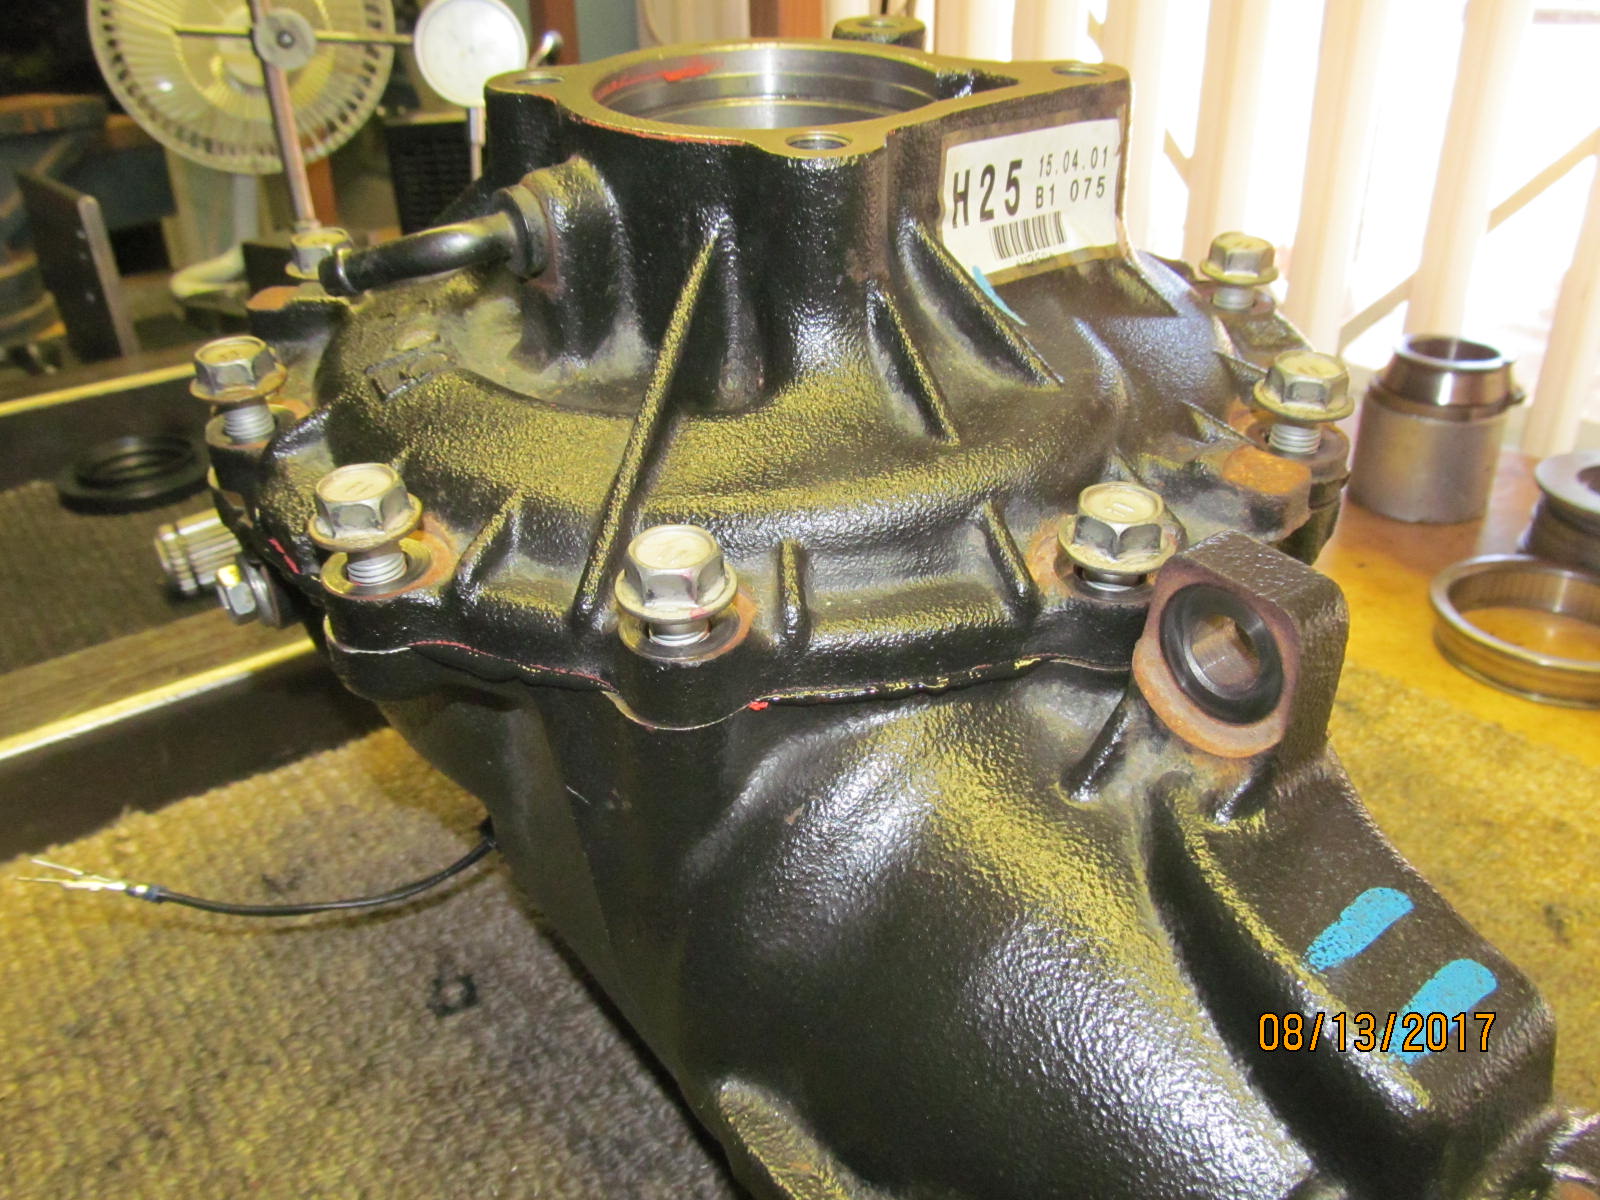
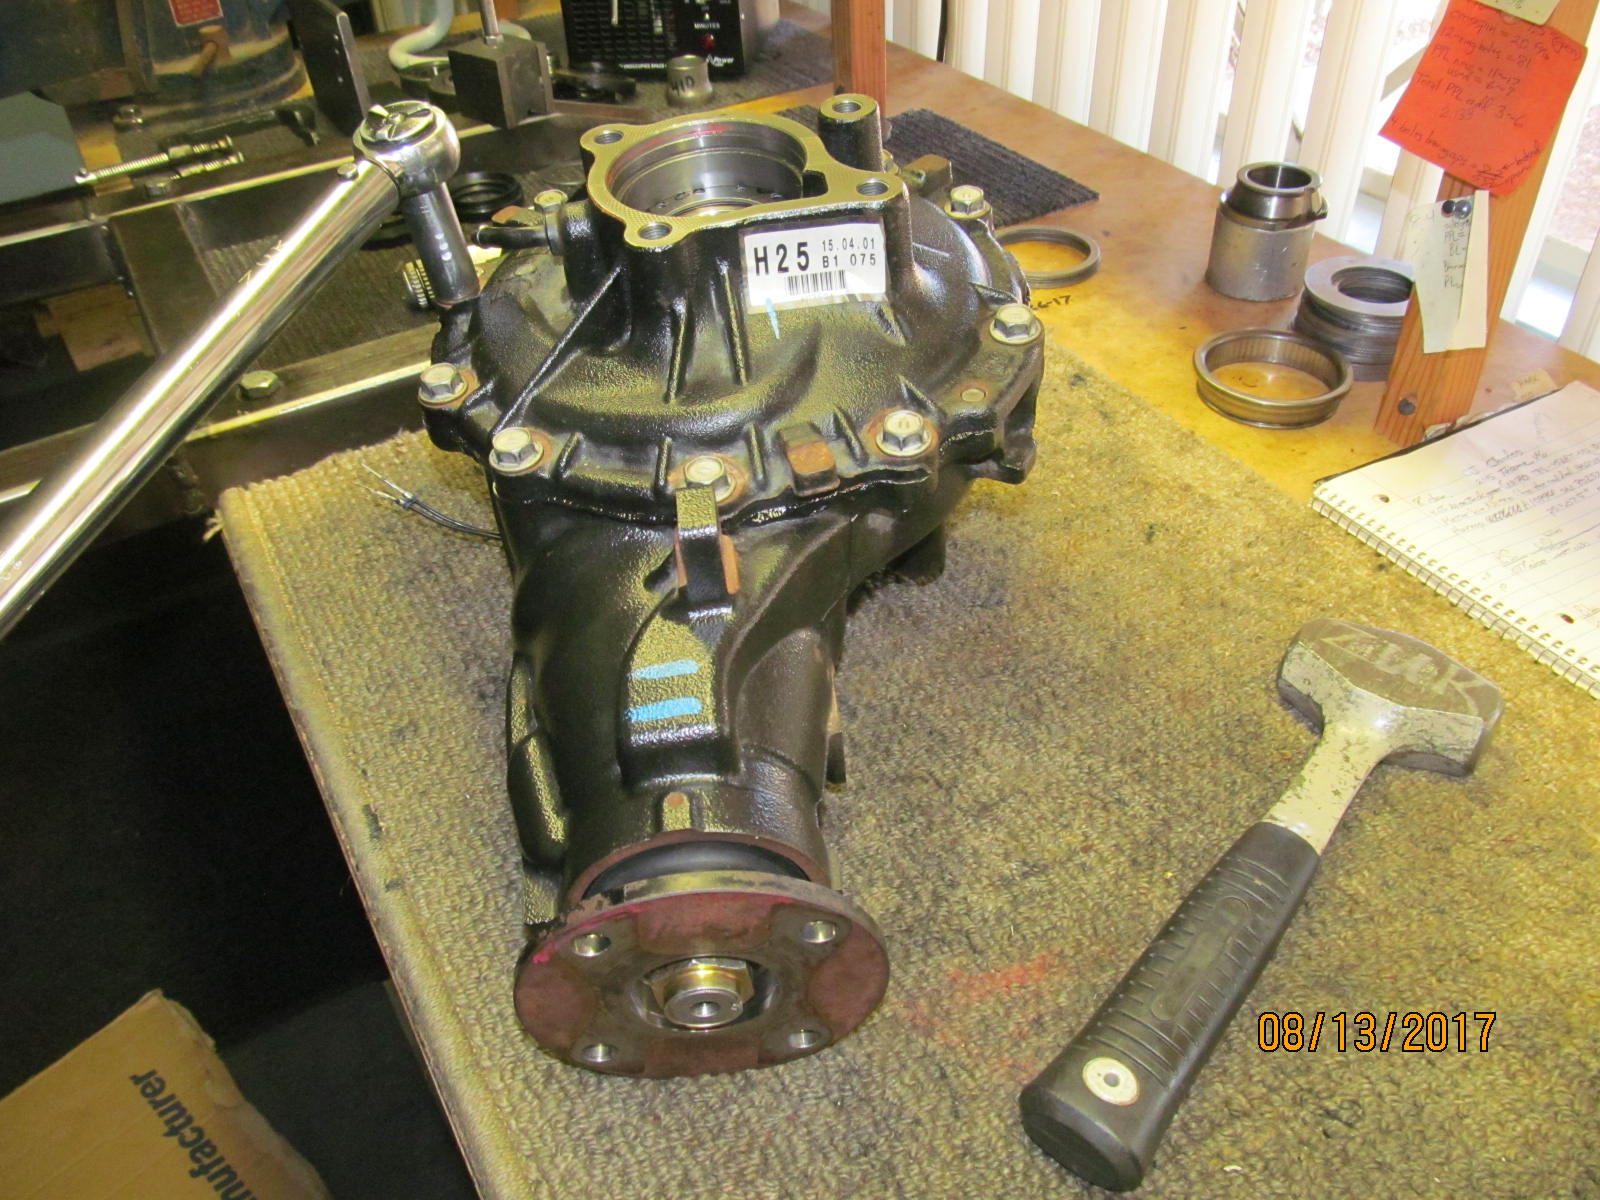
| Basically, it's complete except for a few minor items. |
|---|
|
|
| Tapped in the Nitro driver side seal flush. |
|---|
|

|
| Greased up the clip and drove the axle stub on the other side home. |
|---|
|
|
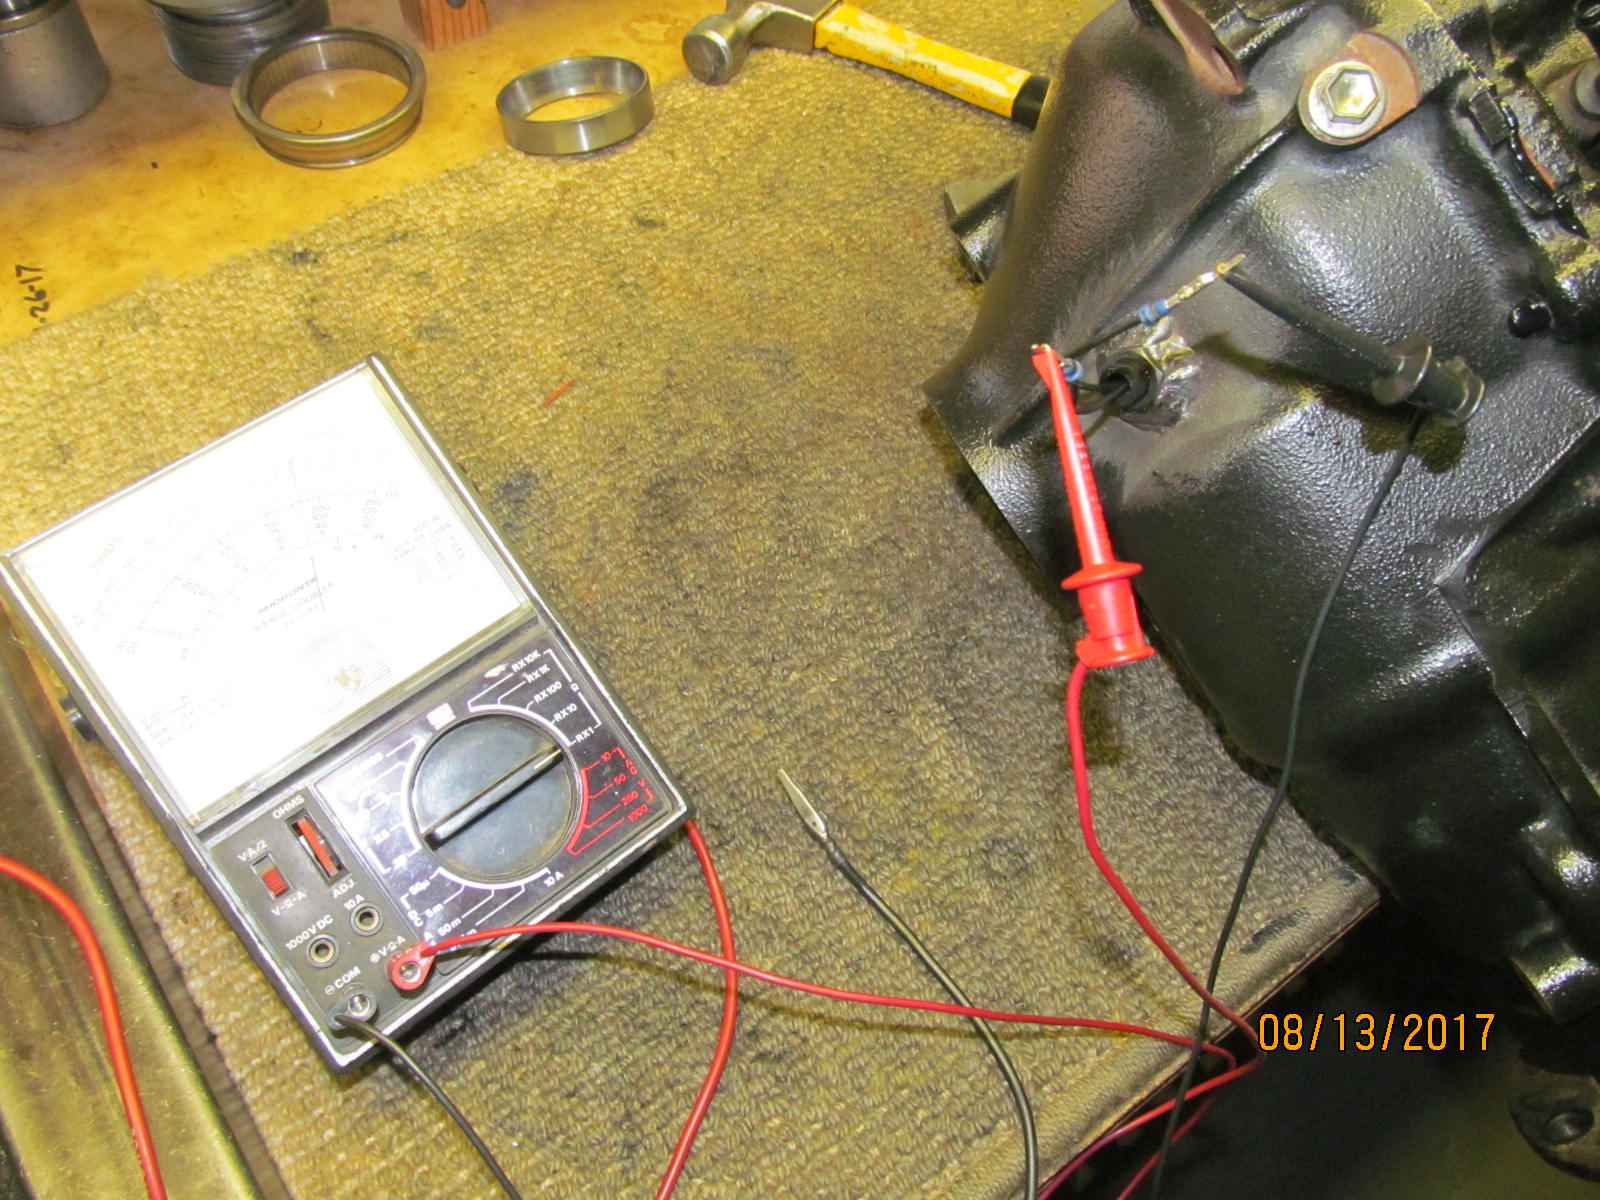
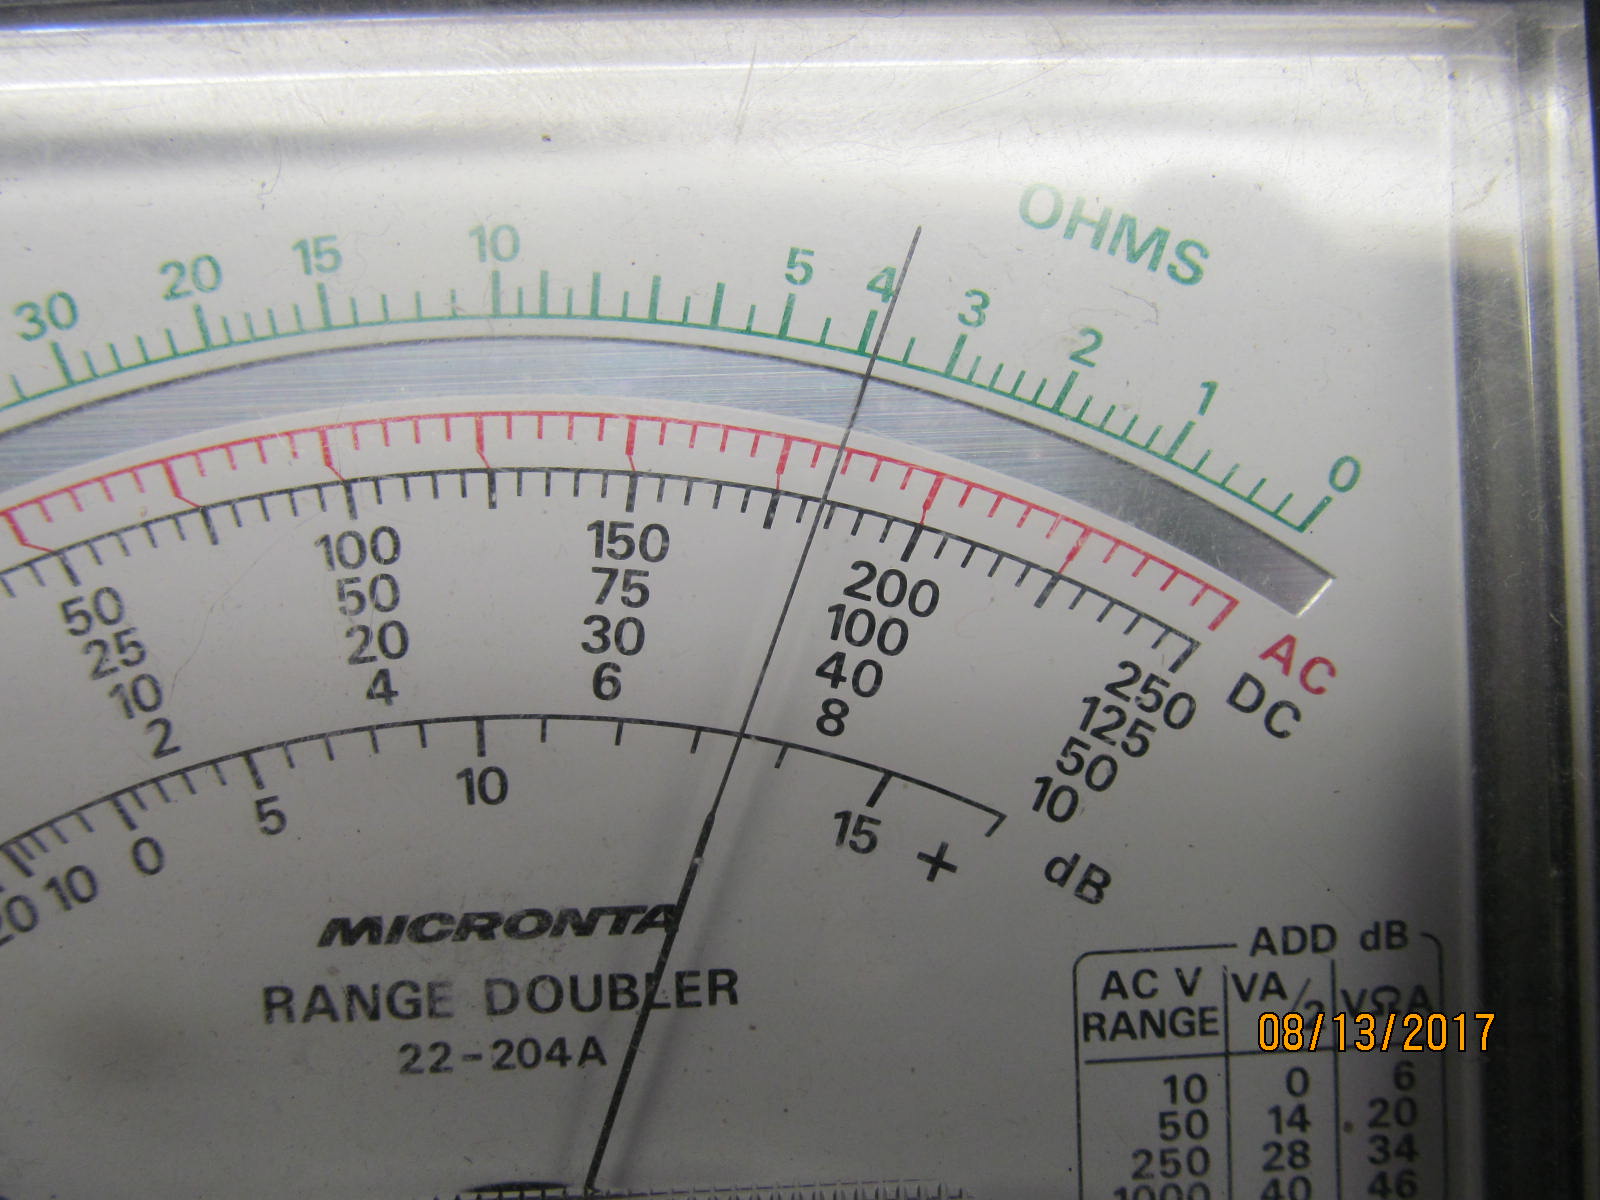
| Resistance check with an old Micronta analog meter from the 80's. |
|---|
|
|
Needle was properly zero'd beforehand and measuring 3.9 ohms. Ohm's Law says 4 ohms at 12 volts is only 3 amps....
or 4 ohms at a higher 16 volts is still only 4 amps current draw. |
|---|
|
|
| fyi |
|---|
|

|
| fyi |
|---|
|
|
| fyi |
|---|
|
|
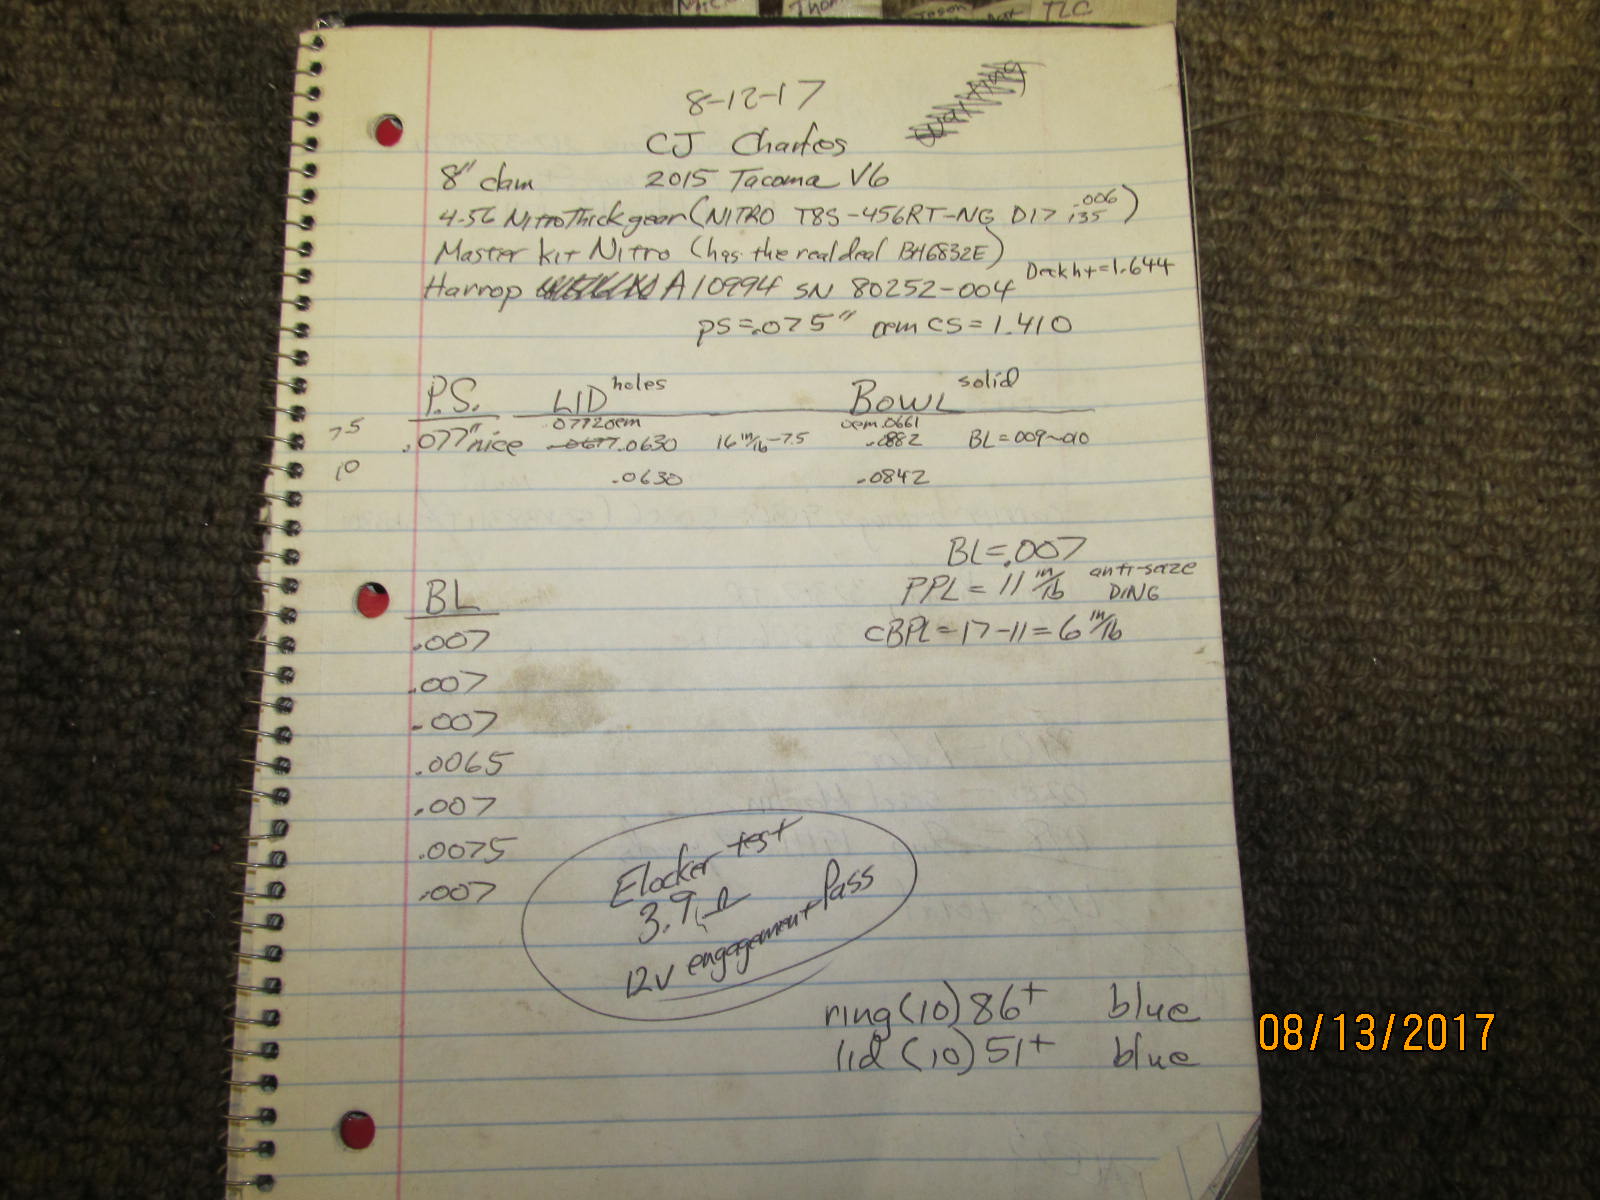
Notes taken during this install. Regearing an 8" clam and adding a Harrop elocker is not as easy as I might make it look.
Best to send it to me ;) |
|---|
|
|

|