| Tony's 1984 4Runner front Hi-Pinion gets a Harrop elocker and Nitro 488R gears |
|---|
| (68 BIG pics loading) |
|---|
| JAN 6 2018 |
|---|
|
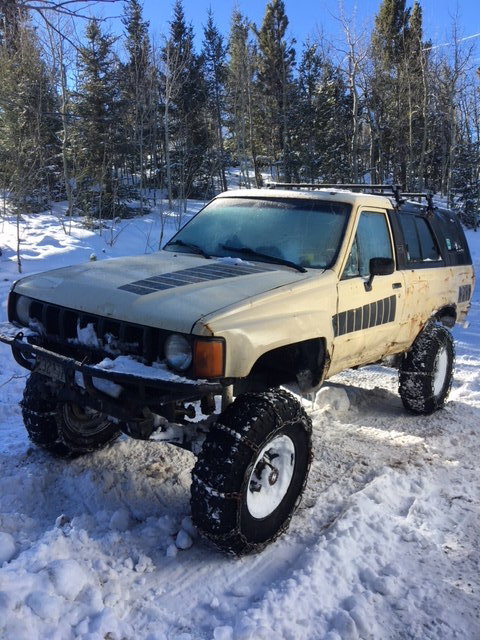
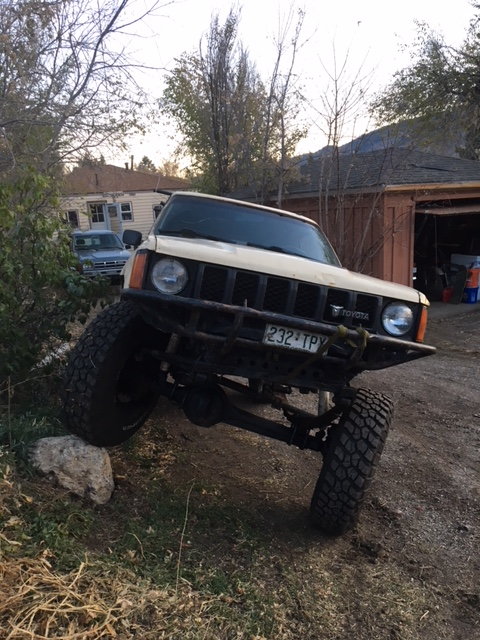
| Tony has the first year of the 4Runners....1984....a classic year. |
|---|
|
|
The rear was retrofitted with the Factory elocker a couple years ago.
Time to upgrade the front to a Harrop e-locker now.
|
|---|
|
|
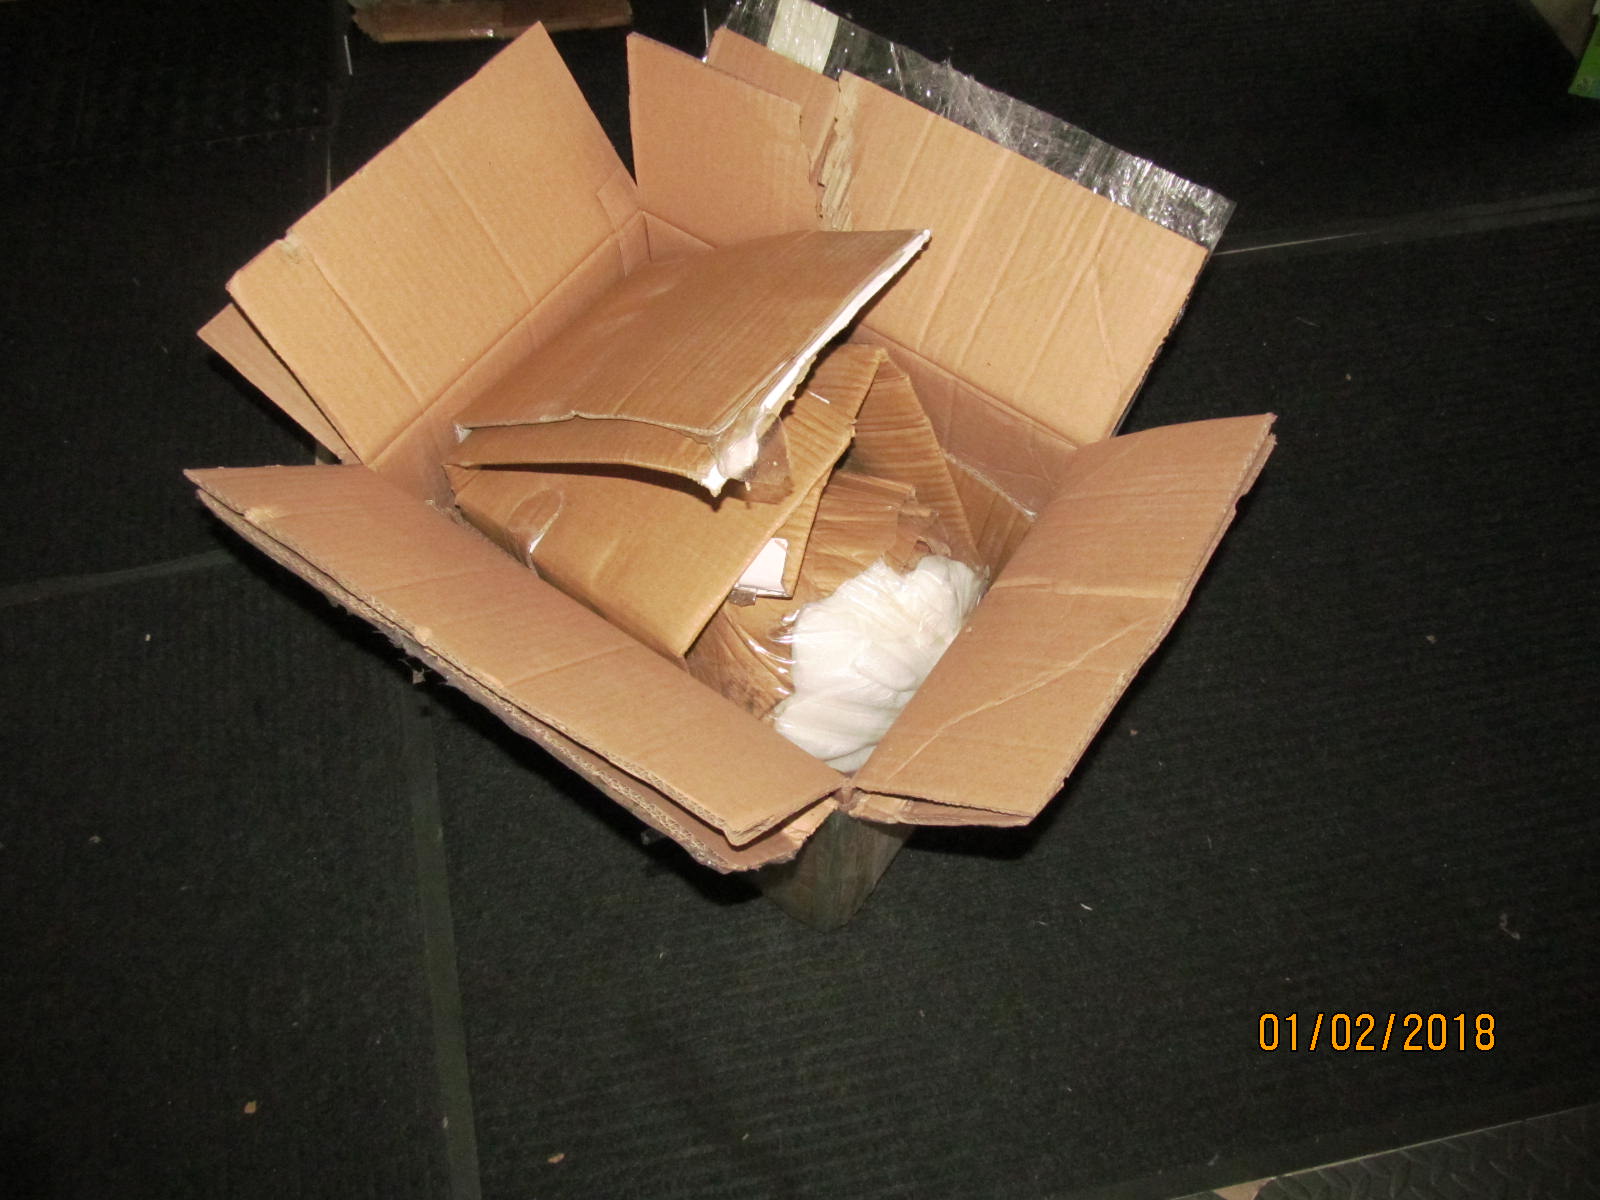
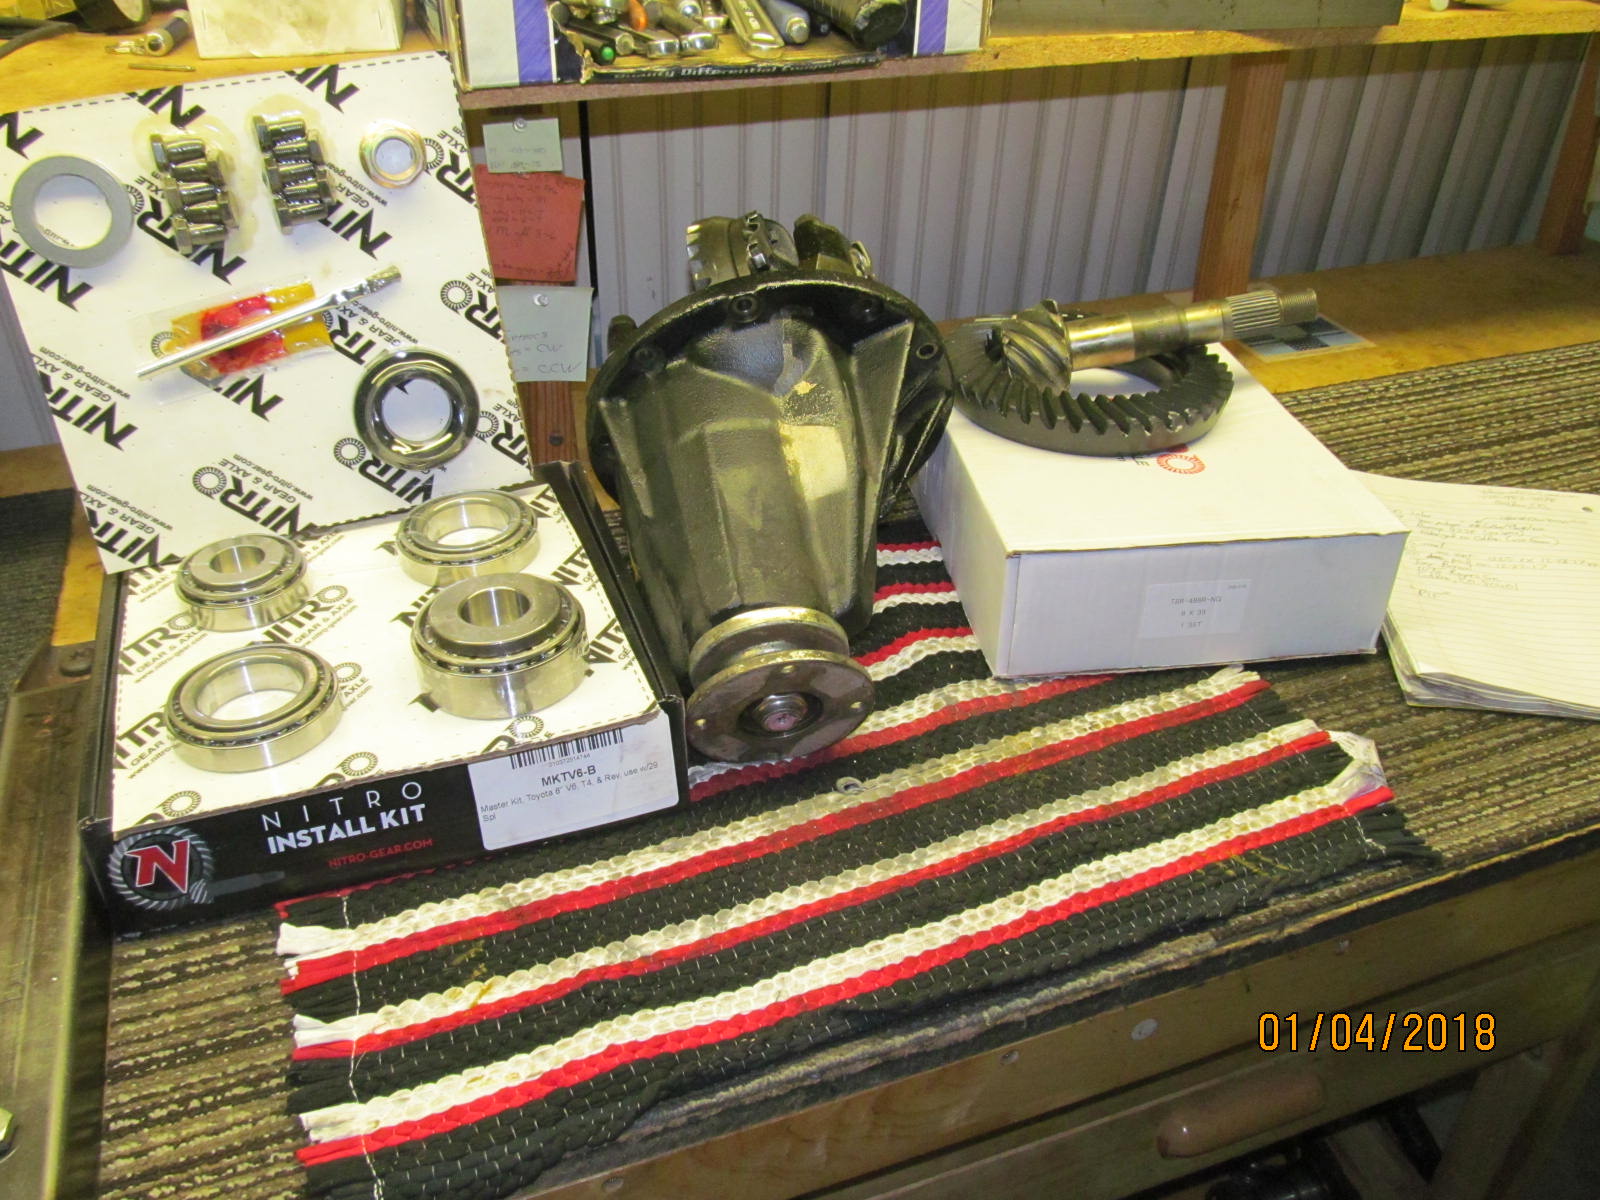
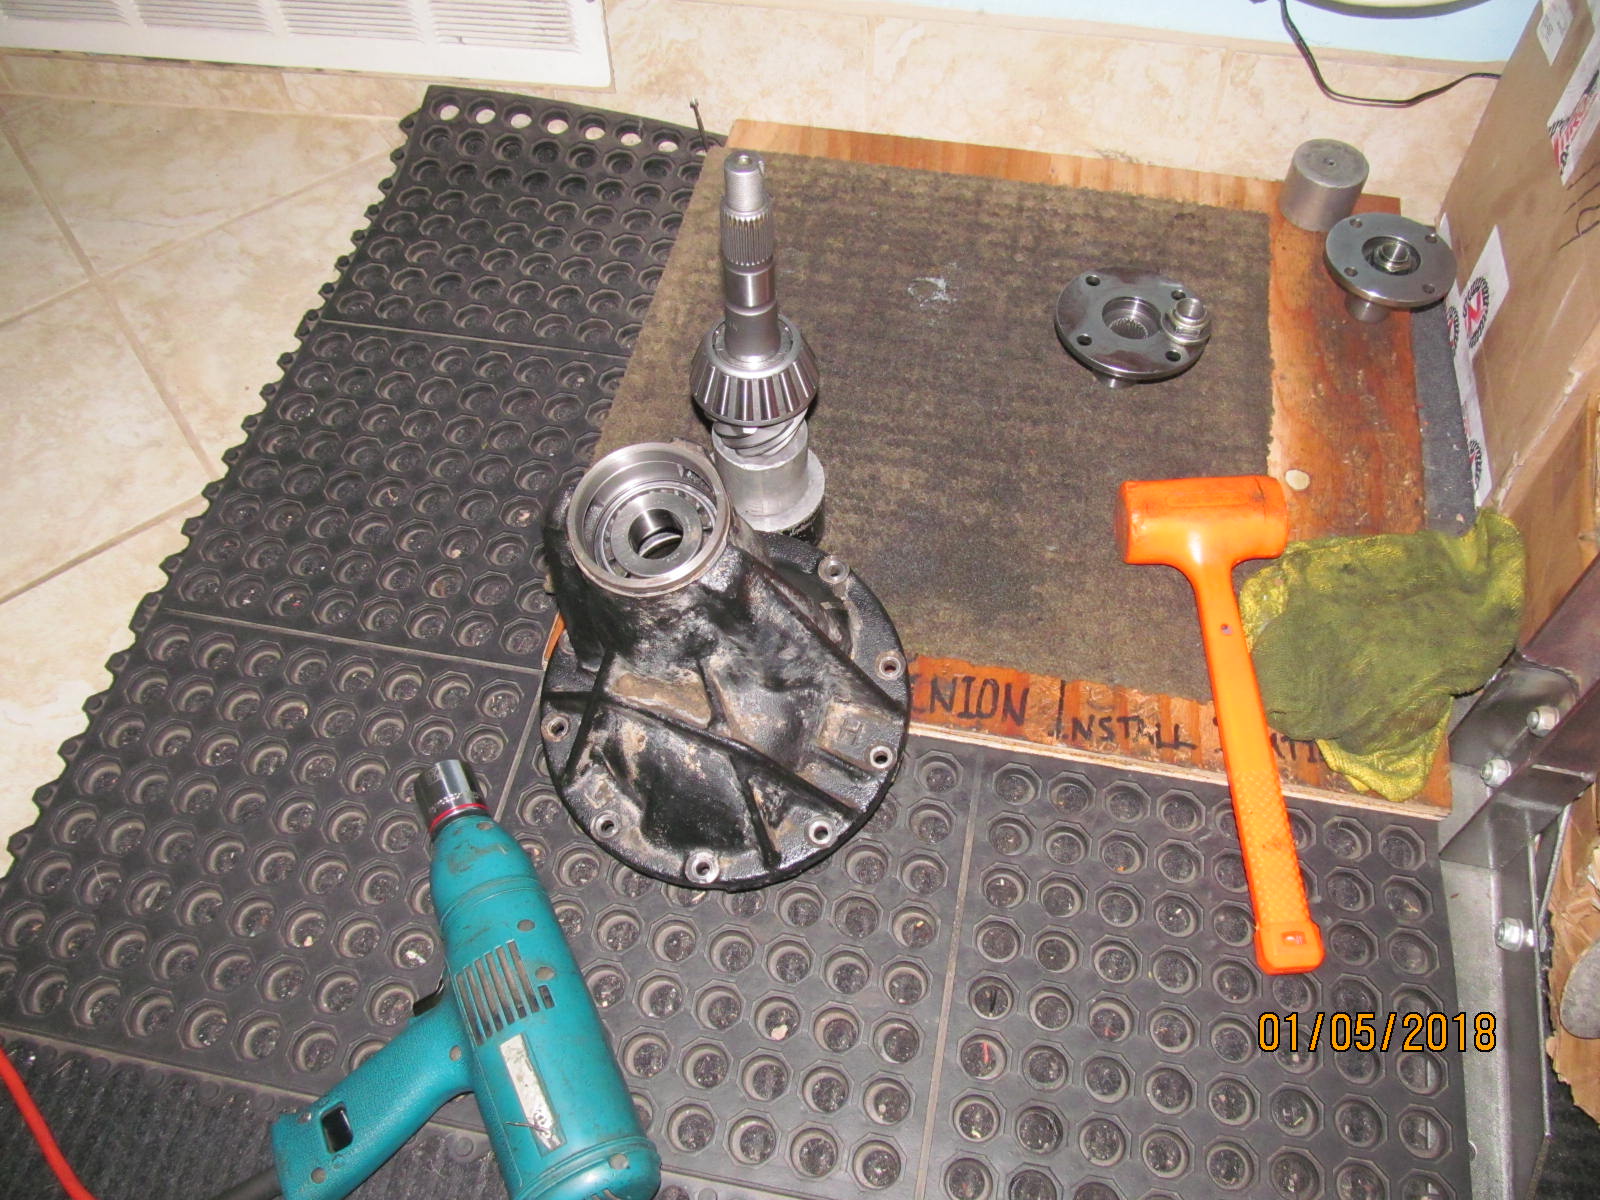
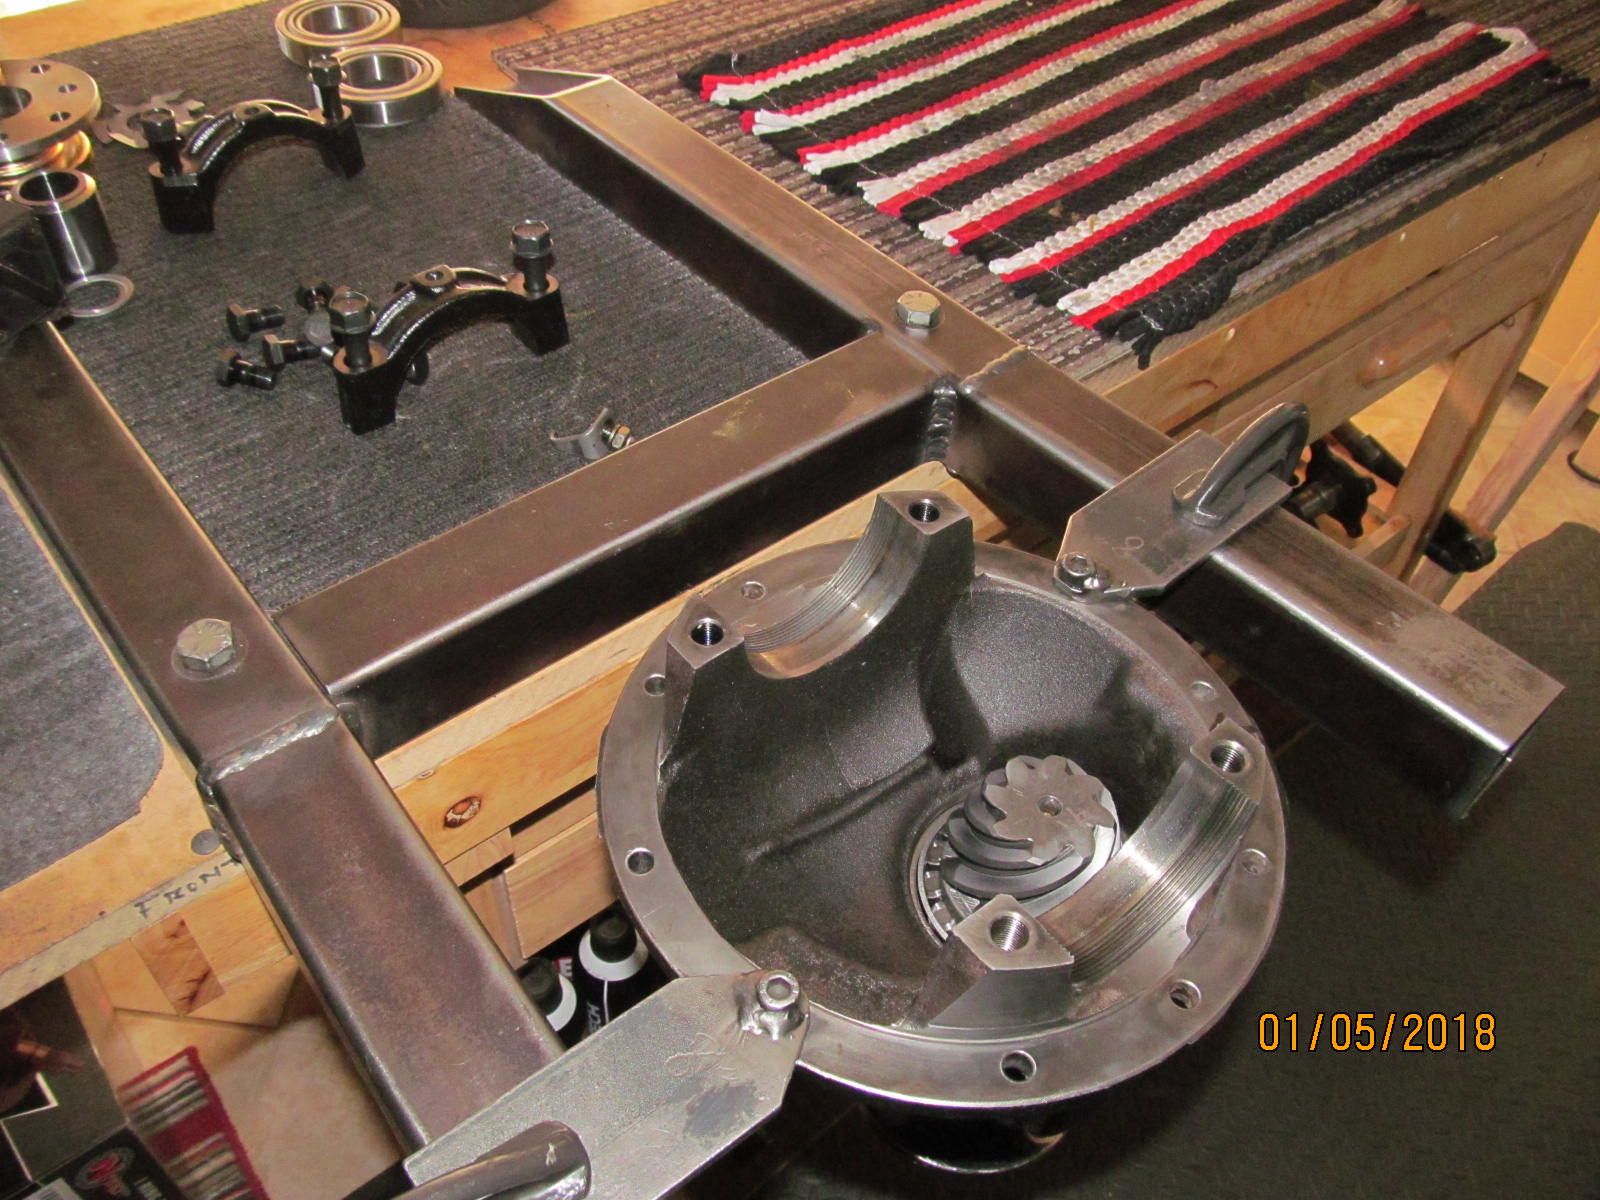
| This arrives from Colorado....a very well packed high pinion 3rd. |
|---|
|
|
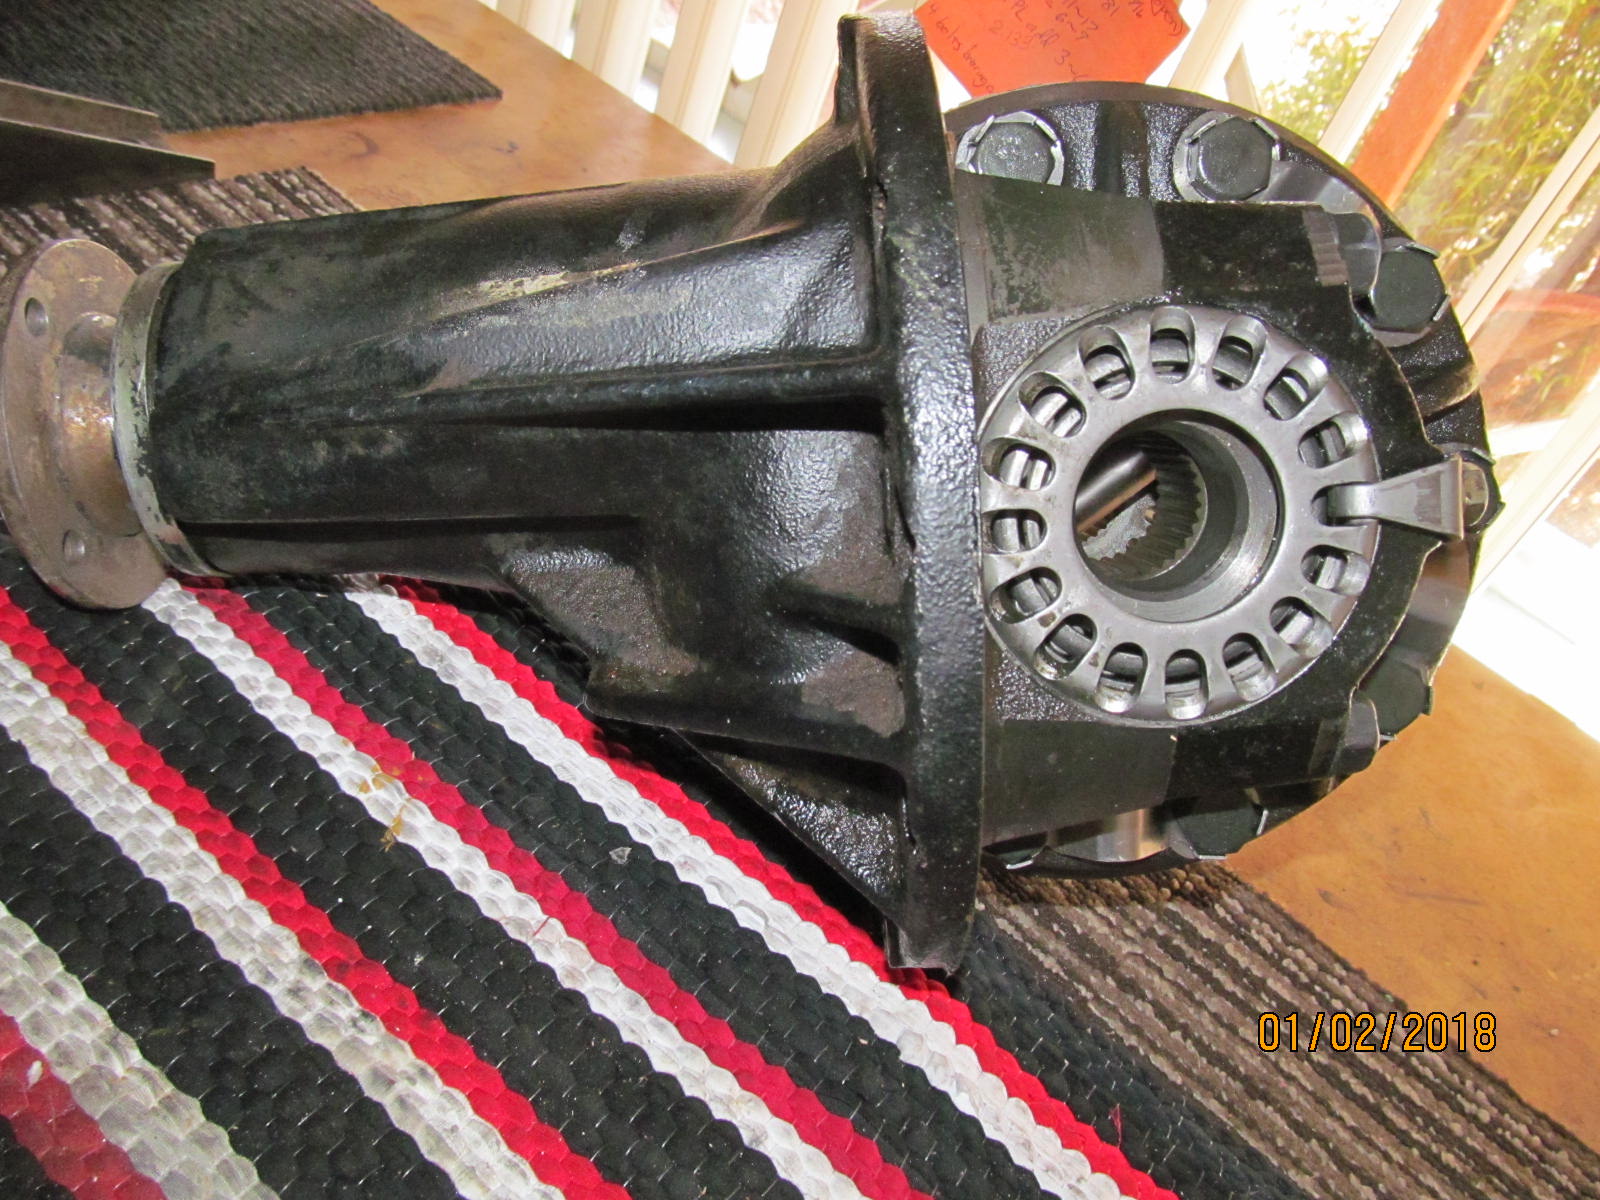
| Tony did a nice job of getting 99% of the oils and caked on grease/dirt off. |
|---|
|
|
| I'm still waiting on the Harrop but can still do some preparation of his 3rd. |
|---|
|
|
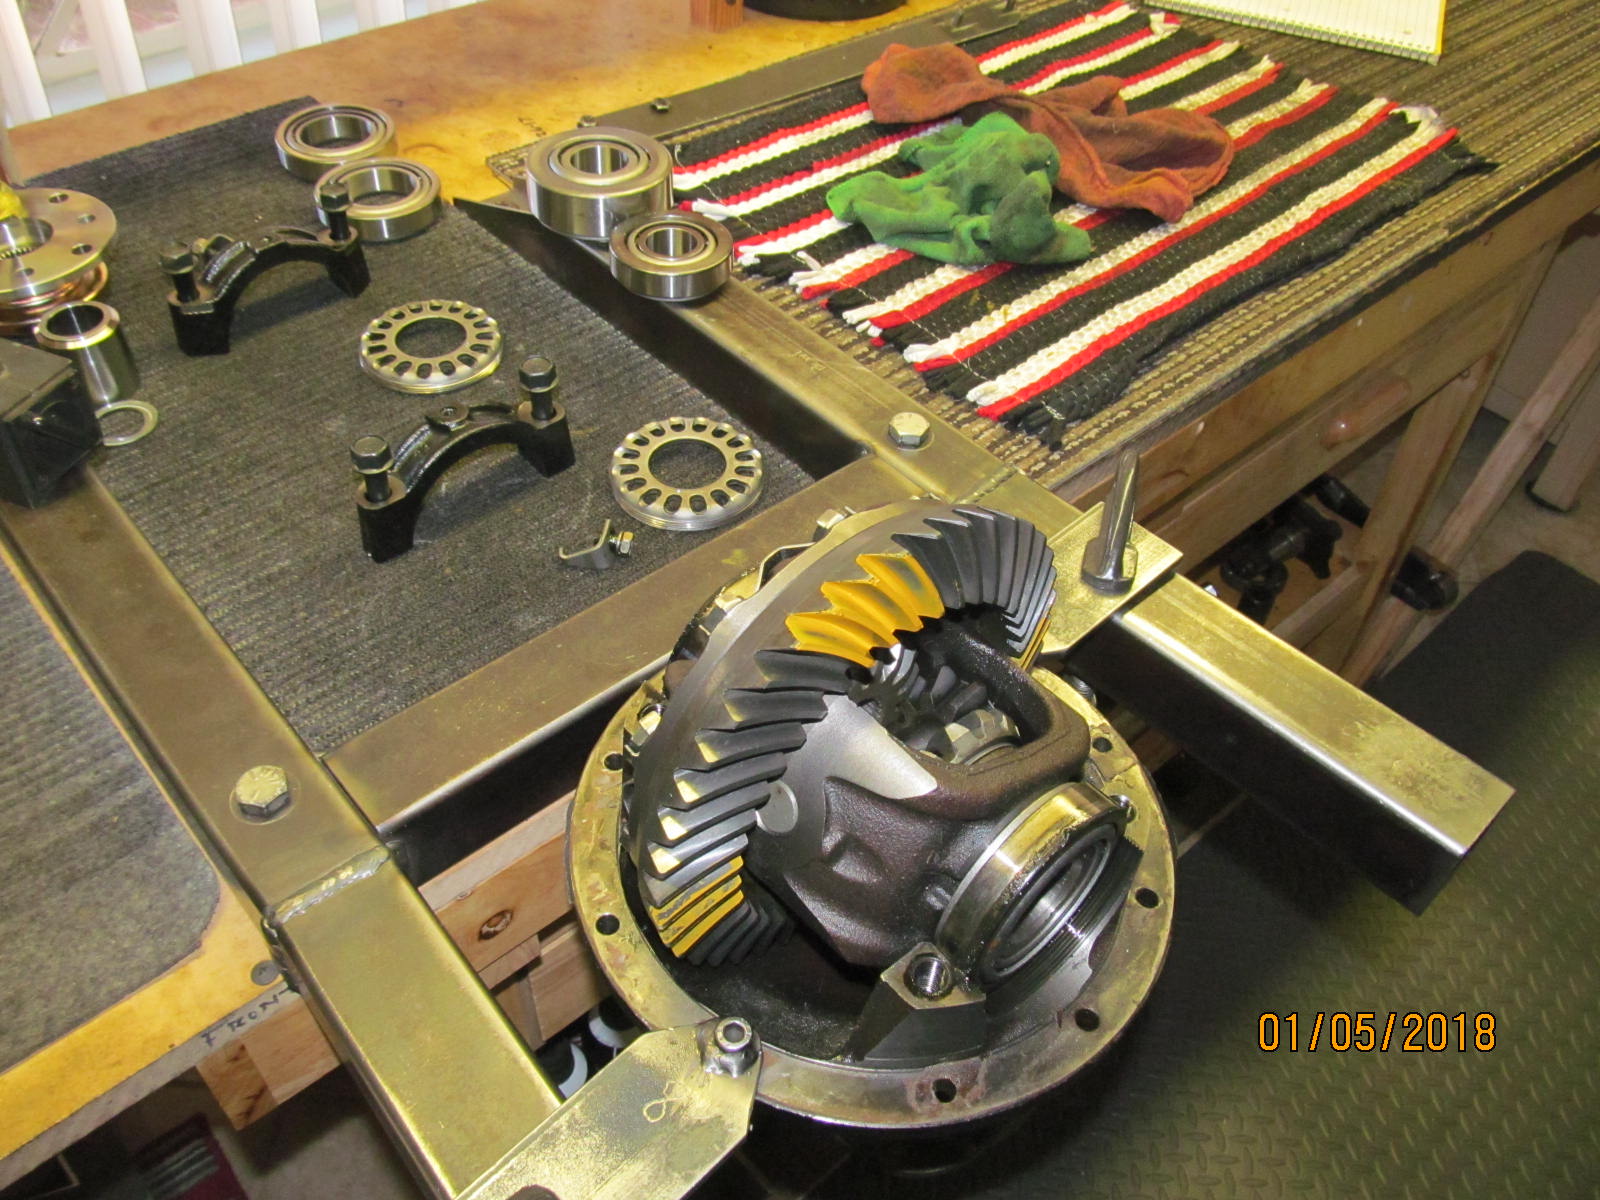
| The hi-pinion 3rd he sent me still had the original 410 gears and they paint ok. Some out of place wear but not too bad. |
|---|
|
|
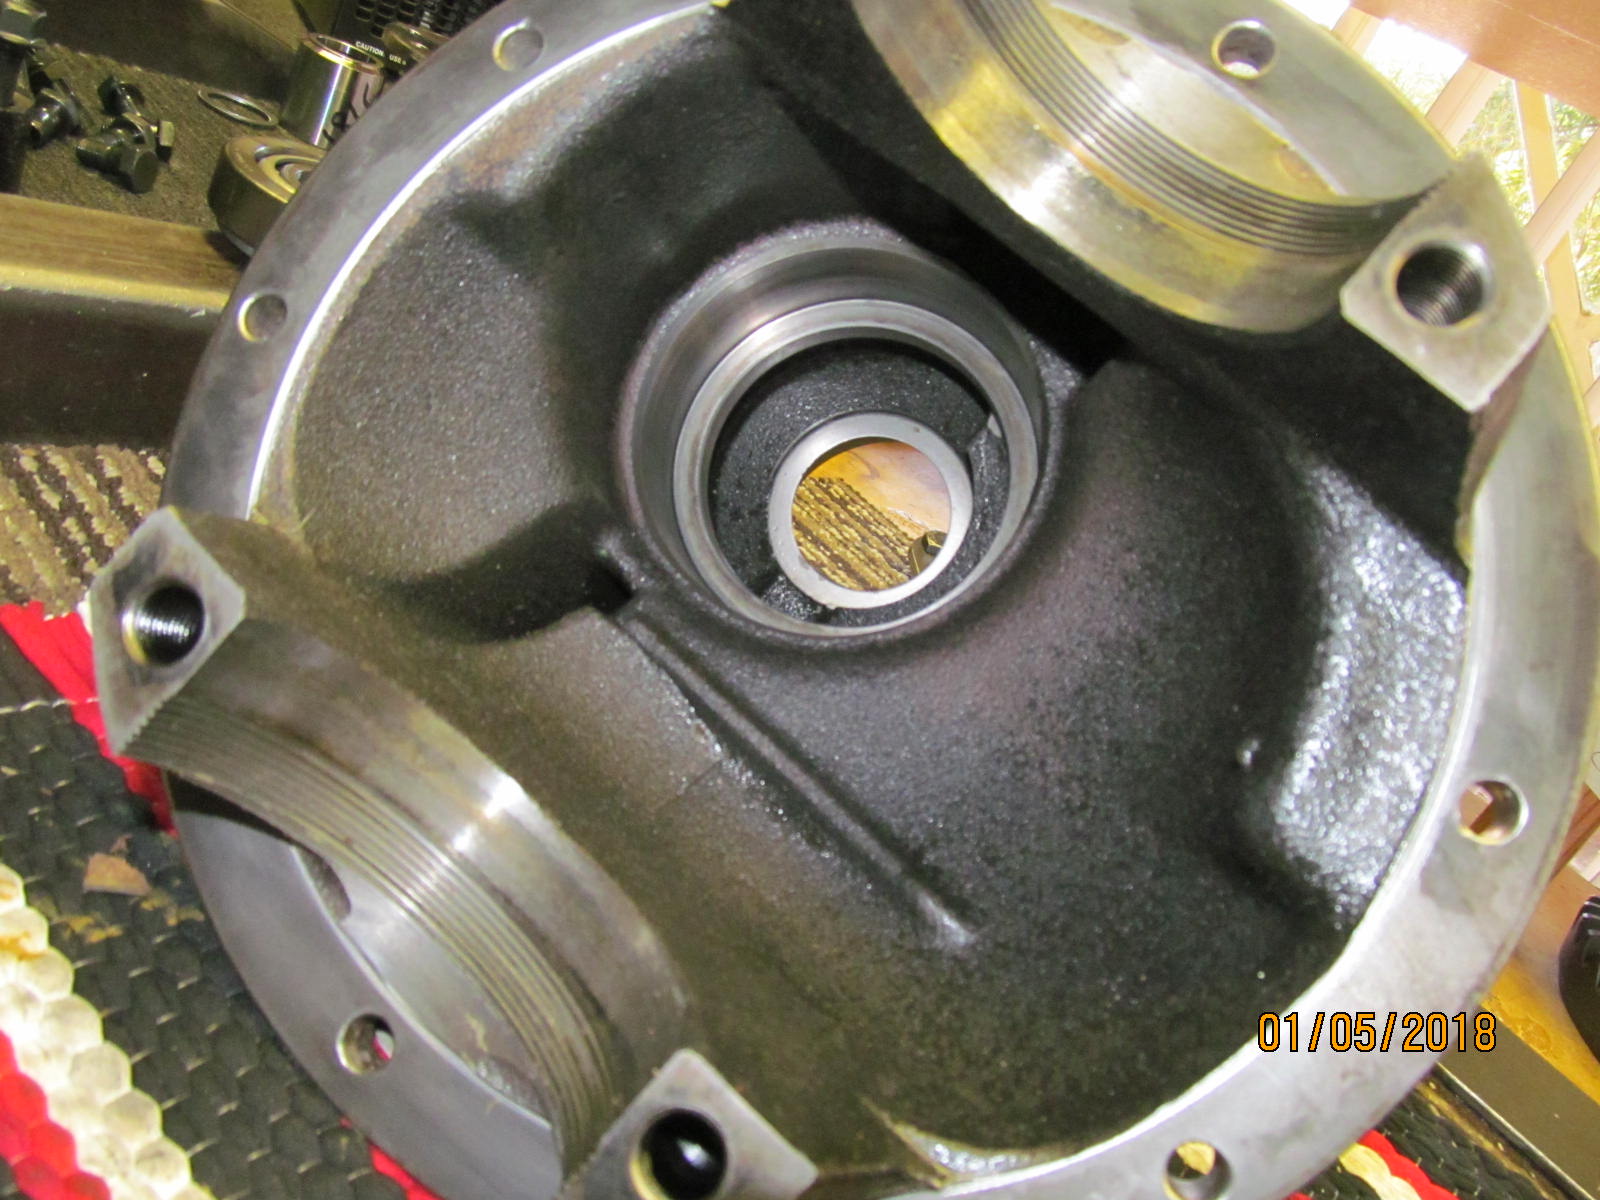
| So every thing was taken out....including the old pinion races. |
|---|
|
|
| A general wipe down. |
|---|
|
|
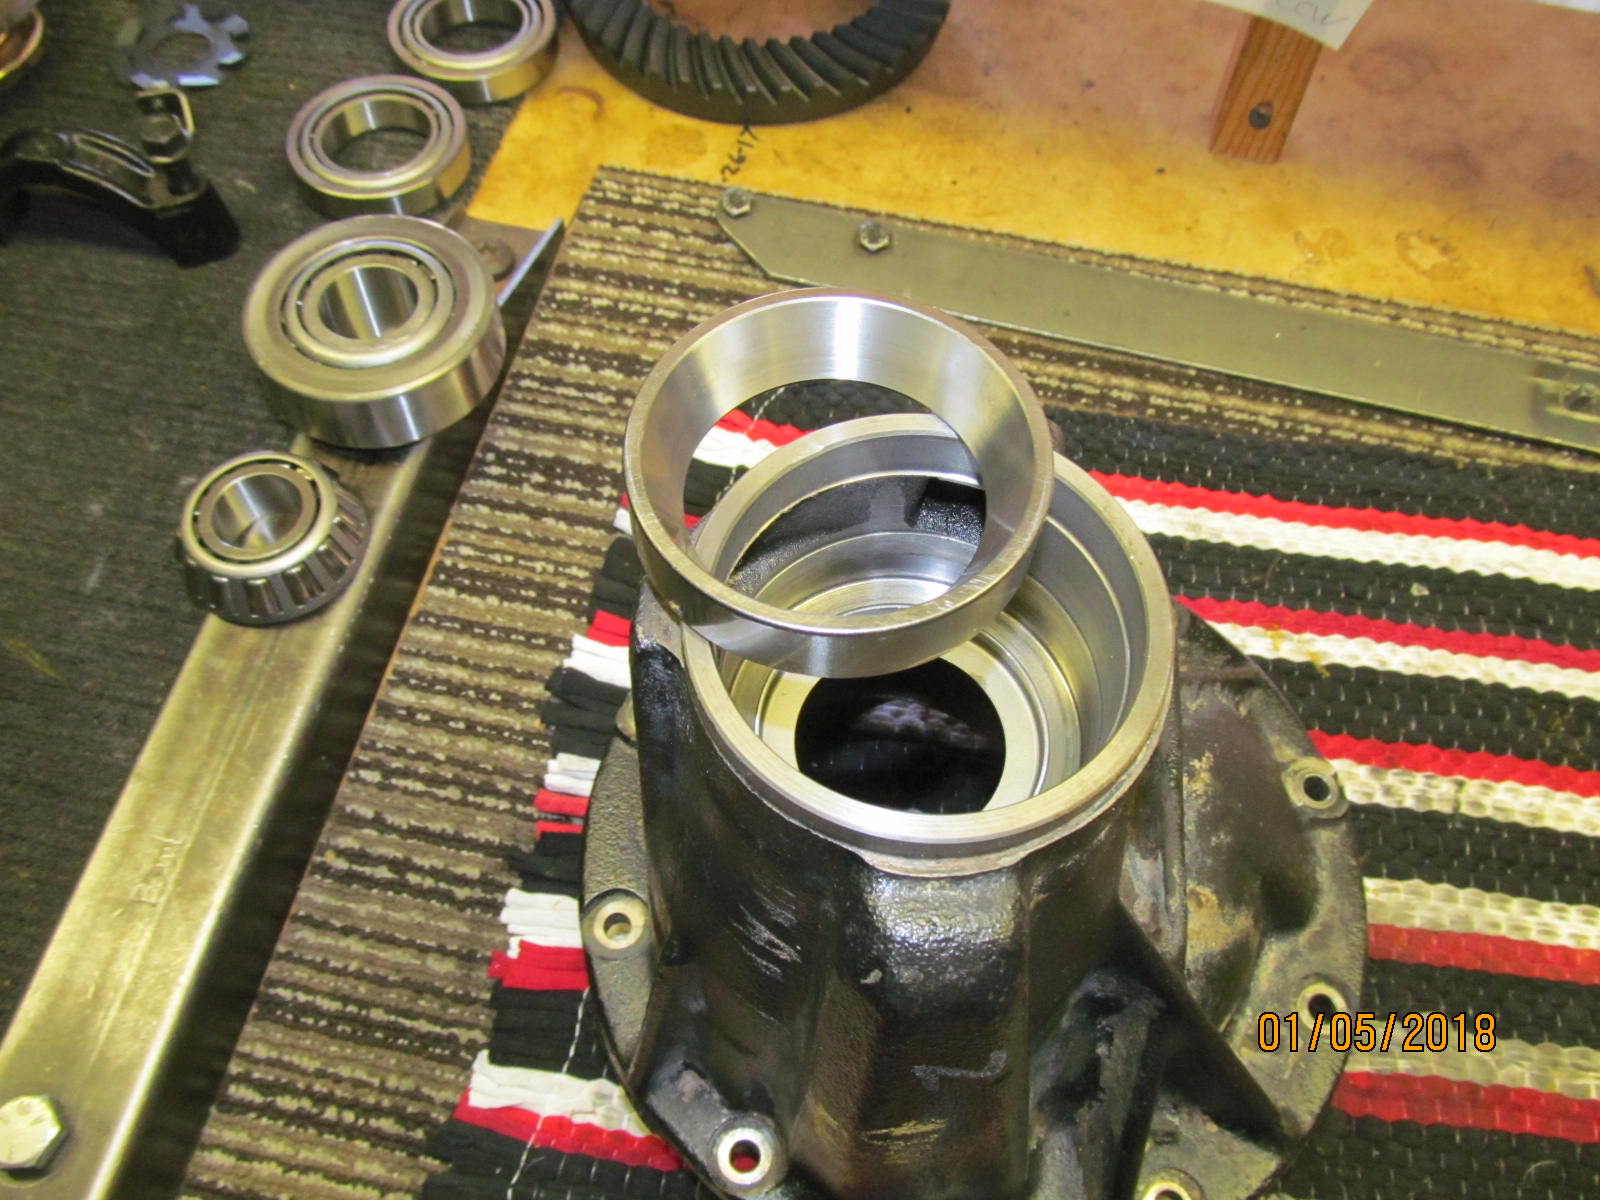
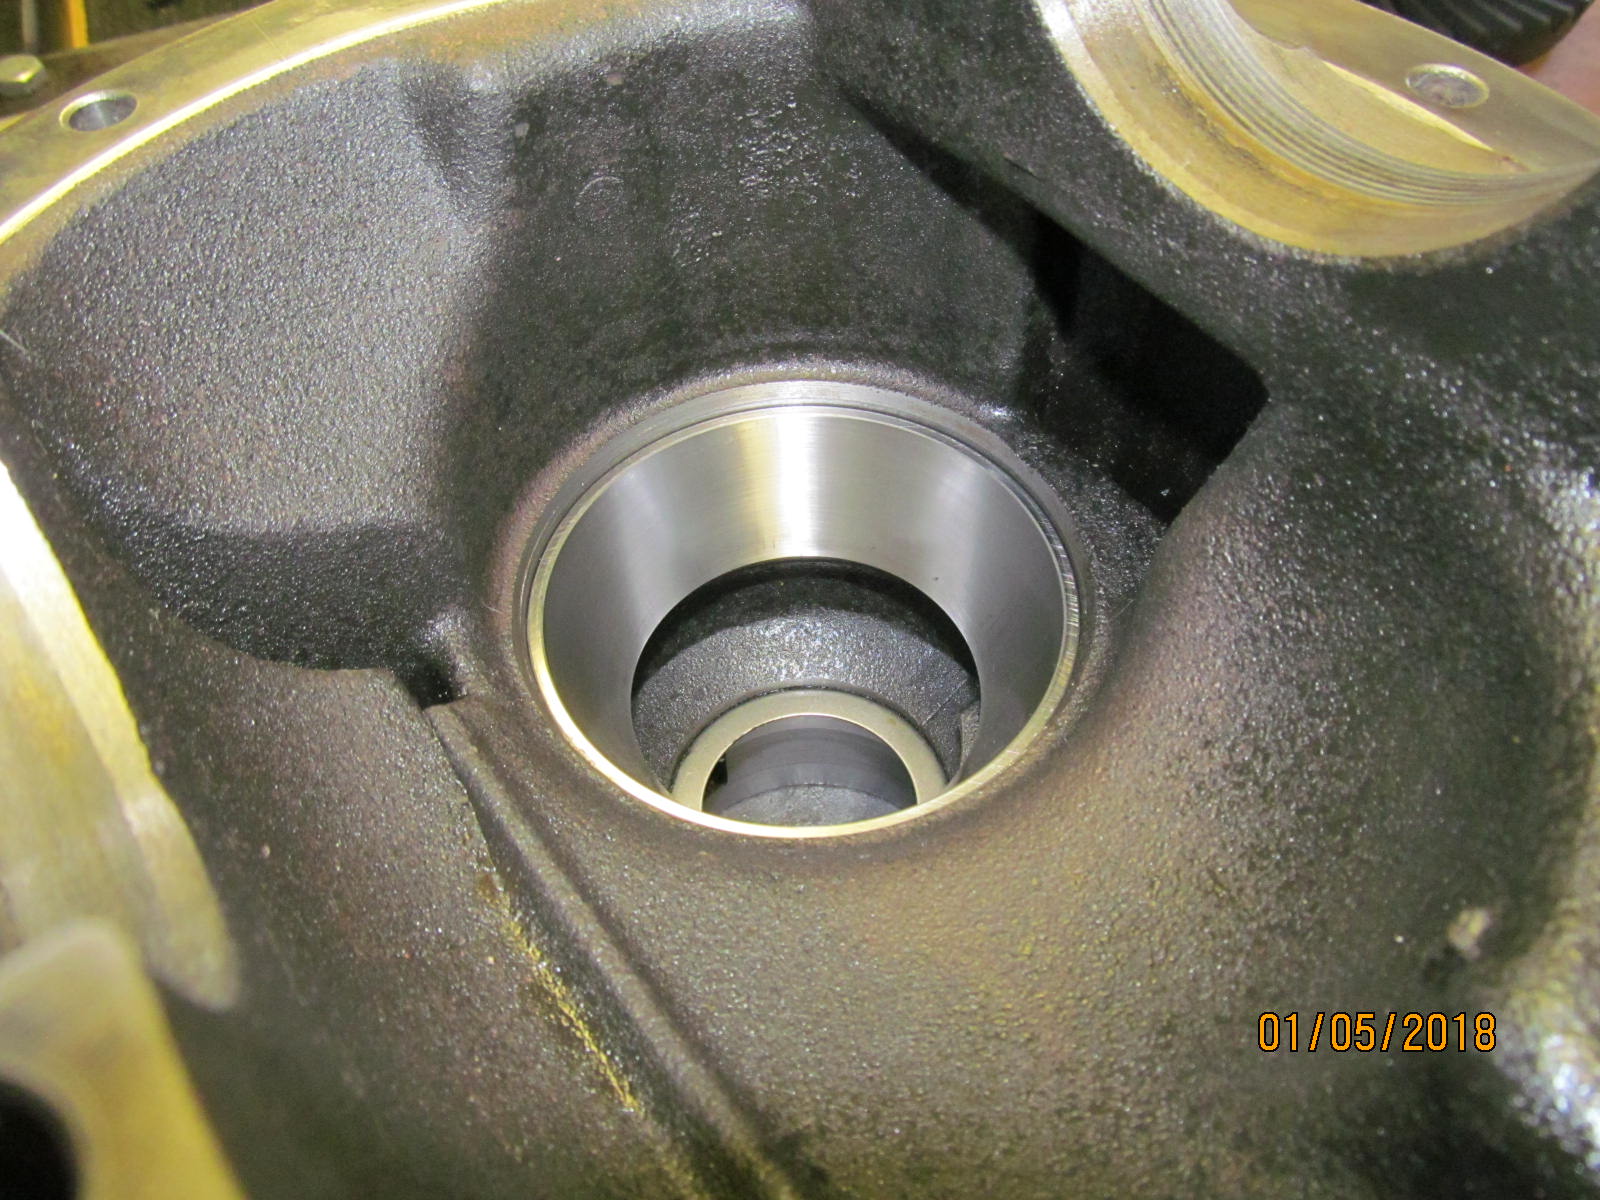
| Let's put the new races in. |
|---|
|
|
| Tapped in very nicely. |
|---|
|
|
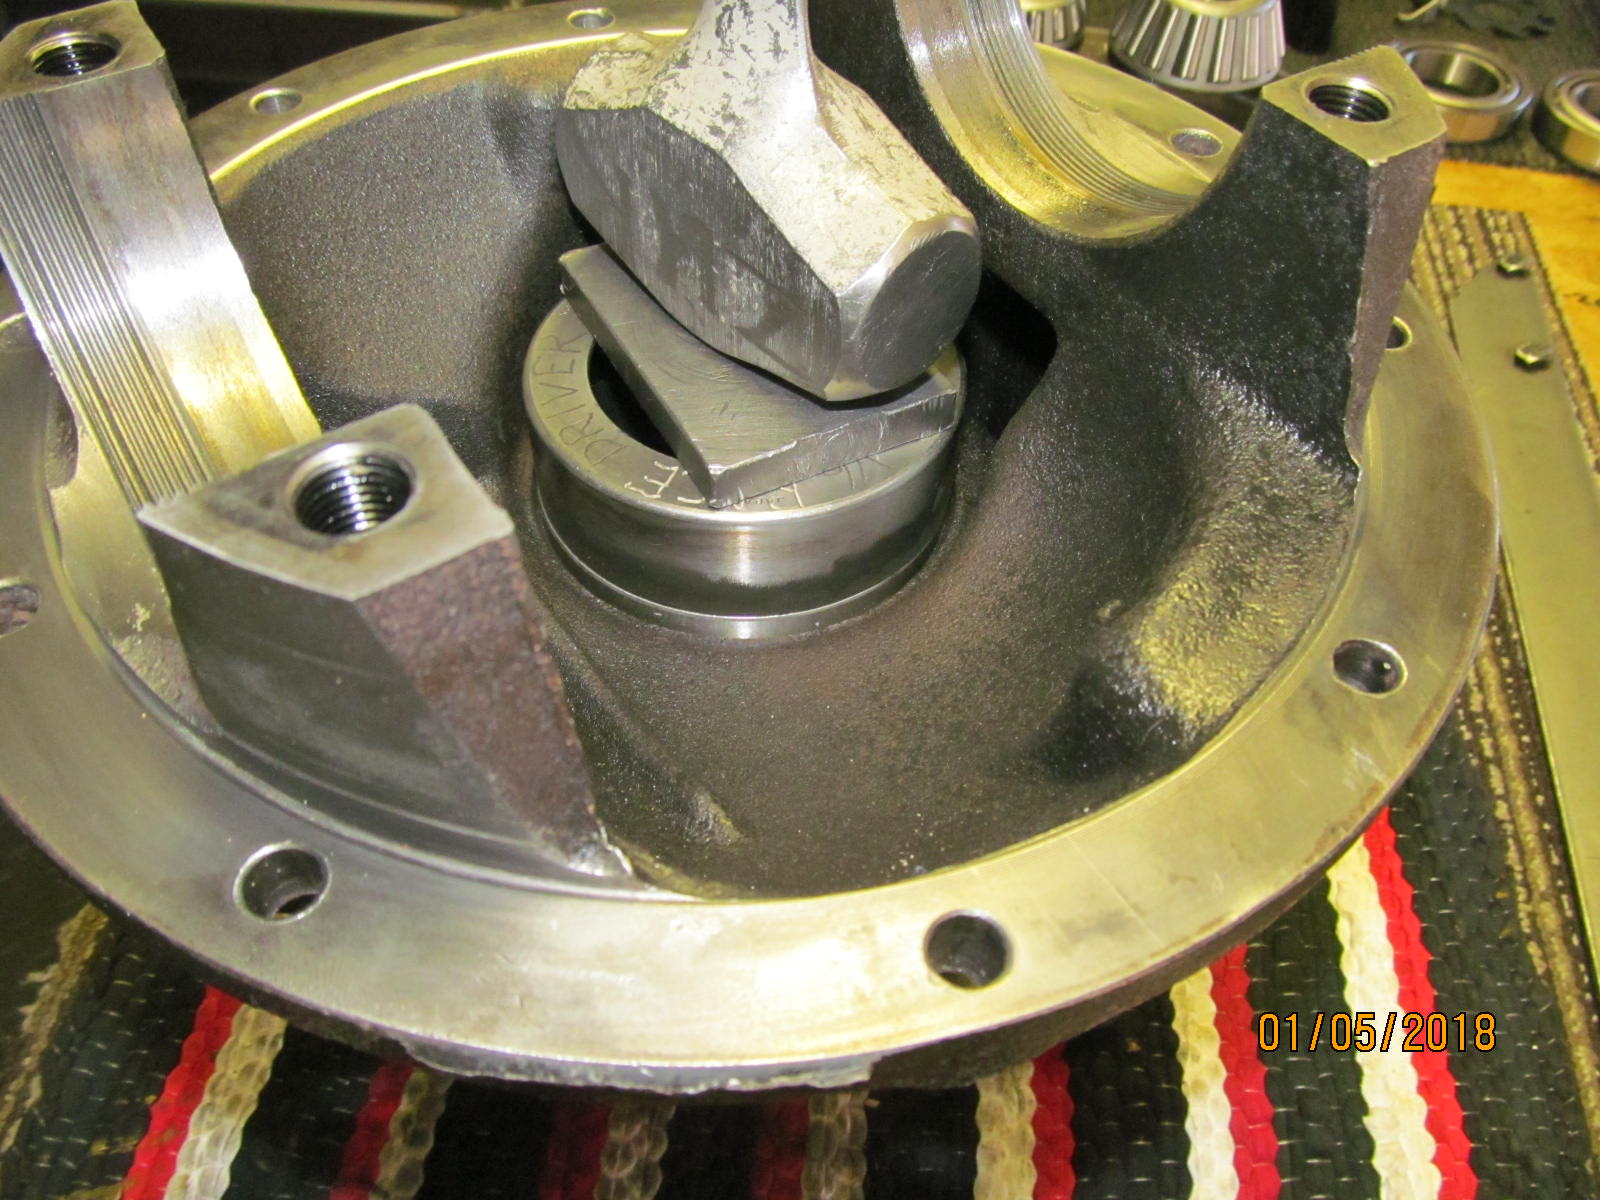
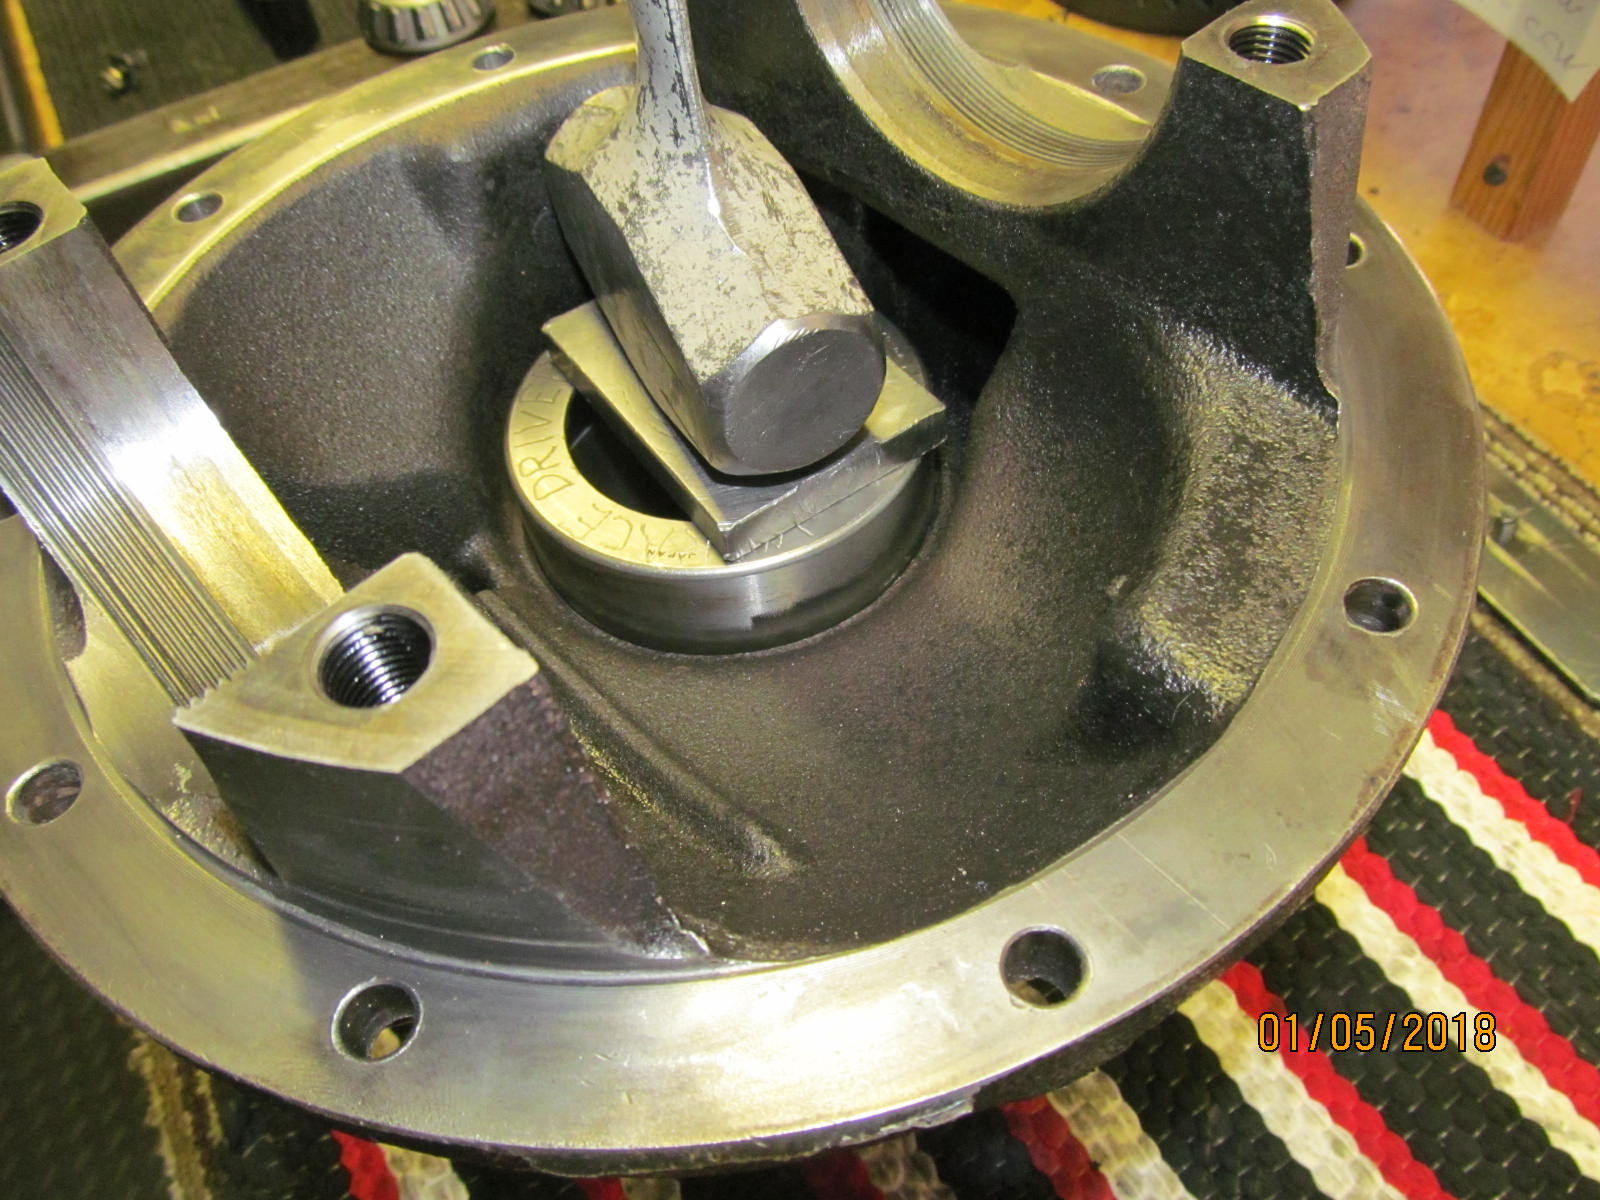
| The large inner race took a little more care and attention but once it was started true and straight then it would go the rest of the way easy. |
|---|
|
|
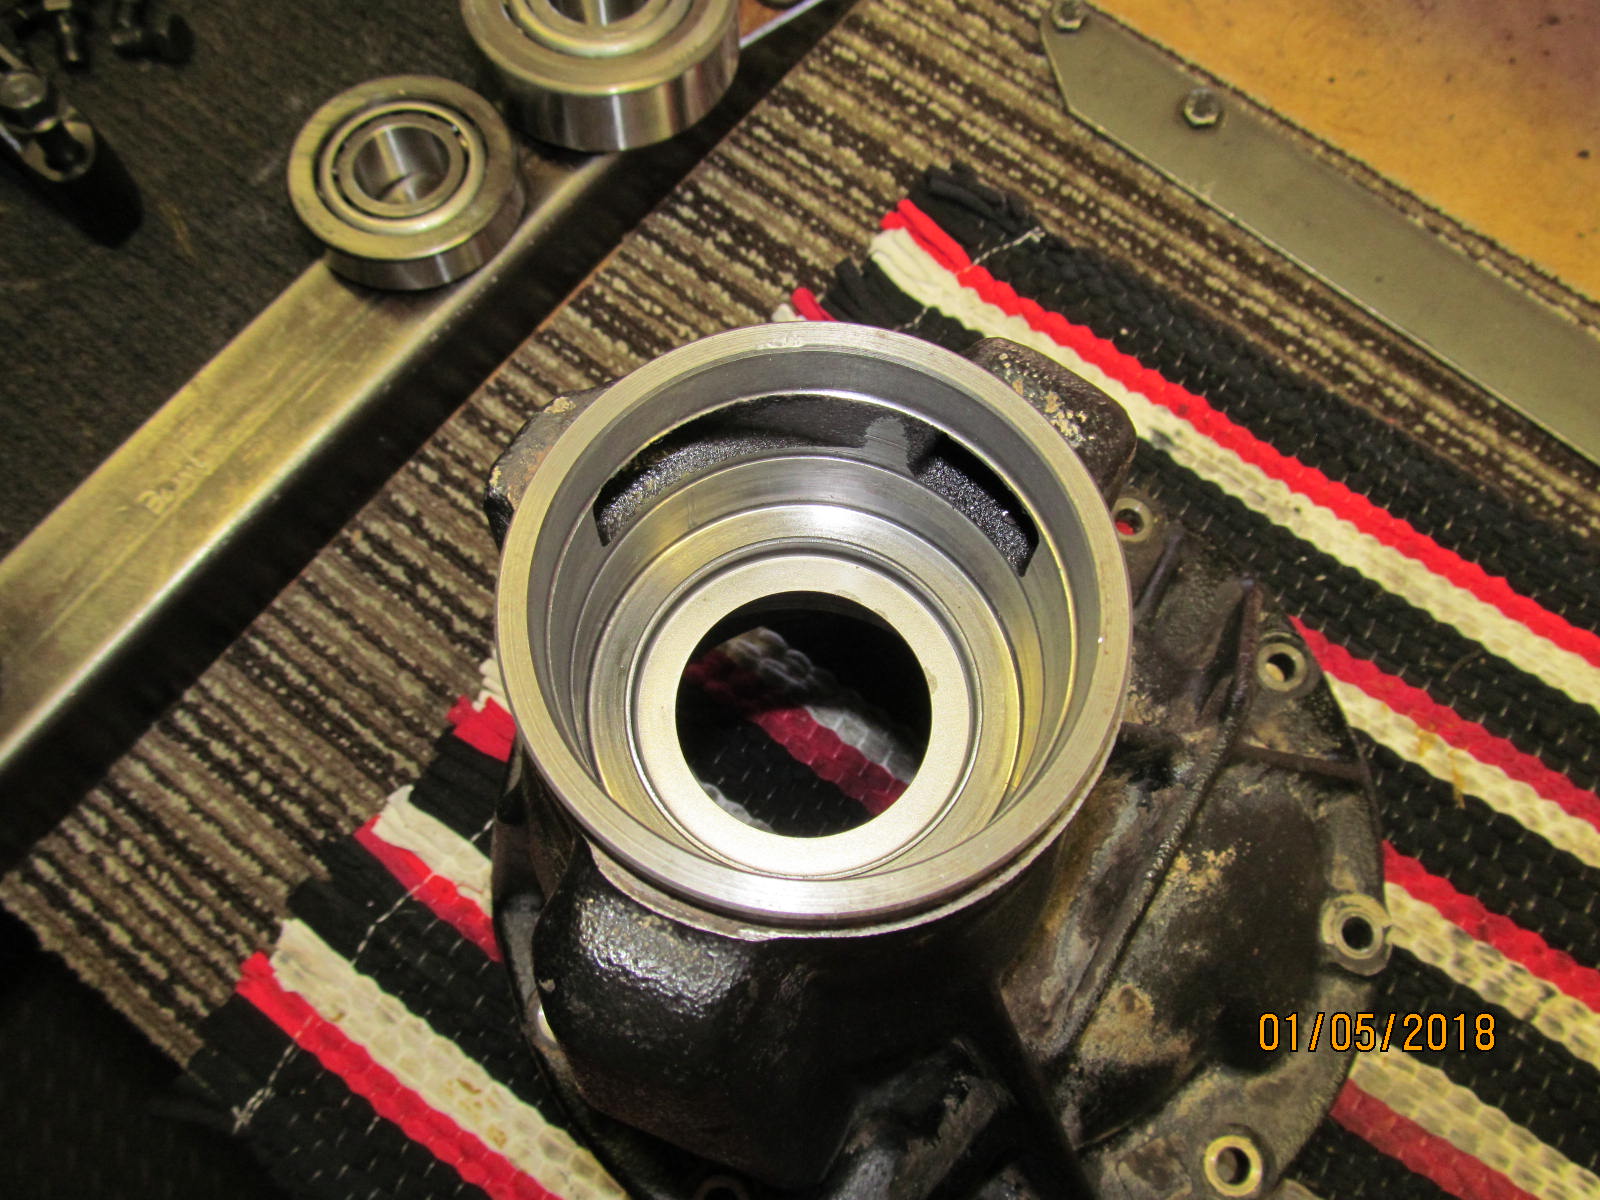
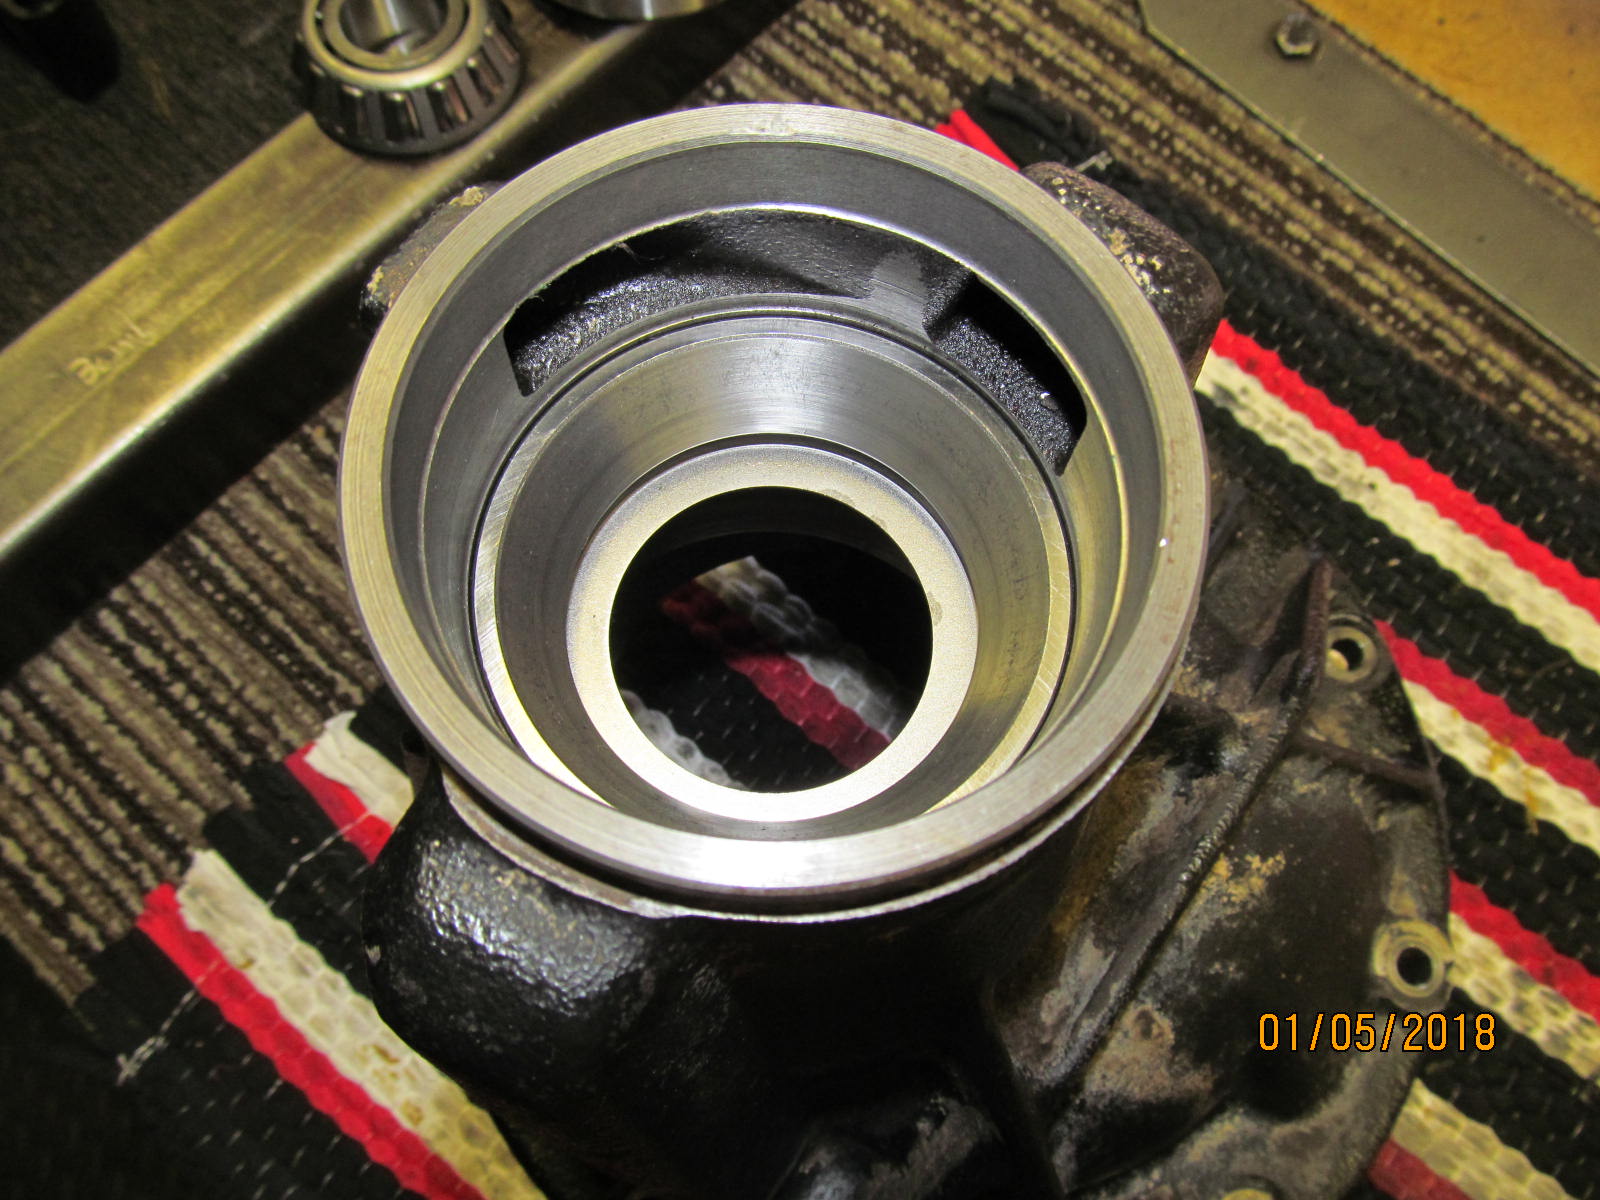
| BAM! 360 degree support all the way around the lip of the race.. |
|---|
|
|
| 100% seated. |
|---|
|
|
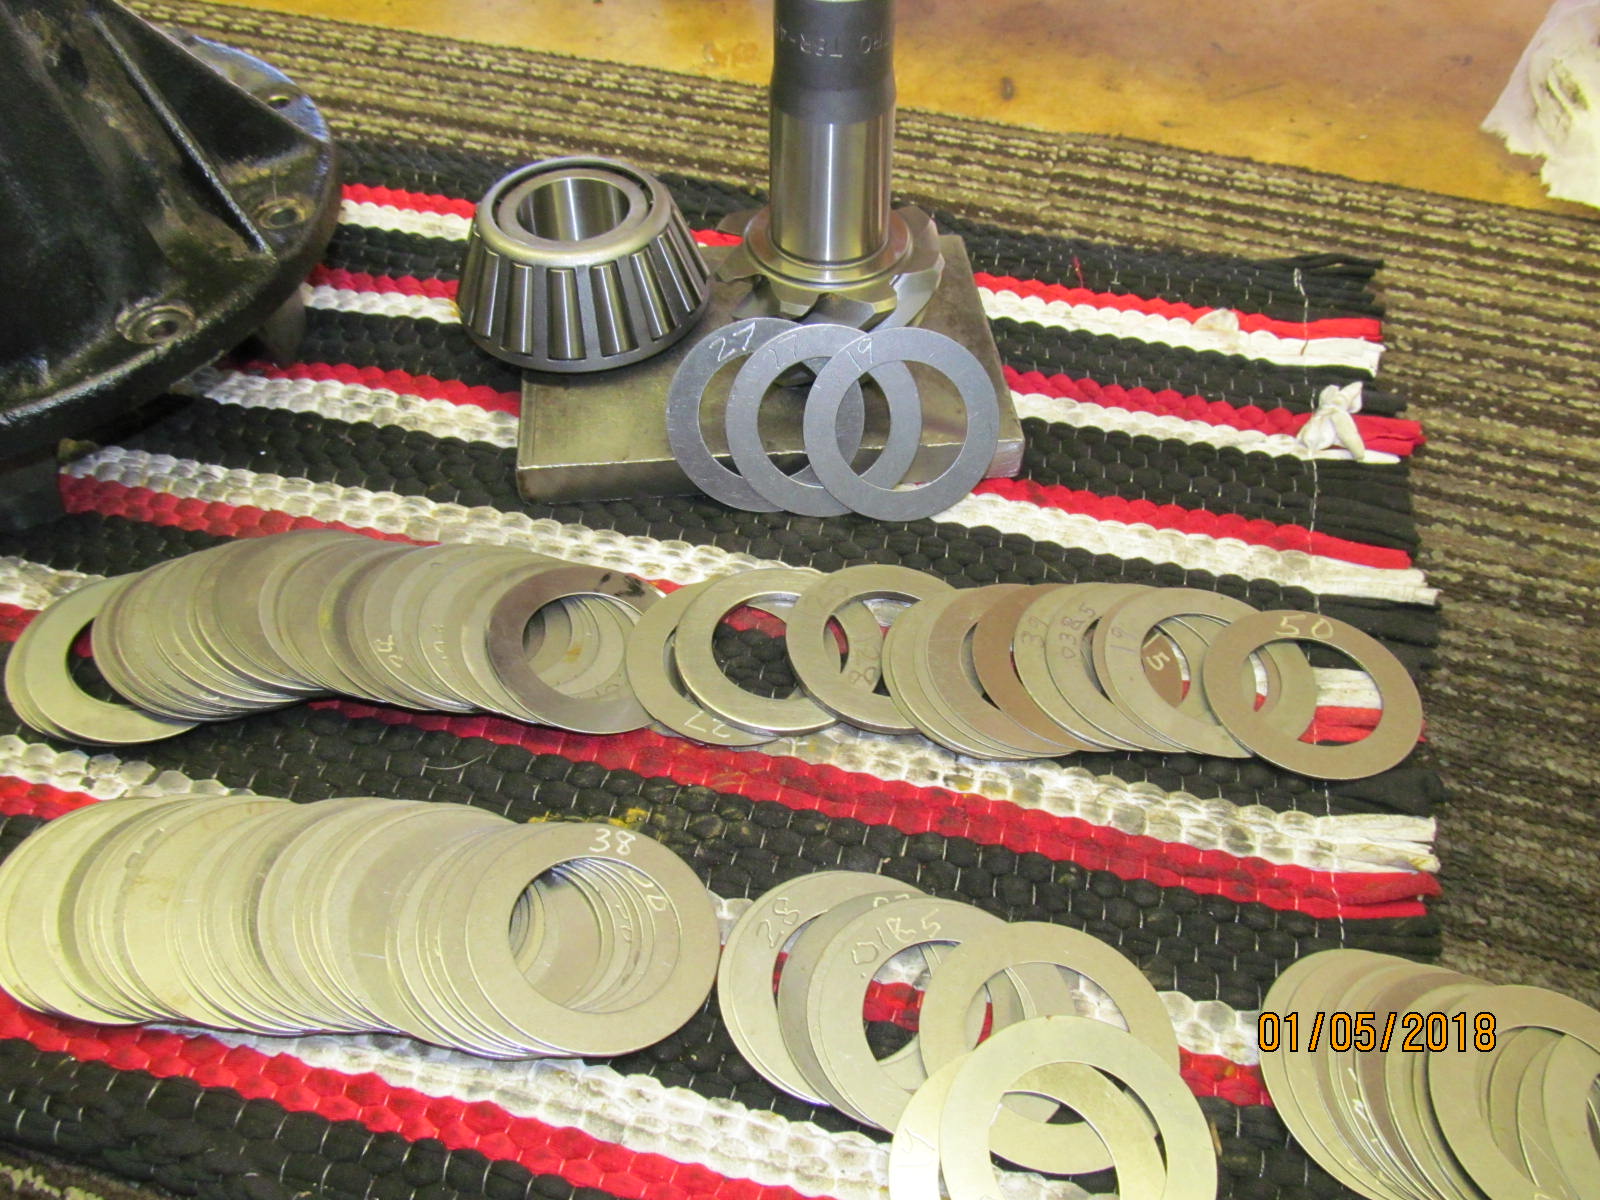
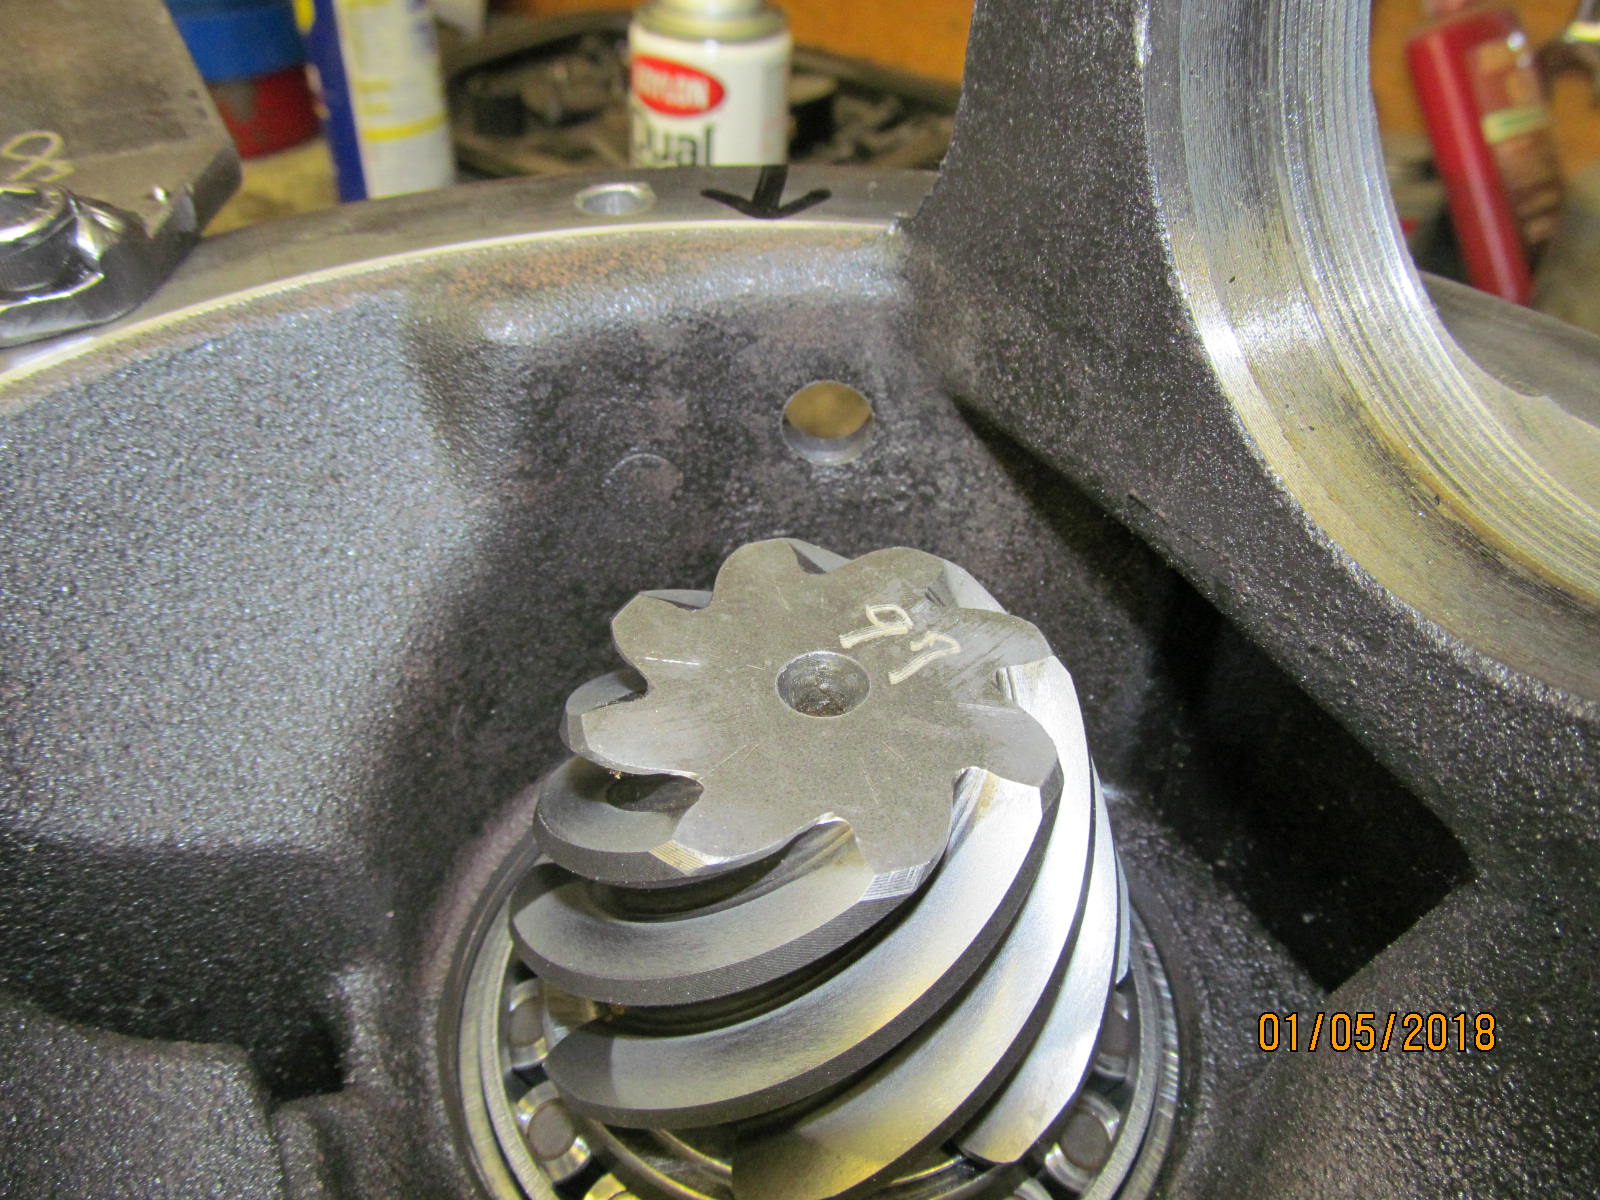
| Careful examination of similar 488 gears in the past and thought it would be best to try .073" as the first try. |
|---|
|
|
| Pressing on the new Koyo bearing with the shim. |
|---|
|
|
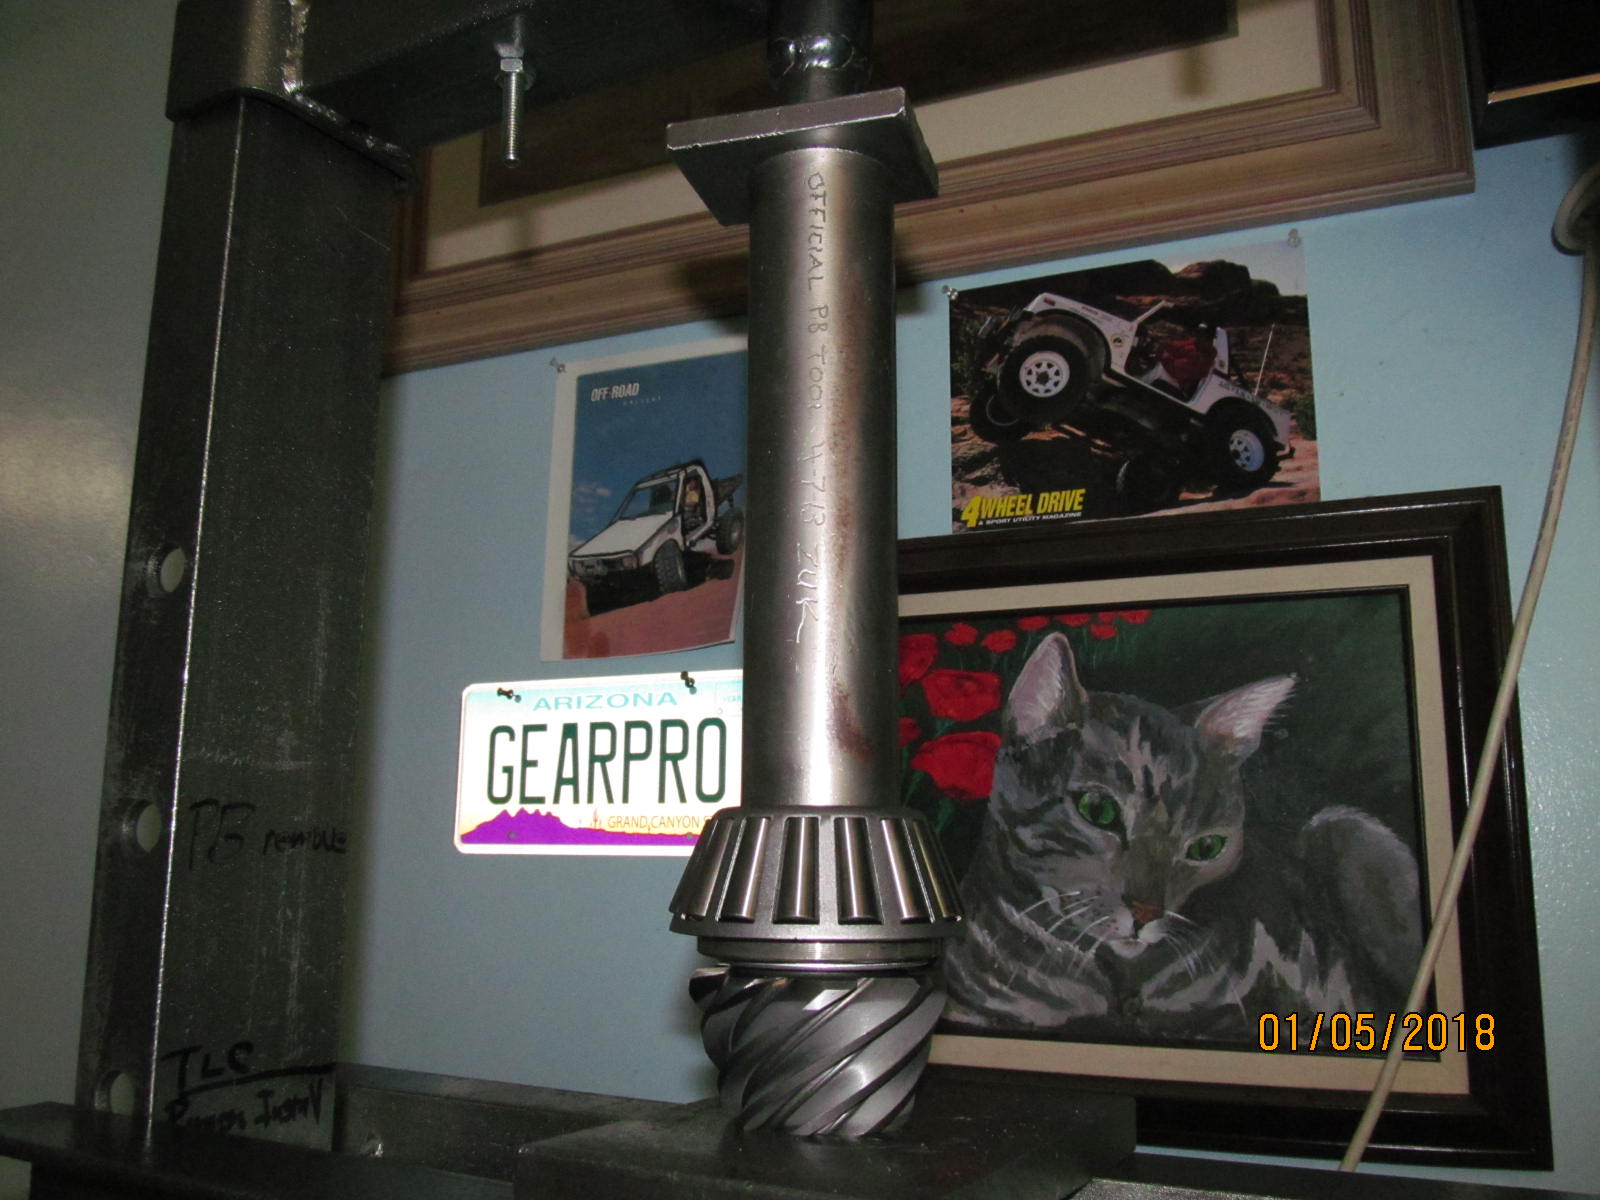
| Now to mount the pinion into the 3rd. |
|---|
|
|
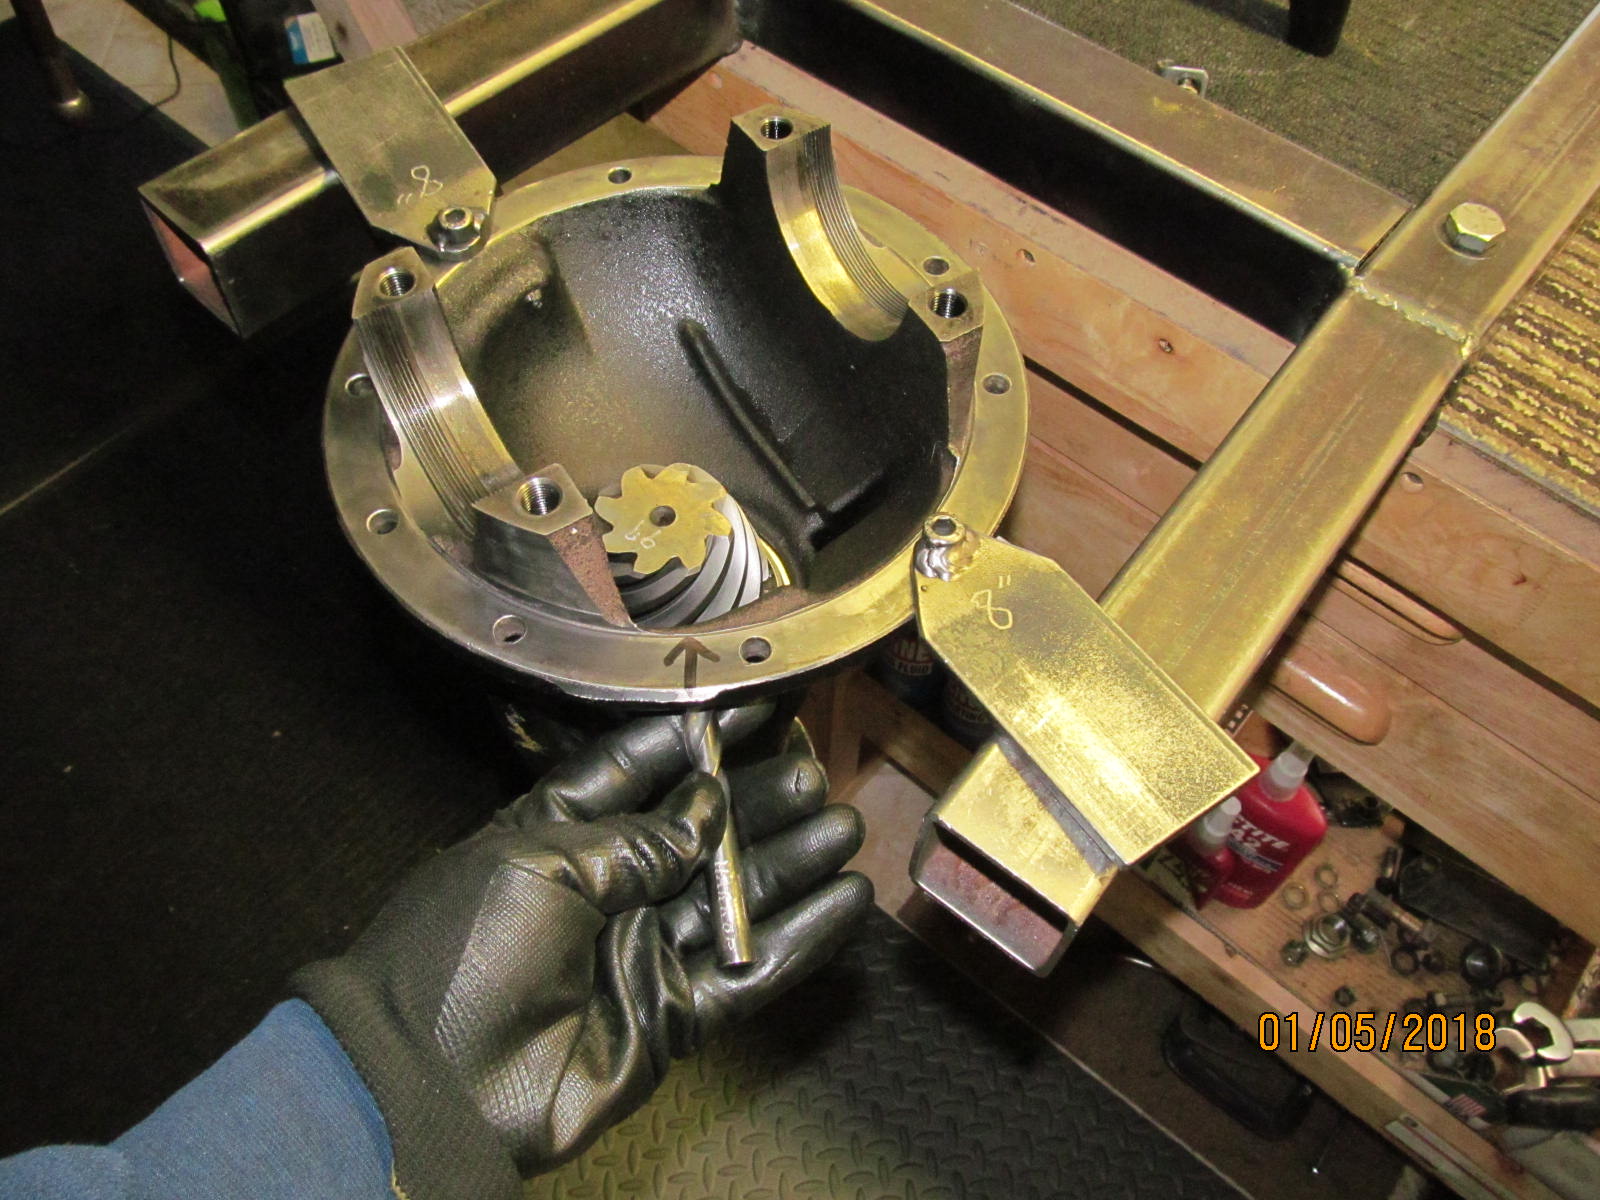
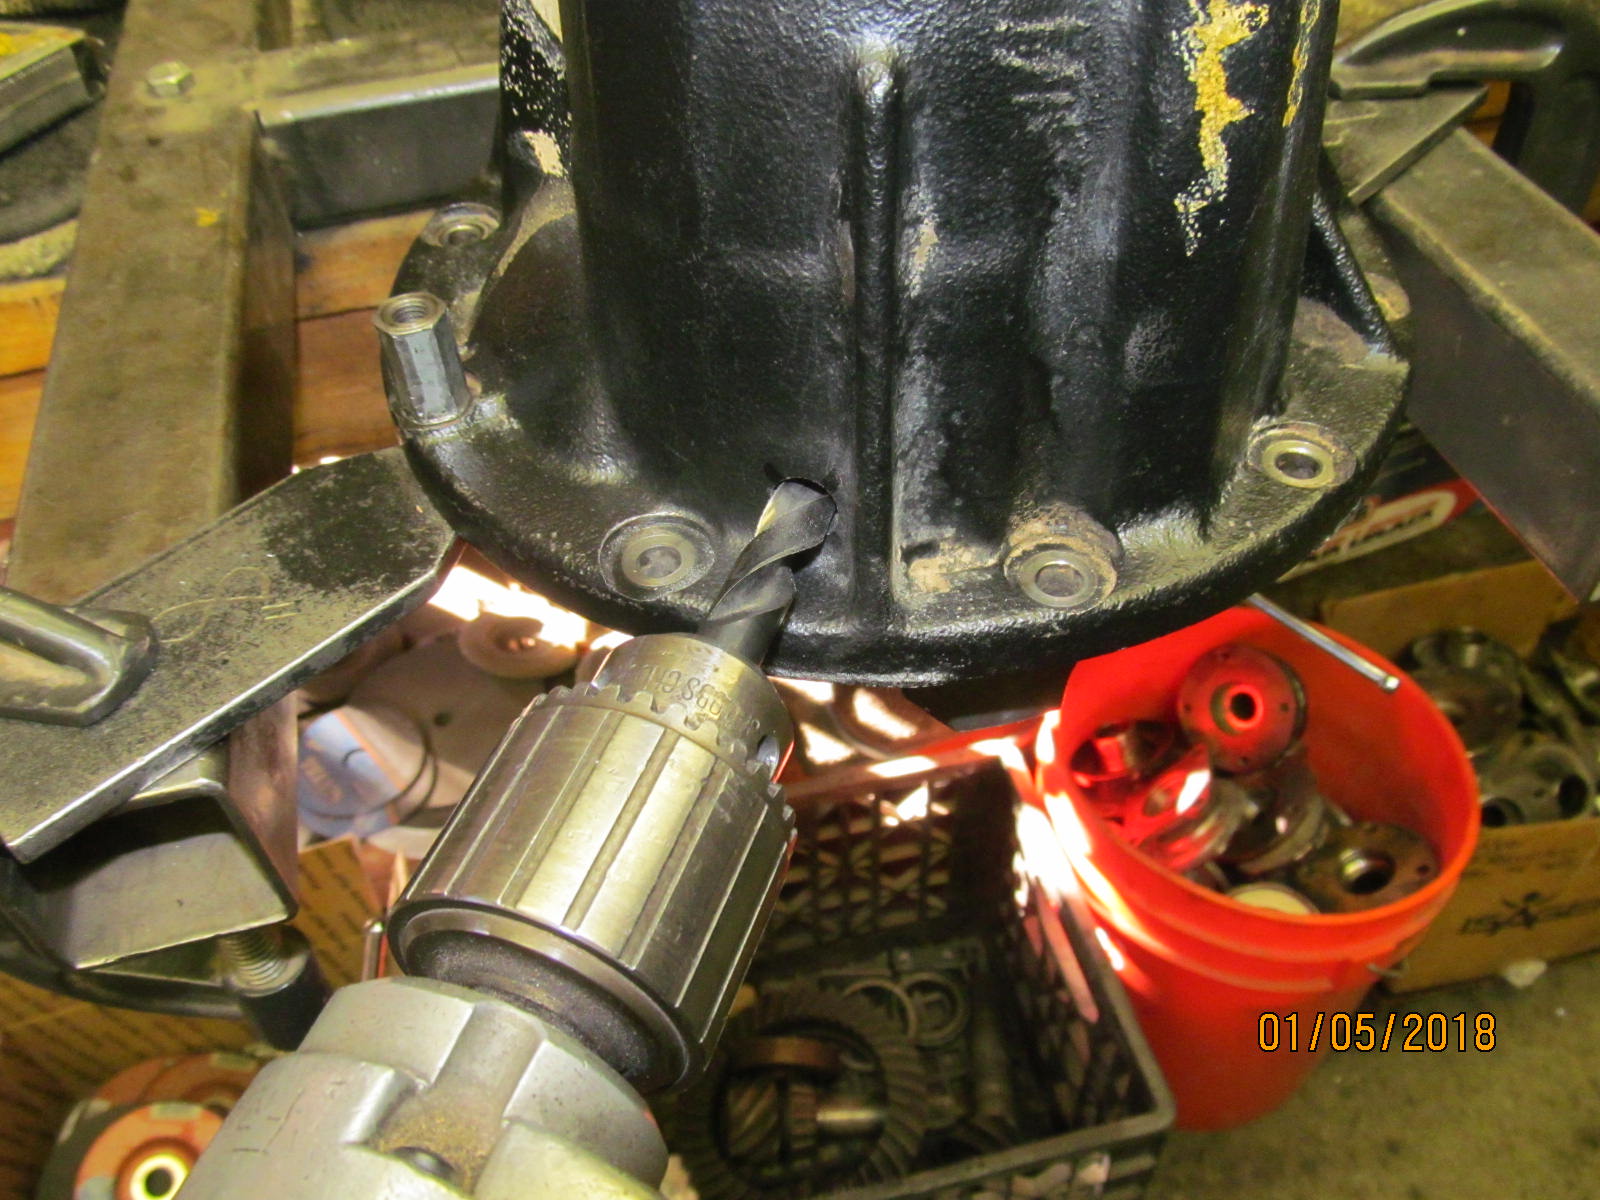
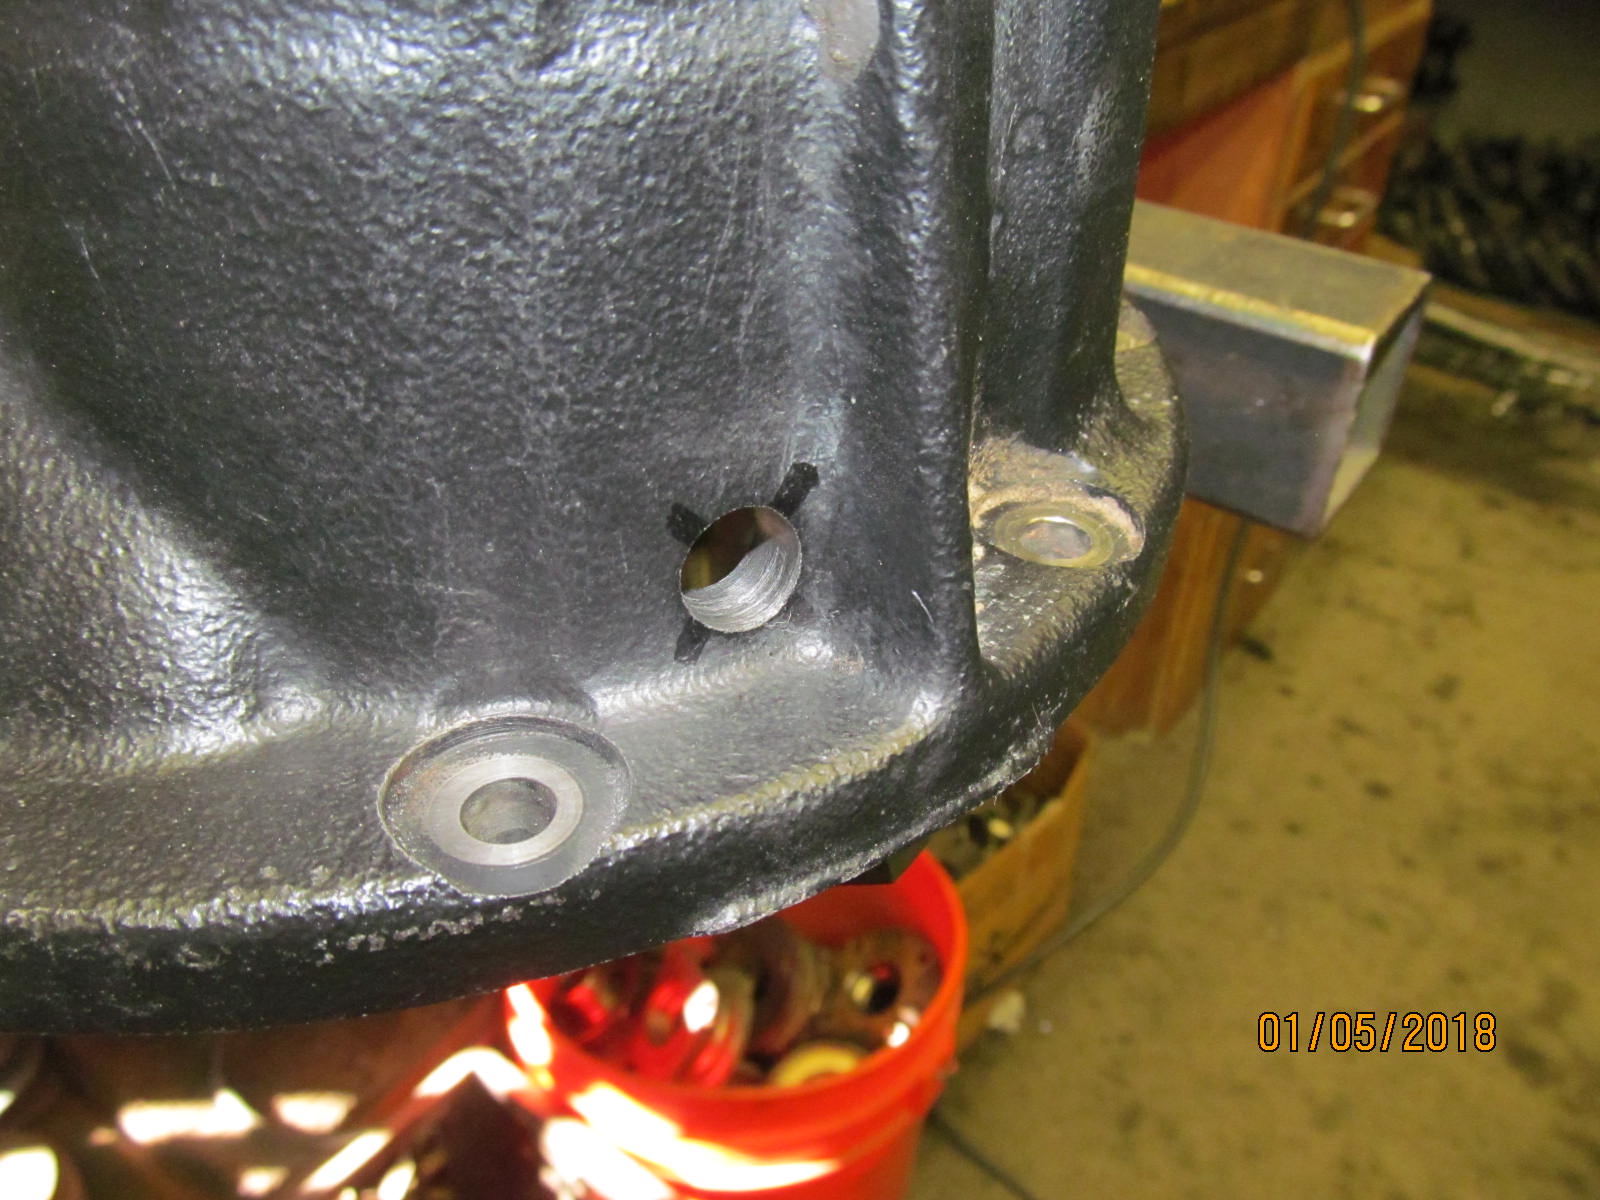
| And about the last thing I can do now without the Harrop is to drill the 29/64" hole for the grommet. |
|---|
|
|
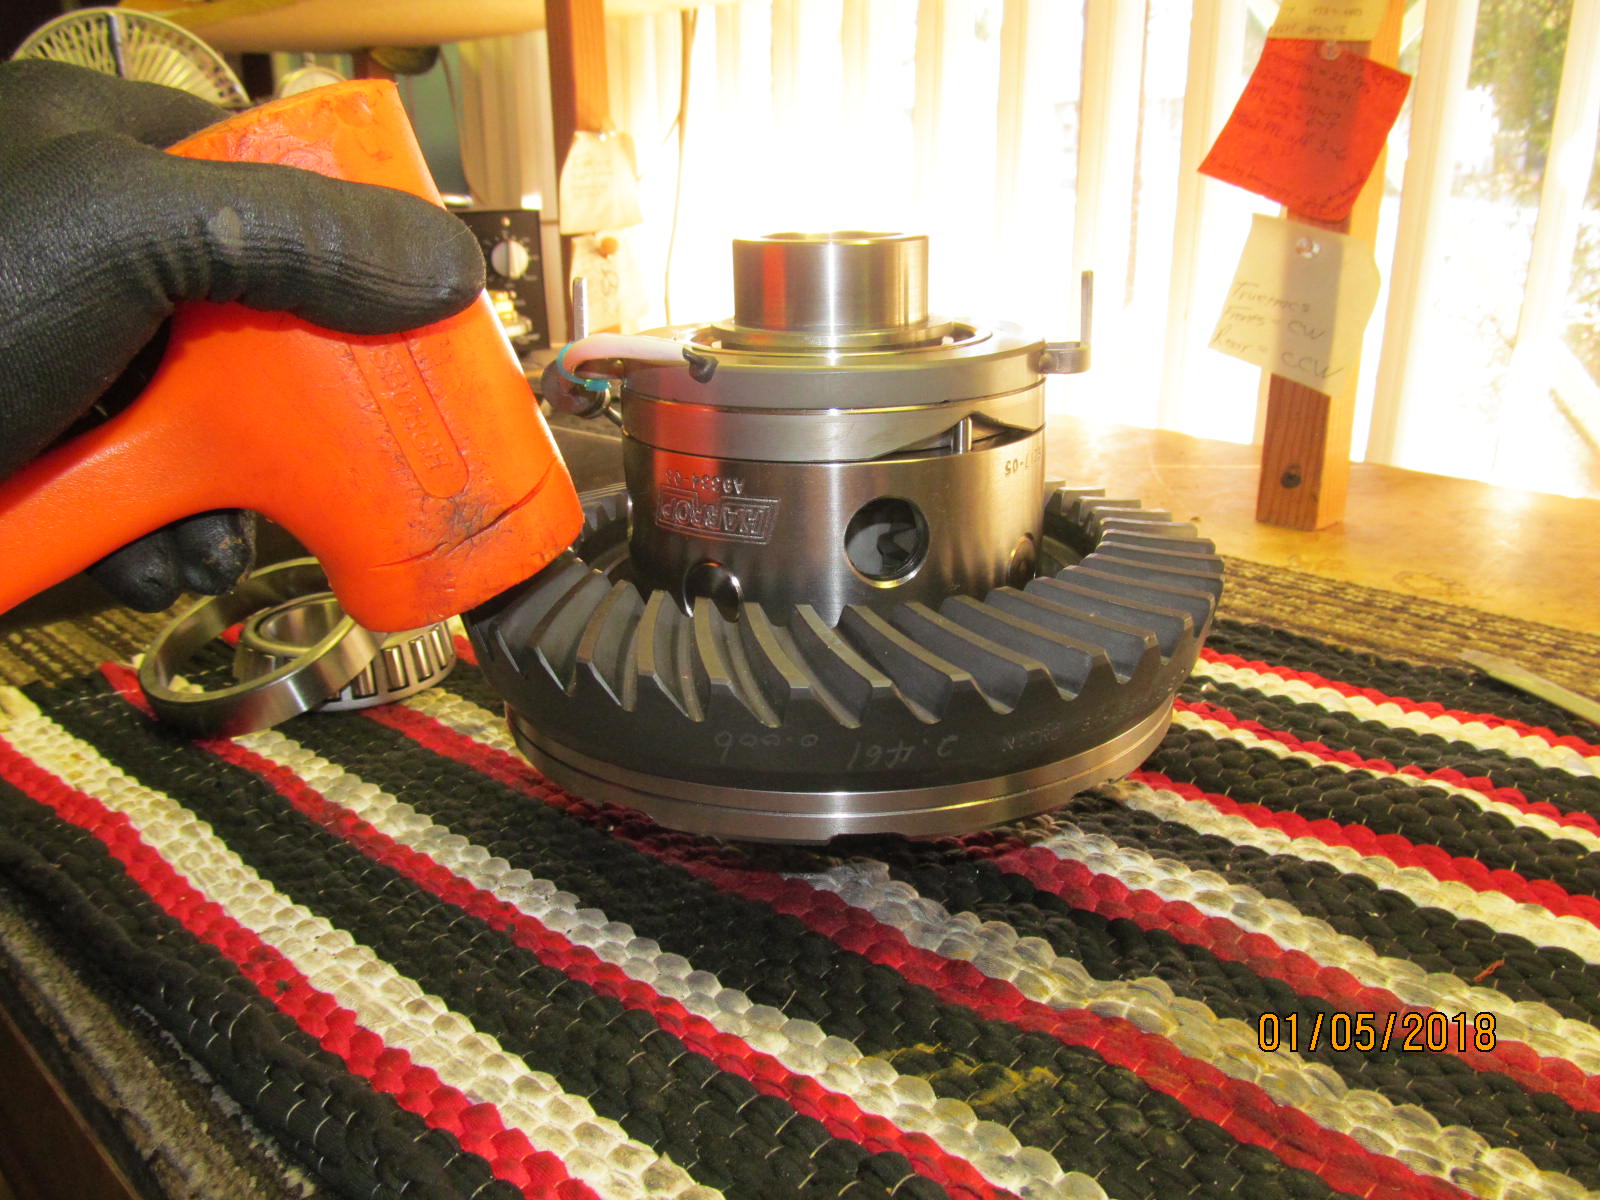
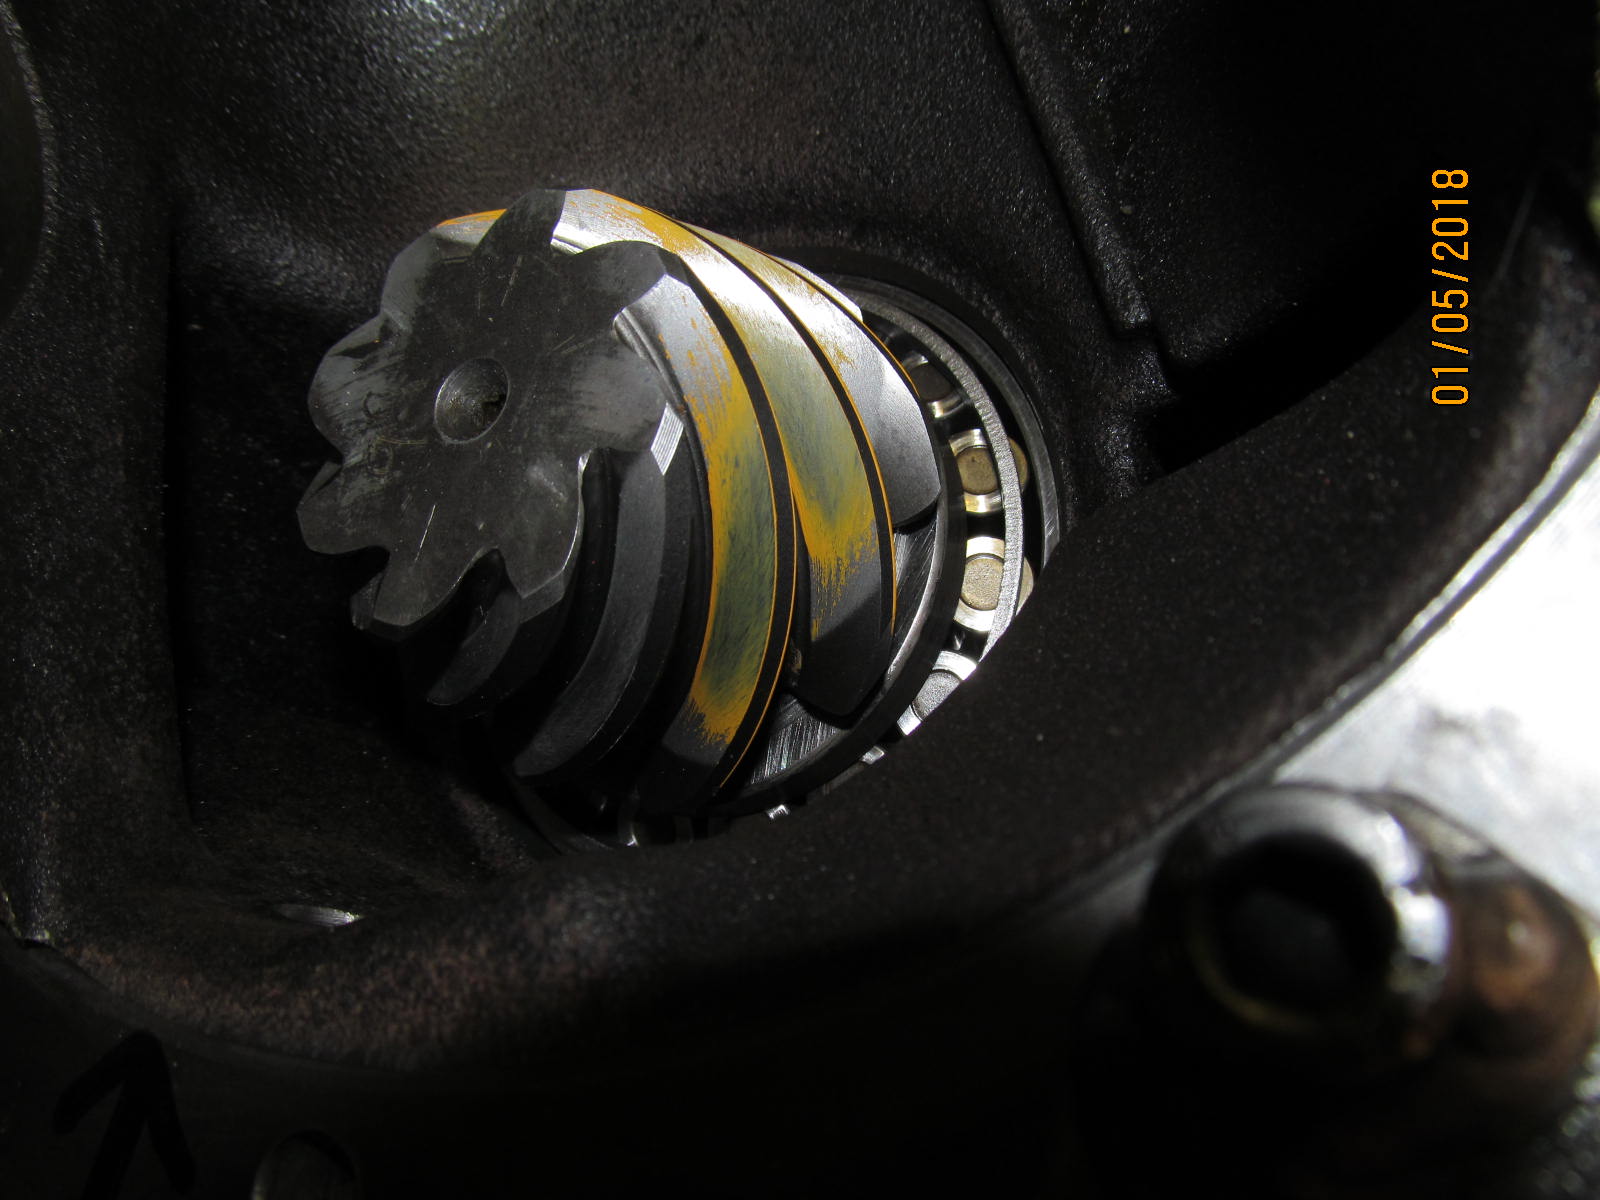
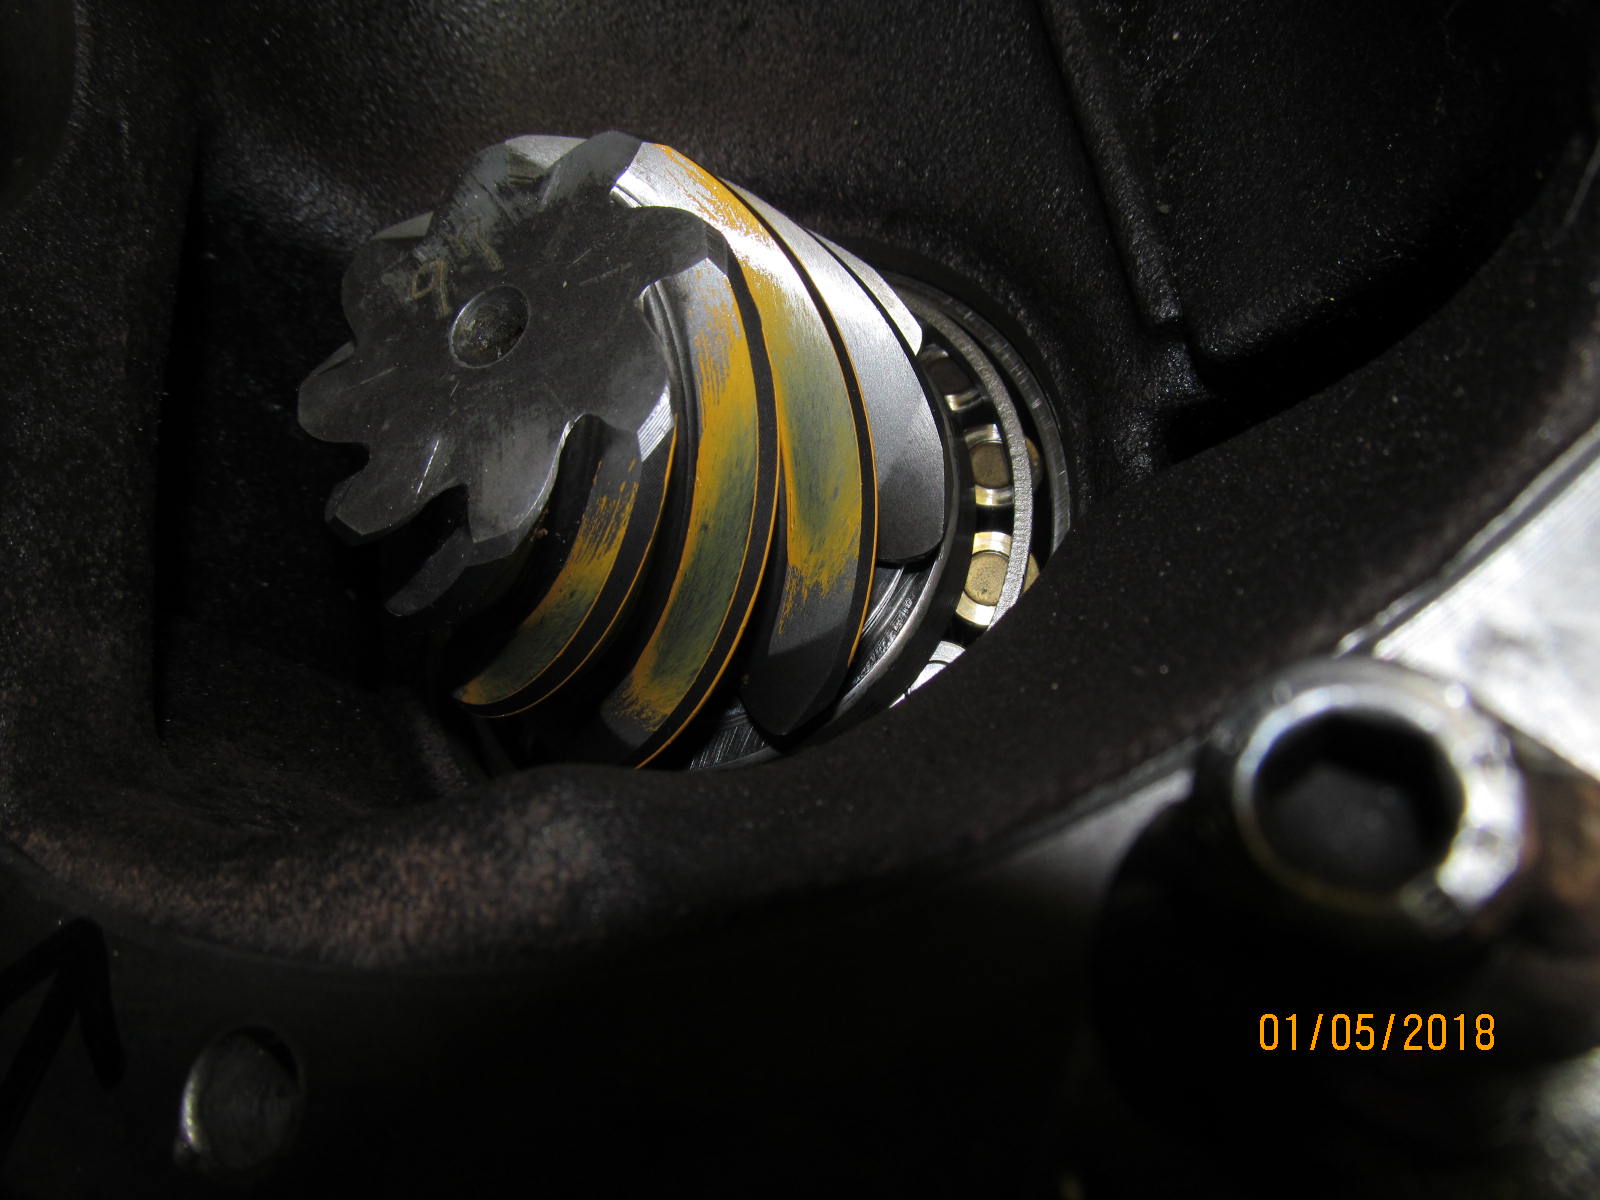
| So, I drill it in the outside shop...drill chips fall away from the pinion like the picture shows. |
|---|
|
|
| ,,,,,,,,,,,,,,,,,,,,, |
|---|
|
|
| ,,,,,,,,,,,,,,,,,,, |
|---|
|
|
| So now it's back in the fixture and little else that can be done without the Harrop....when a truck pulls up to my front door. |
|---|
|
|
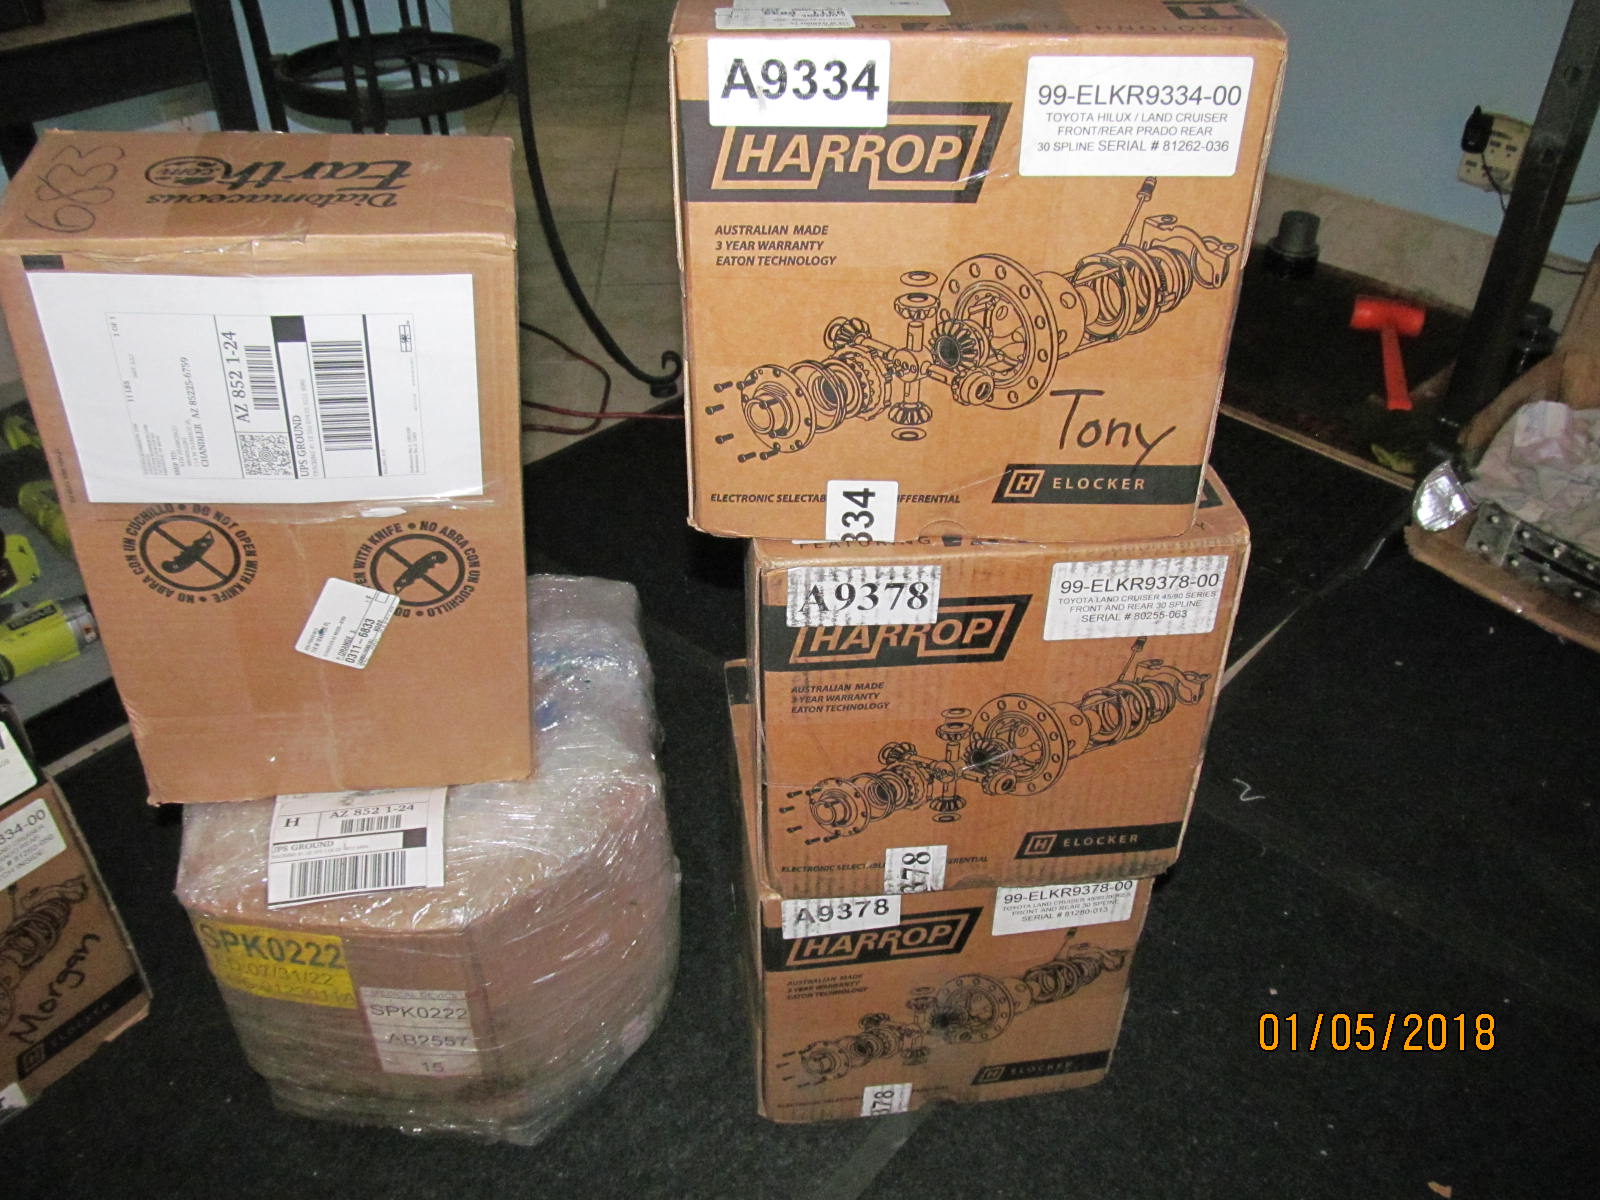
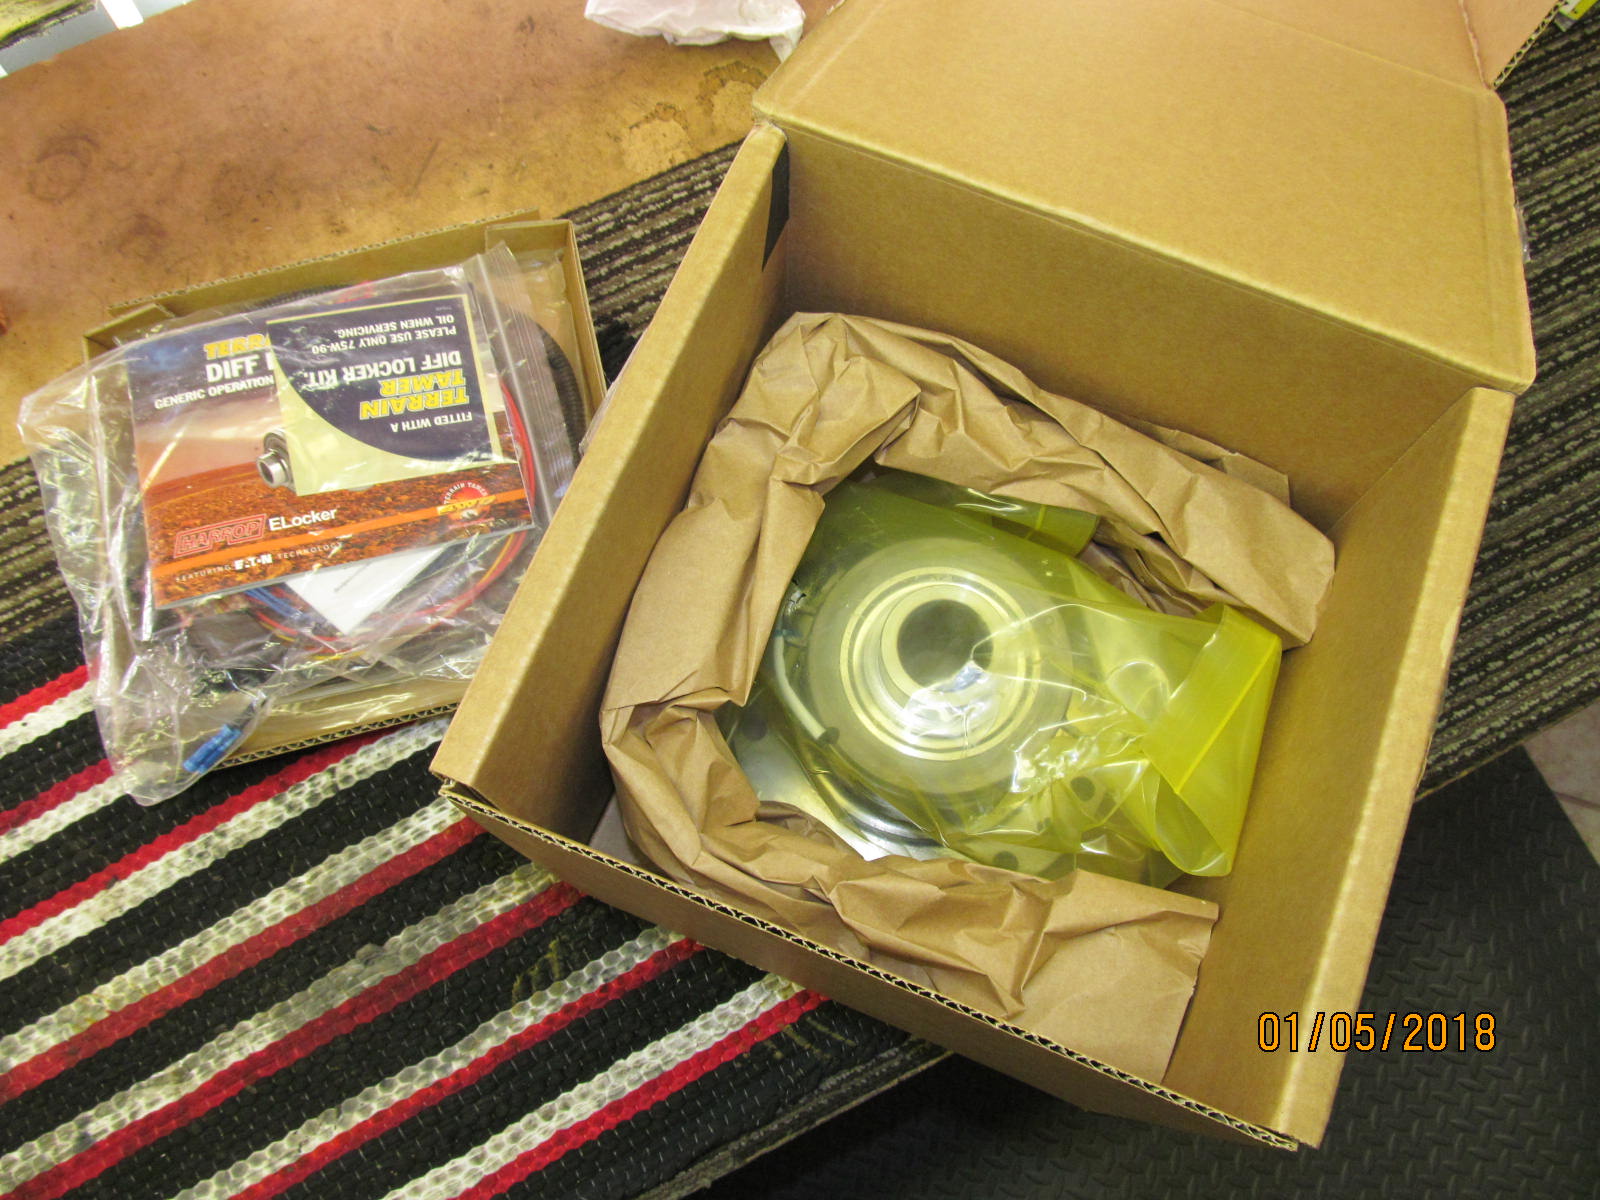
| What timing. It's the Fedex truck and they dropped off 5 boxes for me....one of them was Tony's Harrop :) |
|---|
|
|
The Harrop is pretty well secured. I should point out the this model 9334 fits a ton of Toyotas that have the very common 4 cylinder 8"
or the V6 8" 3rd. It fits 79~85 pickups and 84/85 Runners front and rear applications.
It fits the rears of the 86 thru 95 pickups/Runners.....and a bunch more. |
|---|
|
|
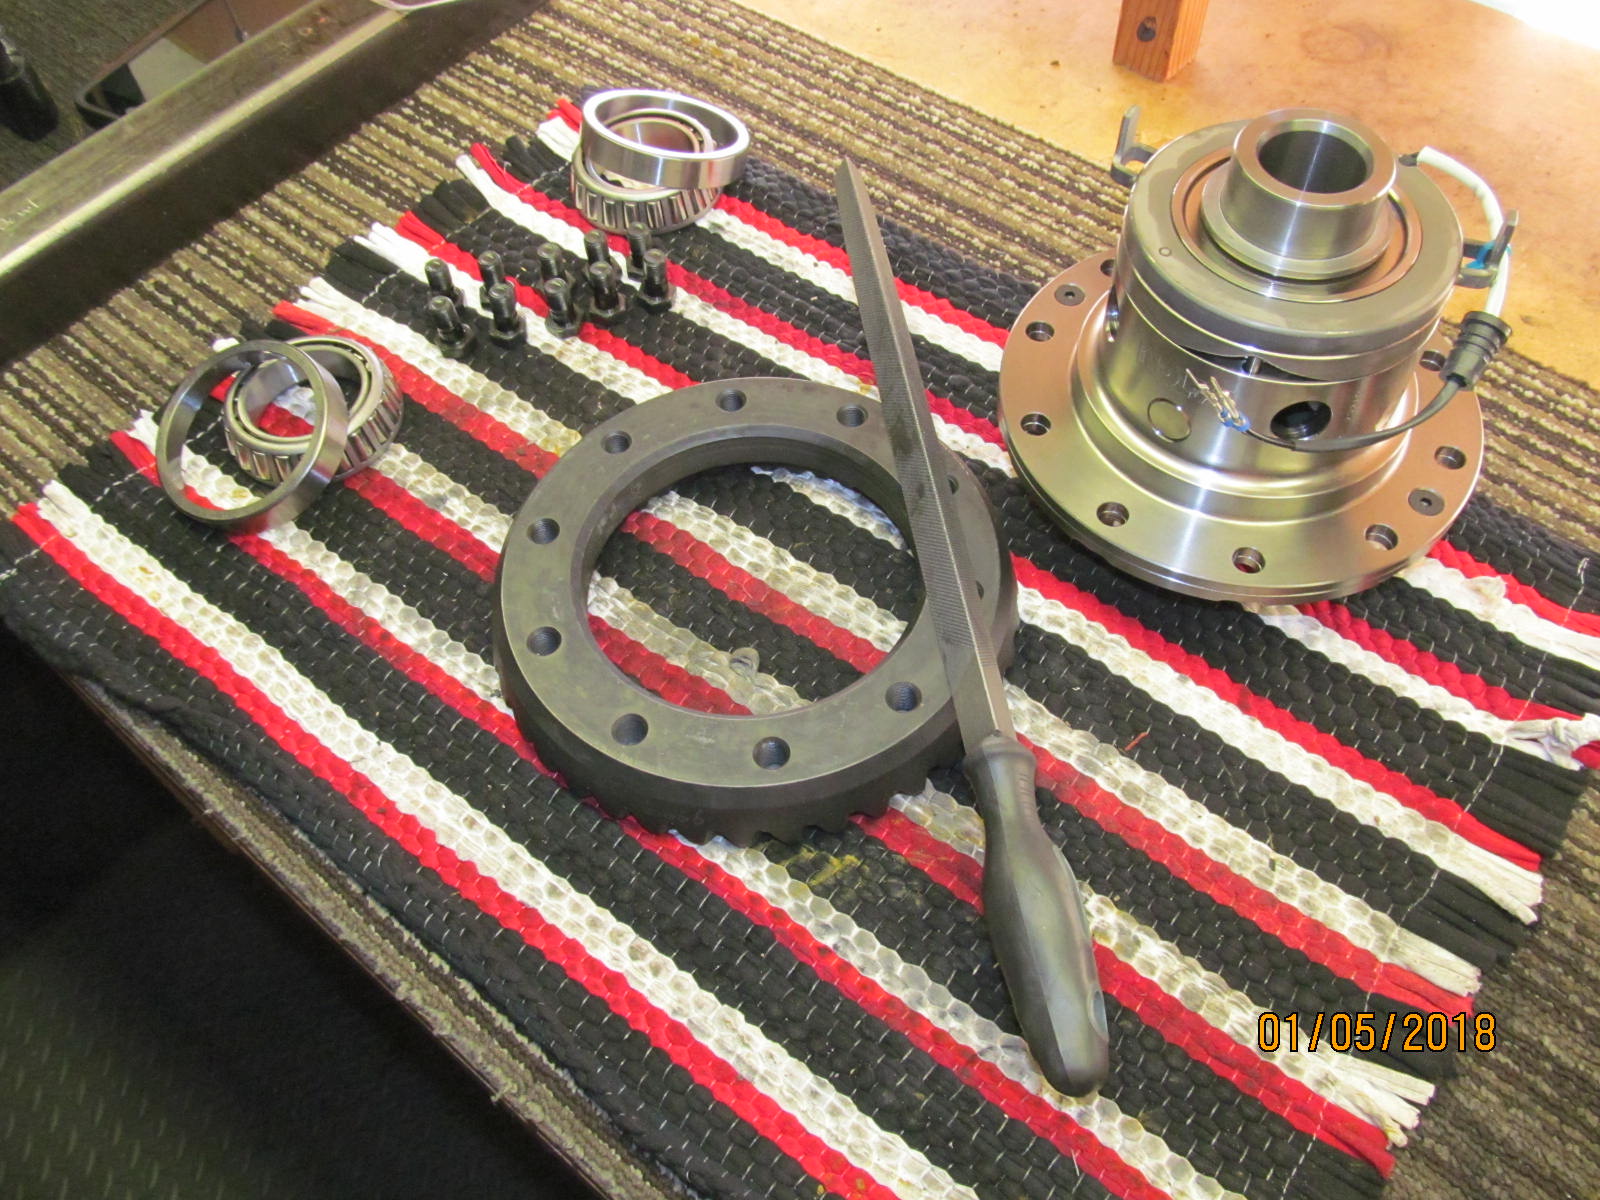
| Time to load the carrier bearings and 488 Nitro ring gear onto the Harrop but first to check the surfaces for anything unusual. |
|---|
|
|
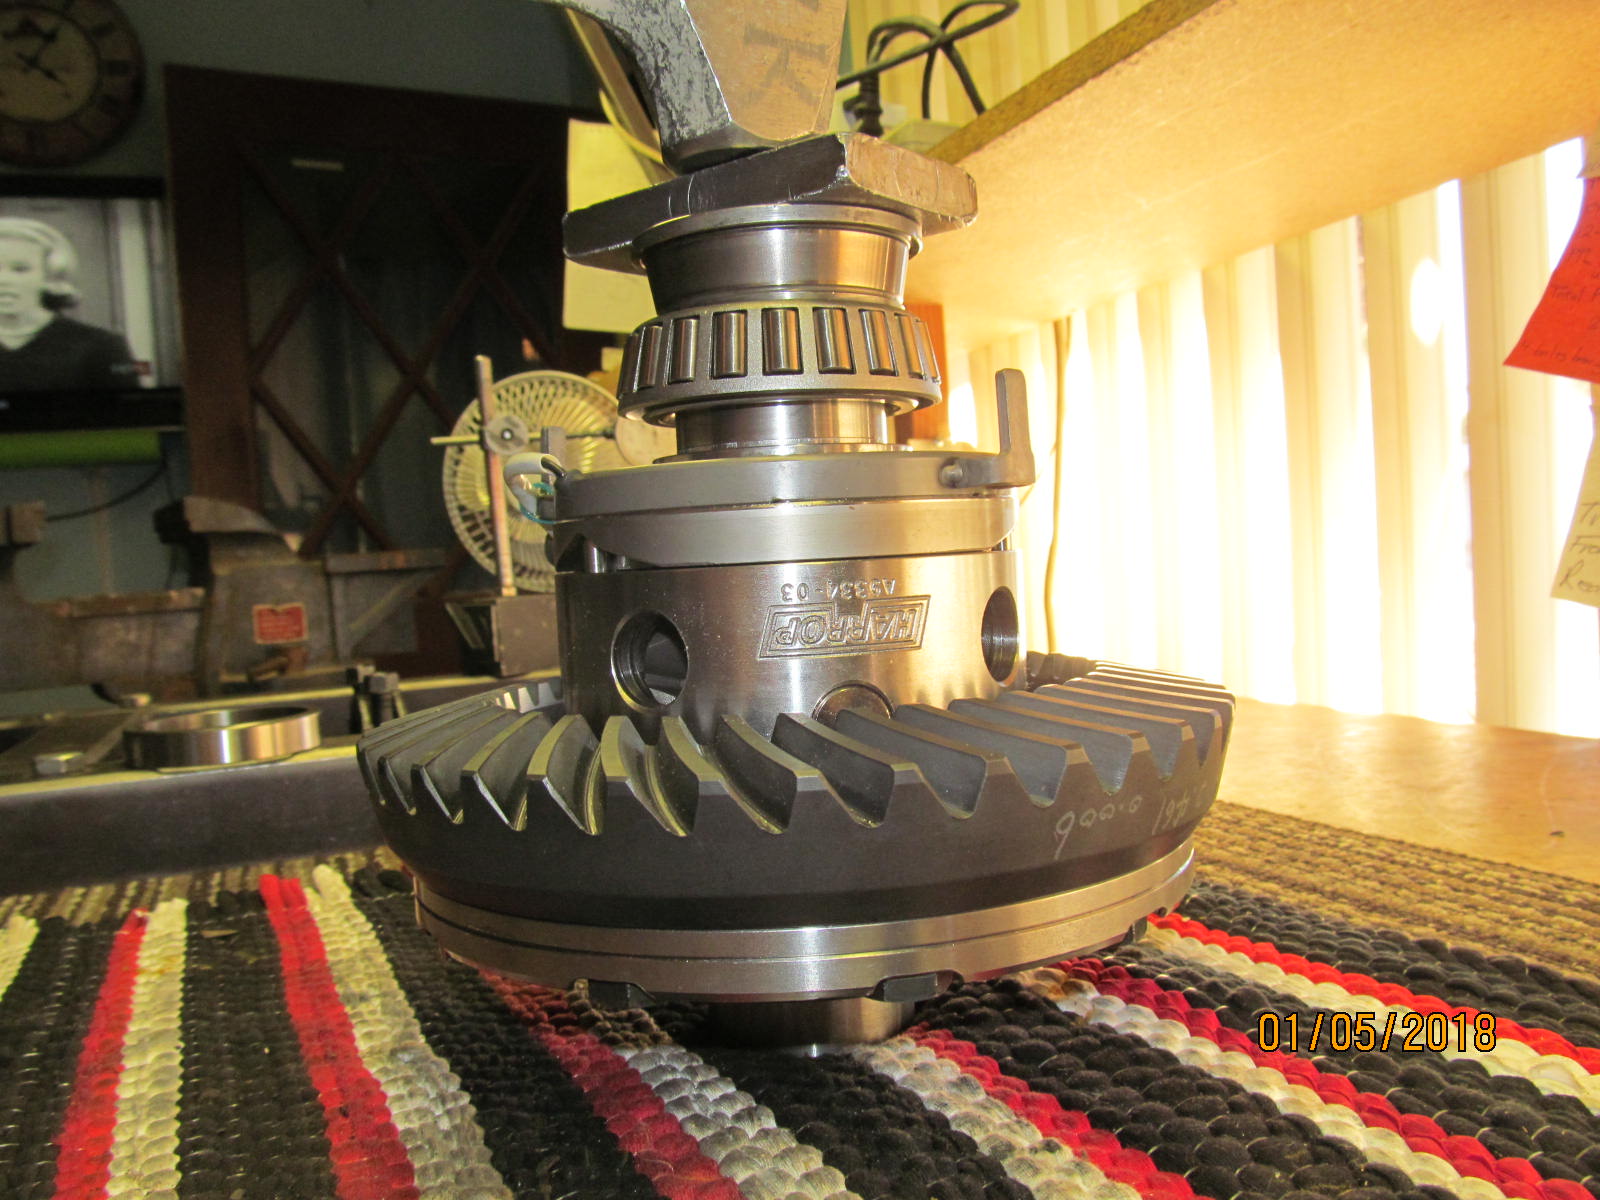
| All was good so the plastic hammer easily tapped the ring in place. It was more of a slip fit which is the way I wish all my rings went on. |
|---|
|
|
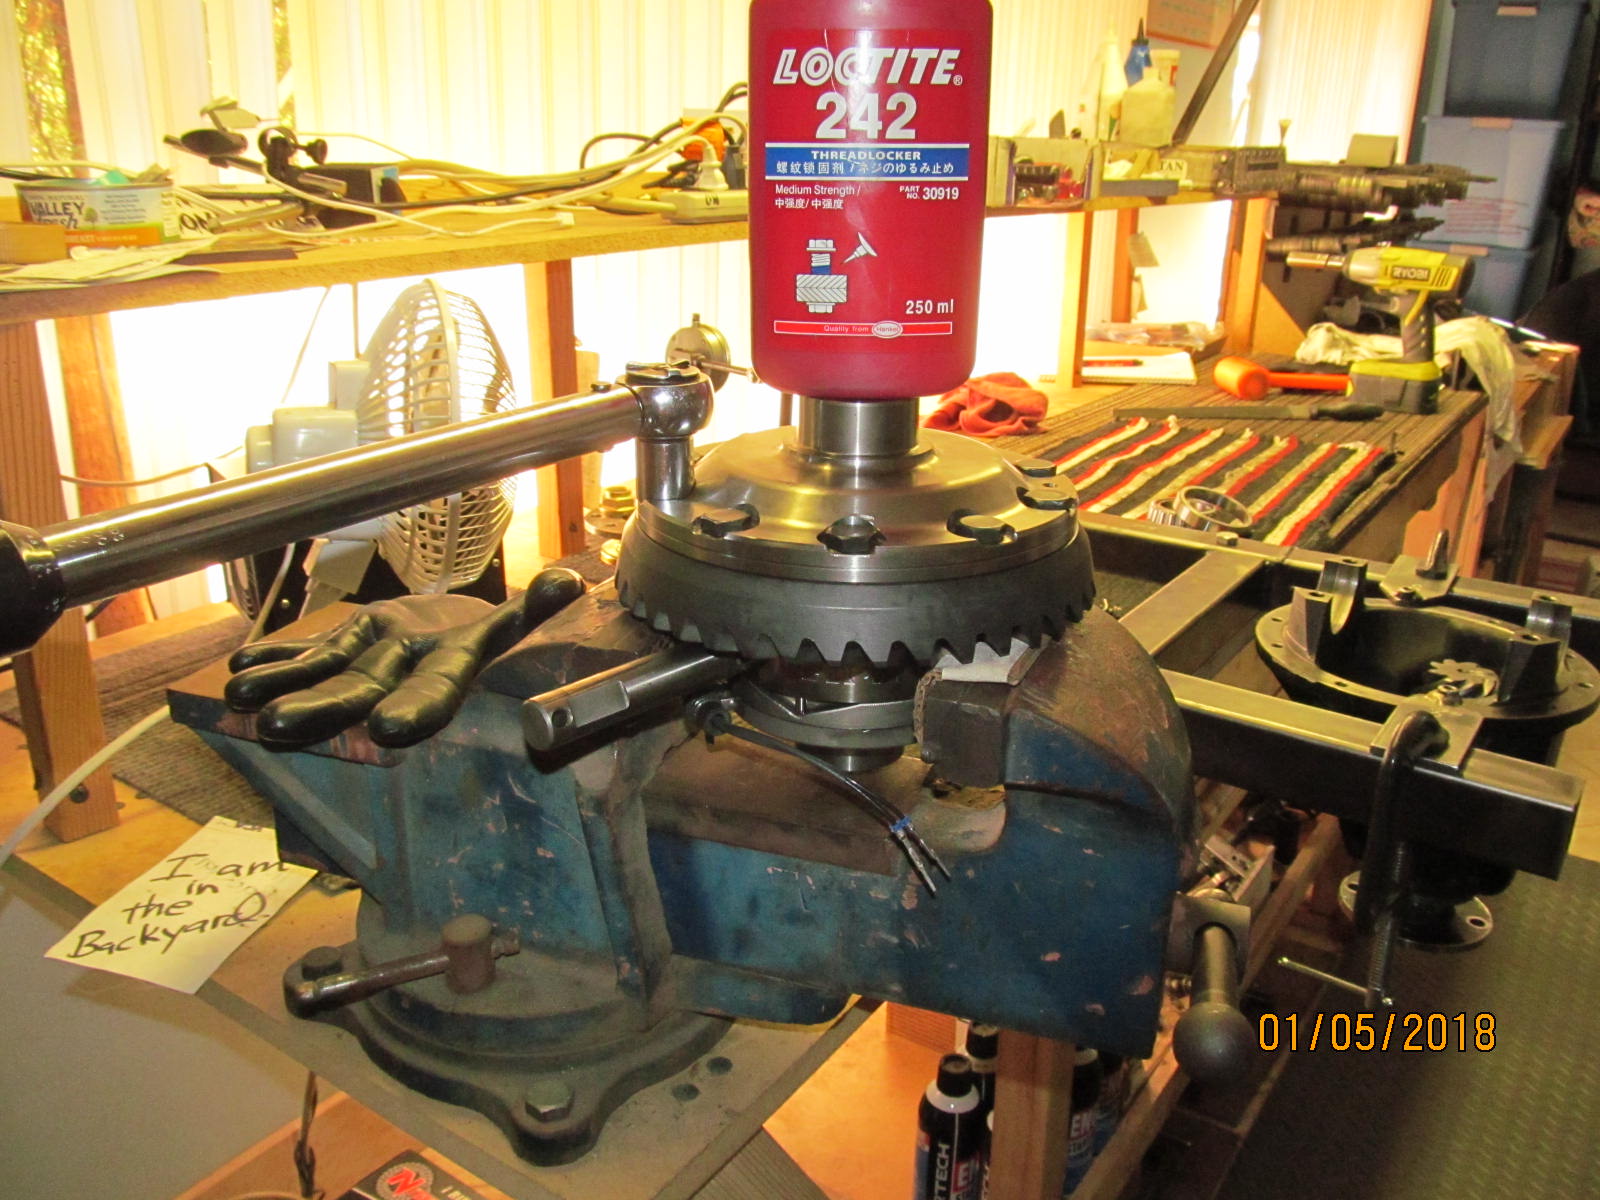
| A little blue Loctite and 70 ft/lb. |
|---|
|
|
| Nice, tight fit onto the journals. |
|---|
|
|
| ,,,,,,,,,,,,,,,,,,,,,,,, |
|---|
|
|
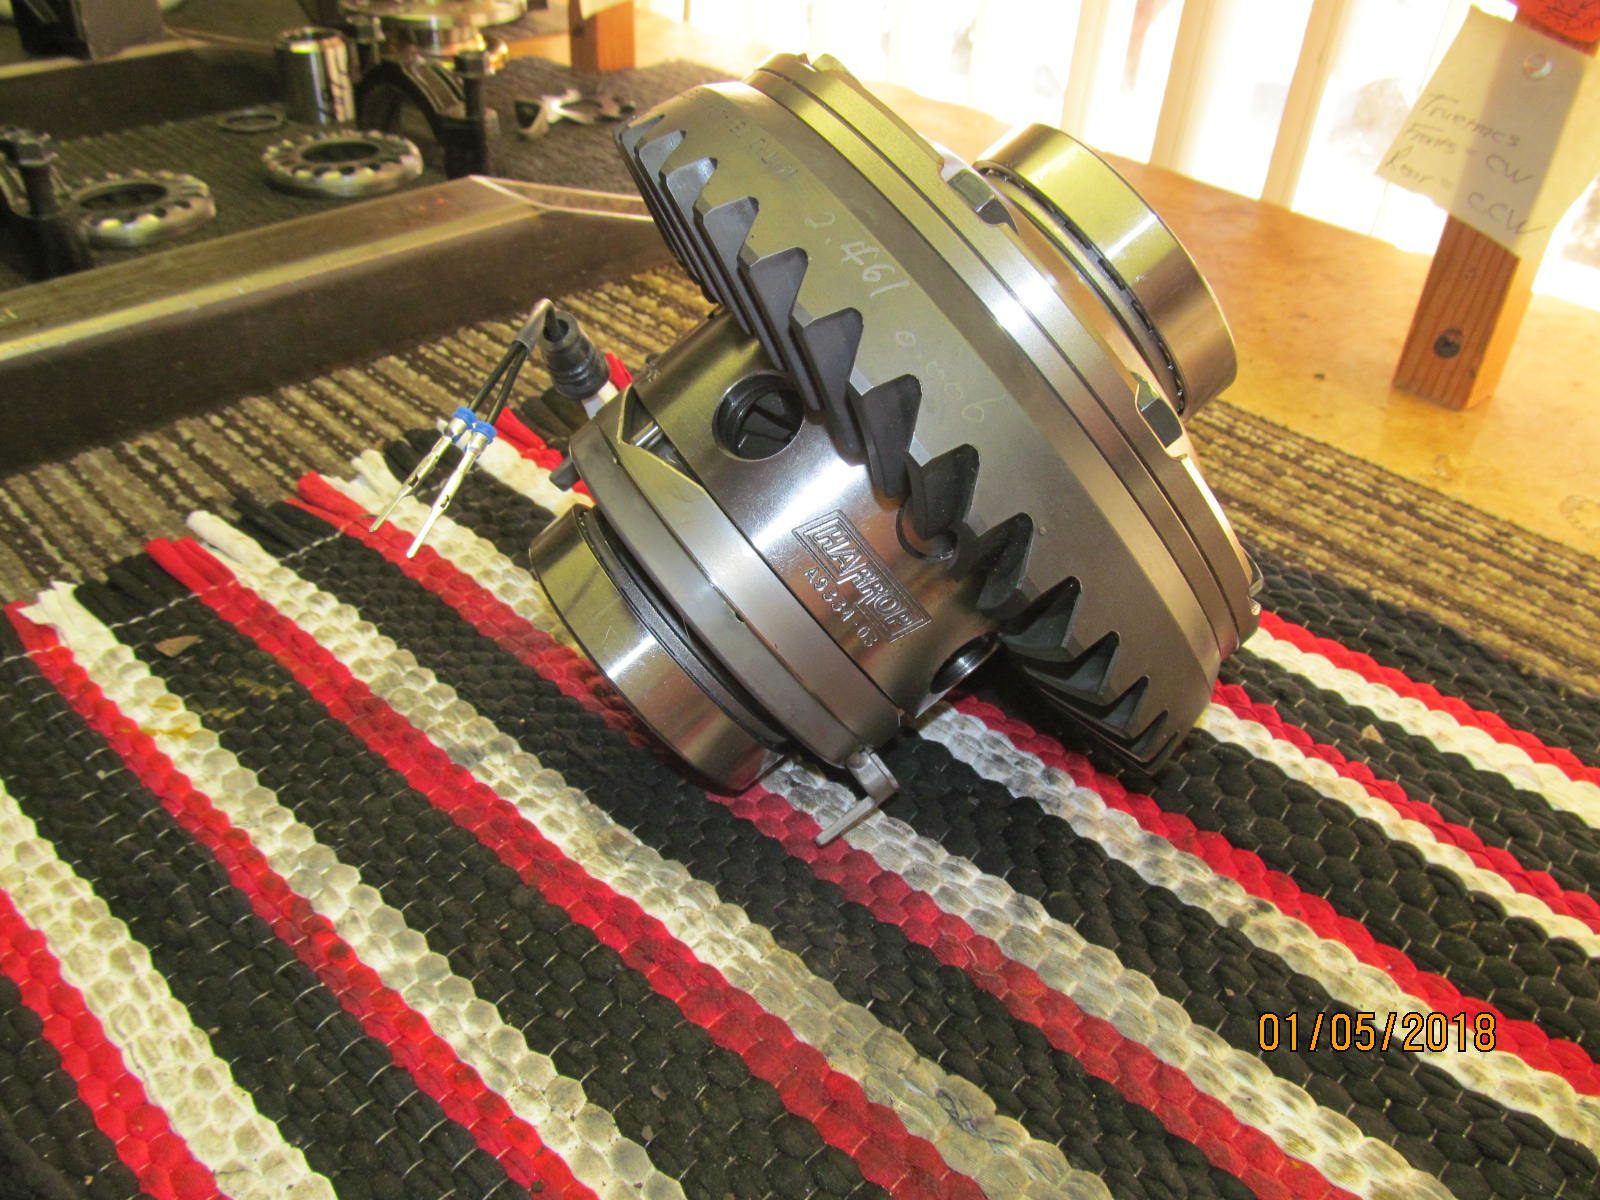
| The Harrop is ready. |
|---|
|
|
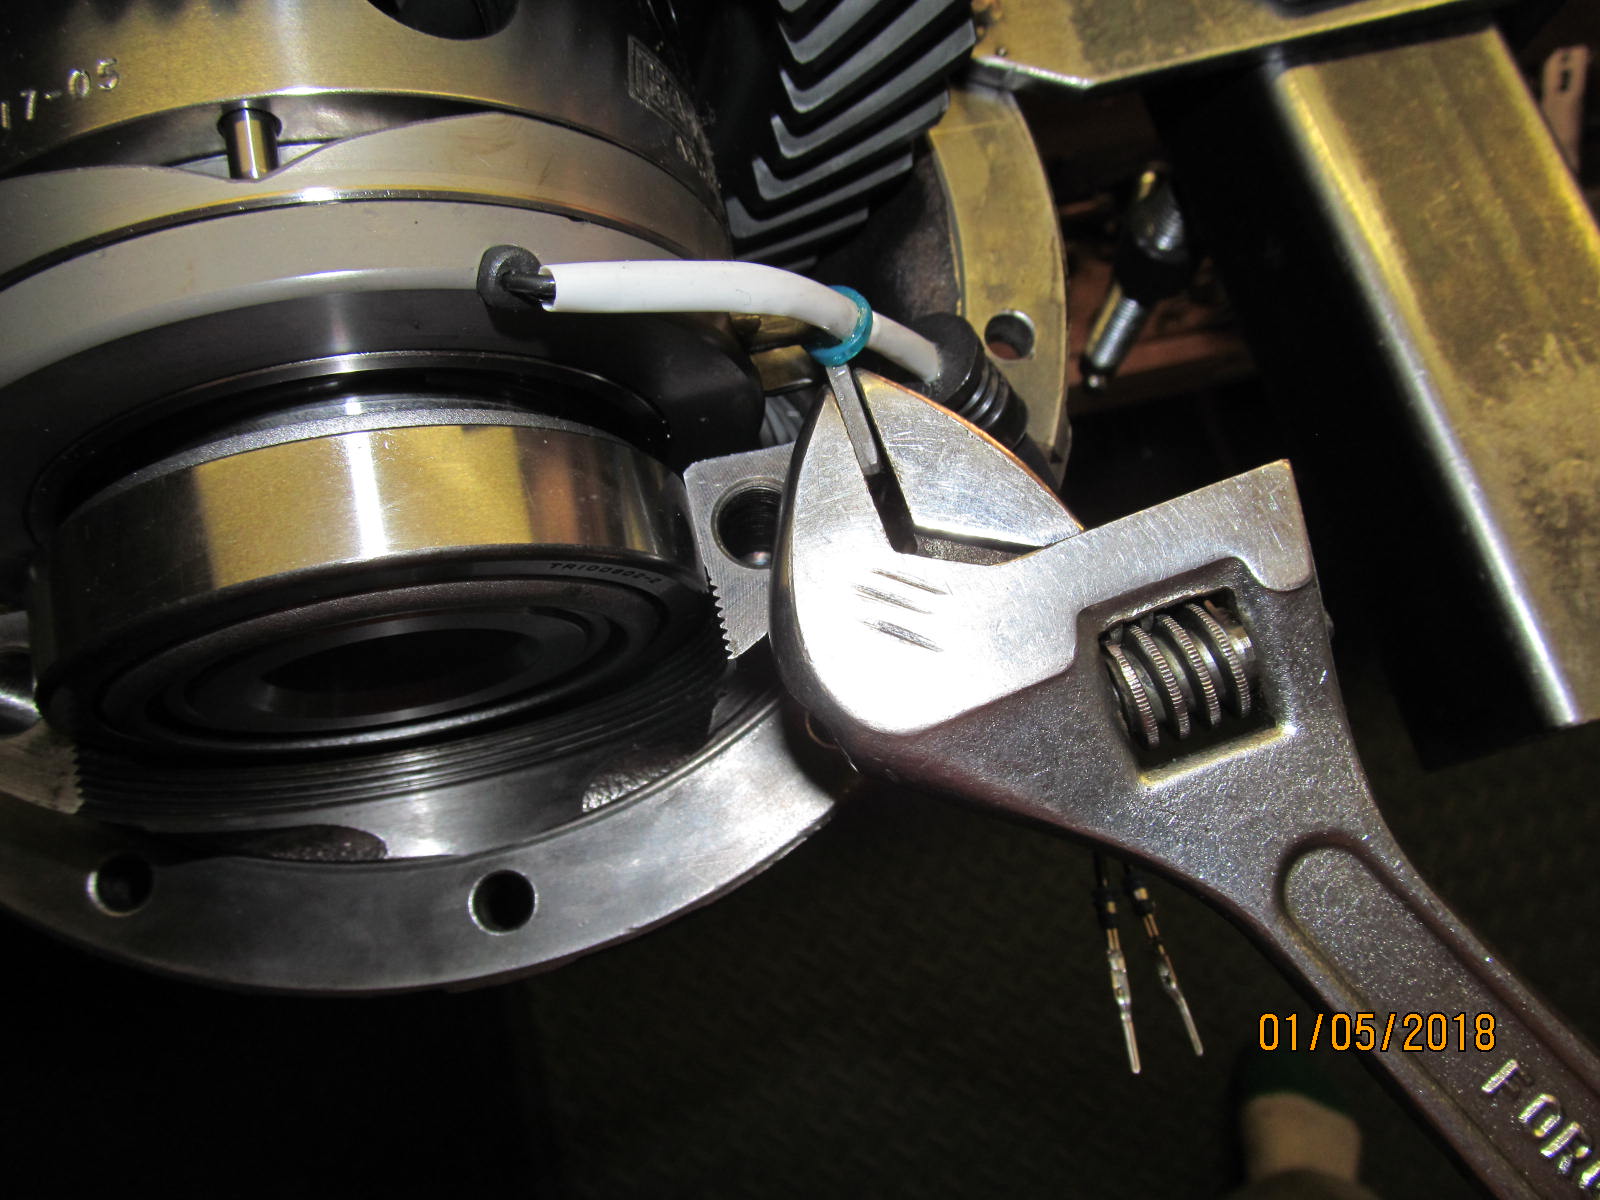
| I had to bend the 2 stop tabs out with a crescent wrench....just enough to clear the bearing cap. |
|---|
|
|
| Just enough to clear the bearing cap..... |
|---|
|
|
| ...this one also. |
|---|
|
|
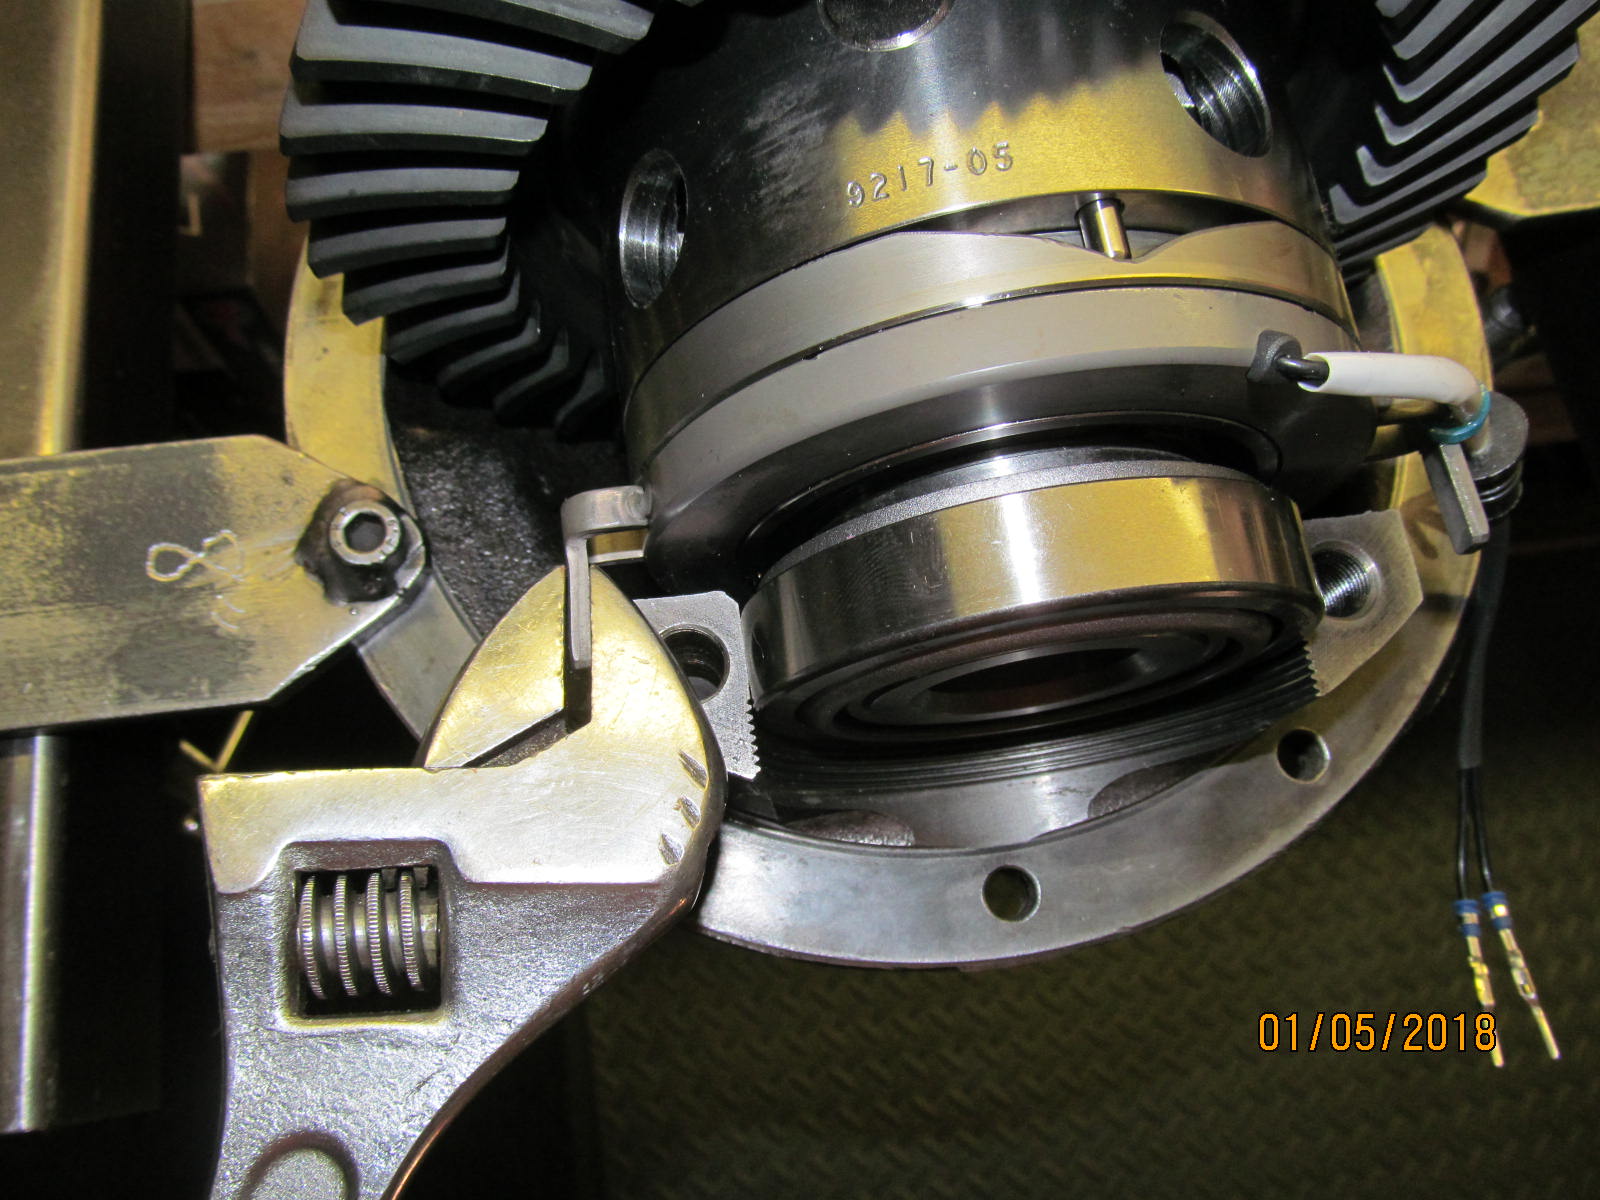
| Now the cap slides in perfectly |
|---|
|
|
| Then the 2 bolts can be tightened finger tight and the big adjusting wheel can be screwed in. |
|---|
|
|
| The free-play of the stop-tab was checked and it was 1.2 mm. The book recommends 2 mm which will be easy to do later on. |
|---|
|
|
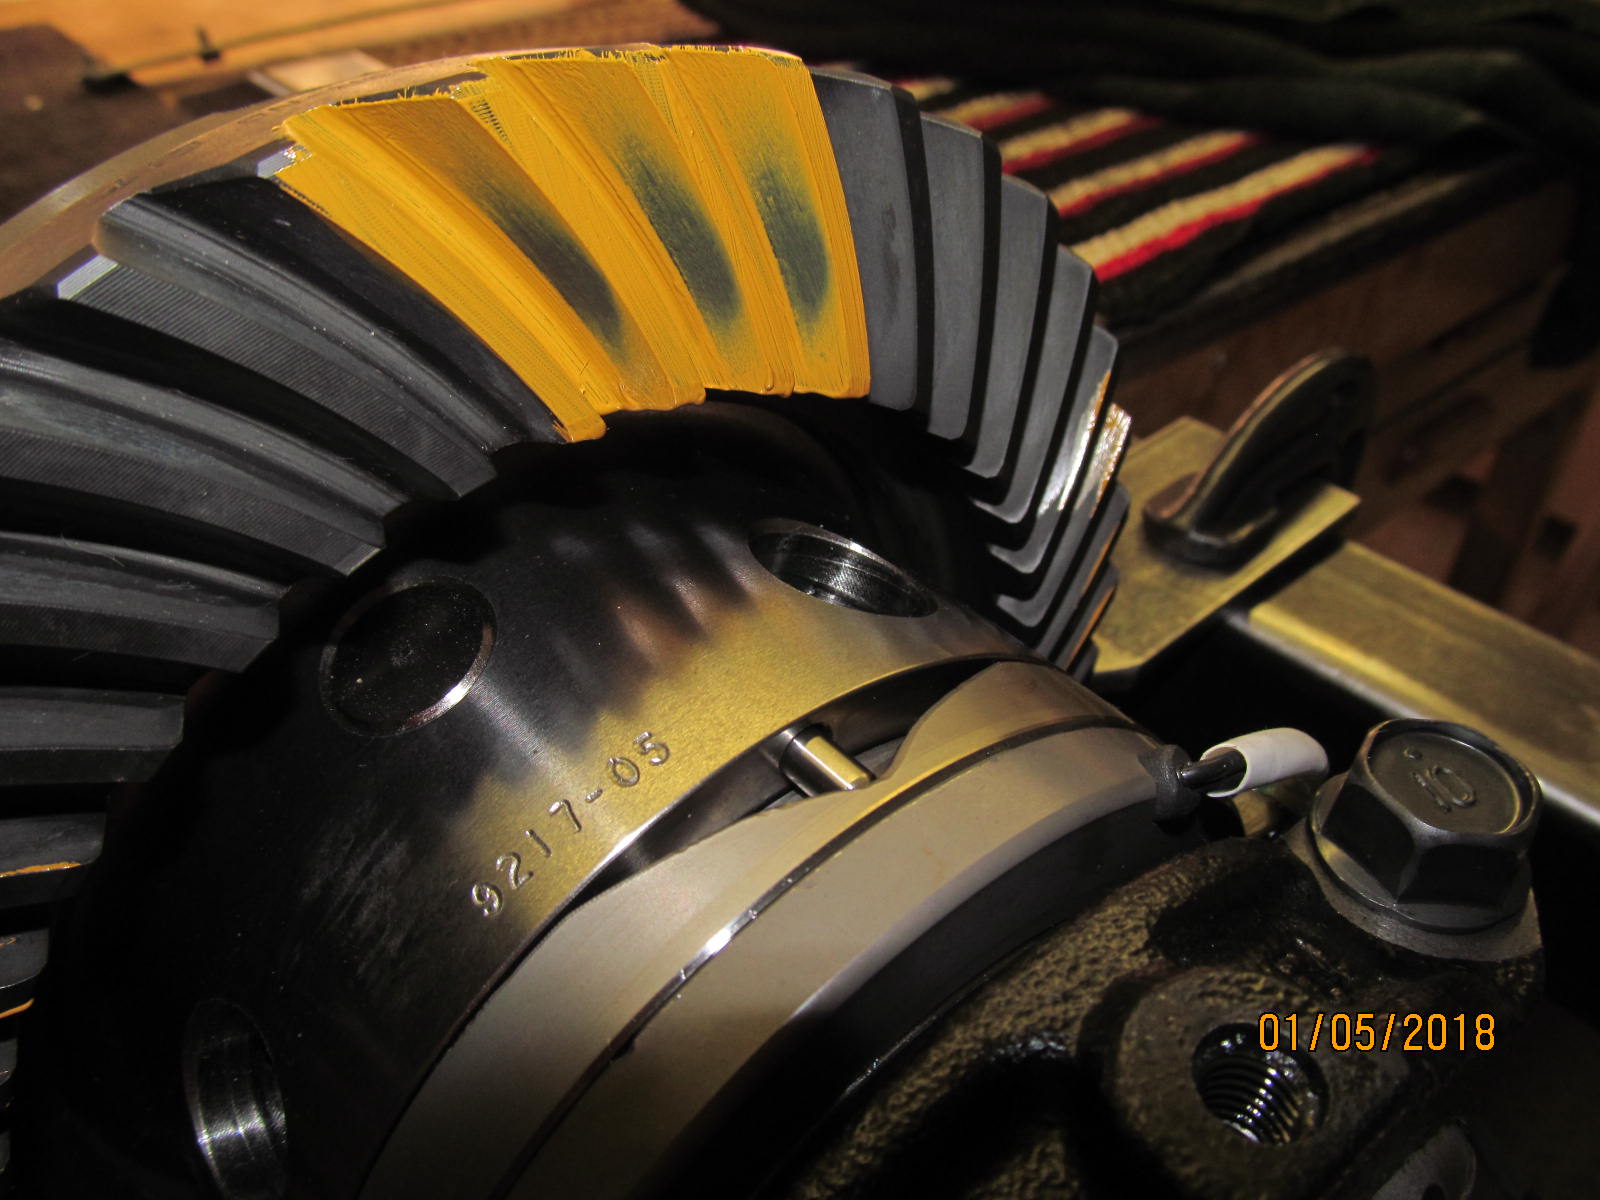
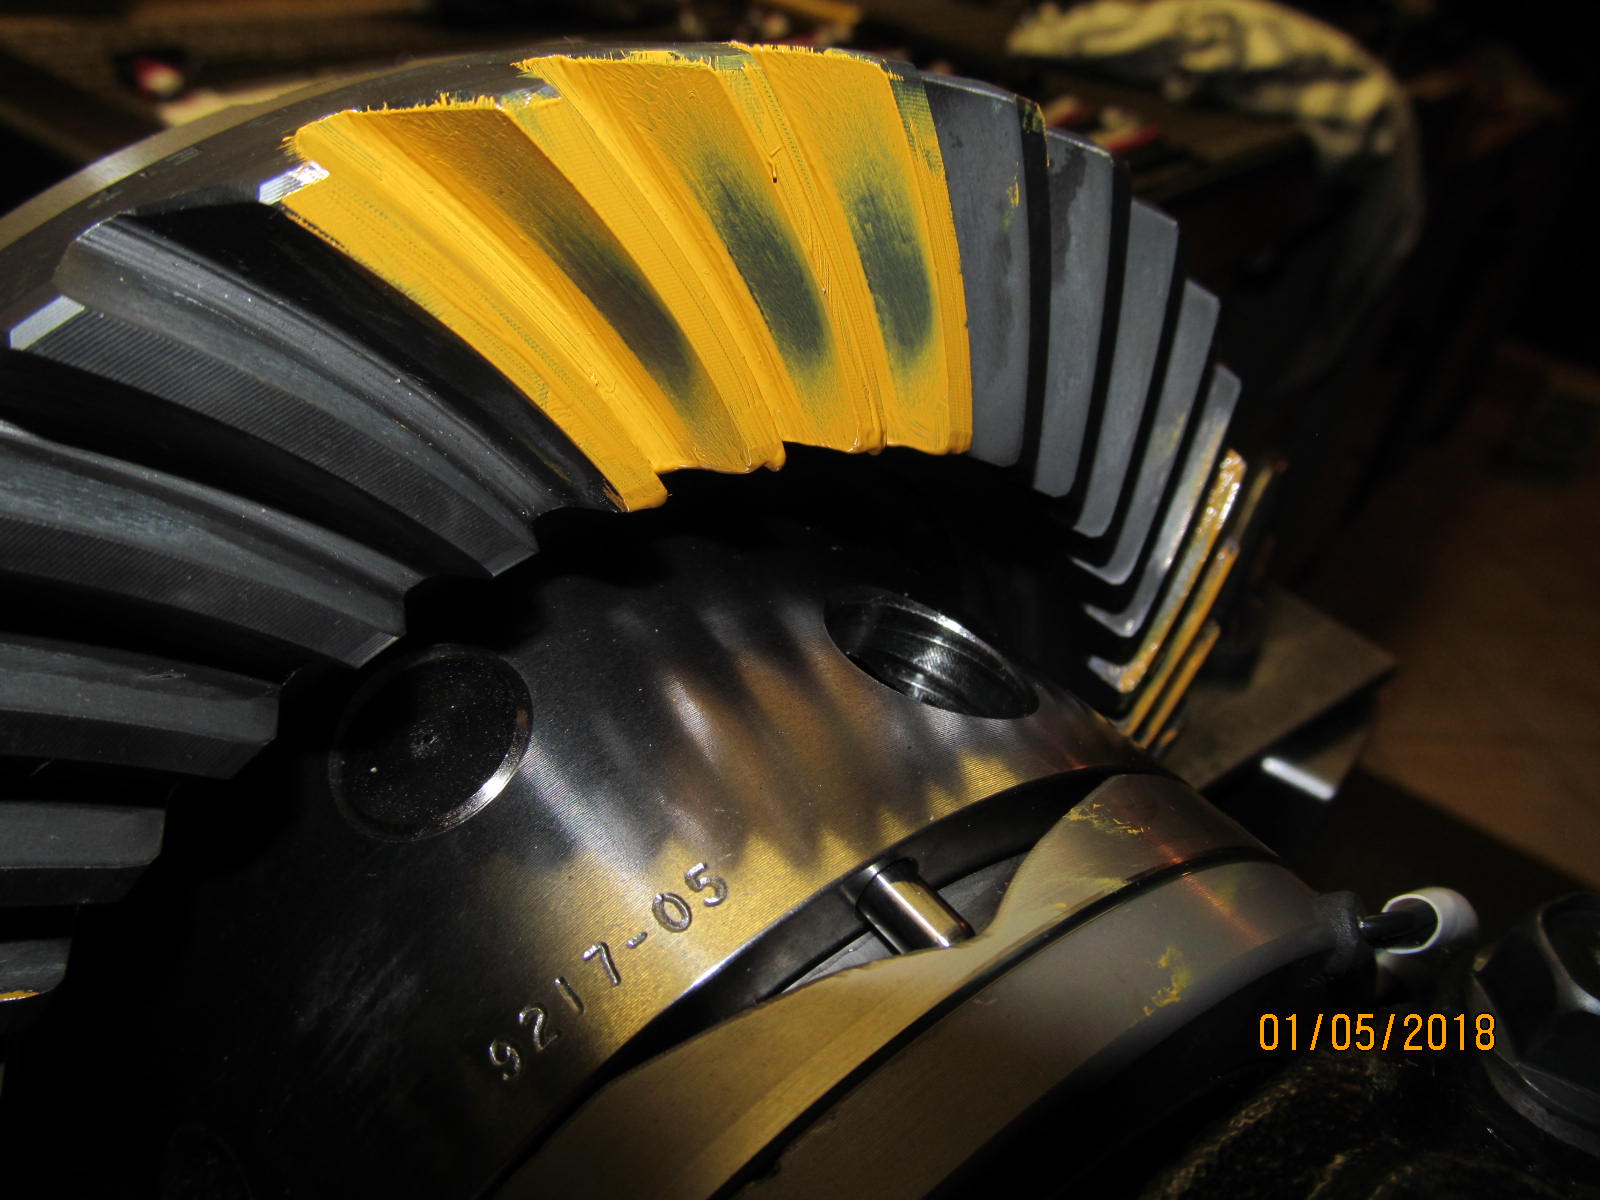
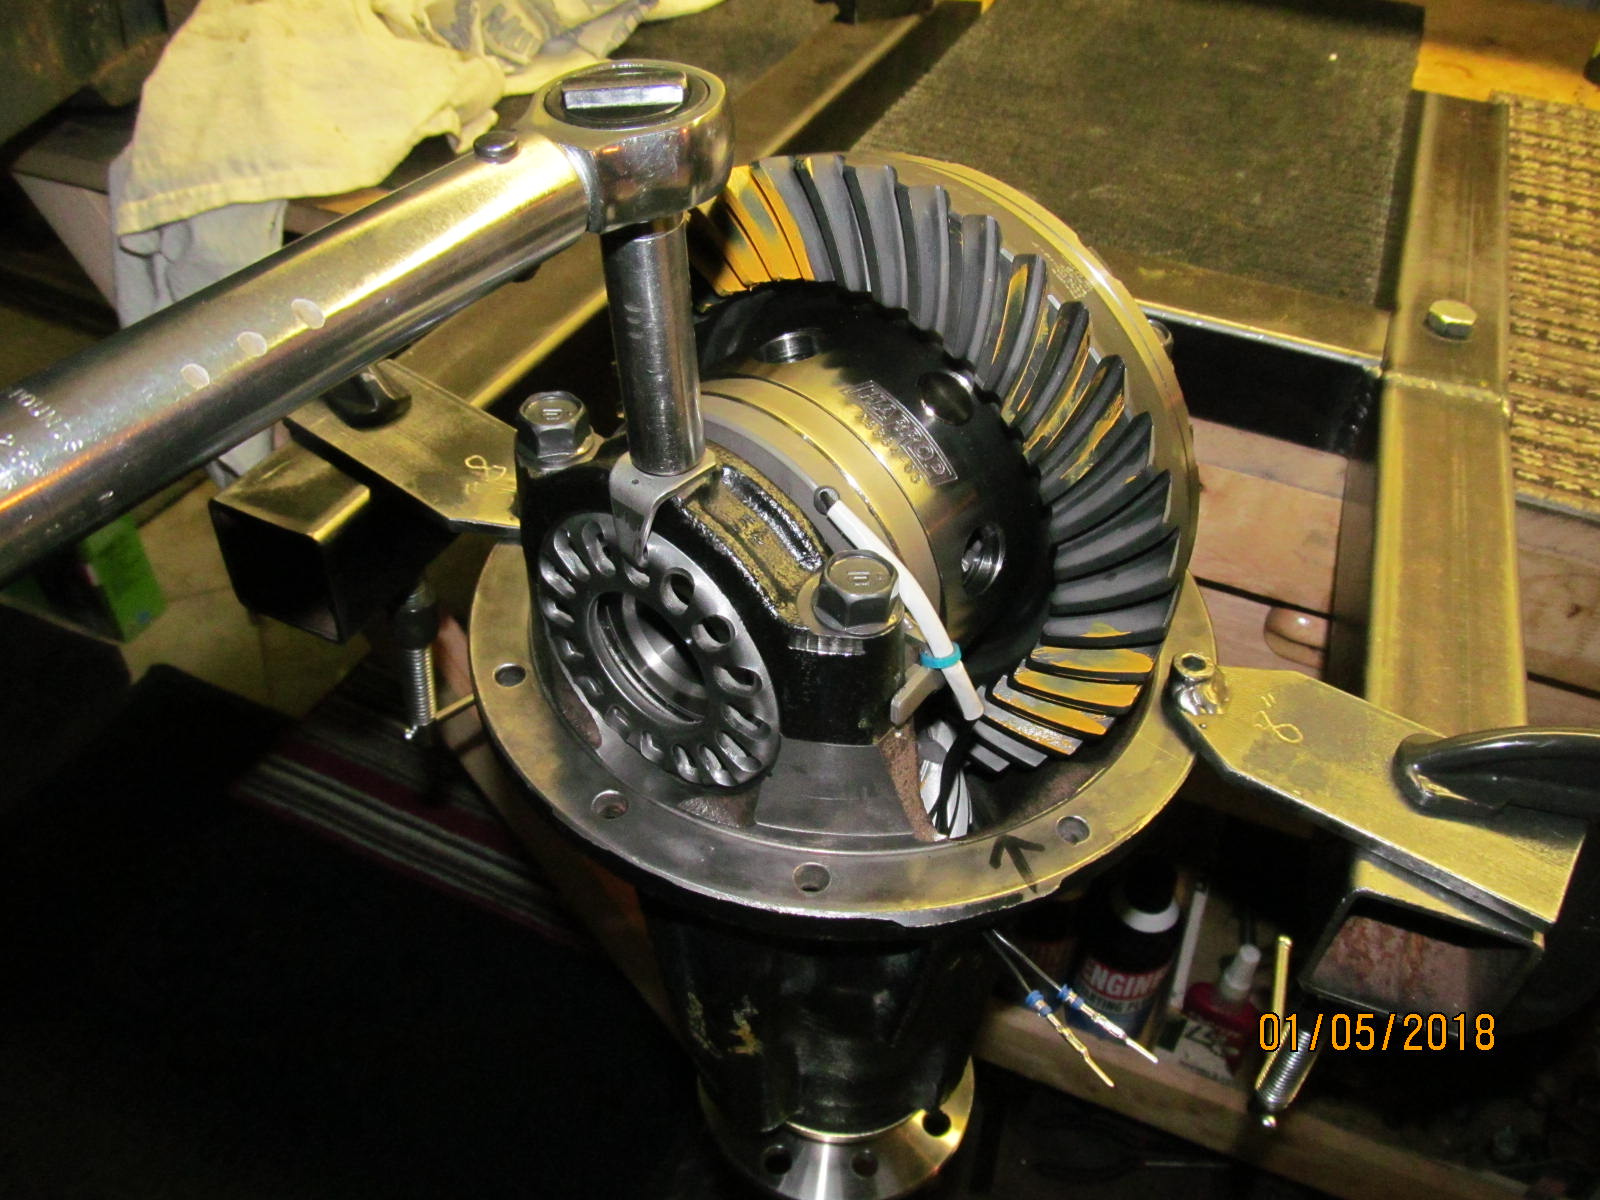
| Backlash was adjusted and the preliminary paint test was exceptional. The drive side appears to be the desired "slight deep" condition. |
|---|
|
|
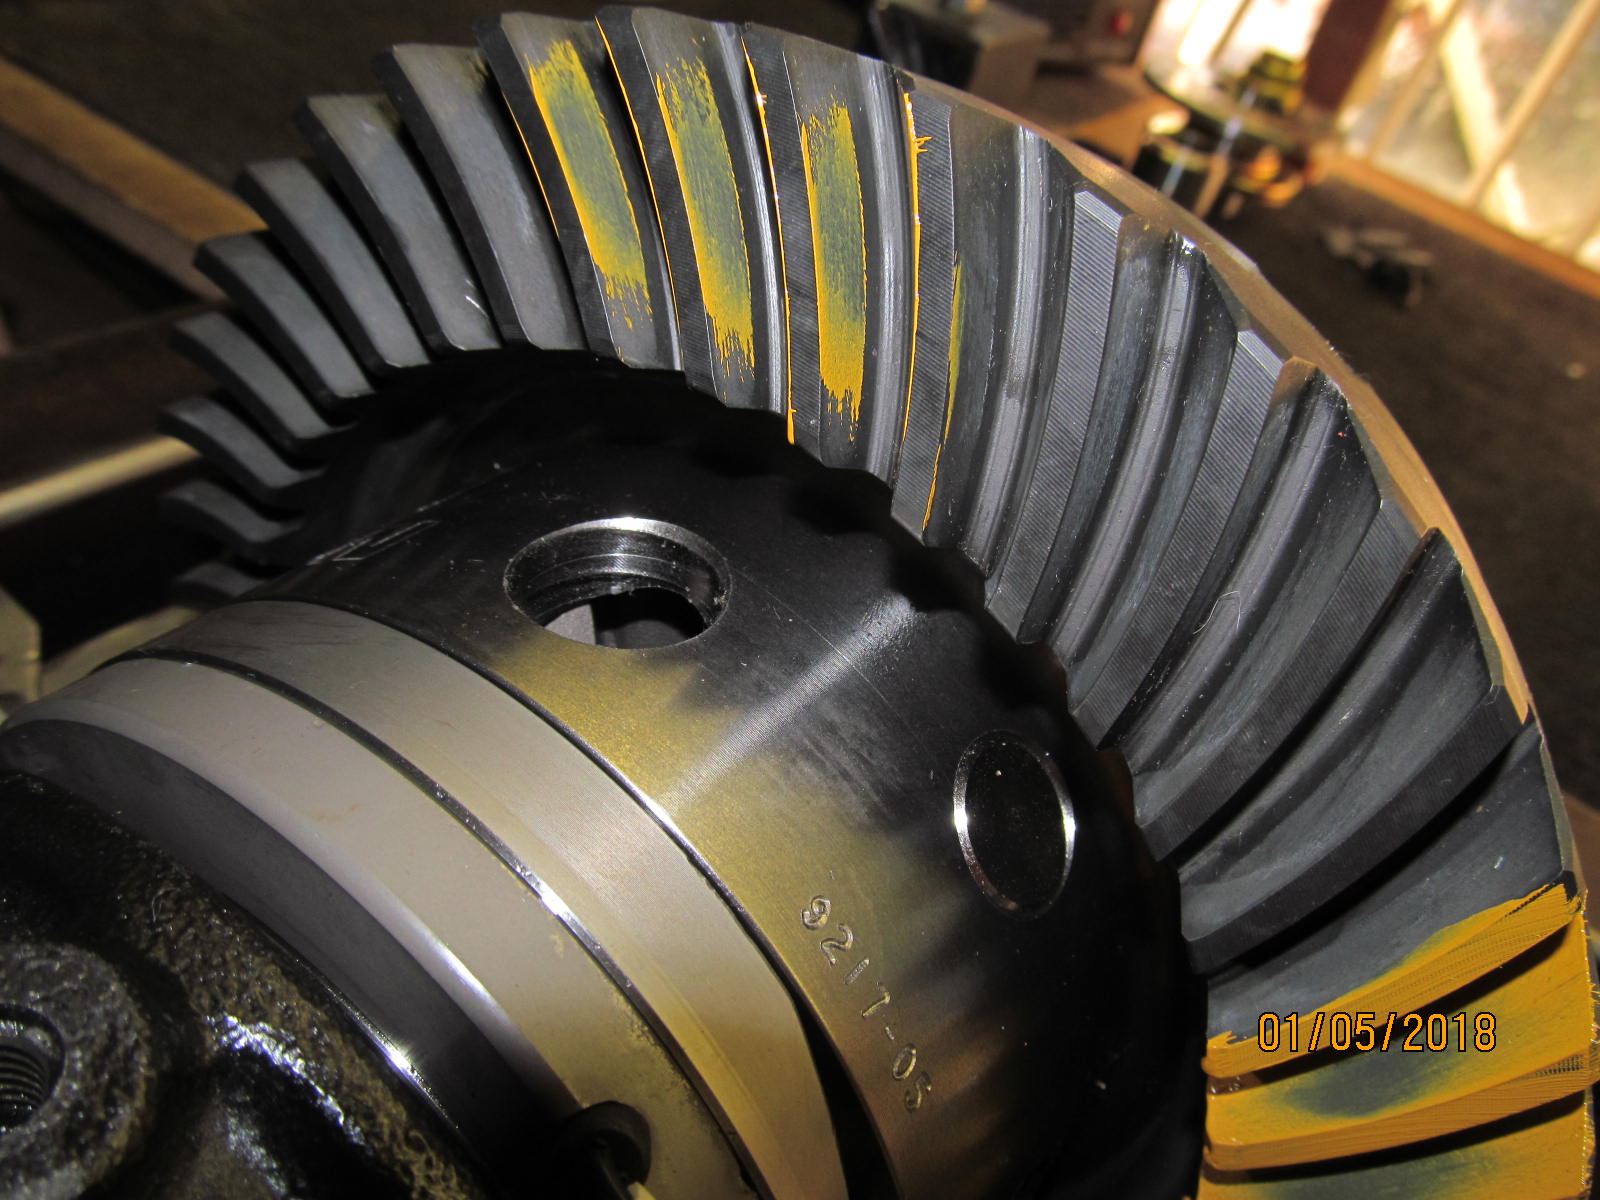
| Coast was centered and showed good depth from face to flank. |
|---|
|
|
| Drive...reverse painted |
|---|
|
|
| Coast...reverse painted. |
|---|
|
|
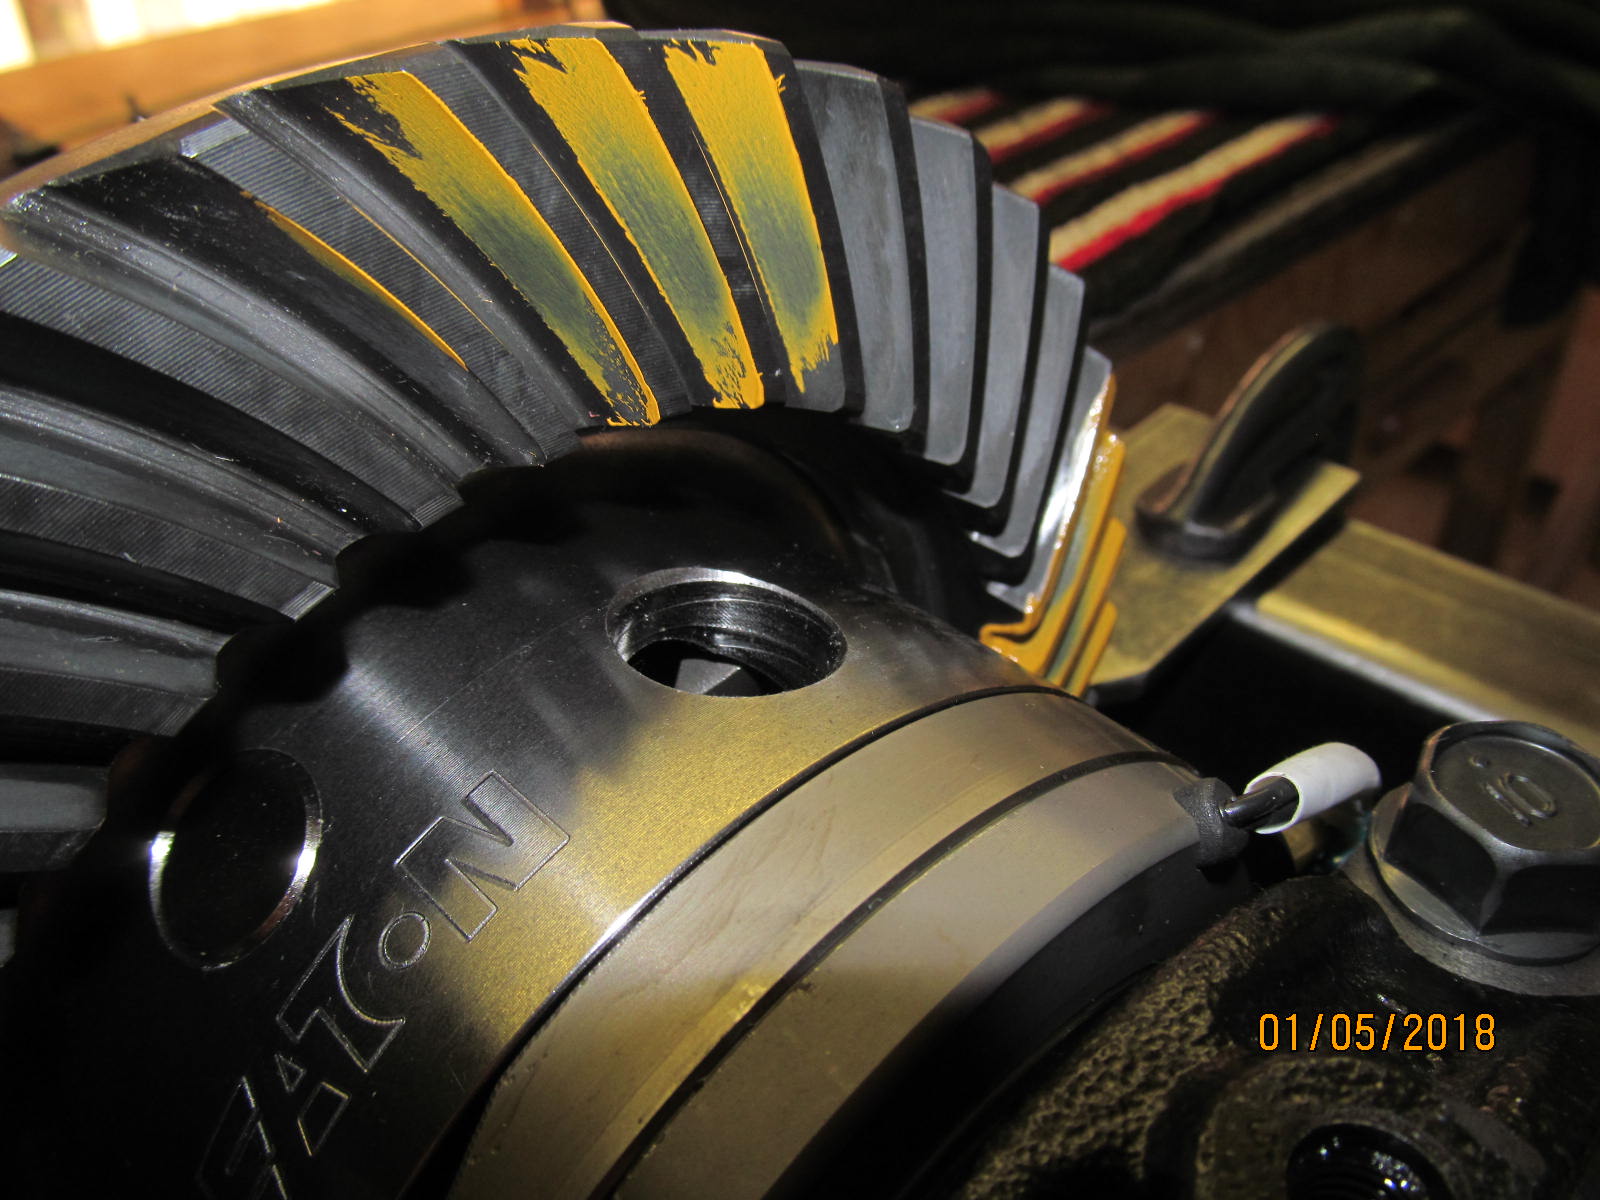
| The comet tail looks ideally in the center. |
|---|
|
|
| The other tooth agrees. It says the depth of the ring gear patterns are deep enough and not to go any deeper. |
|---|
|
|
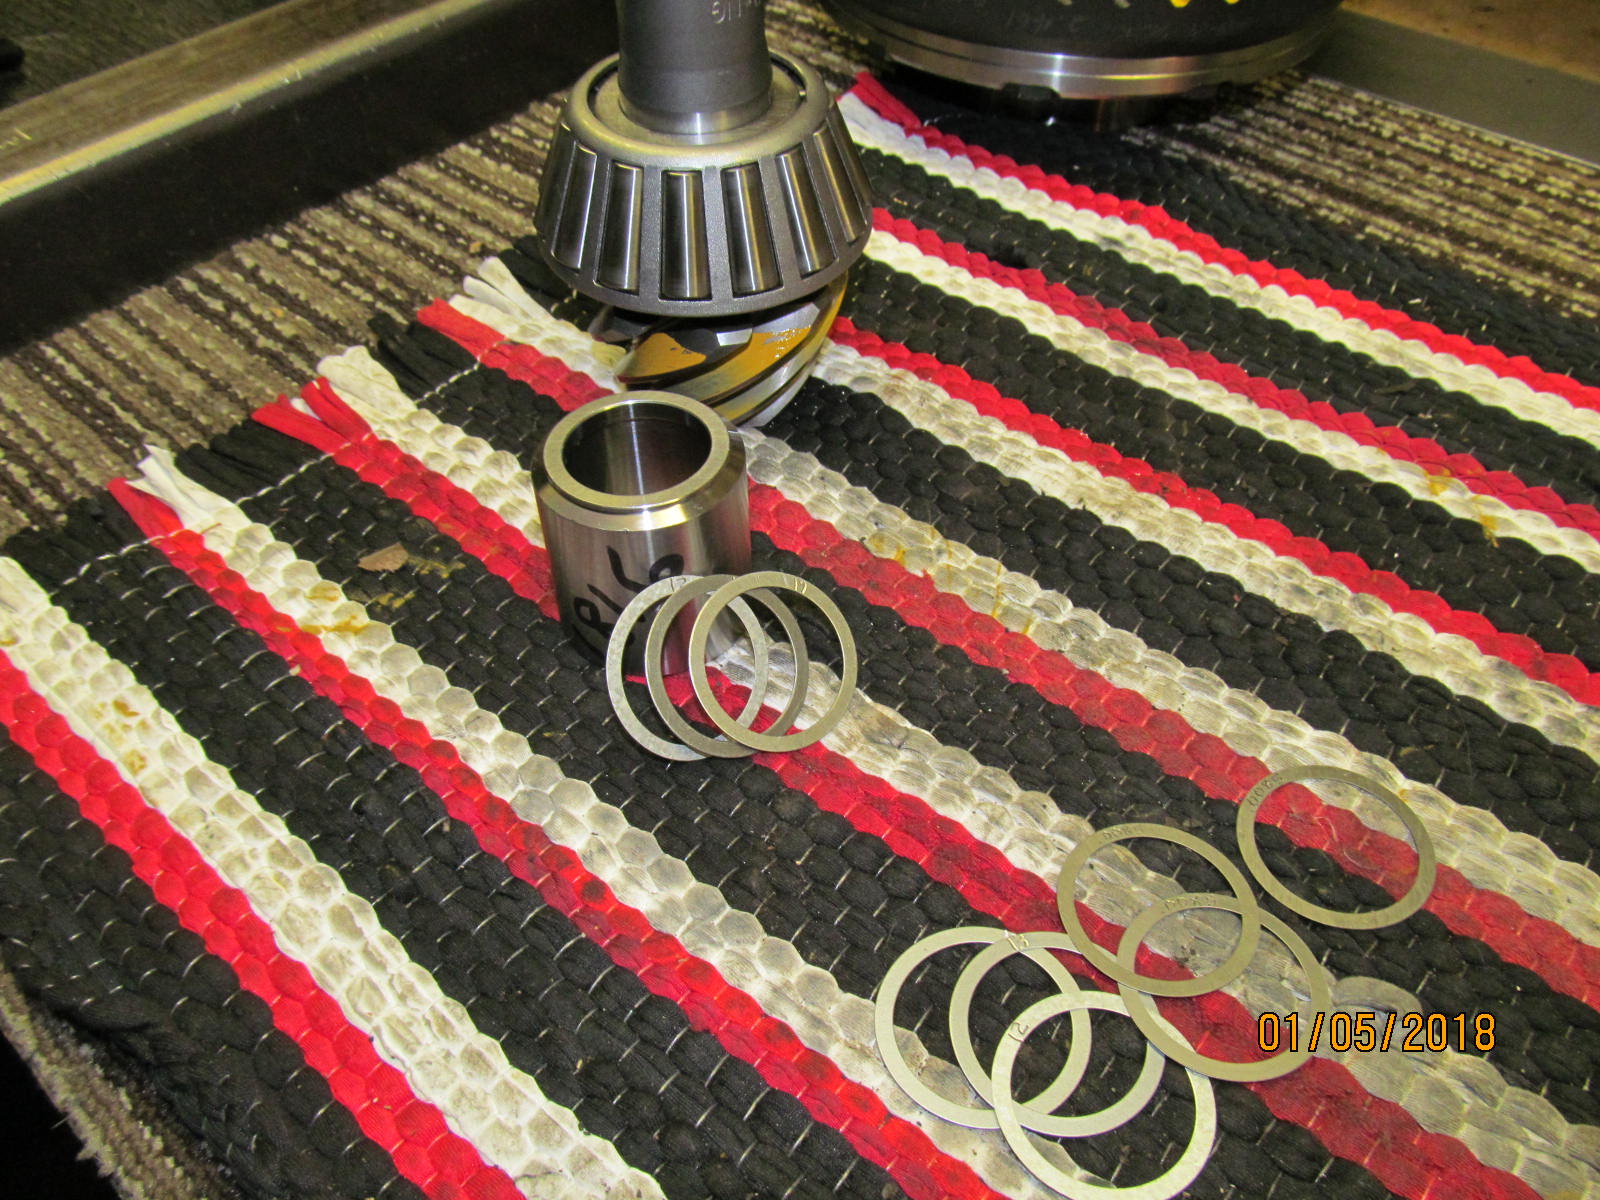
With pinion depth established now the solid collar can be installed. Collar length plus shims should be around 1.866"
so let's try .050 and see what that gets. |
|---|
|
|
| Not bad....that resulted in 10 in/lb of preload with the pinion nut moderately tight. Add .001" to the shim pack and we are done :) |
|---|
|
|
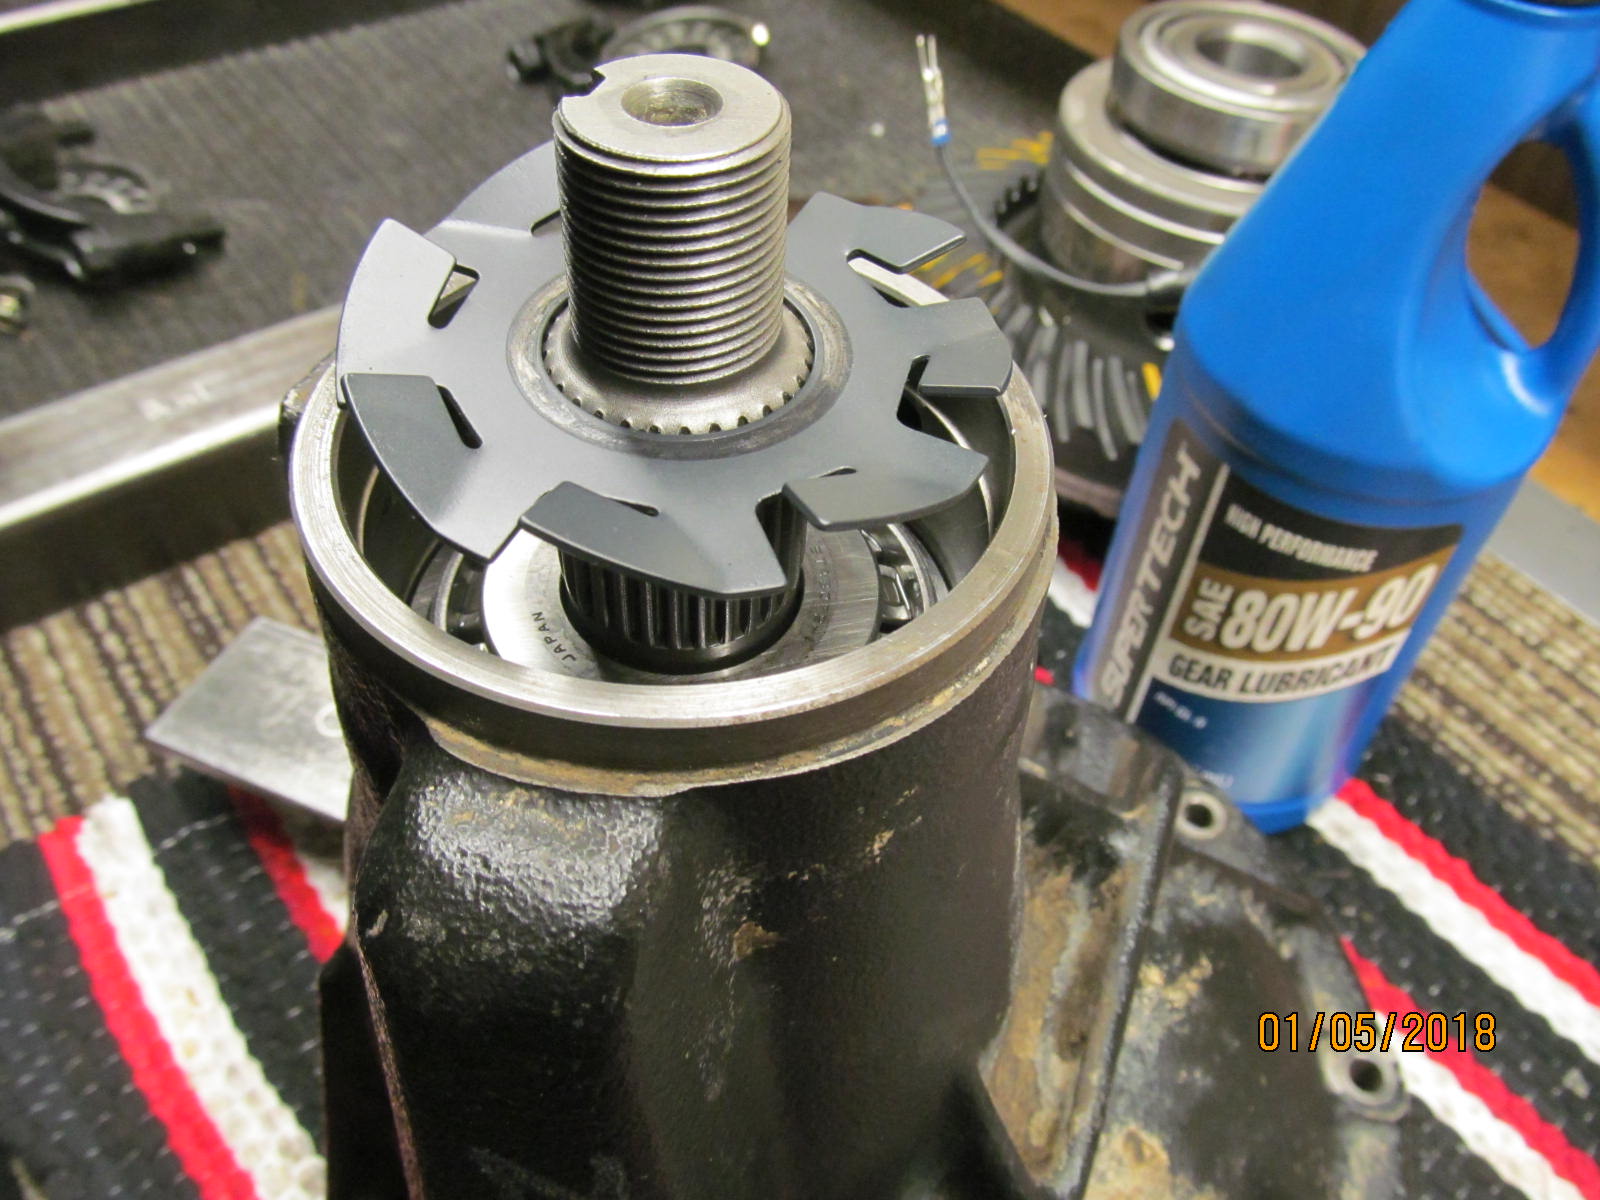
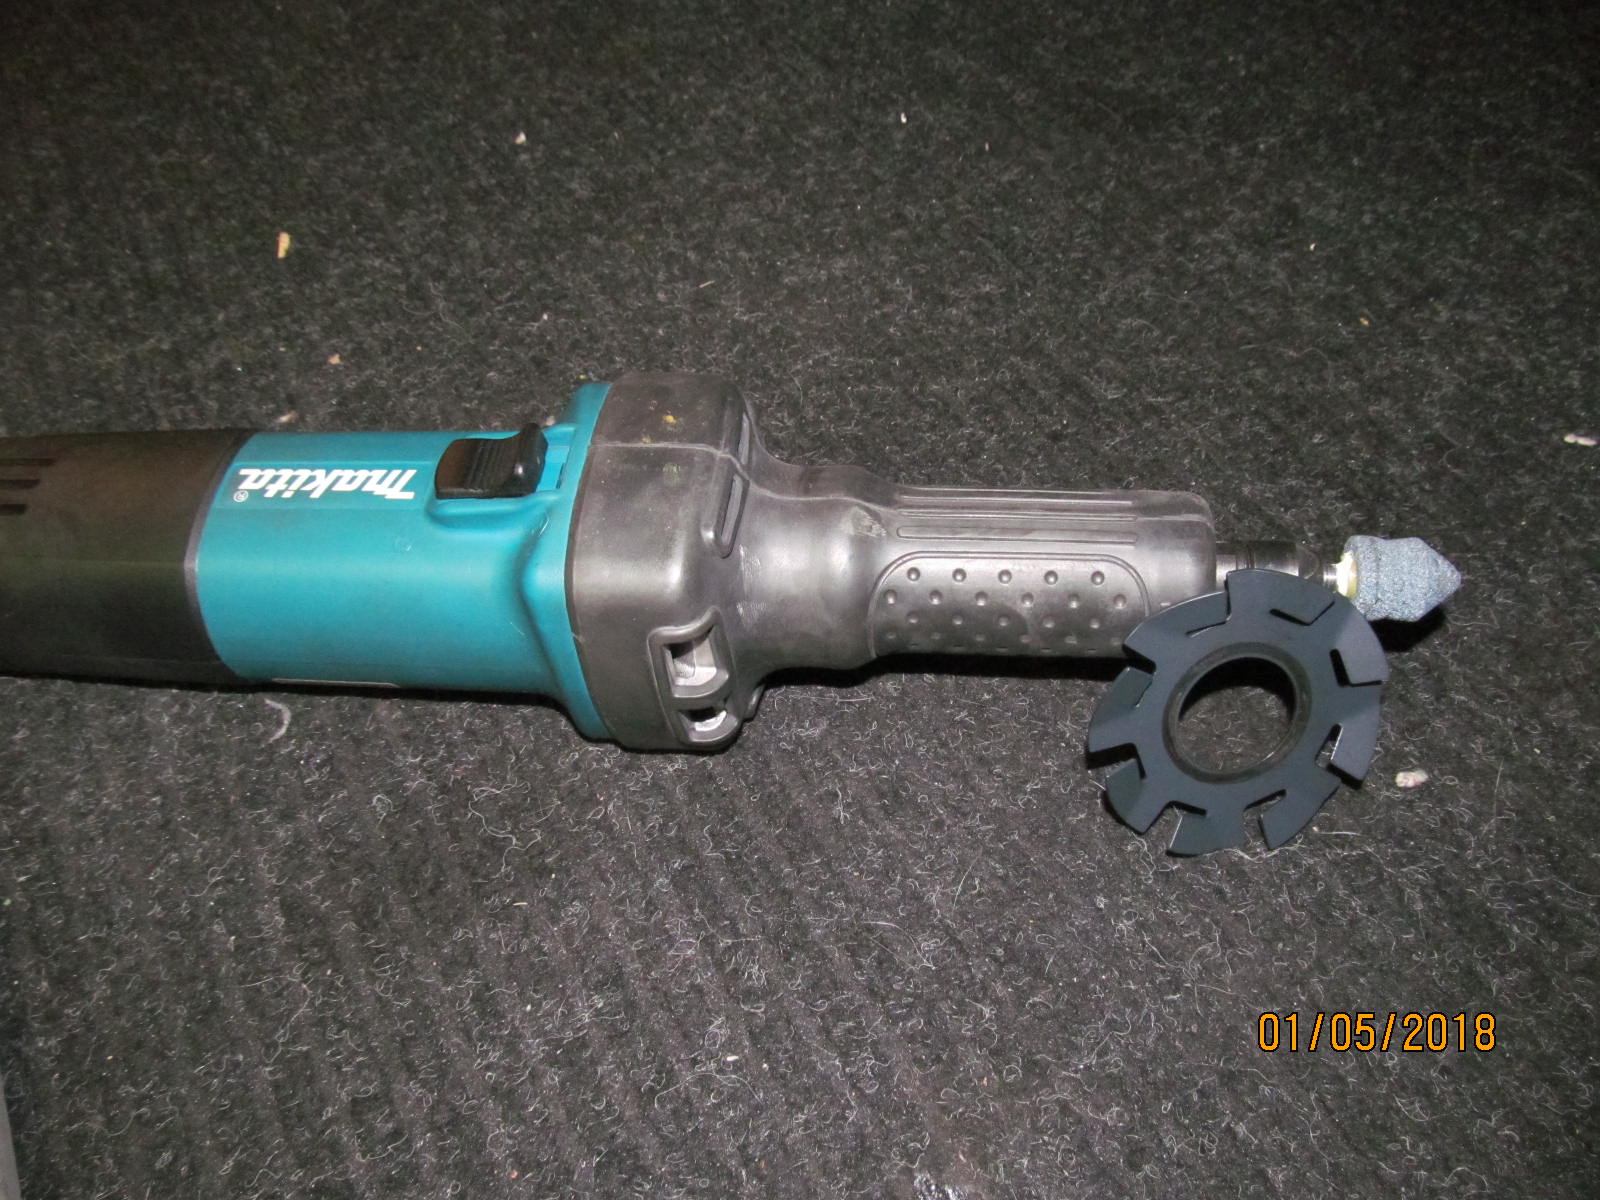
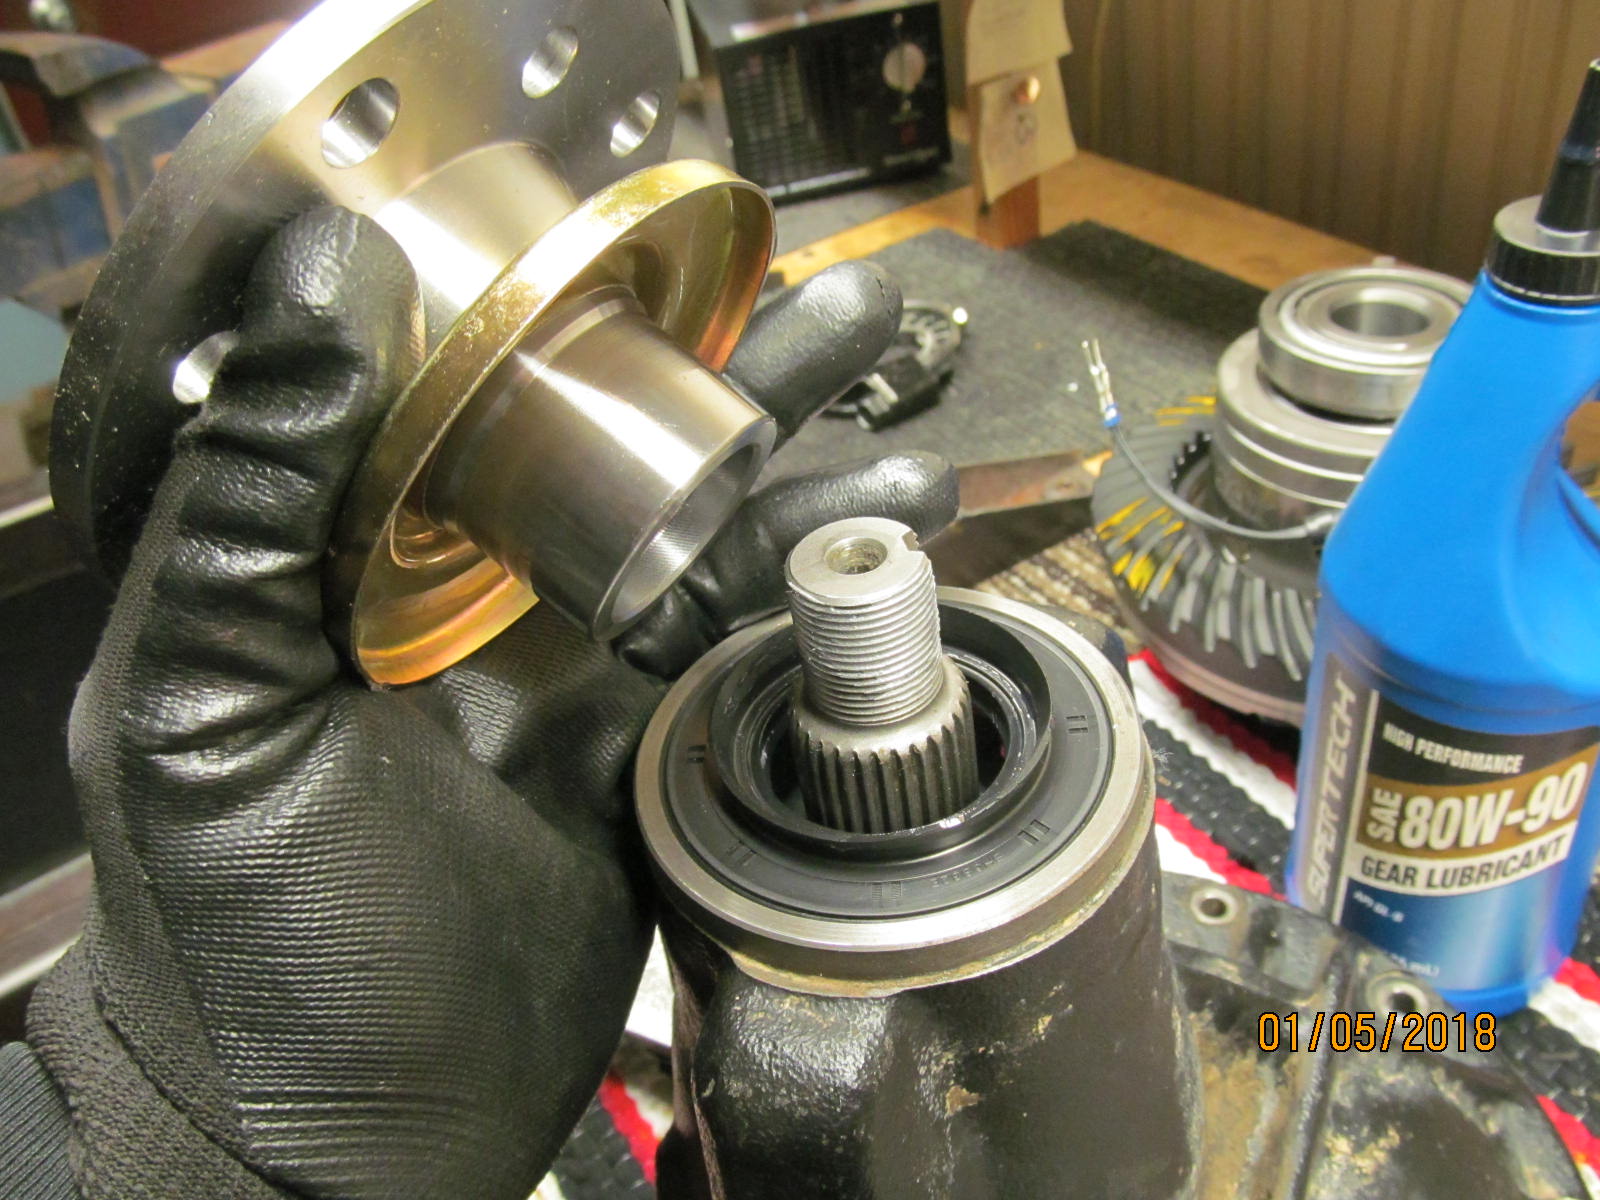
| The fan blade slinger was designed for the smaller 27 spline pinions....will not fit over 29 spline pinions. |
|---|
|
|
| A 1/4" die grinder and 3 minutes of targetted grinding.... |
|---|
|

|
| ...and the slinger will go down. |
|---|
|

|
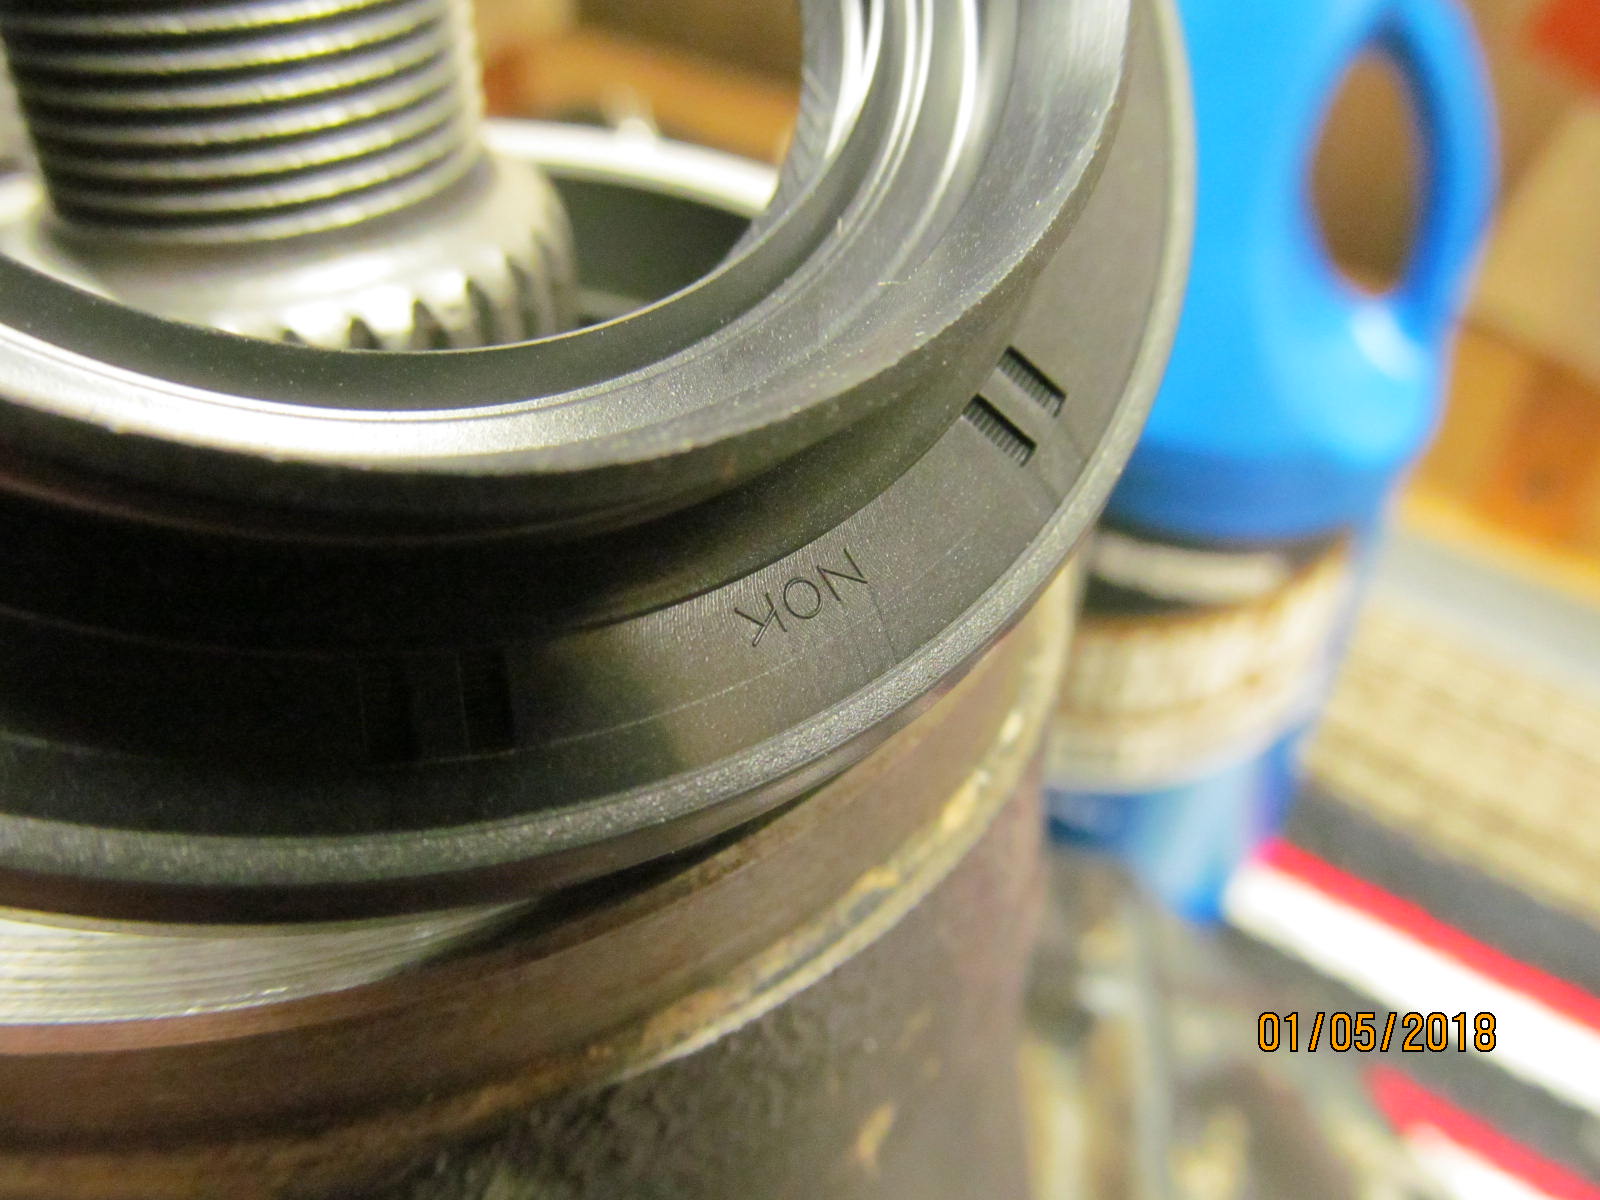
| The pinion seal was upgraded to the genuine oem "29 spline seal". |
|---|
|
|
| NOK |
|---|
|
|
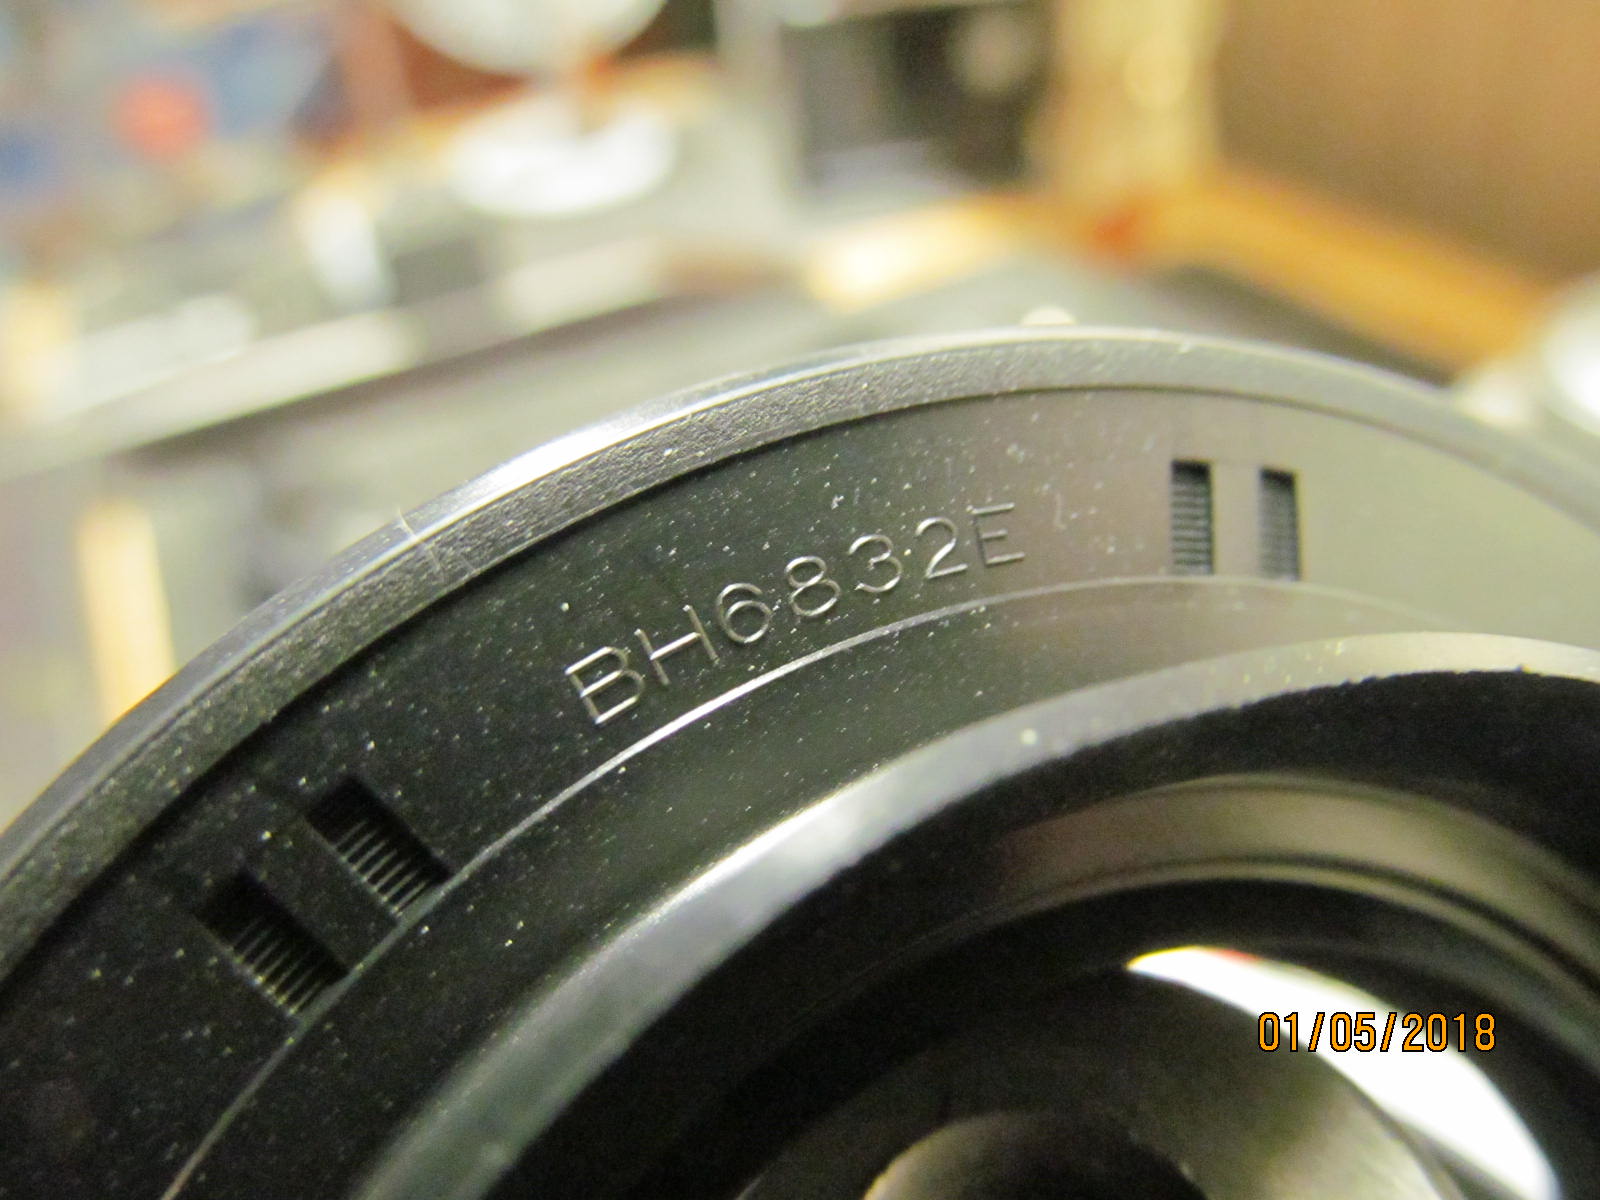
| BH6832E and that is how you know it genuine. |
|---|
|
|
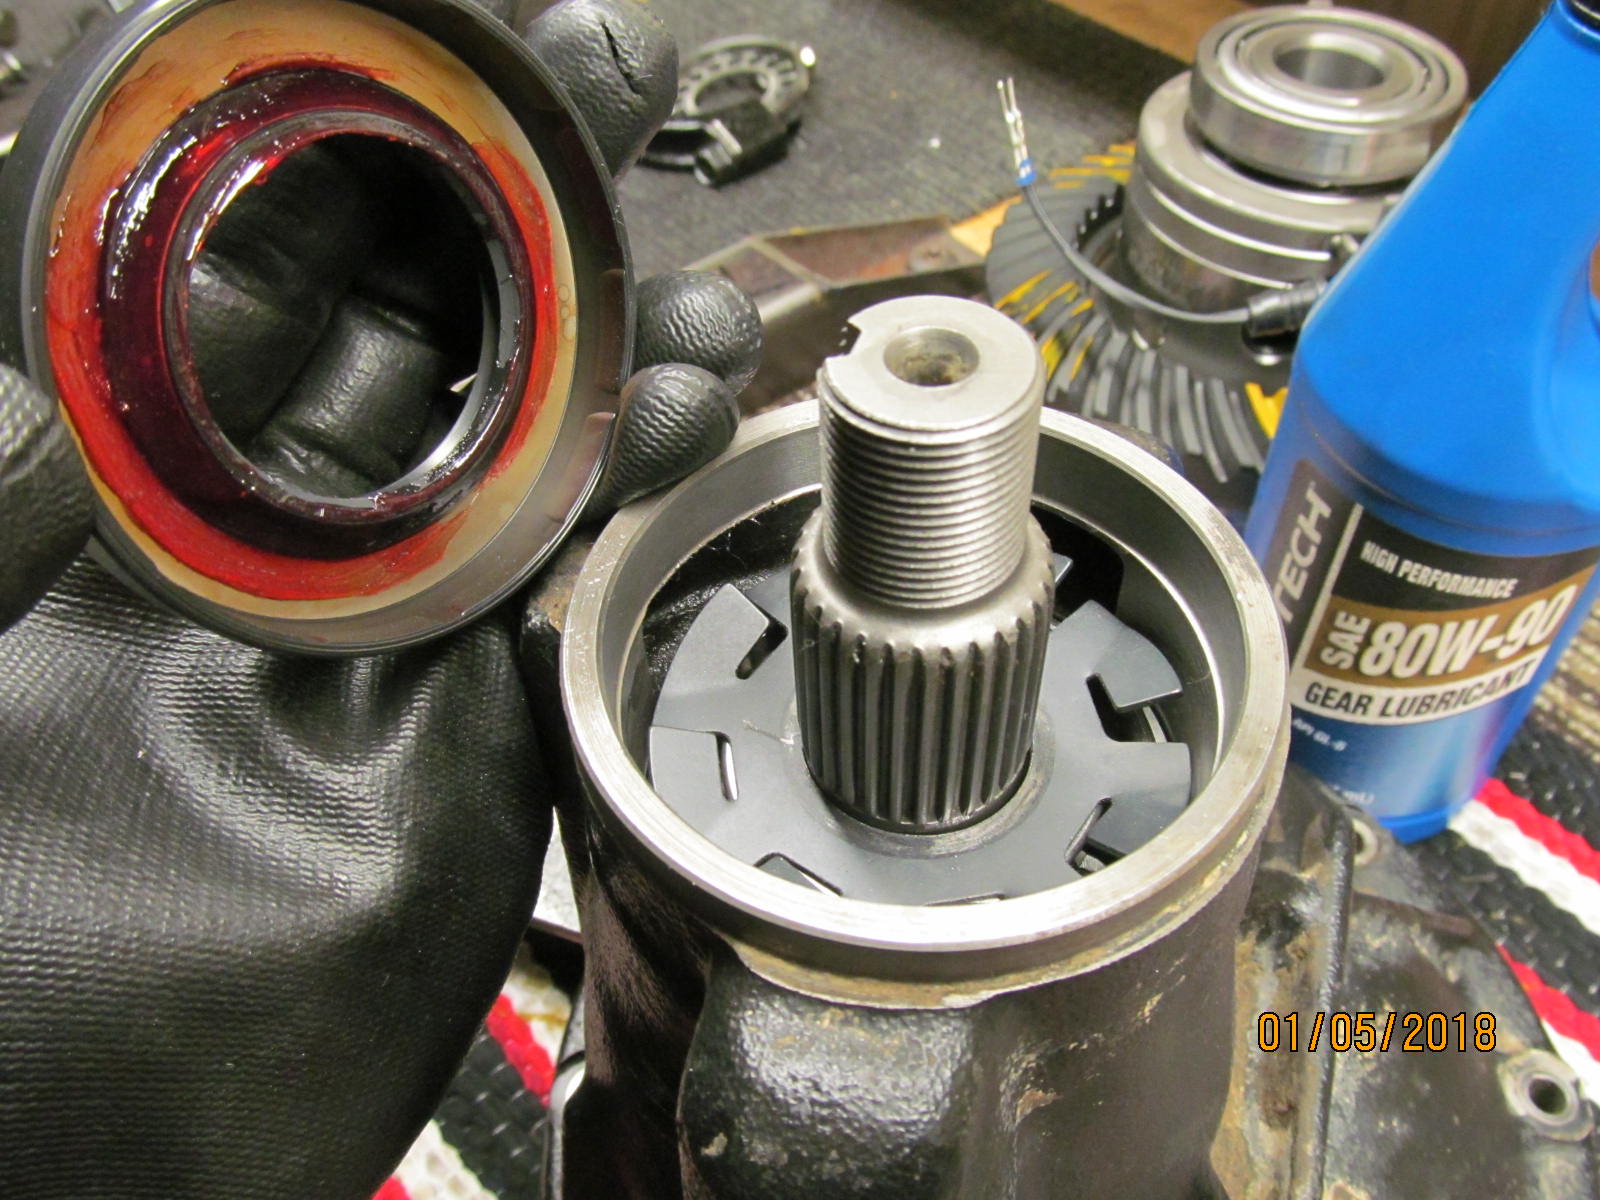
| A light coating of grease over the garter spring... |
|---|
|
|
| And then the new dual drilled flange is installed....with a light coating of gear oil on all related rubber surfaces. |
|---|
|
|
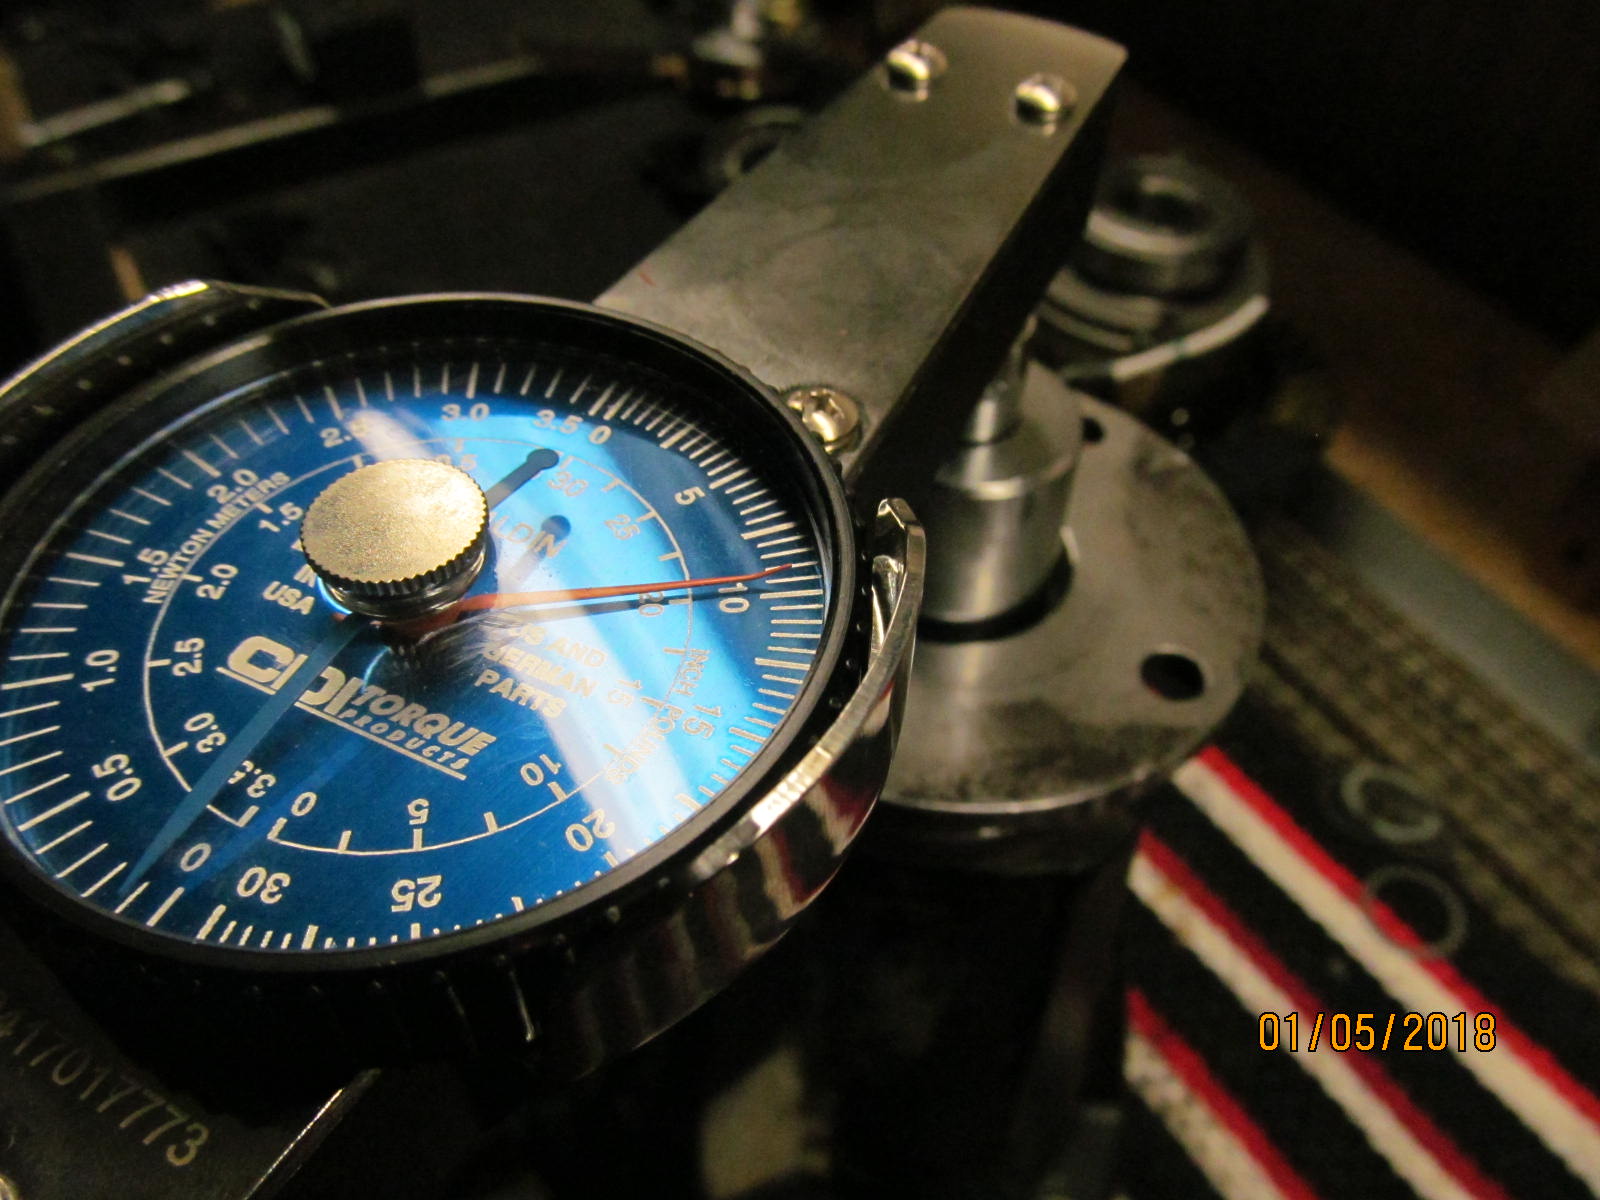
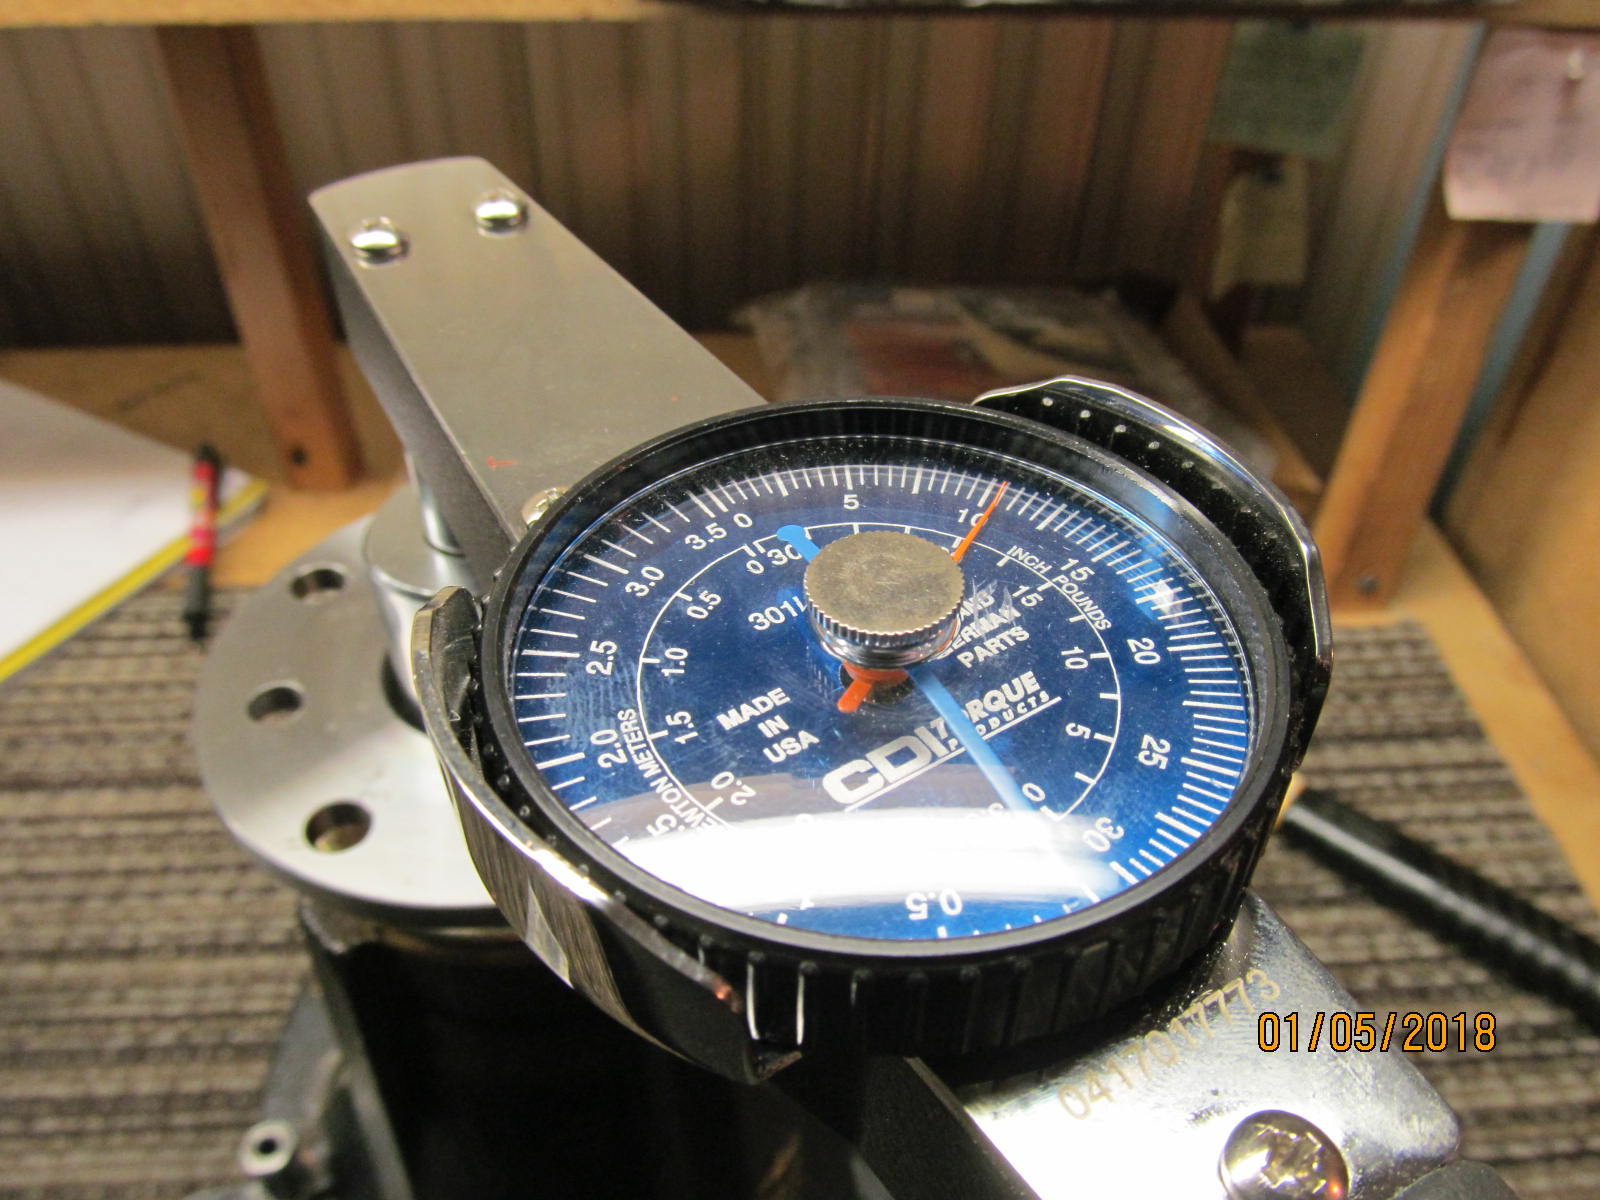
| A nice, smooth 10 inch/pounds of pinion prload is measured. |
|---|
|
|
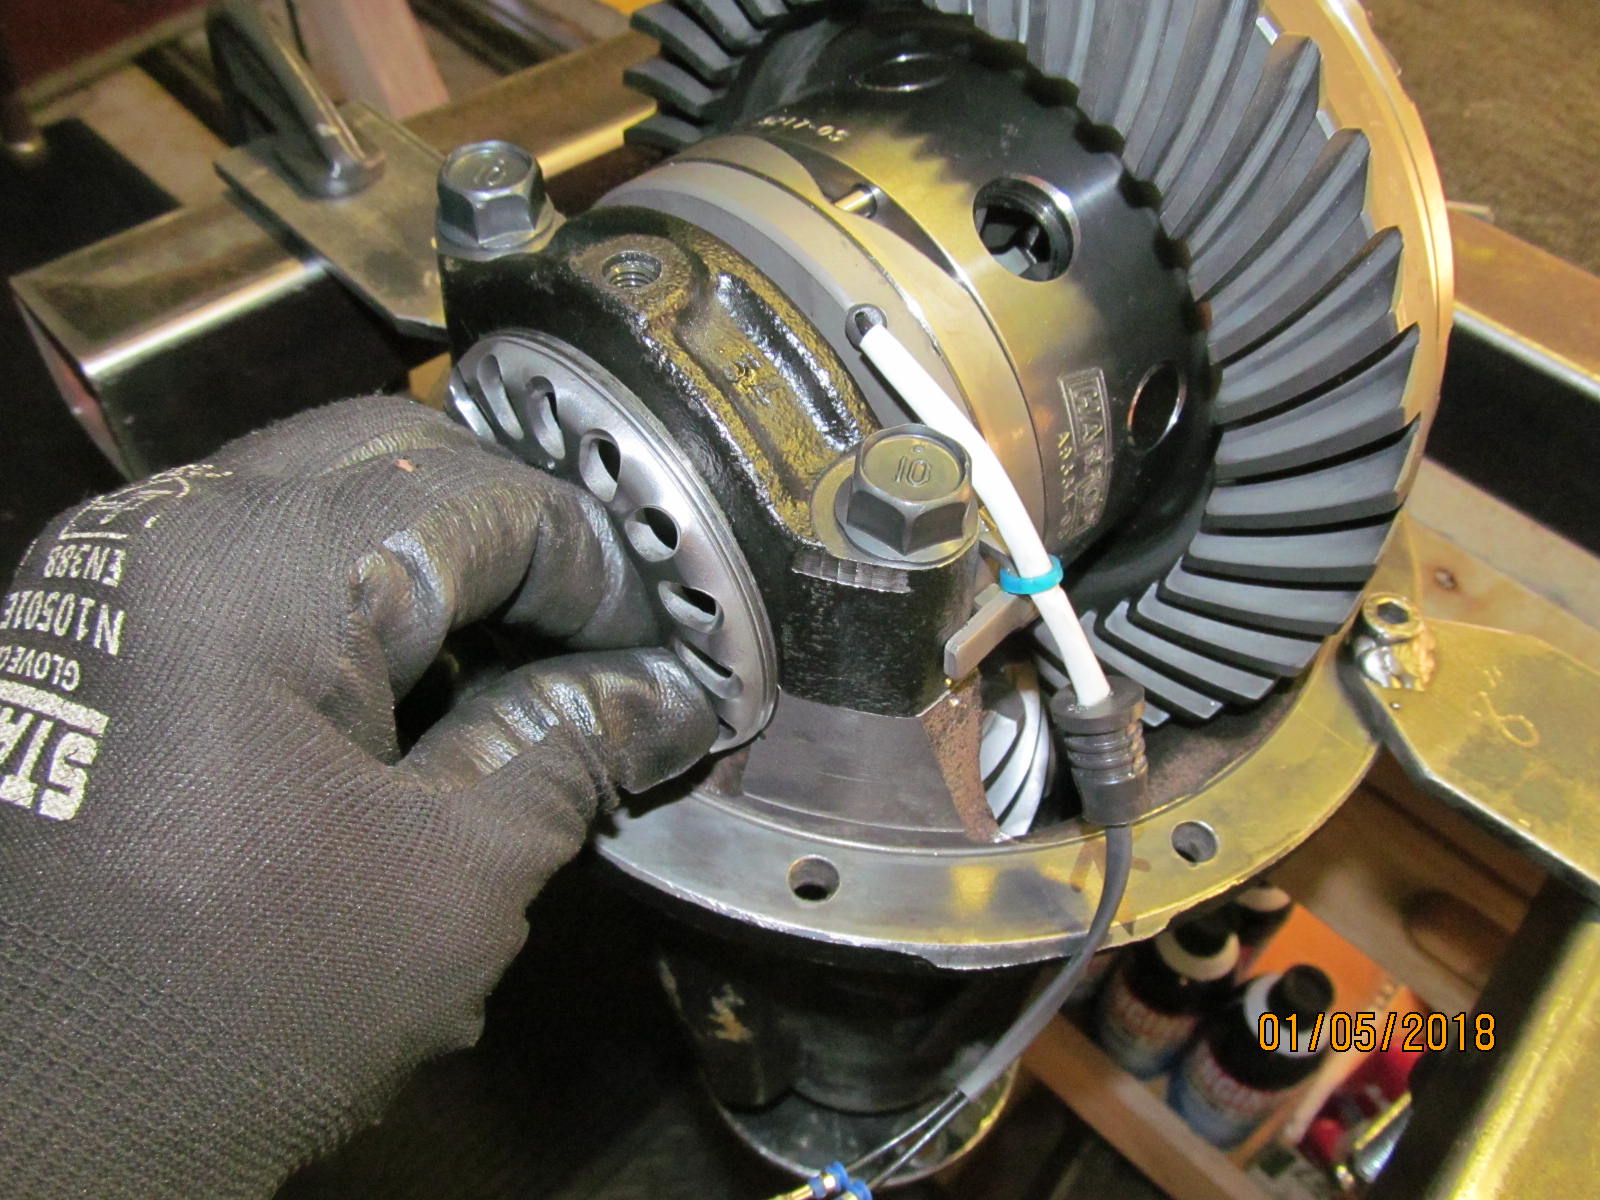
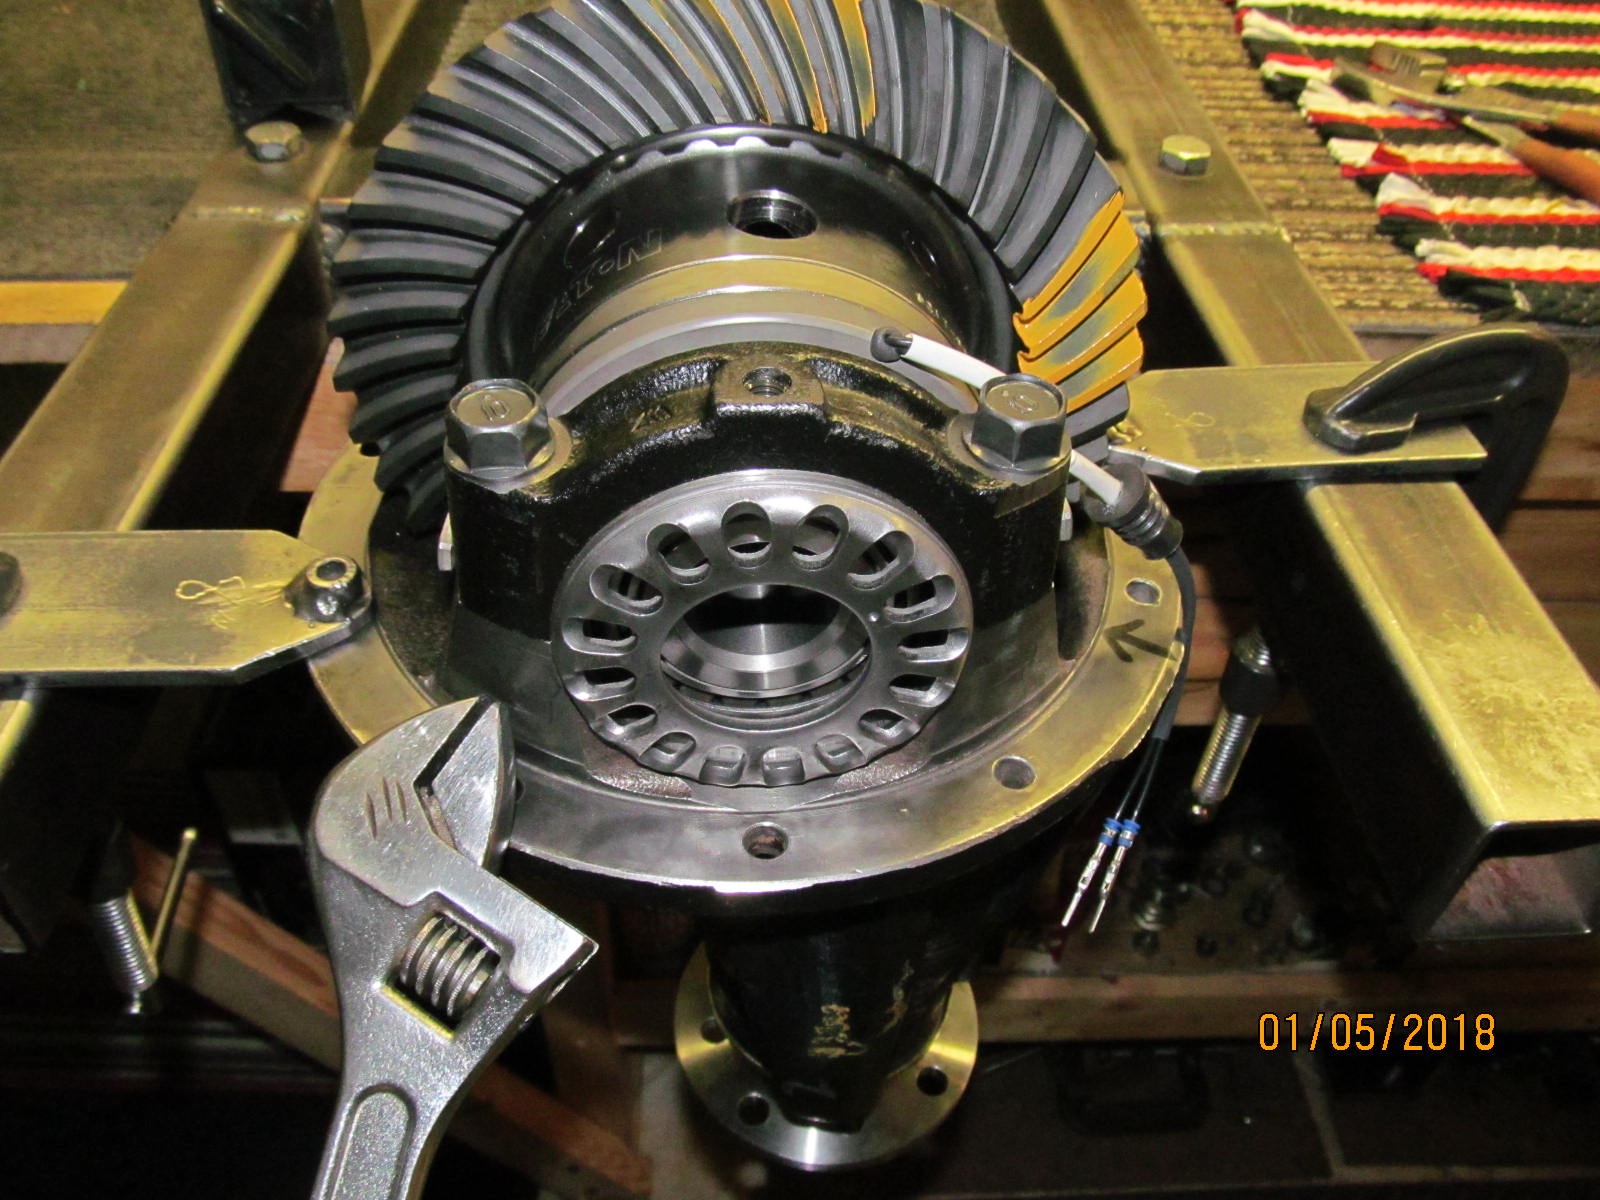
| The stop tab on the left was tweaked just a little more outwards and then the bearing cap was slid in sideway and the wheel was threaded in place. |
|---|
|
|
| And now, when I measure the play, I see 2.1mm. This is not a critical measurement. |
|---|
|
|
| The 4 bearing cap bolts are torqued to the 70 ft/lb spec. |
|---|
|

|
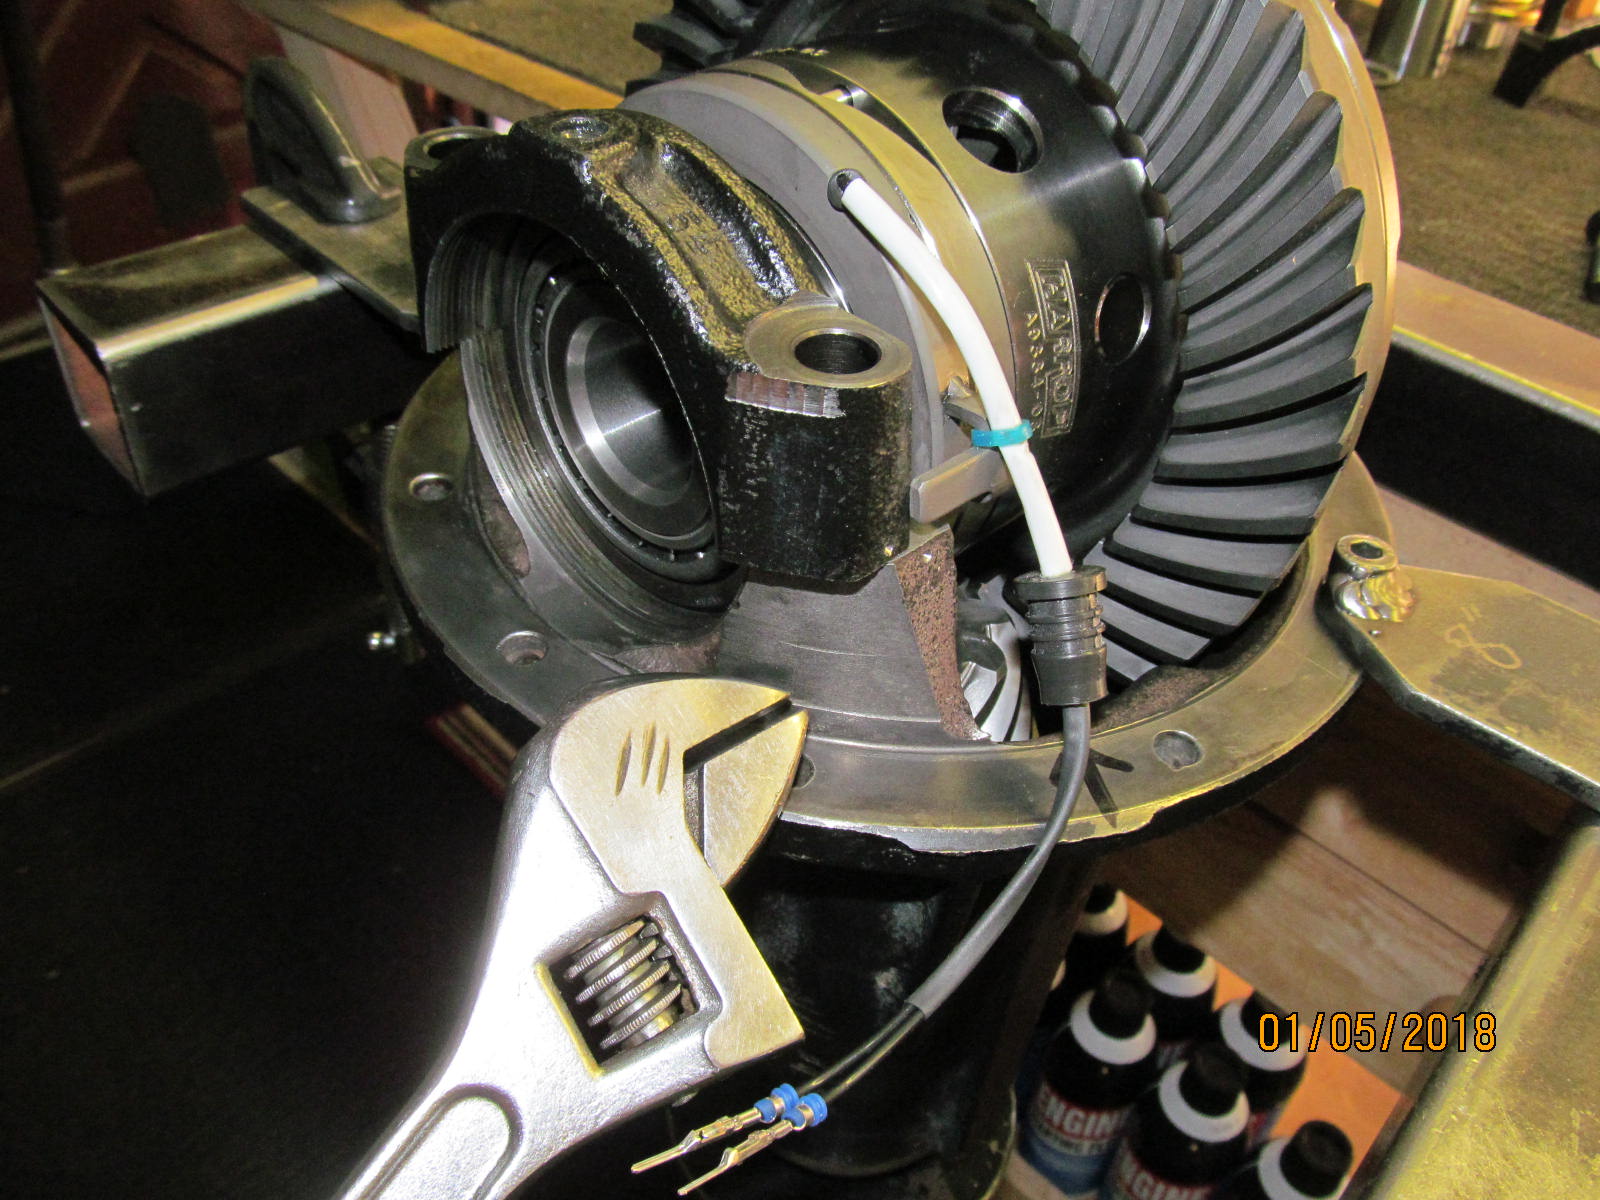
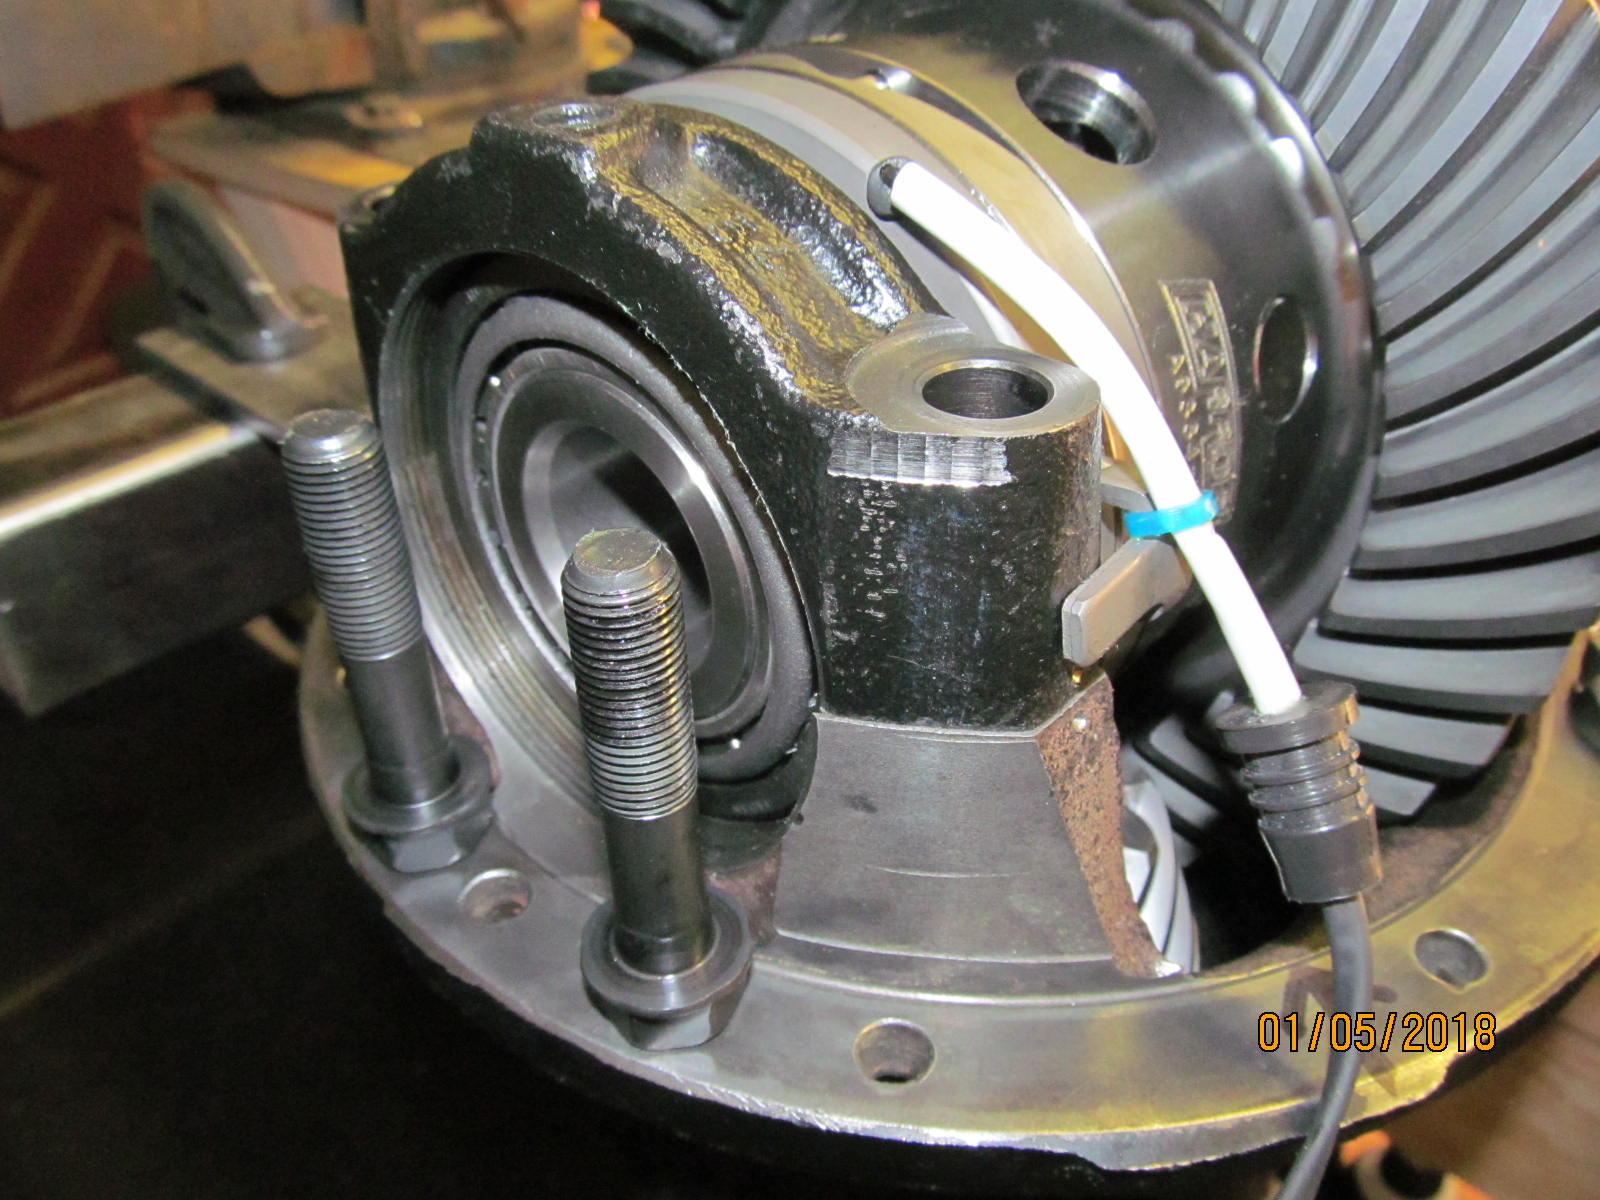
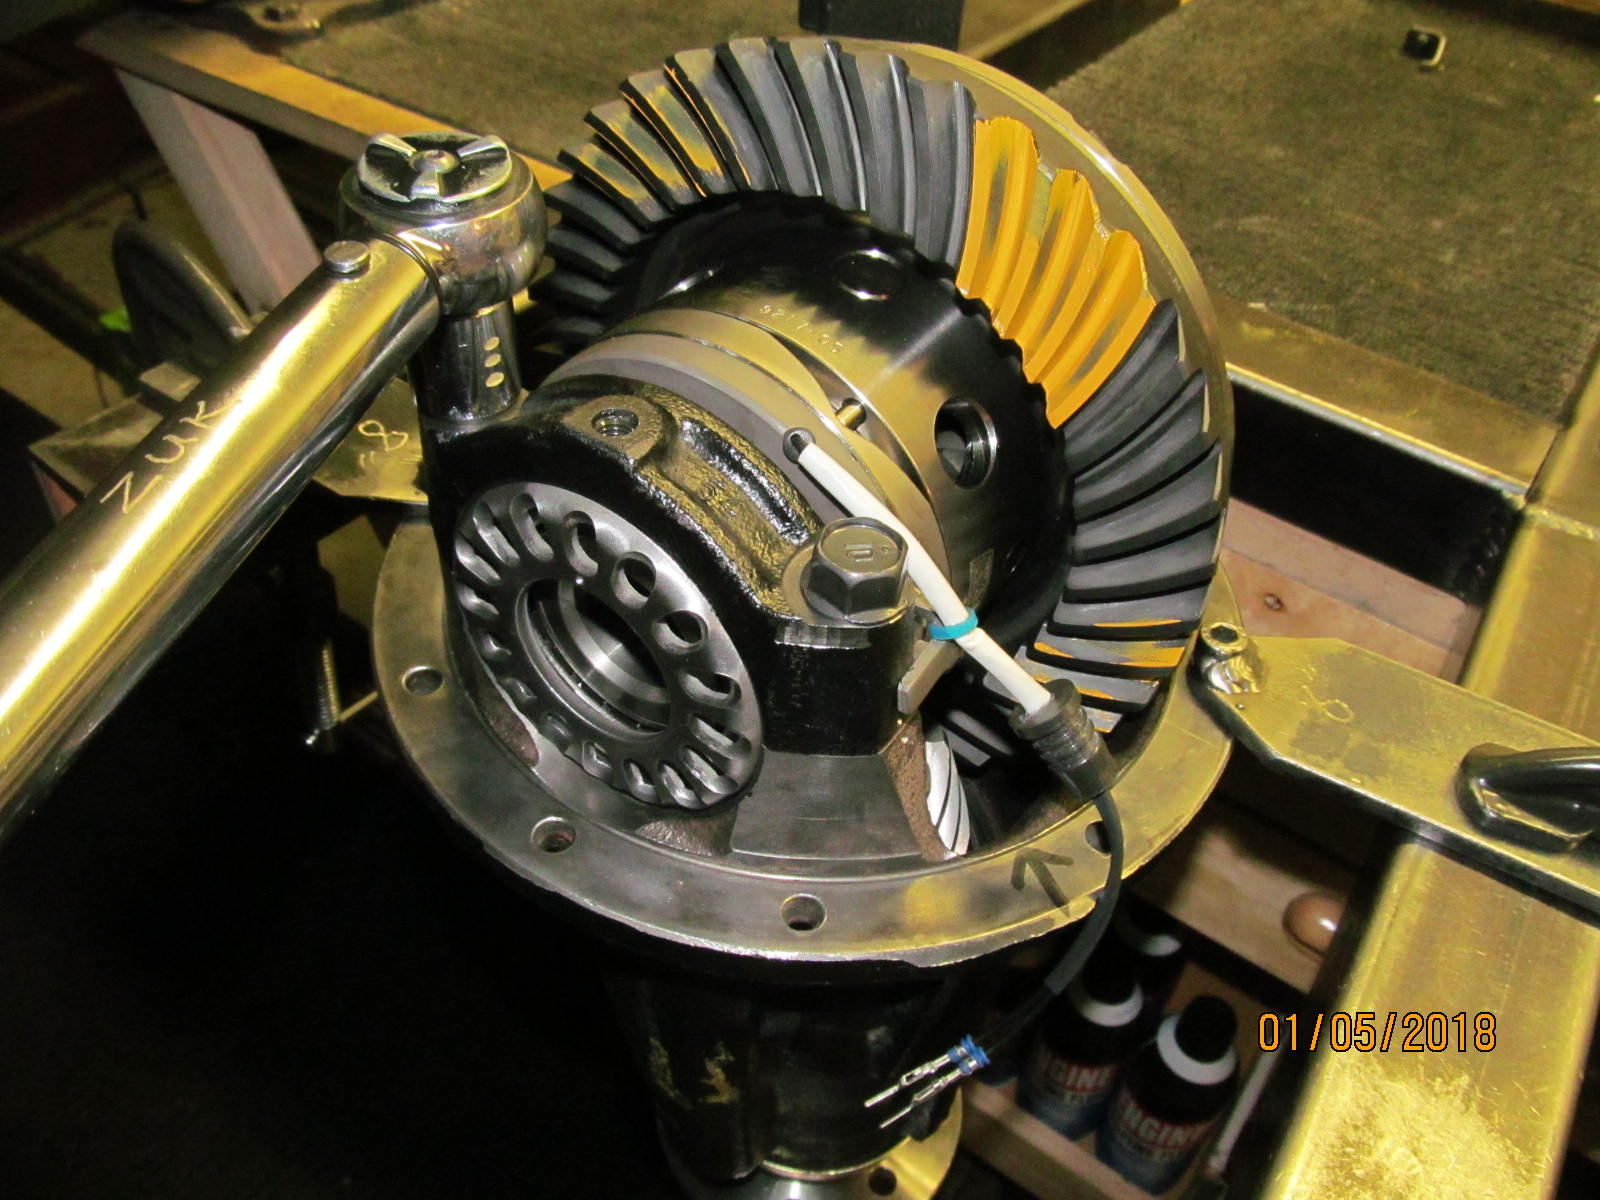
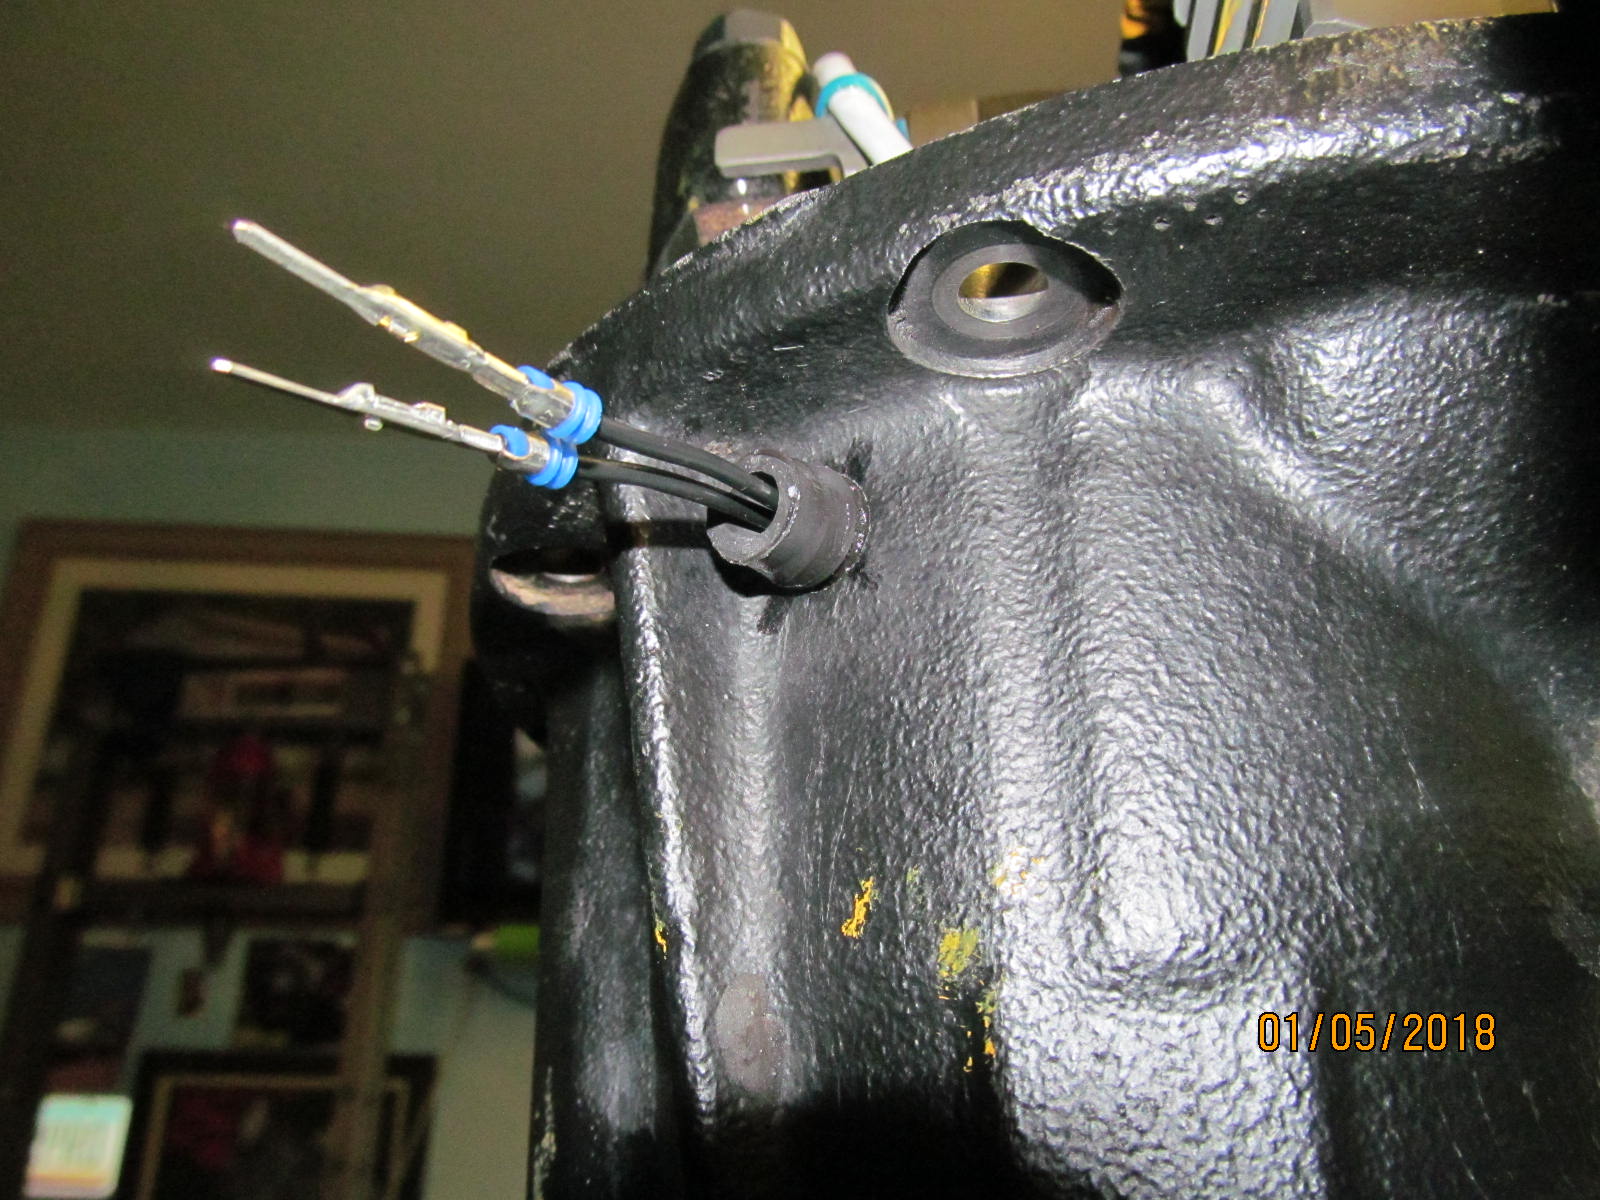
| Black rtv was applied to the rubber grommet and it was pushed through. |
|---|
|
|
| Looks good. 1 inch of black wire showing. |
|---|
|
|
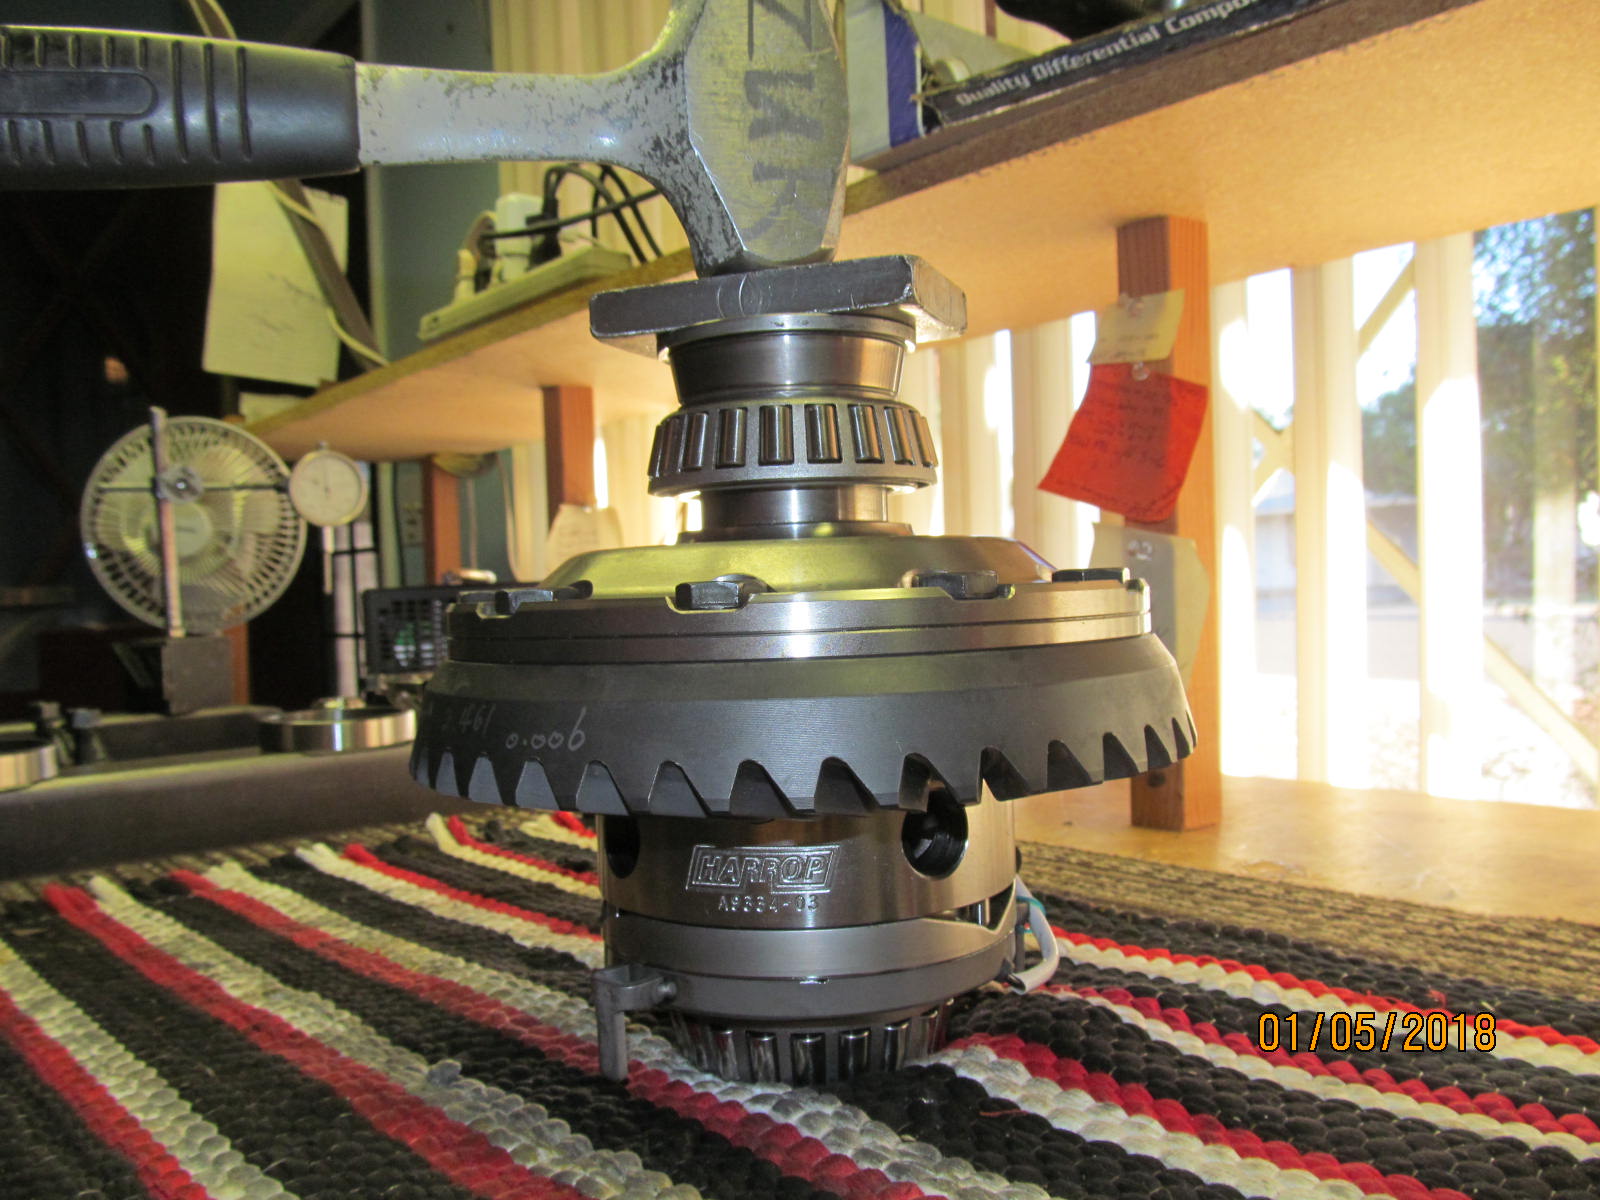
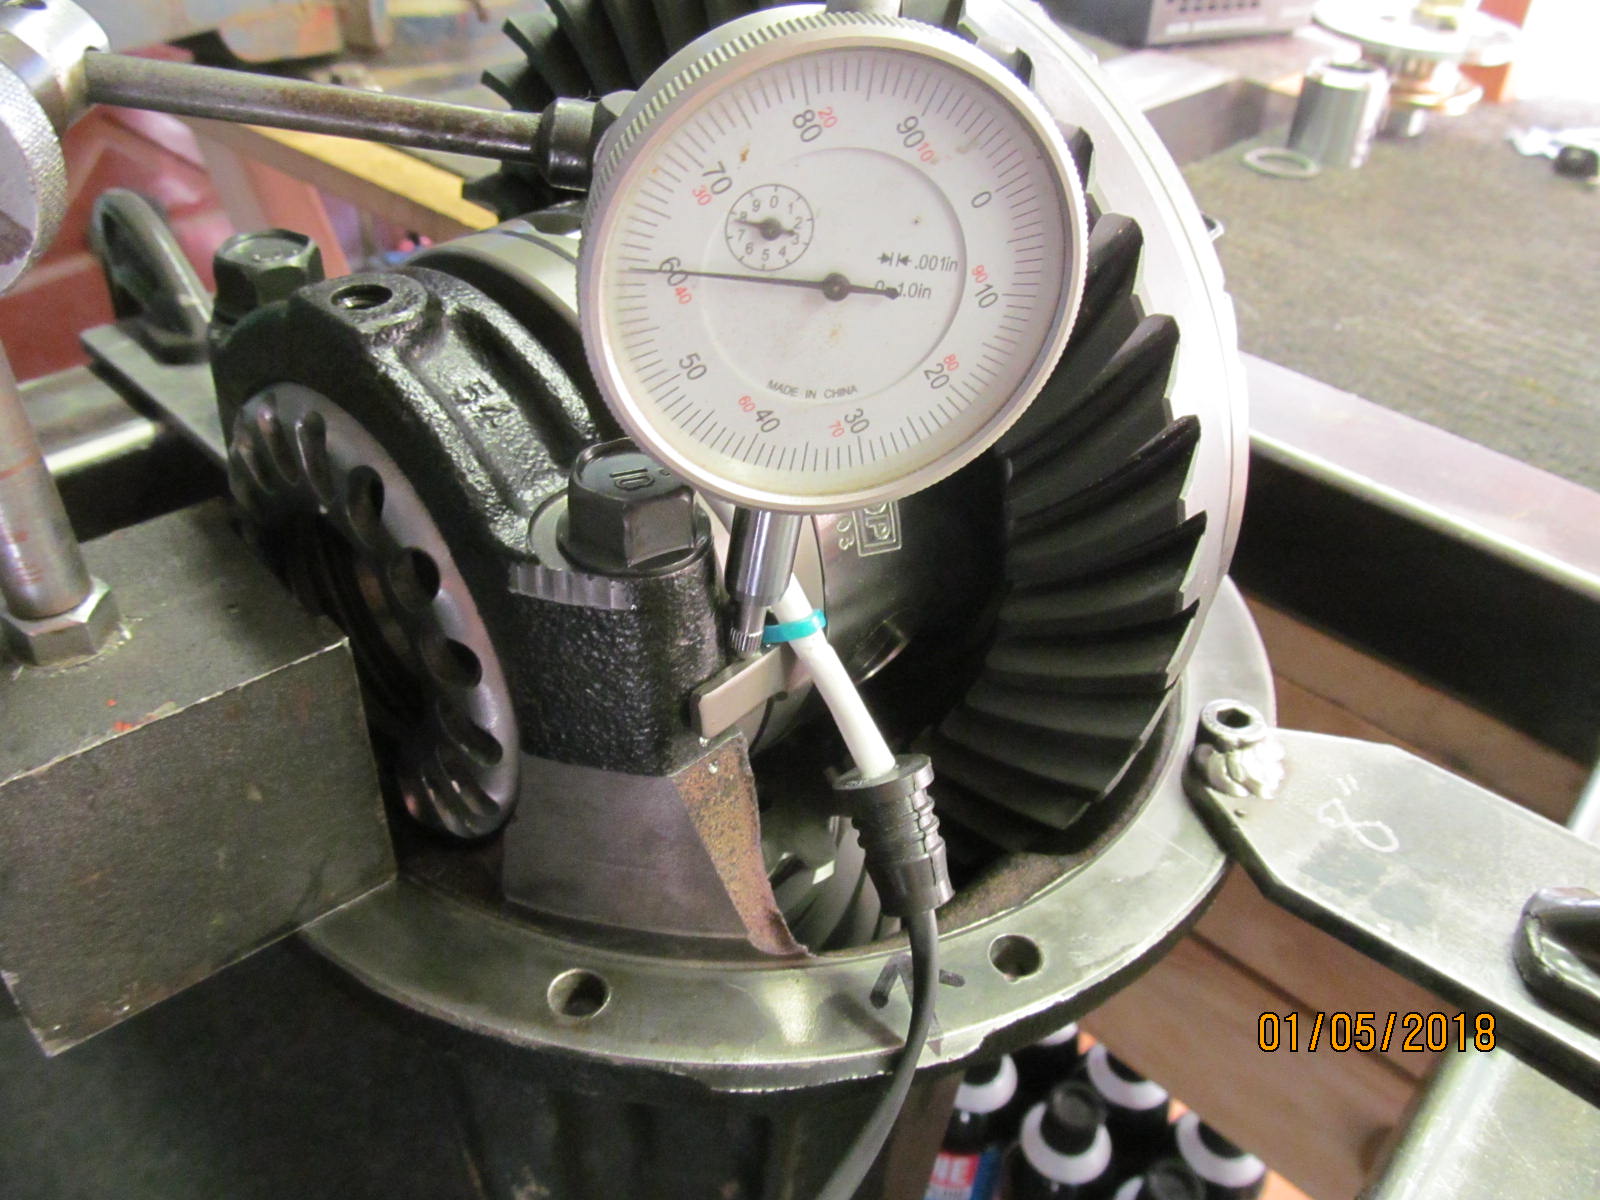
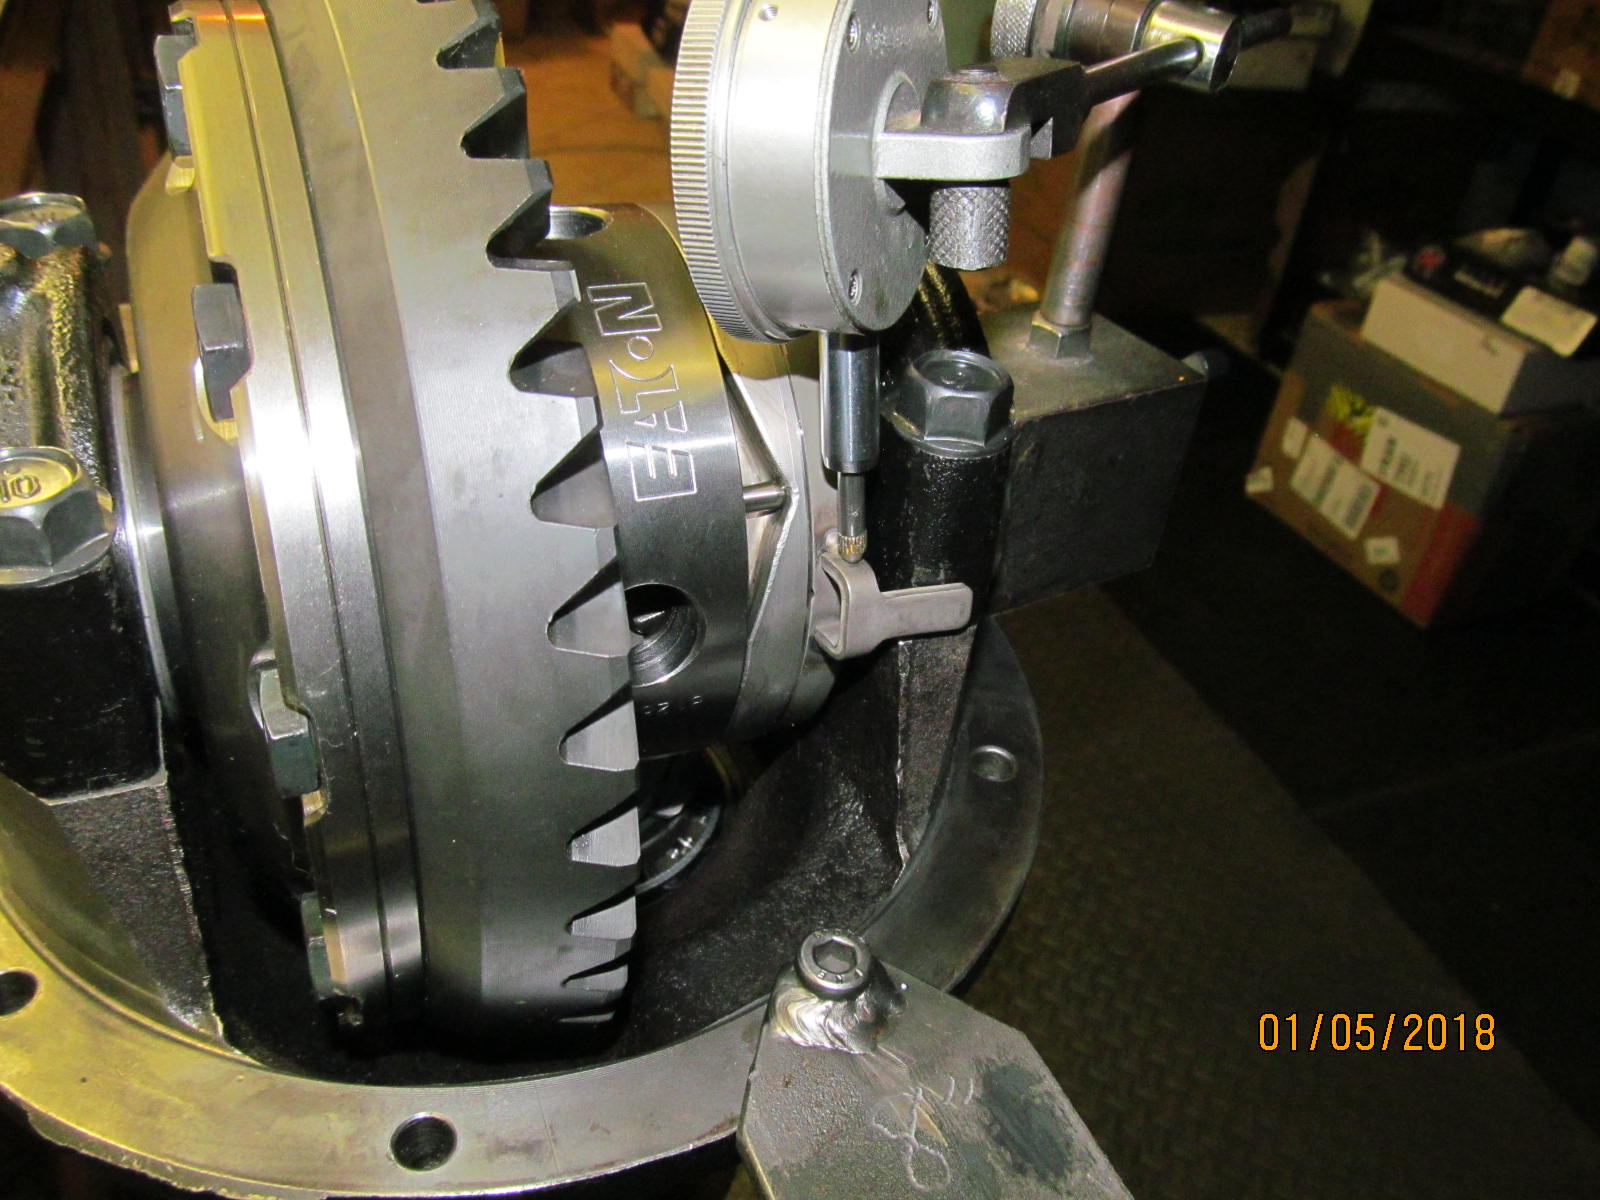
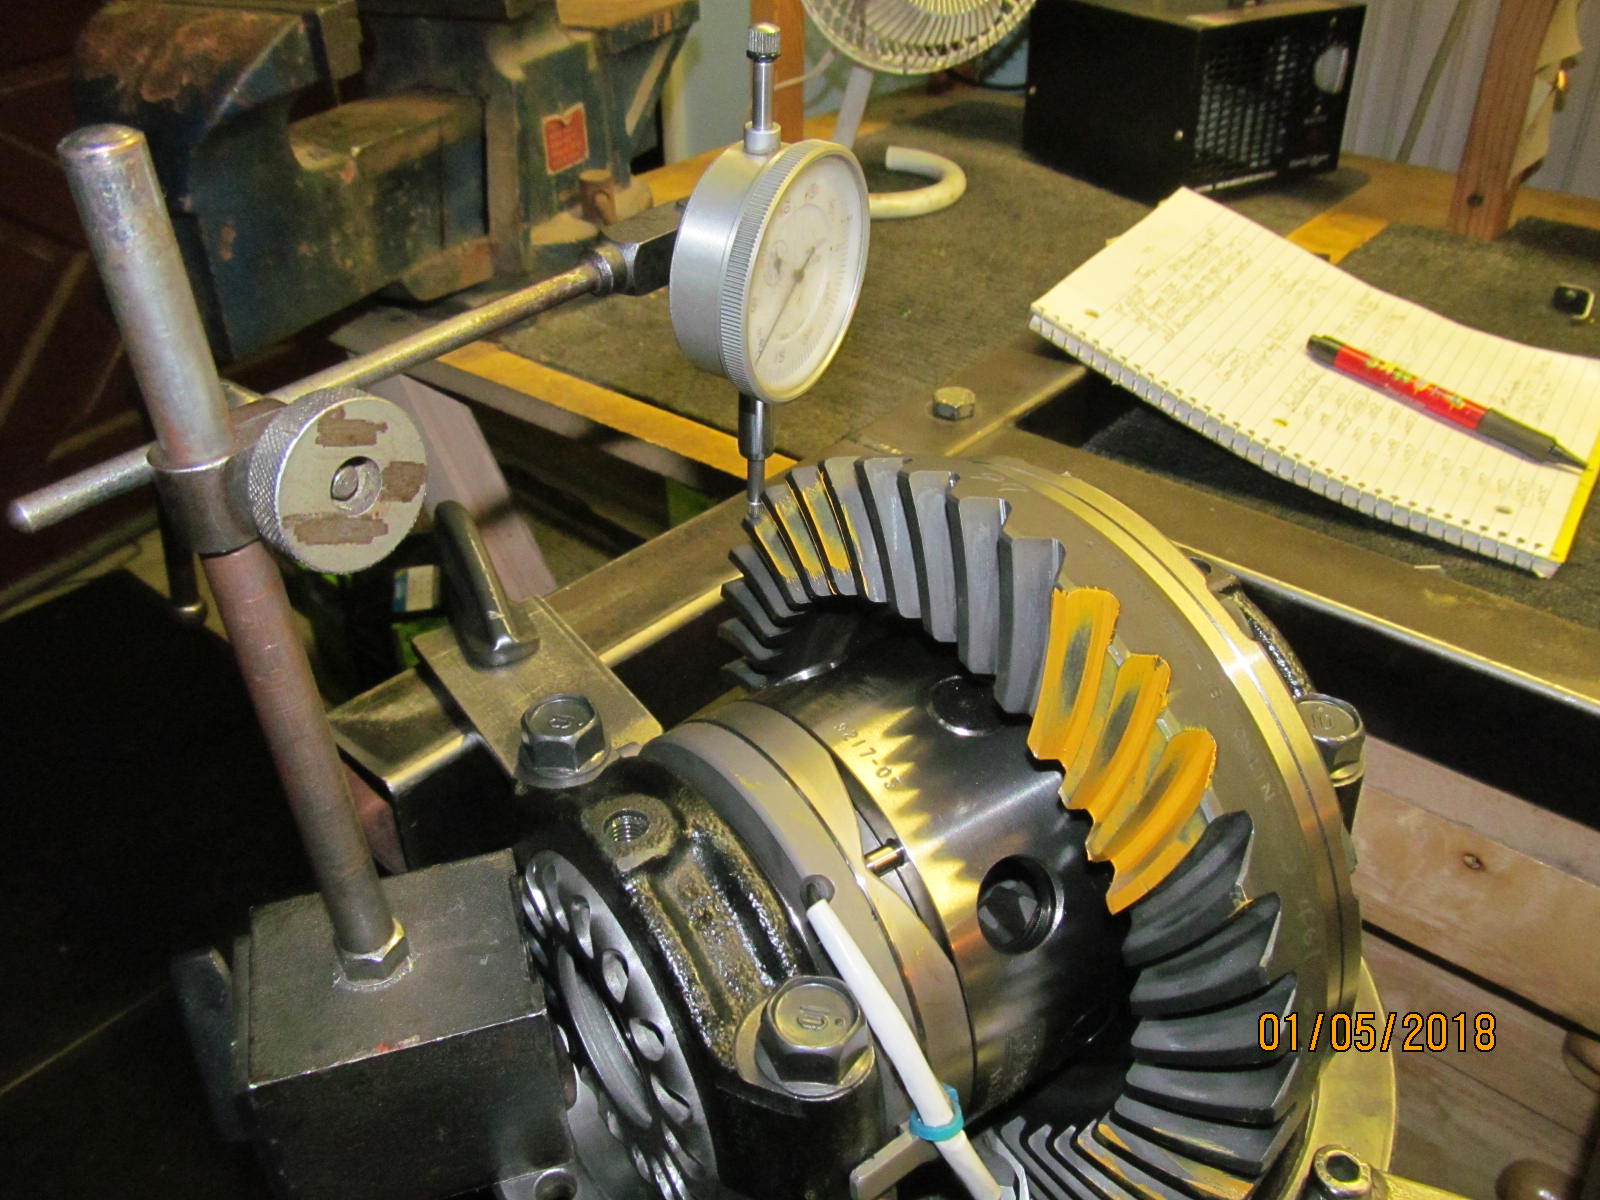
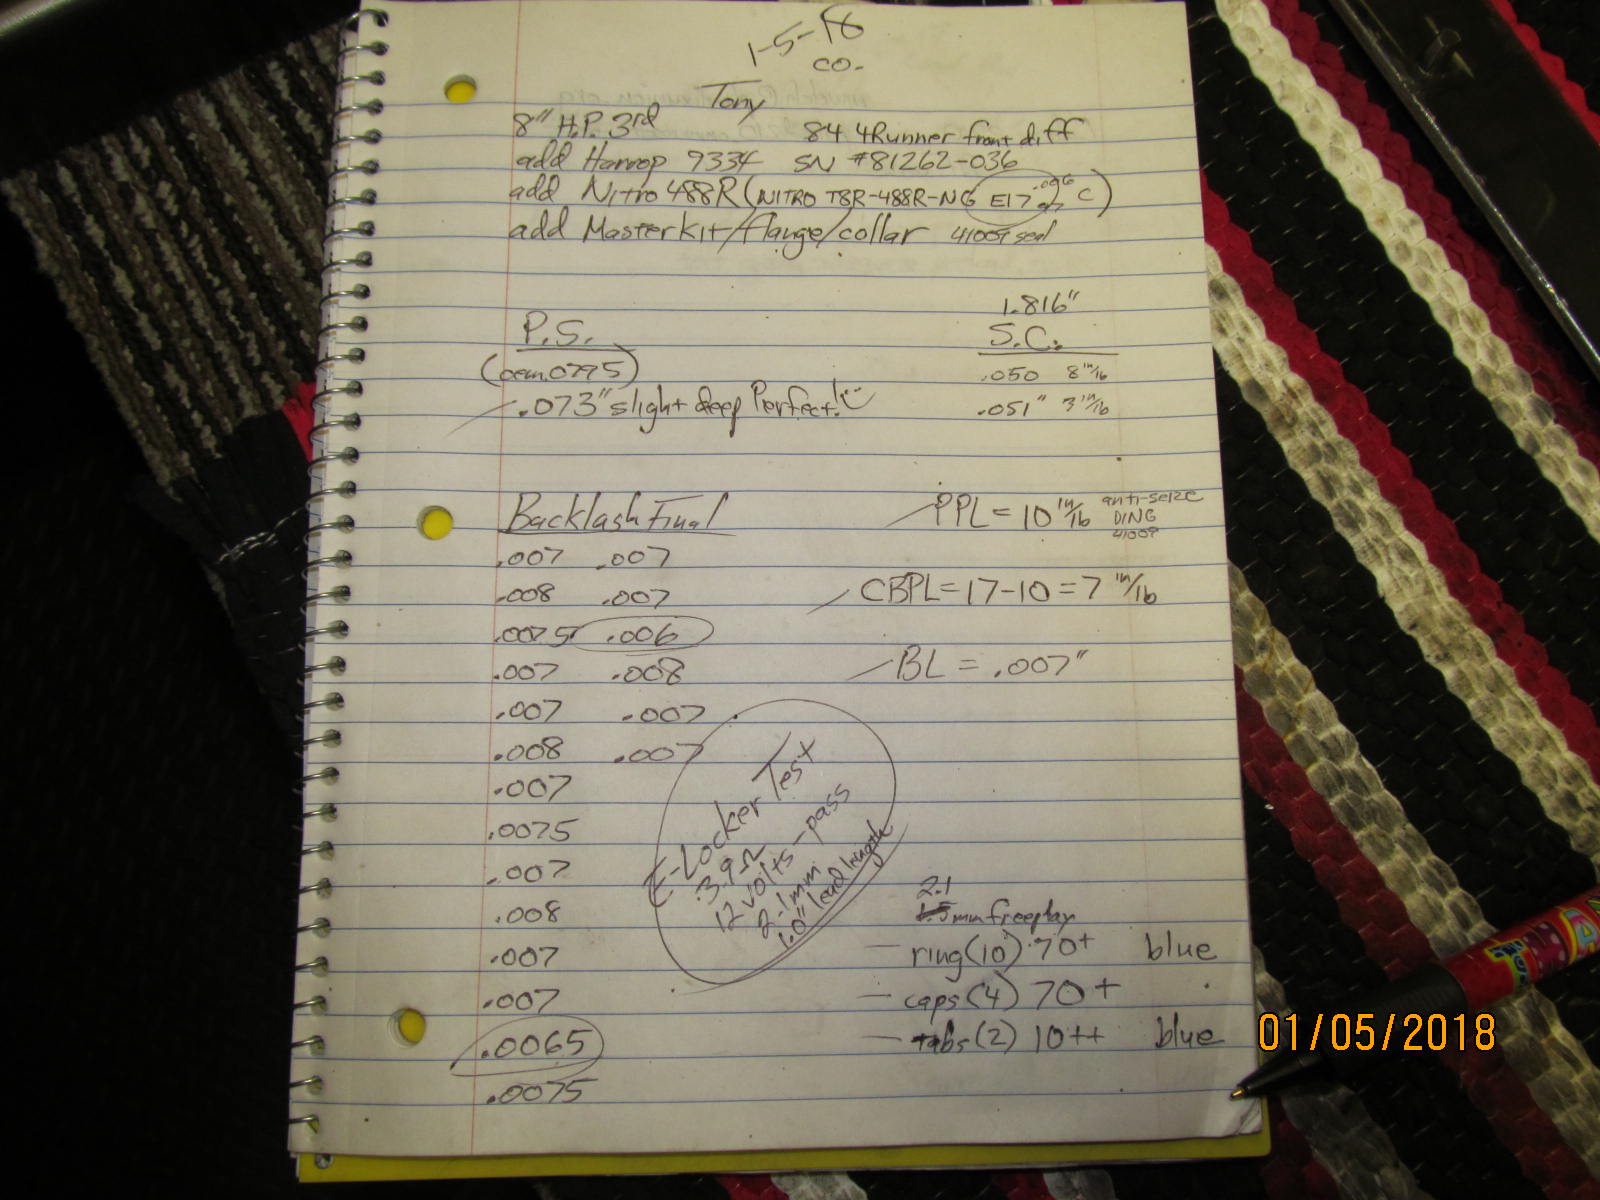
Adjuster wheel are cranked tight and the backlash was recorded on every other tooth. The average low value was a good .007".
The carrier bearing preload checked in at a solid 7 inch/pounds. |
|---|
|
|
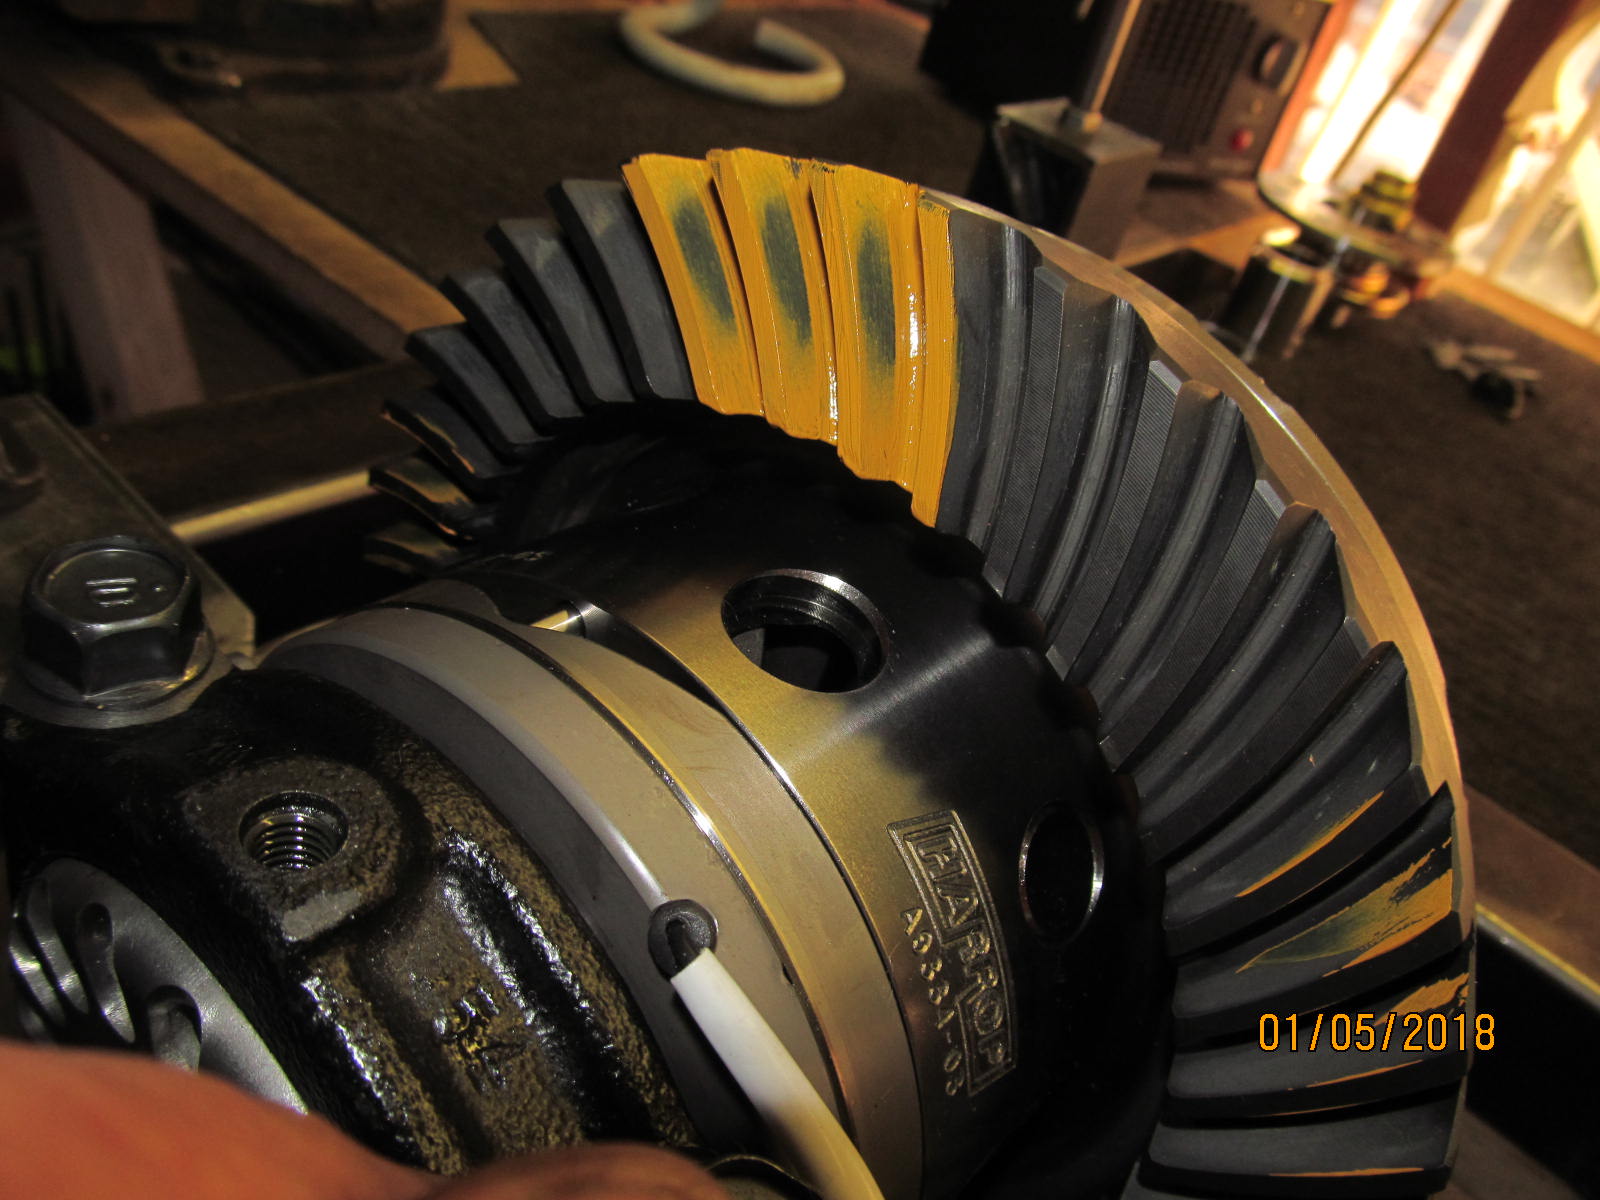
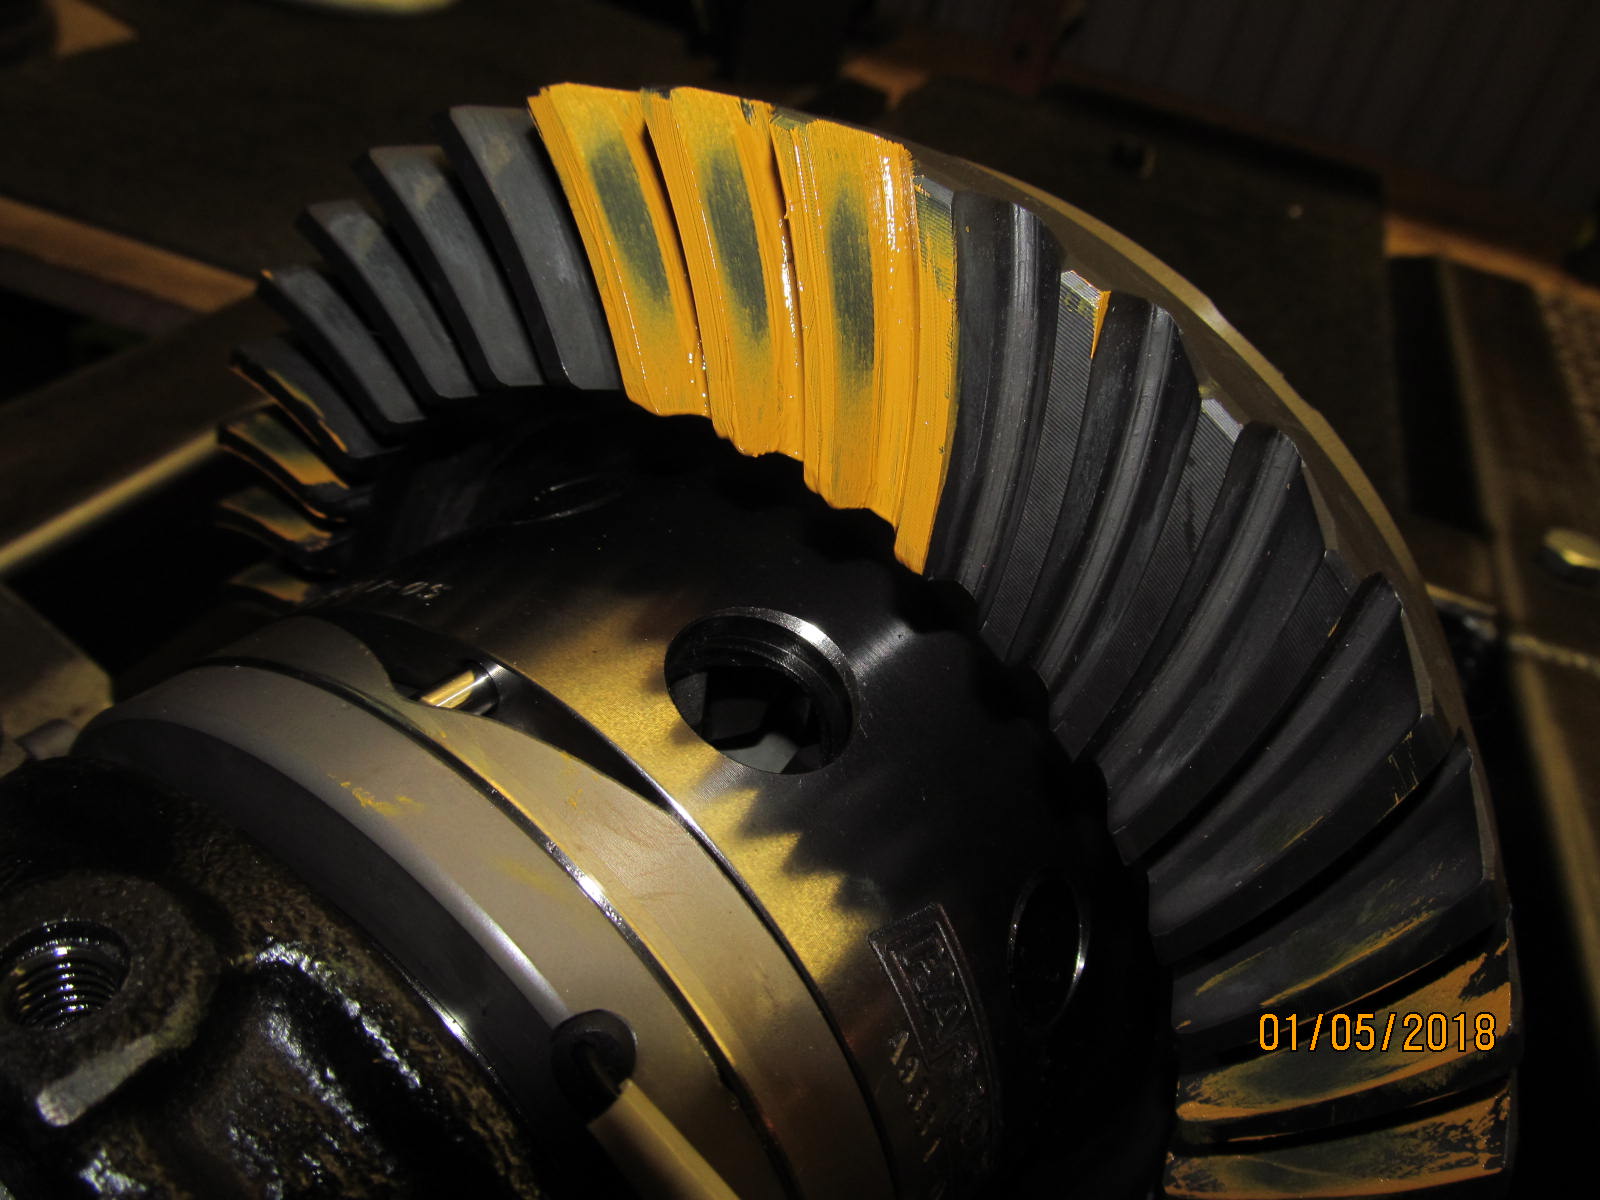
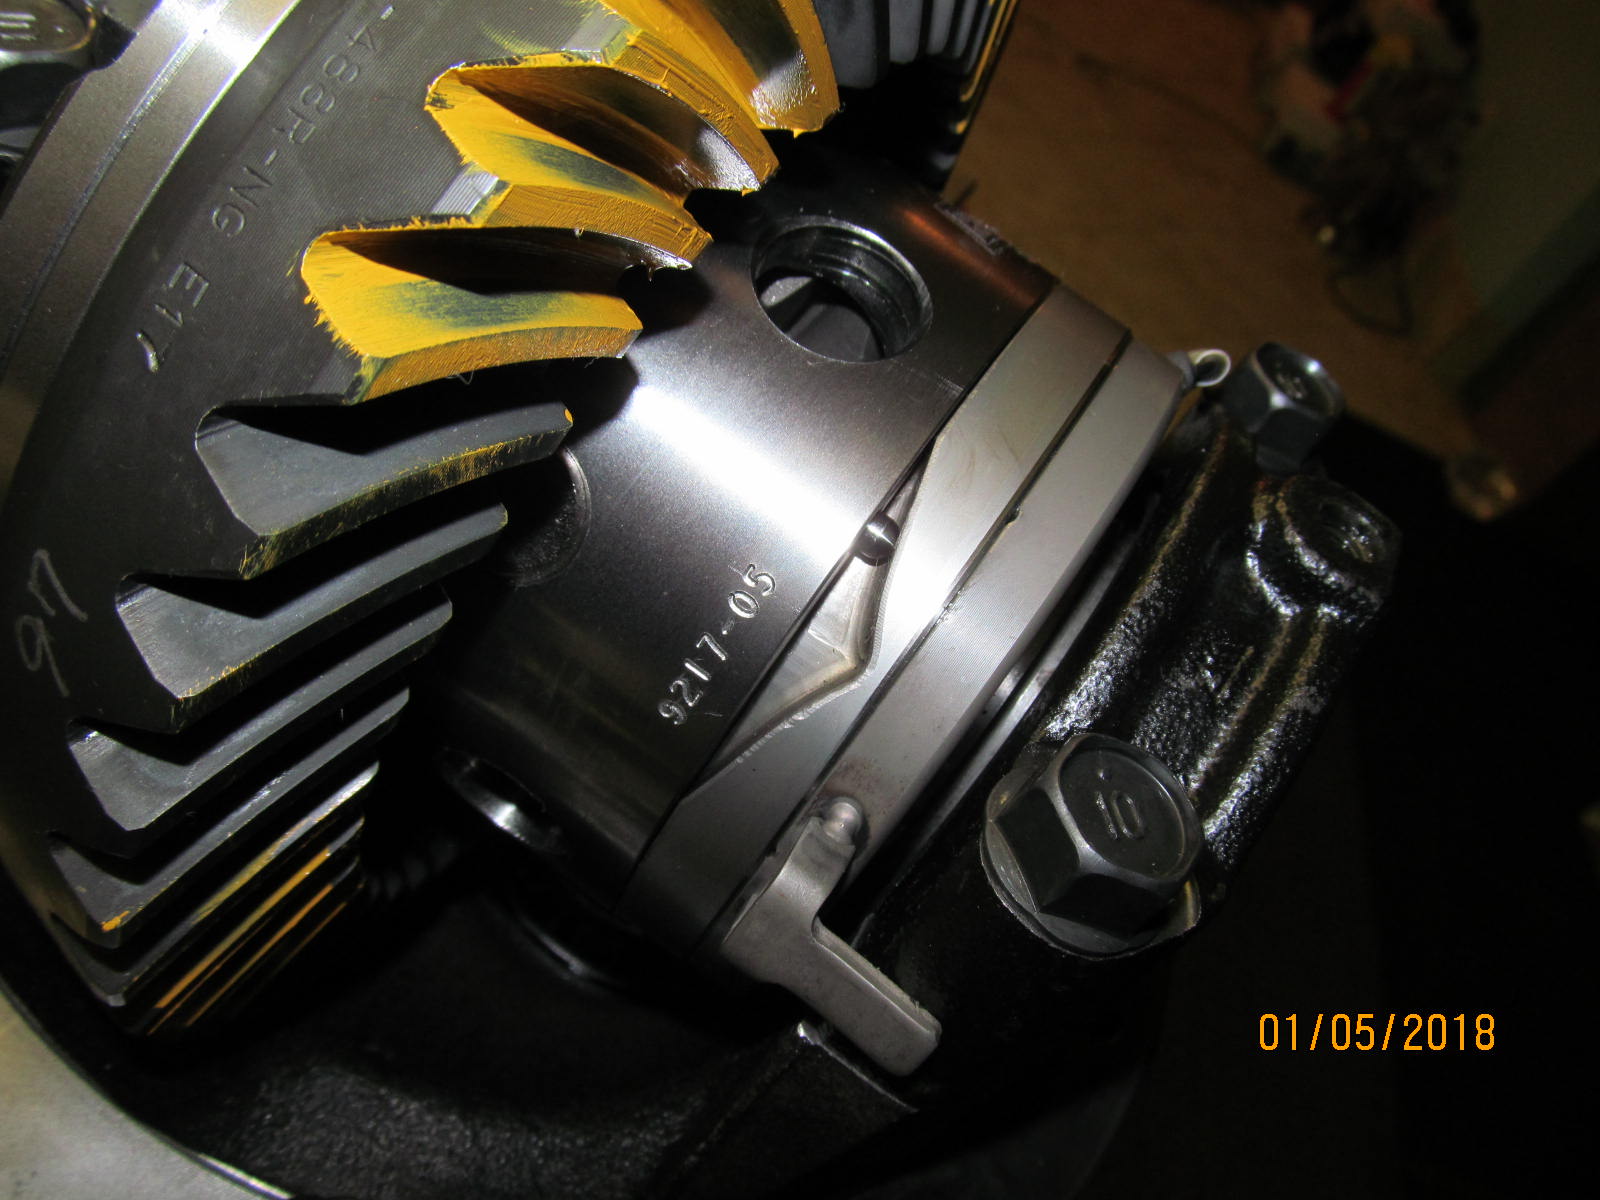
One last final paint and the drive side looks slight deep. It is favoring the coast a little
but very little can be done to move that. |
|---|
|
|
| Coast looks super....and is in the center to boot. |
|---|
|
|
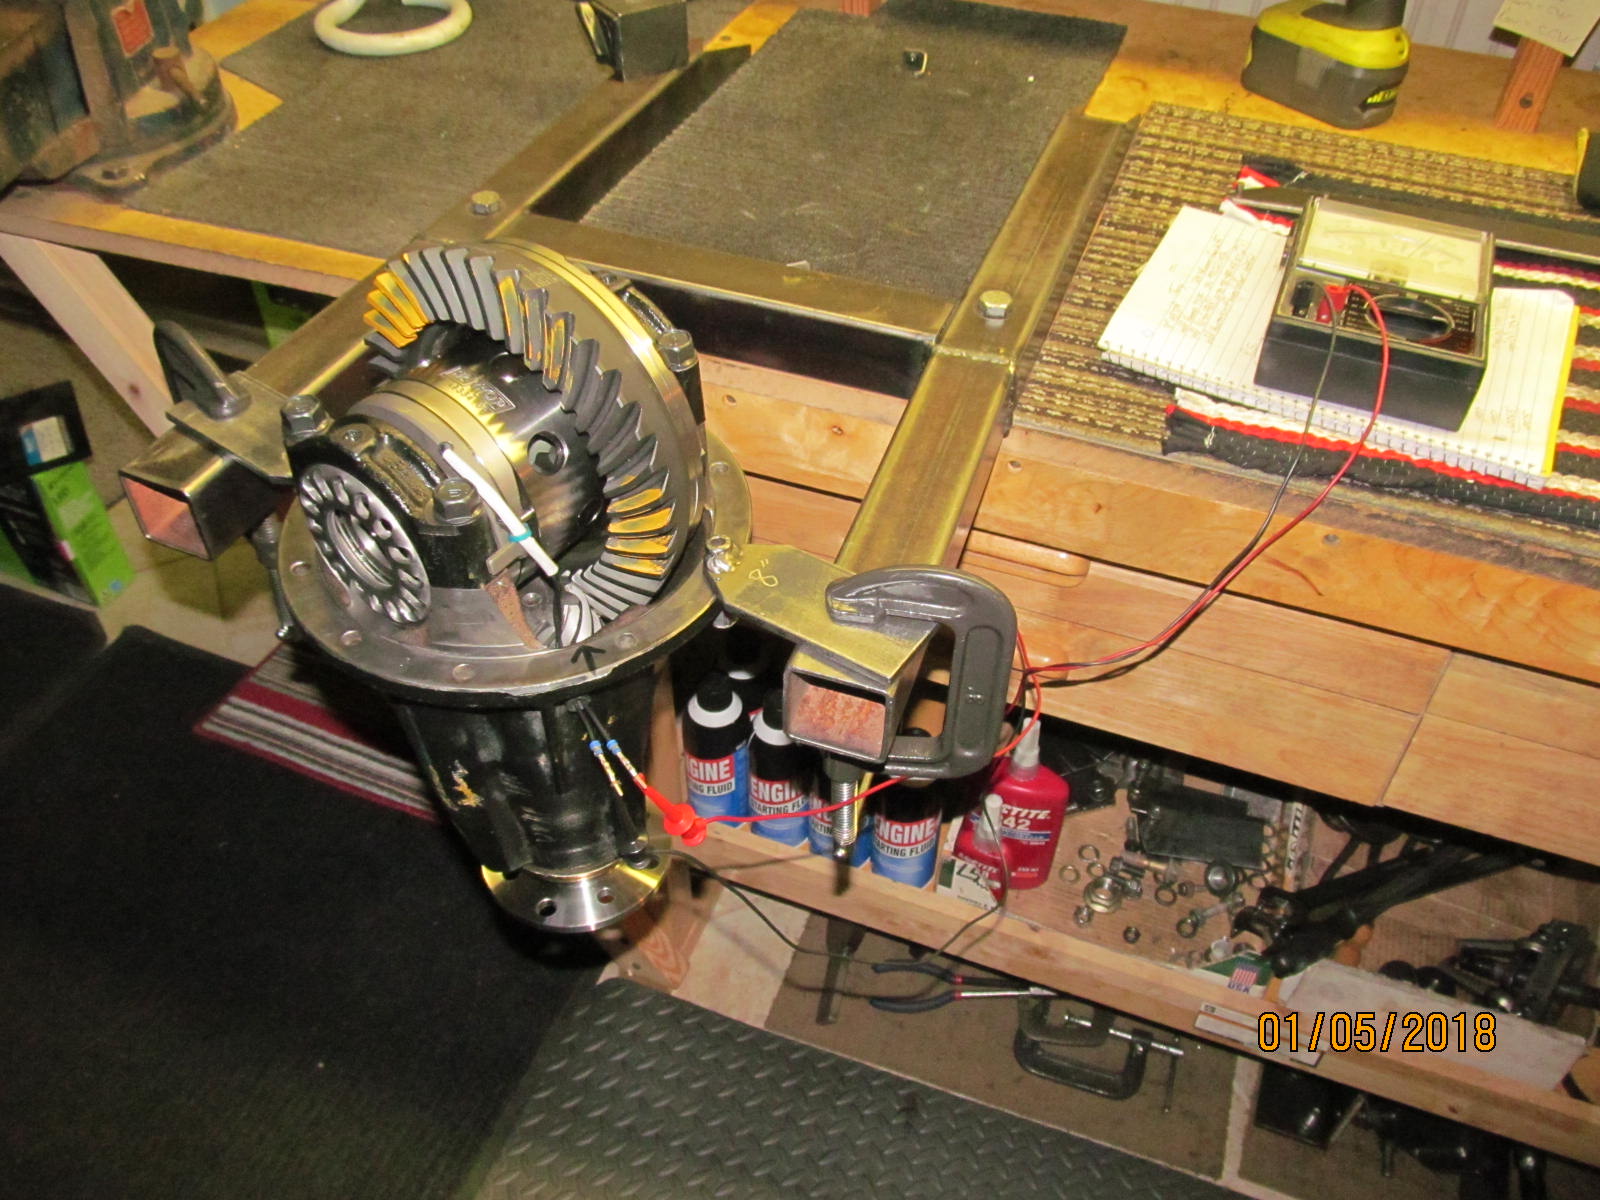
These basic elocker tests are probably not done my most. Doing a resistance check and a visual check is so easy so why not?
Here, an ancient Micronta analog meter is used to measure the "ohms".
3.9 ohms |
|---|
|
|
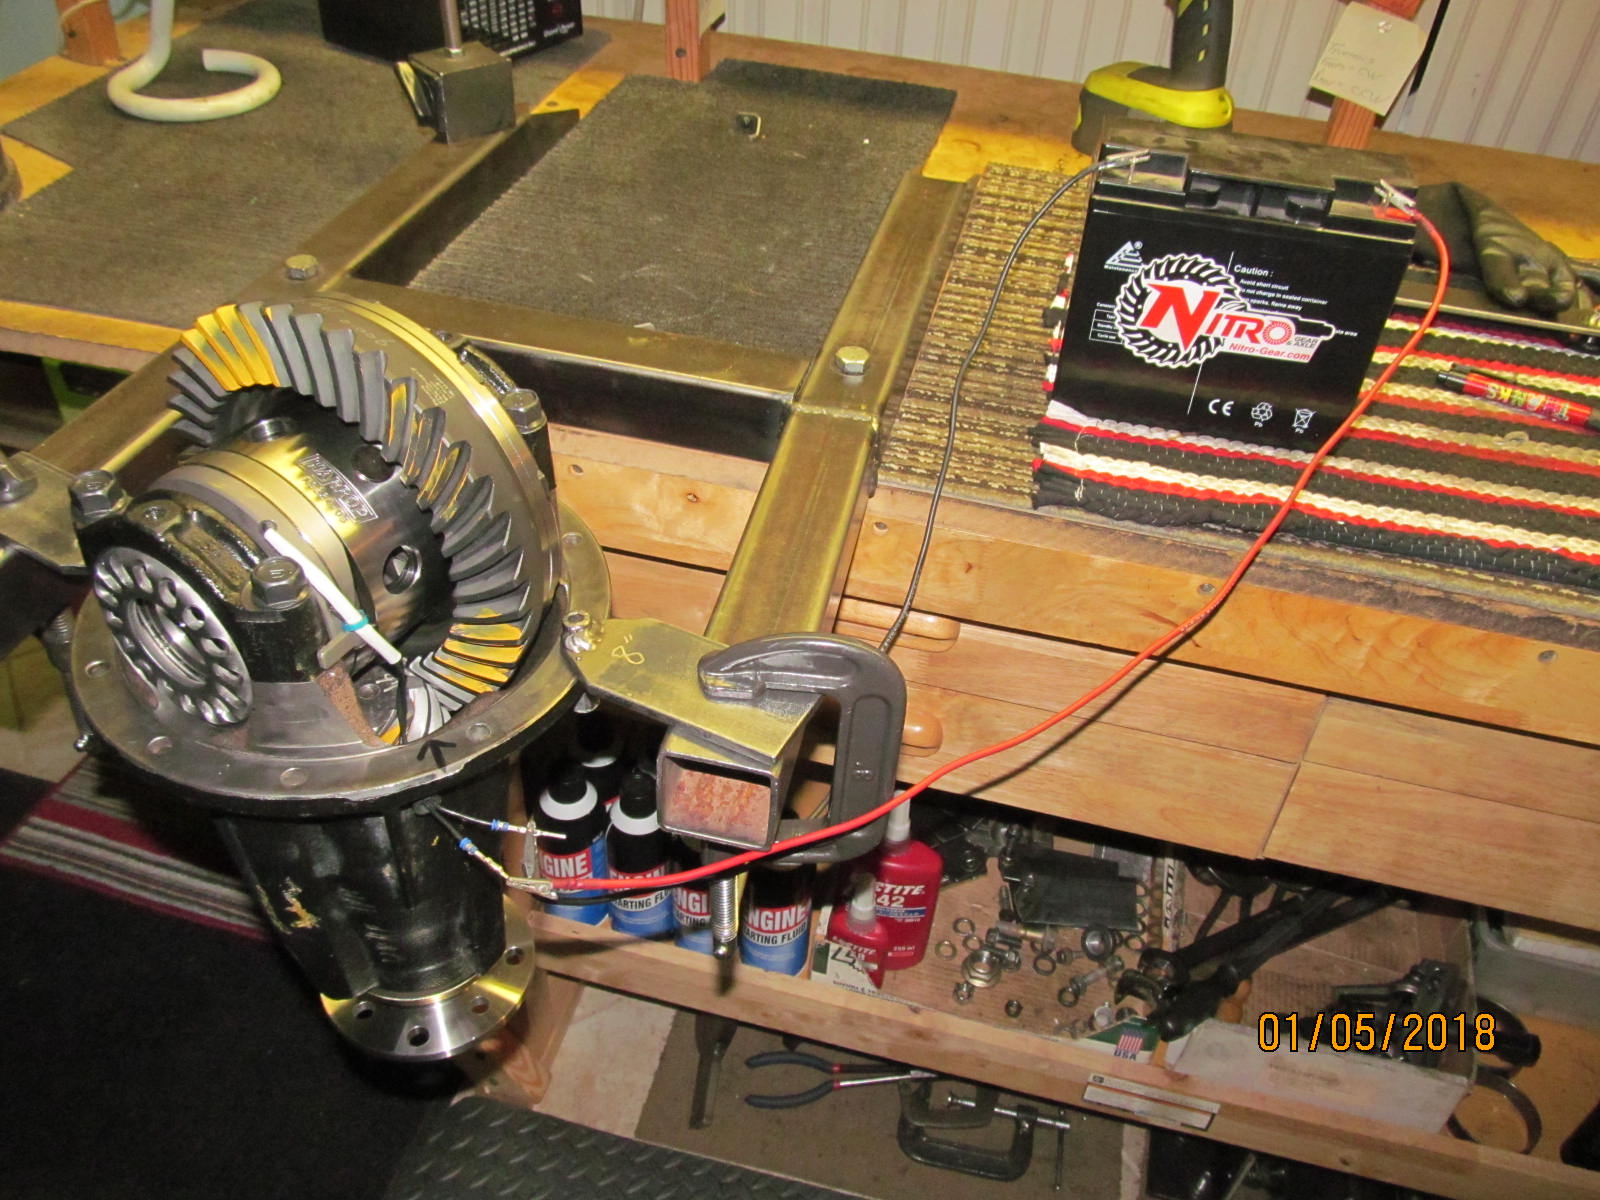
| Here, a worn out 12 volt SLA battery powers up the elocker with barely 3 amps. |
|---|
|
|
The grey electro-magnet ring on the right "attracts" the ramp ring to the left of it and holds it firmly in place
while the ring gear side of the Harrop rotates and causes the 3 pins to pushed in. |
|---|
|
|
| Satisfied with everything, now the 2 lock tabs can be torqued to 10+ ft/lb with blue loctite. |
|---|
|

|
| Recorded on the ring gear. |
|---|
|
|
| Notes taken. |
|---|
|
|
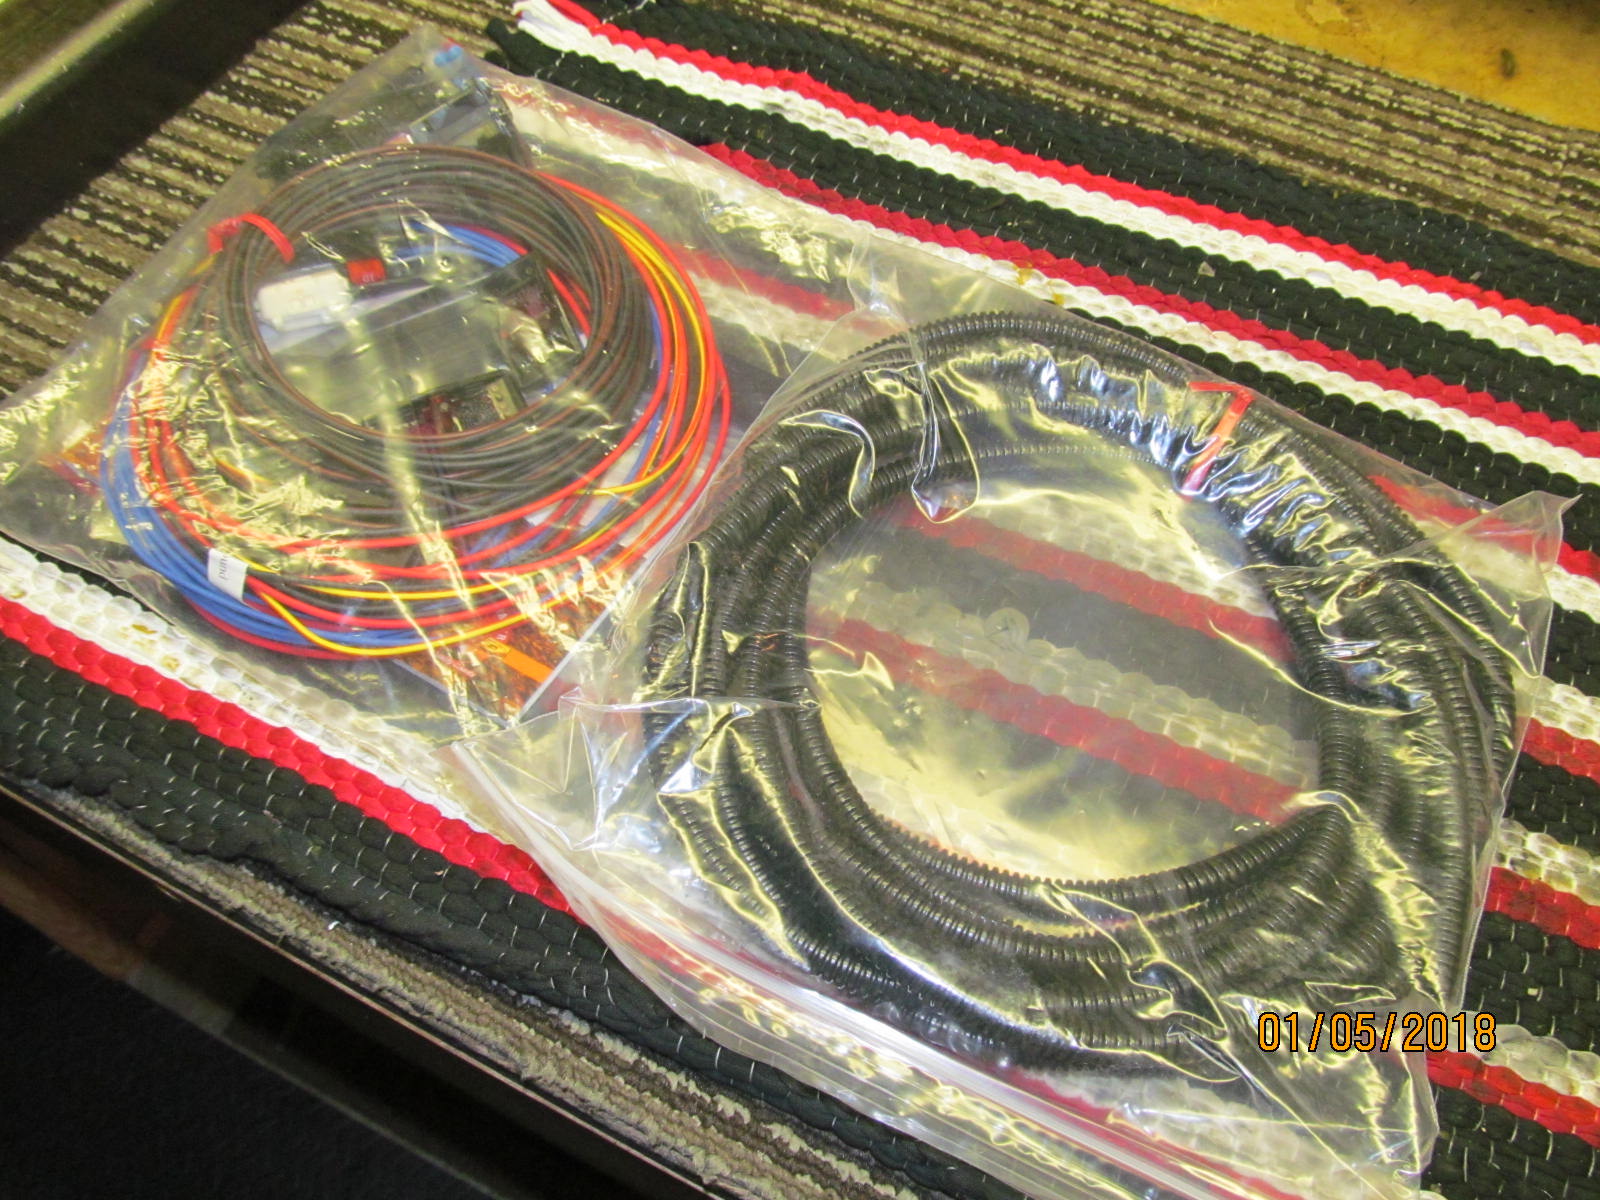
| A shot of the Harrop harness they supply. |
|---|
|
|
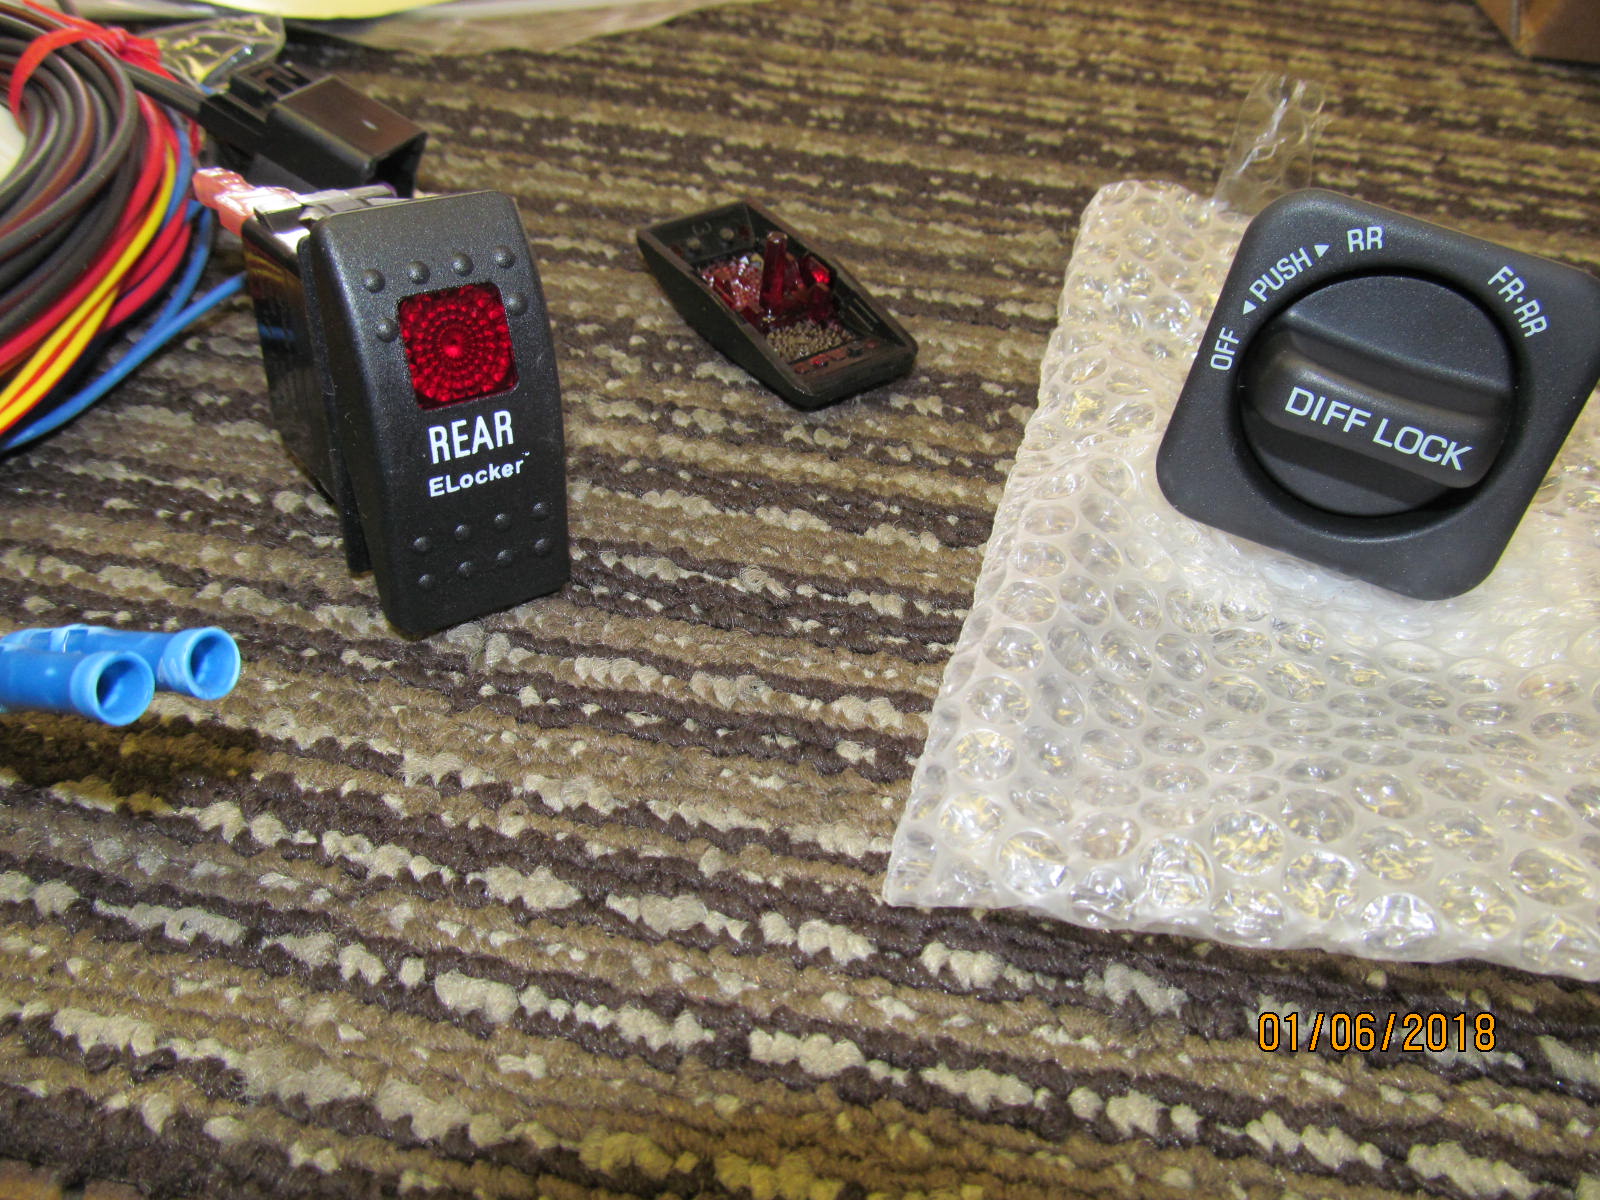
The nice looking REAR ELocker switch supplied on the left and the optional factory oem switch on the right.
Nothing wrong with the Harrop switch for sure. |
|---|
|
|

|