|
|
|
|
|
|
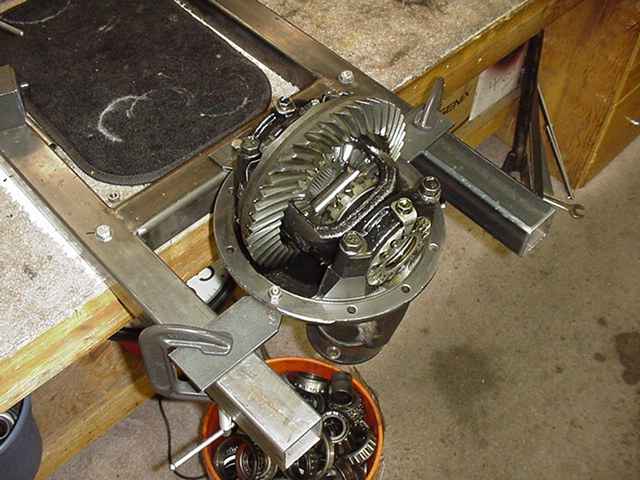
The front 3rd is secured to the fixture. |
|
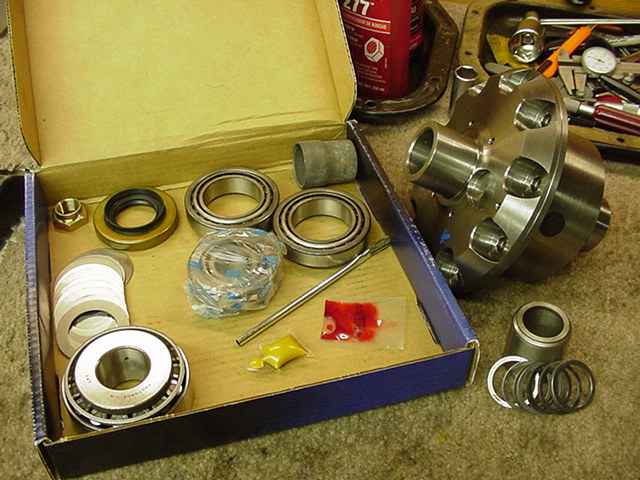
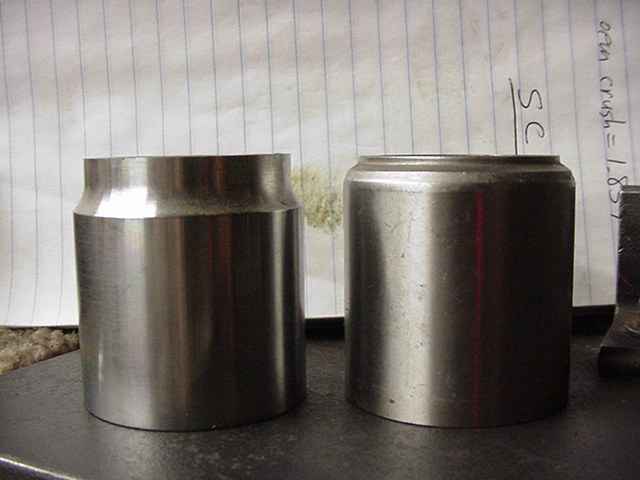
Master install kit with the solid collar on the right side. |
|
... |
|
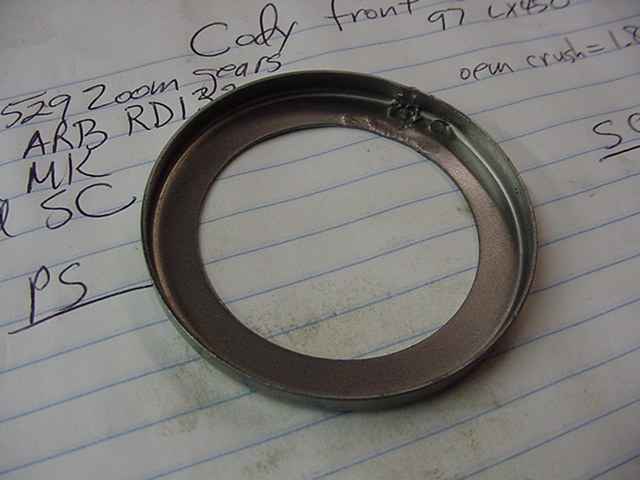
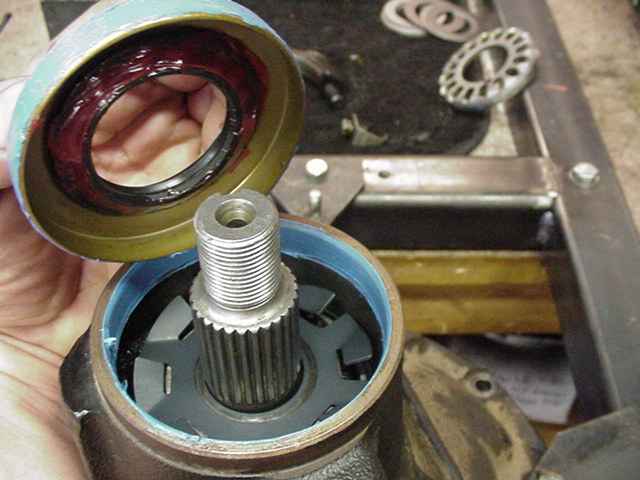
I tore down the 3rd and removed the races from inside the 3rd. Some damage is always done to the oil retainer which is located behind the outer pinion race. |
|
Using a flat chisel, I was able to tap most of the damage out. Basically, it's as good as new. |
|
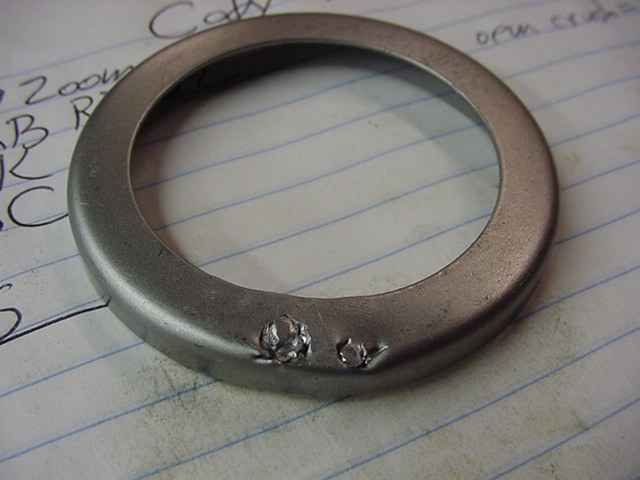
When it comes time to press the races in, this "rough area" can be located on the topside(12 o'clock position) such that the oil will puddle up on the lower side (the un-effected half of the retainer). |
|
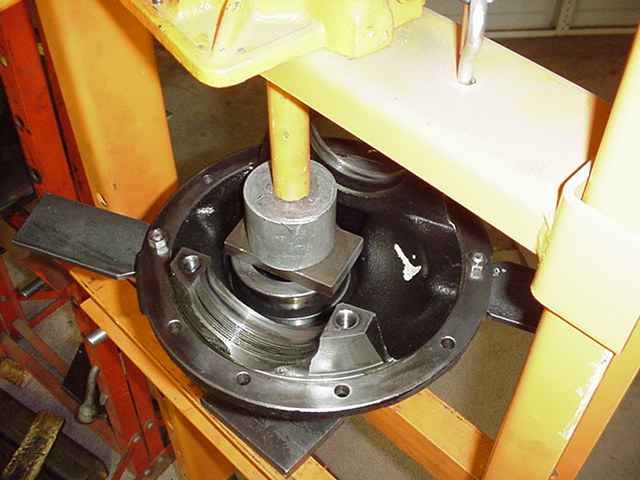
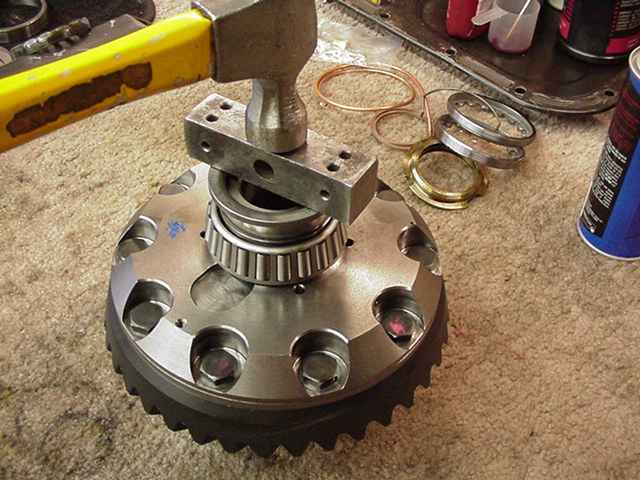
Races are pressed in....don't forget the retainer behind the outer race. |
|
The .077" shim is pressed on with the bearing. |
|
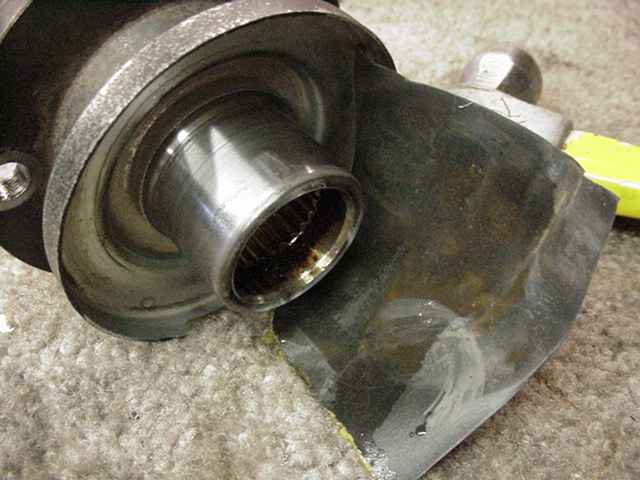
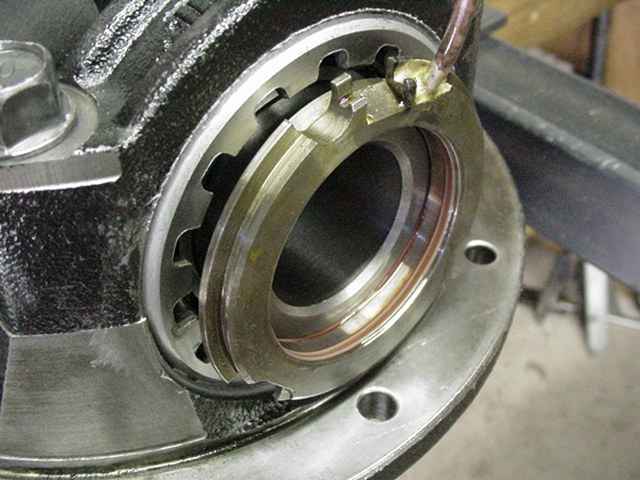
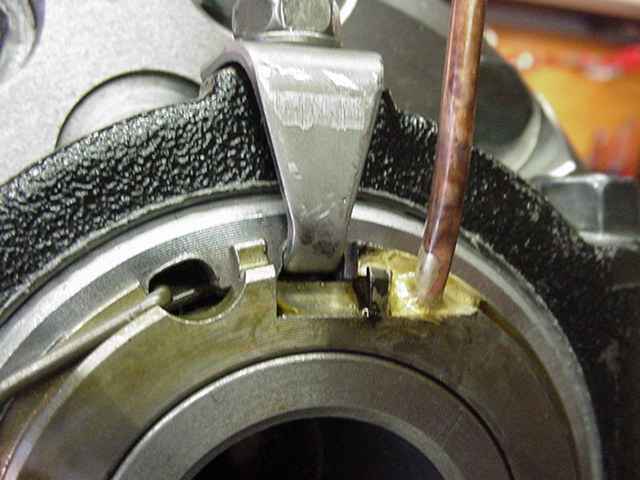
The long neck collar on the left will not rub the oil retainer. The collar supplied with this gear install is shown on the right. There's almost no neck-down and it will make strong contact with the inside diameter of the retainer. |
|
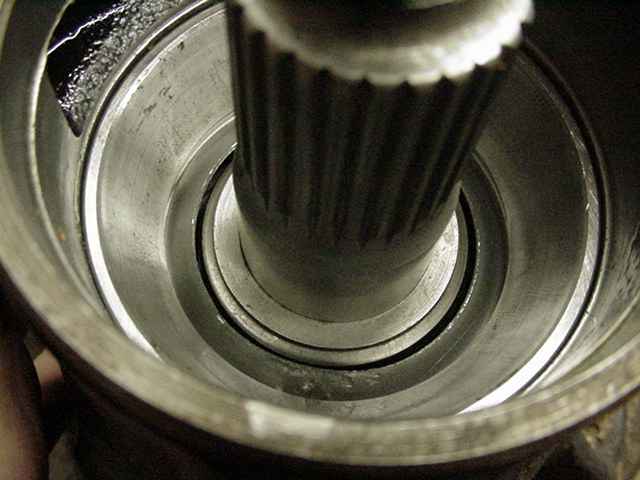
If the oil retainer can be flared upwards some then it will clear the collar. If the retainer flares too far upwards then it will contact the bearing itself. So flare it enough to clear the retainer but not so much that it reaches up and smacks the bearing rollers. The pic above shows the retainer with the right amount of flare. |
|
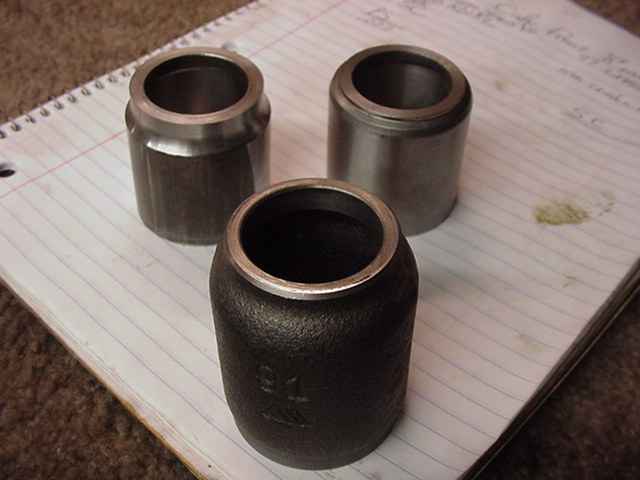
My flaring tool is a simple one and is shown in the front row. It's a genuine Toyota solid collar made from cast. It has the right dome shape to flare the retainer just right. The only solid collar that I know of that clears the oil retainer is supplied from MarlinCrawler.com. |
|
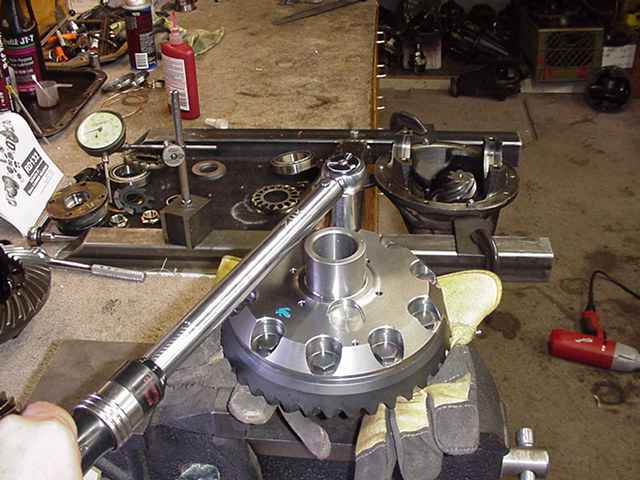
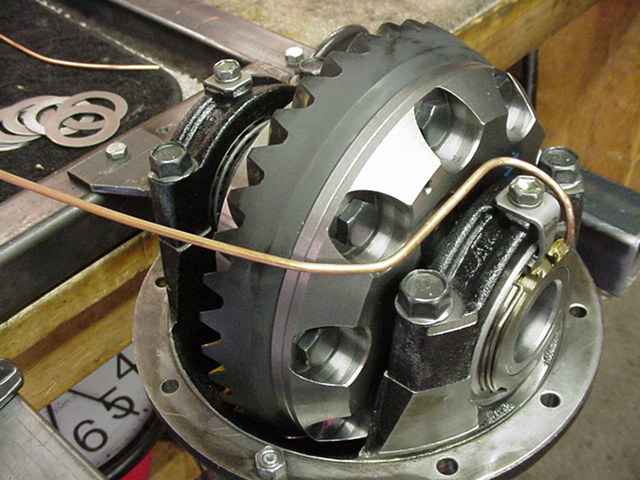
With the collar now clearing the retainer...and the pinion mounted inside the carrier now the ring gear is installed onto the ARB. Loctite and 75 ft/lbs. |
|
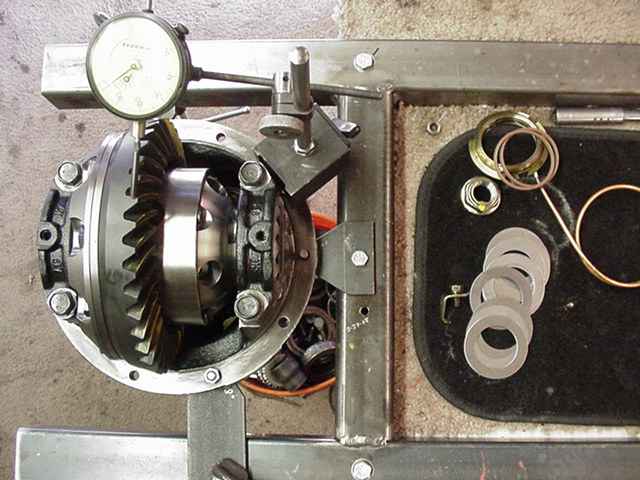
Using a carrier bearing body from a T100, the carrier bearings can now be tapped in place. The case assembly is then mounted in the carrier... BL is set and some light CBPL is set. |
|
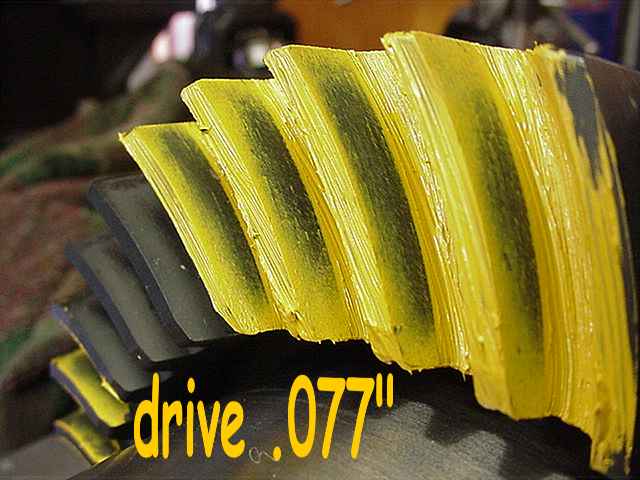
Excellent drive pattern....slightly deep which is preferred in my book. |
|
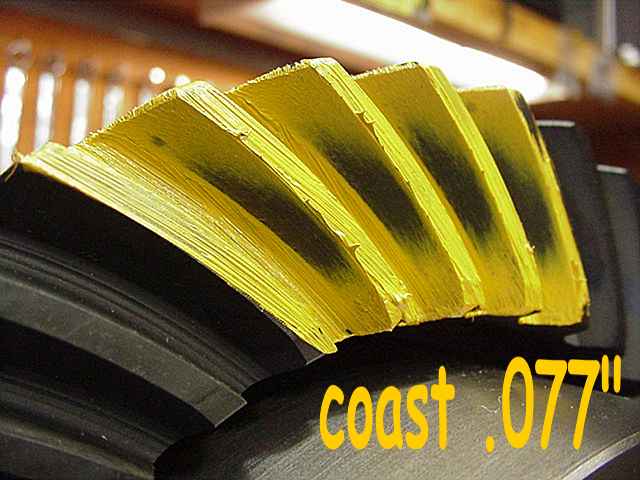
Coast pattern is better than most! Nicely centered with nice definition. |
|
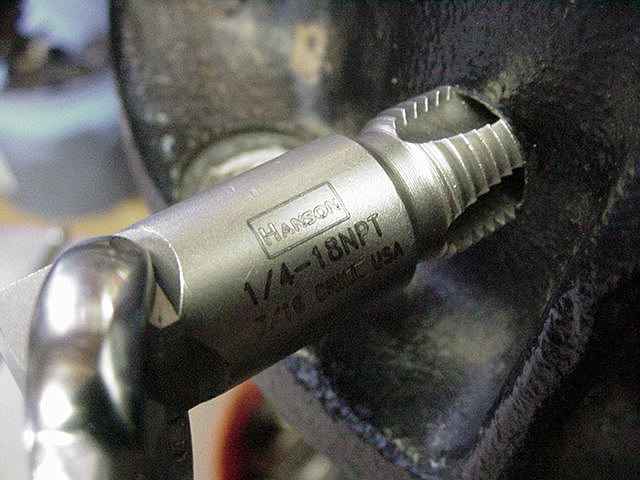
Time to drill and tap for the brass fitting. |

|
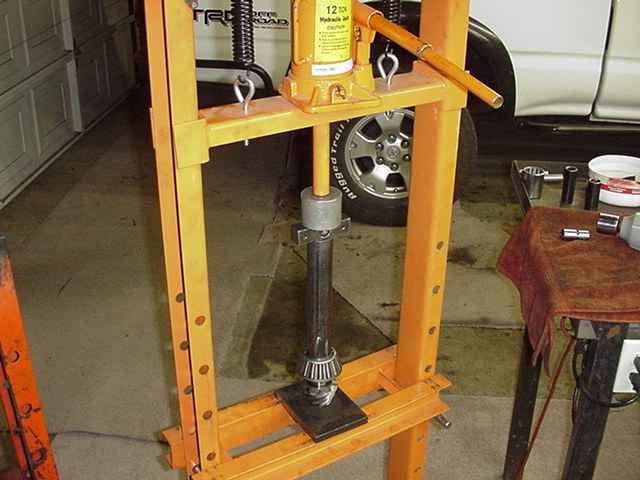
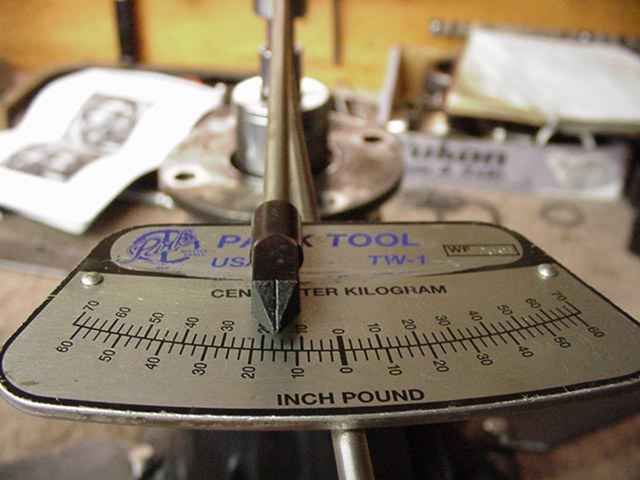
The pinion is broken down and the solid collar is installed. On the 3rd try, I had 12 inch/pounds of PPL. |
|
The oil slinger and seal are installed. |
|
The wear groove was very minor but I still wet sanded it with 1000 wet/dry sandpaper. |
|
I cranked down on the pinion nut and squeezed out a few more inch/lb for a total of 16 inch/pounds of rolling drag... near the upper end of the spec. |
|
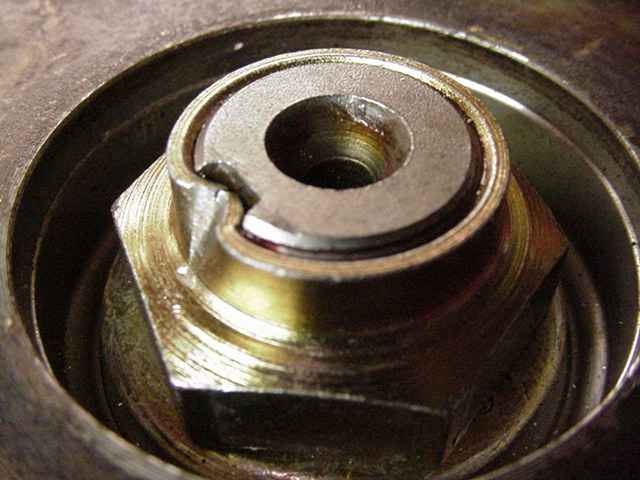
Ding and the pinion end is complete. |
|
The ARB case is installed and BL is set to .007. |

|
The adjusters on both sides are equally tightened 1 notch at a time until the CBPL is 150 ft/lb or more. The threads have a generous coating of aluminum anti-seize to allow the CBPL to more easily surpass the 150 ft/lb benchmark. |
|
The o-rings are coated with gear oil and the seal housing assembly is evenly pushed on. |
|
The lock tab is up and out of the way of the seal assembly to prevent a possible o-ring leak condition. |
|
Per the ARB instructions, the soft copper line is formed around the ring gear exactly as they show it....but I think mine is a little neater looking than their example :) |

|
Looks like I ran out of digital film....basically done here. I like to use liquid teflon on the brass fitting....then install the tiny o-ring and leak test it. ZUK |

|