|
|
|
|
|
|
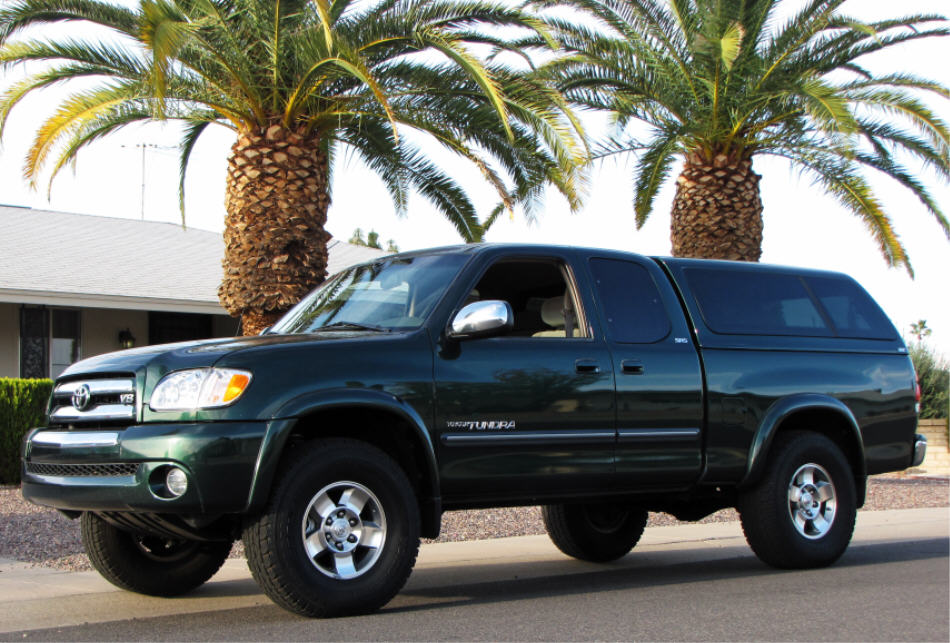
Dylan's 03 Tundra has 139k miles on it. |
|
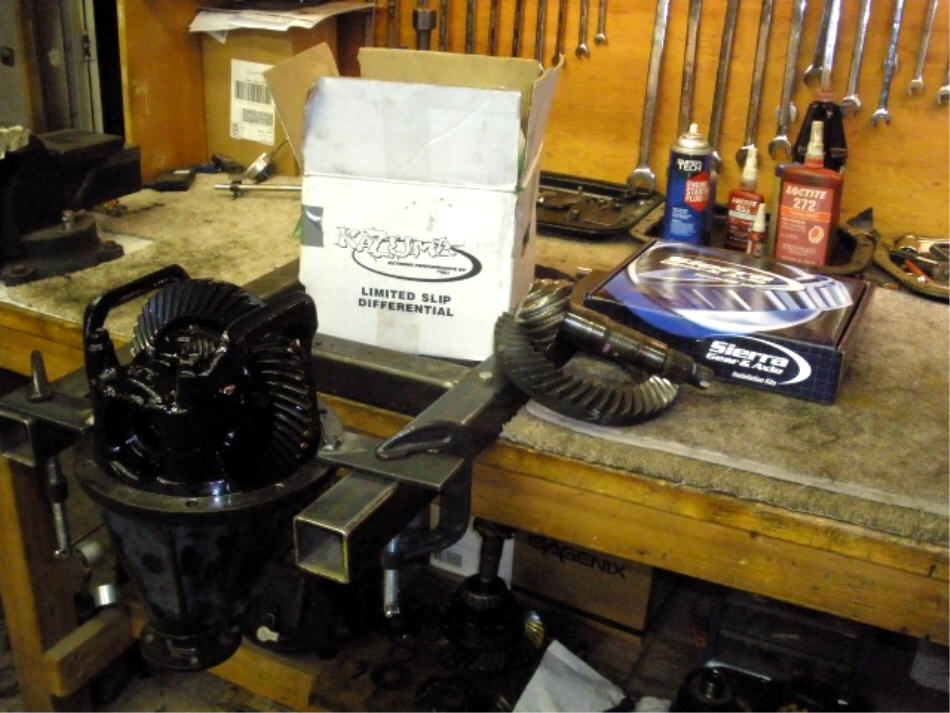
His 8.4" rear 3rd has stock 390 gears and the factory lsd. The plan is to swap in some good, used 430 gears with a Sierra Gear master install kit and a Kazuma lsd. |
|
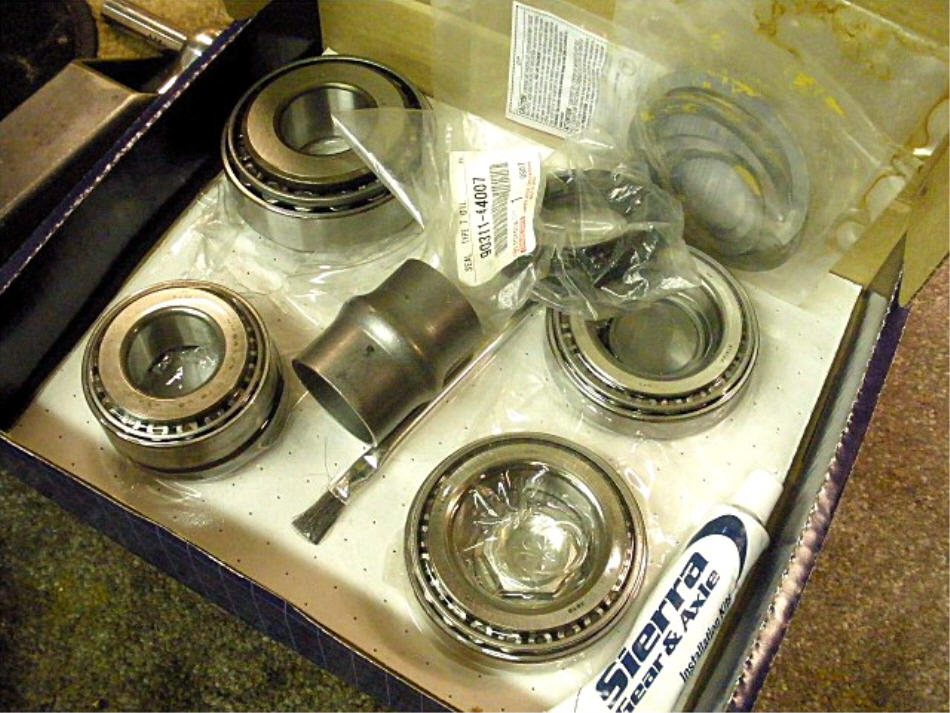
Sierra master install kit |
|
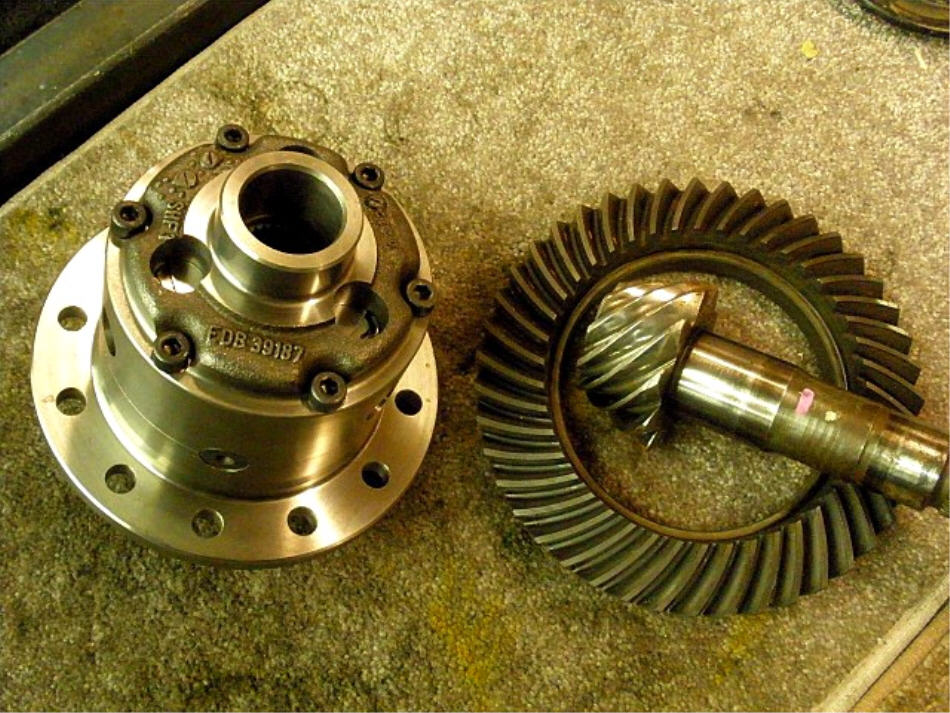
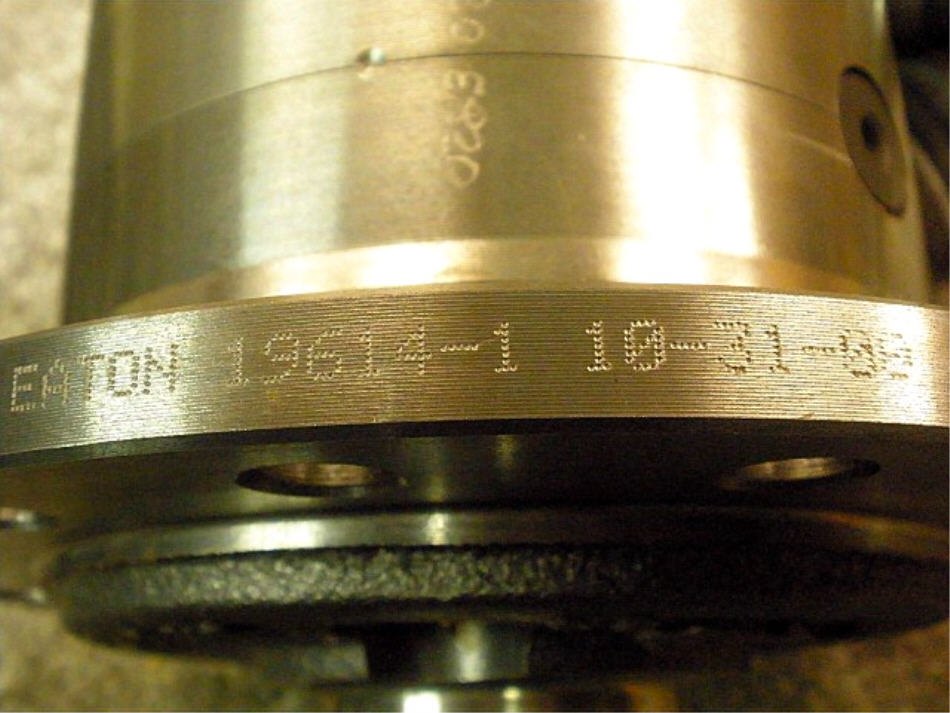
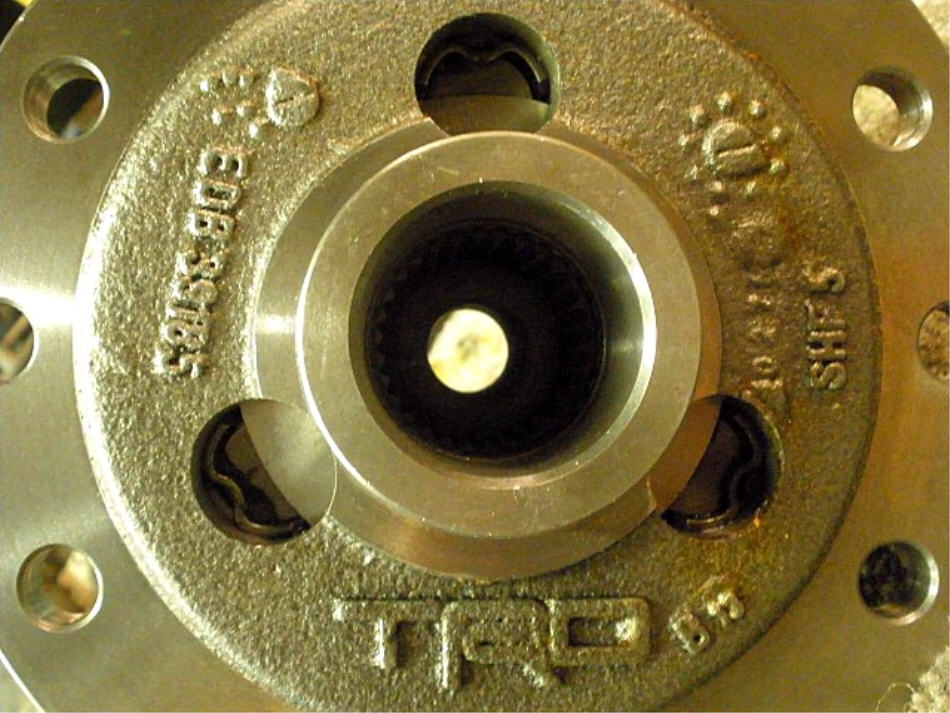
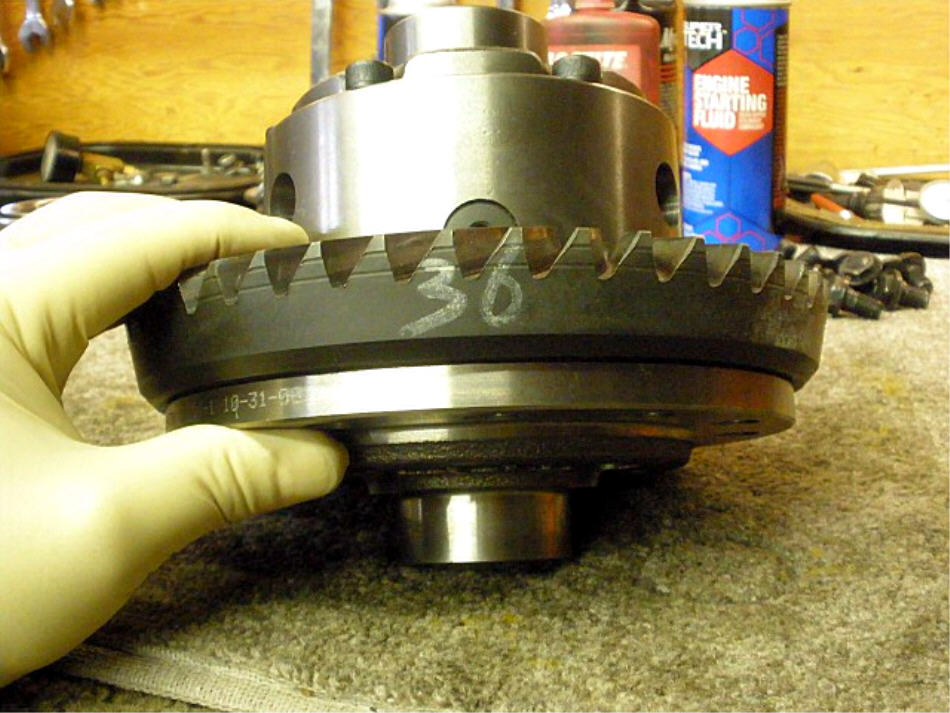
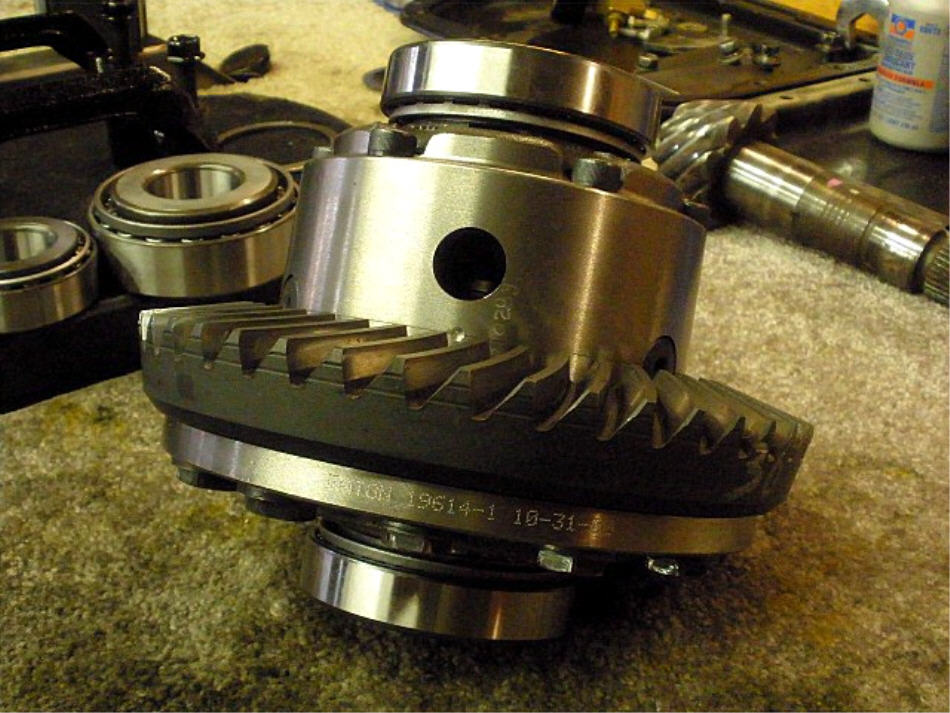
Kazuma lsd made by Eaton.....and a used set of 430 factory gears. |
|
...made 10-31-00. |
|
... |
|
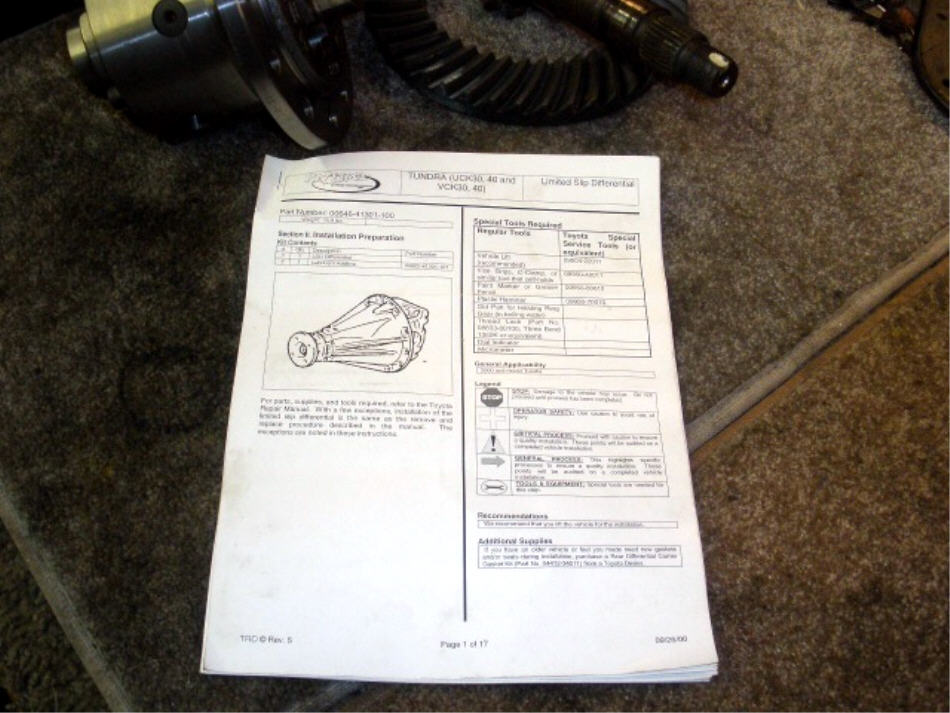
The Kazuma install manual has some good info in it. |
|
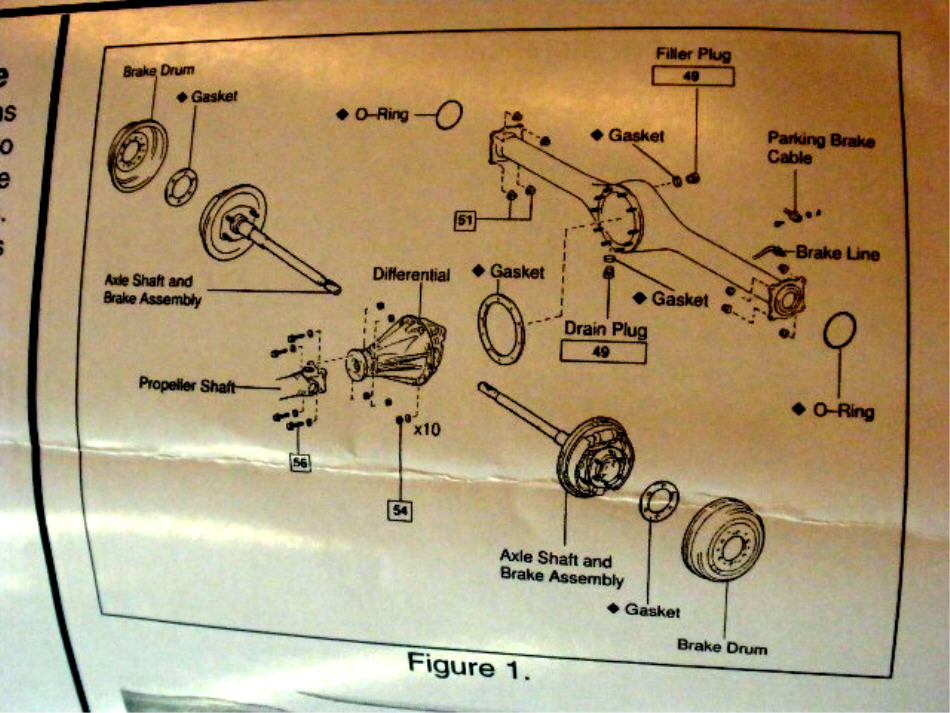
A basic pictorial diagram. |
|
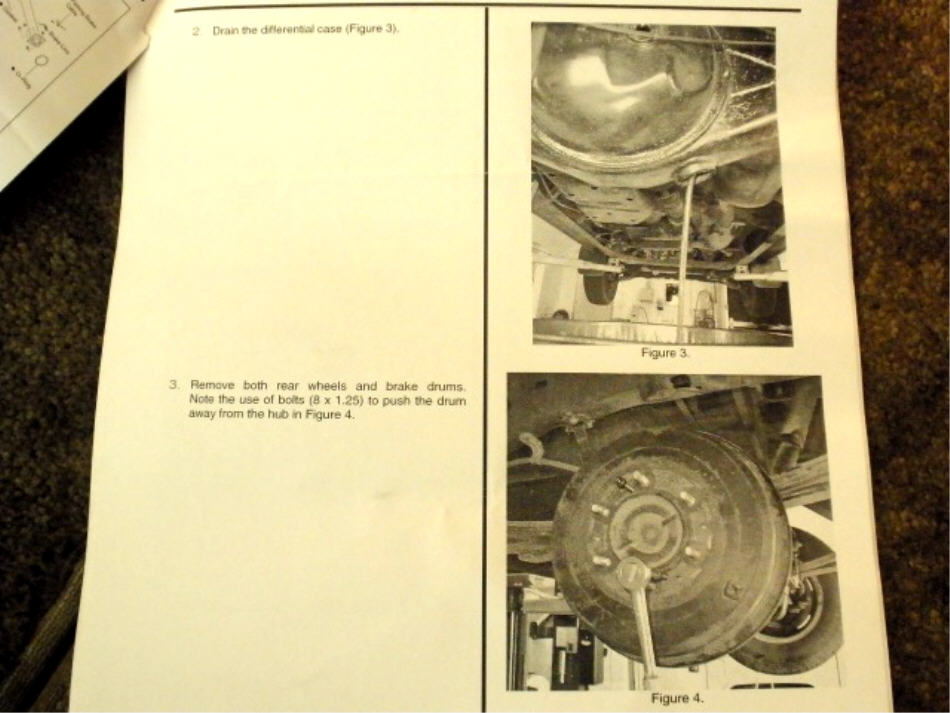
Drain the oil and push off the heavy drums using a 2 bolts 8mm x 1.25mm pitch. |
|
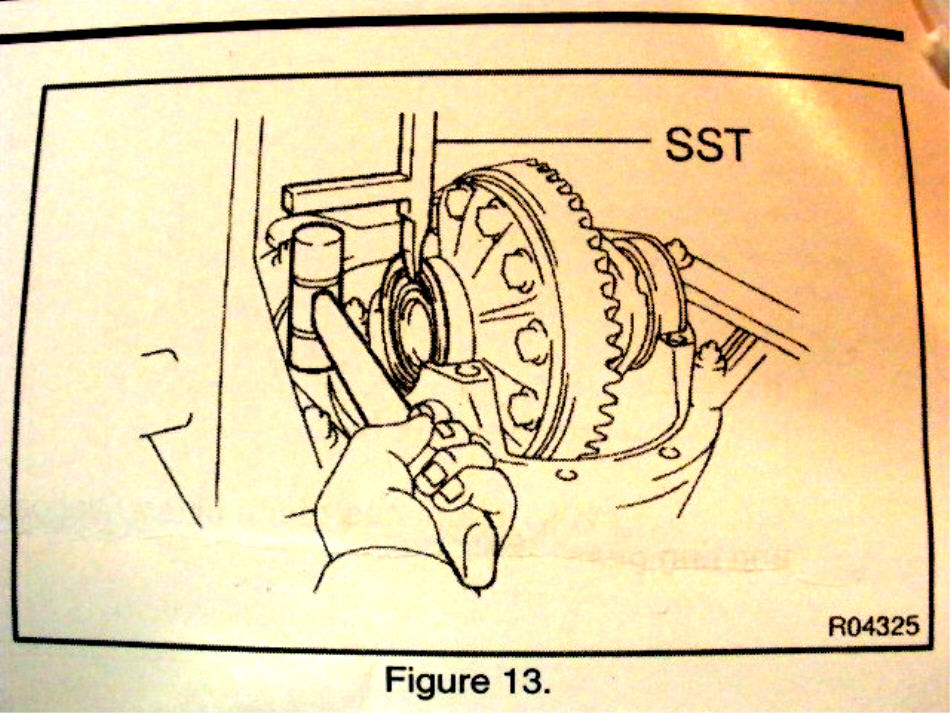
There's a special SST even to remove the washer shims. I sometimes use a small sized blunt chisel to carefully tap off the washer. |
|
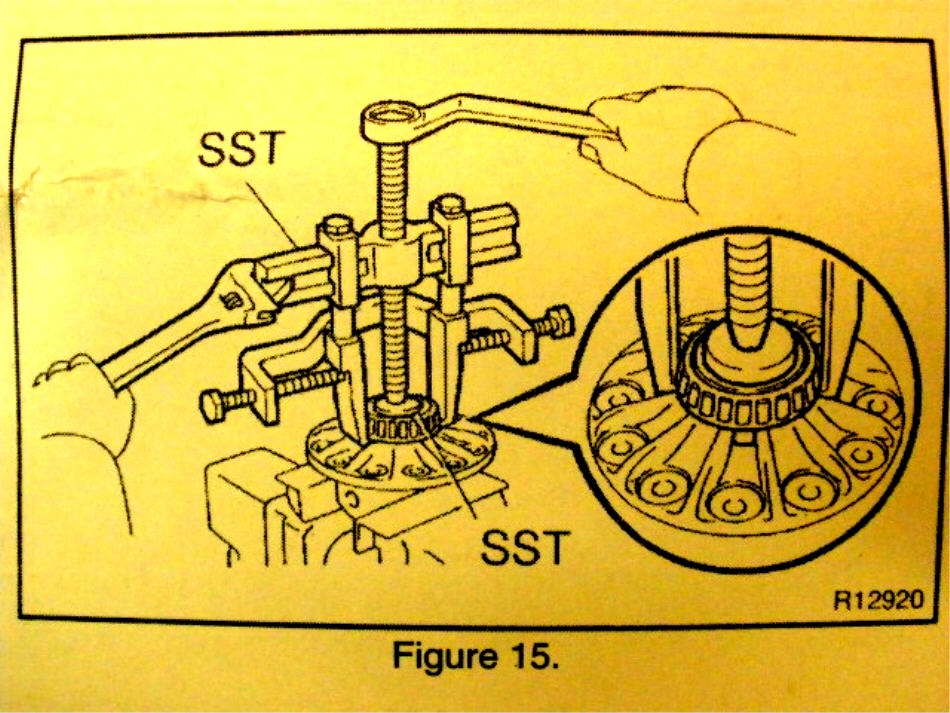
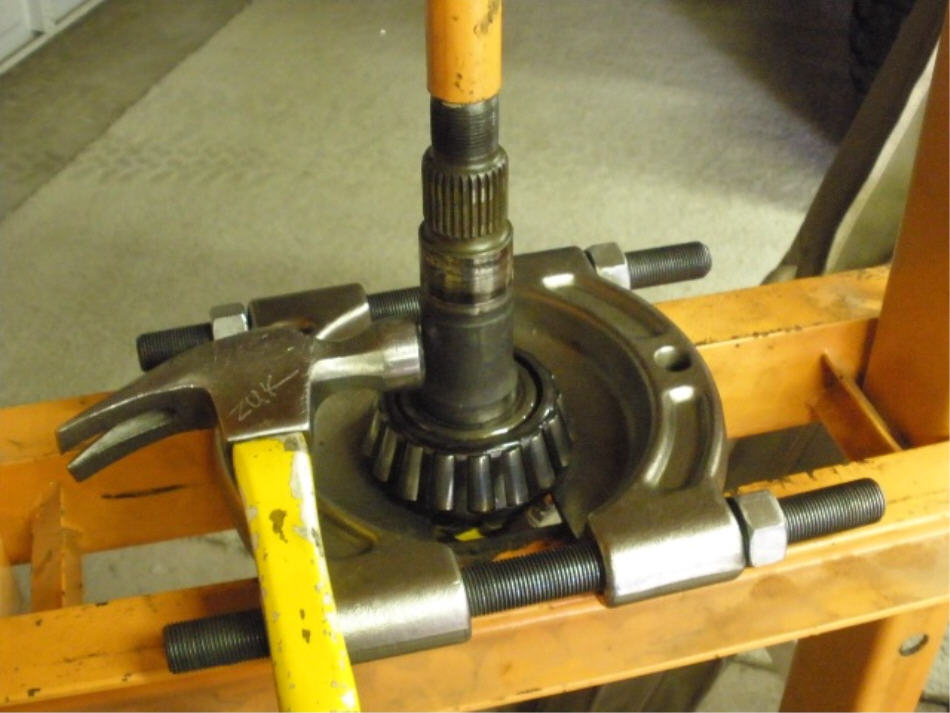
An interesting SST contraption for removing the carrier bearings. |
|
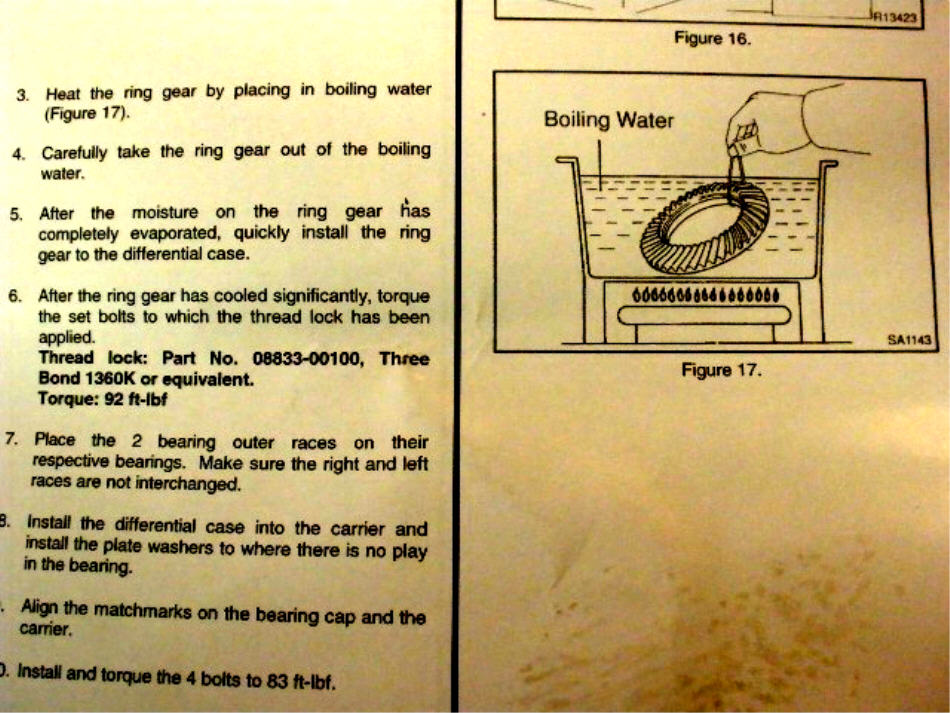
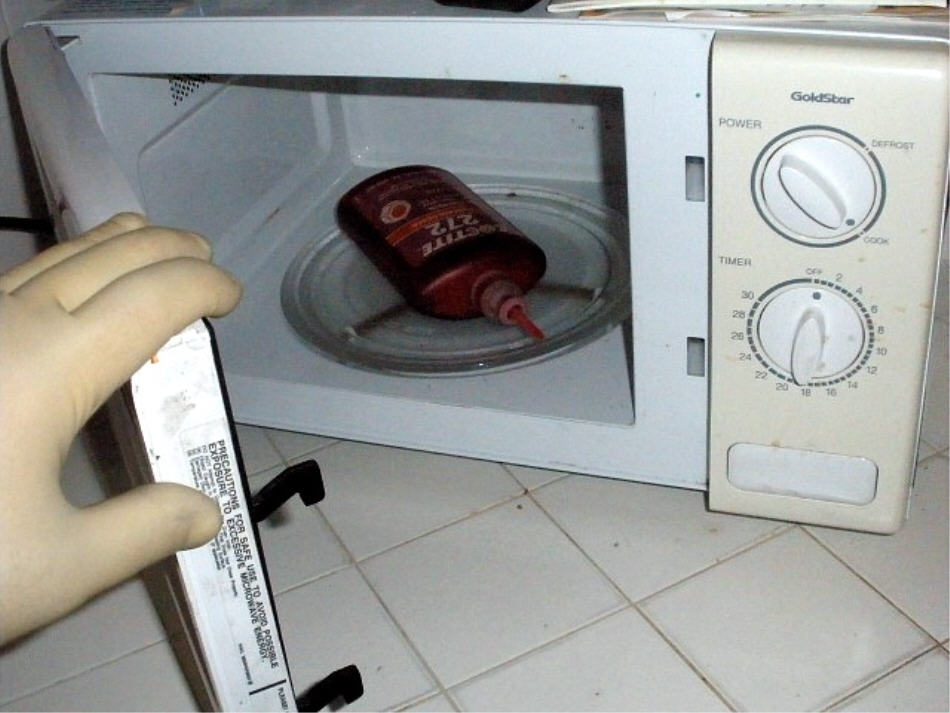
I only have one pot...and I cannot be putting ring gears in it....even if all it ever sees is Hamburger Helper. |
|
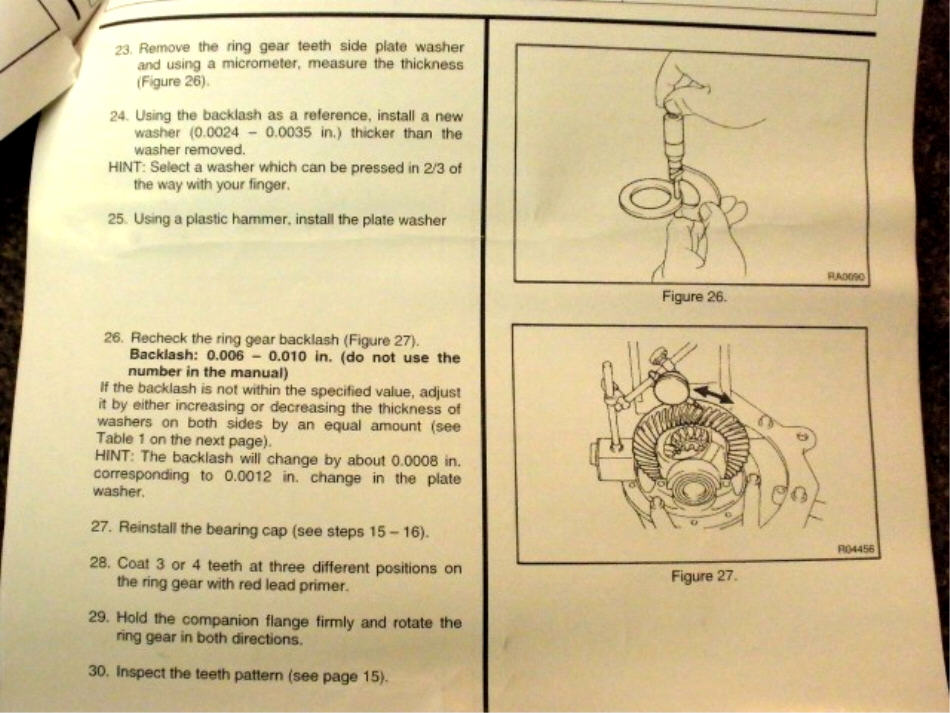
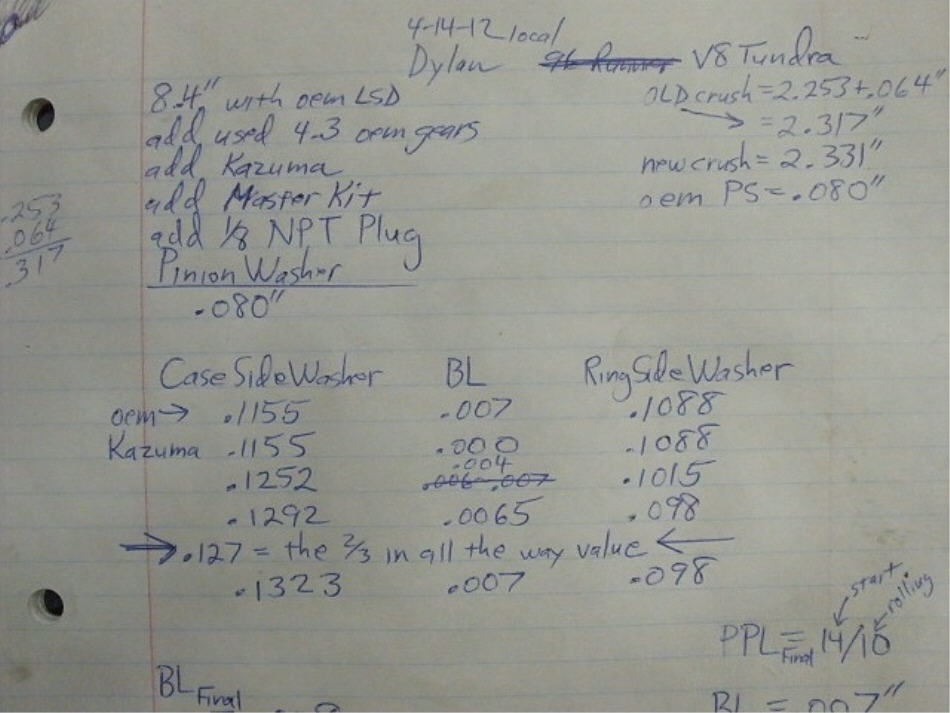
Step #24 and the hint about 2/3 the way in is interesting. That's how they determine the outcome CBPL(carrier bearing pre-load). |
|
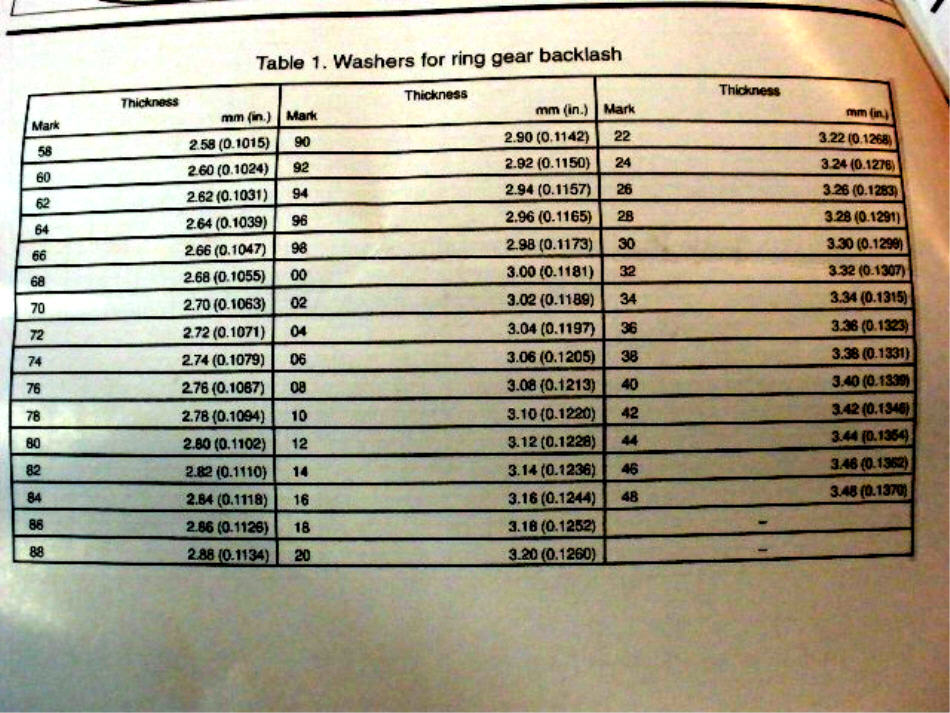
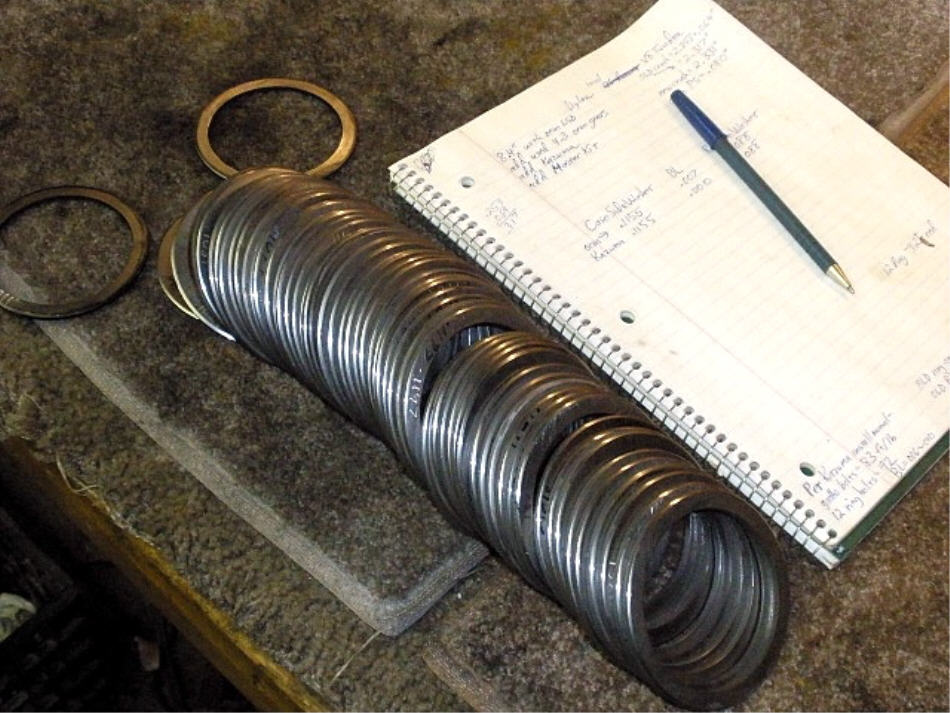
46 washer plates for setting backlash and CBPL. I think I have them all. A worthwhile investment. |
|
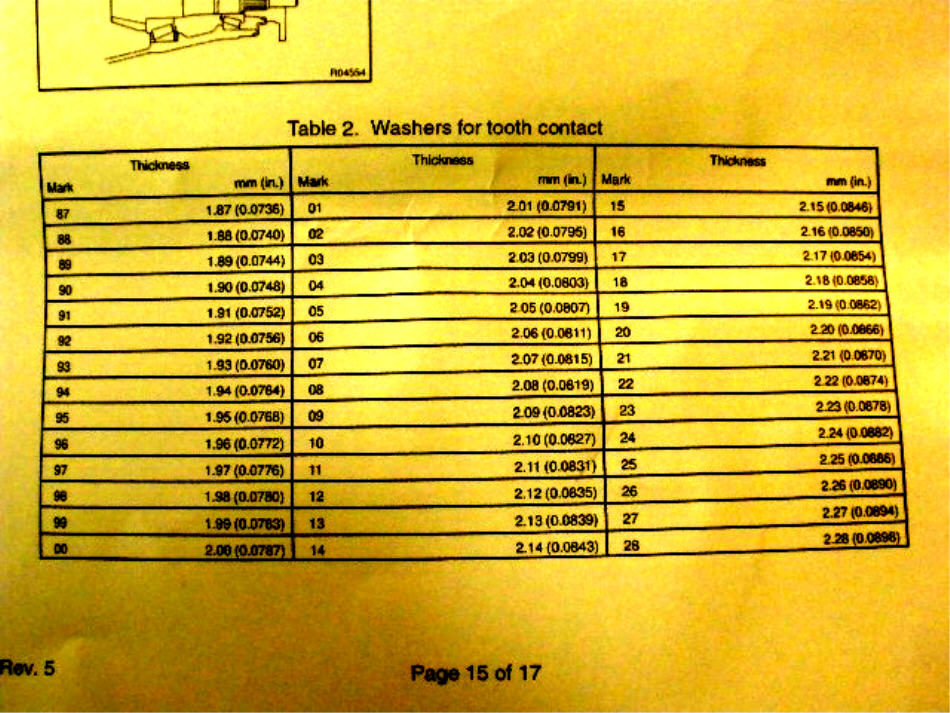
42 possible pinion washer plates. I have an order in right now for a bunch of them. |
|
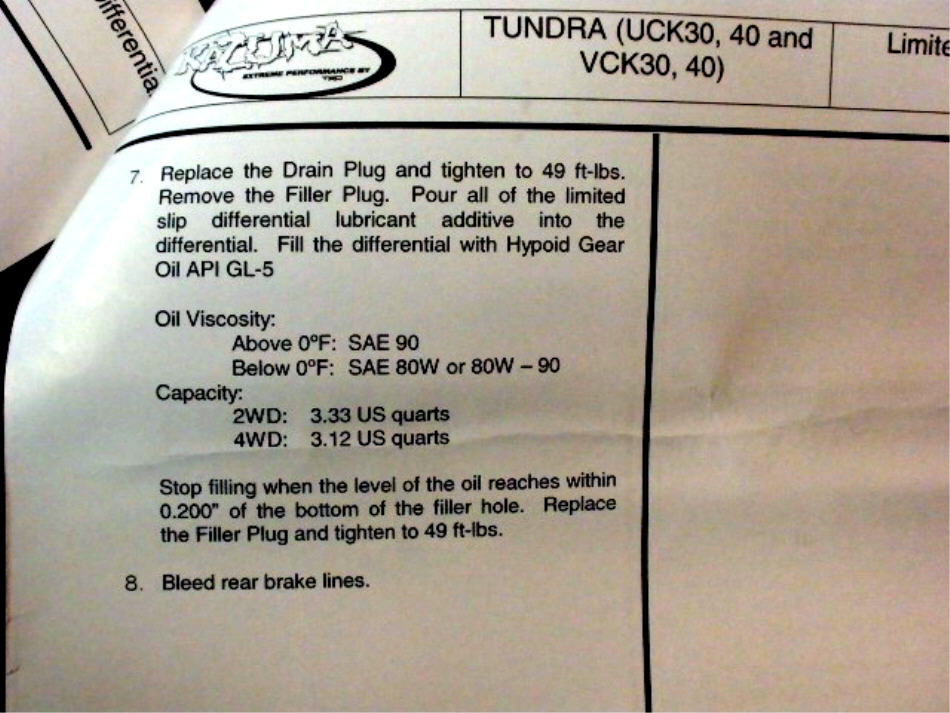
The last 2 pages in the manual have various torque settings that are useful when reloading the 3rd. |
|
... |
|
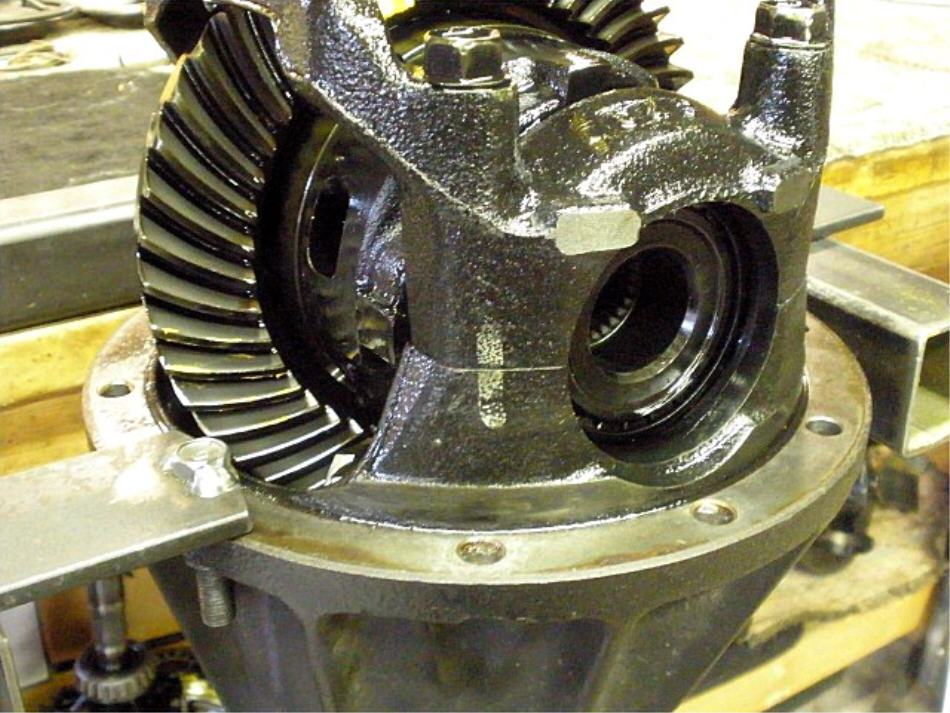
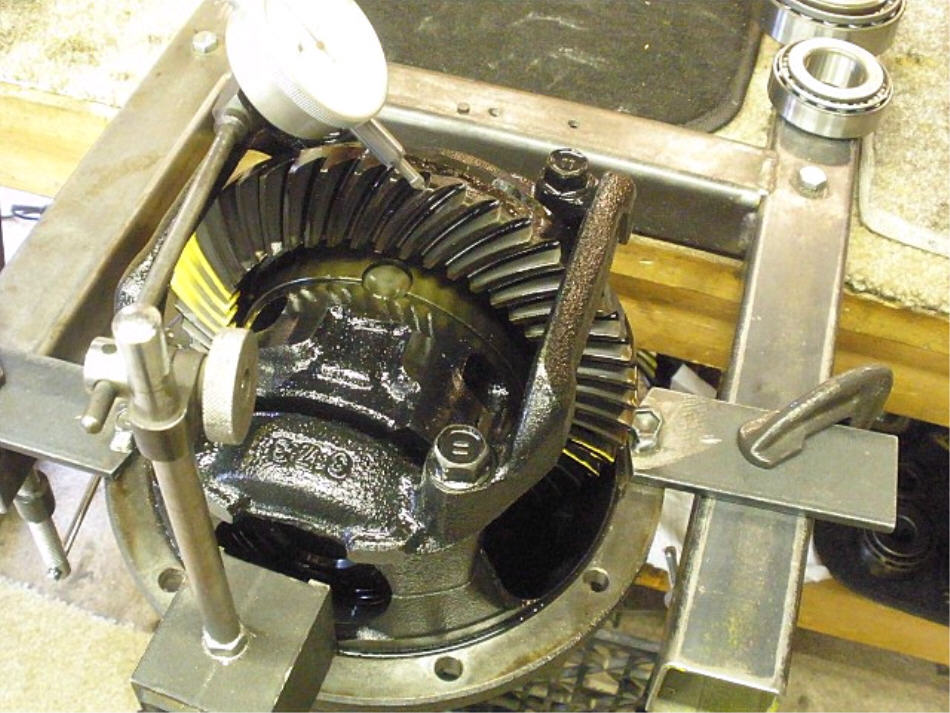
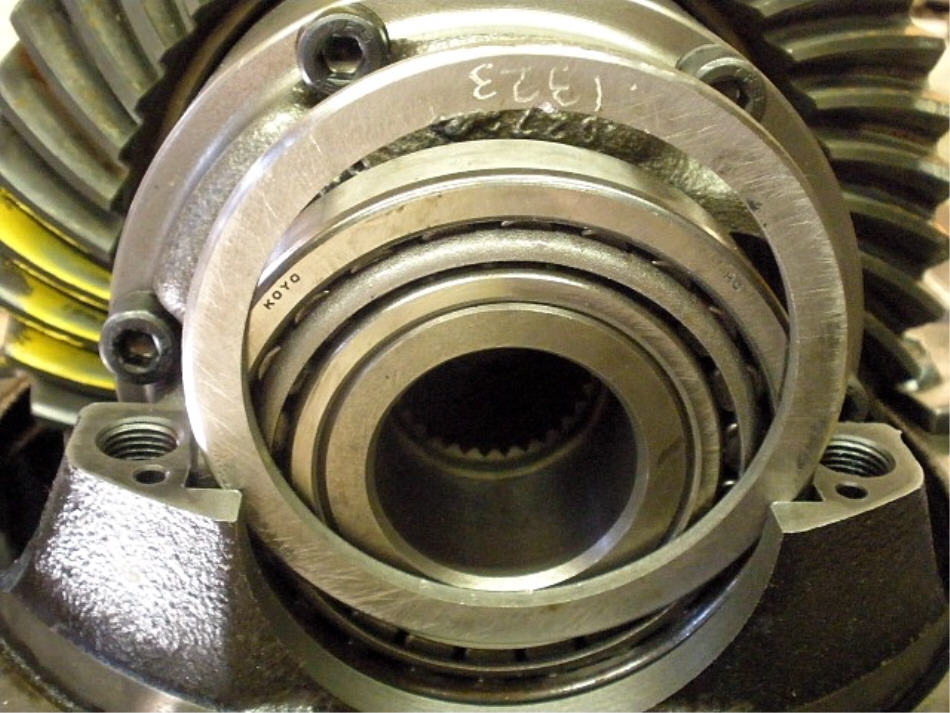
Before tearing down the 8.4, a quick paint check shows the the factory may have set this one a little on the shallow side. Driveside. |
|
Coast. |
|
No need to mark the reinforced bearing cap as it has a factory white paint line already. |
|
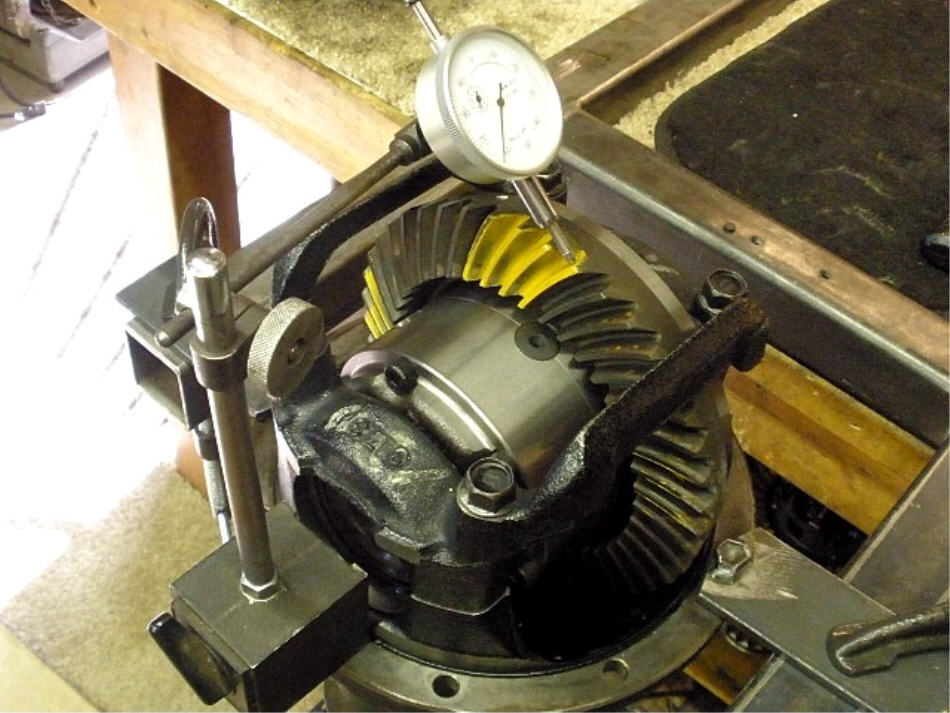
Backlash checked in at about .007" |
|
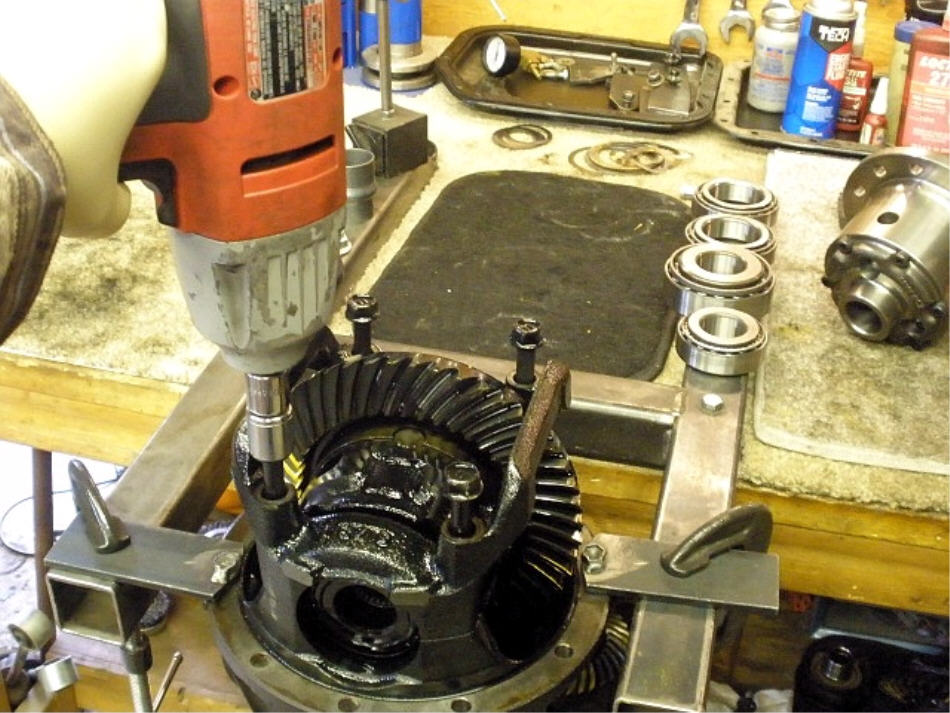
The electric impact whizzes off the 4 cap bolts. |
|
With 139k on the bearings, it's no surprise that the washer plate was so easy to remove by hand. This oil was thick,gooey, and black.....probably is still the original factory oil here. Can't blame Dylan as he's only had the truck since October. |
|
... |
|
The white powder is what's left of the high strength factory loctite. |
|
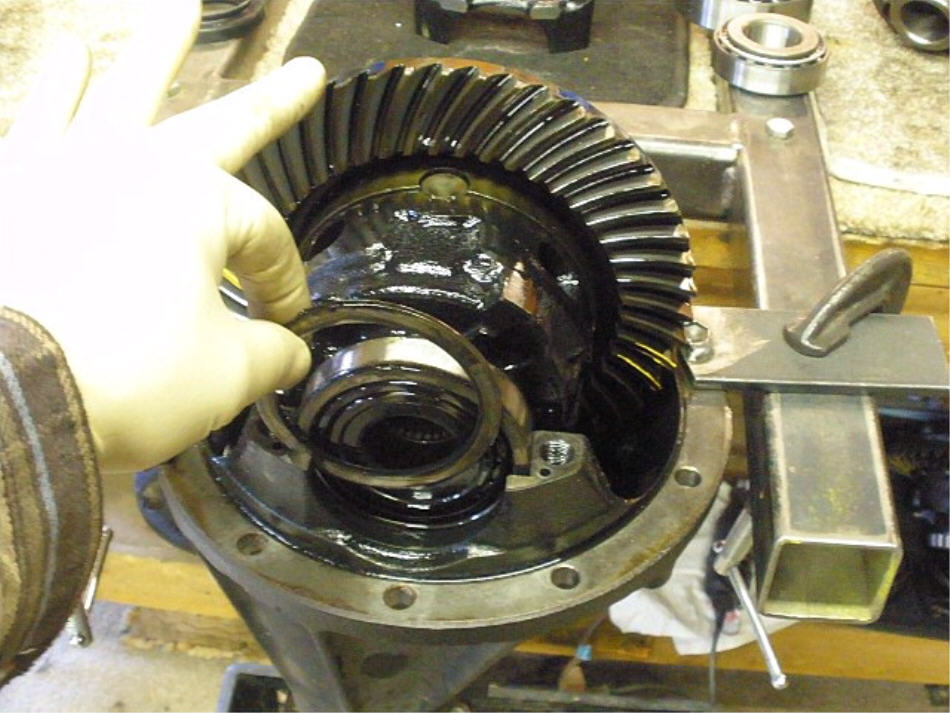
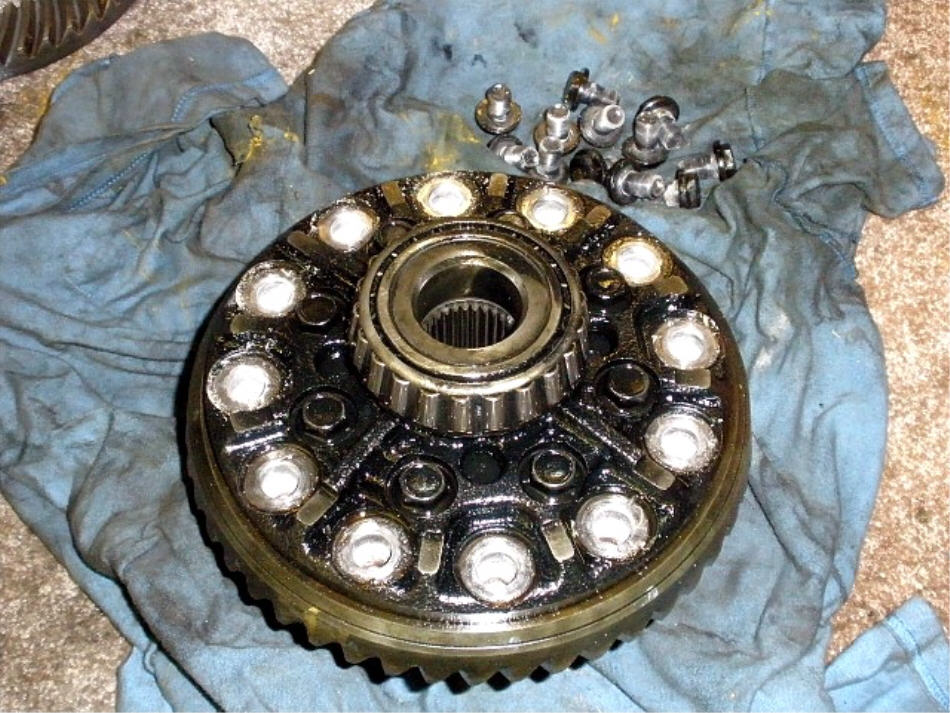
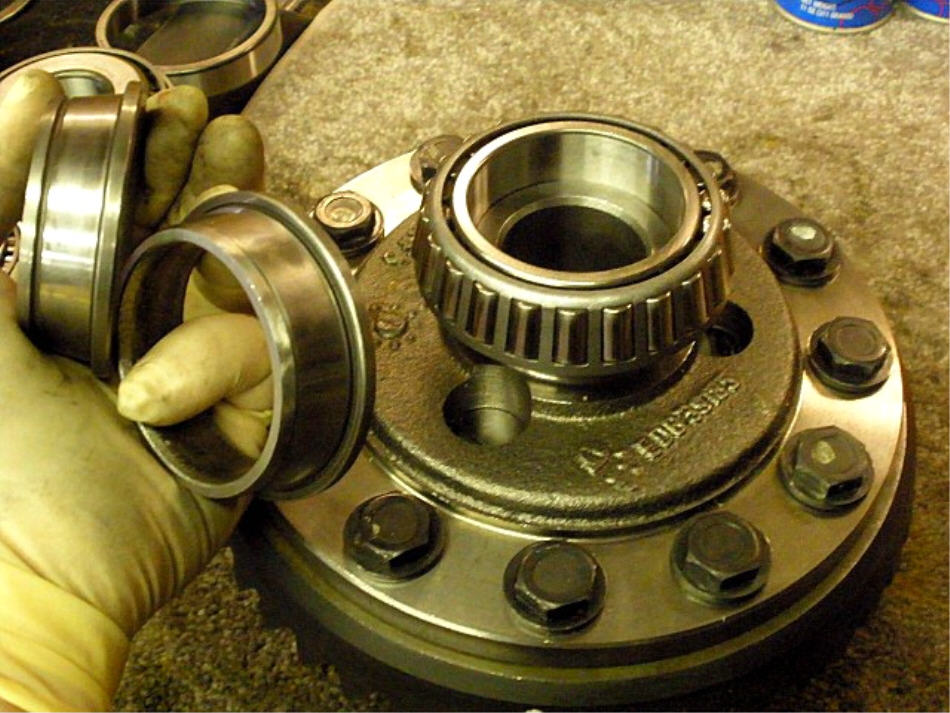
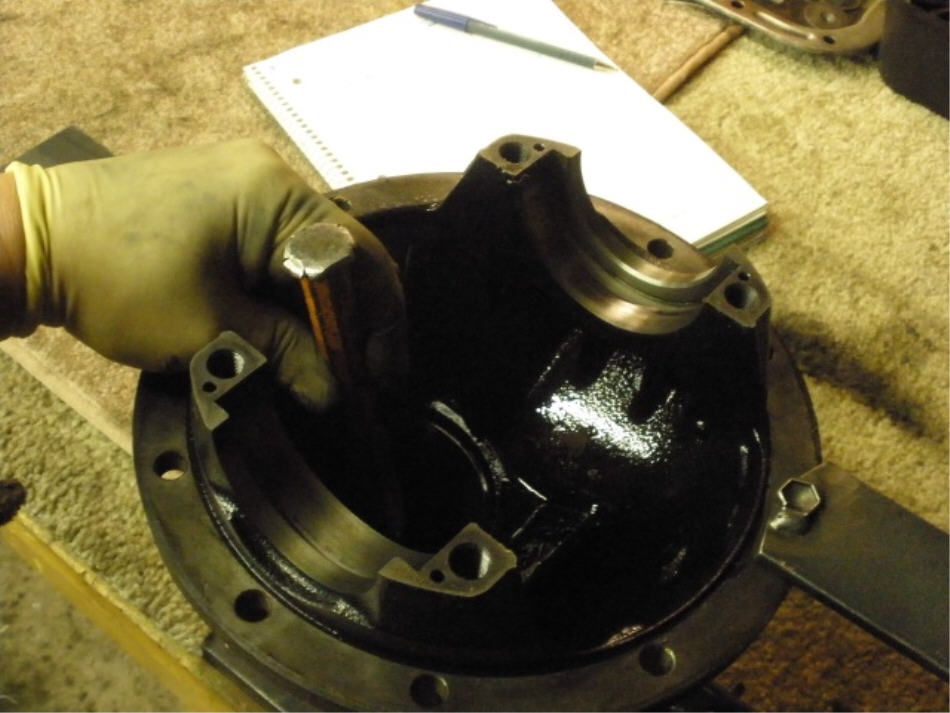
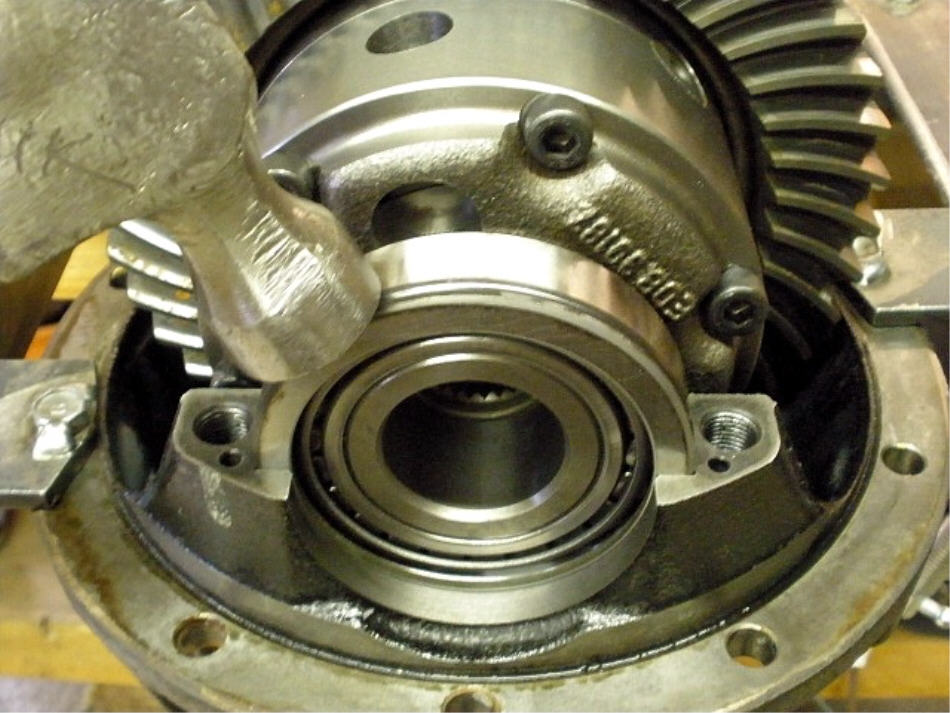
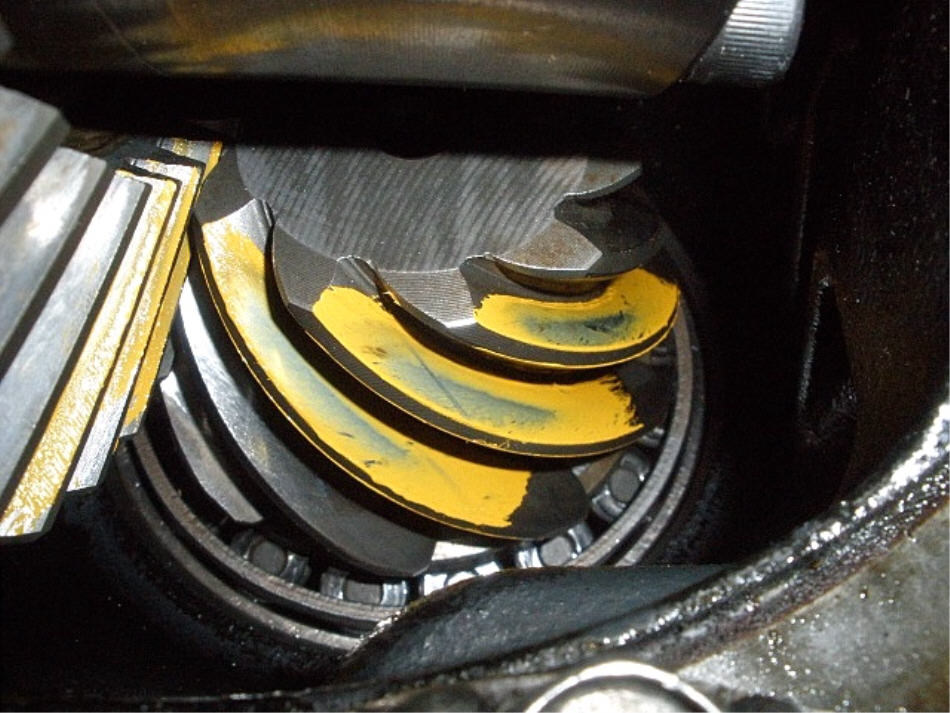
Looks just like a standard 4 pinion V6 case....until you look inside and see the lsd parts. |
|
The Kazumas have heavy duty springs inside. Nice machine work on the outside. |
|
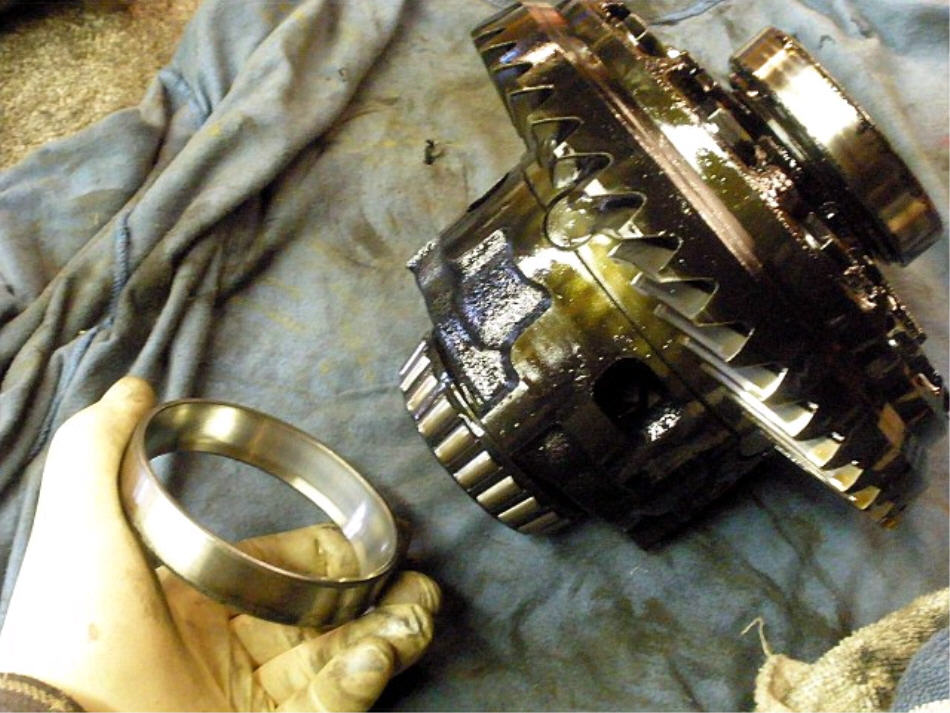
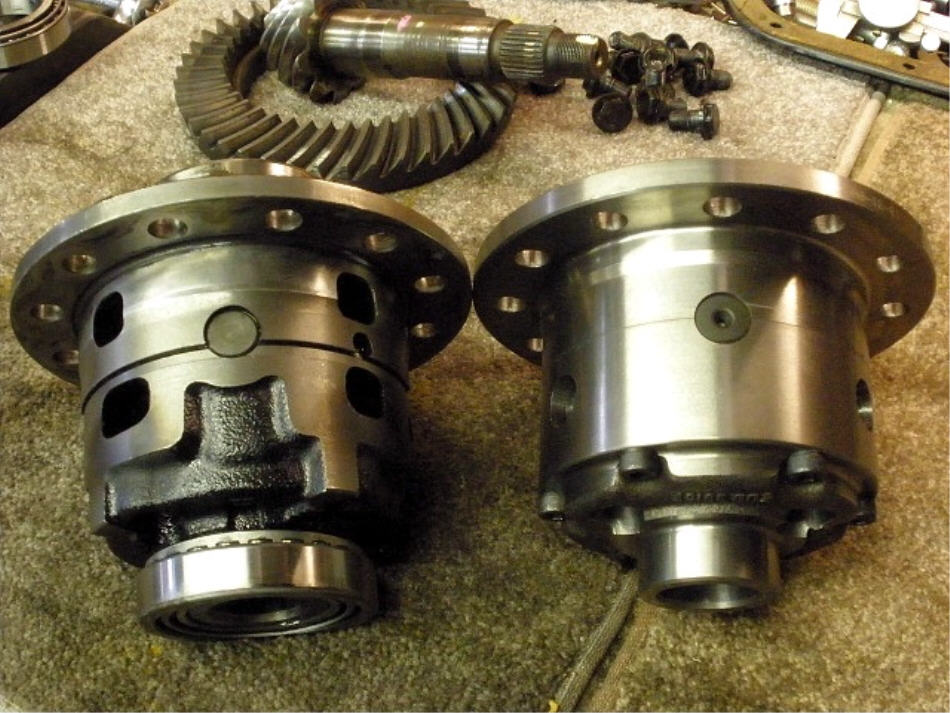
Worn out OEM lsd on the left and the Kazuma on the right. |

|
Both surfaces are checked with a large aggressive file for burrs and all looks good. |
|
A super fit with the ring....just kept wiggling it back and forth by hand and it eventually settled right down. No slop was detected. |
|
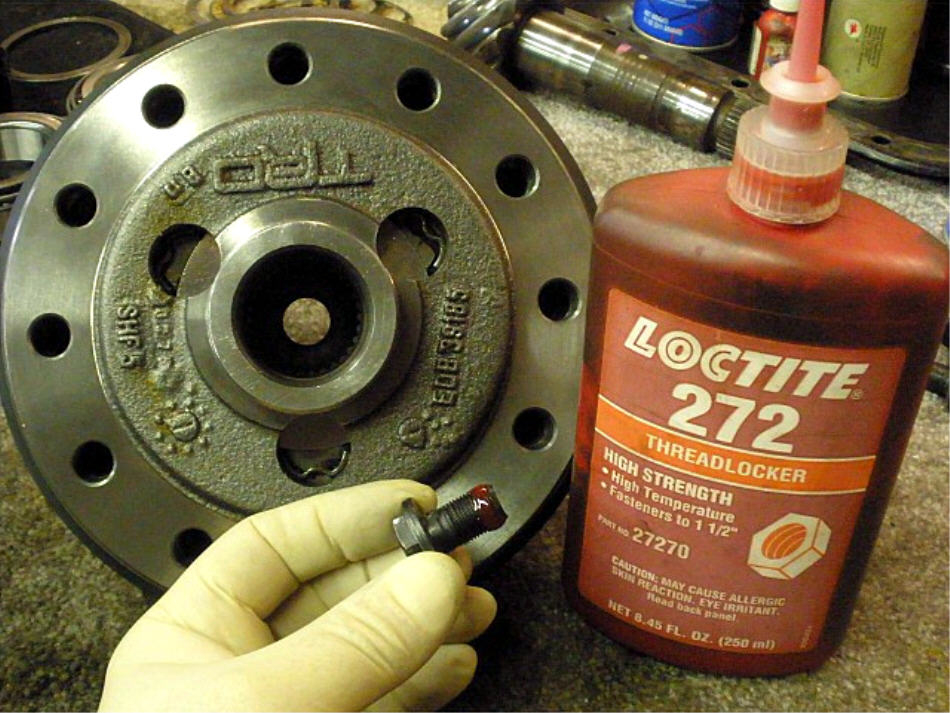
On this particular cool morning, it helps to pre-heat the red Loctite for about 8 seconds to thin it out. Then the Loctite can be thoroughly shaken up. |
|
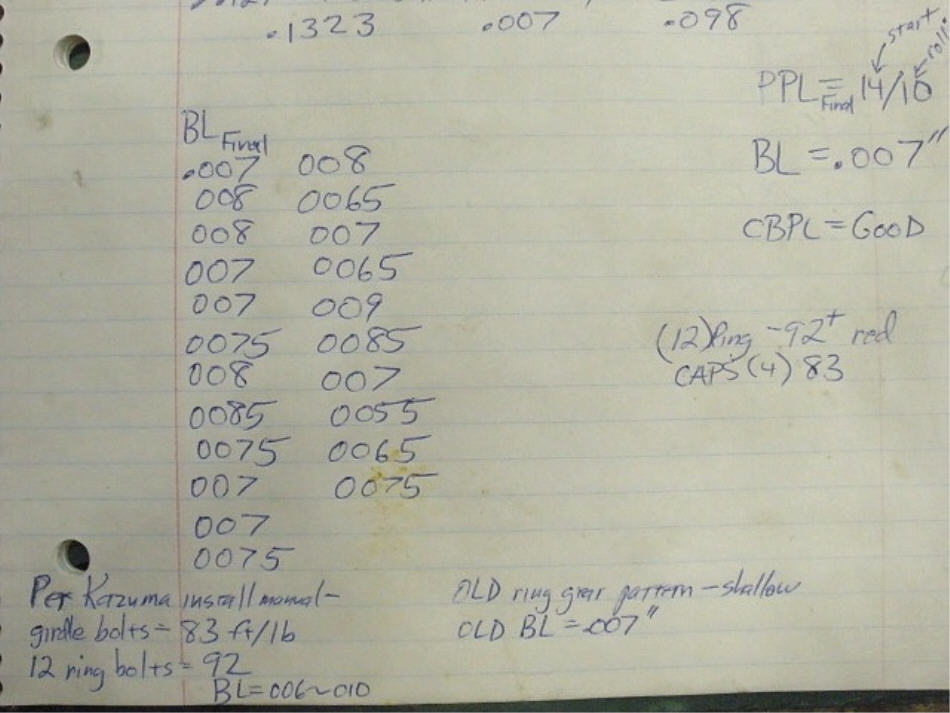
Never had one ever back out with good red loctite on it....that and 92 ft/lbs. |
|
The high quality flange bolts are torqued to the 92 spec. |
|
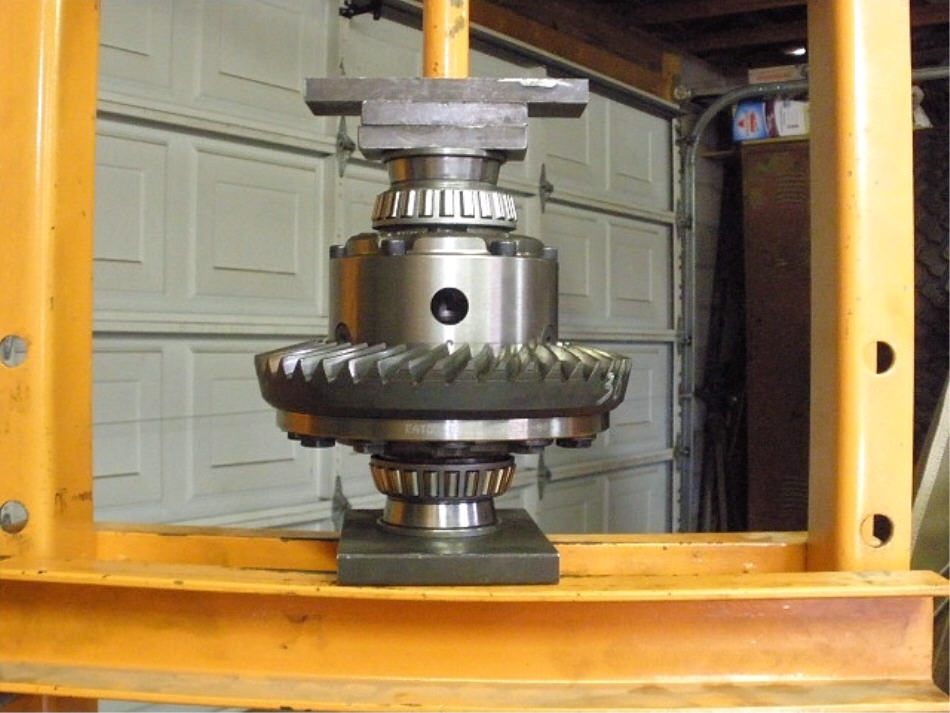
Using old parts to press in the new ones. |
|
An excellent tight fit onto these journals. |
|
The case end of things is done. |
|
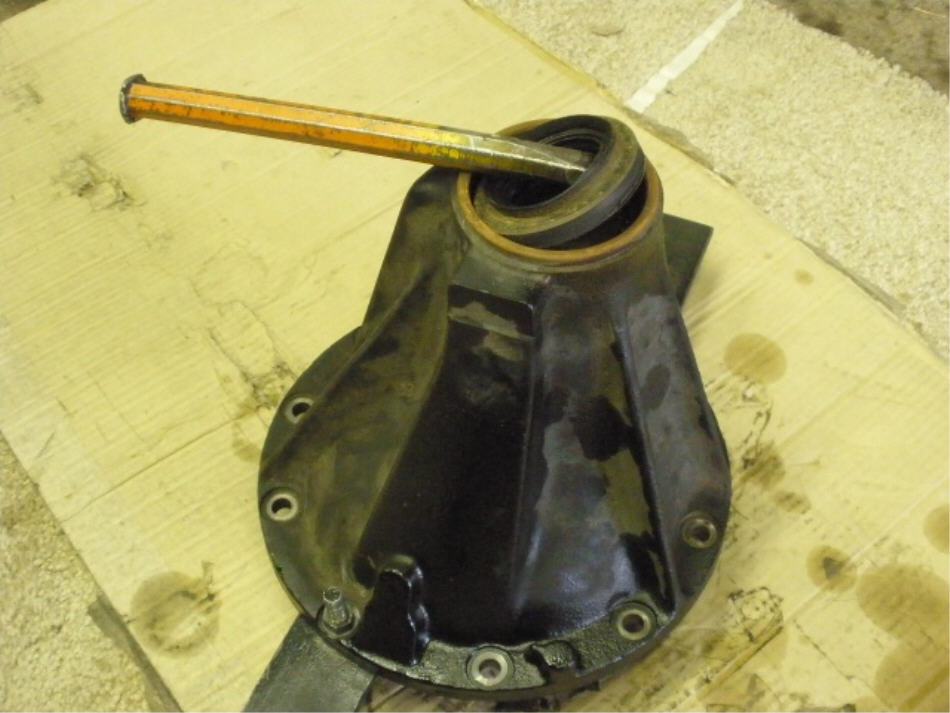
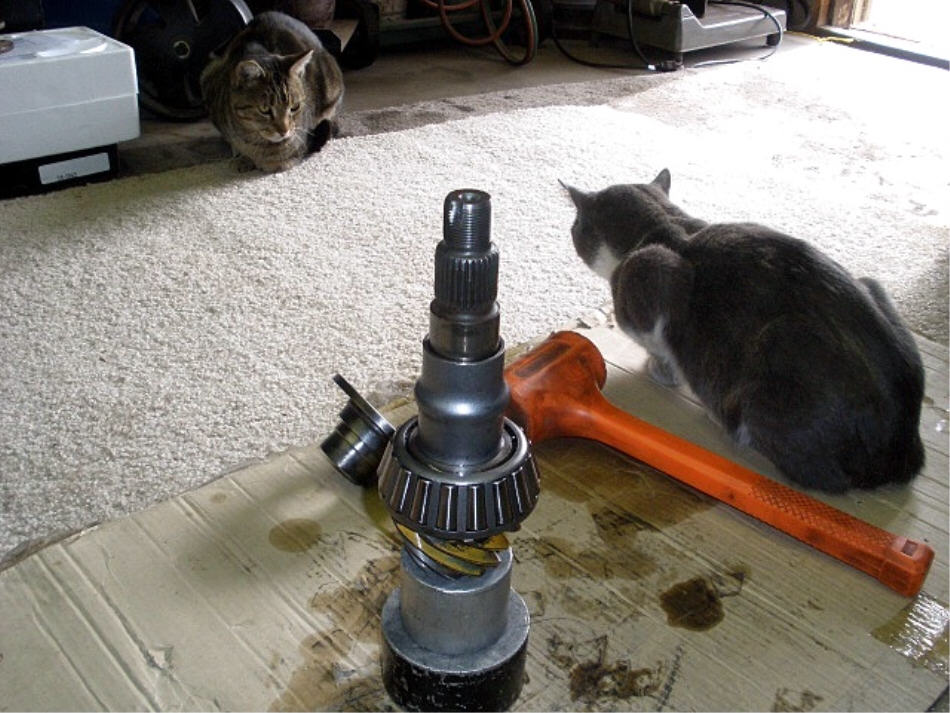
Now to remove the old 390 pinion. |
|
It must be that old lsd additive that's been in there forever that makes it turn with so much apparent resistance. |
|
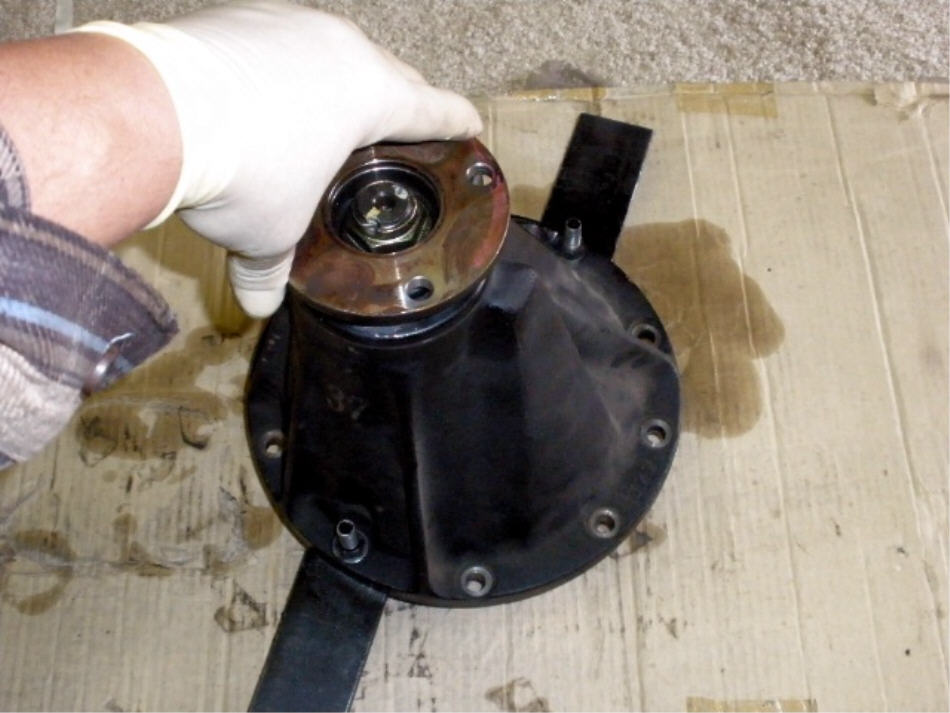
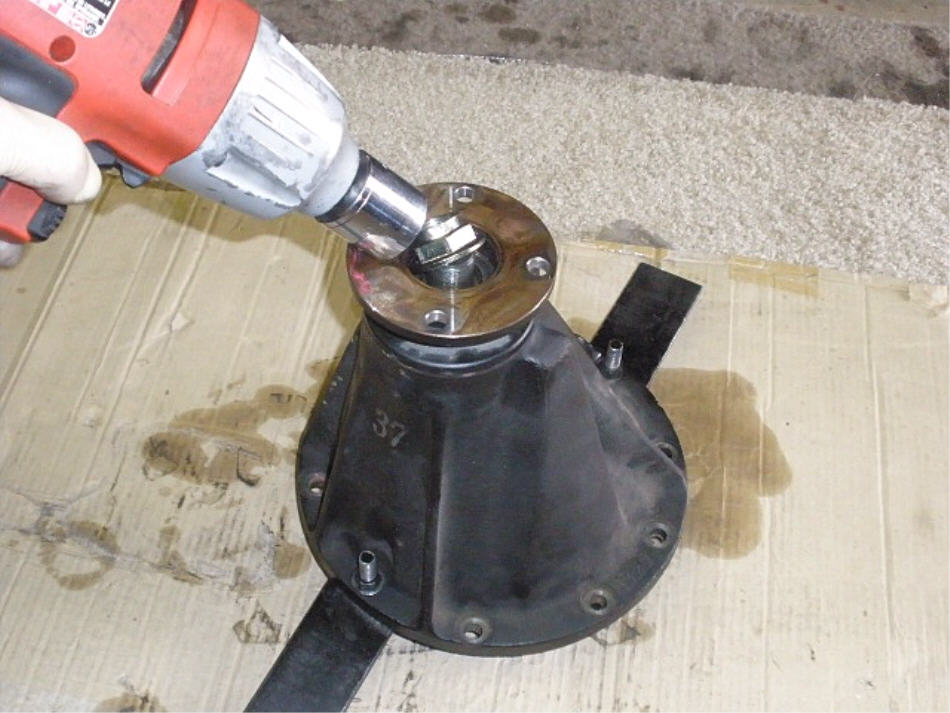
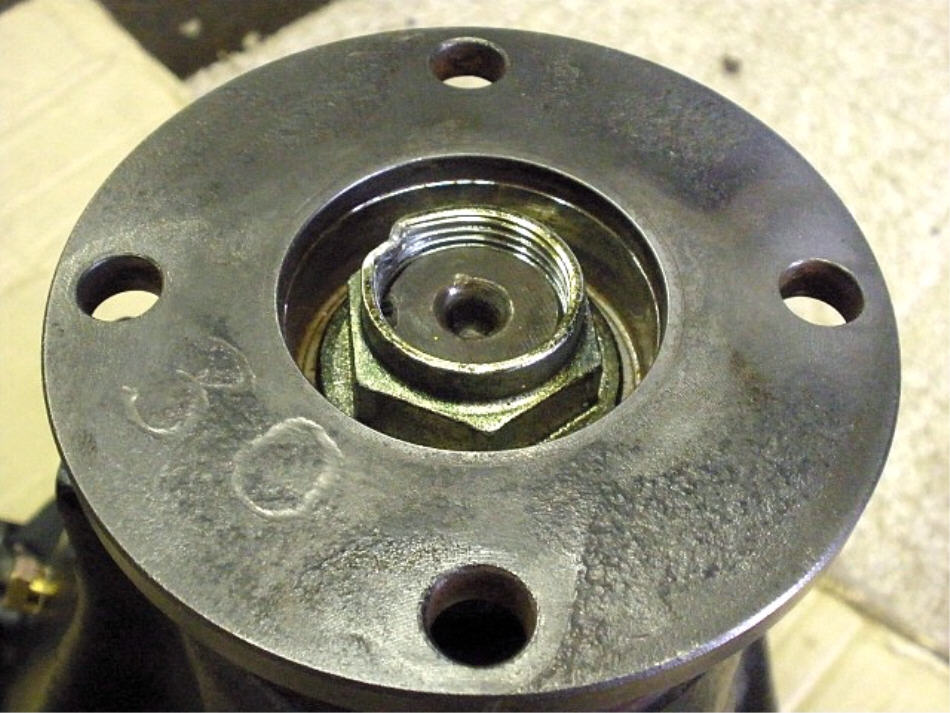
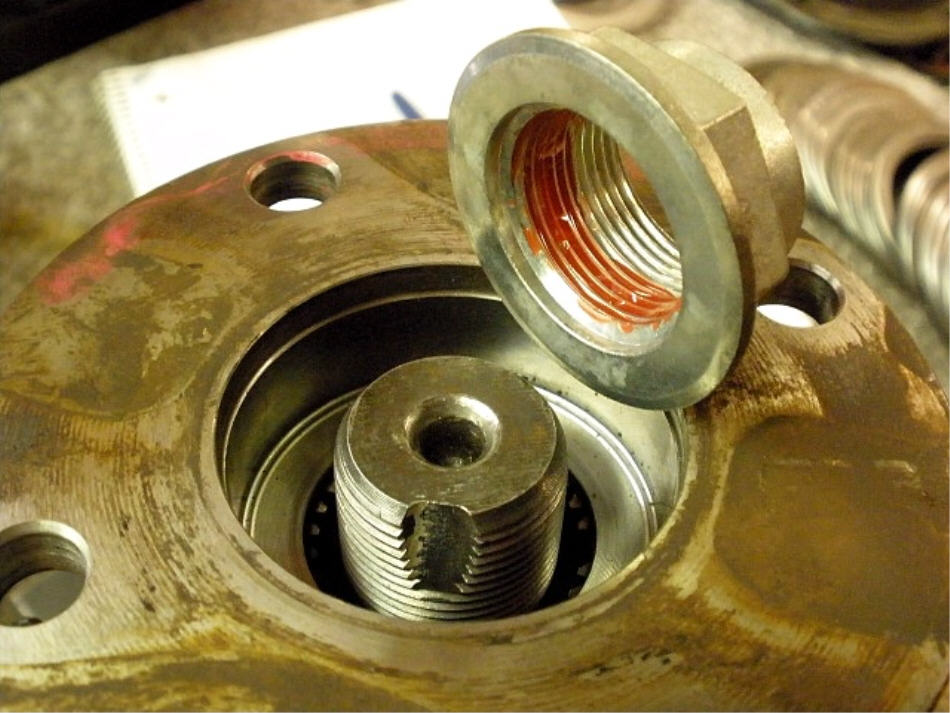
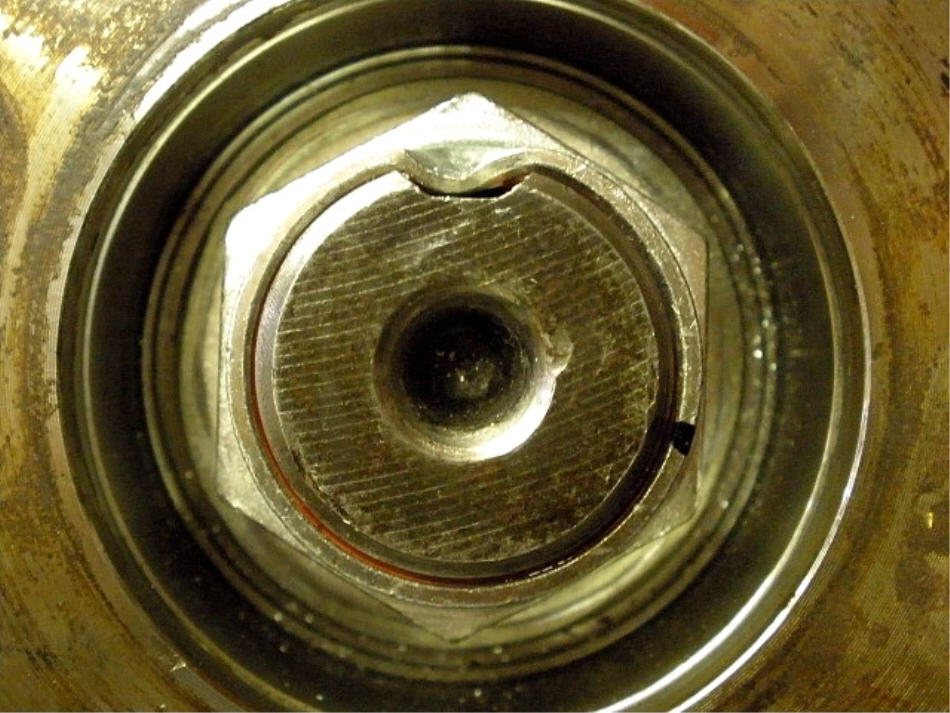
The electric impact easily removed the 30mm nut. |
|
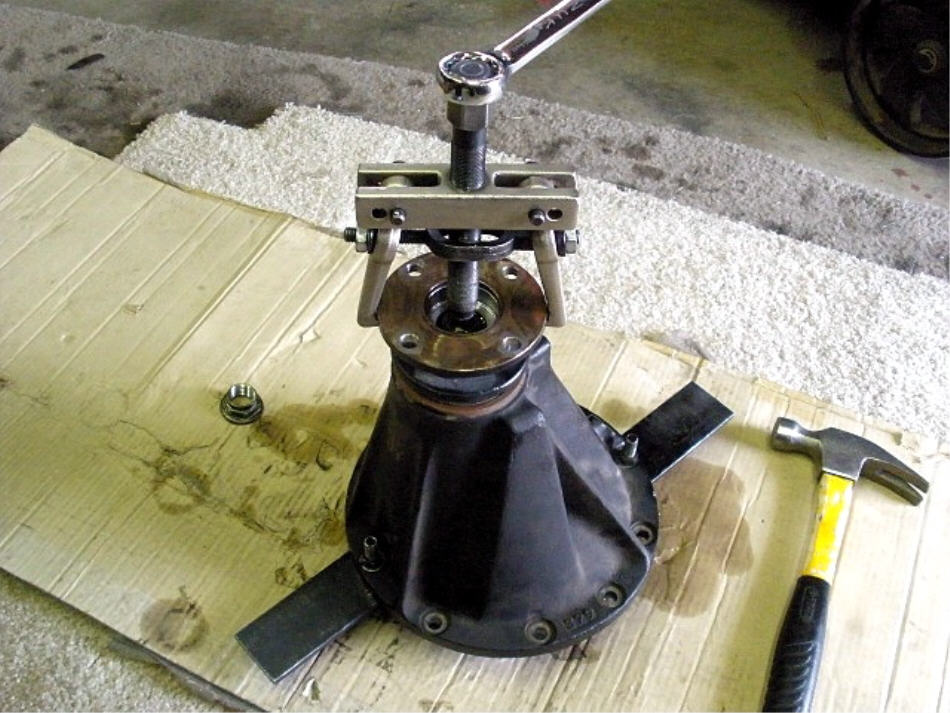
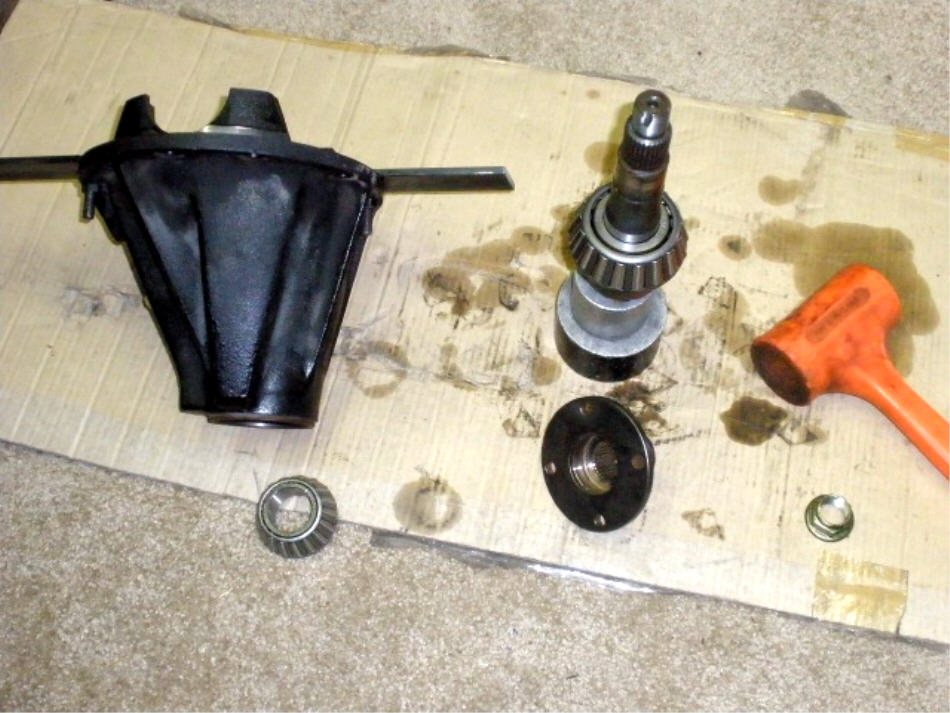
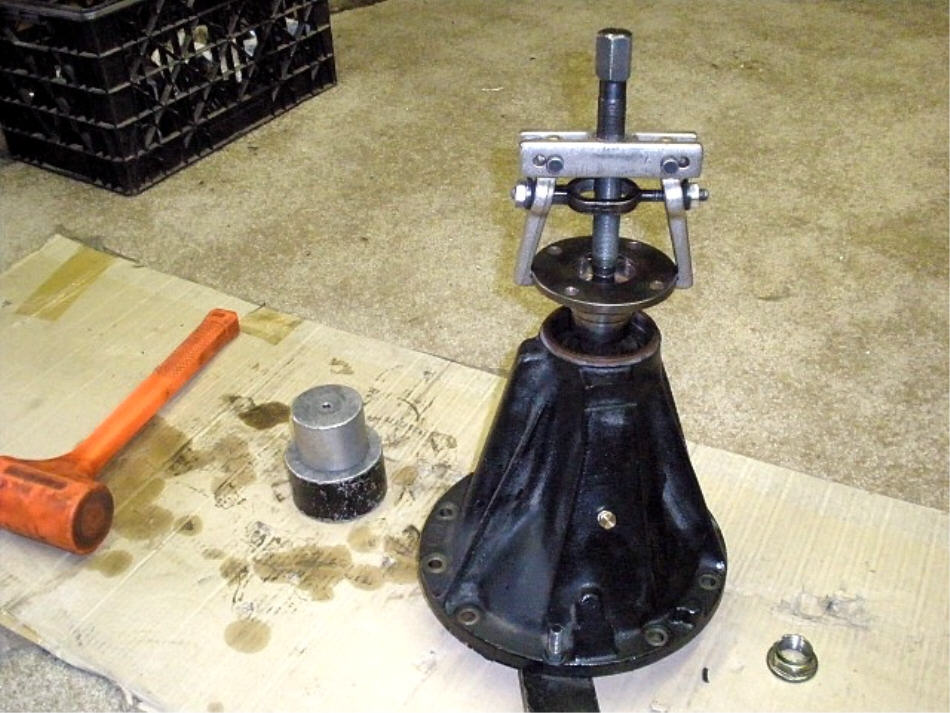
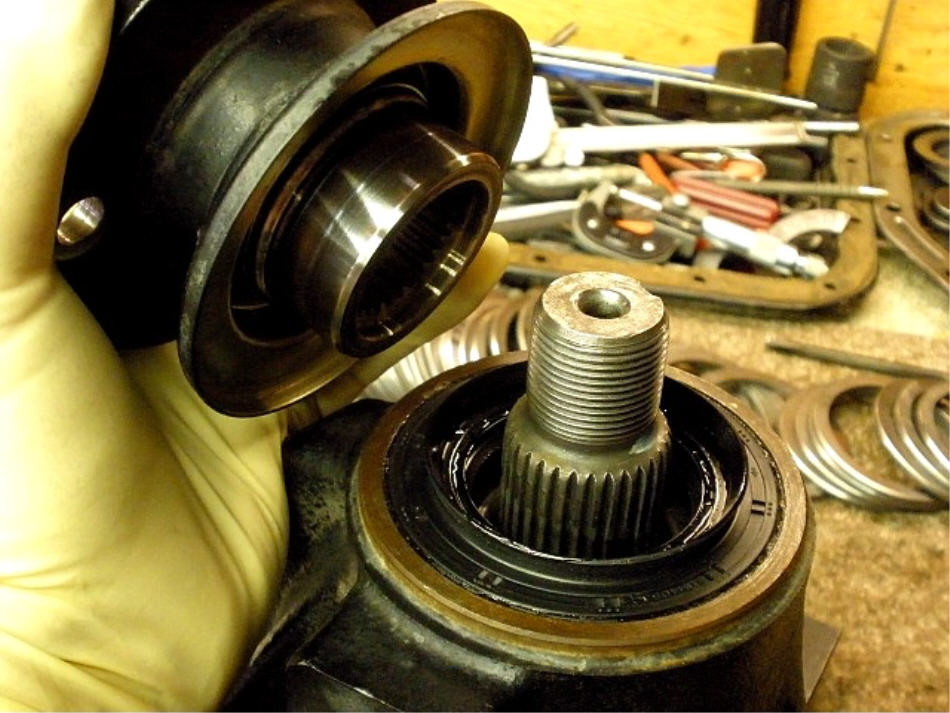
Flange is removed with the help of the puller. |
|
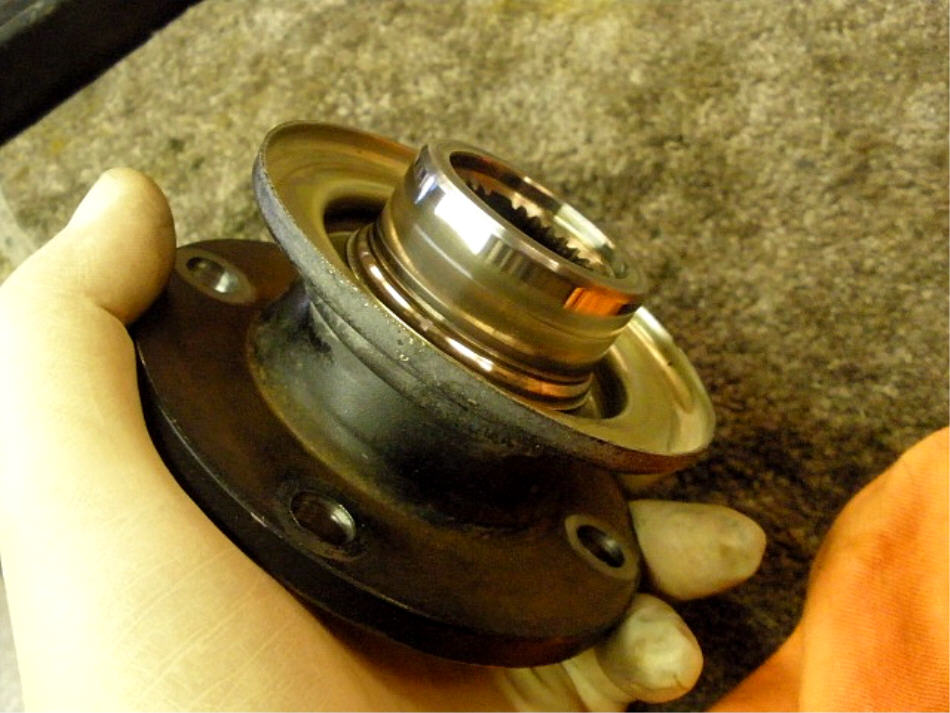
A very small groove so this flange is ok to re-use. |
|
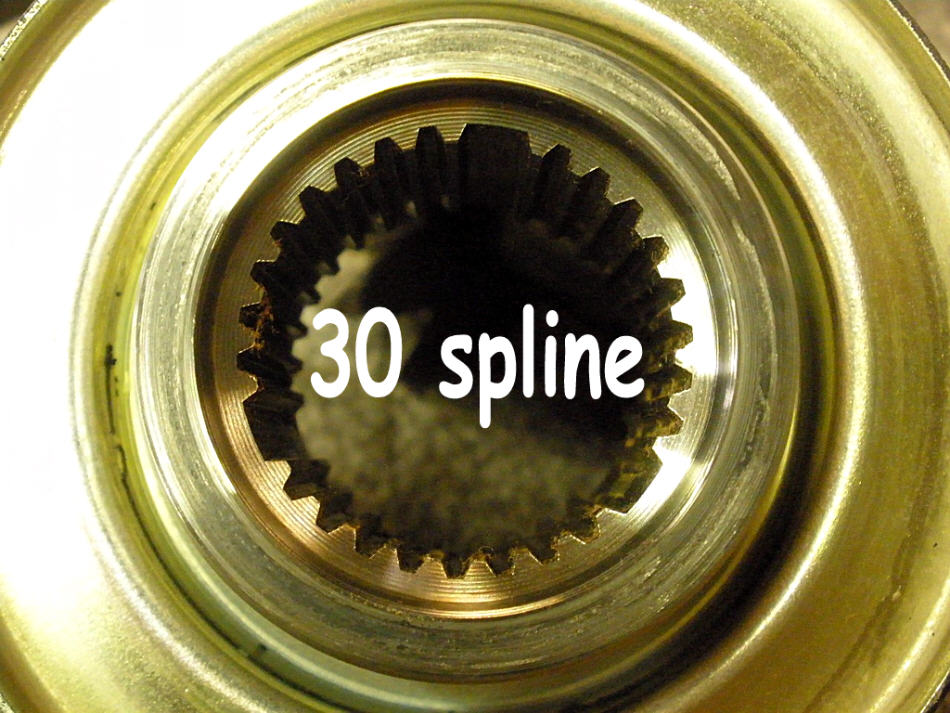
Due to the 3 evenly spaced notches, there's really 27 splines for biting. |
|
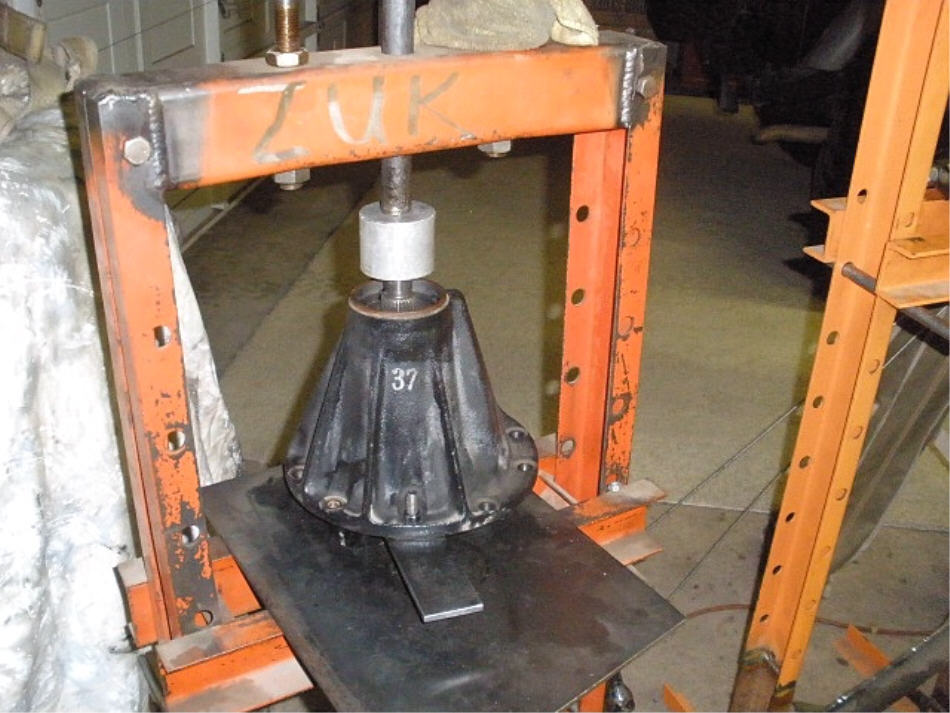
The pinion is pressed out. |
|
On the 8.4", the factory employs 2 thick spacer shims on the topside of the crush sleeve. |
|
The bearing was a very tight fit so I used the shockwave effect to help dislodge the bearing. It worked. |
|
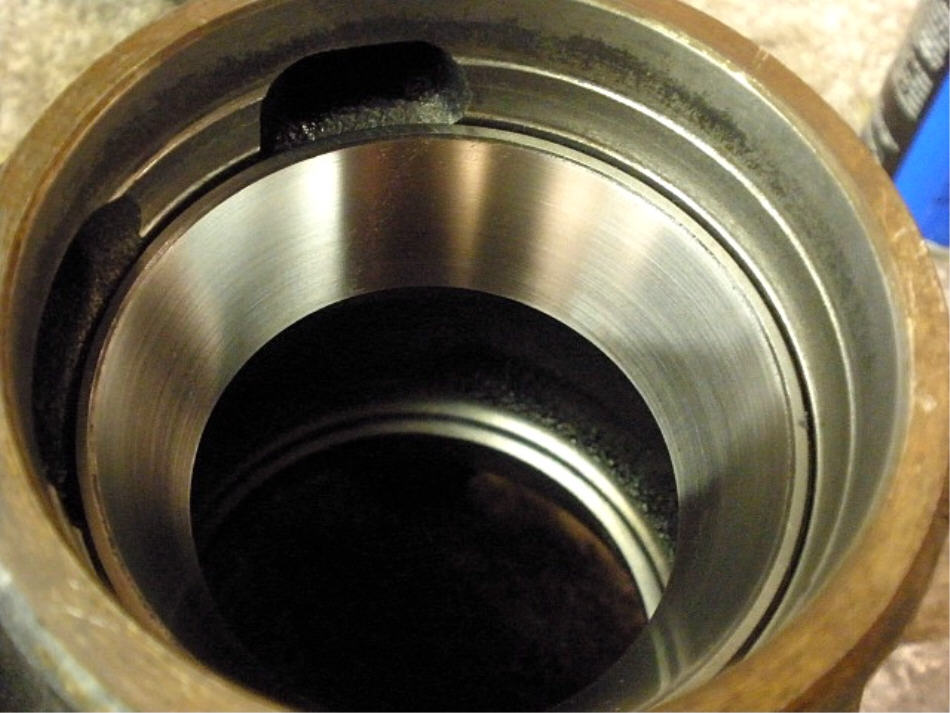
The seal removal tool does its job well. |
|
The same tool easily tapped off the outer pinion race. |
|
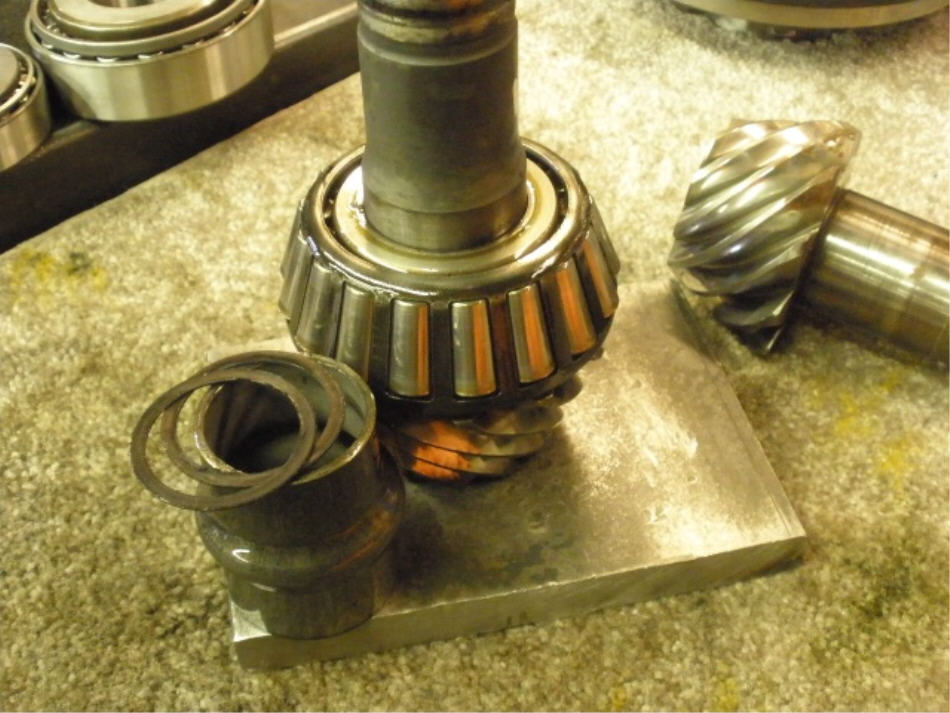
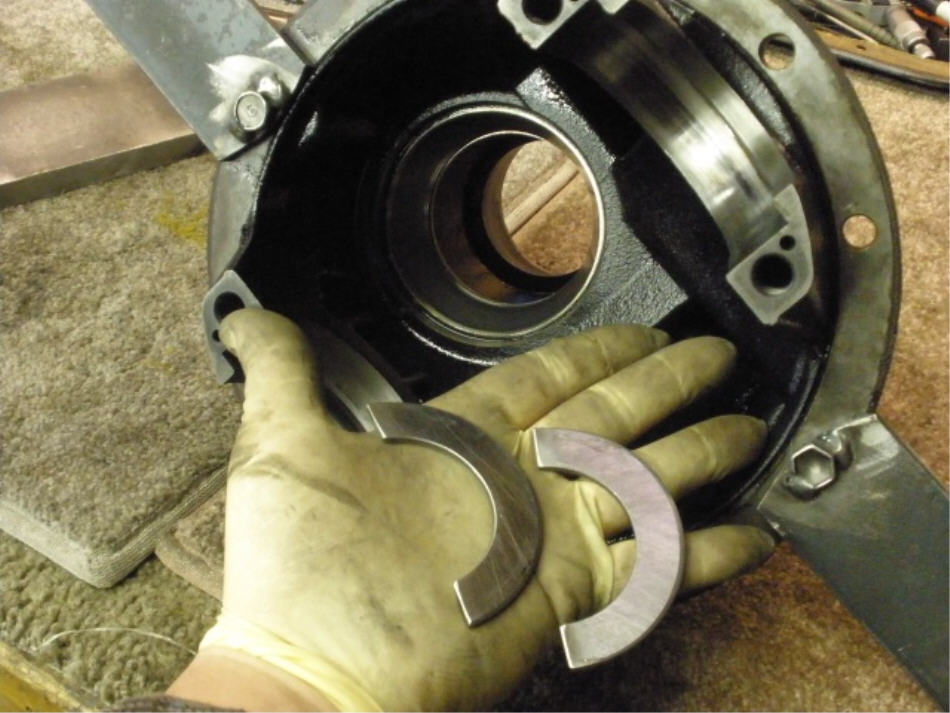
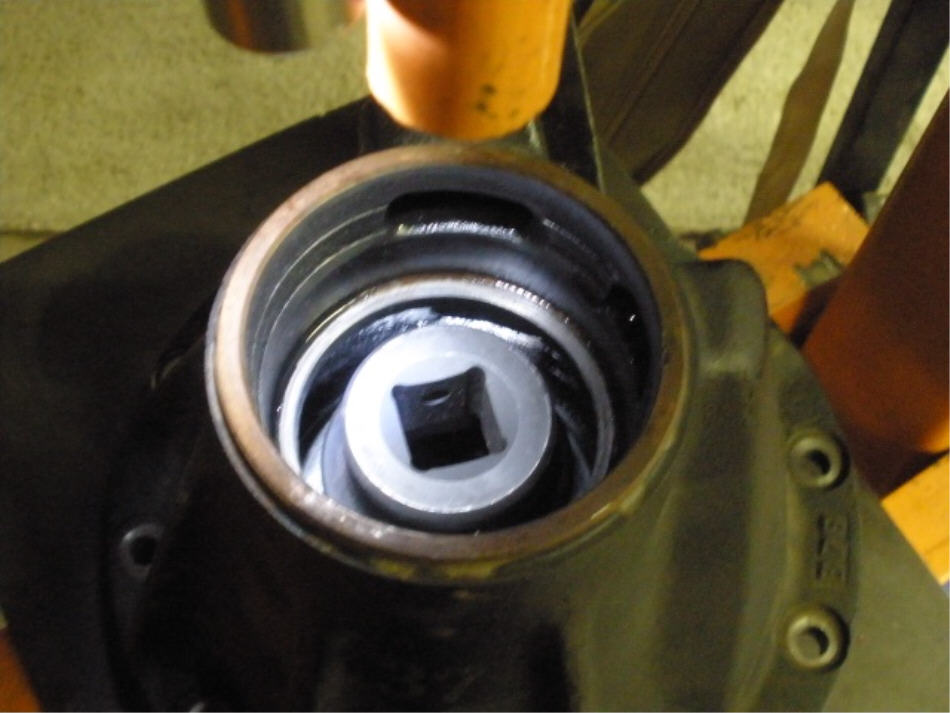
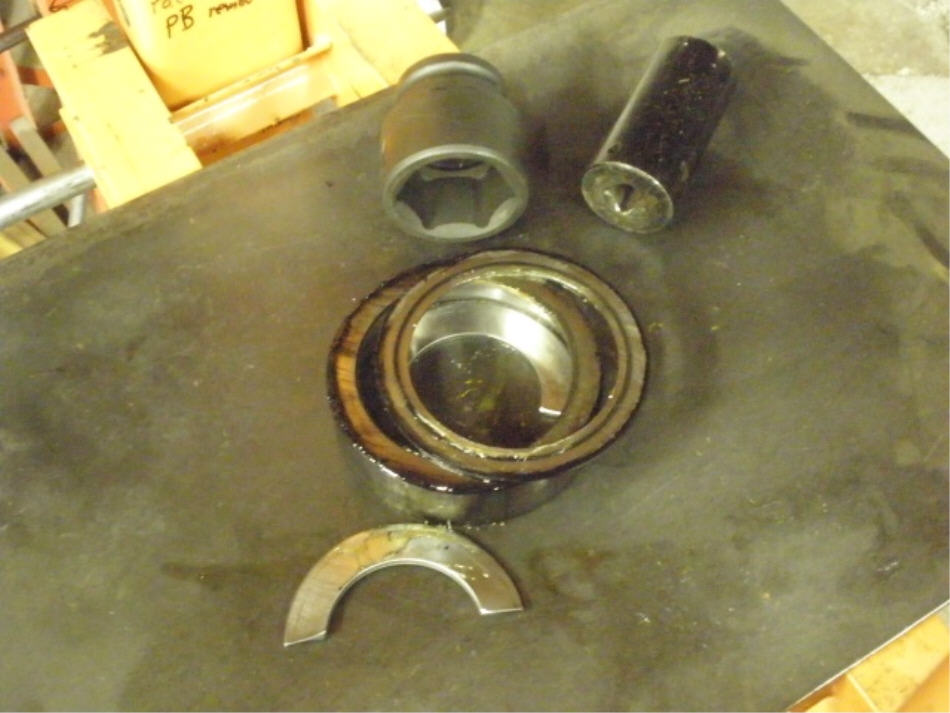
These half-washers work great for removing the large inner race with zero damage to the pinion washer plate. |
|
A dab of thick grease holds them in place. |
|
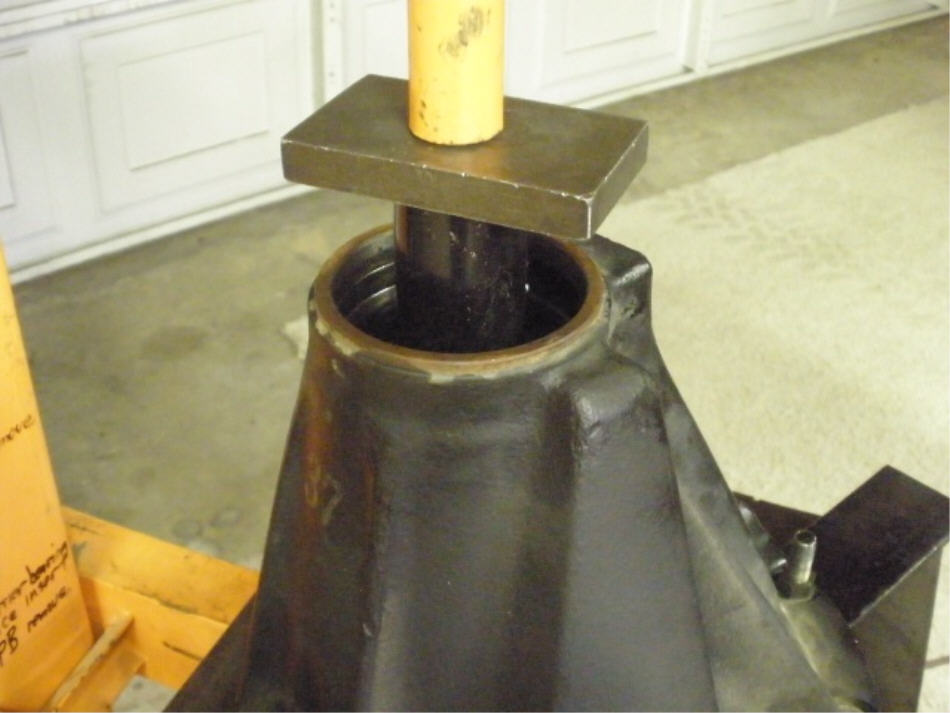
A very large socket with the appropriate spacers allows the press.... |
|
...to push the race out.... |
|
...with no damage to the washer plate |
|
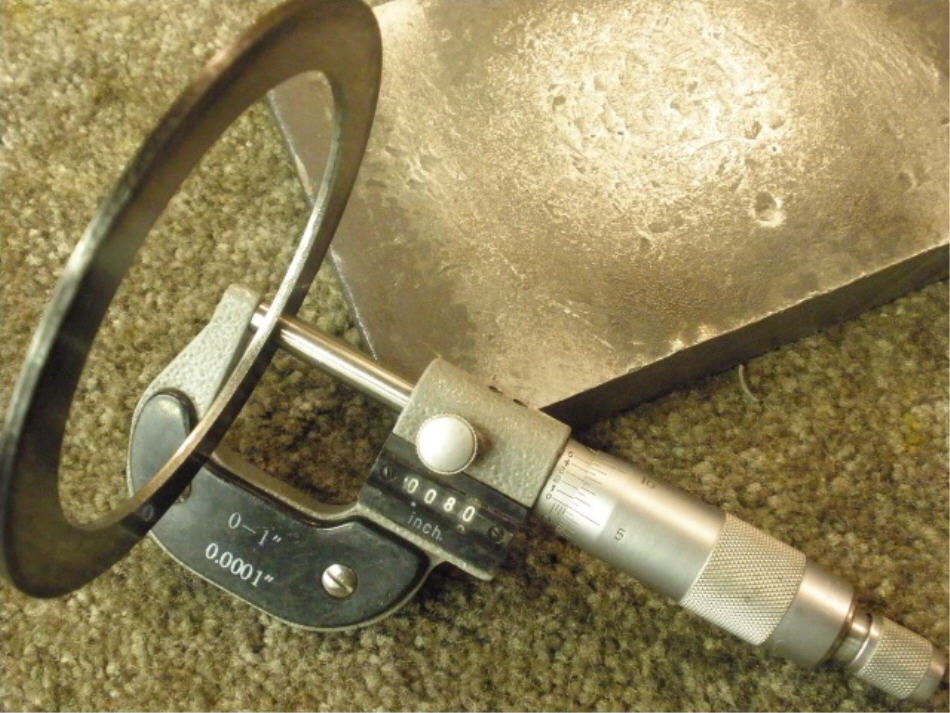
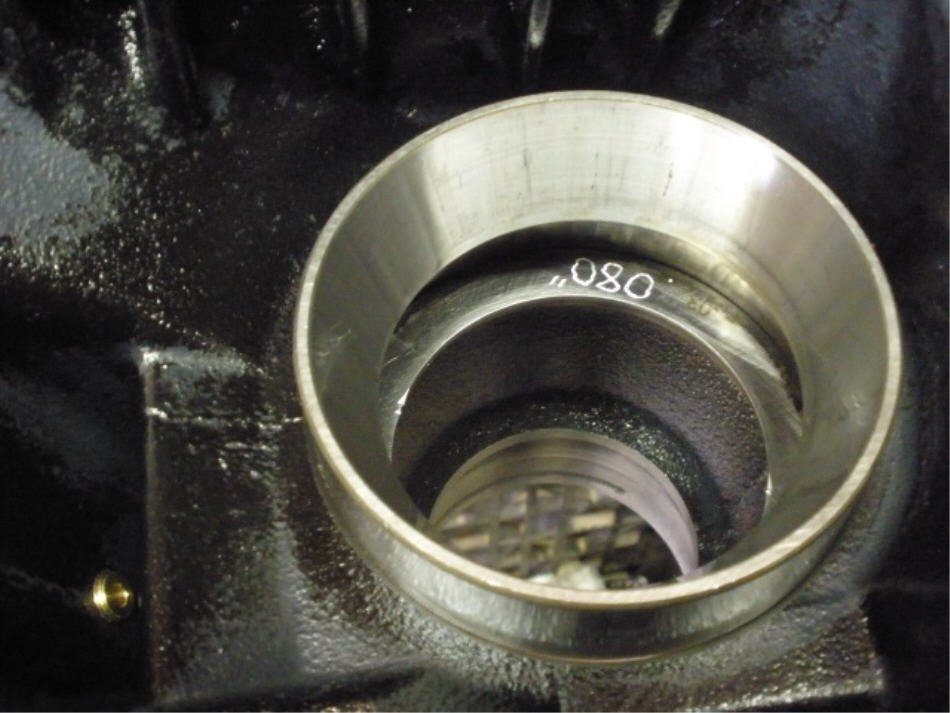
The .080" thickness of the plate is recorded. |
|
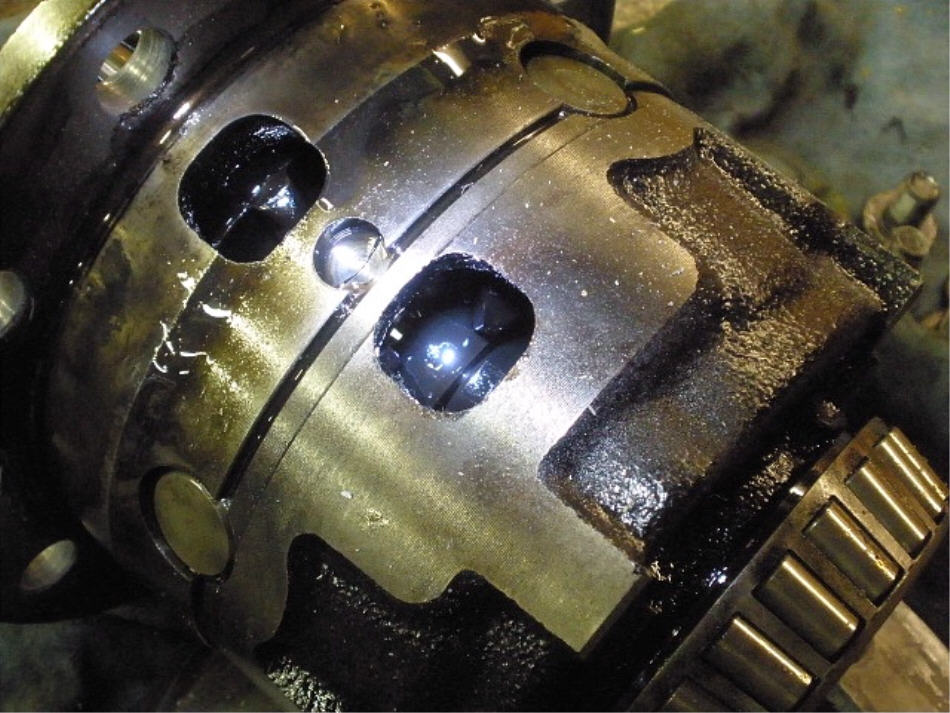
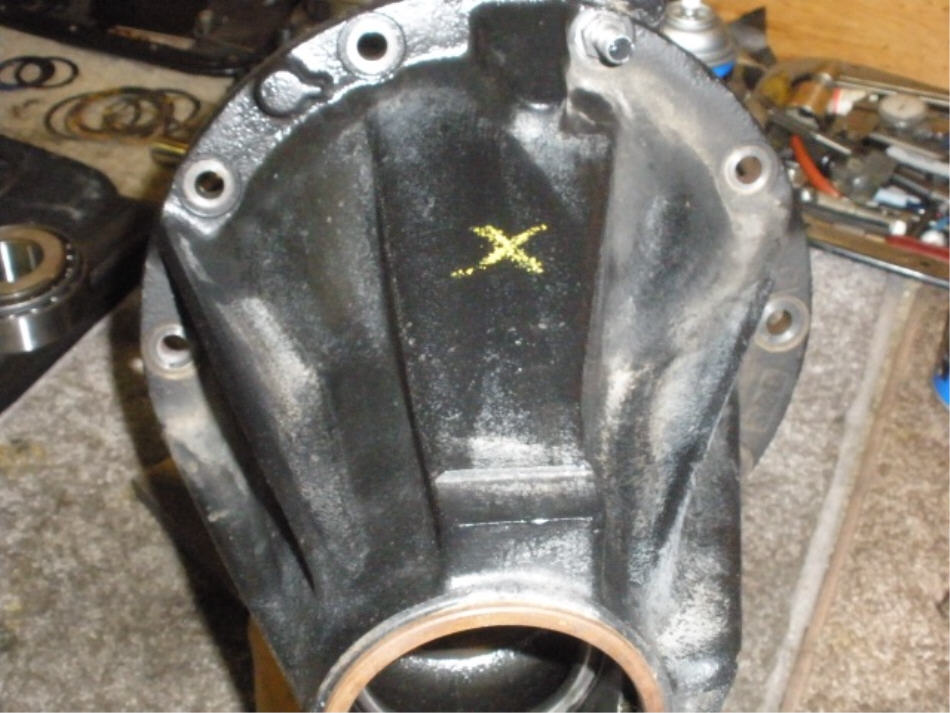
With the 3rd completely empty, now is a good time to drill, tap, and plug a hole. |
|
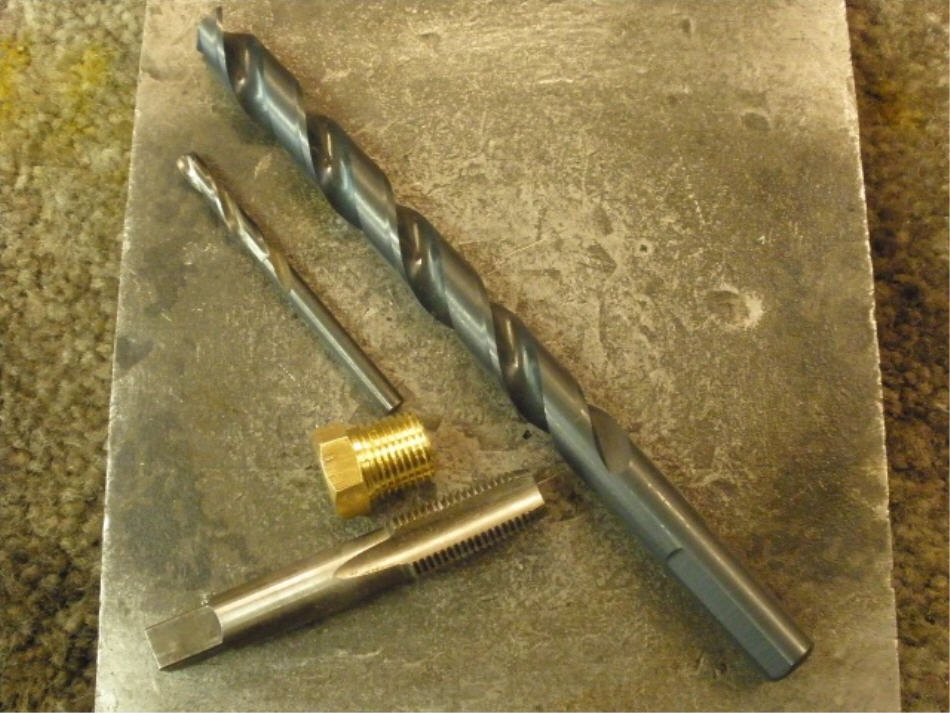
The drill on the left is just a pilot drill....1/8". The big one is .339" which is perfect for an 1/8" NPT. |
|
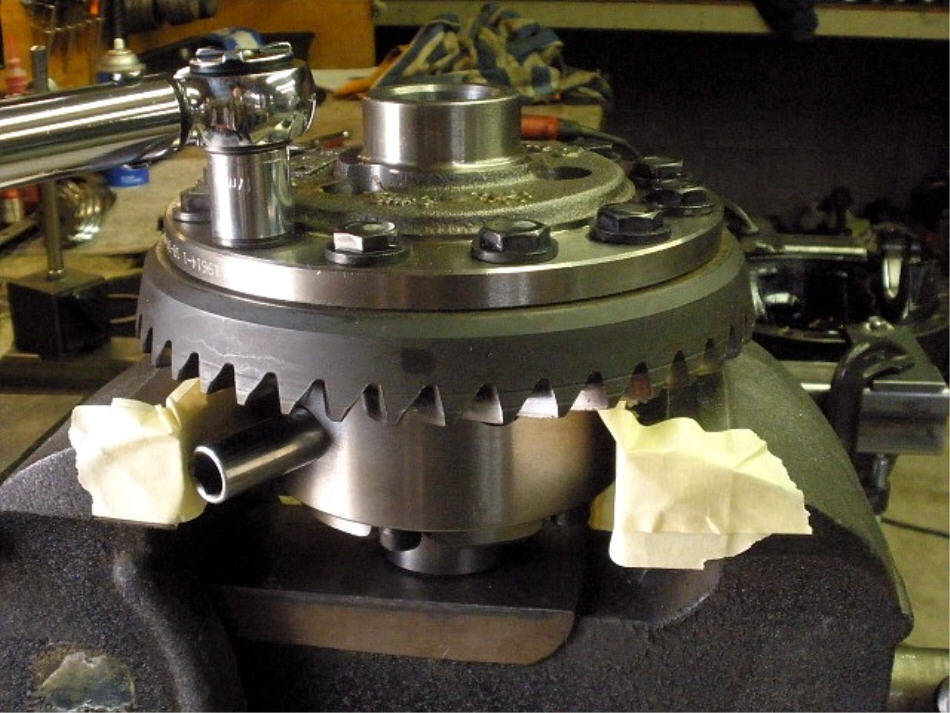
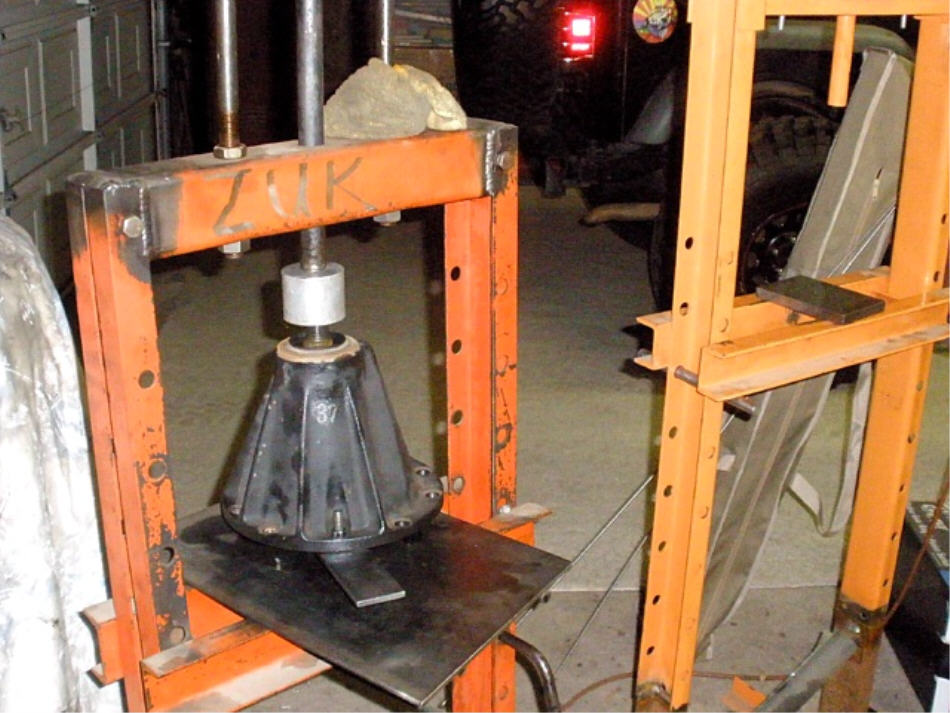
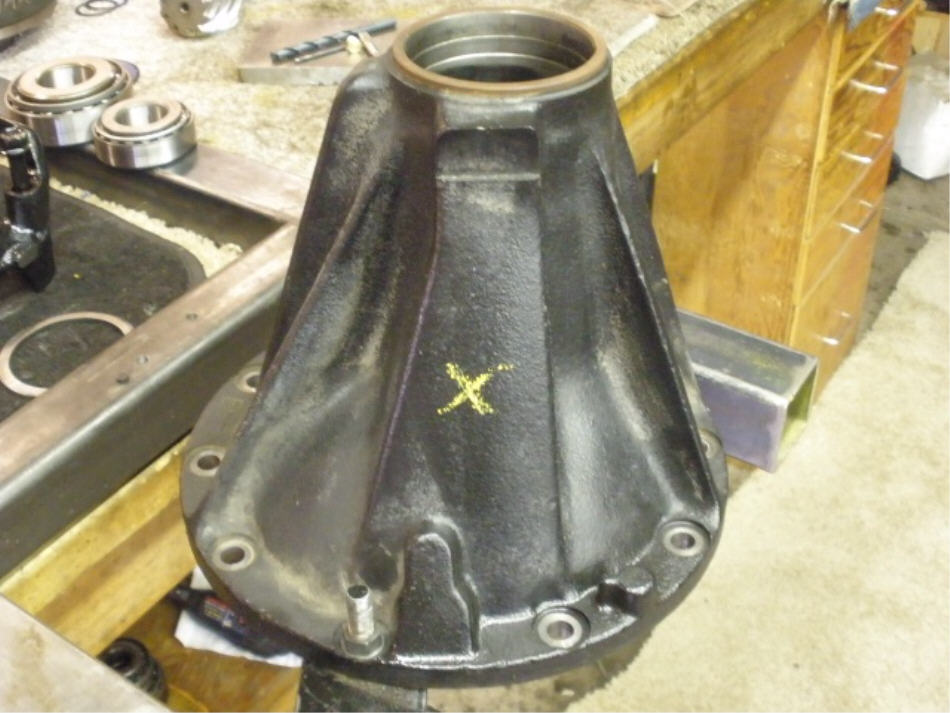
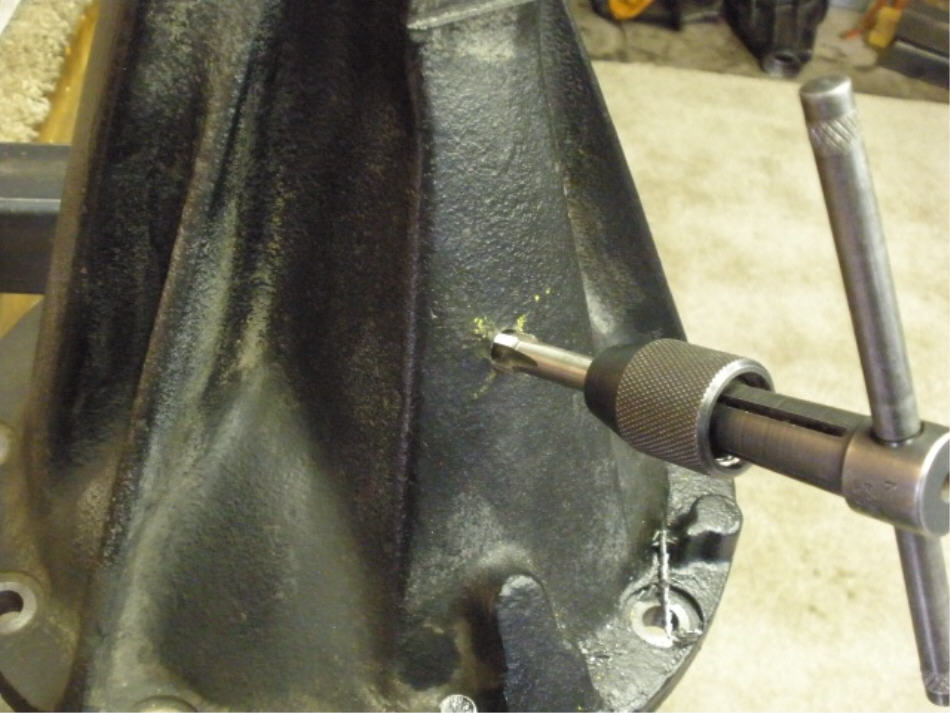
The 3rd is secured to the fixture. |
|
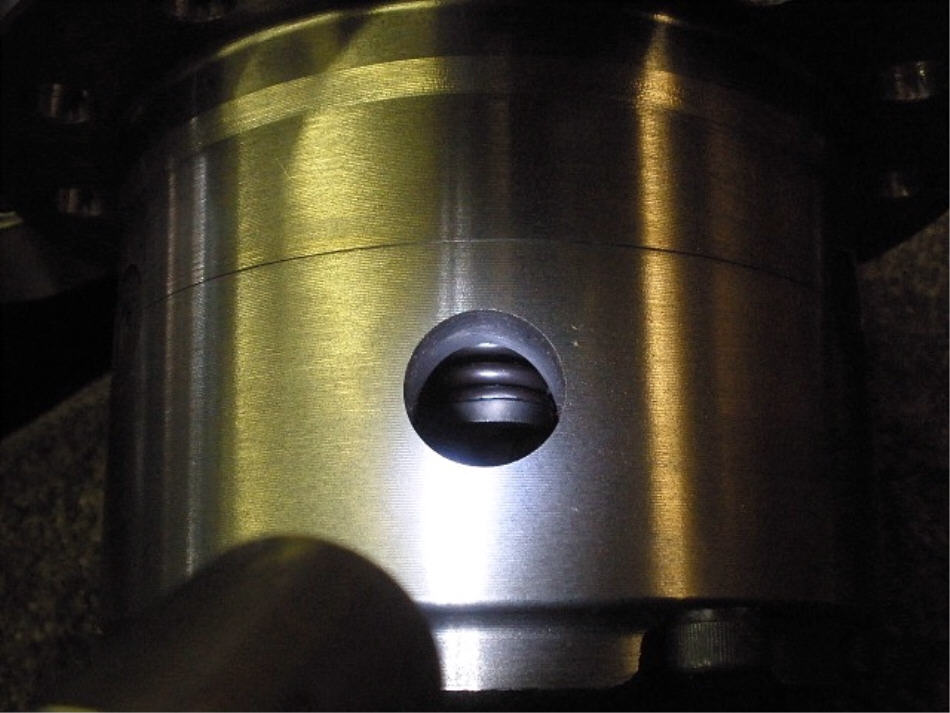
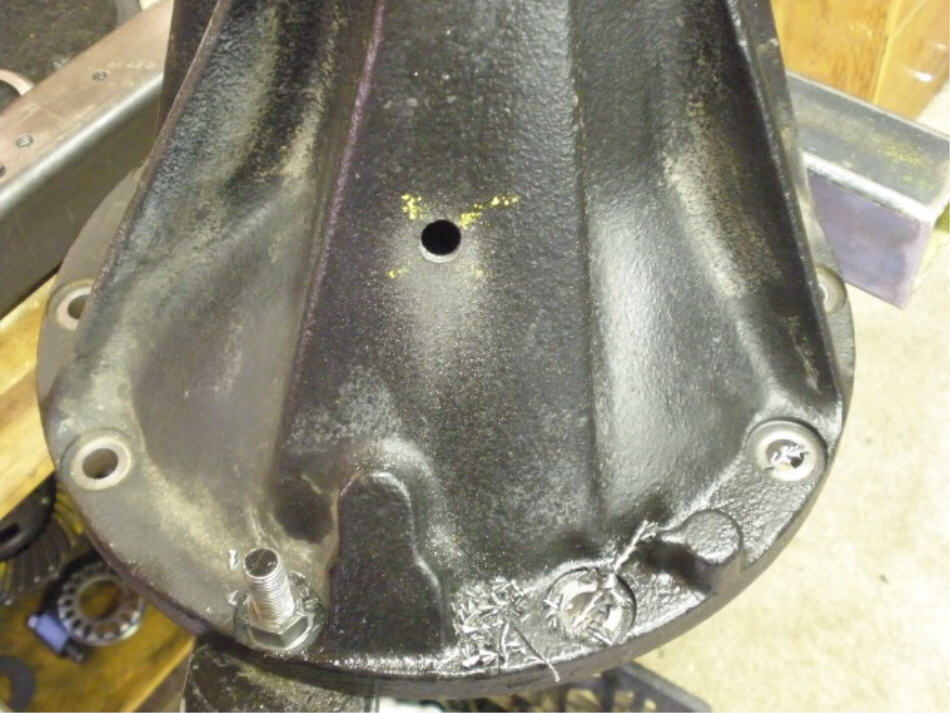
.339" hole is drilled.... |
|
...1/8" NPT tapered tap. |
|
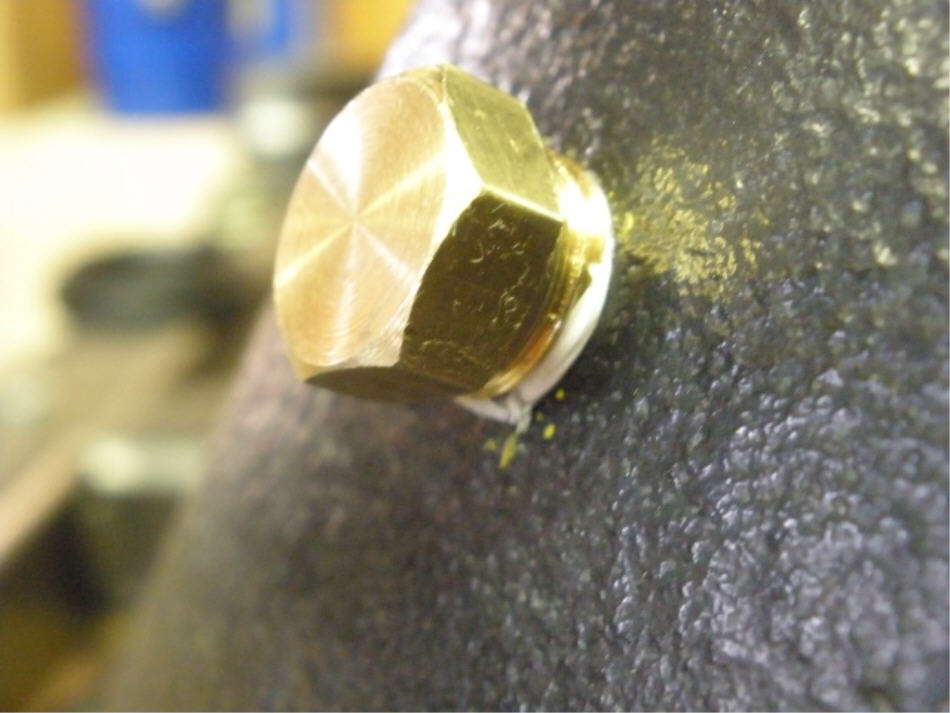
Teflon tape guarantees no leaks. |

|
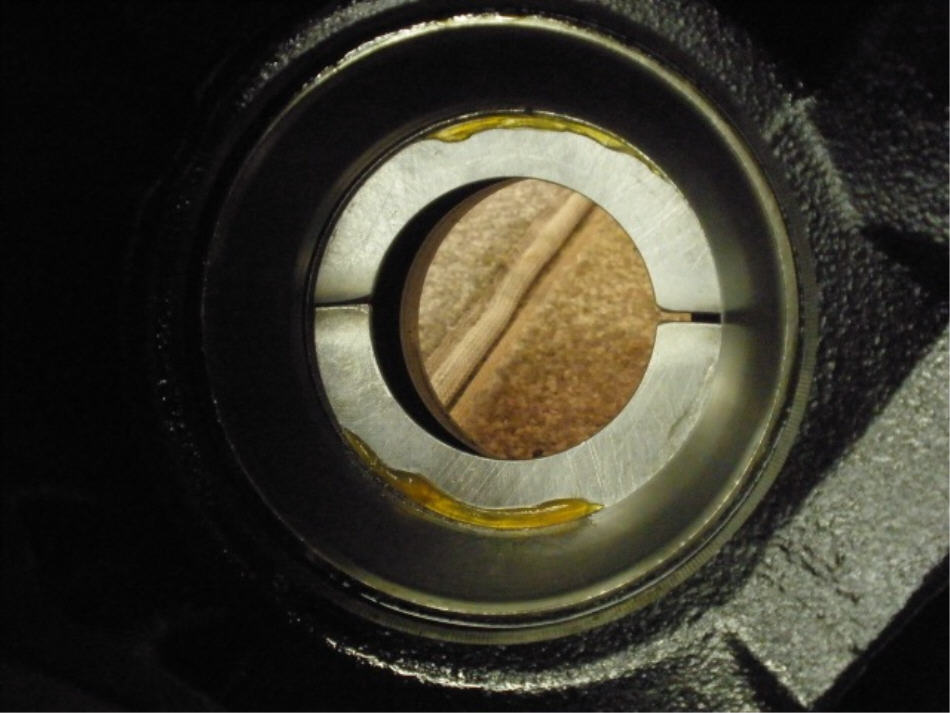
Some strange opticals are going on here. So, as the gear oil gets slung from the ring gear and moves to the front portion of the tunnel to lube the outer pinion bearing, the probe will get an accurate reading of the oil. |
|
The pinion washer plate is followed by the big race. |

|
Using an old salvaged race to push against the new one, the press can now easily seat the race down. |
|
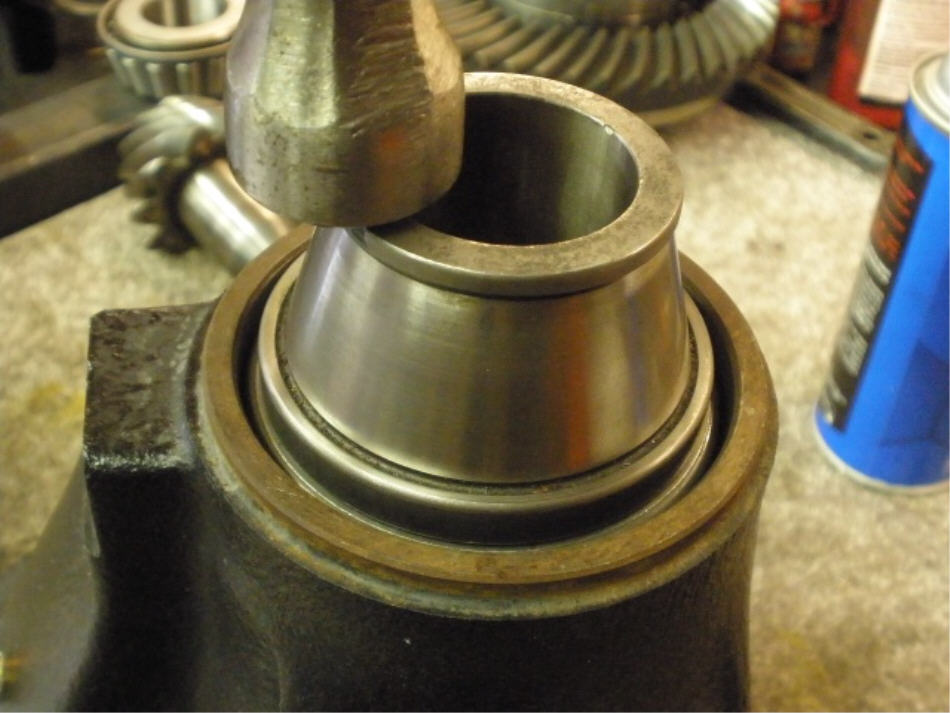
The small outer race can be tapped in place using an old same size race to seat it down. |
|
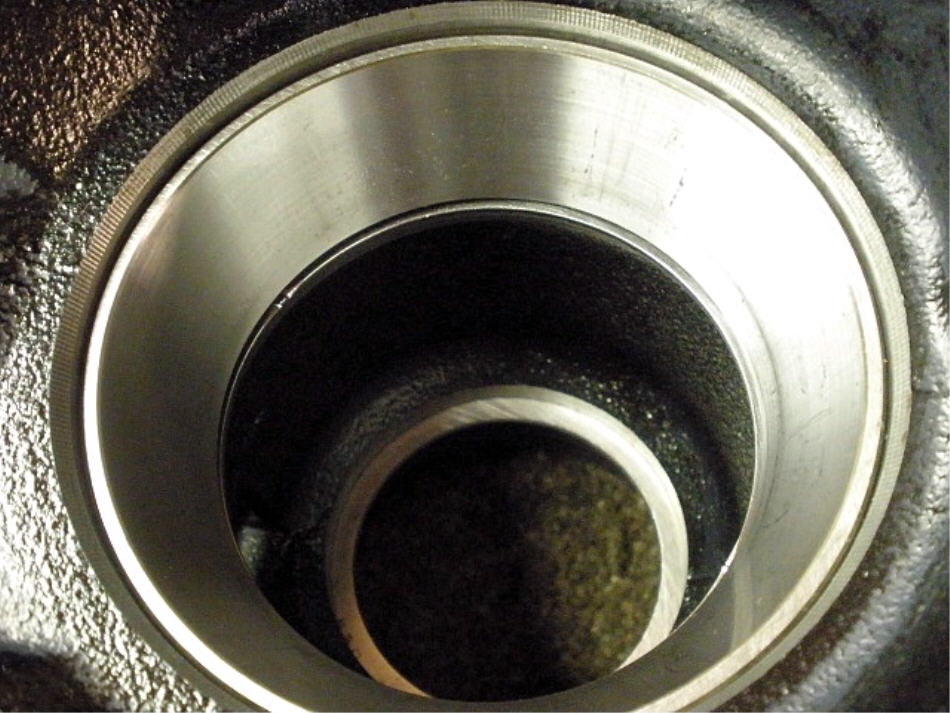
Outer race is in.... |
|
...inner is in with the 080 washer plate behind it. |

|
Now, the large pinion bearing can be pressed on. No shim here because the shim is behind the race. |
|
I place the pinion on 2 aluminum spacer blocks and then place the heavy 3rd over it. That way, I can tap the flange on with the lead filled mallet. |
|
There's enough threads catching to now use the impact to pull it on fully. |
|
Gear oil has been generously applied to the bearings. I kept tightening the pinion nut one ratcket at a time from the electric impact until I had about 10 in/lp of PPL. |
|
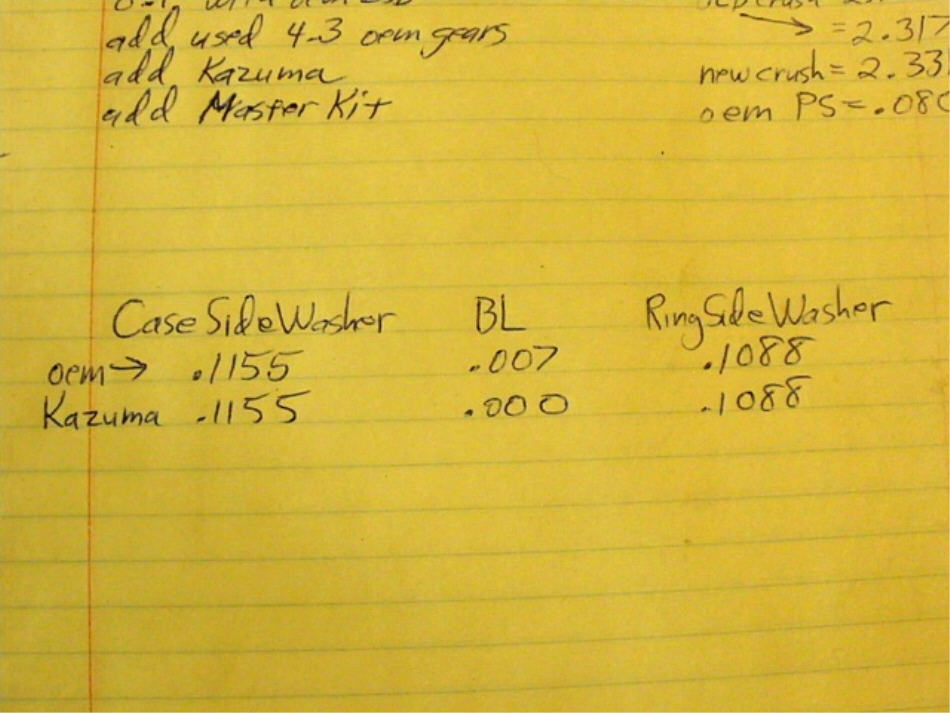
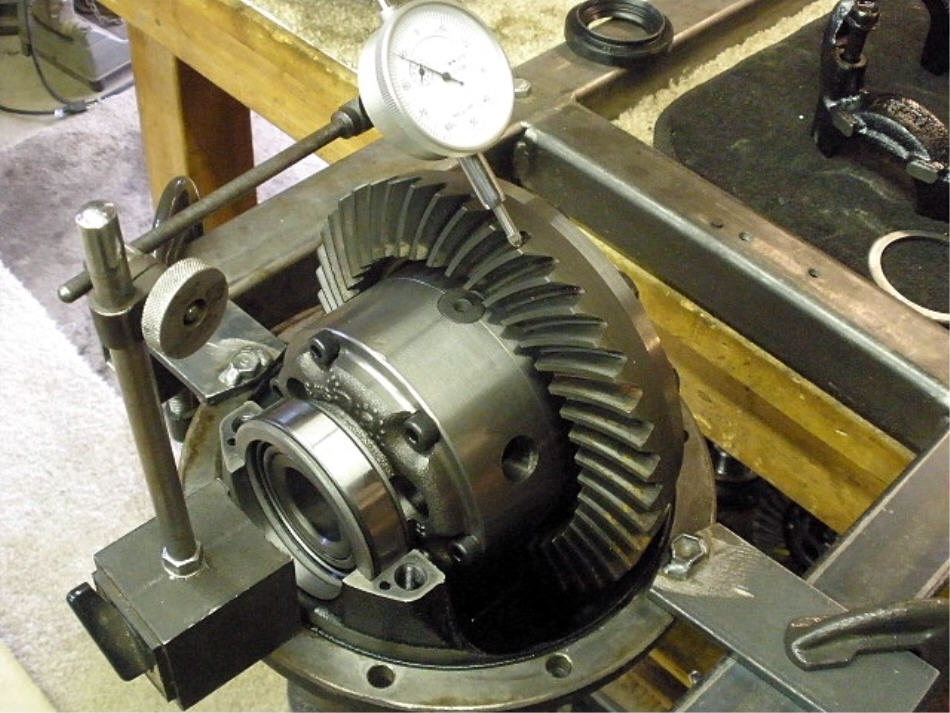
As shown in the next picture below, I had about 007 for backlash with the oem lsd case.....and then by transferring the same washer plates over to the after-market Kazuma I now had ZERO backlash. |
|
... |
|
So, I added about 010 to one side and took off about 007 from the other... |
|
...to get a minimal .006" in measured backlash....good enough for a painted depth check. |
|
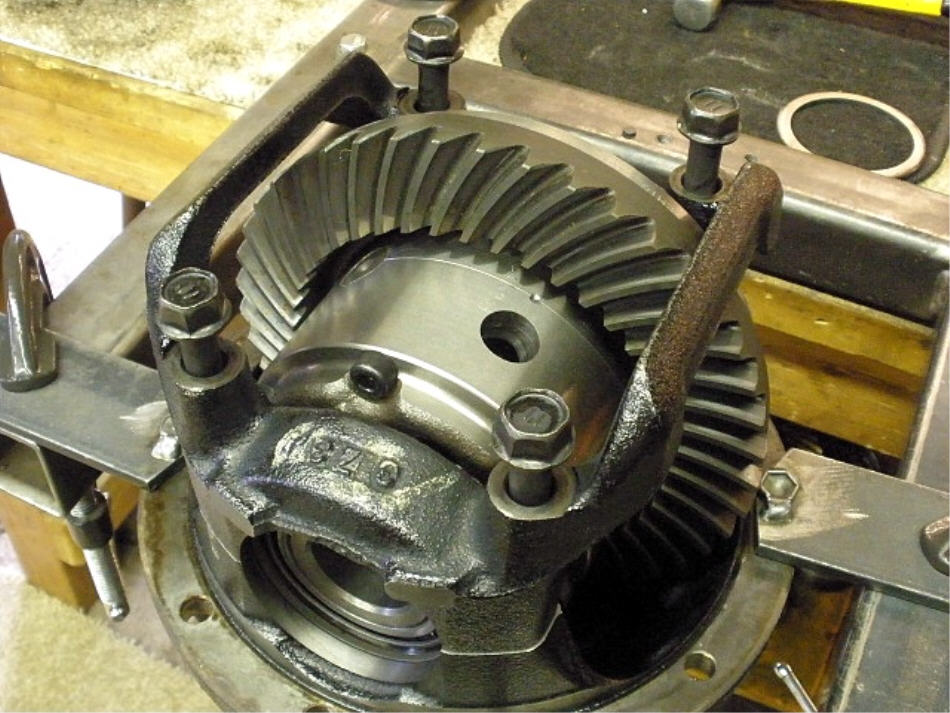
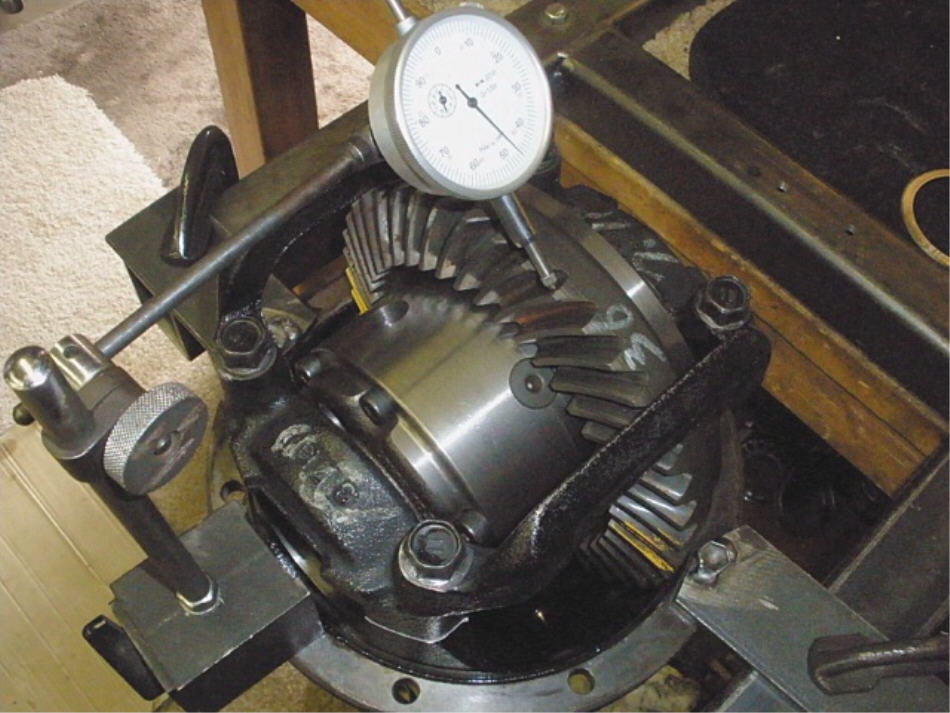
Then I place the reinforcement girdle in place and tighten the 4 bolts down to find that the BL tends to close up about 002".... |
|
...so the true BL is closer to 004 which is ok for checking the pattern depth. |
|
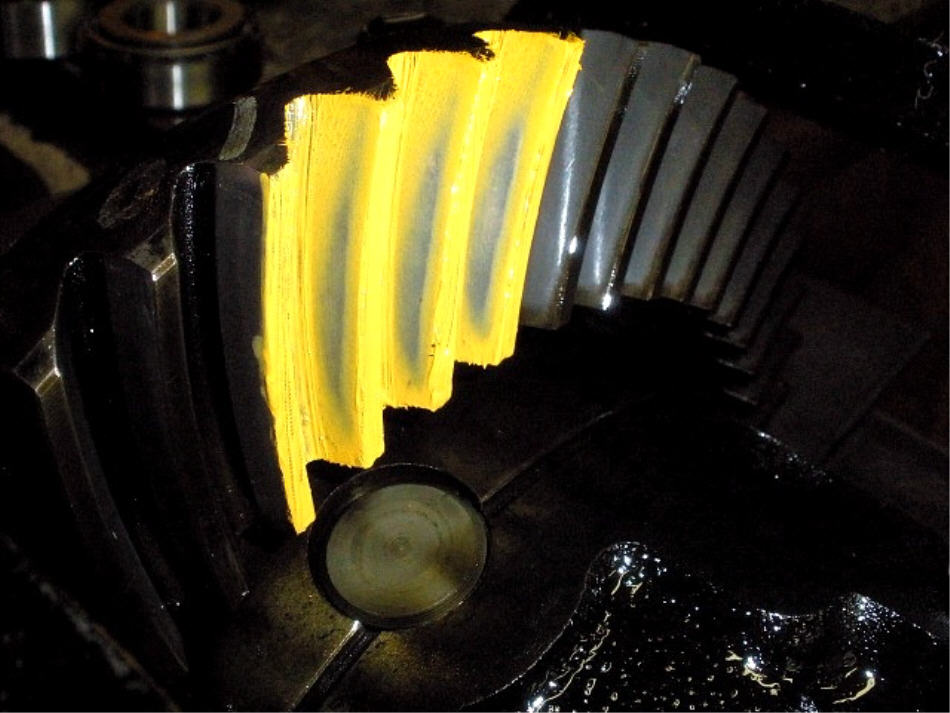
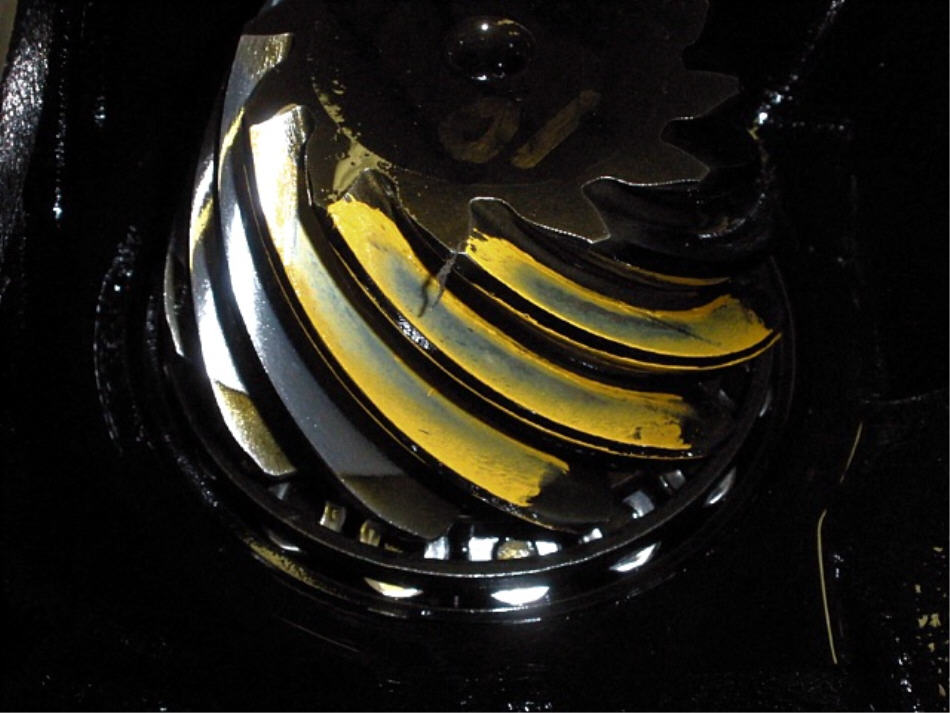
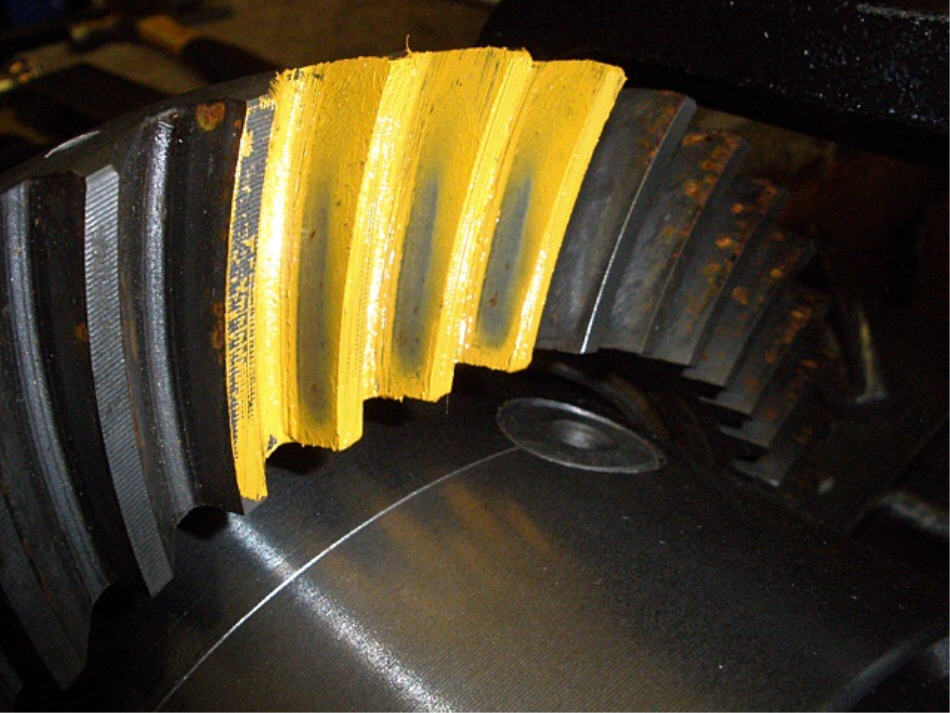
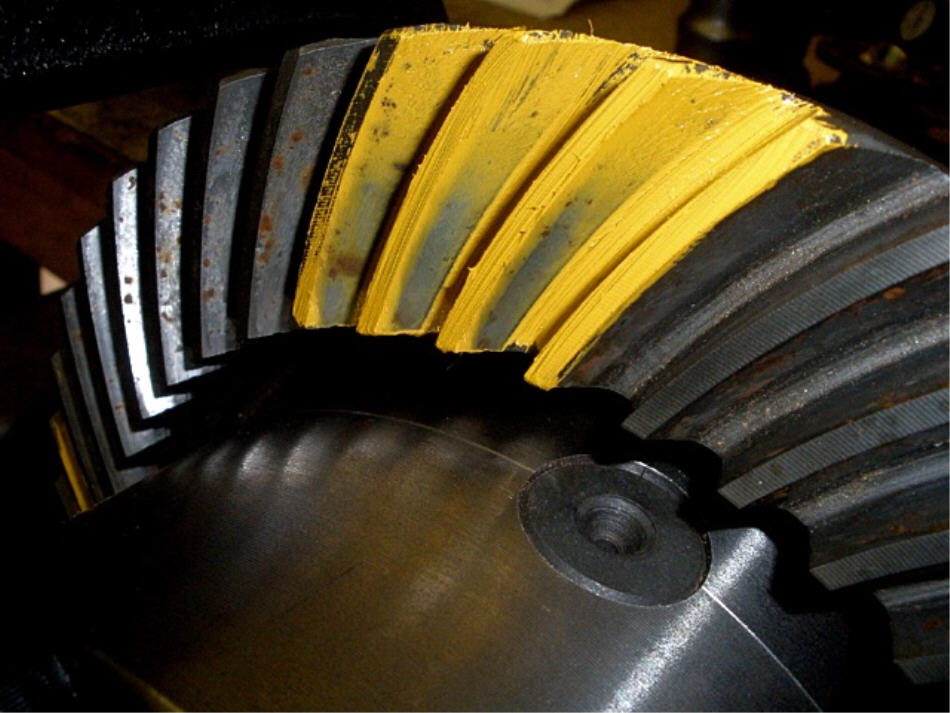
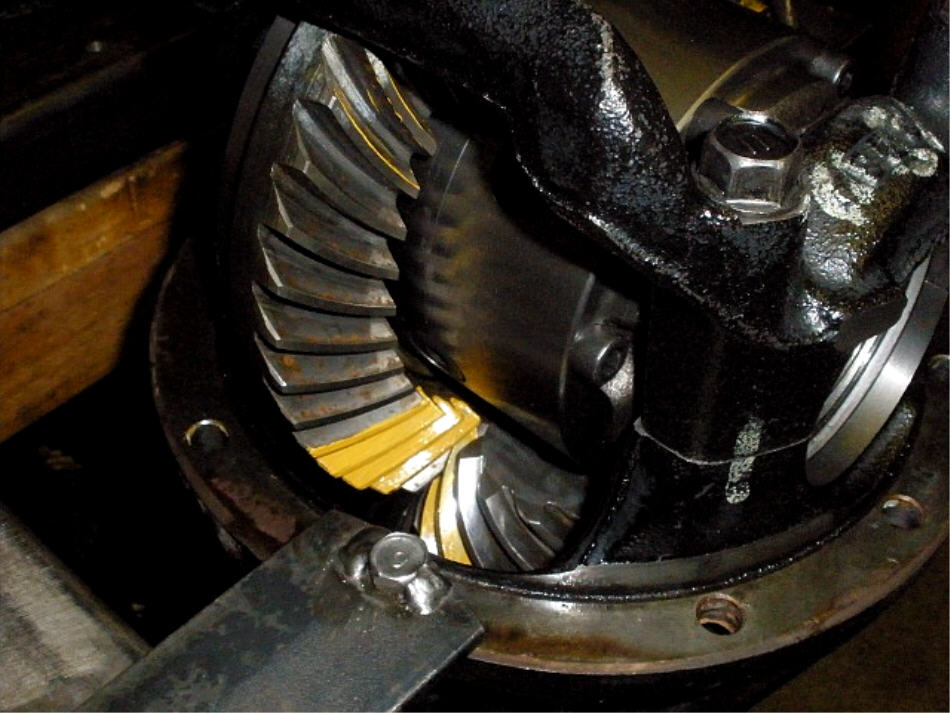
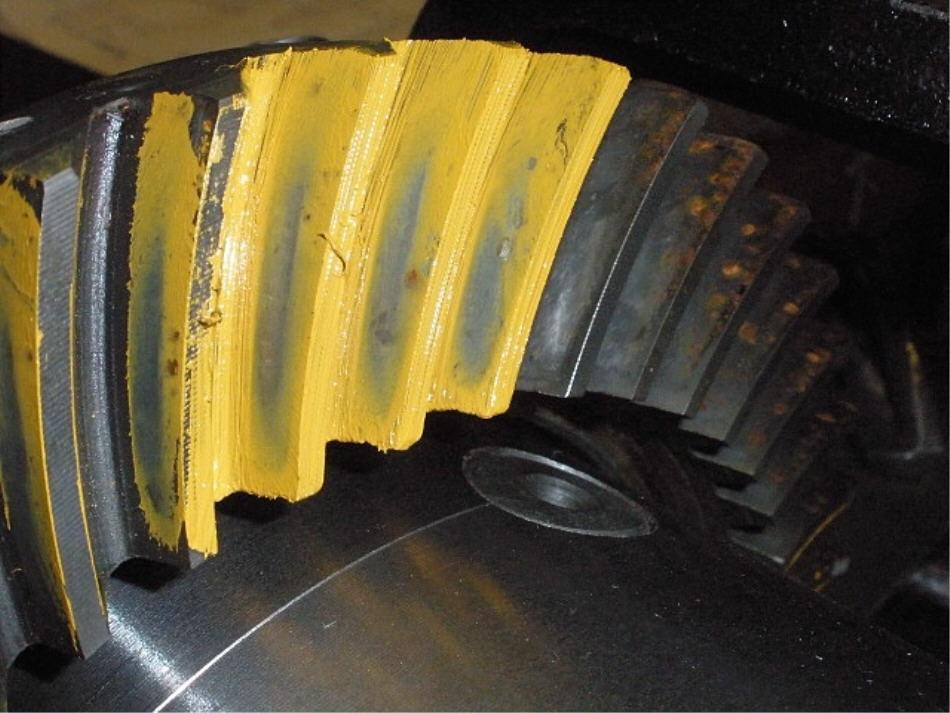
The drive side paint shows dead on. When I say "dead on" I mean from face to flank....from the root to the top. Yes, it is favoring the toe but that is desirable. This is a used gearset and they always don't turn out so well defined like this one. |
|
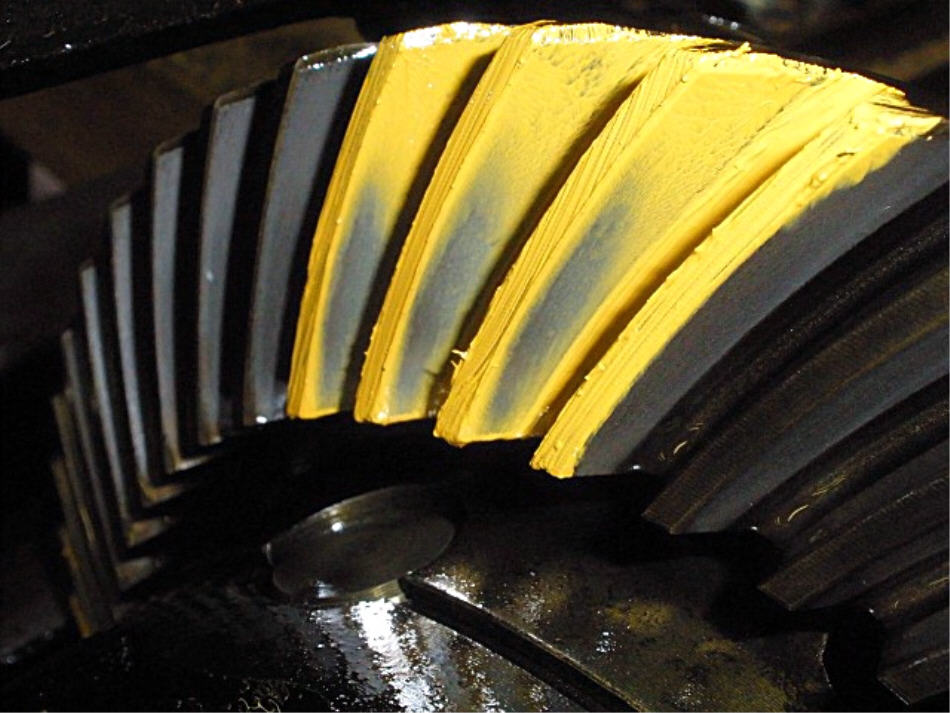
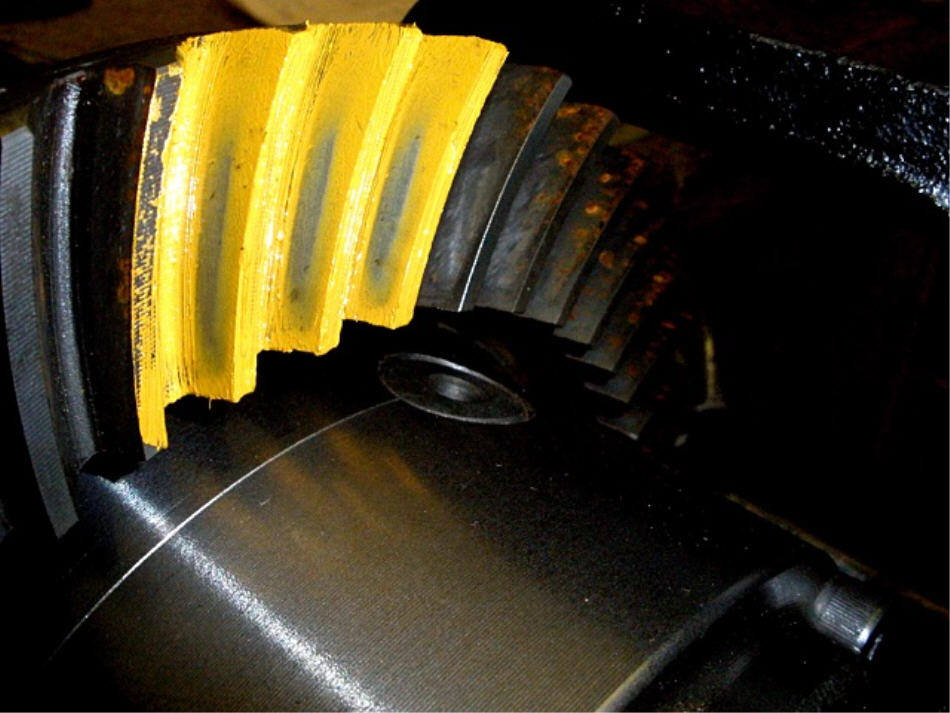
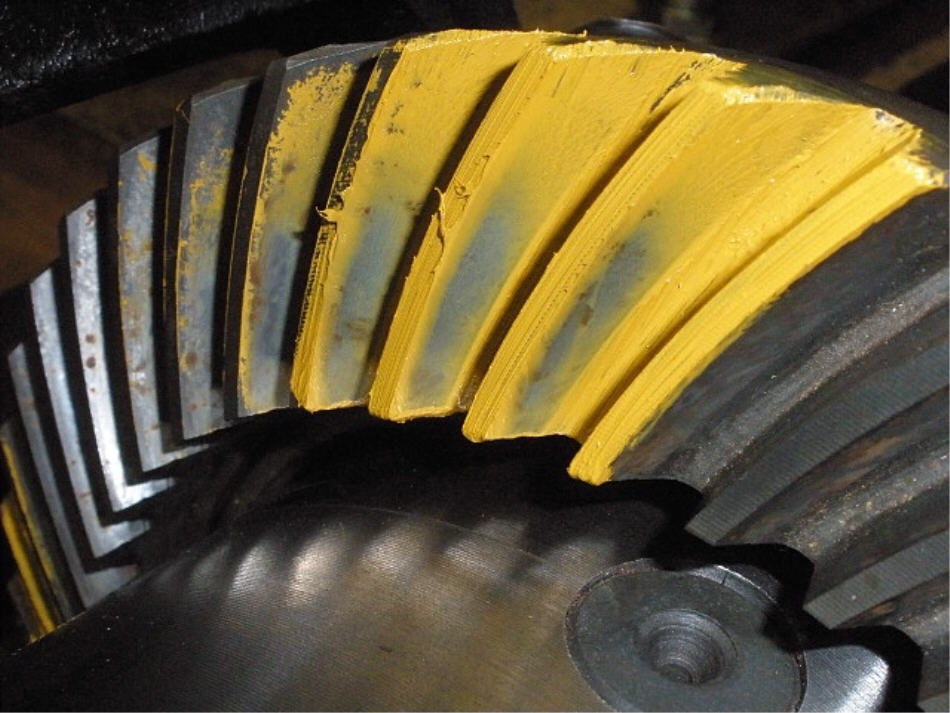
Coast has good depth and it is toe heavy. |
|
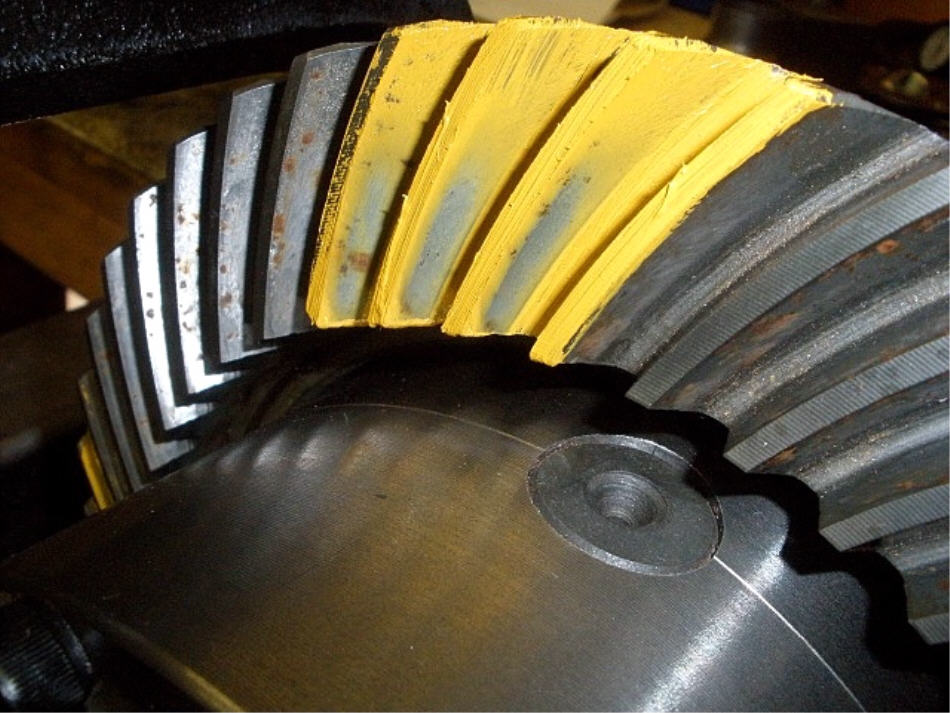
So, I added 004 to the case sideand removed about the same 004 from the ring side. This moves the ring about 004 farther away from the pinion which opens up the BL another 2~3 thou. Put the girdle back on and re-paint. BL= still a little tight at .0065" average.... |
|
...but the increased BL has had the effect of moving the load bearing pattern closer to the center. |
|
Coast. |
|
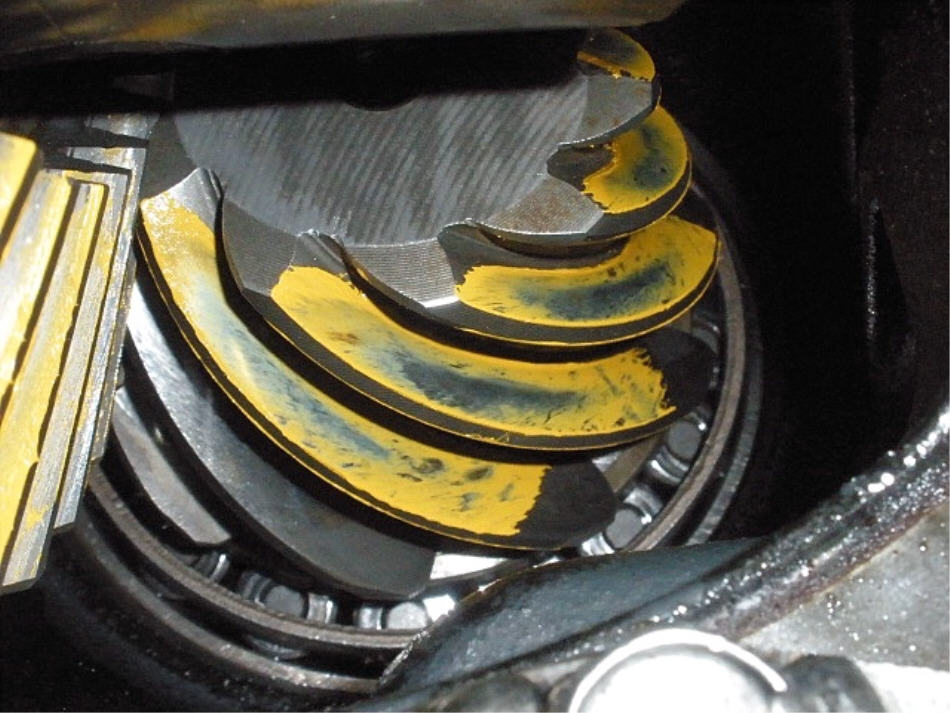
Pinion drive-side. |
|
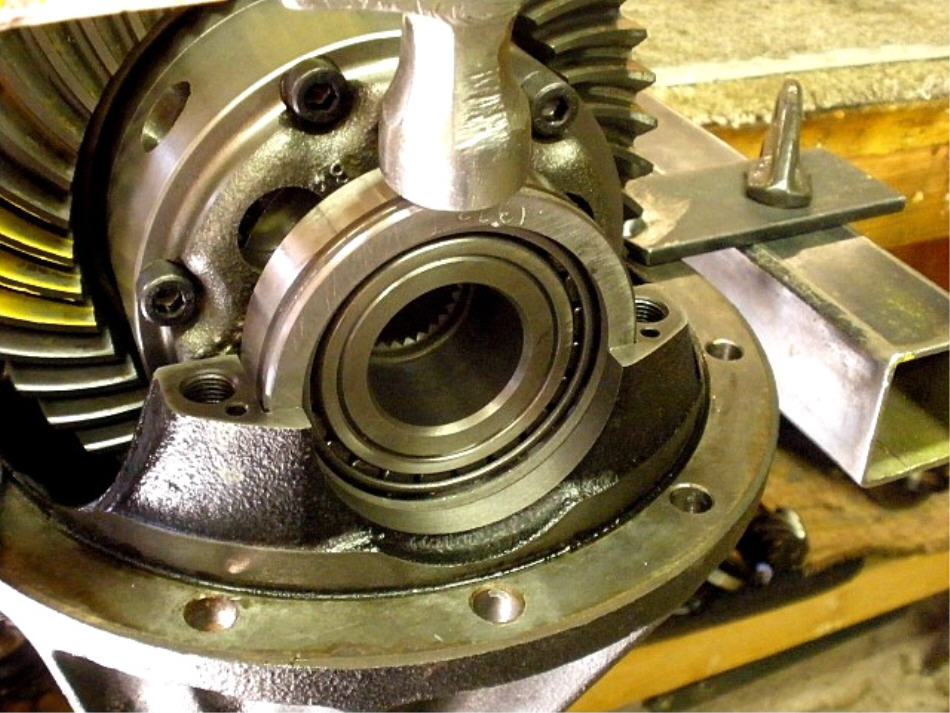
Now that I'm satisfied with the depth setting, now to take it apart and add the new crush sleeve. |
|
Push the pinion out. |
|
Install the new crush. |
|
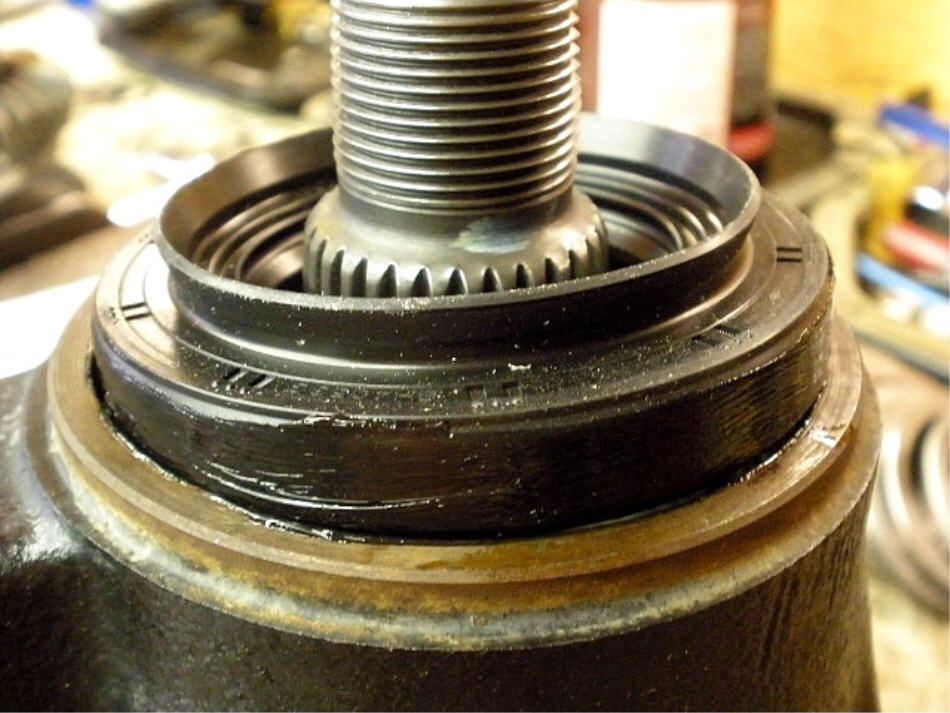
The new rubberized seal has black rtv smeared around it to help help the seal tap down easier. |
|
Gear oil is lightly applied to all related surfaces. |
|
Red loctite is used on almost all my installs. |
|
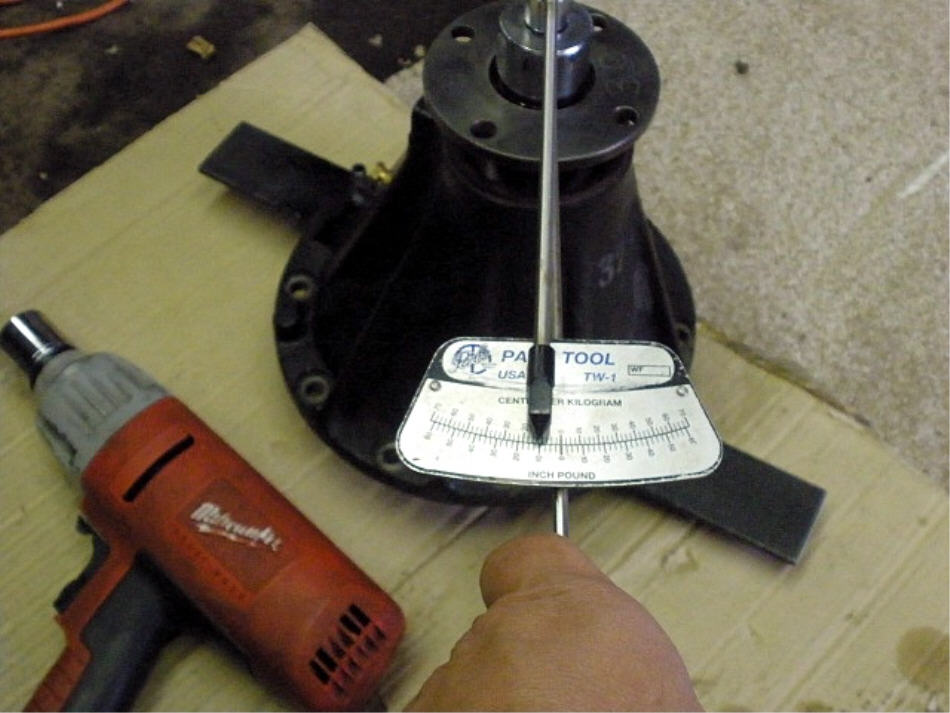
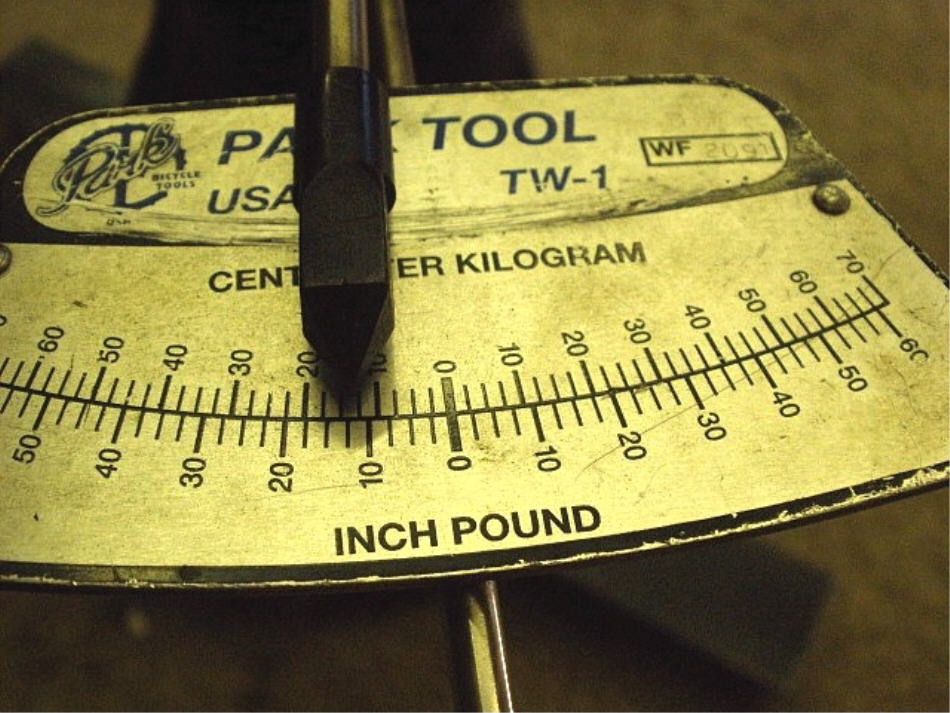
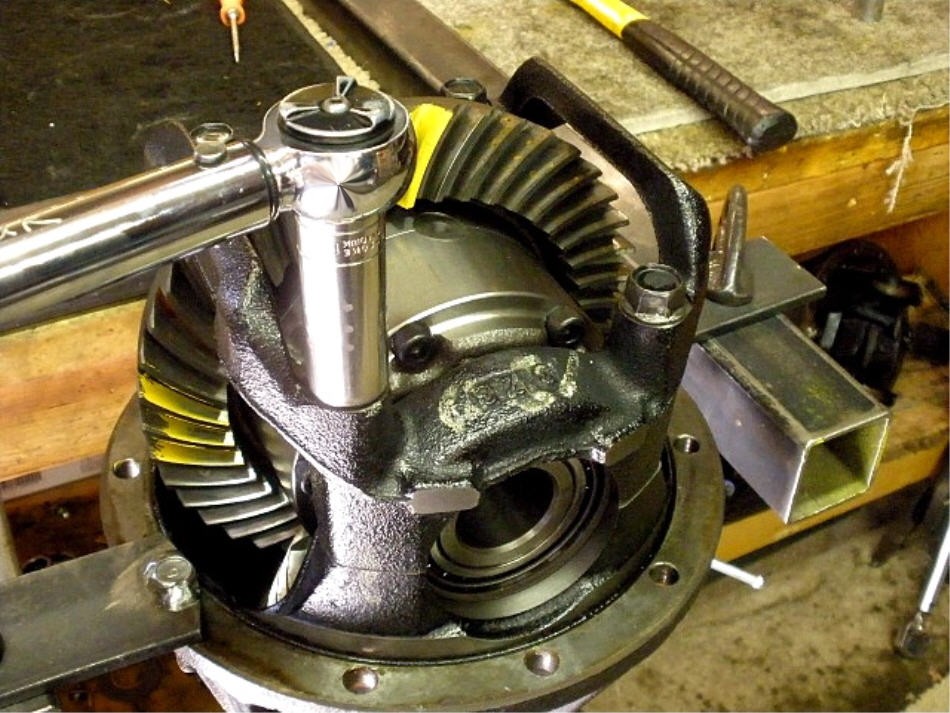
I skipped over the electric impact tightening followed by the 3 foot cheater bar to dial in the "just right" amount of pinion pre-load. Here, I have about 14 in/lb STARTING torque....and that resulted here in 10 in/lb ROLLING torque. |
|
I measured it once and the ding in the nut takes an extra 30~40 ft/lbs to overcome when trying to remove the nut, for what it's worth. See the black marker on the nut at the 3 o'clock position?....that's effectively how far the nut had to be cranked to crush the sleeve to the FINAL setting. Only 1/4 turn which is desired by me. Thread to thread distance on the pinion is about .060"....so a quarter turn means the crush sleeve was only 15 thou longer than the final length. Makes crushing a lot quicker....with far less thread destruction, also. |
|
Final tweak----I want a little more BL and a little more CBPL so I added .003" more to the case side and left the other side alone. |
|
Forceful taps finally seated the washer plate. |
|
83 ft/lb to the 4 bolts. |
|
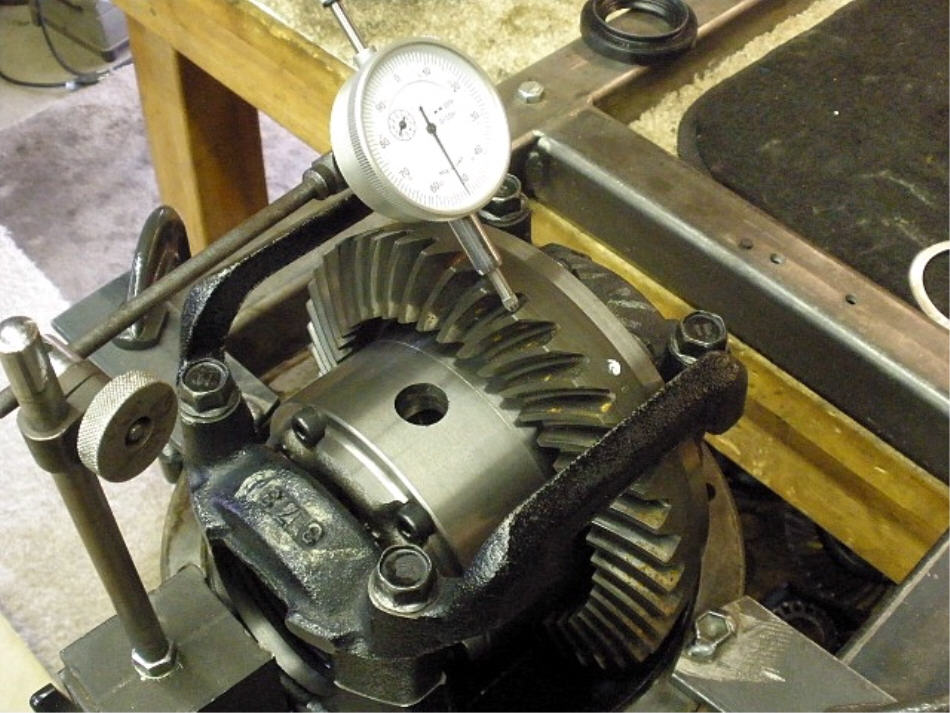
BL was checked on every other tooth....average hovered around 007...the tightest was very close at 0065 and the loosest was up near 009. |
|
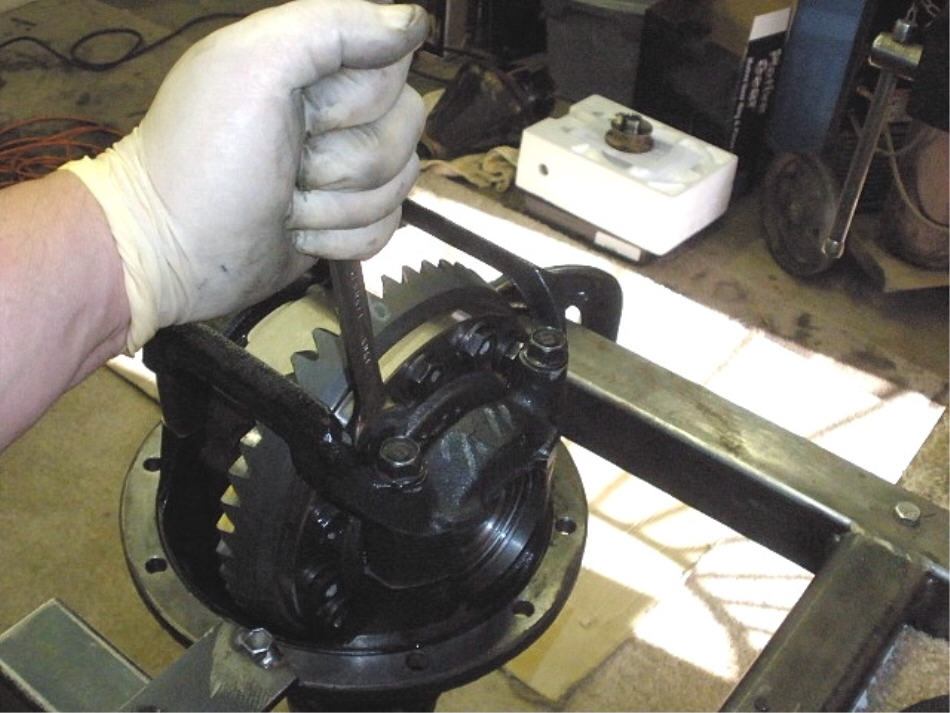
The 3 painted teeth are aligned close to the pinion.... |
|
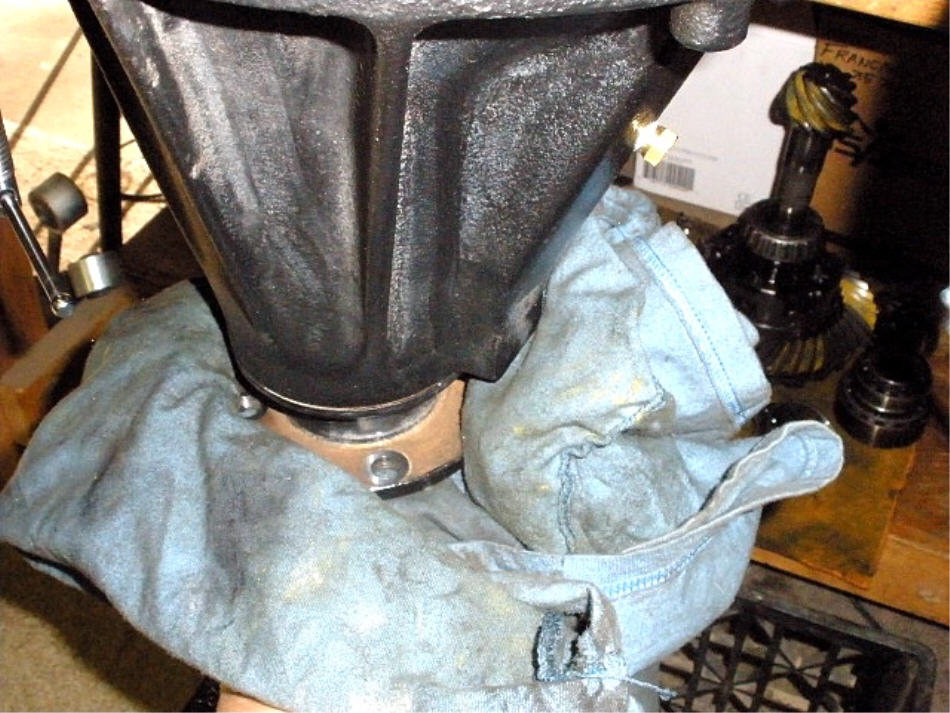
...the rag lightly grips the flange to offer some resistance.... |
|
...while the 17mm wrench moves back and forth 3 times to paint the teeth. |
|
excellent |
|
coast. |
|
pinion driveside. |
|
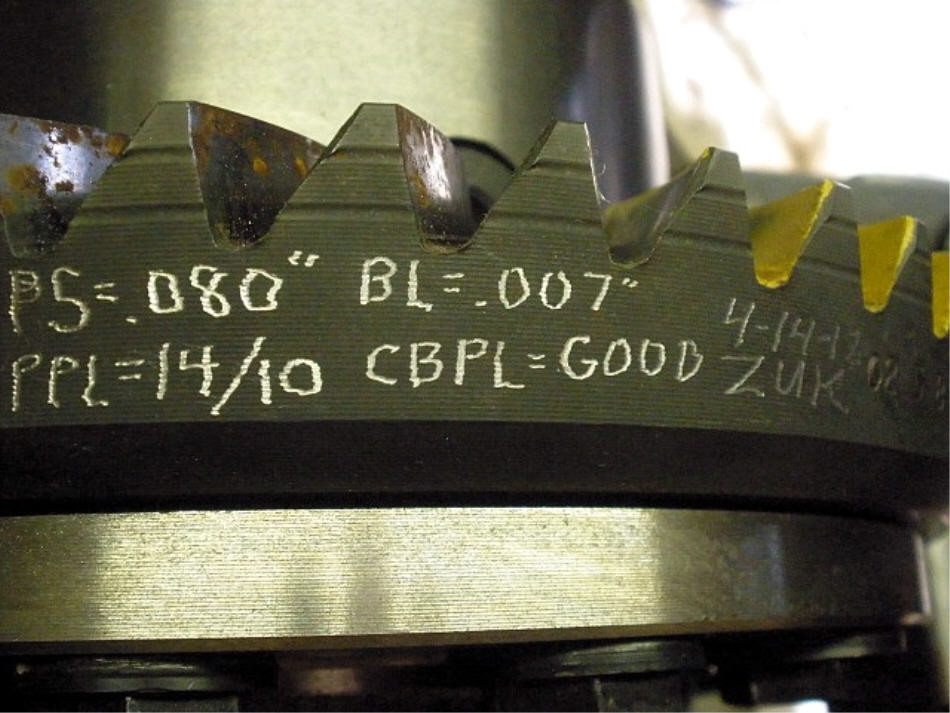
The important stuff is scribed in place. |
|
... |
|
... |

|