|
|
|
|
|
|
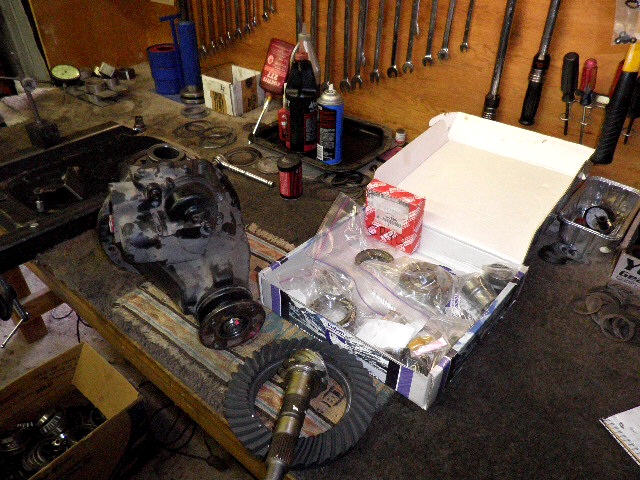
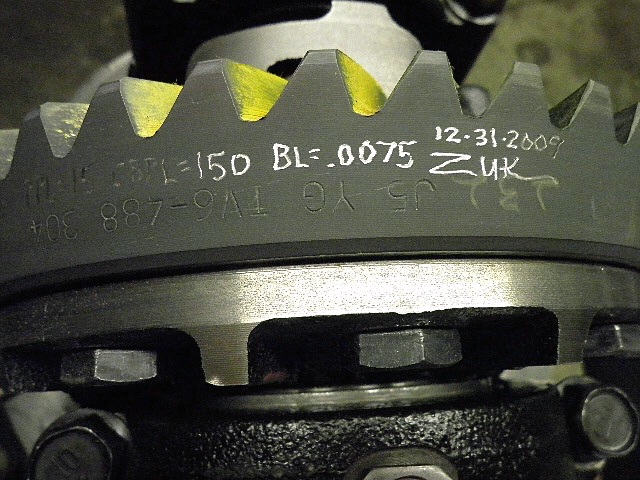
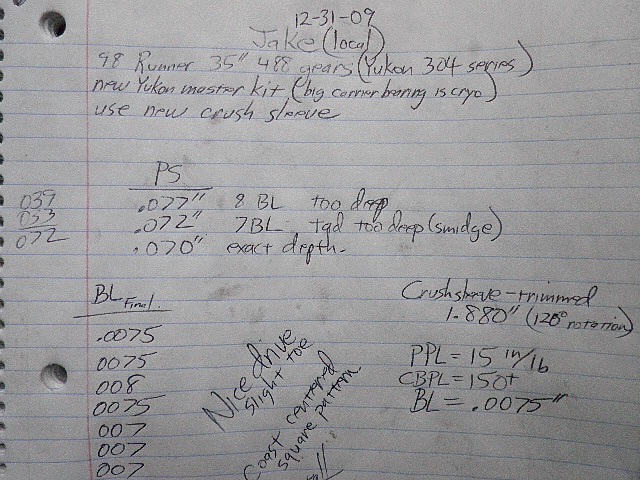
Jake is local to me and has a 1998 Runner with 35" tires. The plan is to install 488 Yukon Gears, a master kit, and a new crush sleeve. |
|
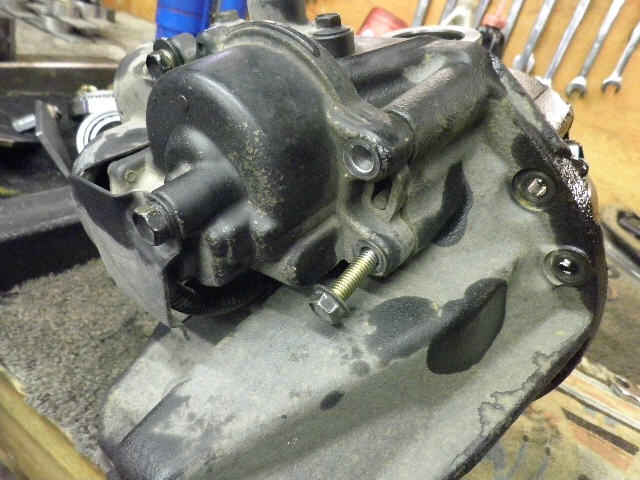
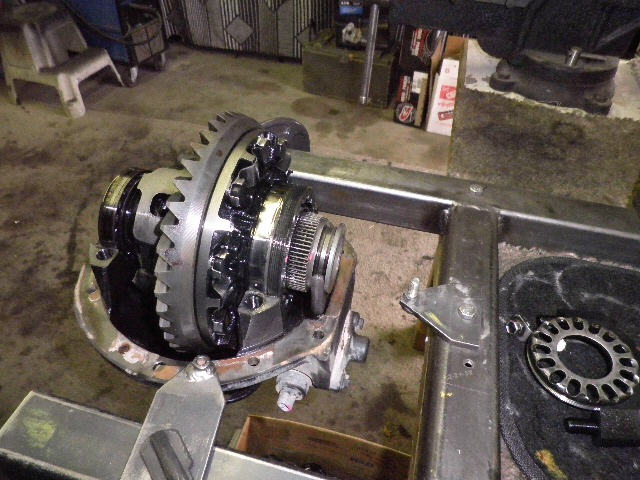
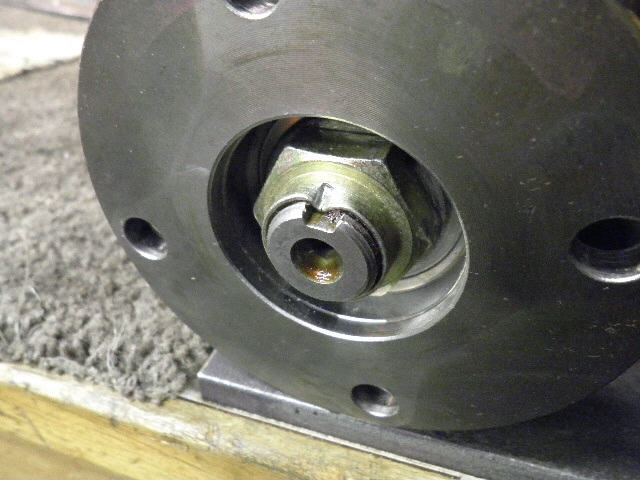
Jake delivered the e-locker to me with the actuator motor still attached. It's very easy to remove it especially for shipping purposes. Just remove this one 12mm bolt... |
|
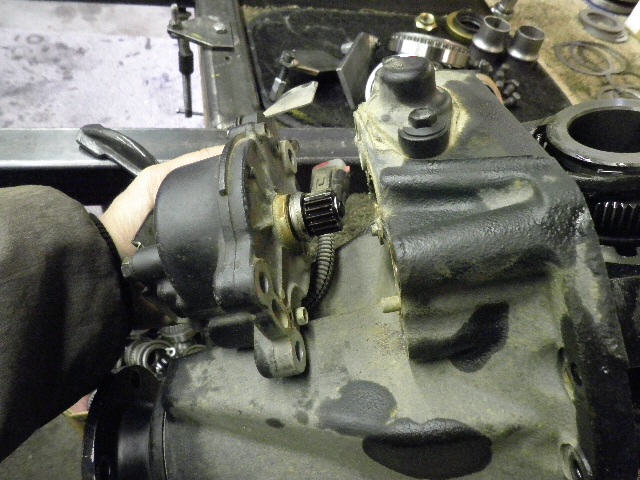
...and off it pops with minimal effort. It's out of the way so now I don't have to worry about damaging it by accidently bumping it and such. |
|
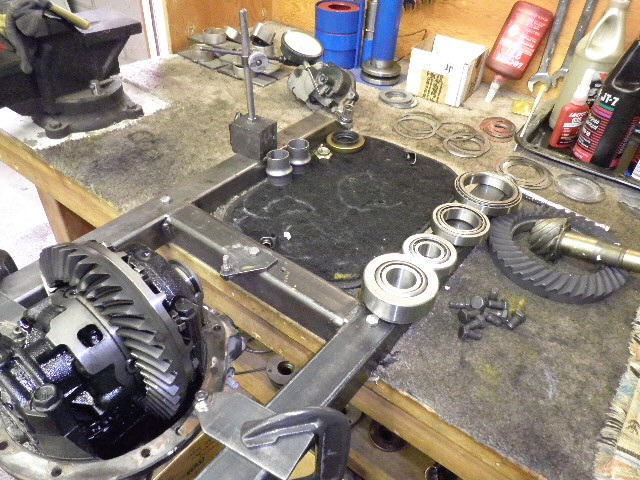
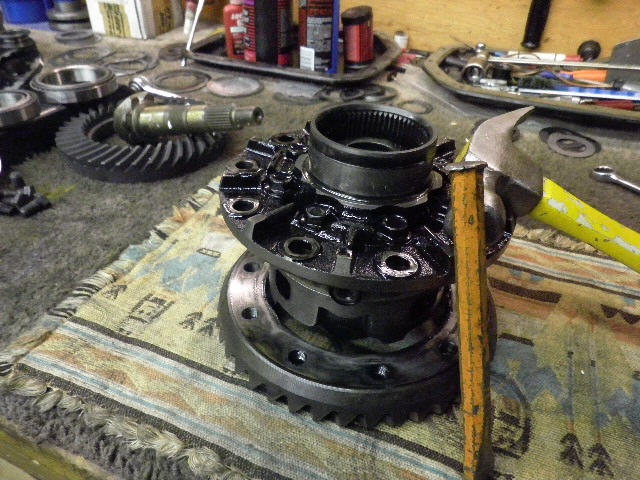
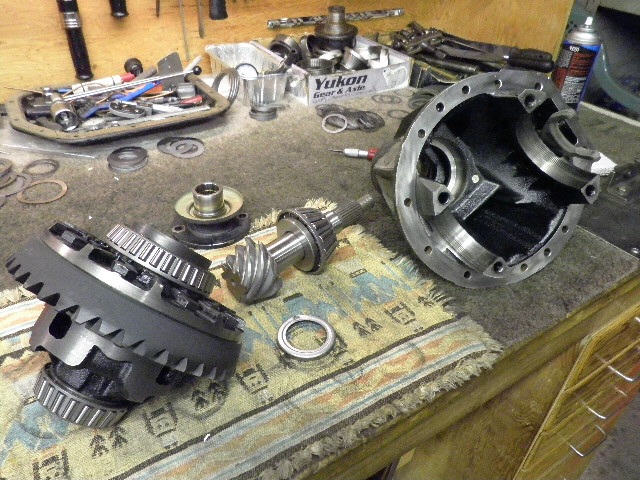
Everything is layed out and organized. |
|
The bearing caps come off first. |
|
... |
|
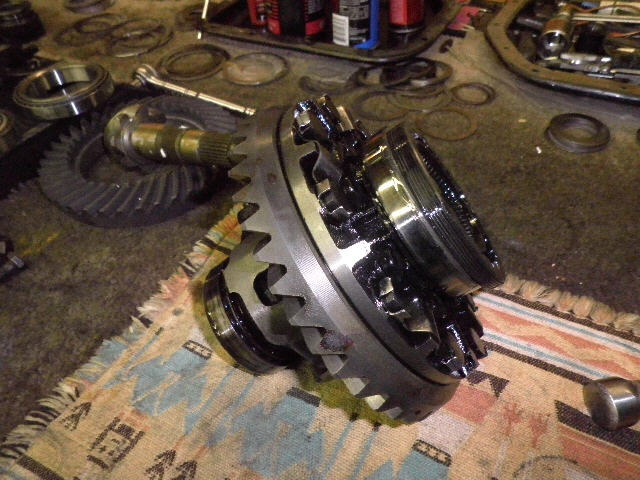
First, let's load up the case with new bearings and the 488 ring gear. |
|
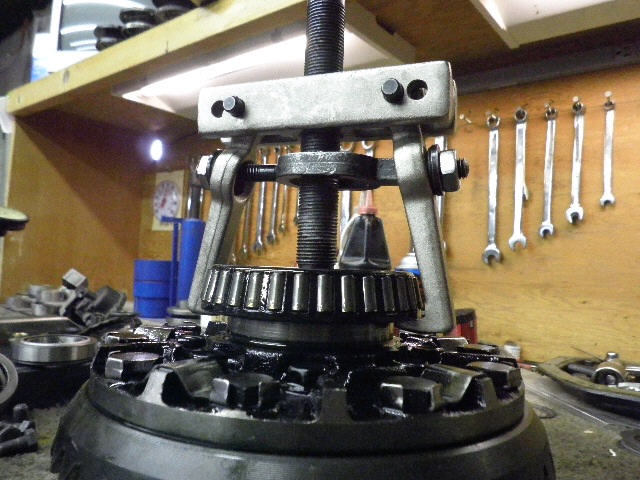
The big E-Locker carrier bearing is no problem for this puller. |
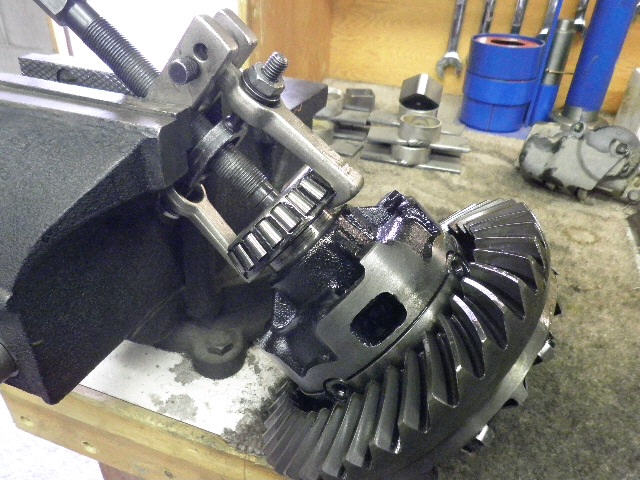
|
The smaller bearing on the other side comes right off. |
|
Some gentle love taps drop the old 410 ring off. |
|
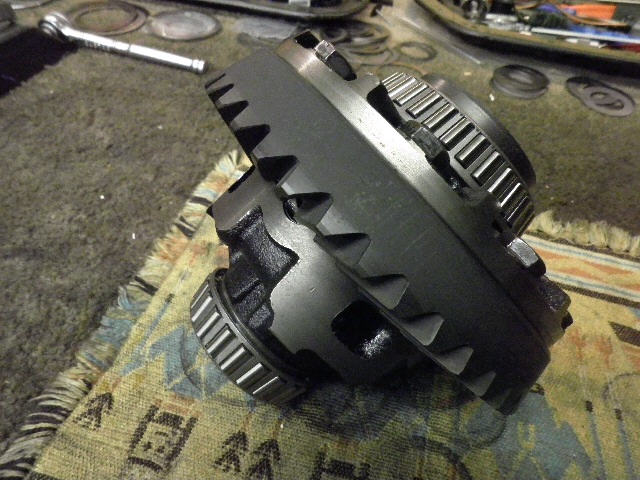
The 488 ring slipped in place and the 10 bolts have had loctite applied....75 ft/lb using a torque wrench. |
|
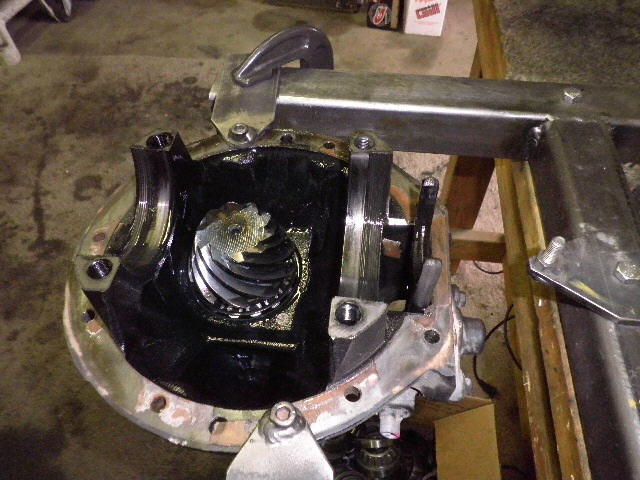
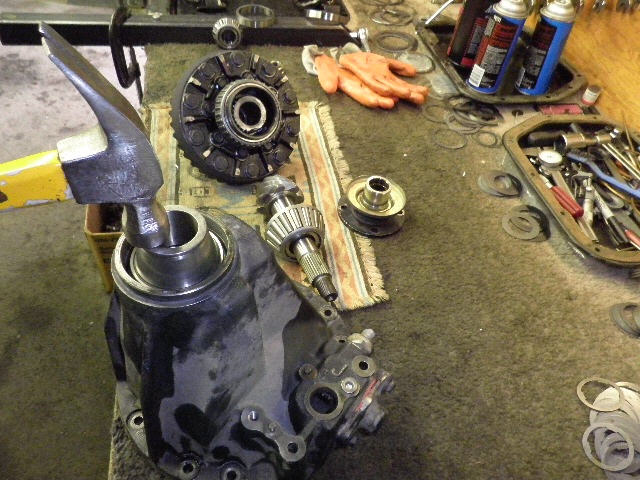
The case is ready. |

|
The pinion was gently pushed out with the press. |
|
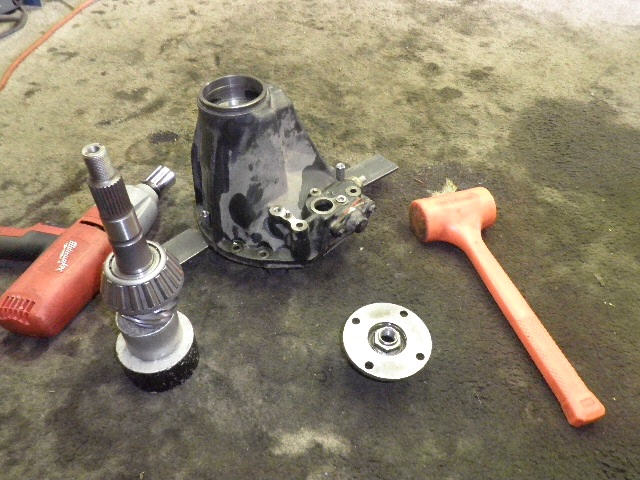
The old races were tapped out and items were cleaned/prepped. |
|
A hammer can be used to tap the outer new race in with the proper spacers. Old bearing inners and races make for great spacers. The larger inner race is more troublesome and the press is used almost exclusively for that one. |
|
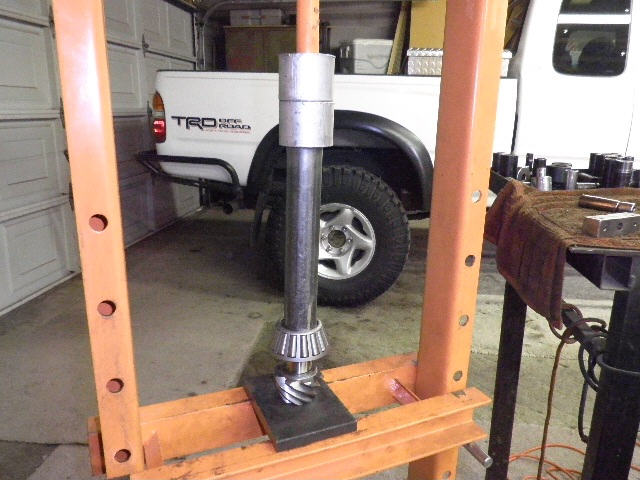
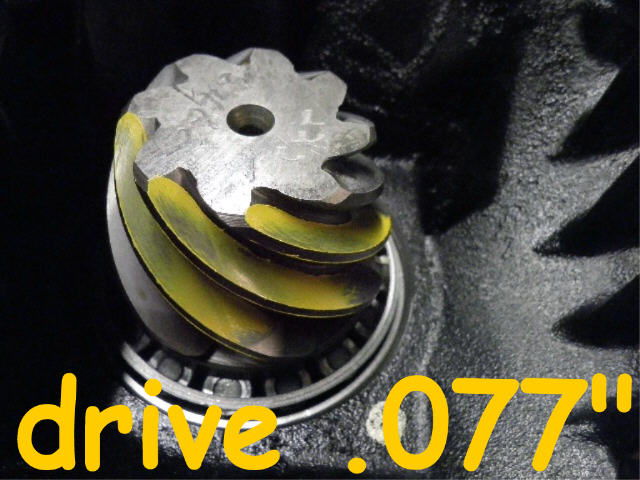
A starter shim of .077" is pressed on with the new inner bearing. My 2001 Taco in the background. It's been a very good truck....many camp-outs in it. |
|
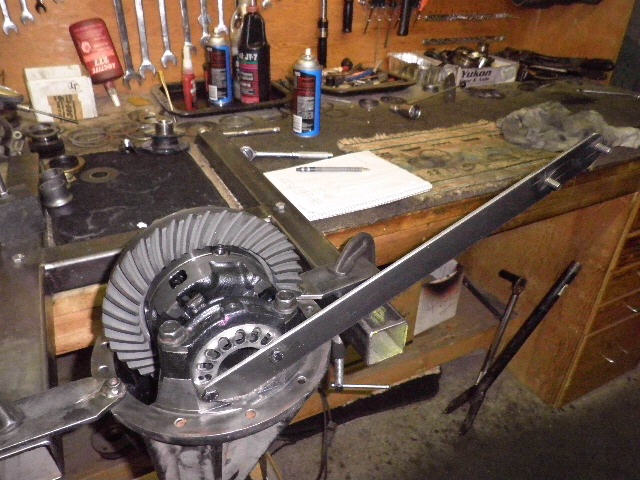
Now to put the upper end together with no crush-sleeve. Just tighten the pinion nut 'til about 10~15 in/lb is measured on the tiny torque wrench. That's good enough for a depth check. |
|
... |
|
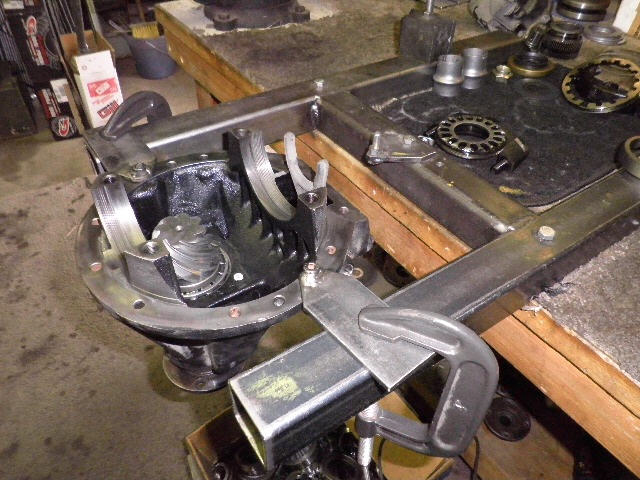
Mount the case and bearing caps...dial in some pre-load and get the backlash in the ball-park of .007". |
|
Too deep. |
|
deep. |
|
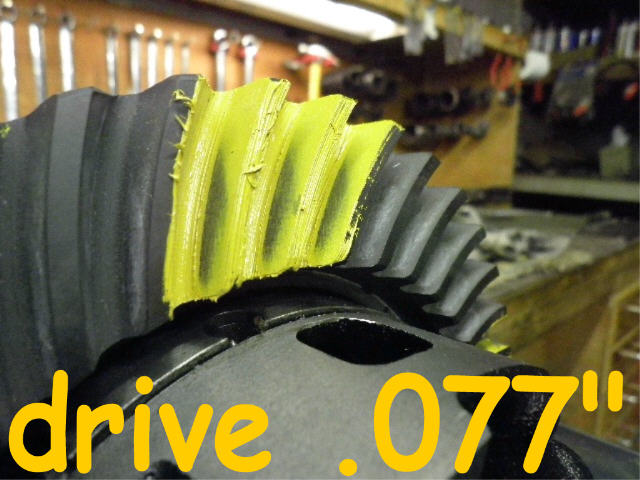
Heavy contact on the outer edges (face) equates to shallow on the pinion which means deep on the ring. |
|
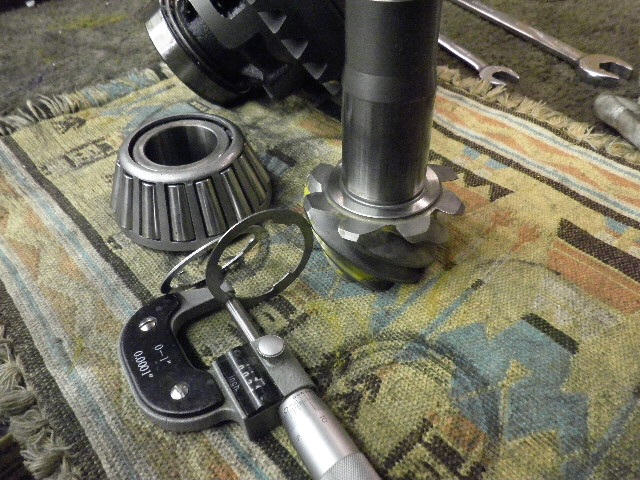
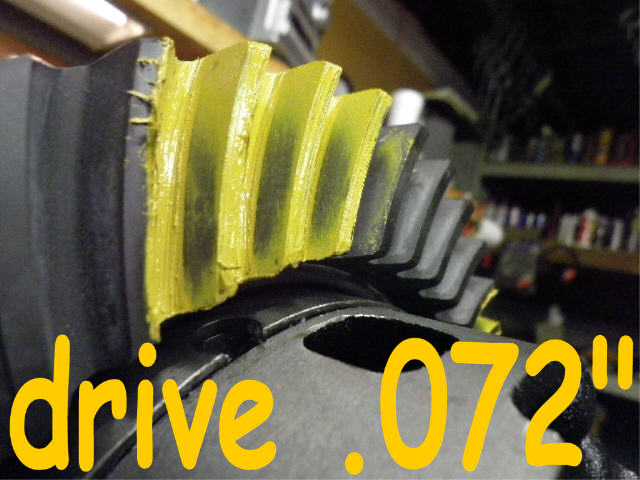
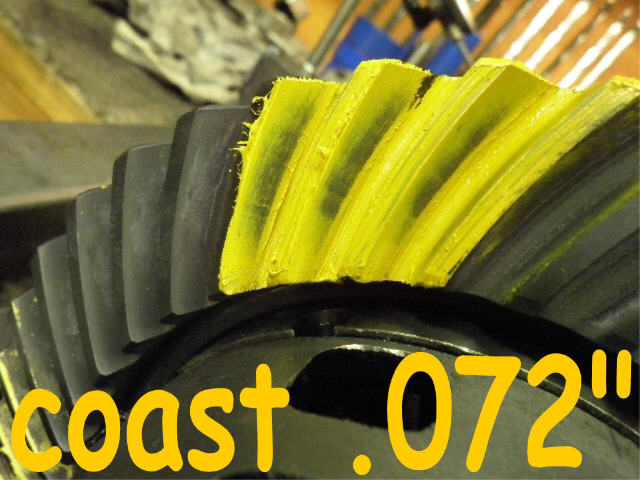
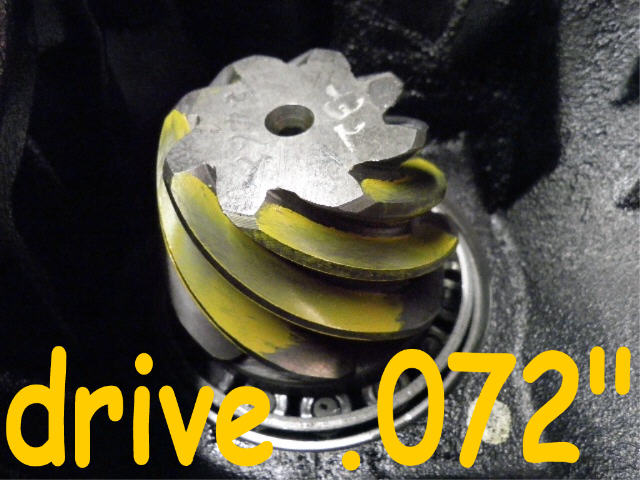
The plan is to now install a pinion shim about .005" thinner (.072"). The micrometers can measure to the accuracy needed. |
|
Much better but I see what appears to be a slightly deep pattern. Good position from toe to heel but favors the root of the tooth a little. |
|
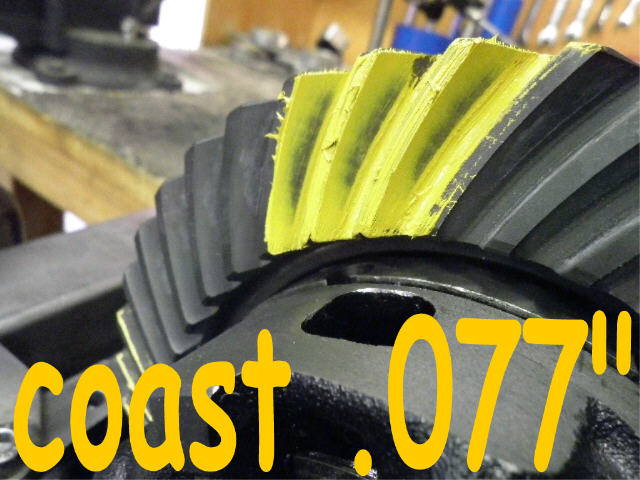
Coast is telling me a bit too deep still. |
|
The pinion seems to still have some heavy contact on the outside edges of the tooth. Shallow on pinion equals deep on ring. |
|
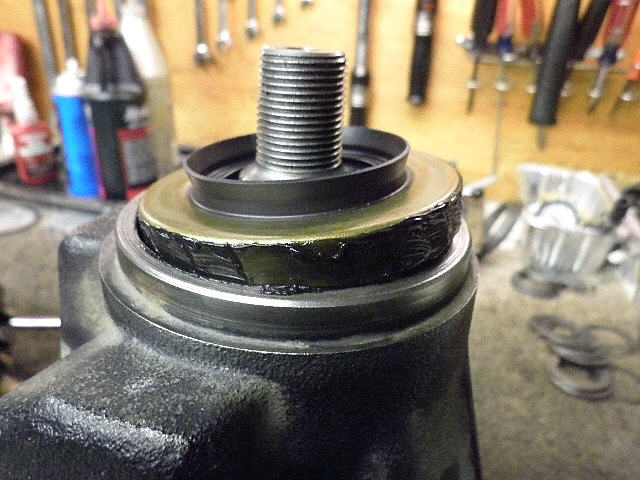
One more teardown and I subtracted another .002" off the pinion shim. I felt confident enough without the need to see the paint pattern to install the new crush sleeve and seal at this stage. |
|
Threads are clean and red loctite is applied to the new nut. |
|
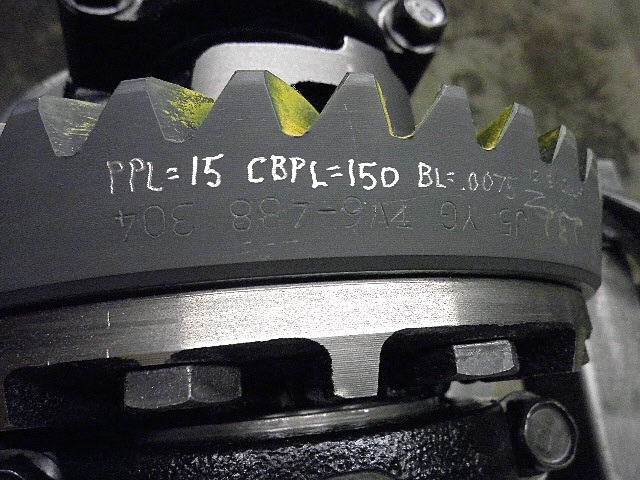
I crushed the sleeve until I measured 15 inch/pounds of PPL. This is "rolling bearing drag"...I observe the gauge while spinning the wrench at a rate of about 1 complete turn per second. It is turning fairly fast and it gets a little tricky to see the read-out but it is doable. The bearings must have about a teaspoon of gear oil on them to get smooth, accurate readings. |
|
Ding and this end is done. |
|
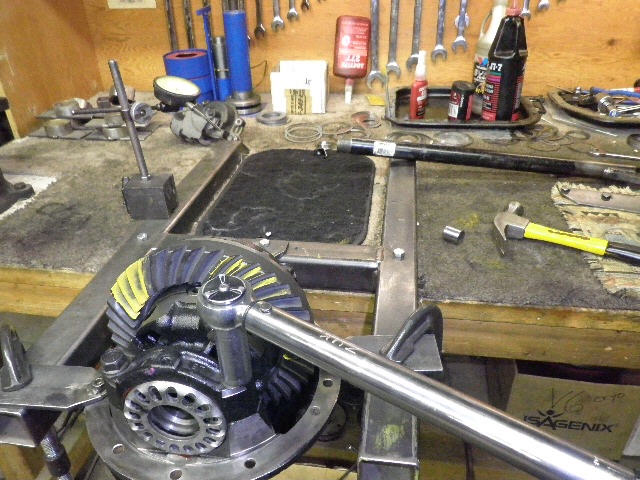
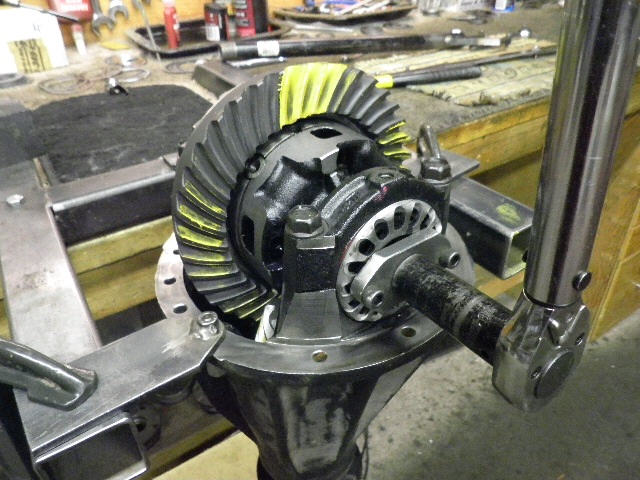
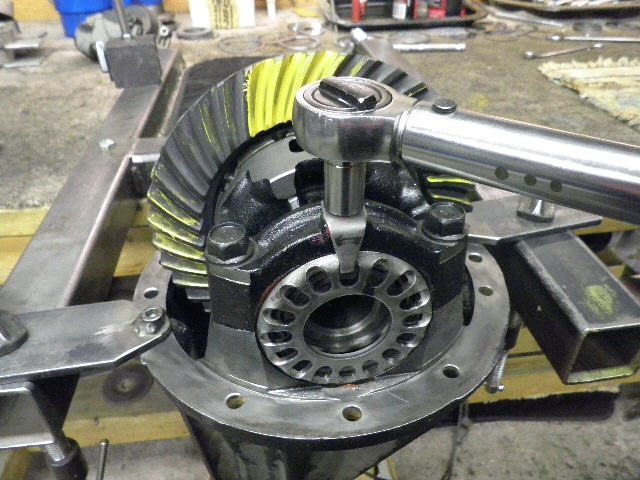
The case is dropped in place and the bearing caps are torqued down to the full 75 ft/lb. |
|
This will be final setting so, with new bearings, I can torque the wheel adjusters to 150 ft/lb....150ft/lb on the wheel equals 15 in/lb on the actual carrier bearings themselves. I guide the backlash to the target .007" window while doing this tightening operation. |
|
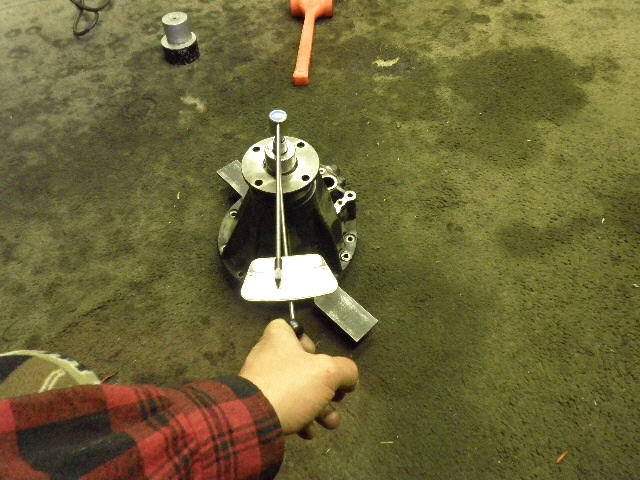
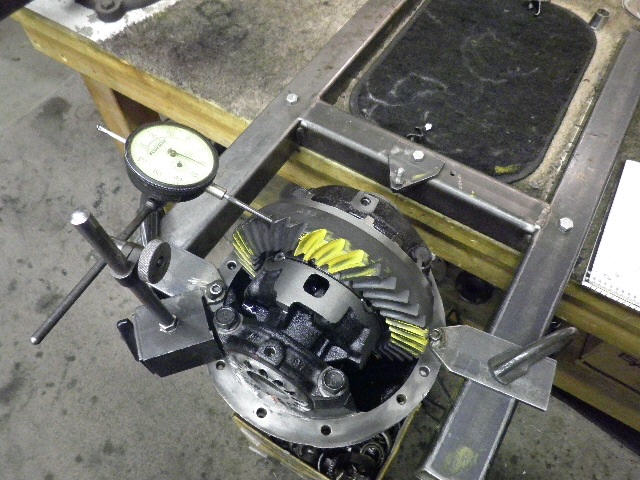
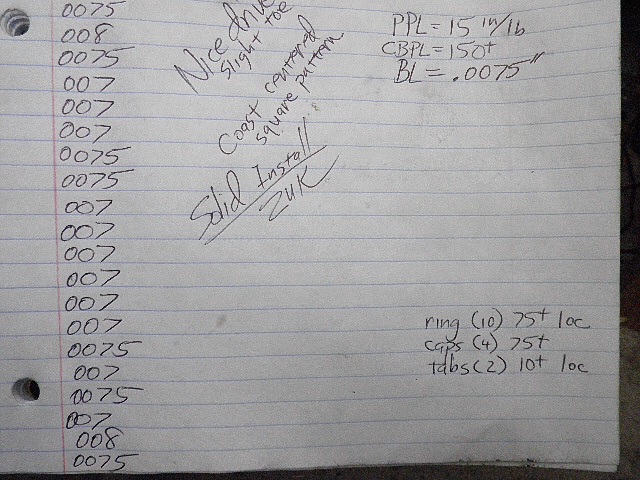
A reading is recorded on about every other tooth for a total of 21 readings. Nothing wrong with every 3rd or 4th tooth also. |
|
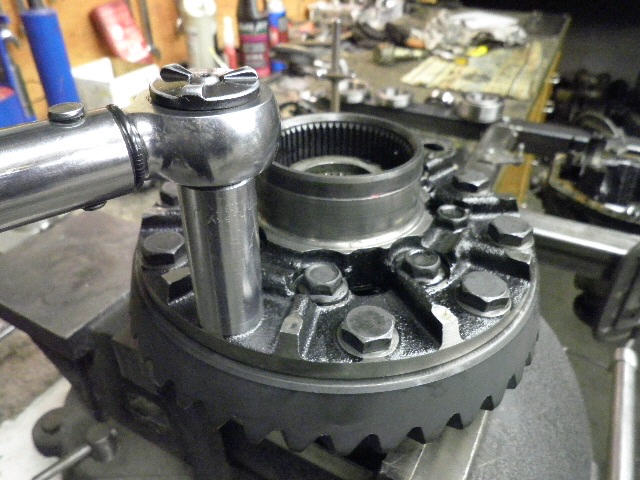
Loctite and 10 ft/lb on these retaining tabs. |
|
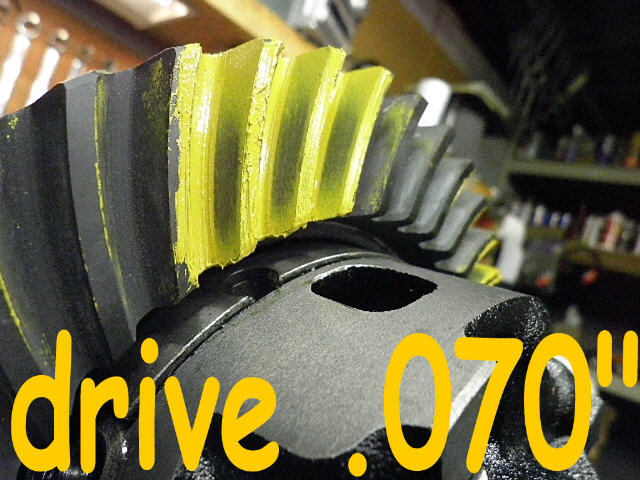
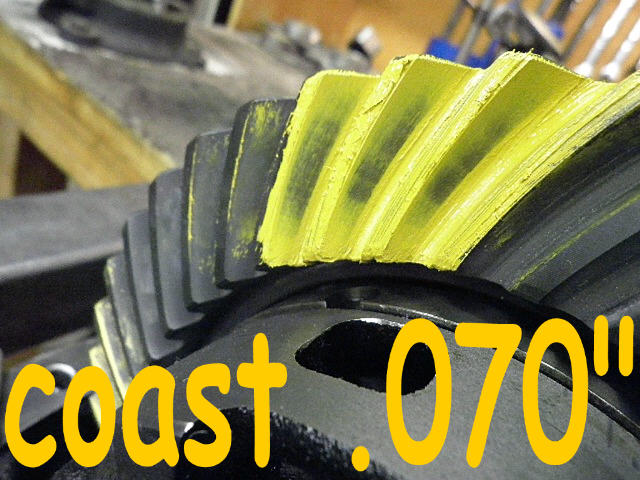
Final check...beautiful. Ideal placement (toe to heel) and ideal depth (root to face). |
|
Nice. Another case of 'if every install I did looked like this then I'd be in gear heaven'. |
|
``` |
|
``` |
|
Notes of the actual install... |
|
ZUK |

|