|
|
|
|
|
|
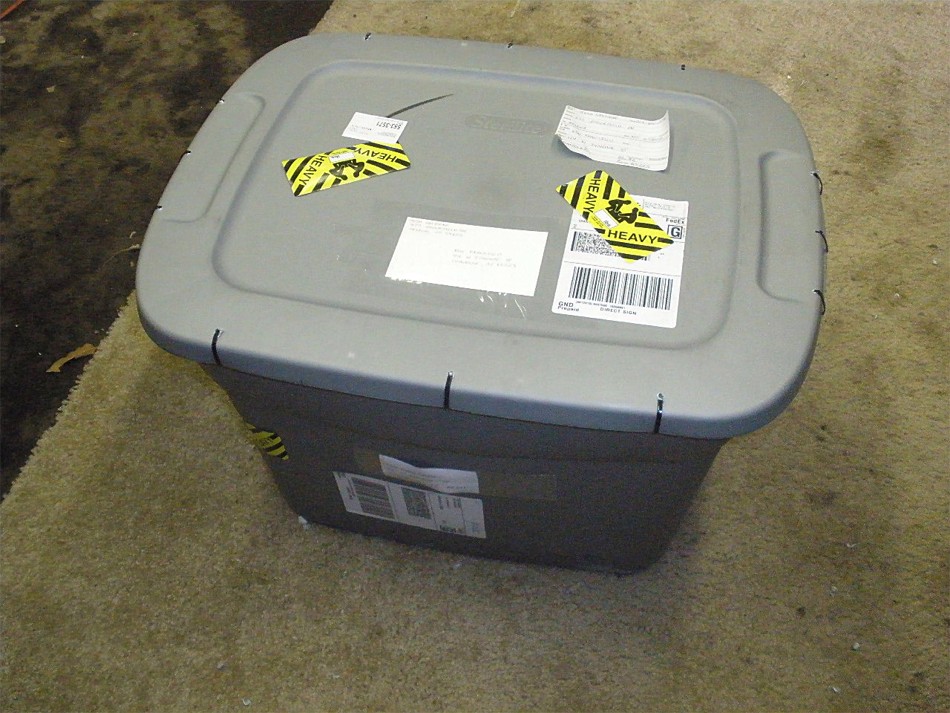
75 pounds in excellent condition from Josh located in Helena, Montana. Using tie-raps is a preferred method. It seems like Fedex actually prefers it, at least they do at my Kinkos outlet. |
|
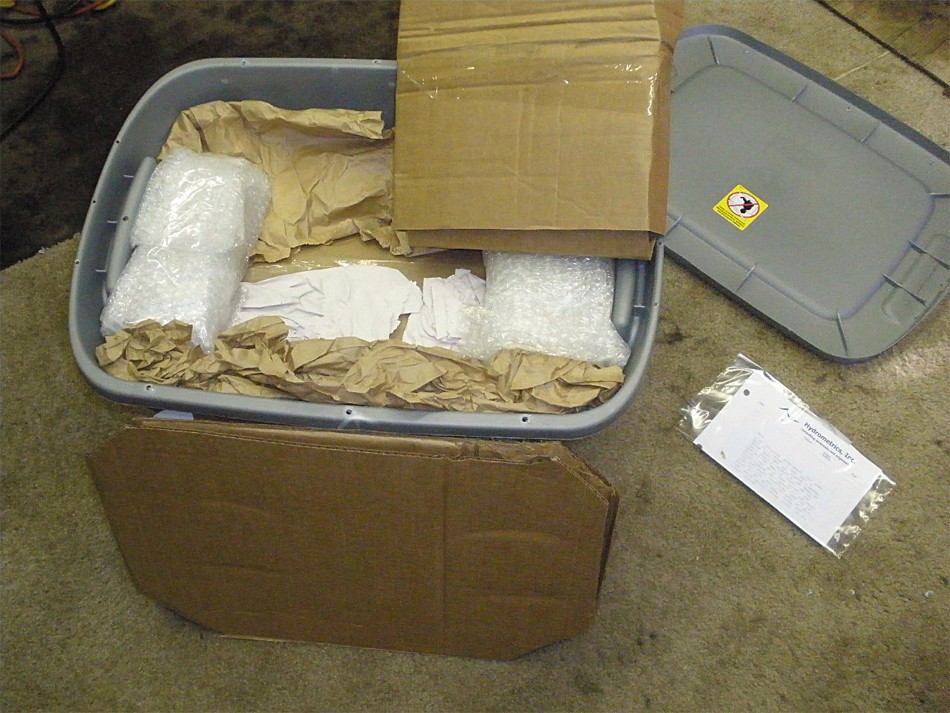
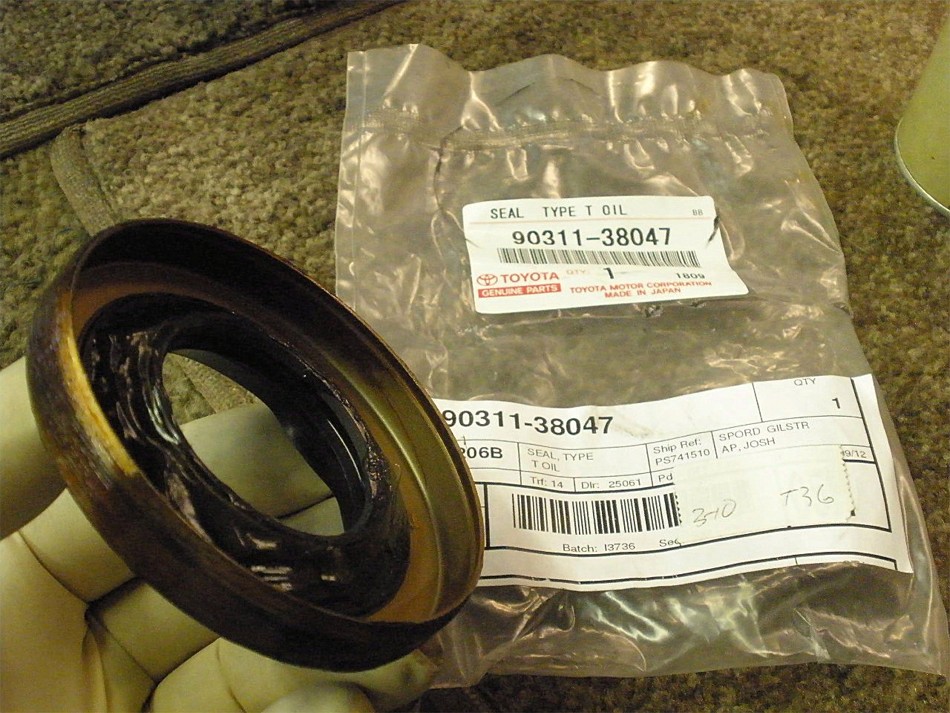
Josh already had purchased the required product and had carefully wrapped it in bubblewrap. |
|
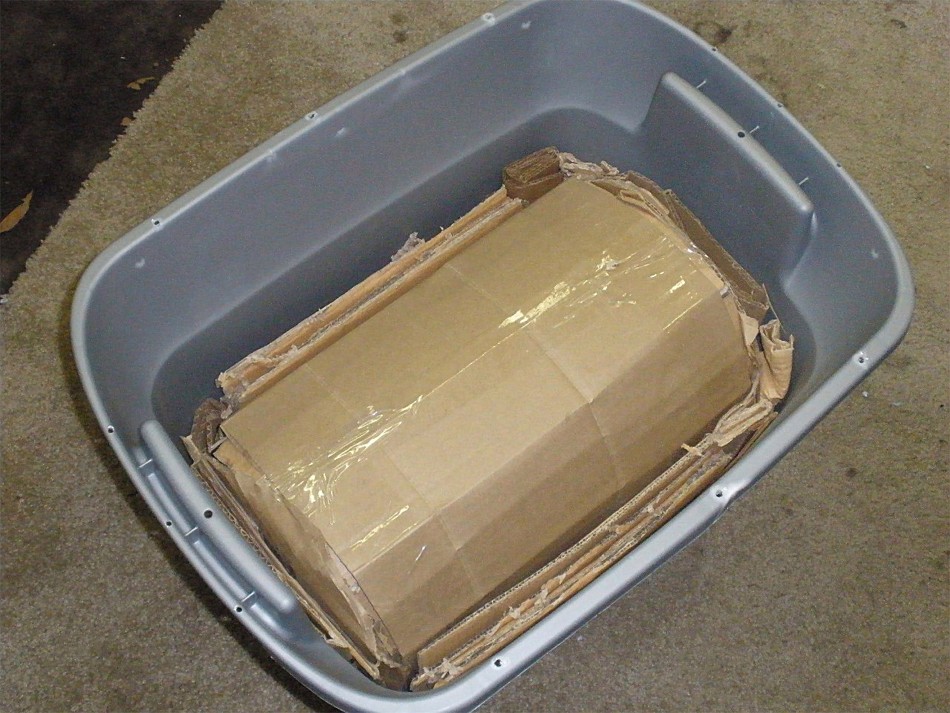
The 8" 3rd has been "burrito wrapped" in cardboard. On the underside was about 10 layers of thick
cardboard which keeps the sharp edge on the 3rd from punching through. The bottom of this tote had no damage at all. This is a good way to send 3rds to me
|
|
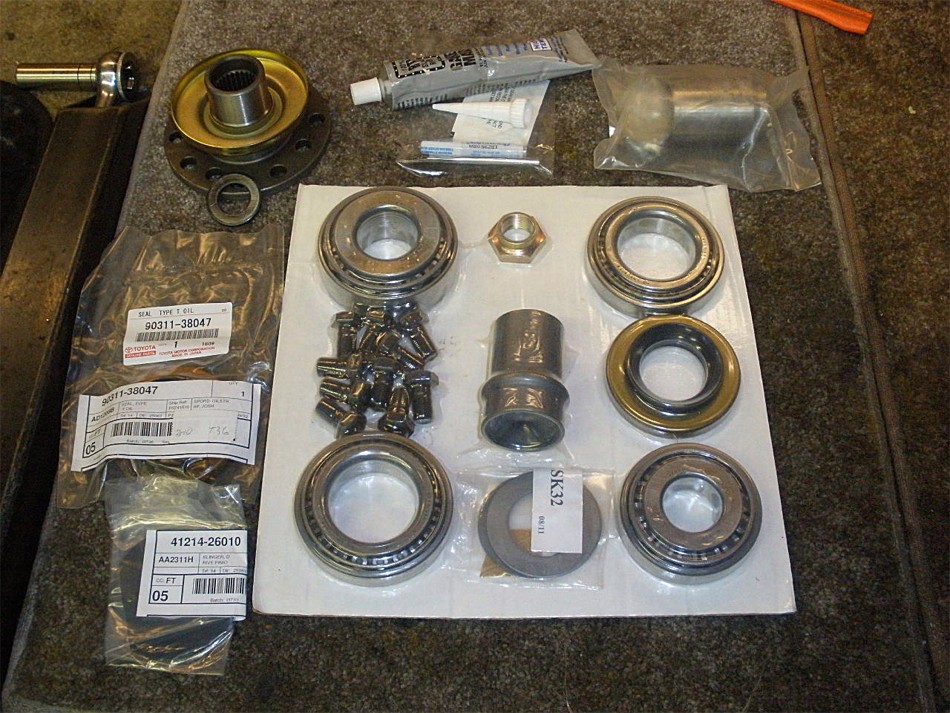
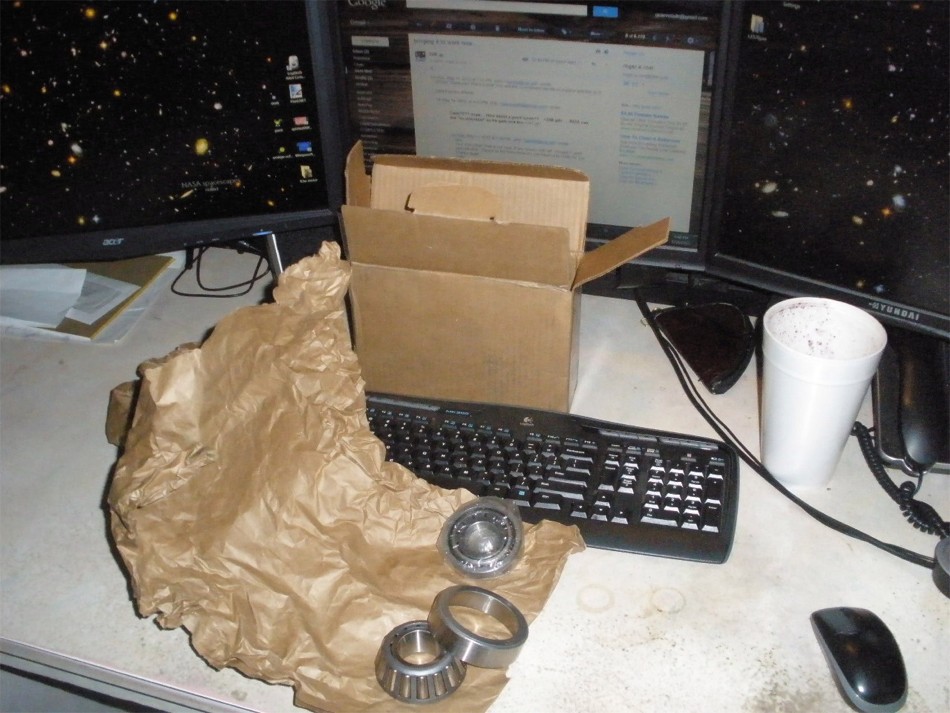
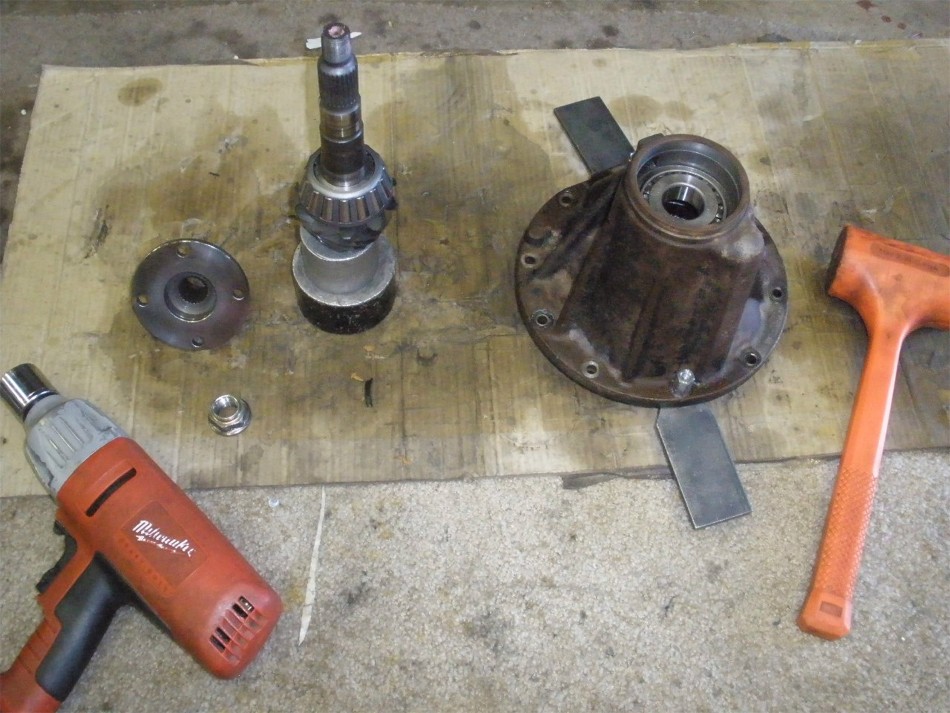
In all that bubblewrap was the master install kit, a new flange, and a solid collar. Josh had chosen to get his product from
Low Range Off-Road which appears to have very competitive pricing. I noted the
bearings are all KOYO and the triple drilled flange looked to be of good quality.
|
|
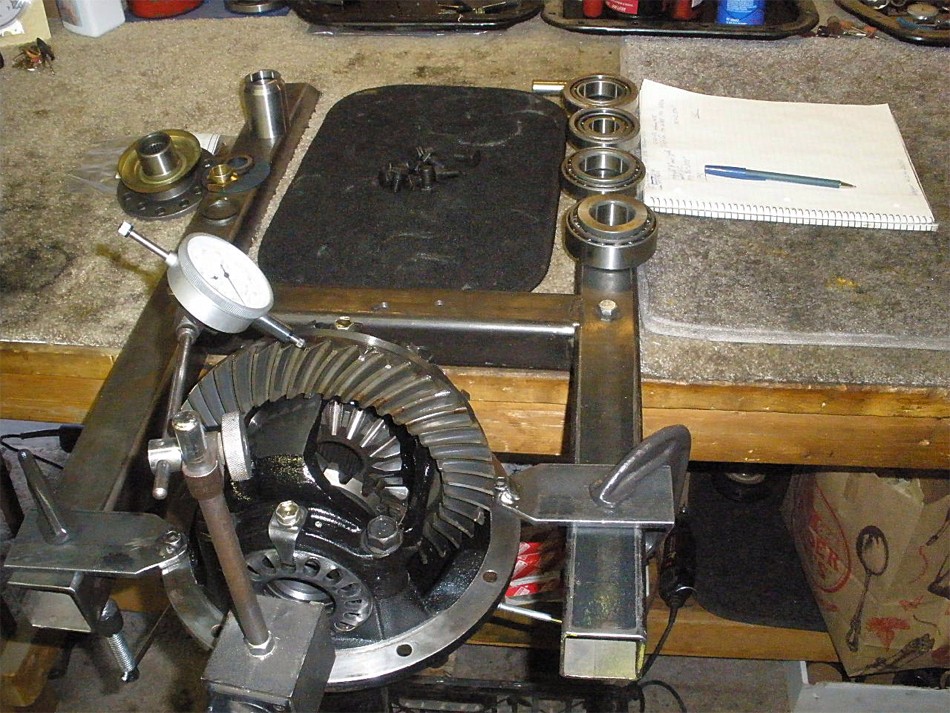
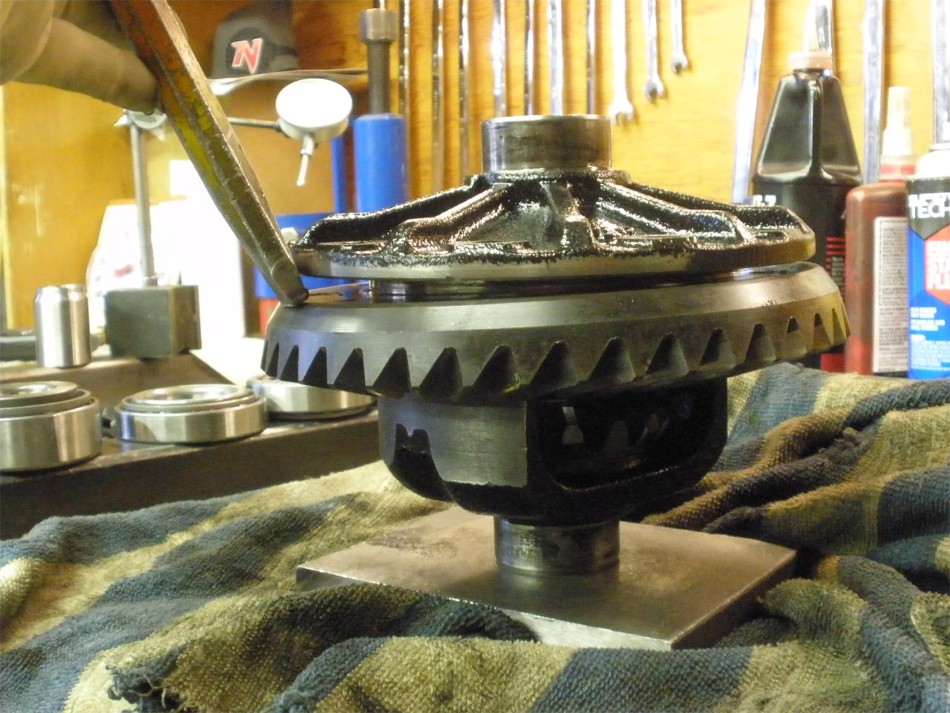
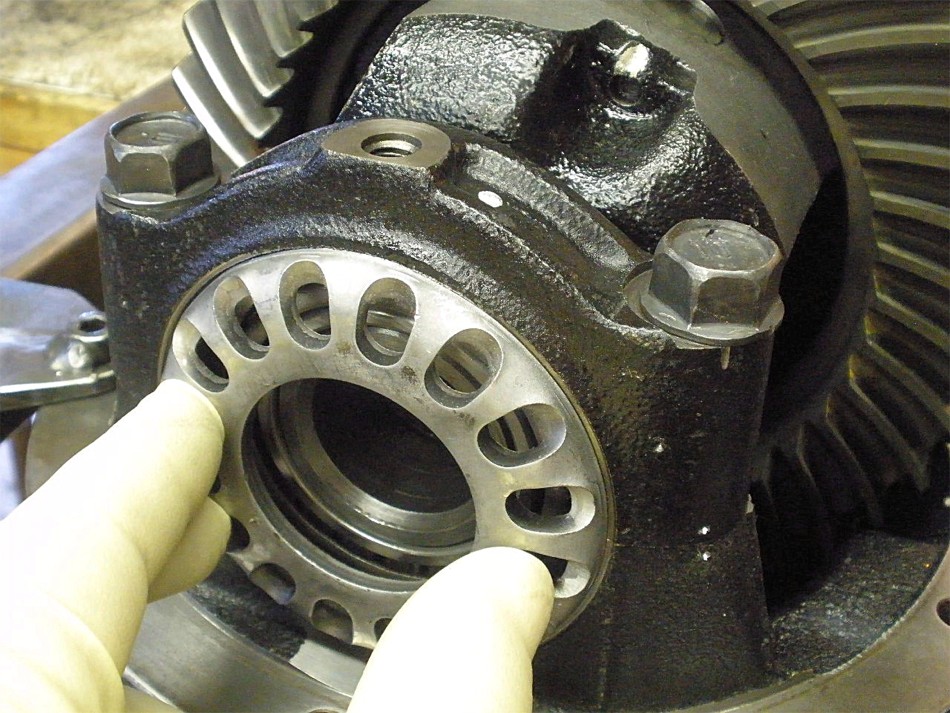
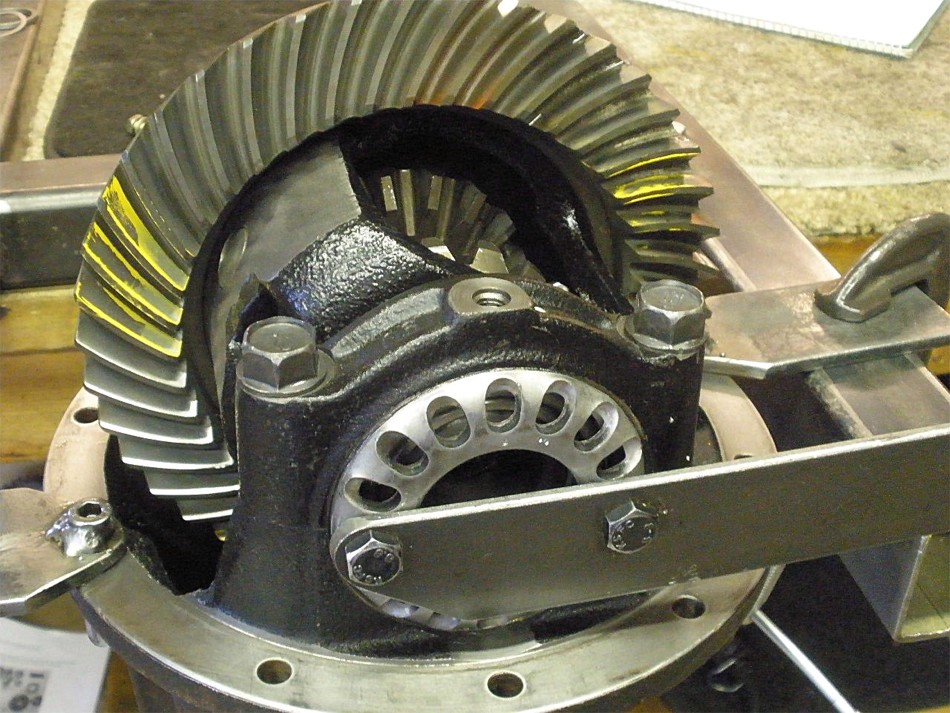
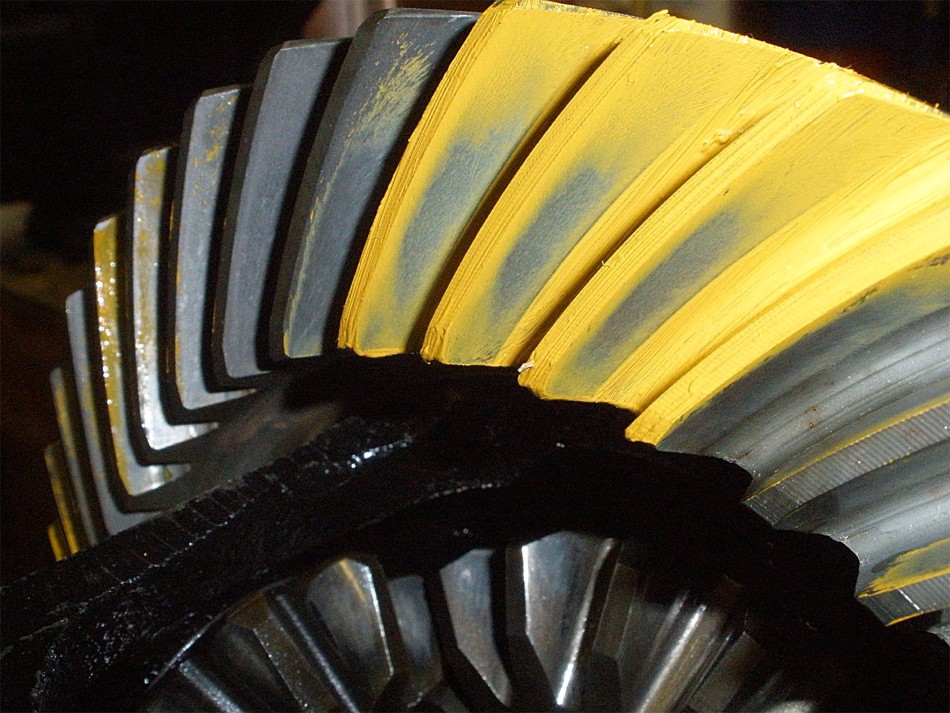
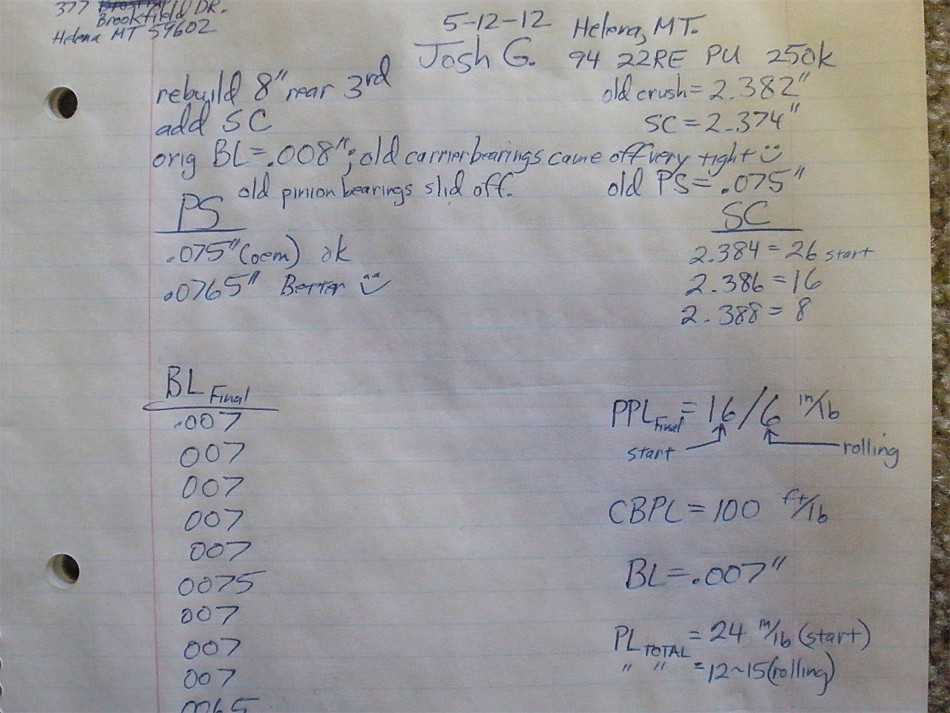
Since we are just doing a bearing rebuild/new solid collar and will be re-using the OEM ring and pinion, it is important to characterize the original backlash and load bearing pattern. Backlash was measured on at least 4 places on the ring and averaged .008" which is pretty reasonable for a used ring/pinion. |

|
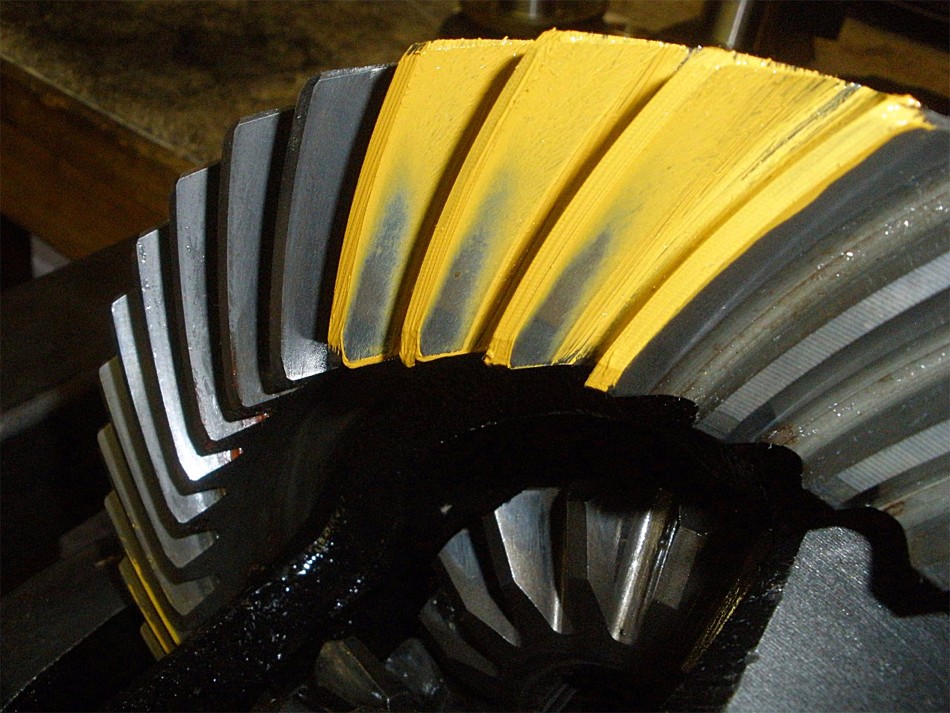
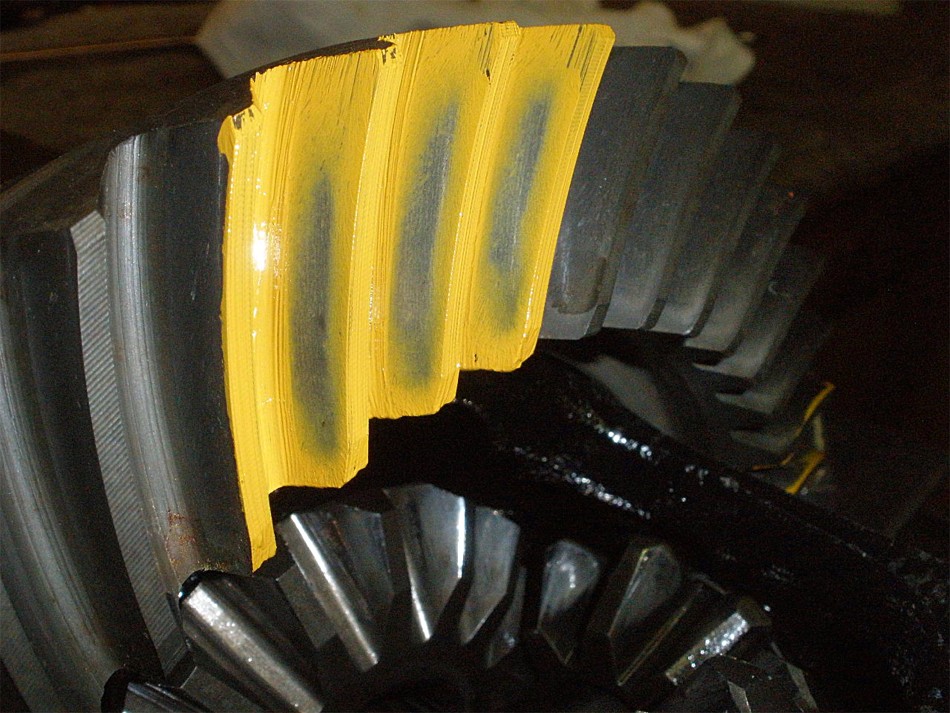
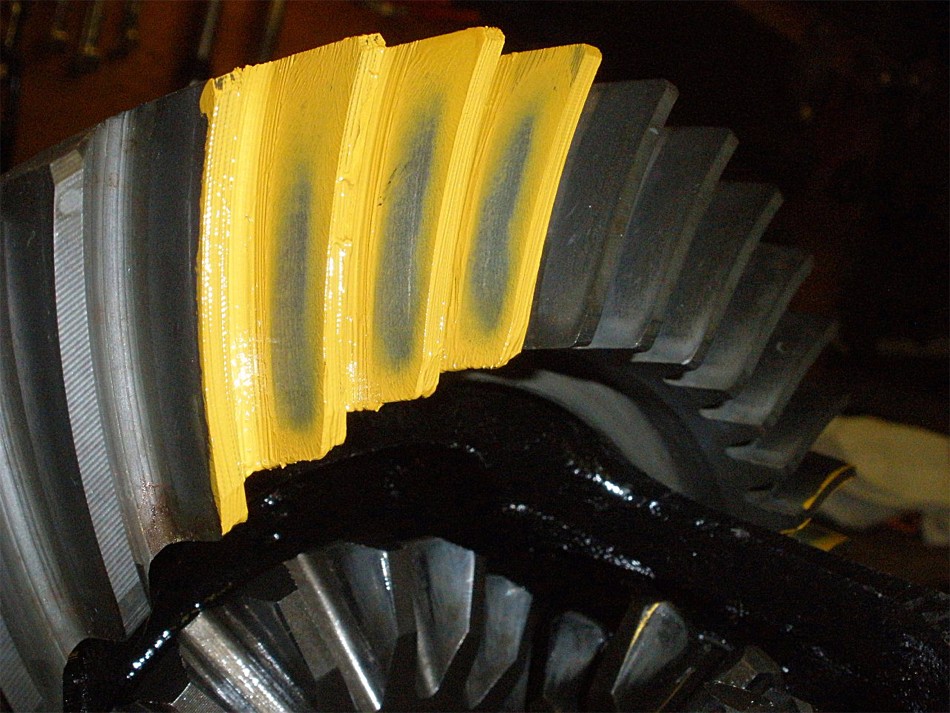
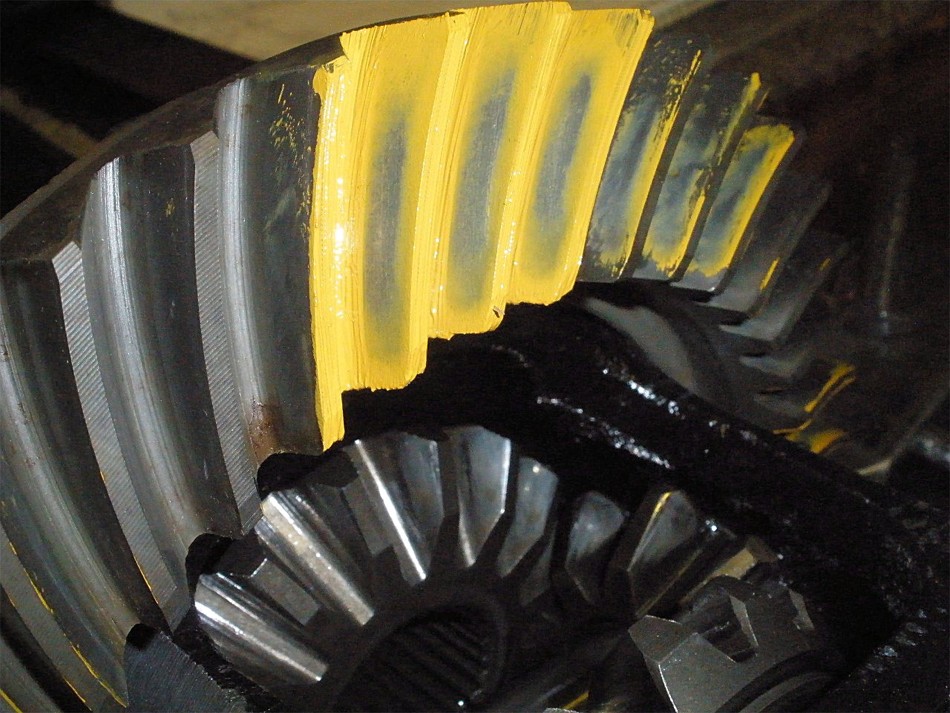
Drive side pattern. |
|
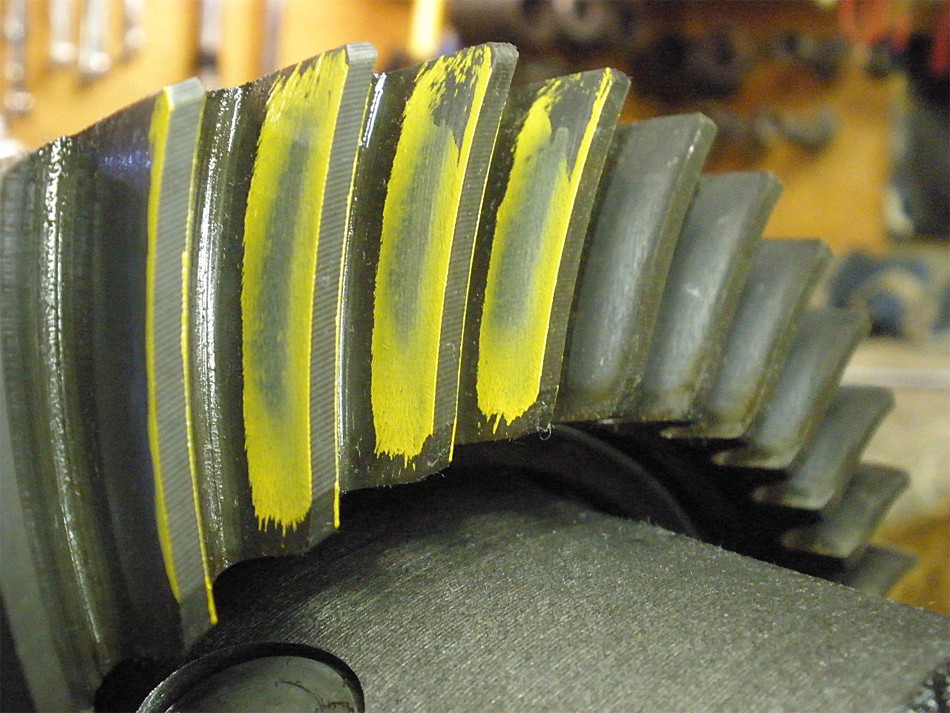
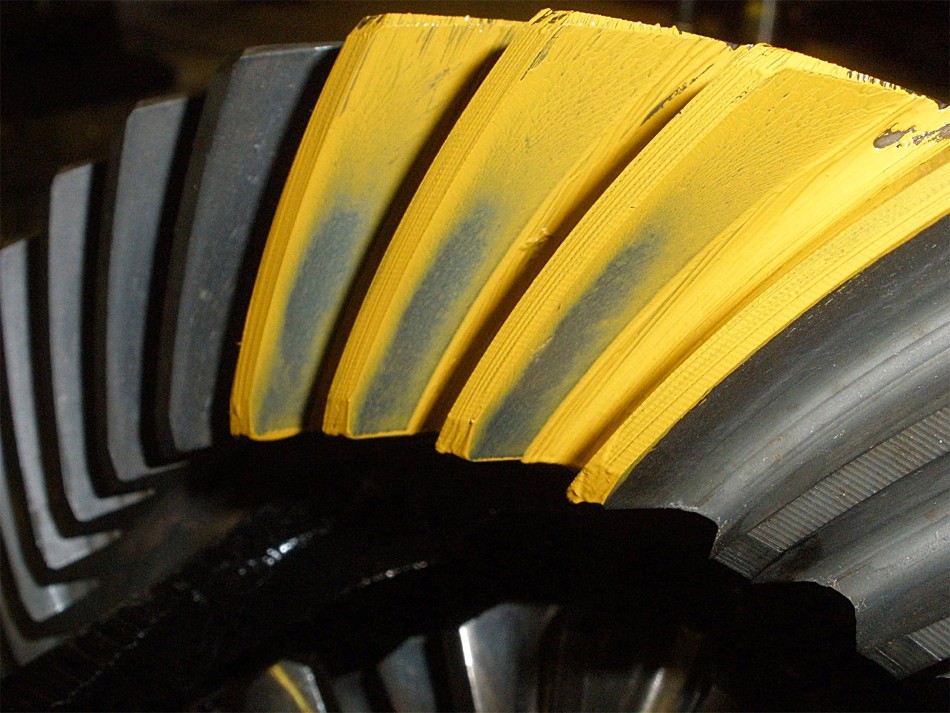
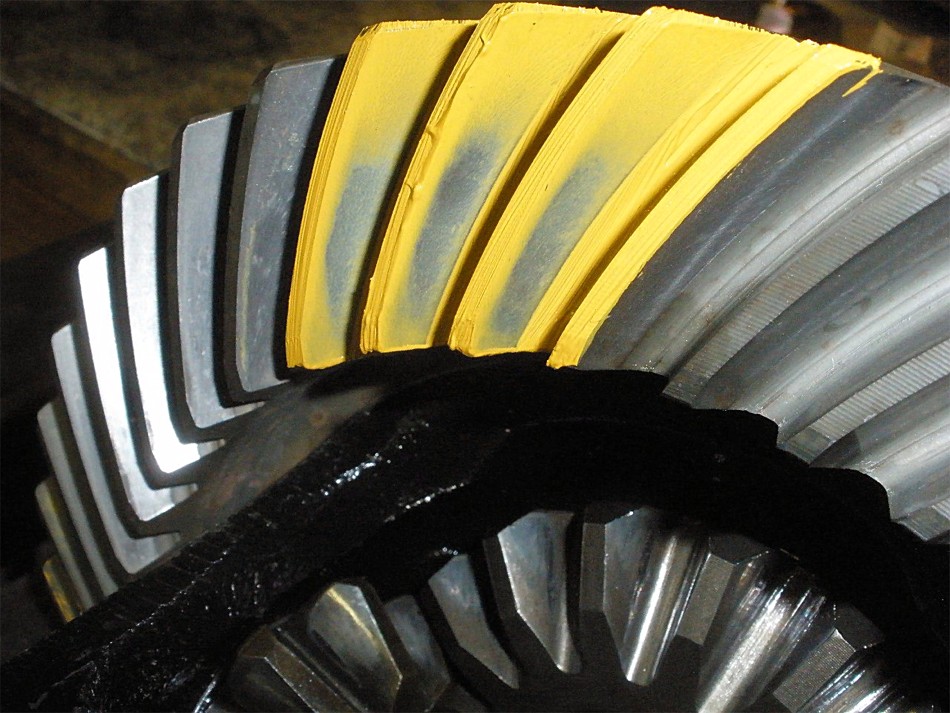
Coast...heavy toe favoring. |
|
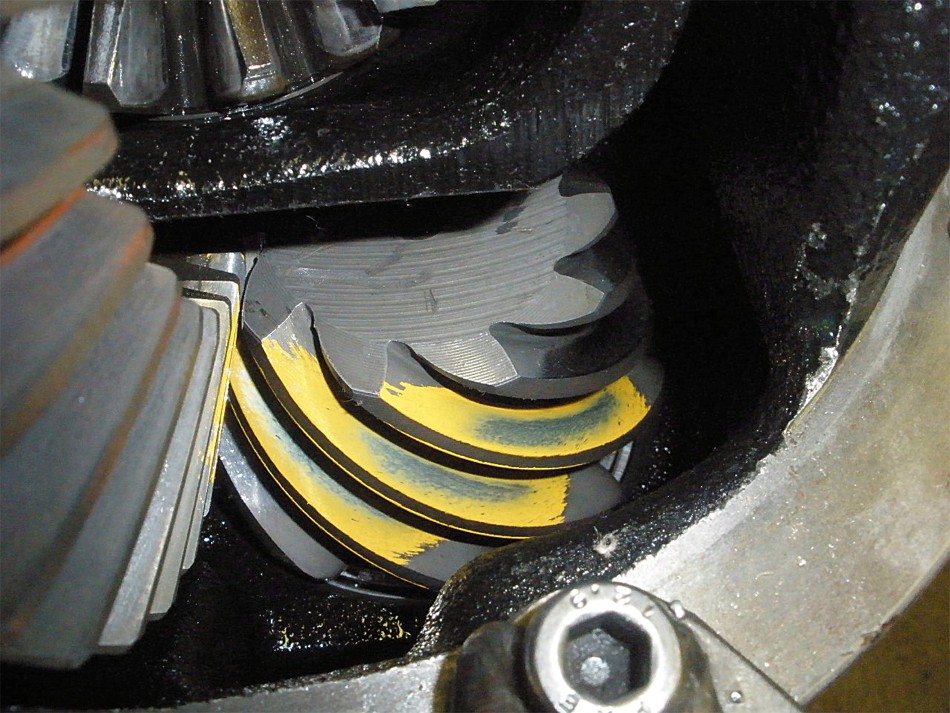
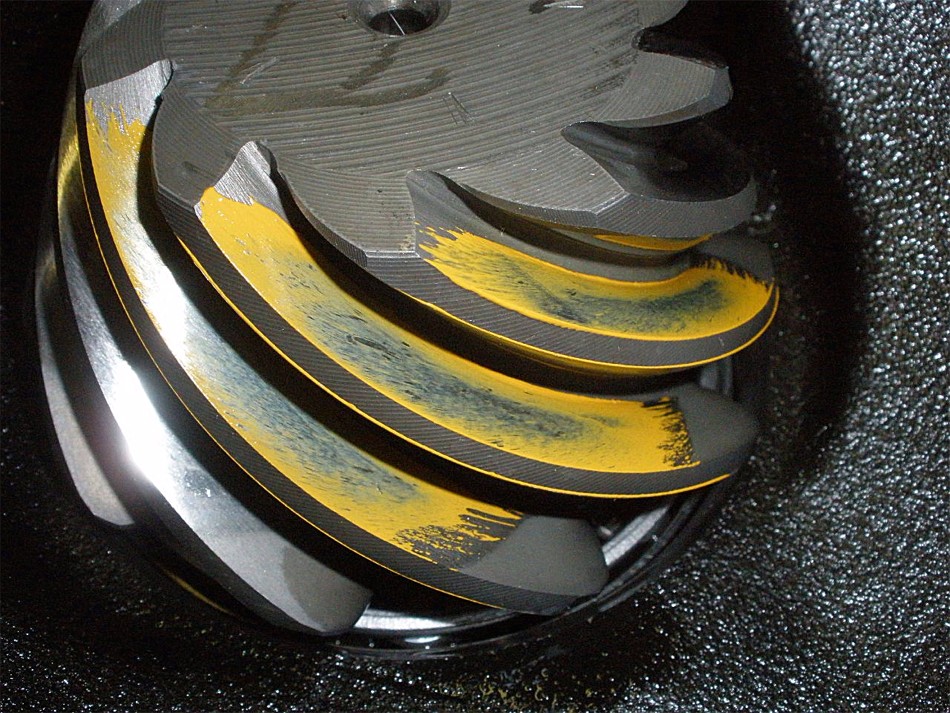
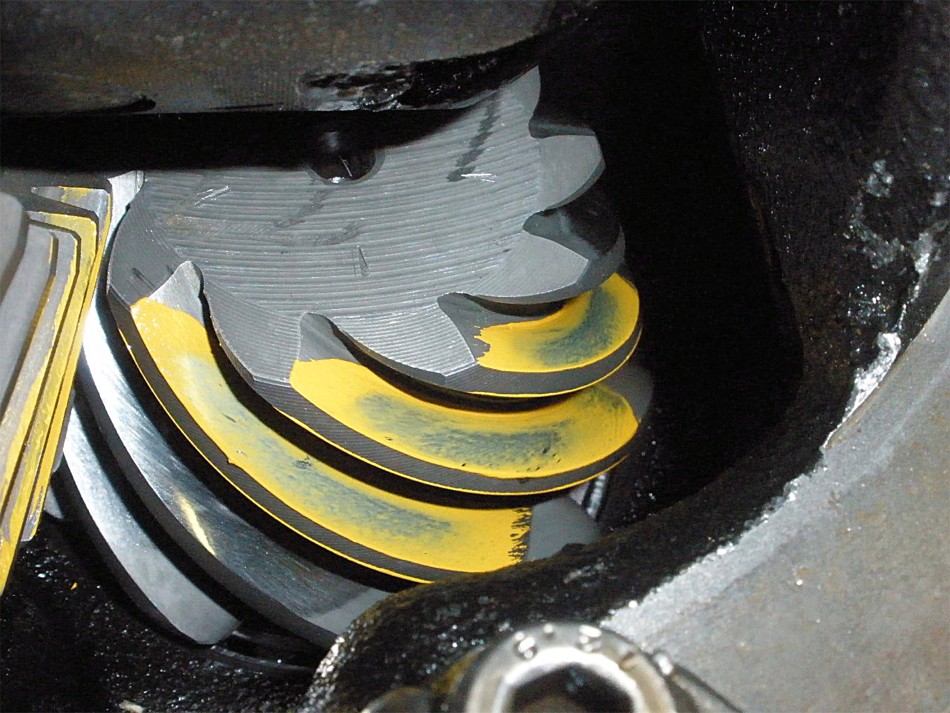
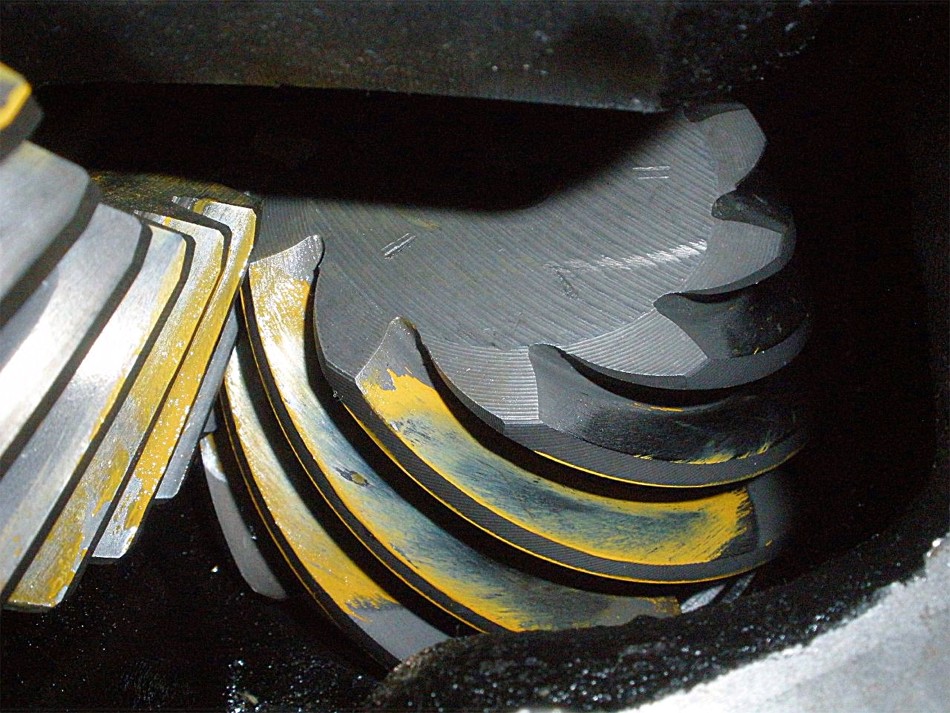
Drive on the pinion tooth. |
|
Drive...reverse painted. |

|
Coast...reverse painted. |
|
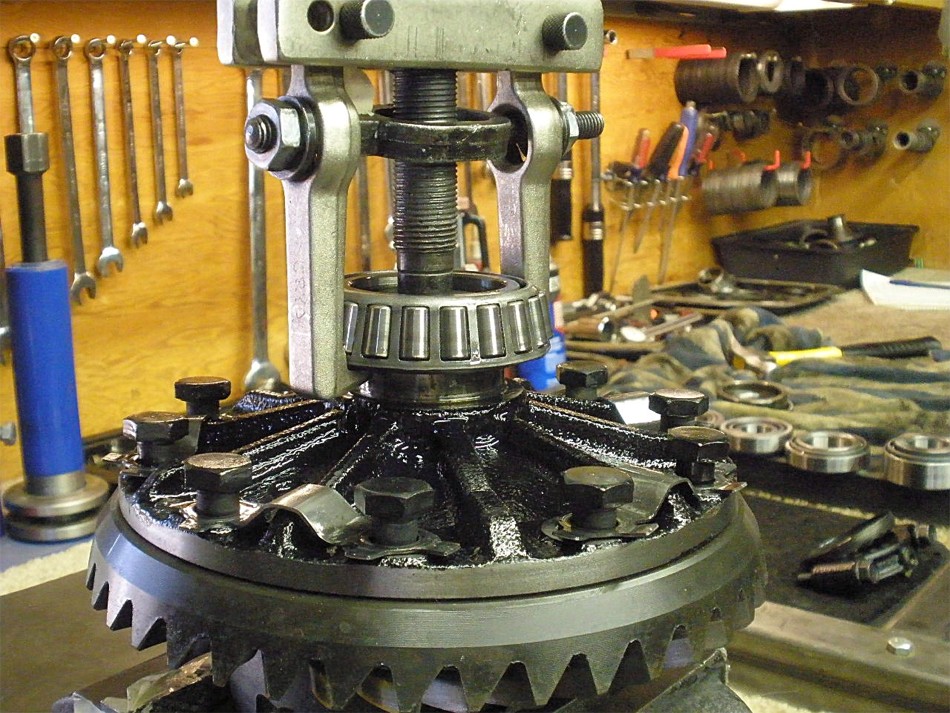
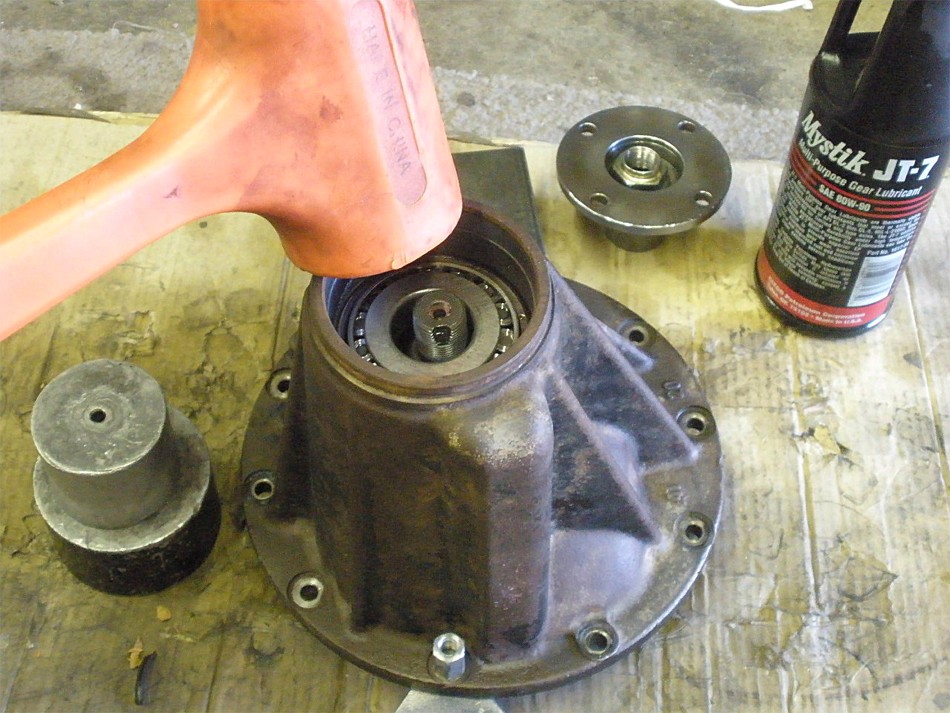
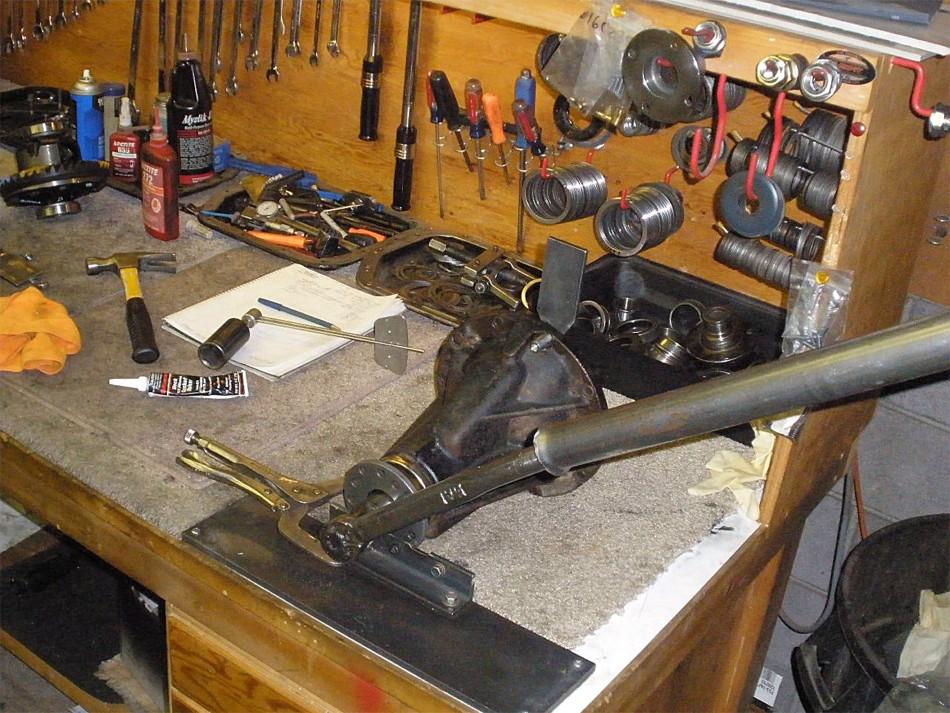
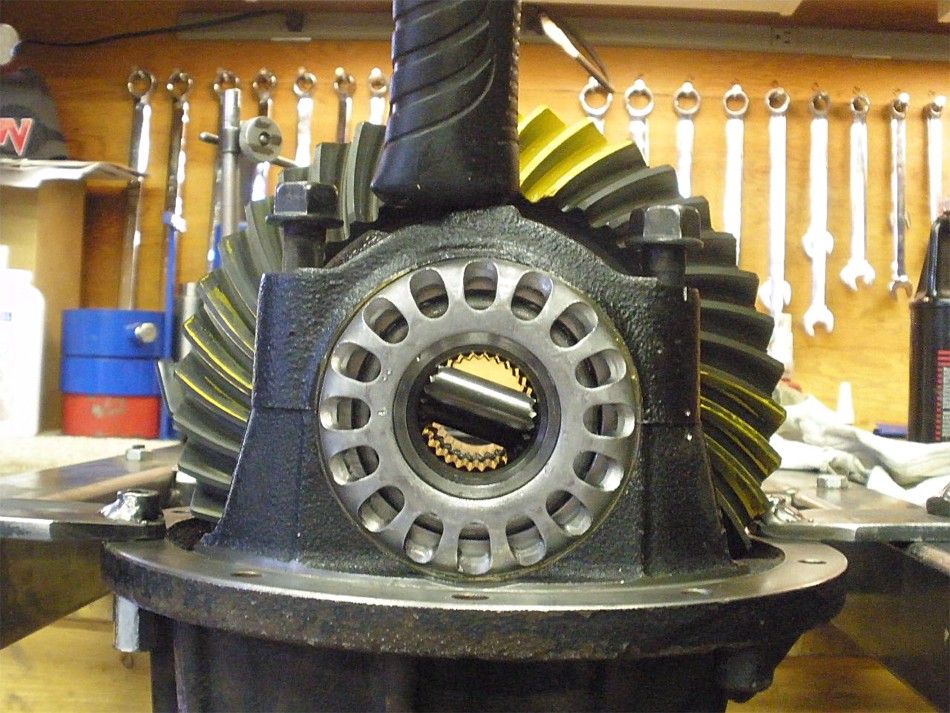
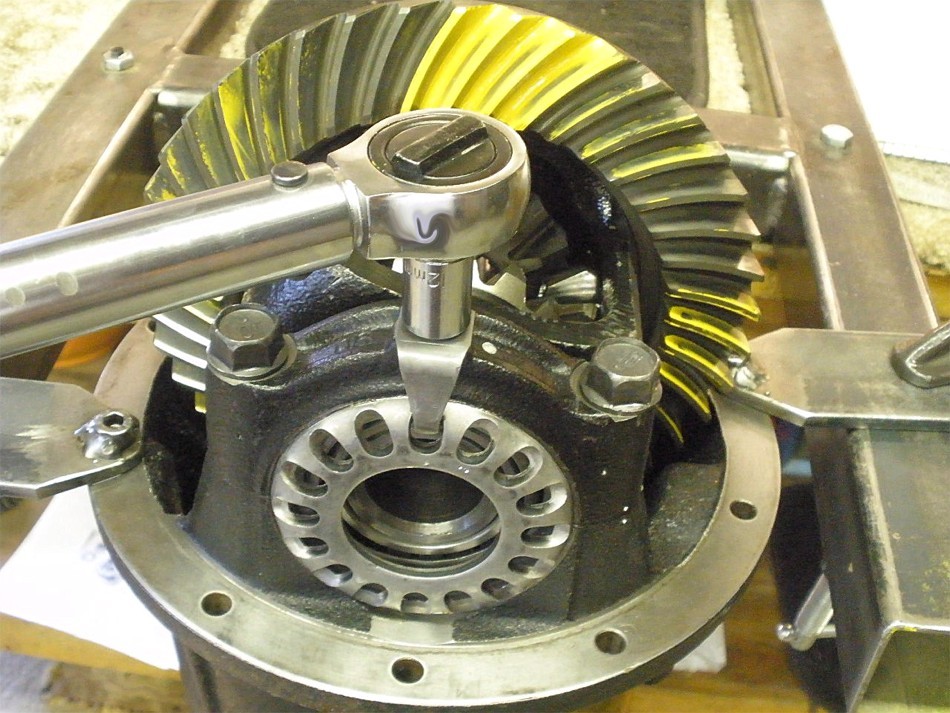
With the BL and paint done, the entire 3rd is mounted in my fixture, case removed, and the carrier bearing shown here is pulled off with the right tool. |
|
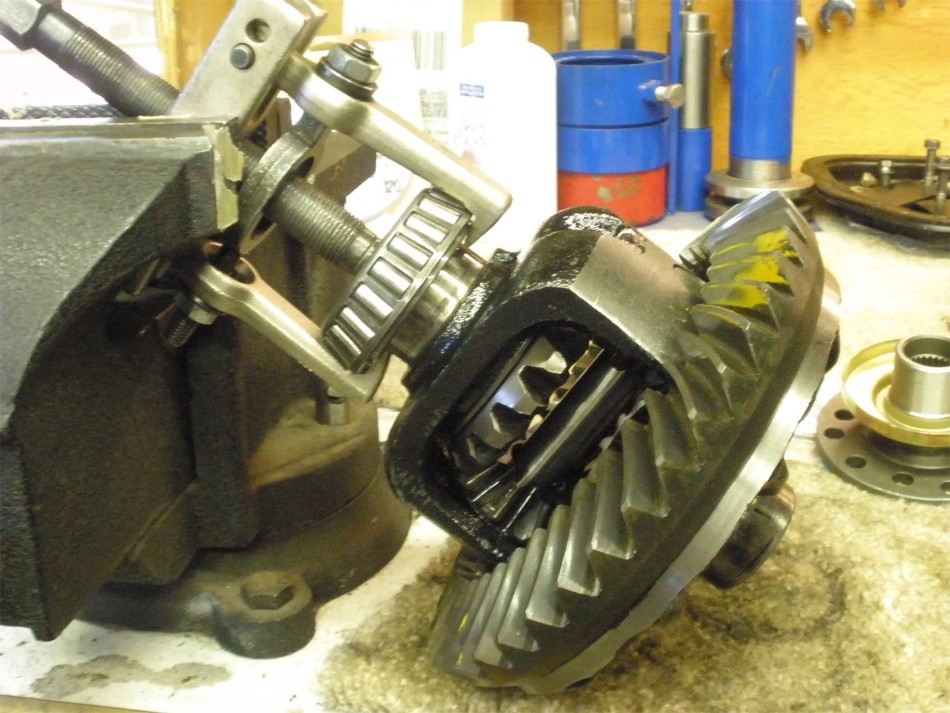
Other side is pulled off with the same OTC-4520 2-finger bearing puller. |
|
Ring is tapped off. |
|
New bearings are tapped on. |

|
Threads are cleaned with "starting fluid" and red Loctite probably too generously applied. |
|
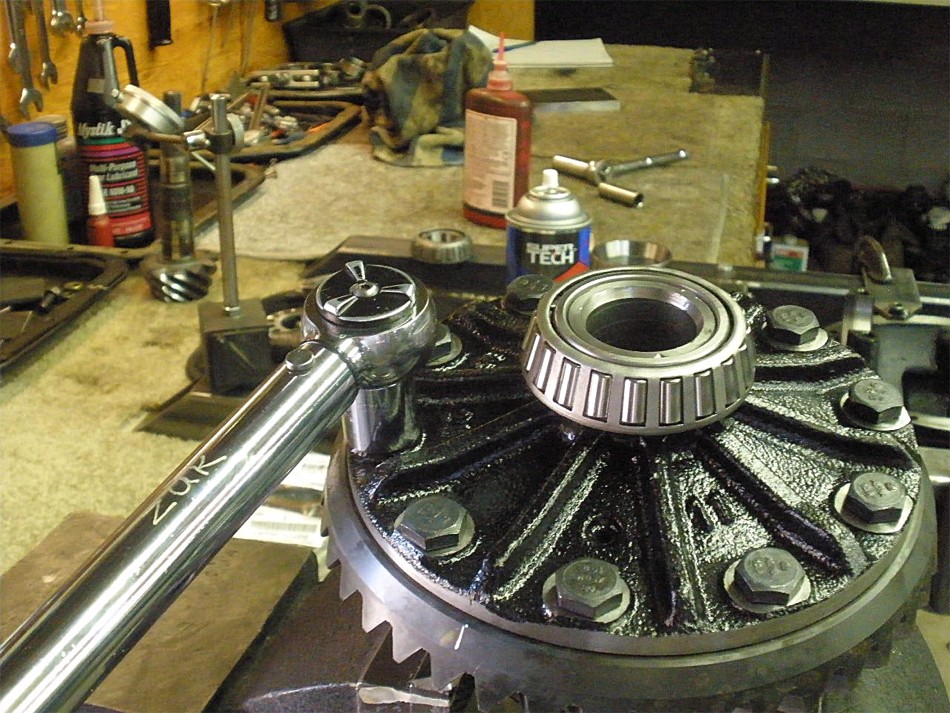
75 ft/lb has never let me down. |
|
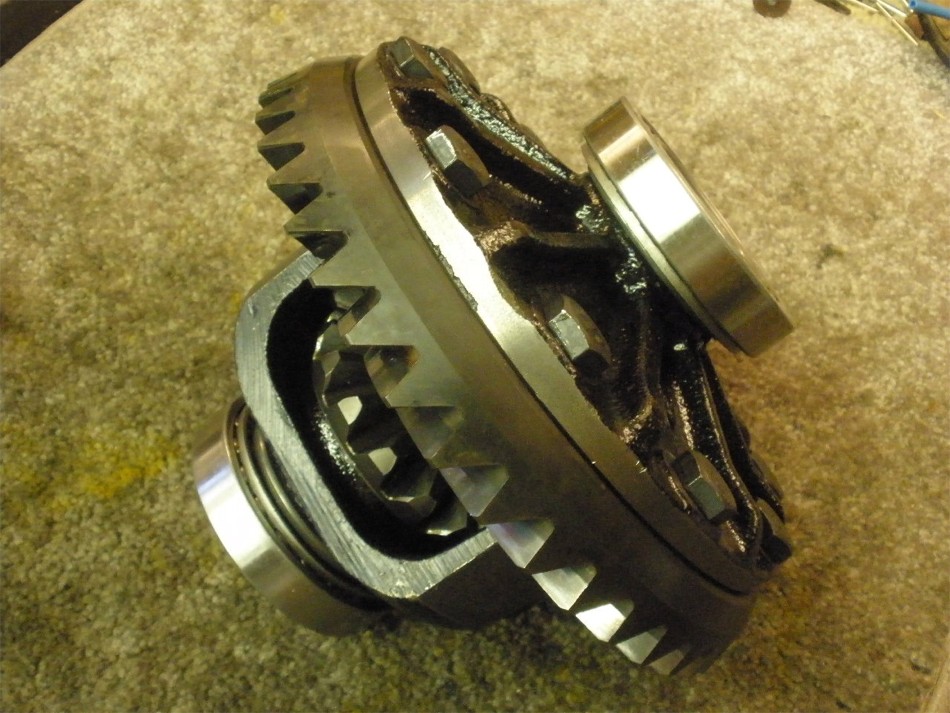
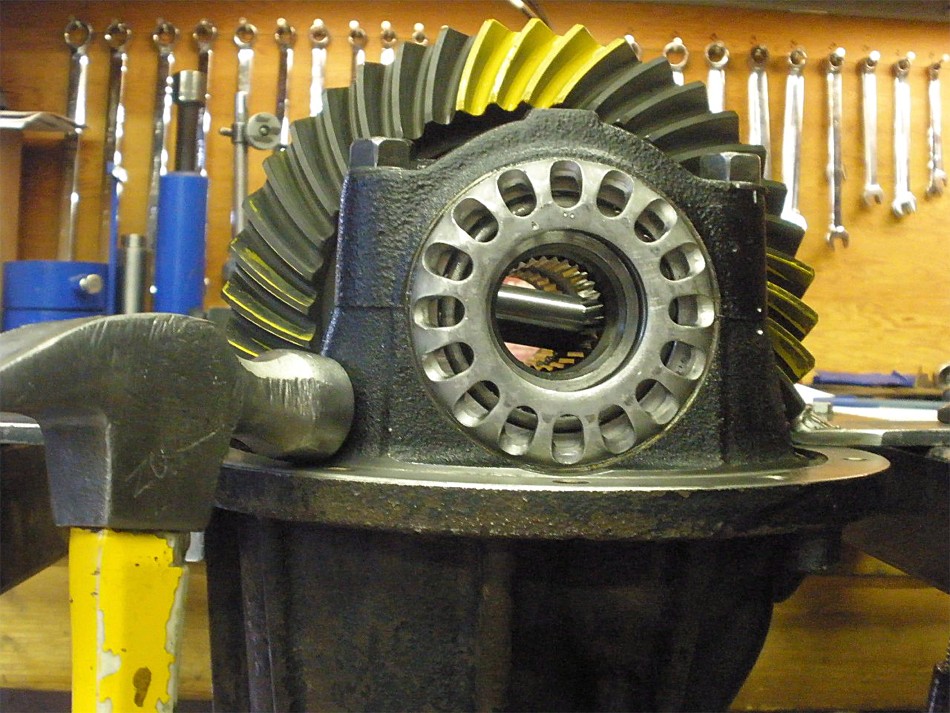
The case end of things is done. |
|
Now onto the pinion end...the pinion fell out when the flange was removed indicating the old outer pinion bearing had lost its fit. I guess 250k miles and 18 years can do that. |
|
Original crush sleeve is measured. This will be referenced when the solid collar is getting shimmed. |
|
Looks like the bearing retainer surface near the teeth has seen better days. Might use some sleeve lock on that area. |
|
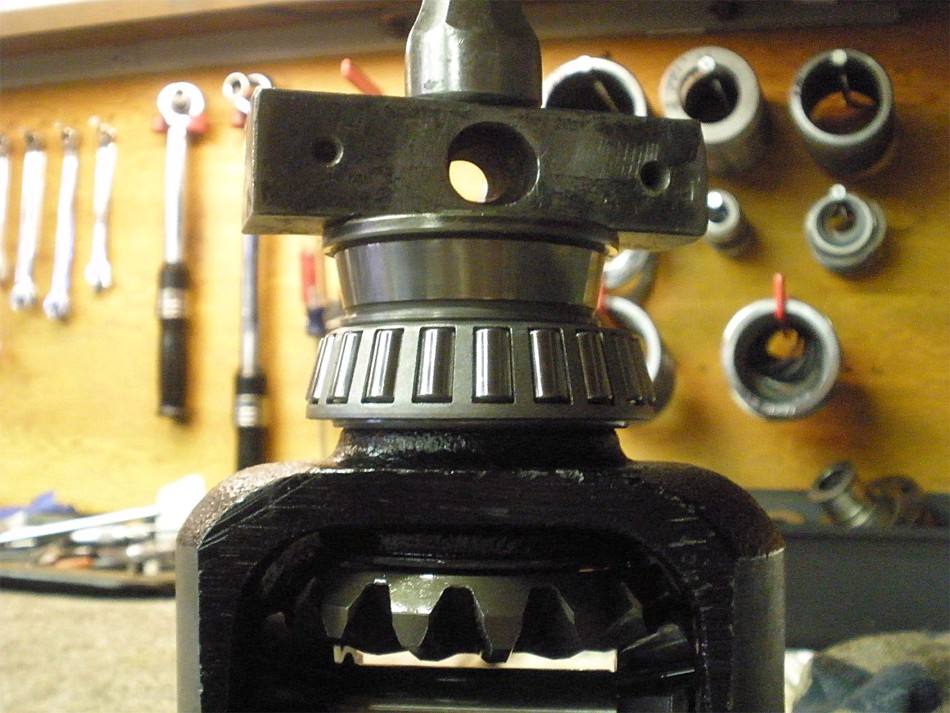
The outer race taps in with normal force. |
|
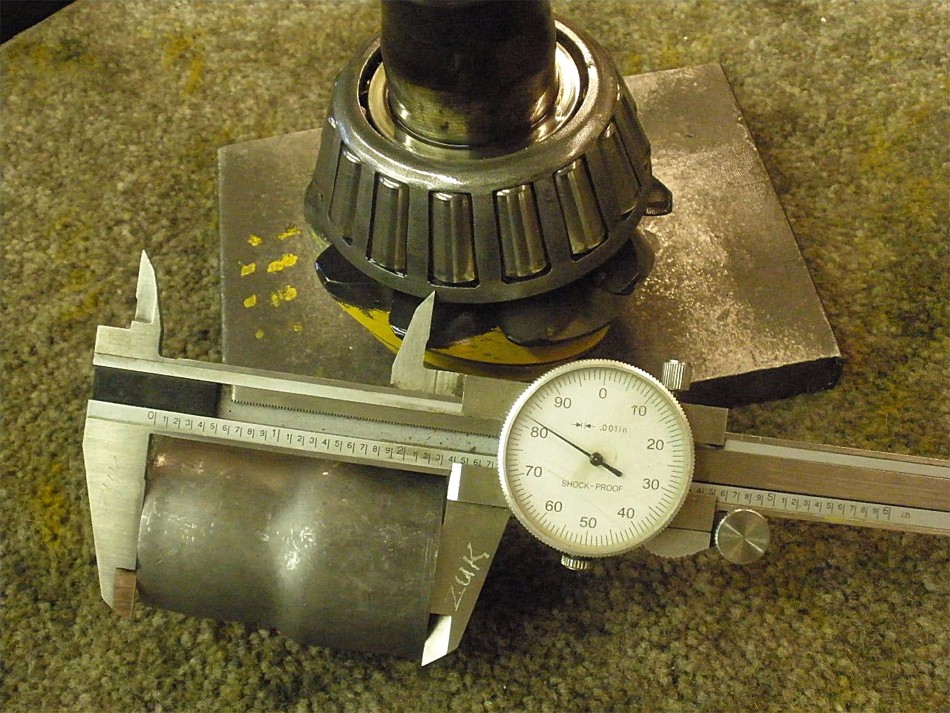
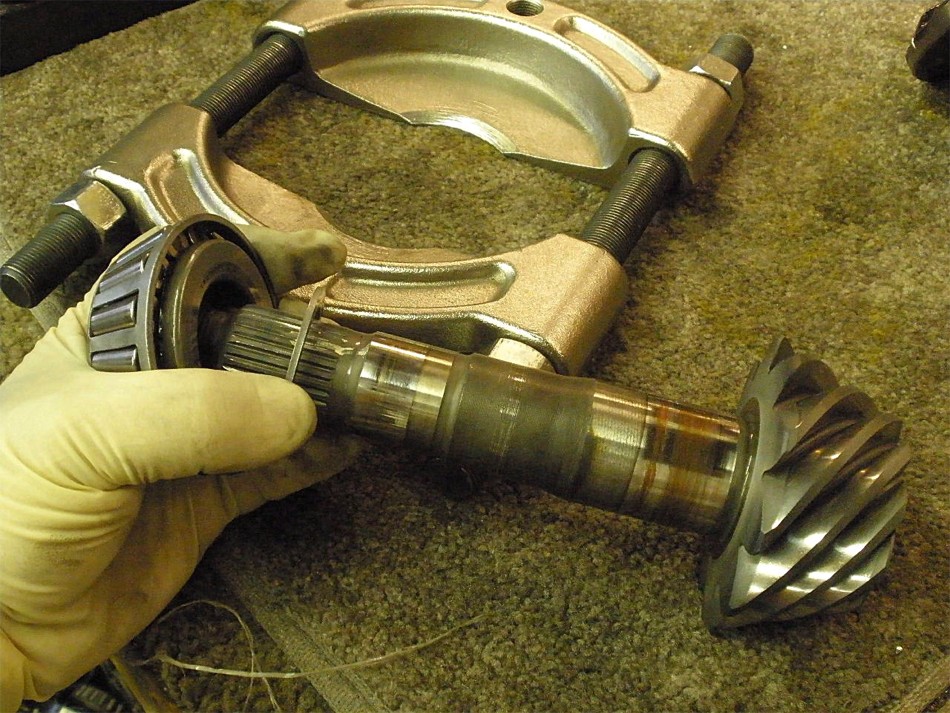
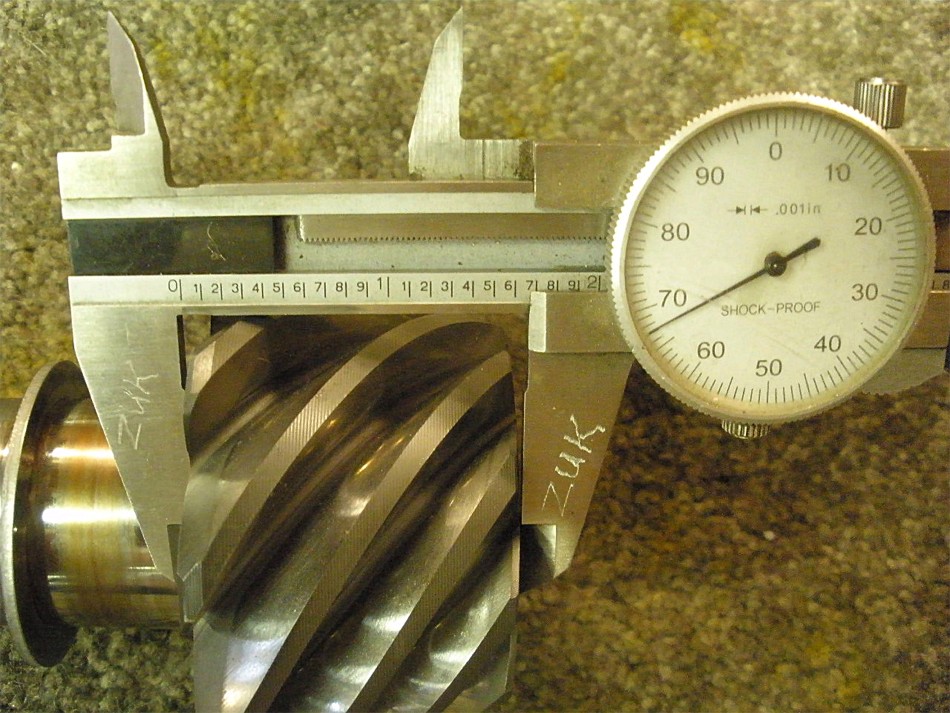
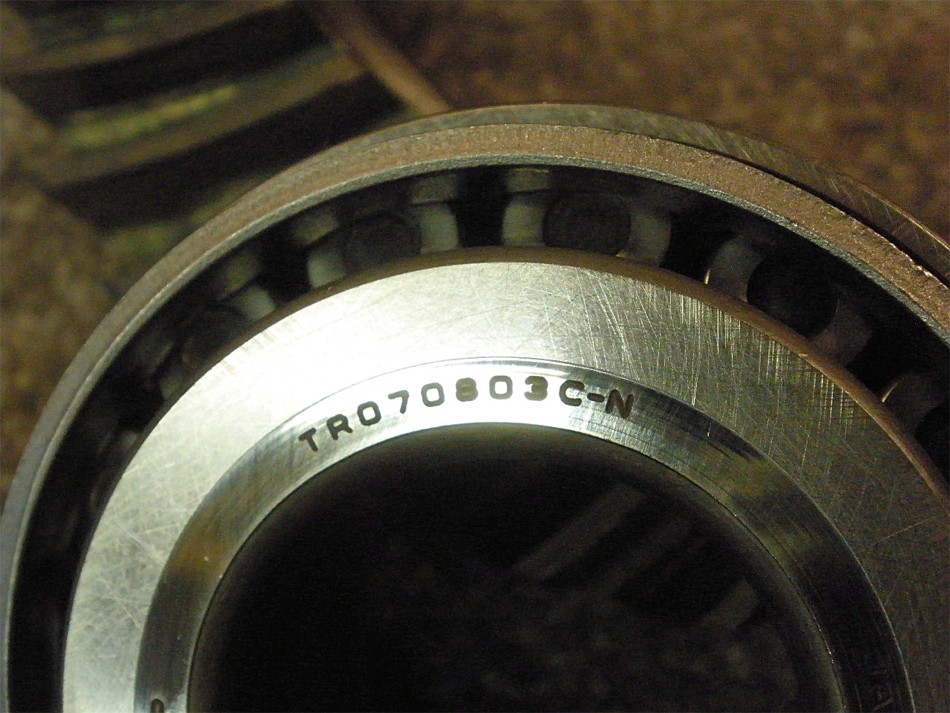
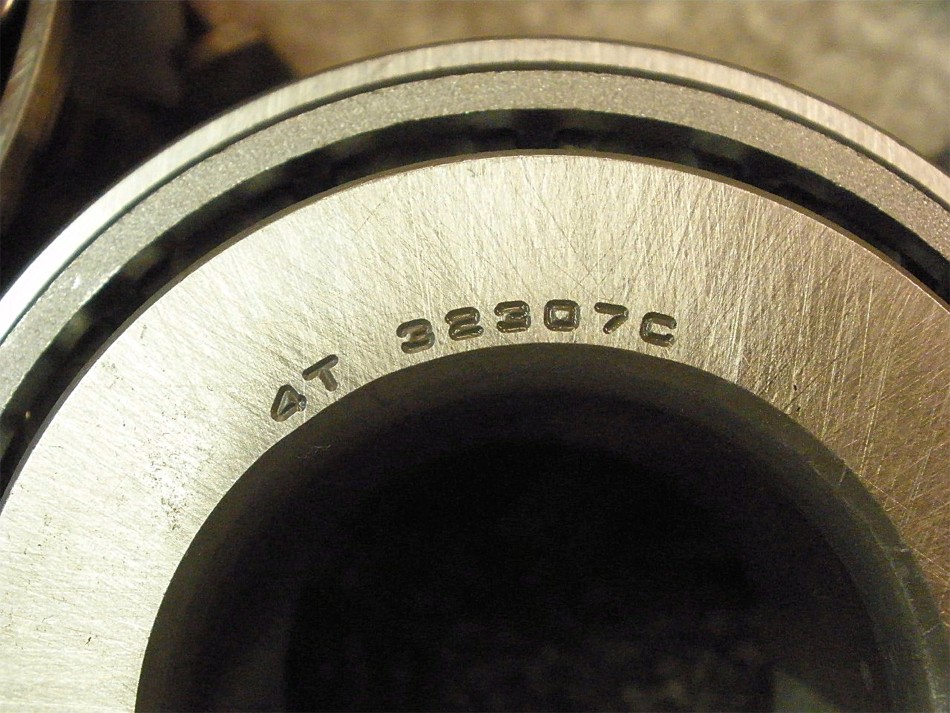
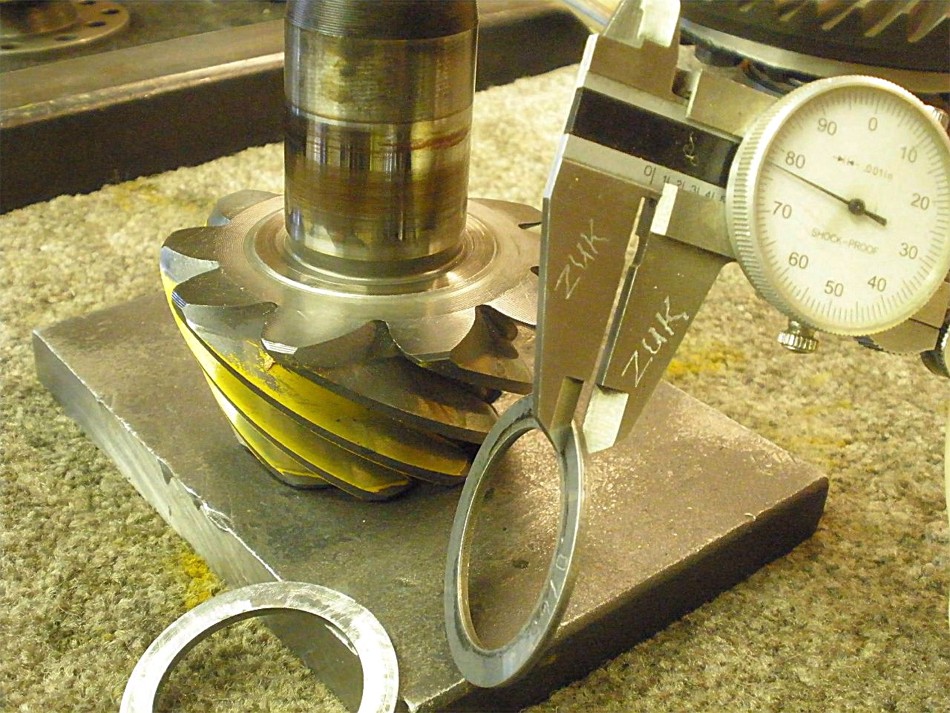
I just now noticed a small snaggle. Josh has a 1994 Pick-up with the 22RE and has the usual LONG PINION HEAD as indicated by the ~1.666" measurement. So, he requires the skinny bearing(070803 number). |
|
Here's his old bearing I took out.... |
|
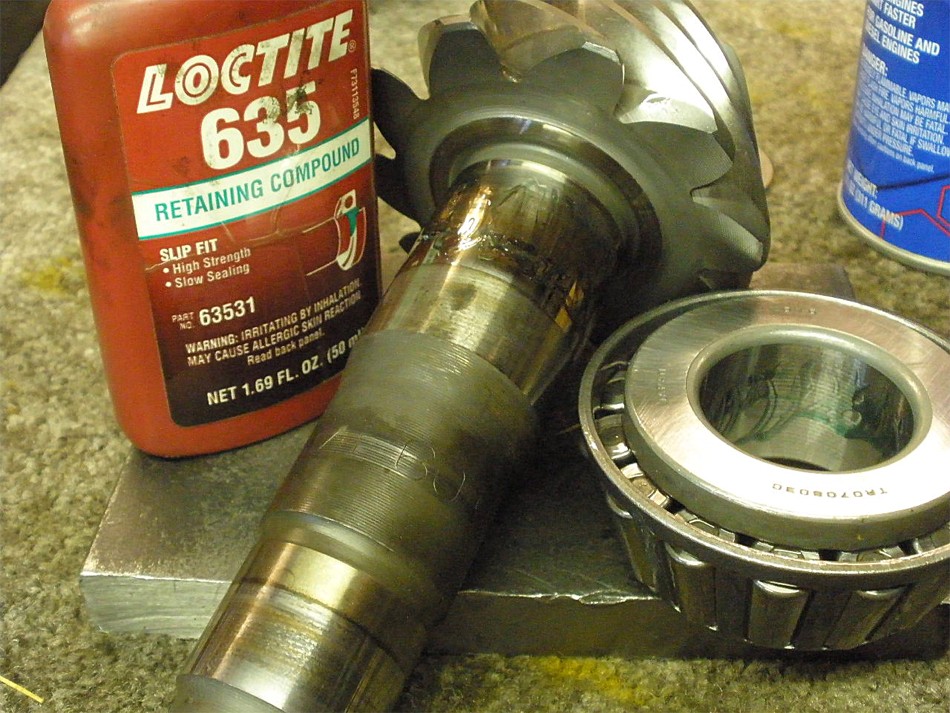
...and here's the new one in the master kit. A 32307 is basically used on the SHORT PINION HEADS(~1.535")...most common on the 79~85 solid beam axle trucks. |
|
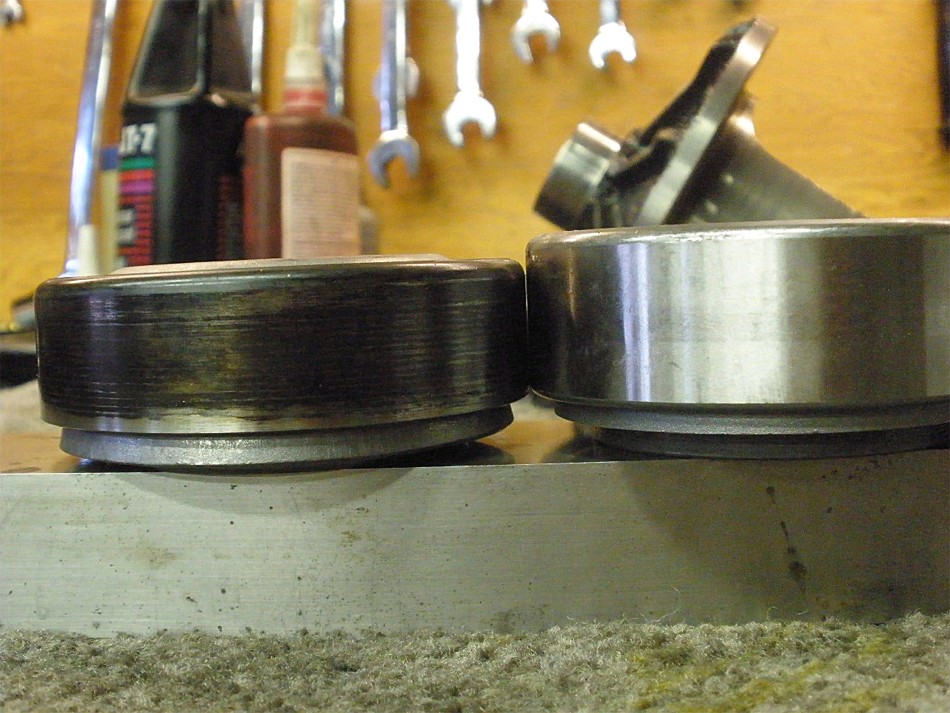
The difference in the 2 bearings is obvious here... about .140" height difference. I usually keep a spare 070803 around as this is not the first time this has happened to me but I just didn't have one handy this go-around. |
|
A call to Kyle at Low Range Off-Road and explaining
the situation resulted in a new one being sent out in no time at all. They really stepped up to the plate in fine fashion...sent the later
model pinion bearing and threw in a new outer for good measure. |
|
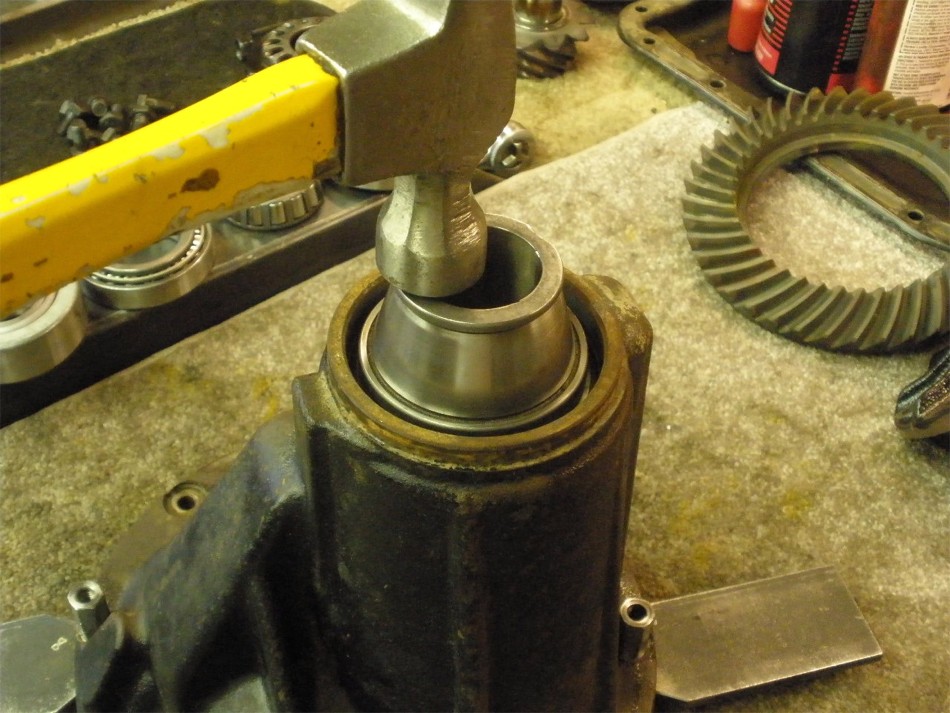
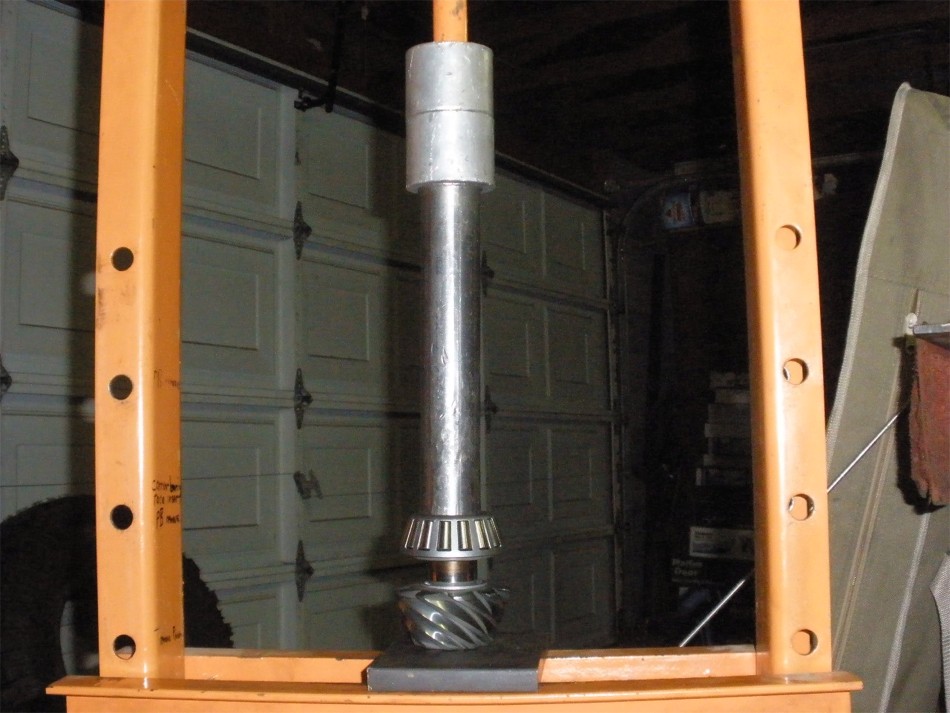
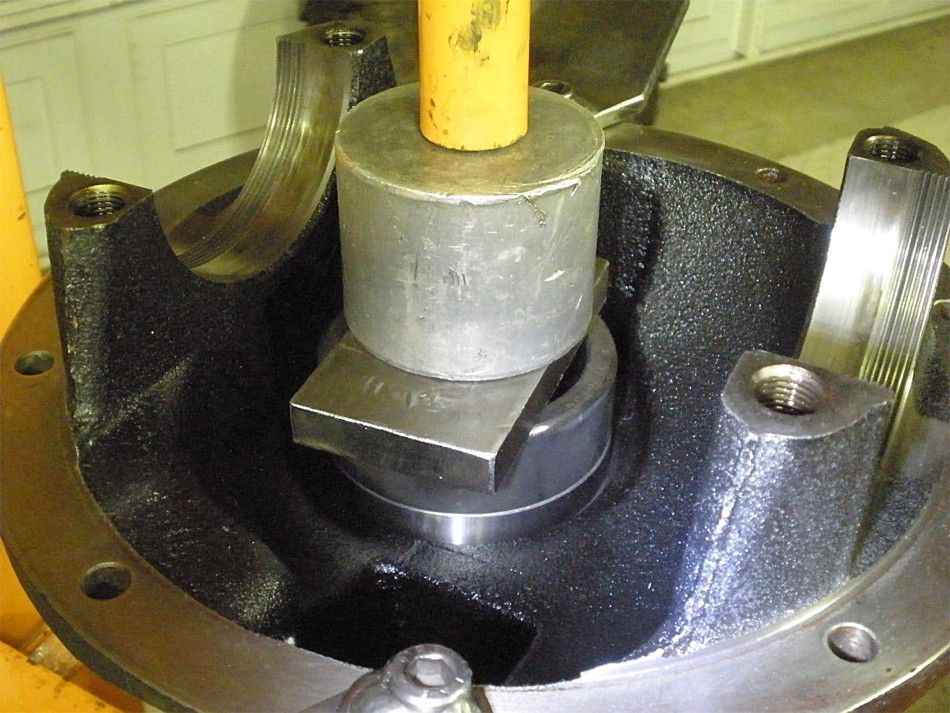
The 070803 bearing is now pressed on the pinion. You guys out there that do a home gear install WITHOUT a press.....I don't know how you do it. I rely on the cheap Harborfreight 12 ton press so much. |
|
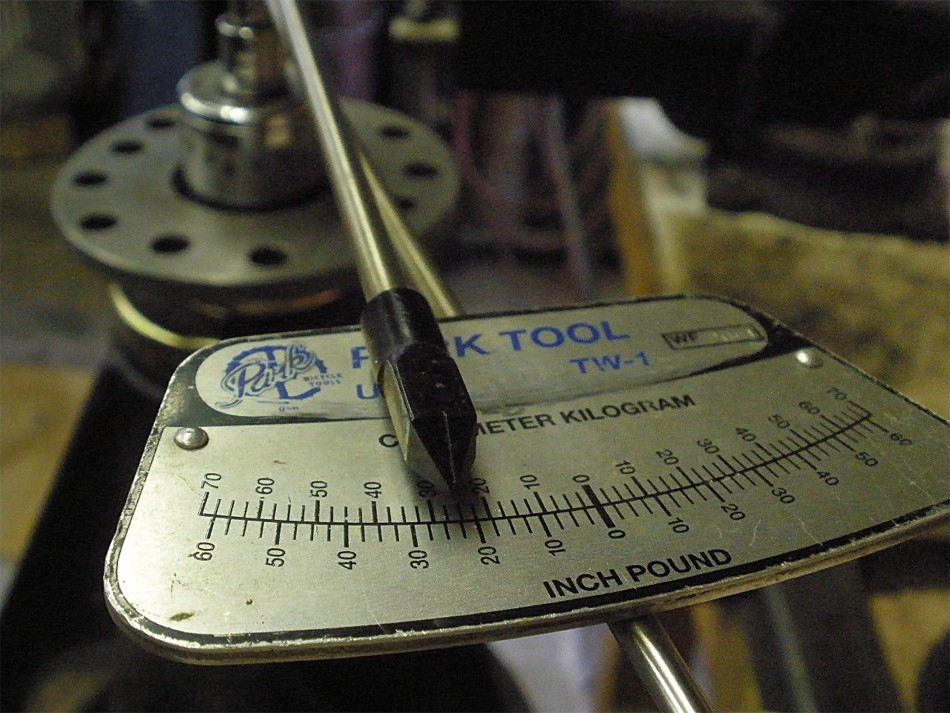
The new race is easily pressed in. It must be started straight or it might bind up....I've had good luck and they all have "self-aligned" and went straight in. In the past, I used a soft, blunt chisel to tap the large inner race in... but I frown upon that now because I feel that some minor deformation damage can occur to the roller surface resulting in possible oscillations in pinion pre-load measurements as noted with my pendulum style 60 in/lb torque wrench. |
|
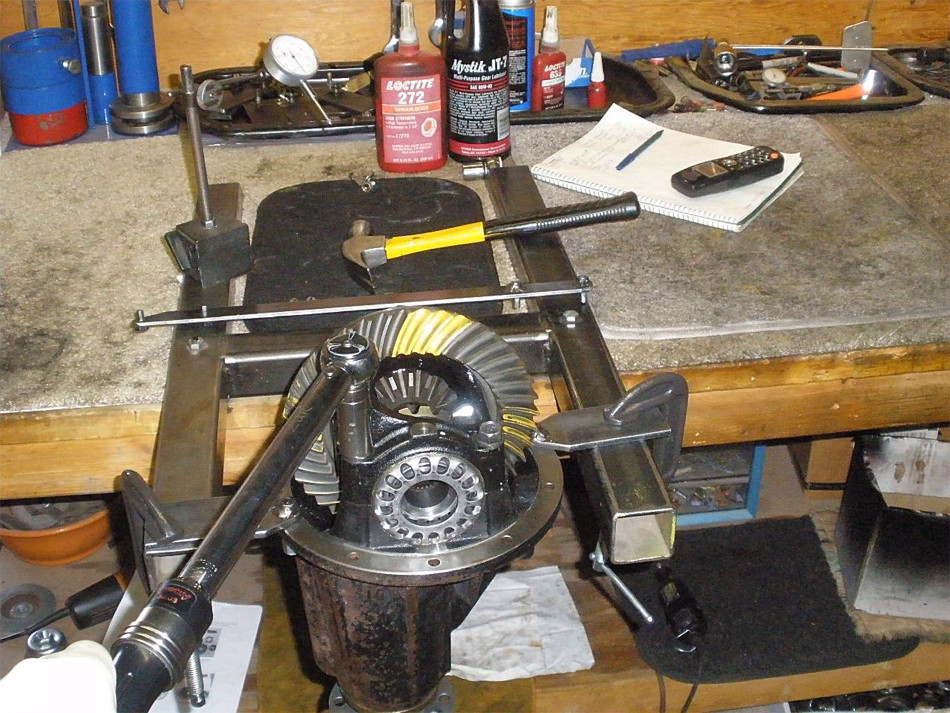
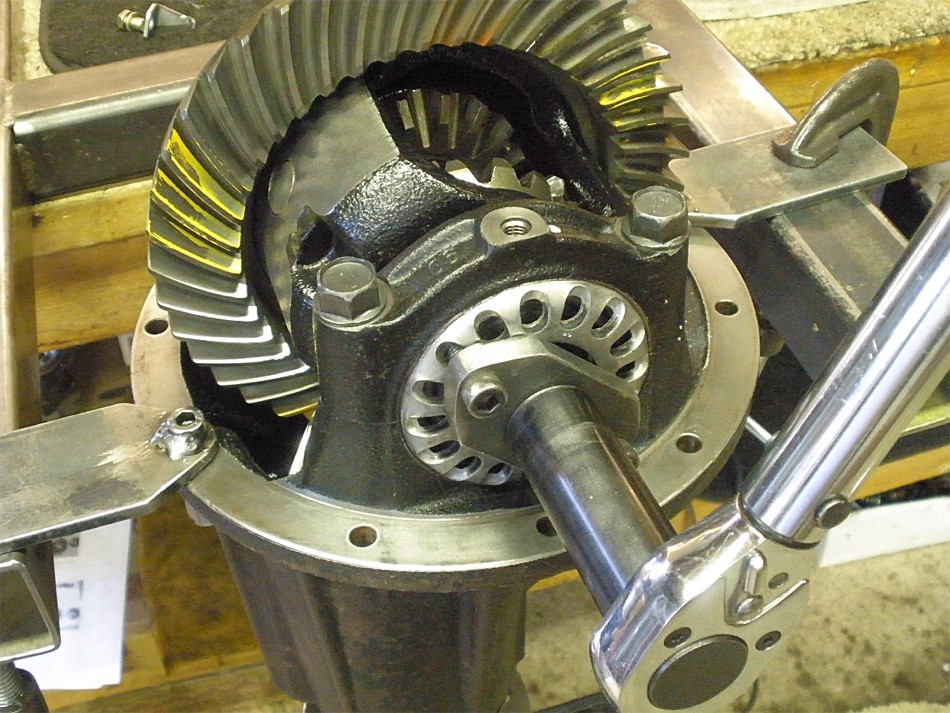
Installing the pinion is easy....support the pinion on 2 aluminum blocks...place main 3rd on pinion..tap the flange on with the lead-filled plastic hammer....and snug the shop flange down with the electric impact until about 15 in/lb is measured....or felt with the calibrated wrist. This is only for a paint pattern check so we don't have to be exact on the PPL this time around ;) |
|
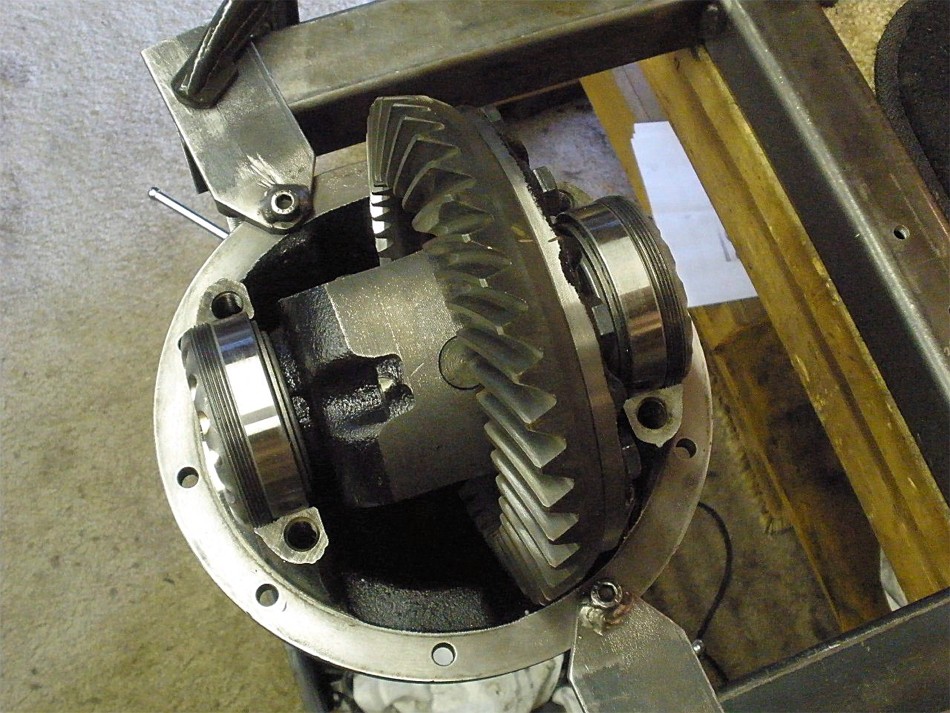
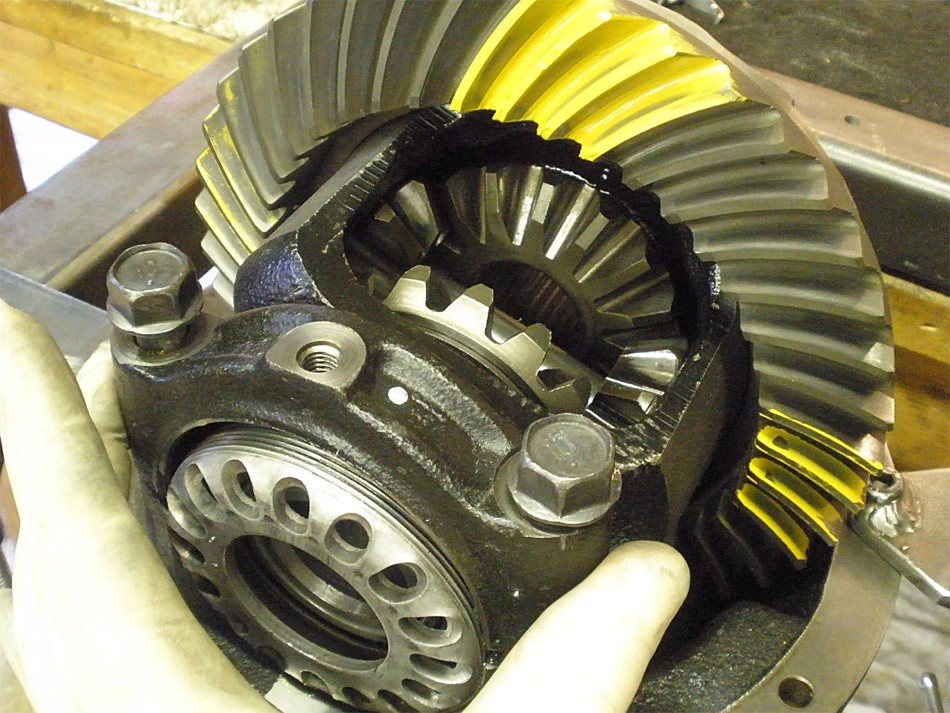
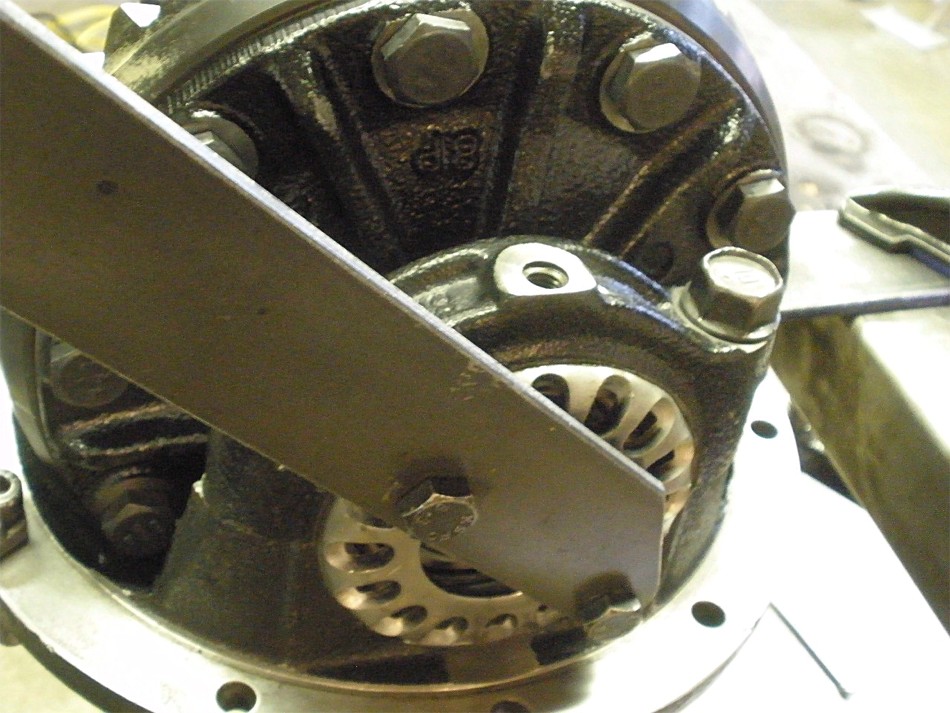
The ring gear case assembly is now loaded in place and the adjuster wheels are placed in the proper threads. |
|
Bolts are started about 3 turns deep....a light tap from the rubber end of a hammer will result in a solid seating on the threads.....if the threads are crossed up then the bearing cap will probably have a gap on the sides. |
|
With the bolts snugged up the wheels should turn with finger power indicating all is good. |

|
Backlash is dialed into the "ballpark" area of .008" for this paint check. Some carrier bearing preload is needed but does not need to be a full 100 ft/lbs. at this time. |
|
Even though the shim is OEM and the inner pinion bearing is a brand new OEM Koyo, this drive pattern appears a touch shallow. I may tweak it on the next teardown as we still have to put in and shim the solid collar. |
|
Coast. |
|
Drive on the pinion tooth. |
|
Sometimes, I use the press to push the pinion out. I used the plastic hammer here. The outer pinion bearing still grabs the well used pinion with some force which is good. |
|
I found another pinion shim that was 1.5~2 thou thicker so this is the tweak. |
|
The large inner bearing was a loose fit on the pinion shaft so the green sleeve-lock saved the day. Both surfaces must be as clean as possible. |

|
Knowing how long the original crush sleeve was, I started with a .010" shim figuring it will probably be too loose. |
|
Hmm, I was a little surprised to see it a bit tight on the PPL numbers....about 26 in/lb start-up. |

|
Looks like I need to add another .002" to give the bearings a little more breathing room.... |

|
Getting closer...still reading at 16 in/lb. |
|
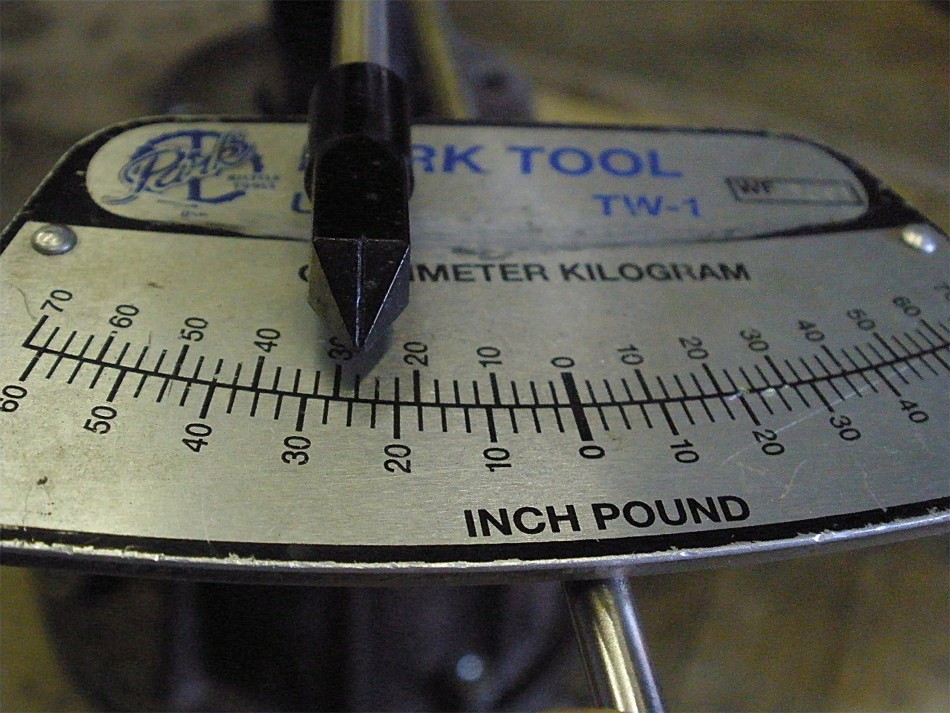
Added another .002" shim and this is where I like to see it....about 6 in/lb start-up. Now, when I go to tighten it with the cheater bar I can tweak this 6 reading up to about 16 if I choose. That is the result of the solid collar compressing which goes to show that the collars are not 100% super solid. |
|
Another redundant paint check...DRIVE...looks better. |
|
Coast....looks even better than earlier paints due to not hugging the toe end as hard as before. A small shift closer to center. |
|
Drive. |
|
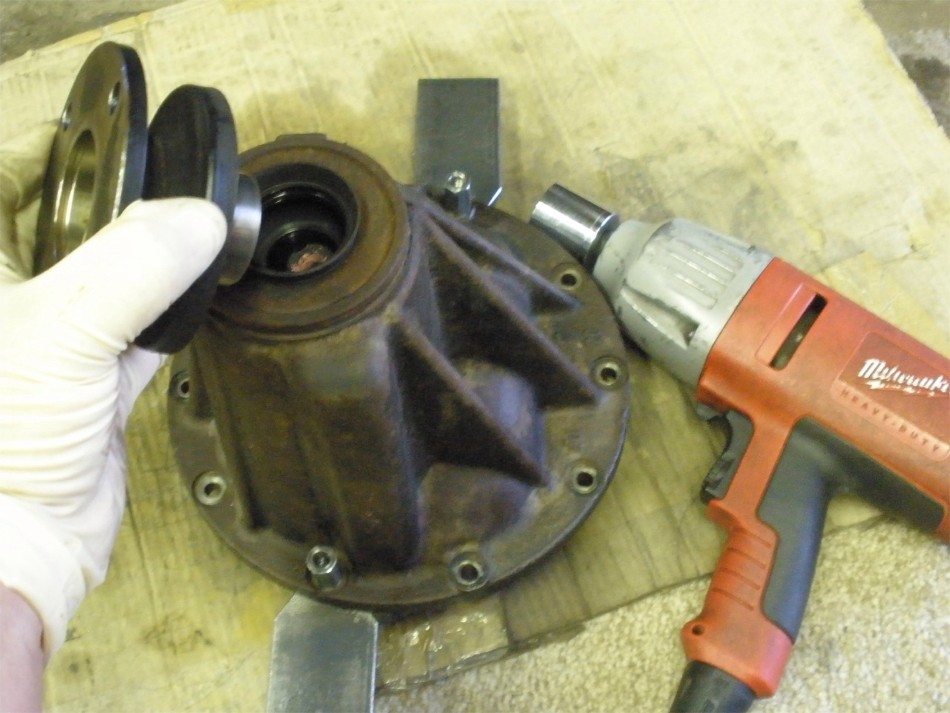
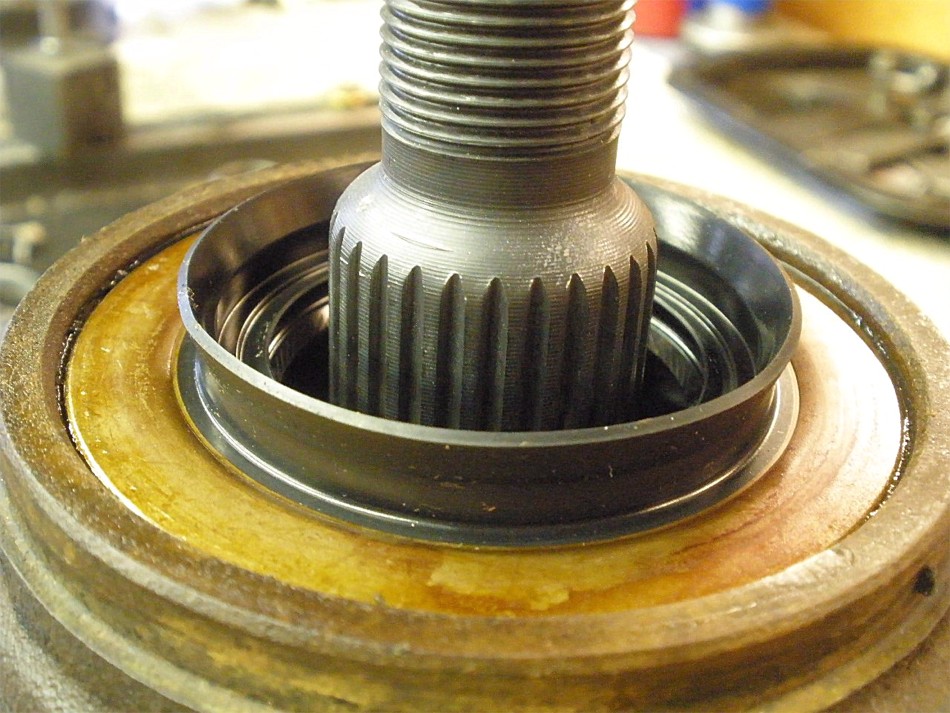
Now it's final assembly time...the shop flange is removed and the seal is readied with rtv on the metal outside and thick grease on the tiny tension coil. |
|
Not seen in the pic but a cotton tip with gear oil on it is smeared on the 3 rubber lips to prevent a dry start-up condition. |
|
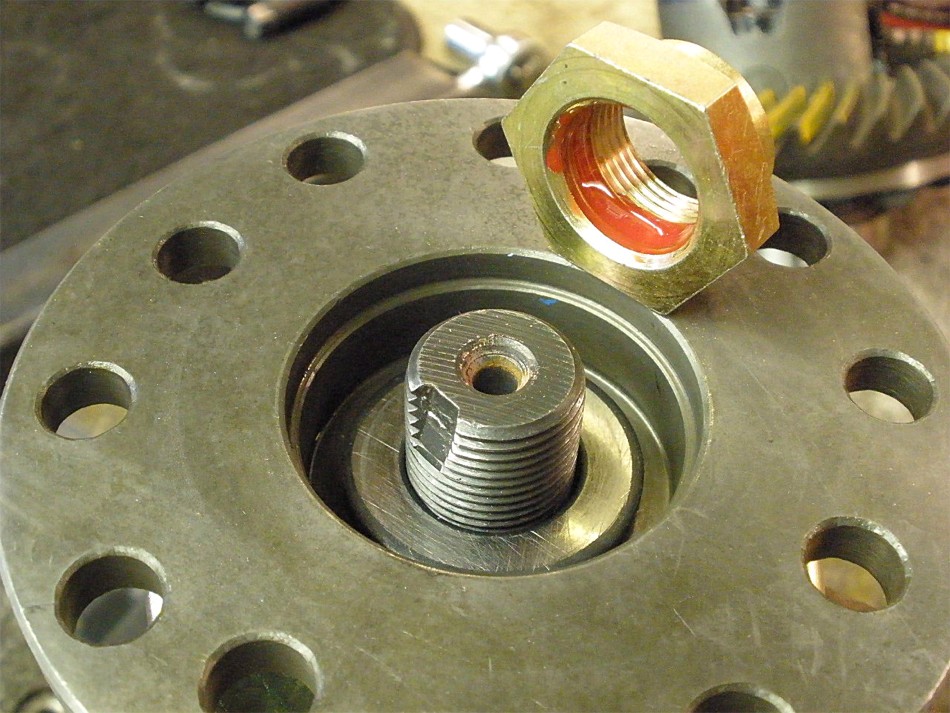
The usual....red Loctite on the pinion nut. |
|
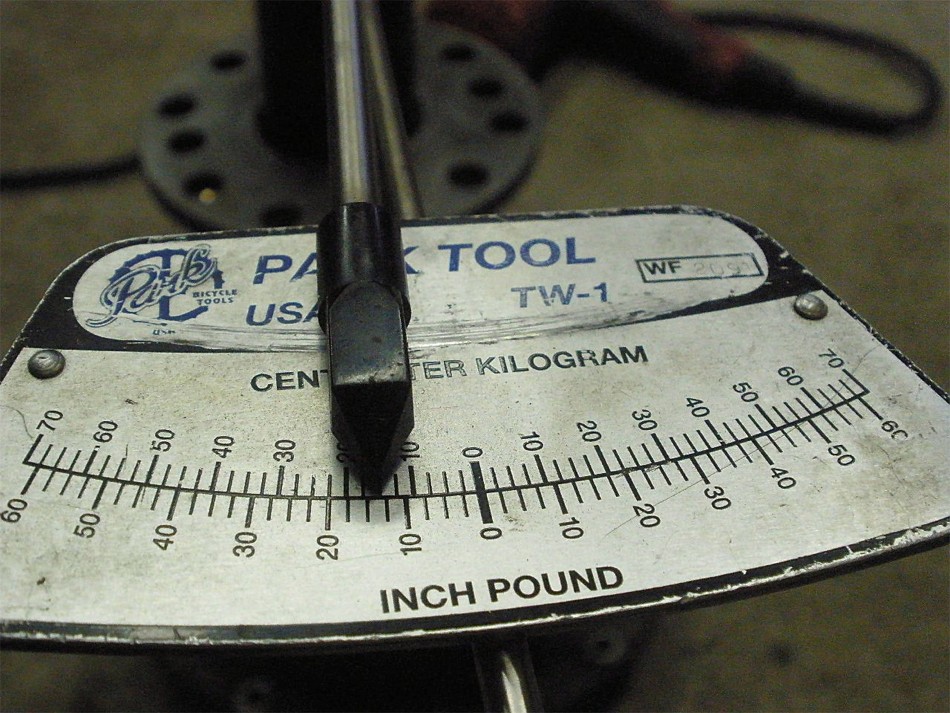
I have already tightened the pinion nut with the electric impact wrench and that results in about 150~200 ft/lb of tightness and the PPL measures about 6 in/lb at that value. So, here, the nut is marked and the cheater bar is cranked a little. |
|
Now the PPL measures in at the new bearing spec of 16 in/lb starting torque which is exactly where I like to see it. |
|
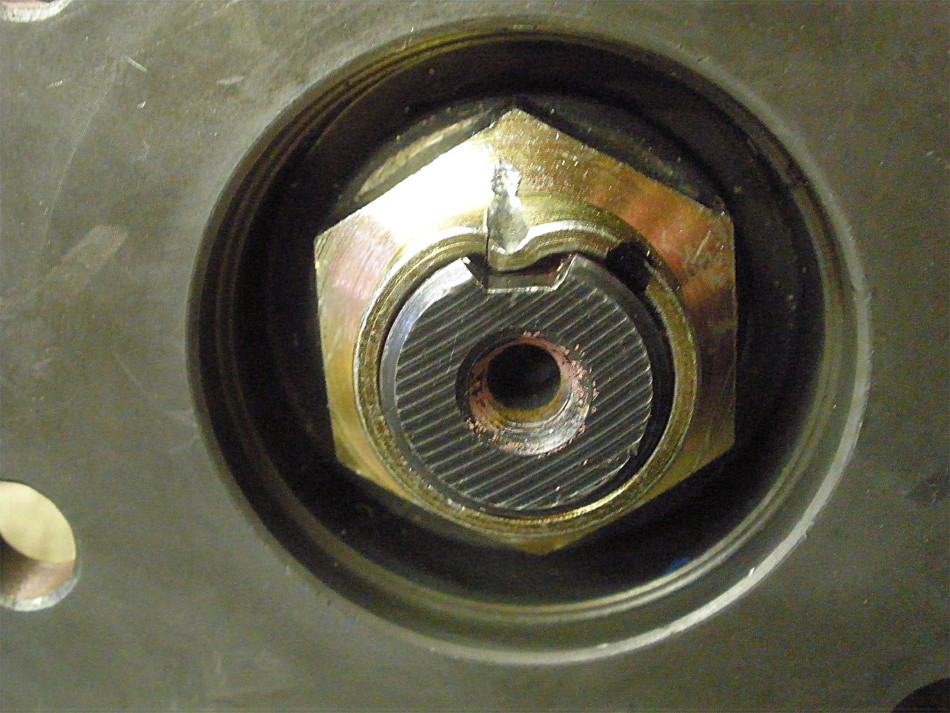
The nut is dinged. See the black sharpie mark....that's how far the cheater bar rotated the nut from the straight up 12 o'clock position. That added 10 inch/lb to the PPL doing that. I now know that the collar is tightly locked between those 2 bearings and those bearings are locked in at exactly that distance apart and that distance will never change. |
|
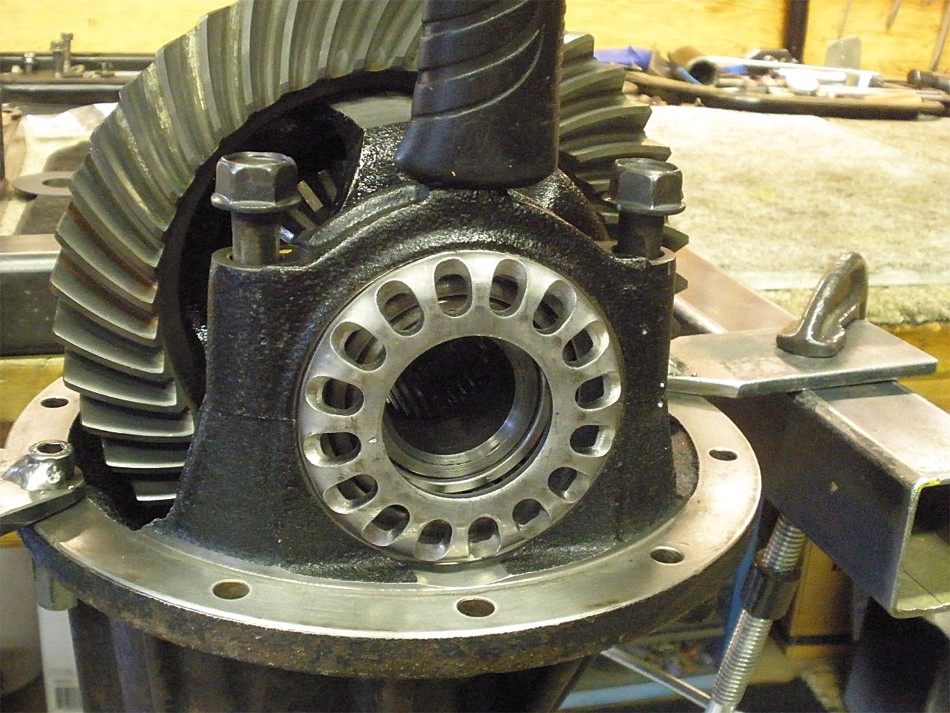
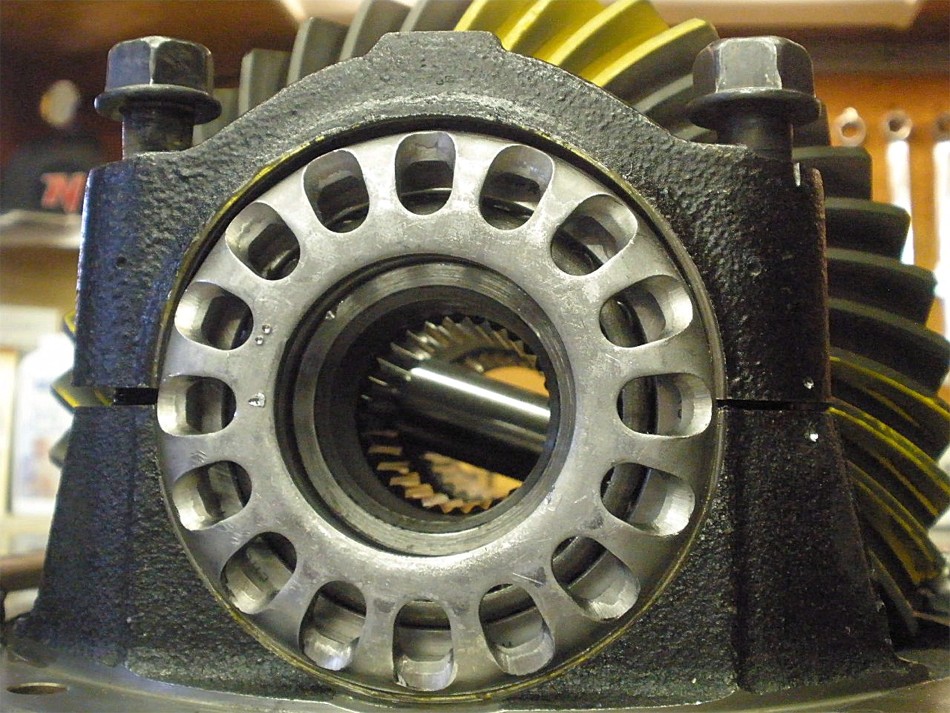
A few extra pics here to show how to get these caps aligned correctly. The bearing cap is hovered over the bearing while the 2 bolts are tightened about 3 turns... |
|
I drop it down and up a few times til I feel it's in the right thread like this....usually, it won't drop down 100 % as is the case here. |
|
BAM! If it was out of alignment here at least I won't damage threads with a gentle drop down of the hammer handle. It was 100% aligned because it went down all the way and left no gap. It also seated with a good, solid snap sound. |
|
With everything aligned, I can now fully tighten the 4 cap bolts to the full 75 ft/lb. |
|
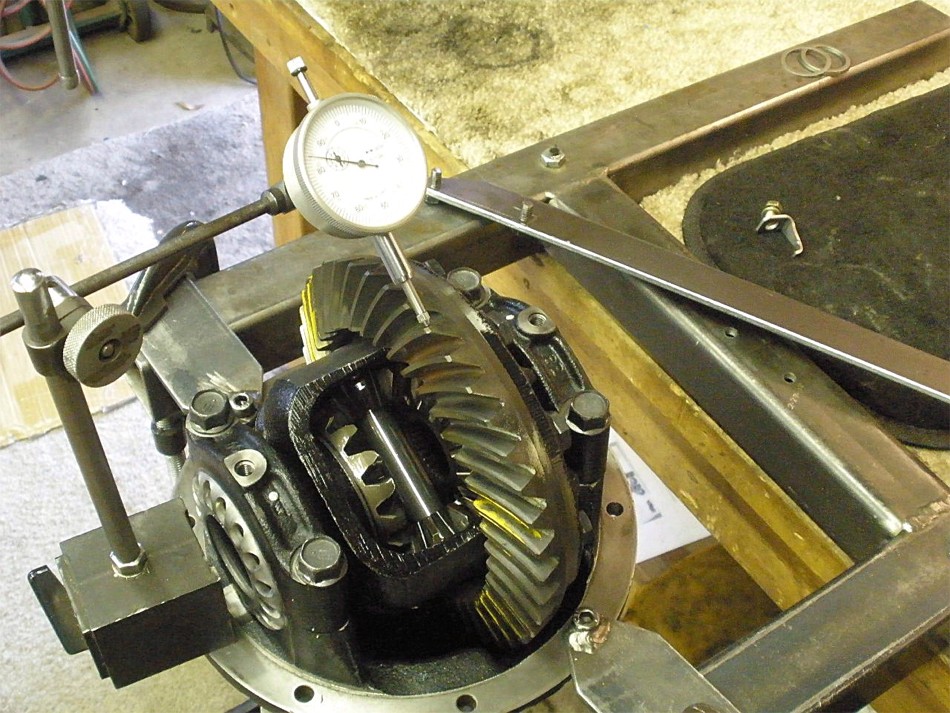
Wheels are turned and backlash is dialed in closer to the target .008" while the CBPL gets tighter and tighter. Shown here, I am rapping the sides while turning the pinion from below. This has the effect of equalizing the carrier bearing tensions on both sides. |
|
Backlash is checked and it's close but I can make one more adjustment and I want to make sure my last adjustment is on the ring side. The last adjustment on the ring side has to be an adjustment that tightens it......a clockwise rotation of the adjuster wheel. |
|
So I adjust the case-side first... |
|
...then the final tightening turn is made on the ring side. Just a good practice to do this. And, then follow up with the hammer raps on the side just to be sure. |
|
I was able to get to 100 ft/lb before the wheel started to move and that is a good solid place to shoot for....for a trail rig or a daily driver. |
|
Final load bearing paint check....drive....centered and appears a bit deeper than what we started out with. |
|
Coast....nice, close to center look :) |
|
Drive on the pinion tooth. |
|
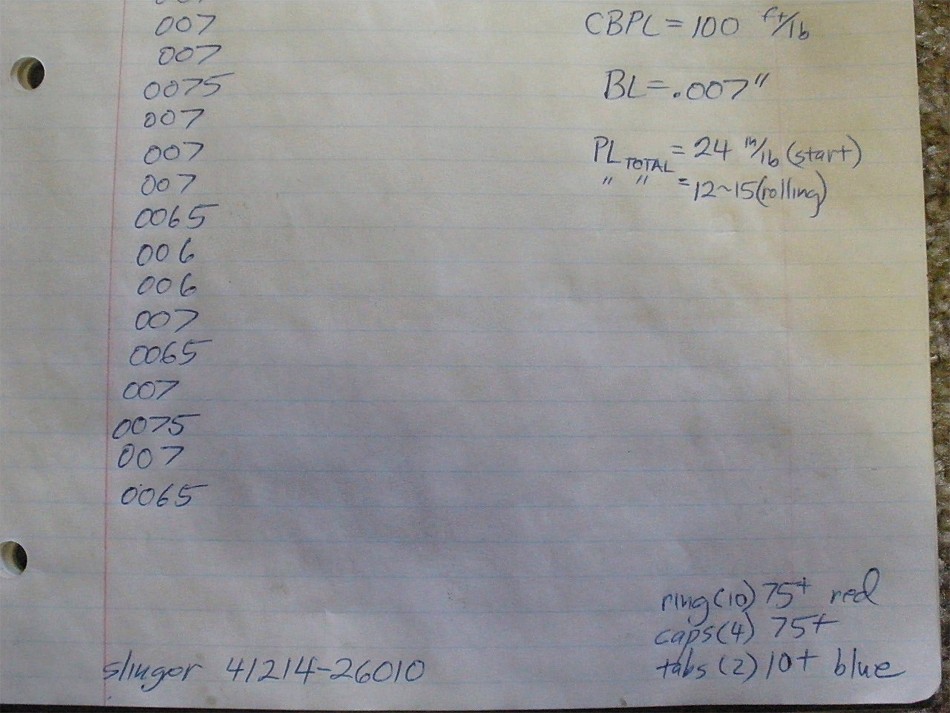
With everything set right where I want it, now I can put the lock tabs in place....medium strength blue Loctite and 10 ft/lb on the small bolts. |
|
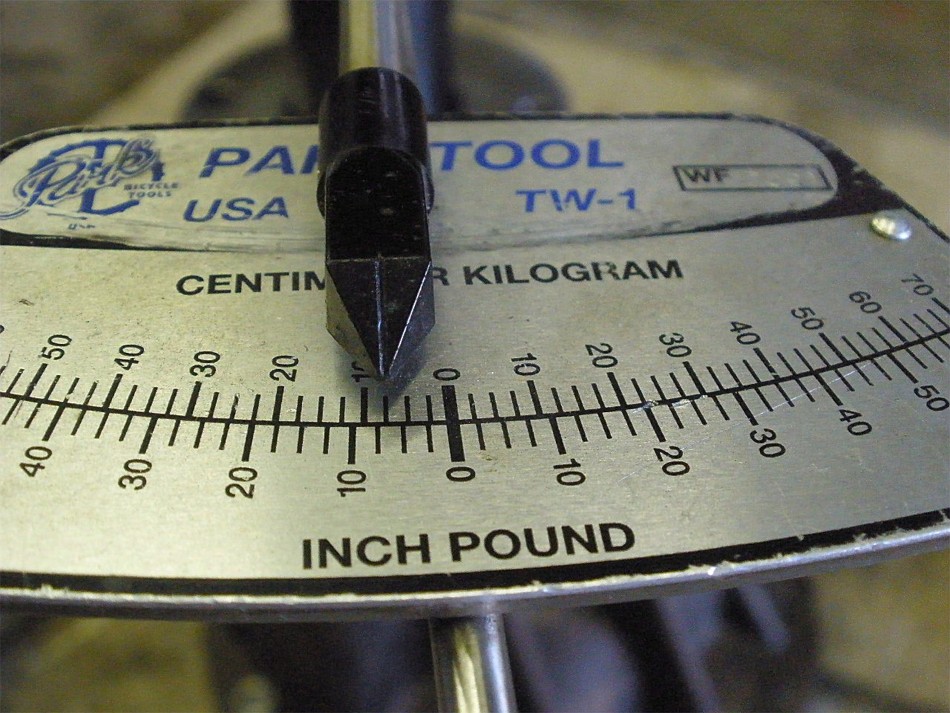
About 20~24 inch/pounds(start torq) TOTAL PRE-LOAD with the pinion and ring gear both turning. |
|
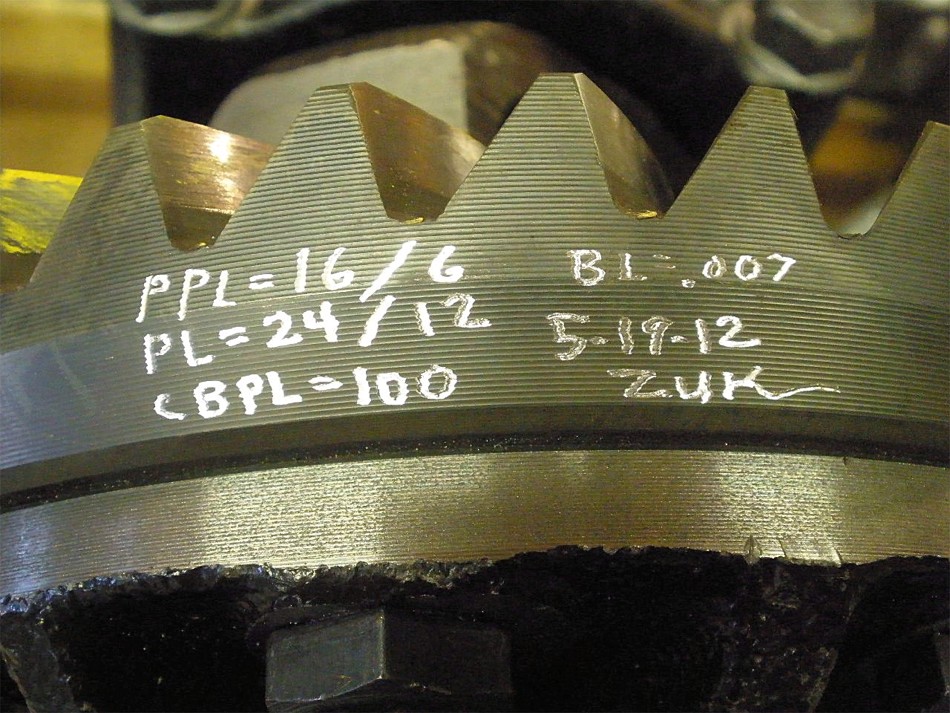
The ring has the basics engraved in it with the diamond tipped bits. |
|
...the actual notes taken during the install. |
|
Ready to send out. |
|
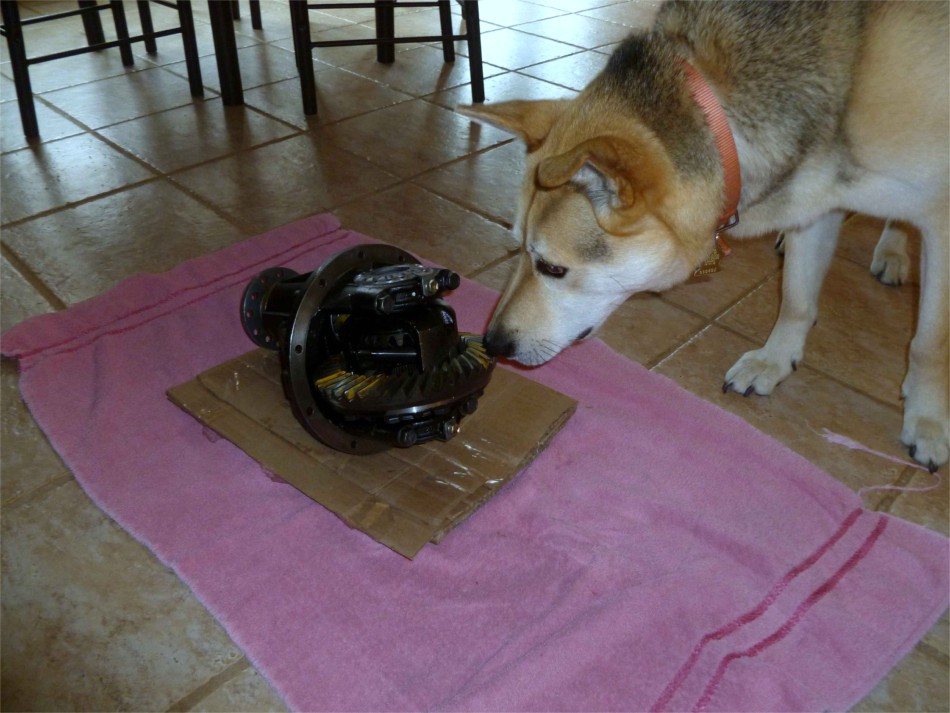
As received by Josh. Tiki approves! :) 5-24-2012 |

|
